
The kitchen is Halloween’s unsung hero. It is where the caramel apples get sliced, where guests hover around the island, and where morning coffee tastes better under October light. These halloween kitchen decor ideas prove the hardest working room in the house can carry the season’s magic without losing an inch of function.
Across 21 ideas you will find exact countertop measurements, real paint colors, material comparisons like glass versus acrylic, and honest budget to premium price ranges. Each section flags what to avoid and where an idea falls short, so your kitchen lands festive rather than cluttered. Start with the pro tip in each section, then adjust for your layout and light.
Pumpkin Spice Station
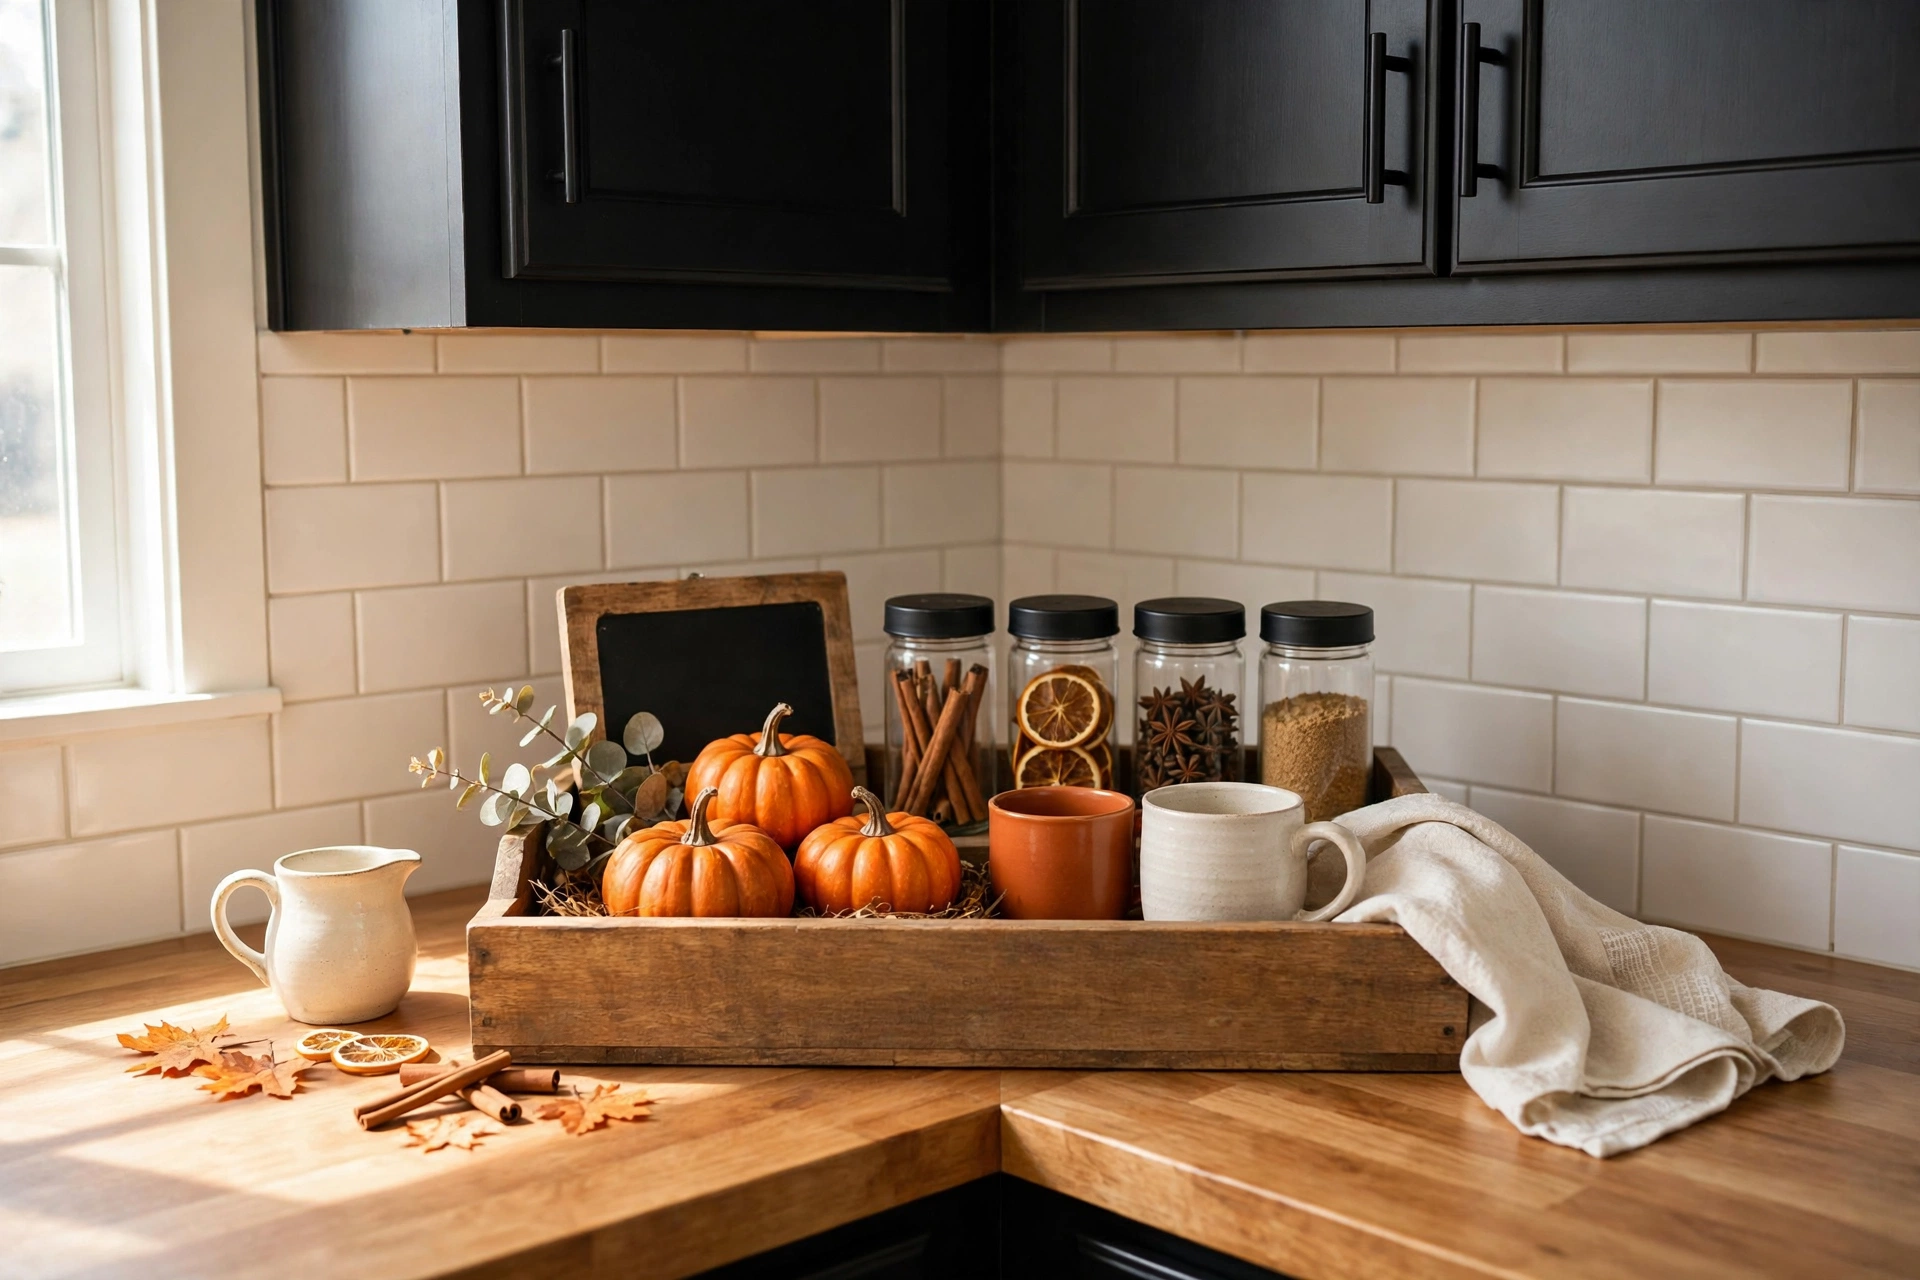
Why This Works:
- Uses a dead corner of counter that otherwise collects clutter
- Everything stays functional, coffee still gets made every morning
- Warm orange tones flatter wood cabinets and butcher block
- The whole station lifts off in one tray when you need the space
A standard kitchen counter runs 25 inches deep, so an 18 by 24 inch tray leaves 7 inches of working depth in front, enough for a cutting board. Choose mini faux pumpkins in the 3 to 4 inch range rather than real ones, because real minis soften within 10 days in a warm kitchen while faux versions last for seasons. Corral syrup bottles and spice jars on the tray so nothing migrates across the counter during the week. Avoid open bags of potpourri near the coffee maker, since strong fragrance oils can transfer to ground coffee stored within 12 inches. The first thing to check before purchasing is tray weight capacity: a loaded 24 inch acacia tray can reach 8 pounds, so skip thin bamboo versions that bow.
In real homes, this approach works best in kitchens where the coffee maker already lives in a corner, because the station simply dresses an existing habit. Homeowners who have tried this find that keeping the palette to three colors stops the corner from looking like a craft store exploded. The honest limitation is counter space: in galley kitchens under 8 feet wide, even a tray can crowd prep zones, so scale down to a 12 by 18 inch version. Compared with a full tablescape, a spice station costs $25 to $45 and takes 10 minutes to style.
Black Velvet Runner
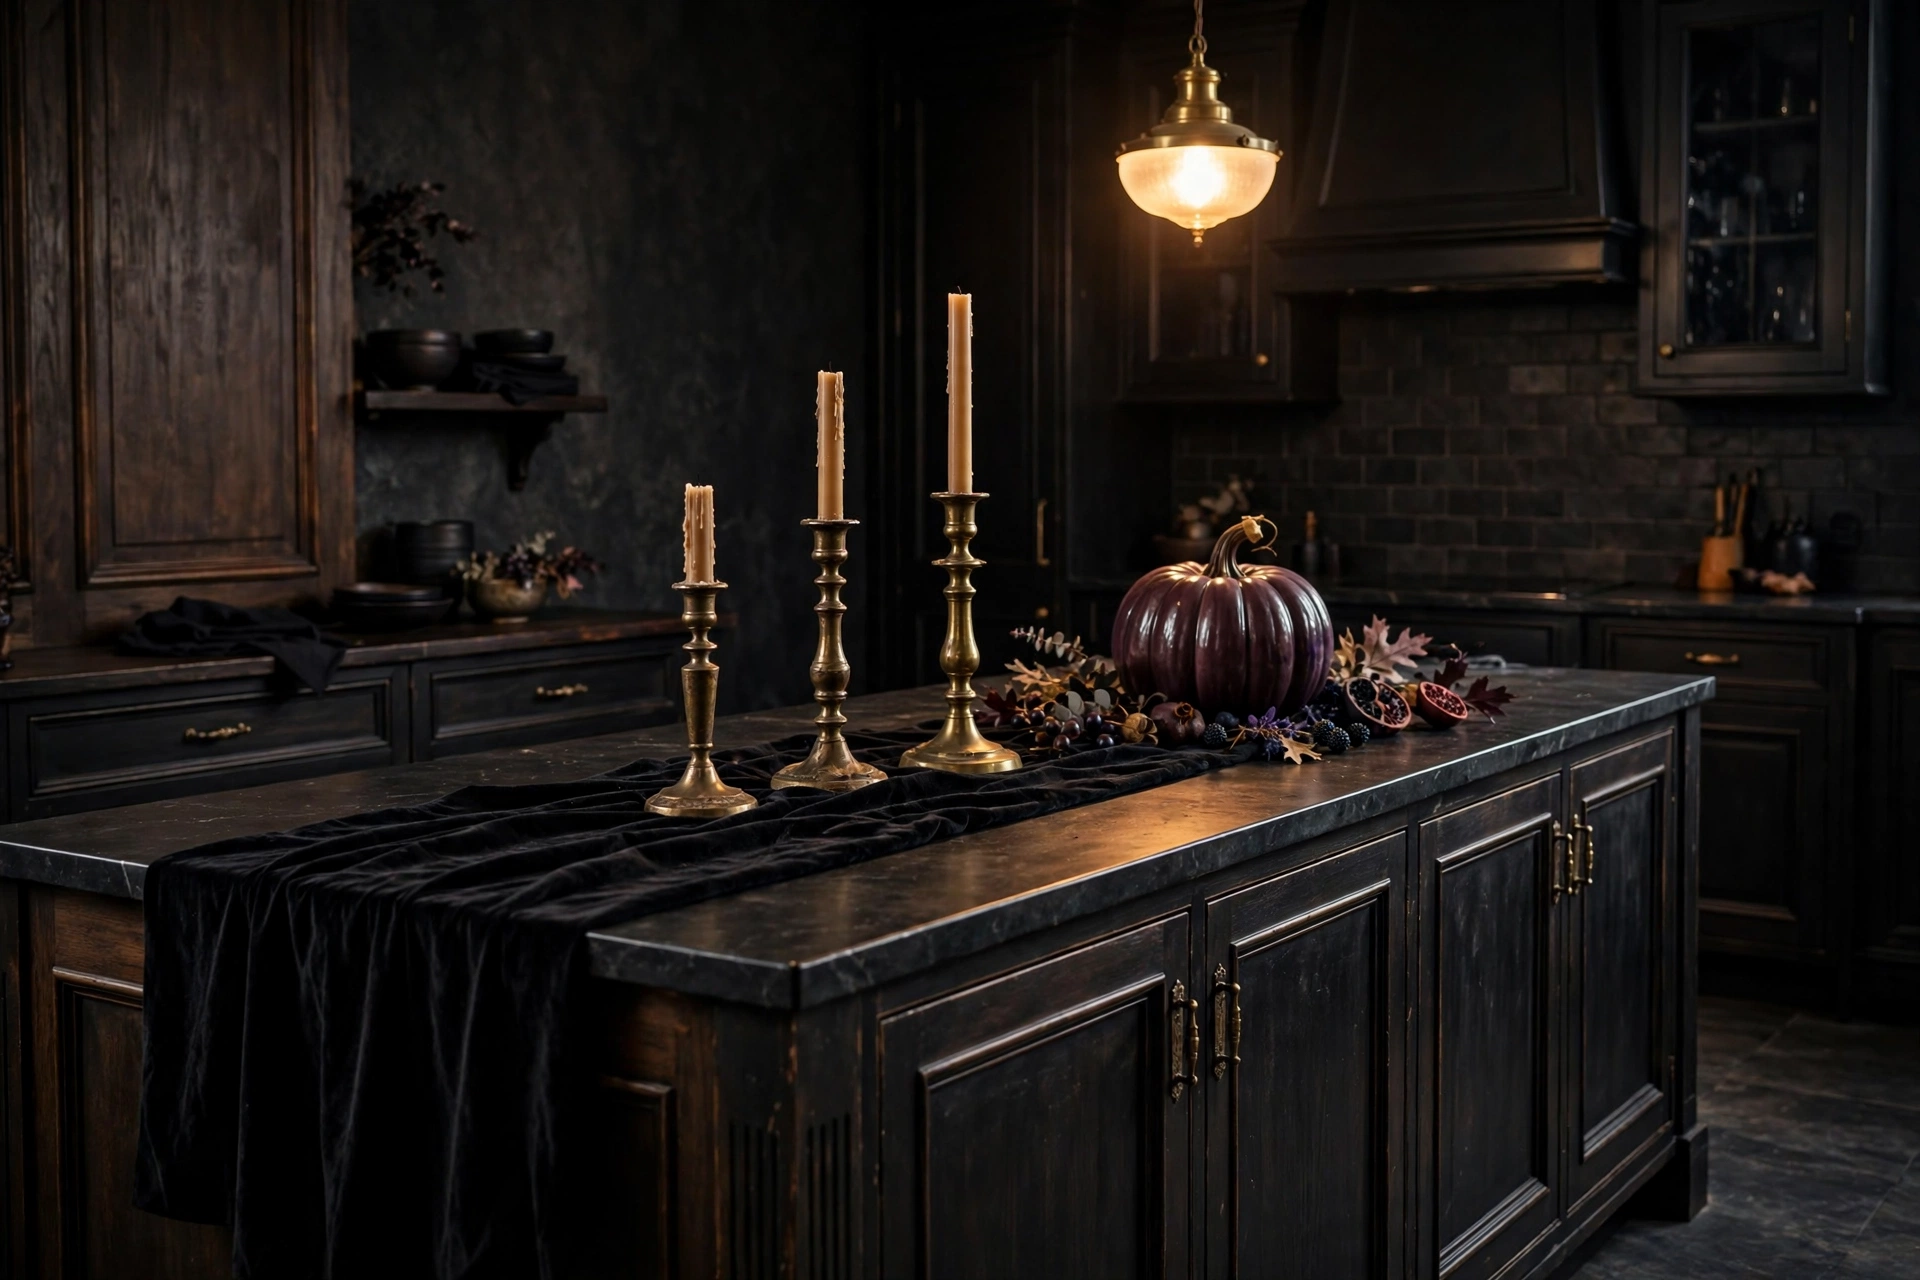
Why This Works:
- Instant drama with zero permanent changes to the kitchen
- Velvet absorbs light, which deepens the moody palette
- The runner protects the island surface from candle wax
- Works on any island length by folding the excess under
A kitchen island typically measures 36 inches high with 42 to 48 inches of clearance on all sides, so a 14 inch wide runner leaves generous workspace on both sides. Choose a runner 12 inches longer than the island so 6 inches drape over each end; a 60 inch island needs an 84 inch runner. Cotton velvet at $30 to $50 outlasts polyester in kitchens because it resists heat marks from warm serving dishes better. Avoid placing the runner under cutting boards or hot sheet pans straight from a 425 degree oven, since velvet scorches. Before finalizing this choice, test the material by spilling a few drops of water: quality velvet beads water briefly, cheap versions absorb instantly and stain.
Homeowners who have tried this find that black grounds even the busiest granite patterns, letting brass and pumpkin tones pop. It suits open plan kitchens especially well, where the island is visible from the living room and sets the seasonal tone. The trade-off is maintenance: velvet shows every crumb, so a quick lint roll before guests arrive is non negotiable. Compared with a full tablecloth, a runner costs half as much and never interferes with bar stools.
Apothecary Cabinet Display
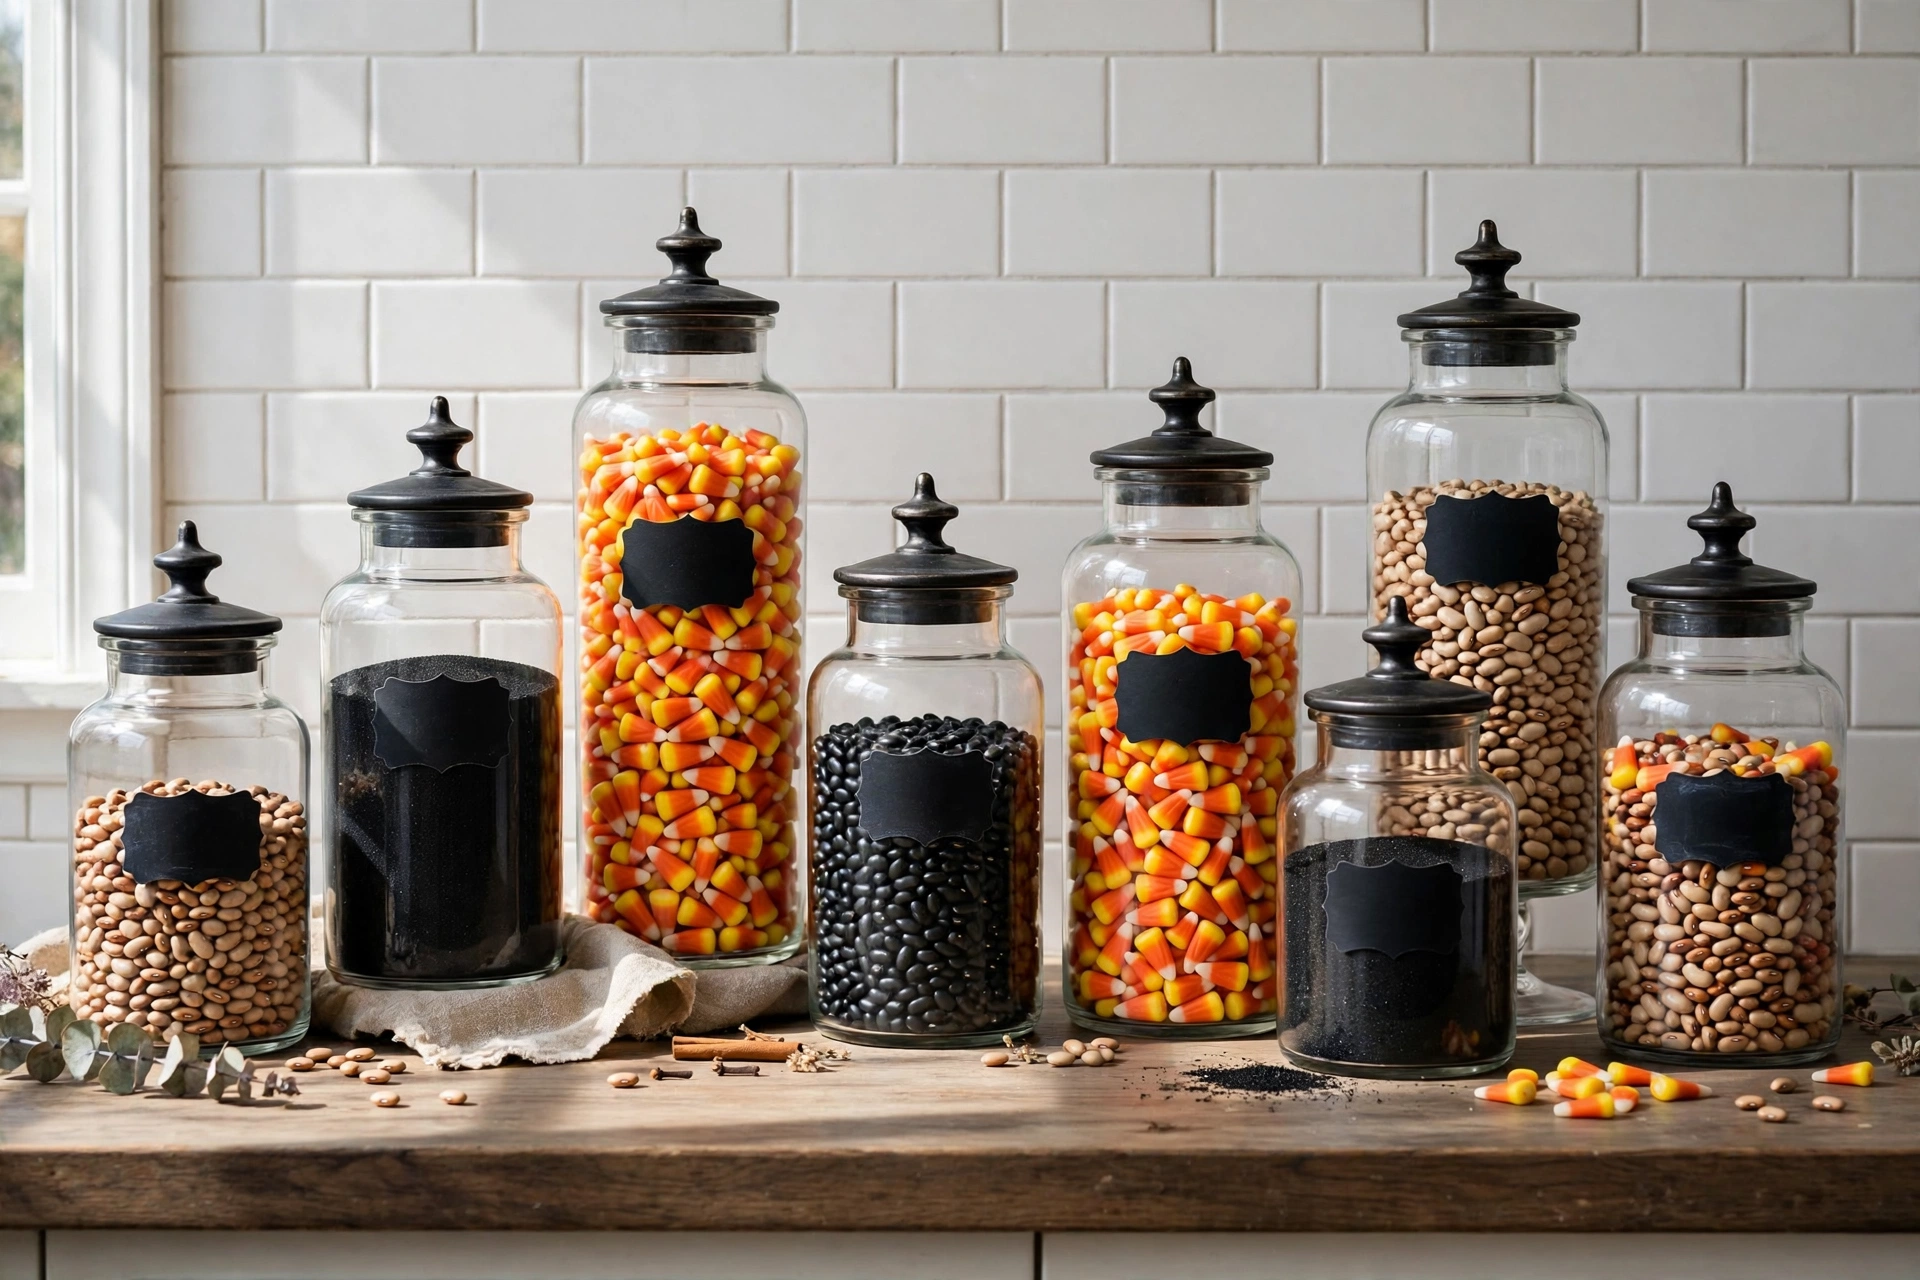
Why This Works:
- Fills the awkward gap between counter and upper cabinets beautifully
- Contents are edible or reusable, so nothing is wasted
- Glass reflects light, brightening dark kitchen corners
- The display doubles as actual pantry storage for dry goods
Upper cabinets sit 18 inches above the counter, which caps jar height at 16 inches including the lid. Cluster three jars at 8, 12 and 16 inches tall within a 24 inch span so the arrangement reads as one vignette. Fill with black beans, candy corn or dried lentils to the halfway mark; full jars look heavy while half filled jars show shape. Glass outperforms acrylic for clarity, though acrylic suits homes with toddlers since a dropped 16 inch glass jar shatters dangerously. Avoid storing anything you will actually cook with in unsealed jars near the stove, because airborne grease coats contents within two weeks. The first thing to check before purchasing is lid fit: loose lids let humidity dull candy coatings fast.
A common mistake during styling is lining jars in a straight row like soldiers; offsetting depths by 3 inches creates a collected look. This suits renters because nothing mounts or drills, and the jars pack into one 18 inch box in November. The limitation is dusting: glass shows fingerprints, so a weekly wipe keeps the sparkle. Compared with buying new canisters at $20 each, thrifted jars cost $4 to $9 and look more storied.
Spooky Halloween Kitchen Shelves
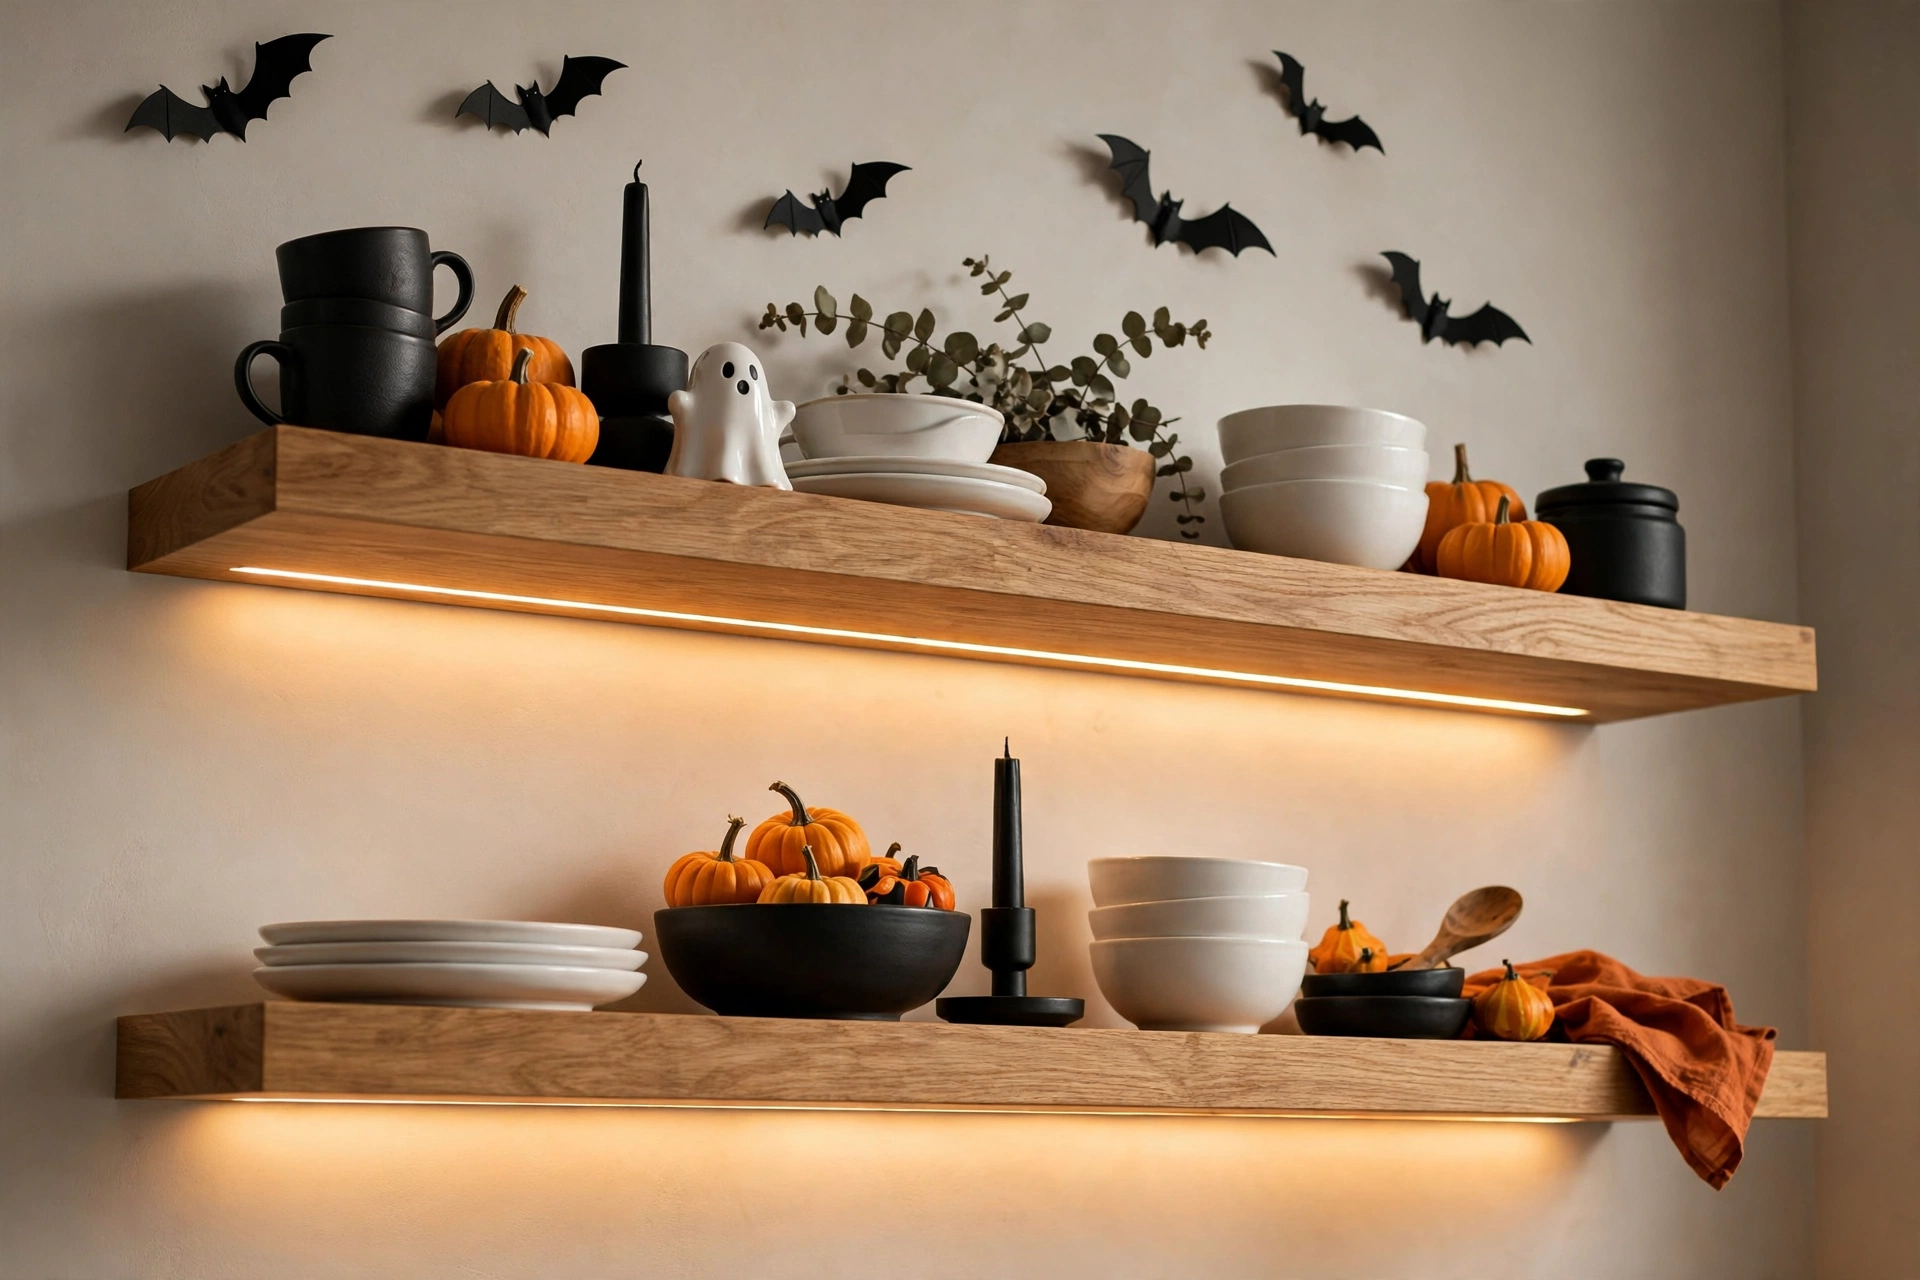
Why This Works:
- Decorates shelves you already use, so nothing feels forced
- Small swaps keep everyday dishes accessible and functional
- Black accents make white dishes look intentional, not plain
- The whole look reverses in minutes after the season
Open shelves are typically 10 to 12 inches deep, so keep decor under 8 inches deep to leave room for daily dishes behind. Space seasonal pieces every 12 inches among regular items rather than clearing a whole shelf, which keeps the kitchen working. Use 3 to 4 inch mini pumpkins and 6 inch bat cutouts; anything taller than 8 inches crowds the 12 to 15 inch gap between shelves. Avoid real candles on open shelves near the 18 inch backsplash zone behind a gas range, where heat and grease are constant. The first thing to check before purchasing is shelf weight rating: most floating shelves hold 15 to 25 pounds per 36 inch span, and ceramic plus decor adds up.
These spooky halloween kitchen shelves work best when the seasonal items share a color with something permanent, like black hardware or a dark faucet, which ties the look together. Homeowners who have tried this find that three well placed pieces beat a crowded shelf every time. The honest trade-off is dust: open shelves in kitchens collect grease film, so wipe decor weekly. Compared with a full shelf restyle, the swap method costs under $30.
Raven Flatware Setting
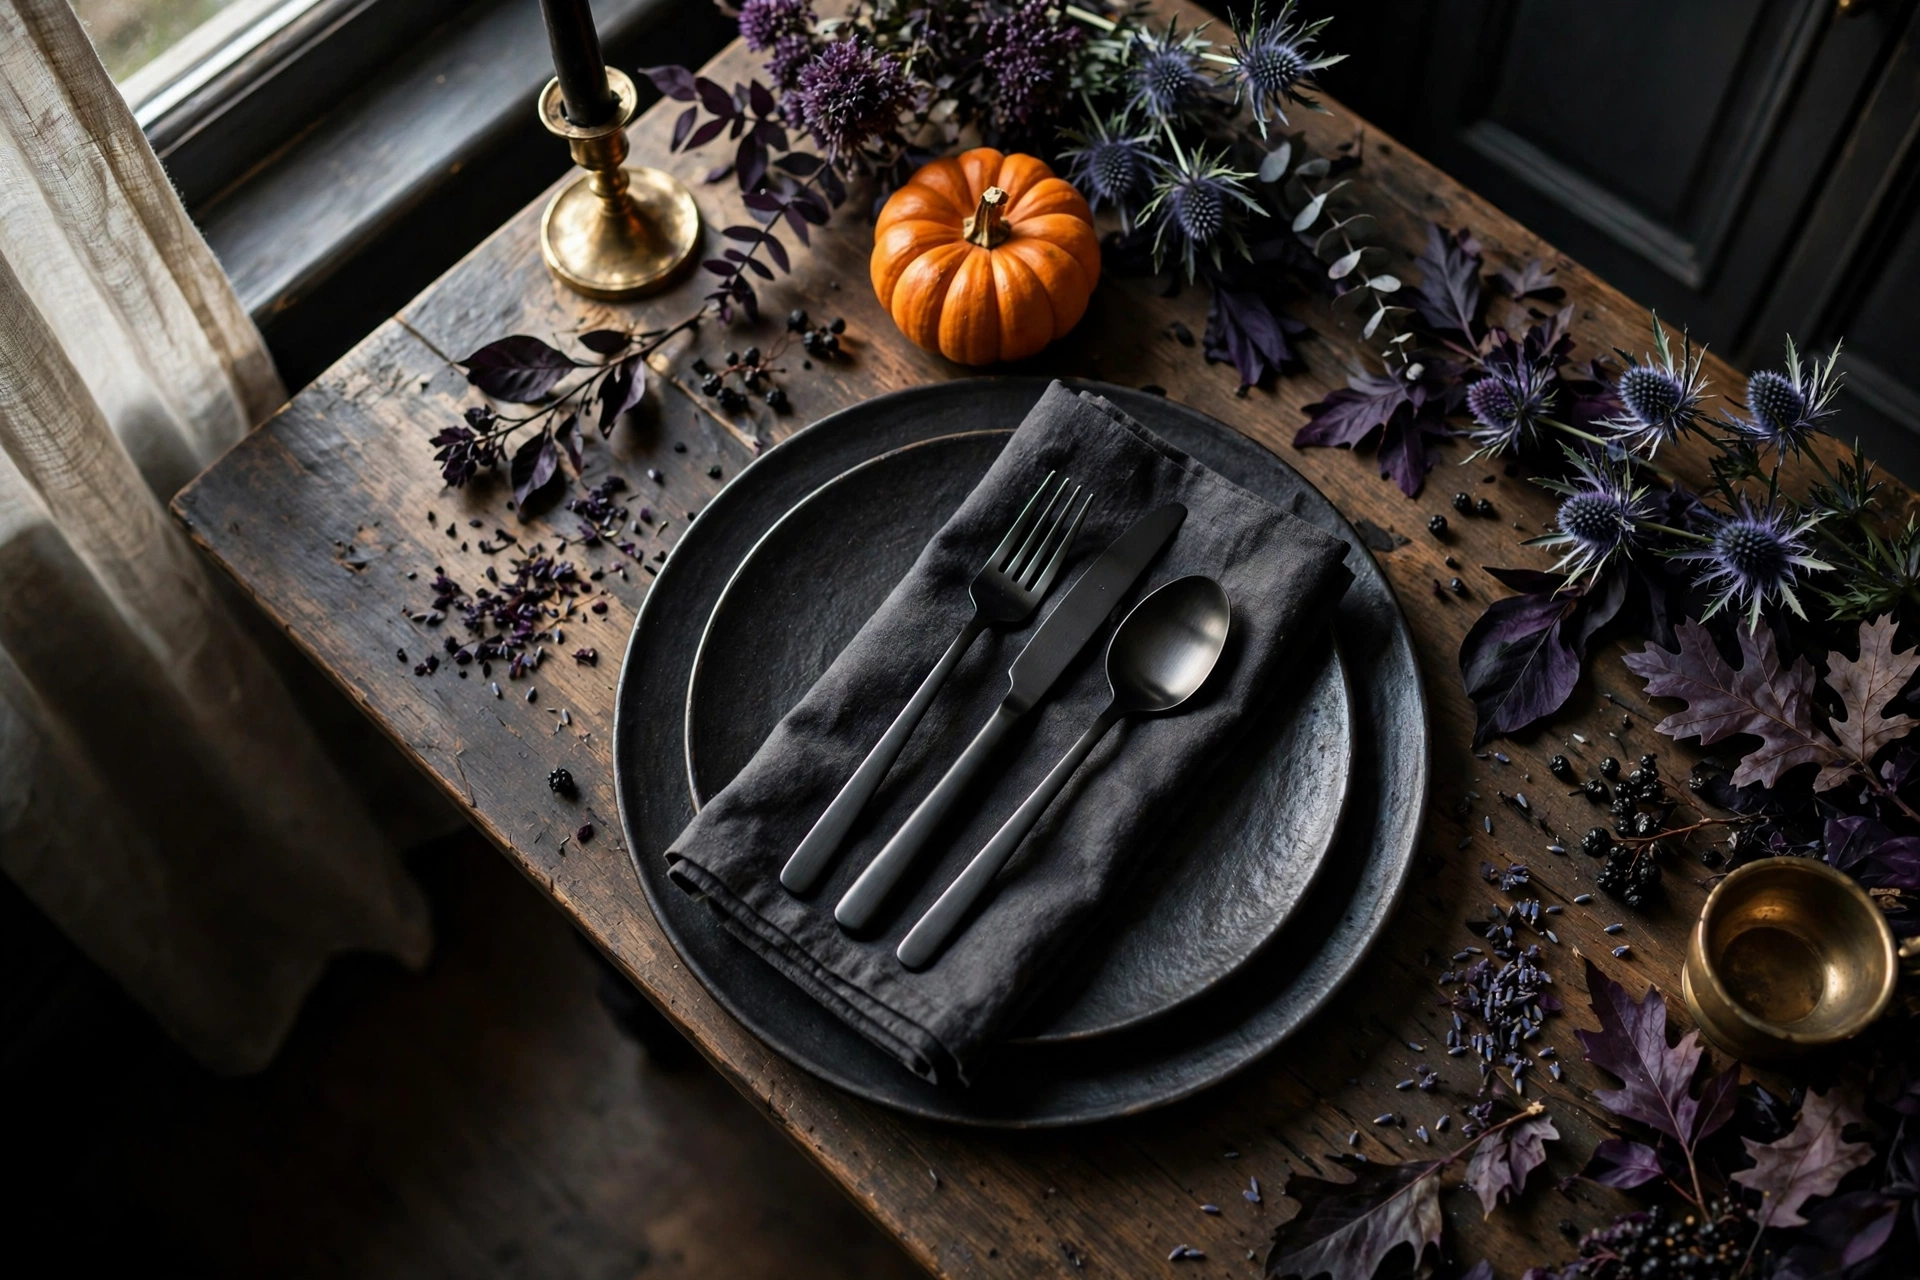
Why This Works:
- Transforms weeknight dinners with pieces you already own plus one swap
- Matte black flatware hides water spots better than polished silver
- Dark linens make food colors pop on the plate
- The setting scales from two people to twelve without extra decor
A standard place setting needs 24 inches of table width per diner, so a 48 inch table seats two per side comfortably. Layer a 13 inch charger under the dinner plate; the 2 inch reveal of charger around a 10.5 inch plate frames the setting. Matte black flatware in 18/0 stainless runs $25 to $40 for a 20 piece set and resists dishwasher dulling better than coated versions. Avoid black flatware with a painted finish rather than PVD coating, because paint chips within months while physical vapor deposition lasts years. Before finalizing this choice, test one piece in your dishwasher for two weeks: cheap sets show silver at the edges fast.
In real homes, this approach works best for households that already own dark napkins, since the flatware is the only purchase. It suits anyone hosting a Halloween dinner because the table looks themed before a single decoration appears. The limitation is formality: matte black reads modern gothic, which clashes with frilly traditional china. Compared with buying a full Halloween dish set, a flatware swap costs a third and gets used year round.
Gilded Pumpkin Centerpiece
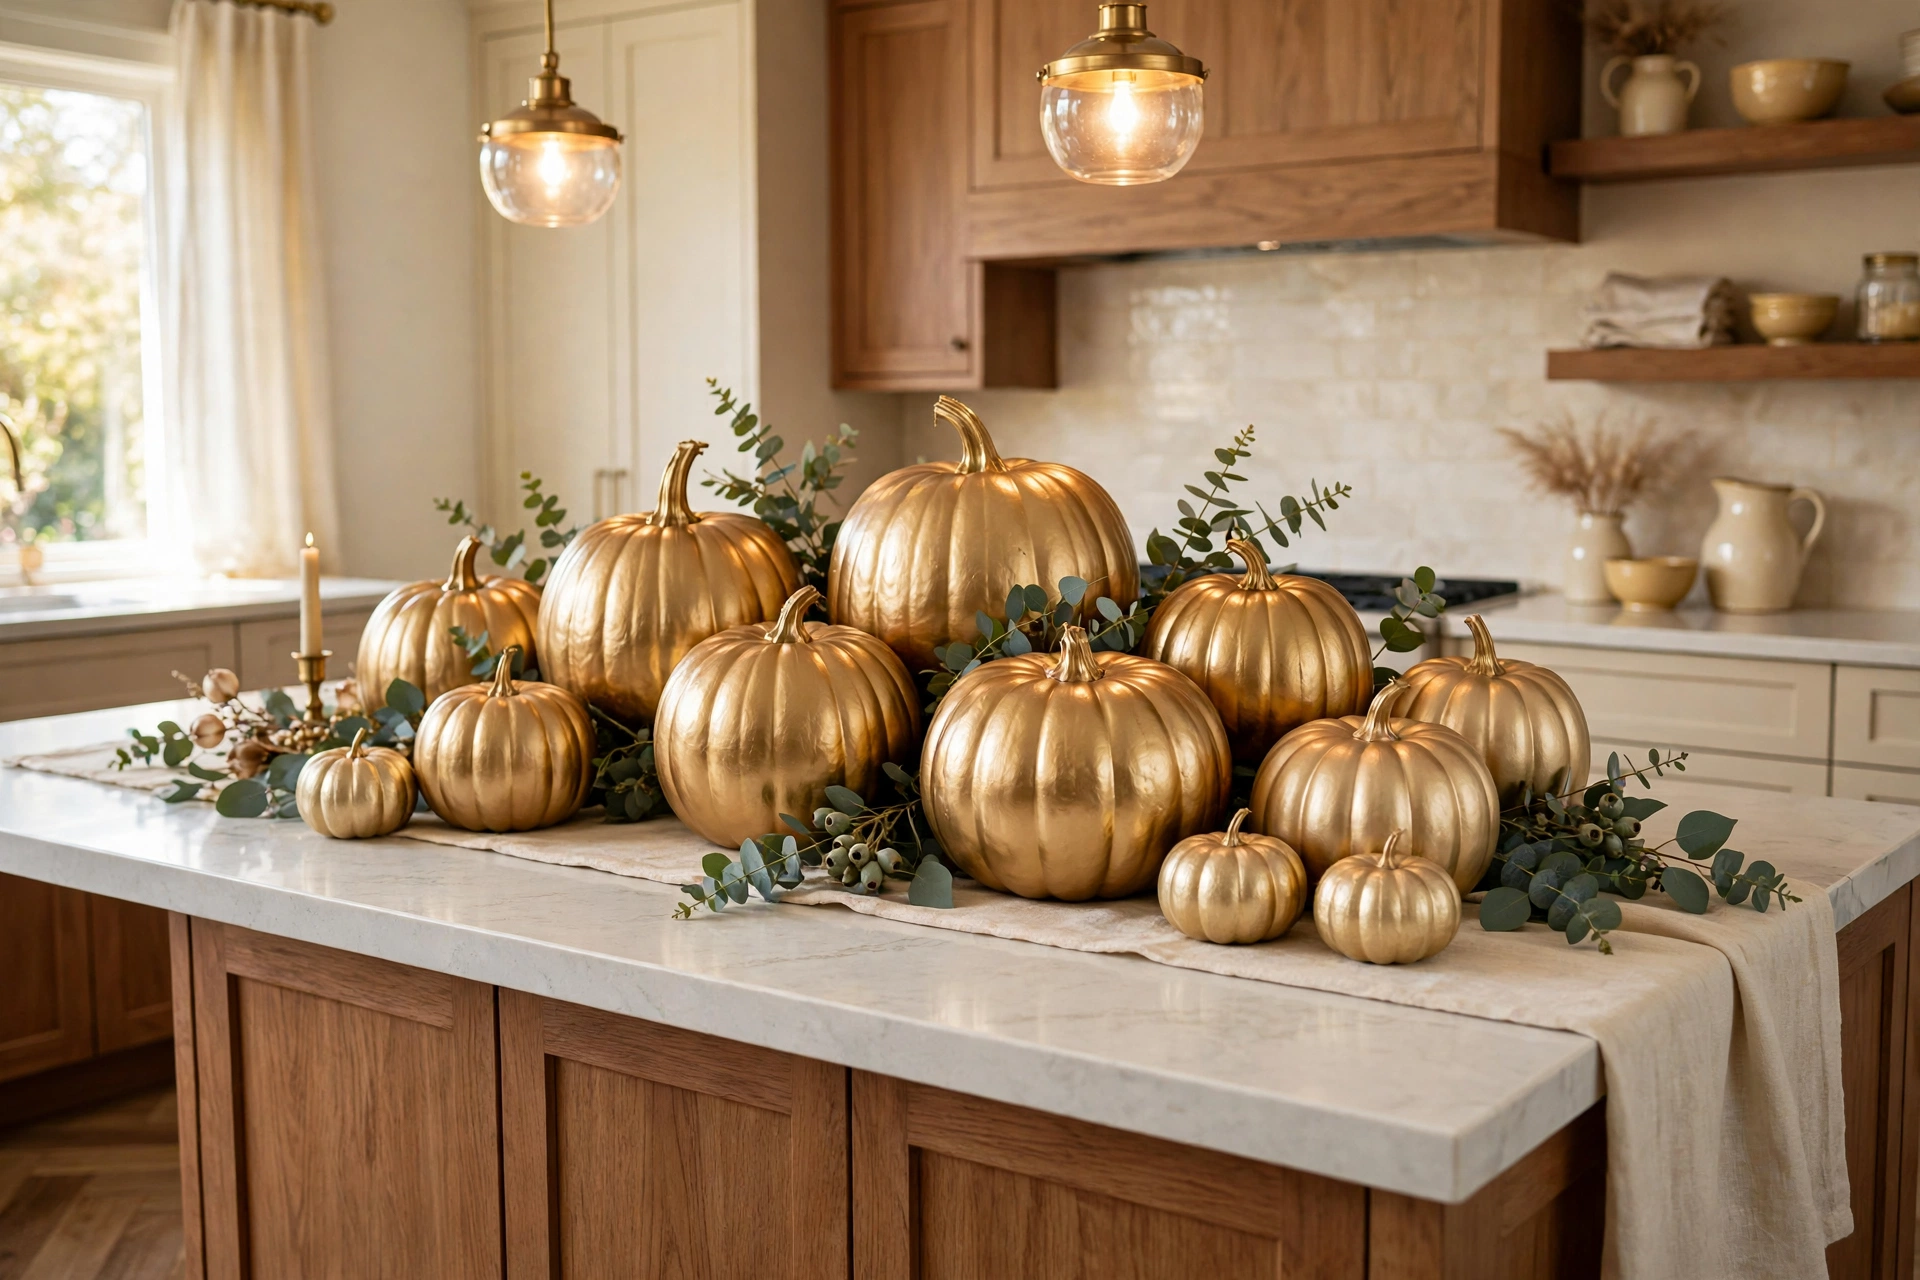
Why This Works:
- Metallic gold reads as luxury, not seasonal novelty
- Odd numbered groupings create natural visual rhythm
- Faux pumpkins last for years, spreading cost across seasons
- The island is the kitchen’s natural focal point at standing height
An island centerpiece should stay under 12 inches tall so sightlines across the 36 inch high surface stay open for conversation. Use pumpkins in 4, 6 and 8 inch diameters; the 2 inch steps between sizes look deliberate. Apply metallic spray paint in two to three thin coats from 8 to 10 inches away, letting each coat dry 20 minutes to avoid drips that ruin the finish. Foam pumpkins weigh under a pound each while resin versions reach 3 pounds at 8 inches, so check that nothing wobbles on a polished quartz surface. Avoid clustering every pumpkin at the same height, since a flat line of identical shapes looks like a store display. The first thing to check before purchasing is storage: five painted pumpkins nest in one 24 inch plastic bin.
Homeowners who have tried this find that champagne gold flatters both warm wood and cool gray cabinets, while bright yellow gold can clash. The honest limitation is dust: metallic paint shows every speck, so plan a weekly wipe with a dry microfiber cloth. Compared with fresh floral centerpieces at $40 weekly, a $35 set of painted pumpkins pays for itself in one month.
Moody Candle Nook
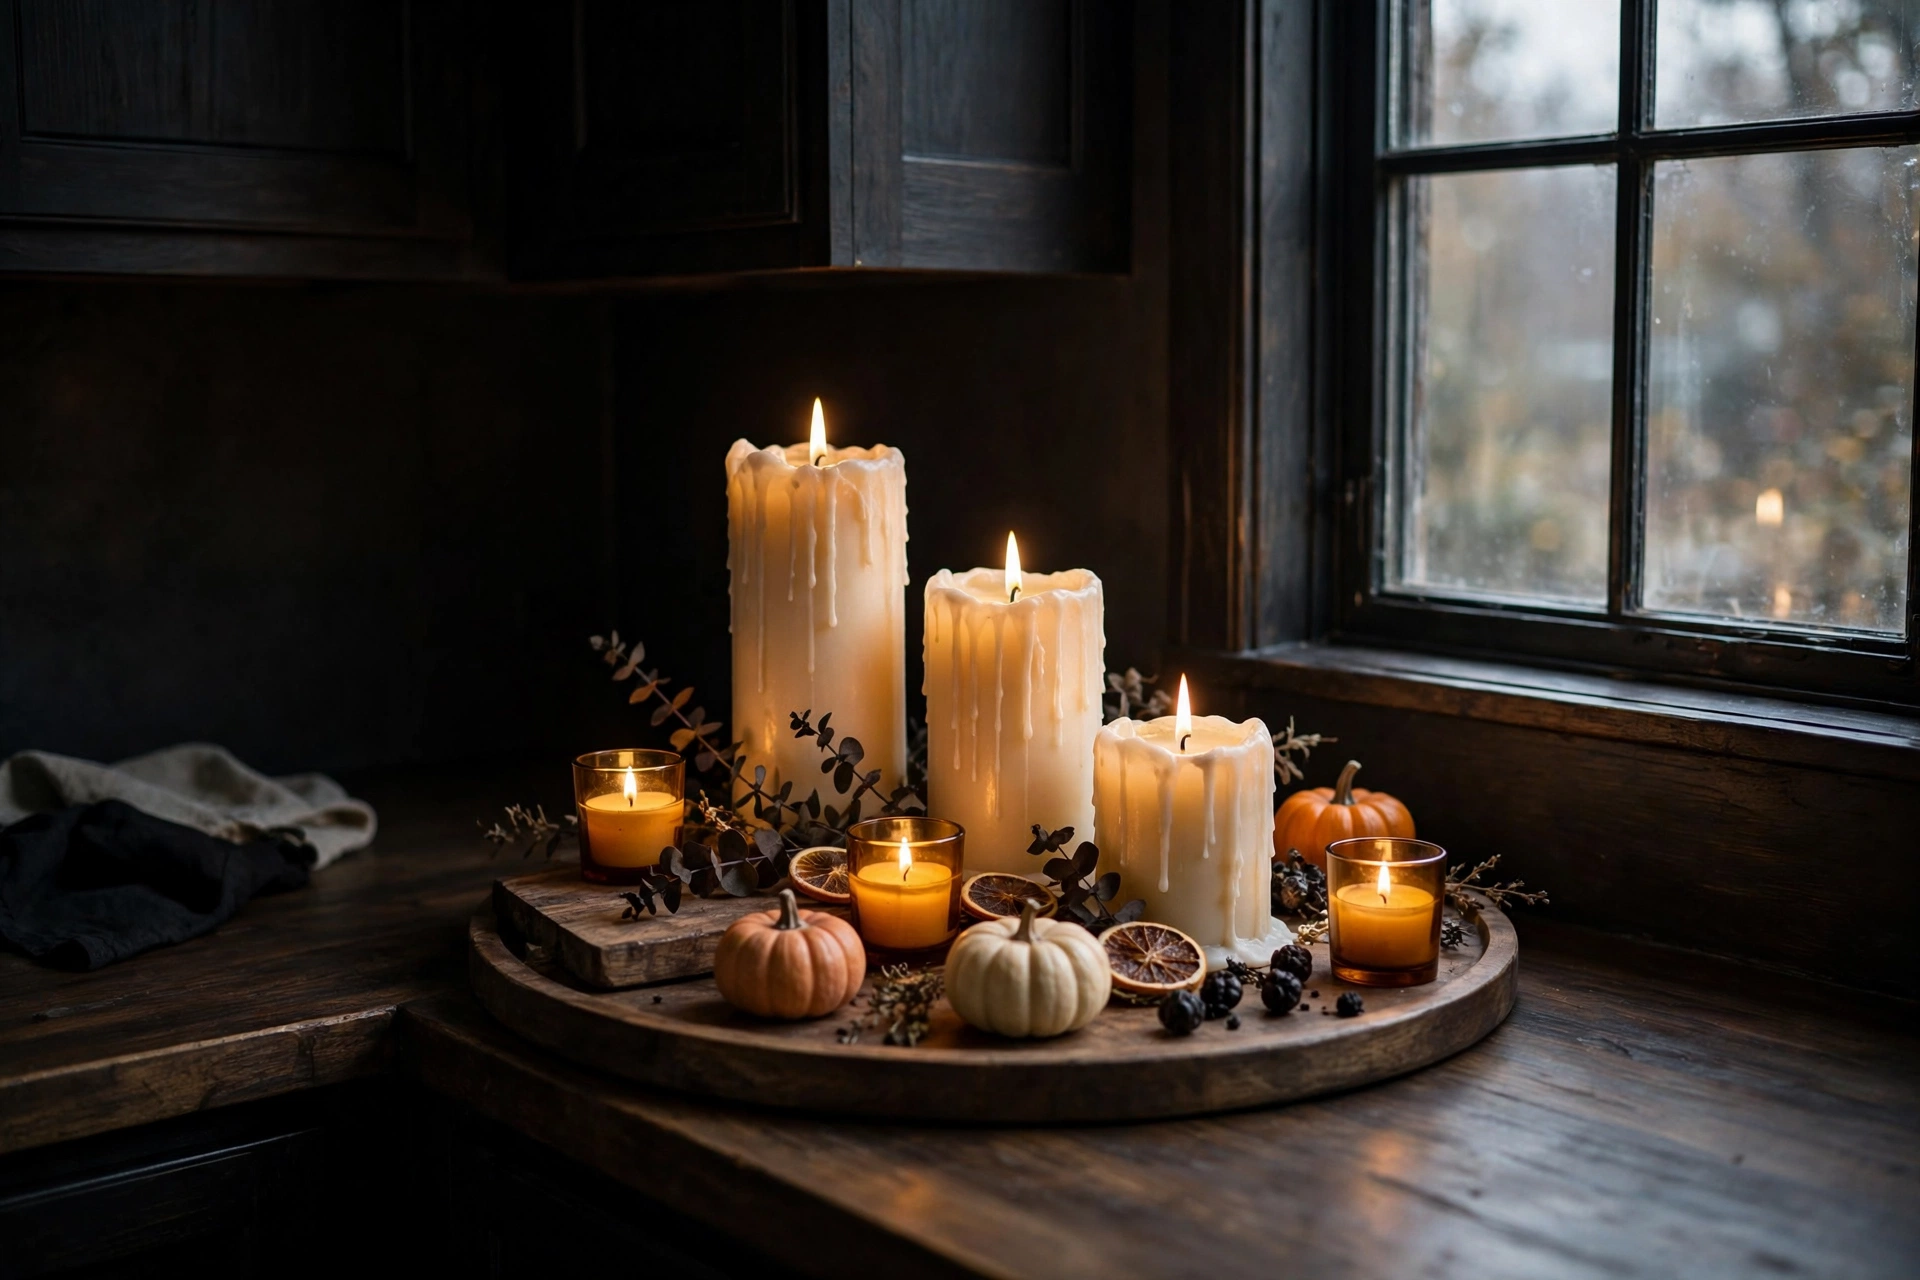
Why This Works:
- Candlelight at 2700K flatters every skin tone and cabinet finish
- A tray corrals everything, so the nook stays tidy all month
- Flameless options give glow with zero fire risk near curtains
- The nook becomes the kitchen’s evening focal point
Build clusters of three, five or seven candles with heights at 4, 6 and 8 inches on a tray at least 16 inches in diameter to catch wax drips. The National Fire Protection Association advises keeping open flame 12 inches from curtains and dried florals, which rules out real tapers near window treatments. LED flameless candles at 2700K now mimic real flicker convincingly and run 500 plus hours on two AA batteries. Avoid scented candles within 24 inches of food prep zones, because fragrance transfers to uncovered ingredients. The first thing to check before purchasing is the timer function: a 6 hour on, 18 hour off cycle means the display lights itself nightly.
A common mistake during setup is placing all candles at identical heights, which reads flat; varying by at least 2 inches creates the layered look. This suits busy households because the tray lifts off in seconds when the counter is needed for cooking. The trade-off is cost: quality flameless pillars run $8 to $15 each versus $2 for basic wax, though LEDs last a decade. Compared with a wired sconce installation, a candle nook costs under $50 with zero electrician fees.
Witchy Chalkboard Menu
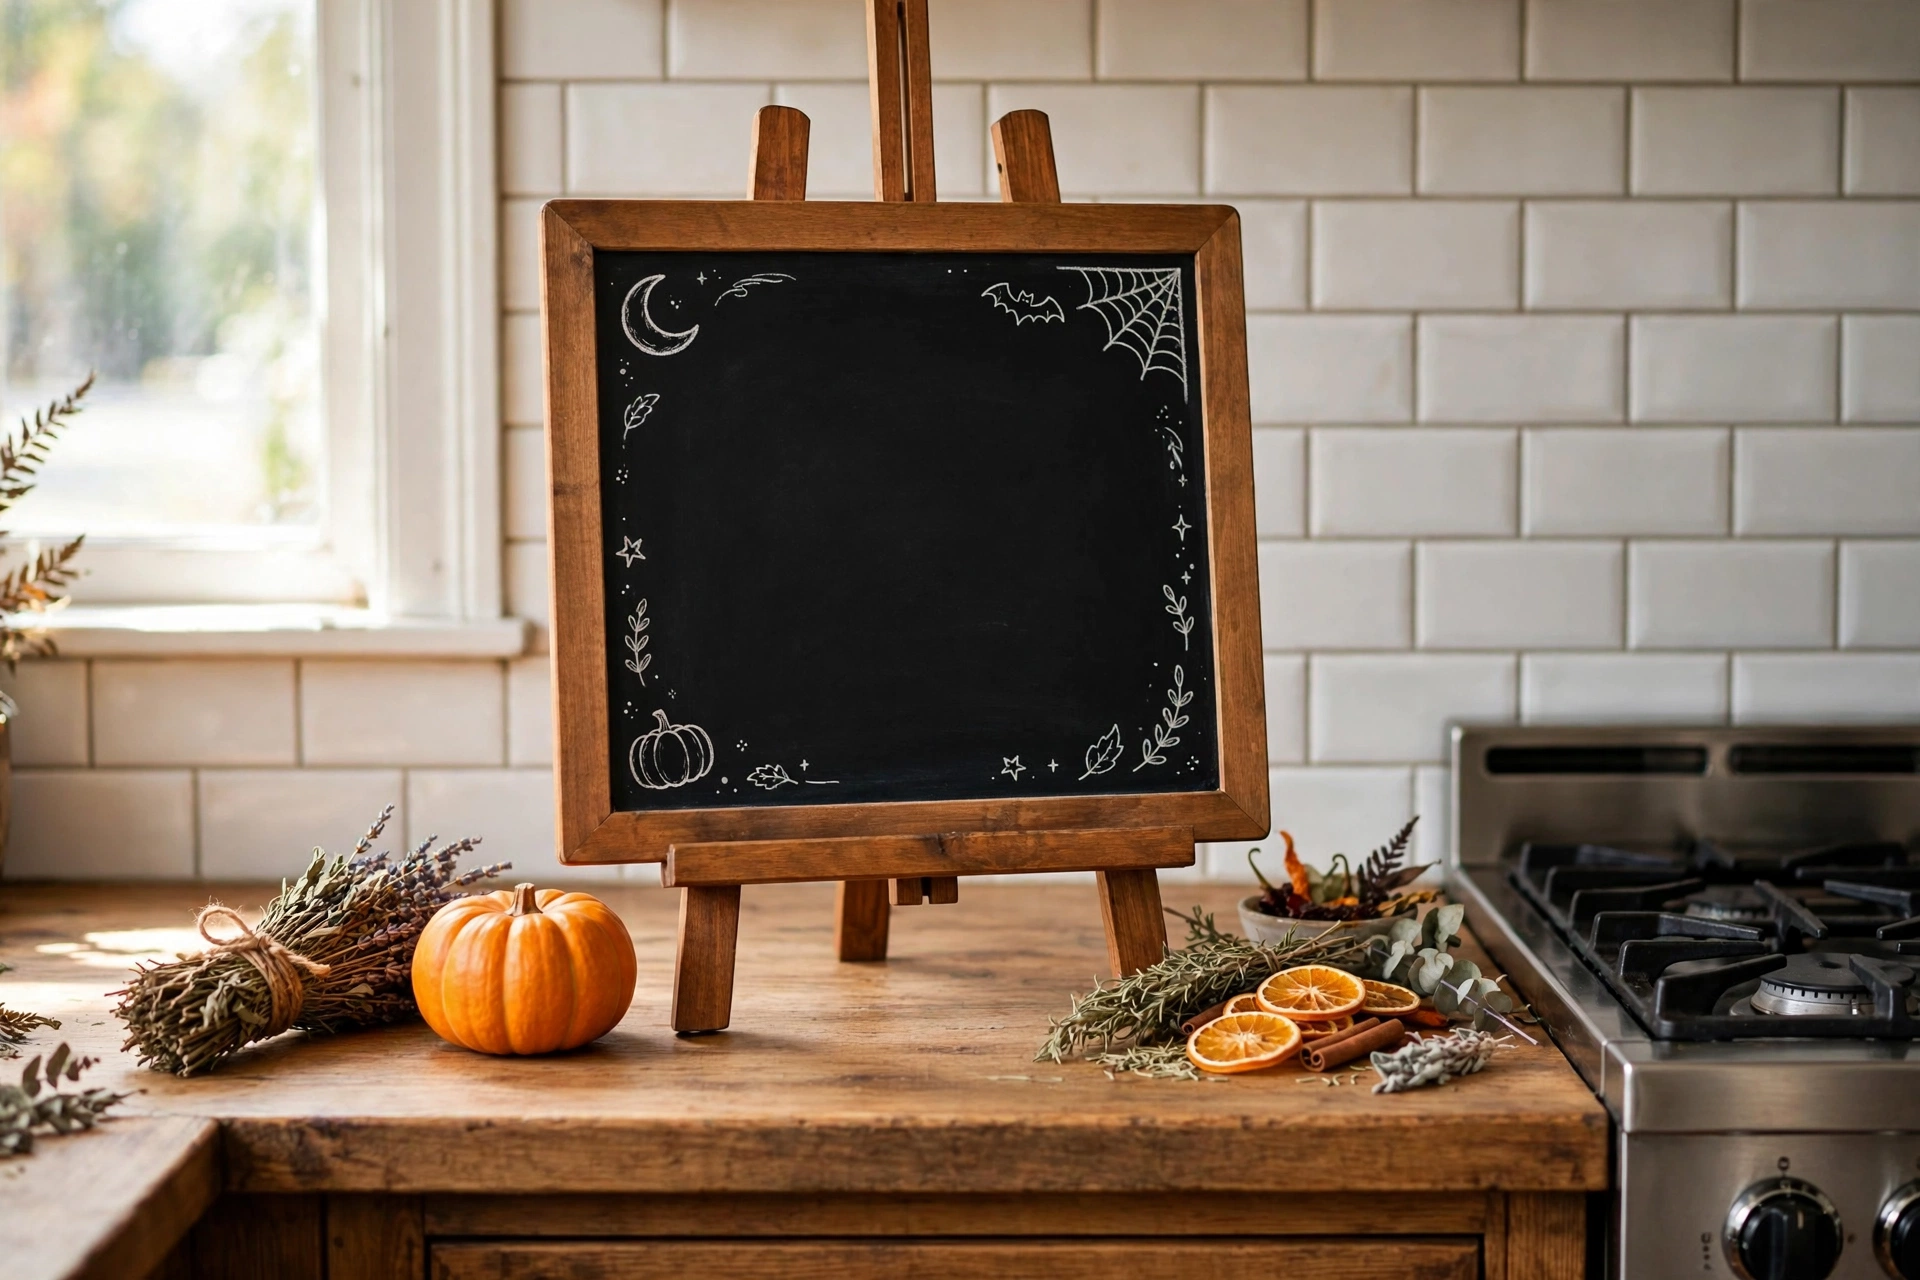
Why This Works:
- Gives the kitchen a personal, hosted feel for the season
- Menu planning on display actually helps weeknight cooking
- Chalk wipes clean, so the board works year round
- Small footprint fits even narrow counters
A 12 by 16 inch board on an 18 inch easel fits the 18 inch backsplash zone without blocking outlets. Use liquid chalk markers rather than traditional chalk for crisp lines; they wipe off with a damp cloth but resist smudging from kitchen humidity. Prop the easel 6 inches from the wall so it leans at a stable angle on 25 inch deep counters. Avoid placing the board within 12 inches of an active gas burner, where heat warps wood frames over time. The first thing to check before purchasing is easel depth: cheap 8 inch easels tip forward on smooth quartz, while 10 inch deep bases stay put.
In real homes, this approach works best for households that already menu plan, because the board earns its counter space functionally. Homeowners who have tried this find that a weekly menu in chalk cuts the “what is for dinner” debate noticeably. The limitation is handwriting: if yours is shaky, use a printed menu card tucked into the frame instead. Compared with a $60 custom sign, a $15 chalkboard and easel deliver the same charm.
Amber Glass Glow
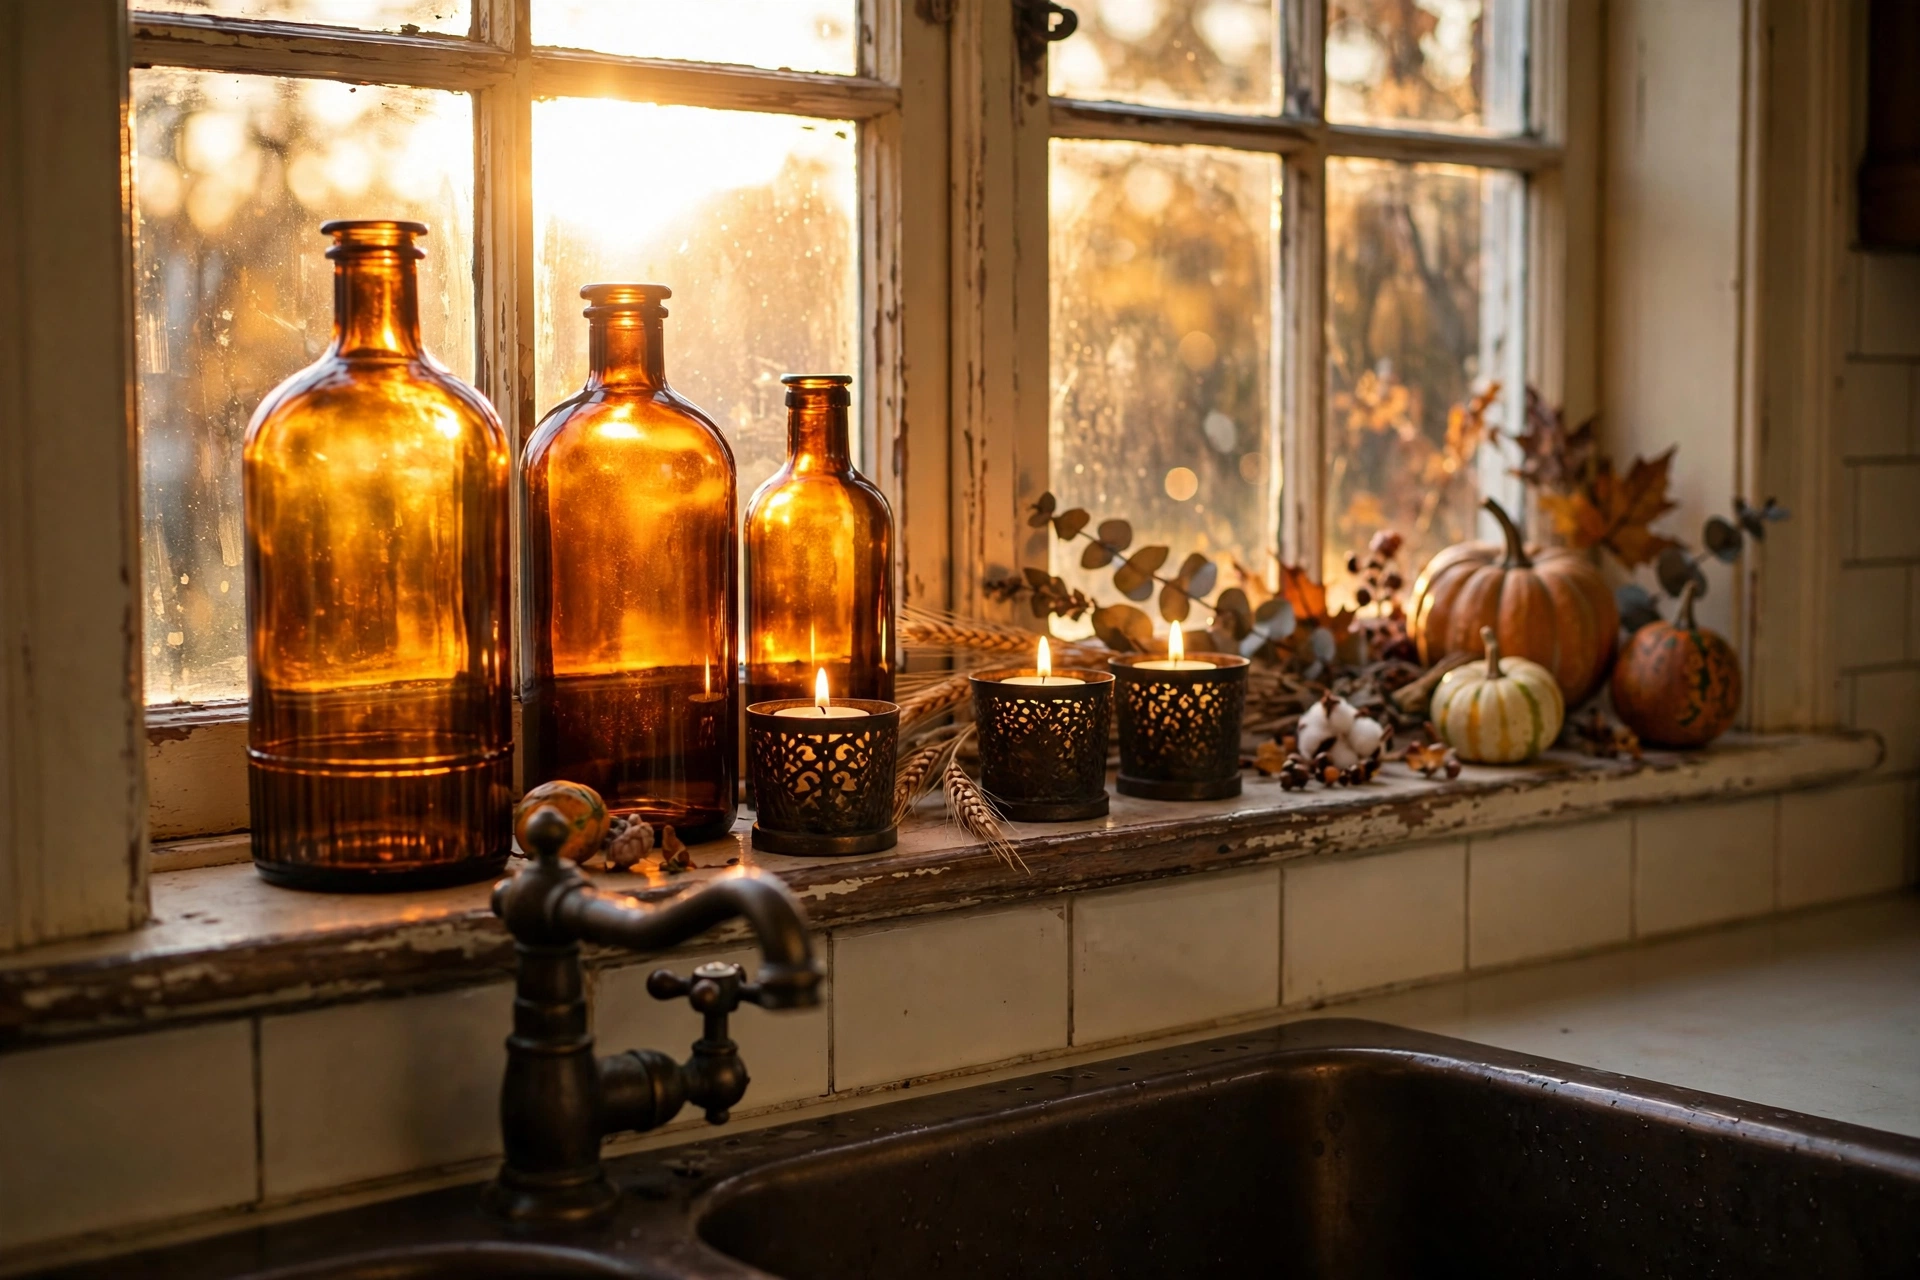
Why This Works:
- Backlit amber glass glows without any wiring or batteries
- Uses the windowsill, which is otherwise dead space
- Vintage bottles cost almost nothing at thrift stores
- The warm tones flatter both white and dark cabinets
A standard windowsill offers 5 to 7 inches of depth, so keep bottles under 5 inches in diameter to avoid tipping. Group bottles at 8, 10 and 12 inches tall; the 2 inch steps catch afternoon sun at staggered heights. Real amber glass contains no hazards and will not fade, while spray painted “amber” glass chips within months near a steamy sink. Slip 2 inch LED tea lights inside rather than real flames, since curtains often hang within 12 inches of kitchen windows. Avoid blocking more than half the window width, because kitchens need daylight for safe food prep. The first thing to check before purchasing is stability: top heavy 12 inch bottles need a 4 inch base diameter minimum.
Homeowners who have tried this find the glow becomes the kitchen’s favorite evening feature, especially in October’s early sunsets. It suits small kitchens where counter space is sacred, since the sill holds the whole display. The honest trade-off is cleaning: glass near sinks spots with hard water, so a weekly vinegar wipe is needed. Compared with new decor at $15 per bottle, thrifted amber glass runs $2 to $5.
Harvest Backsplash Garland
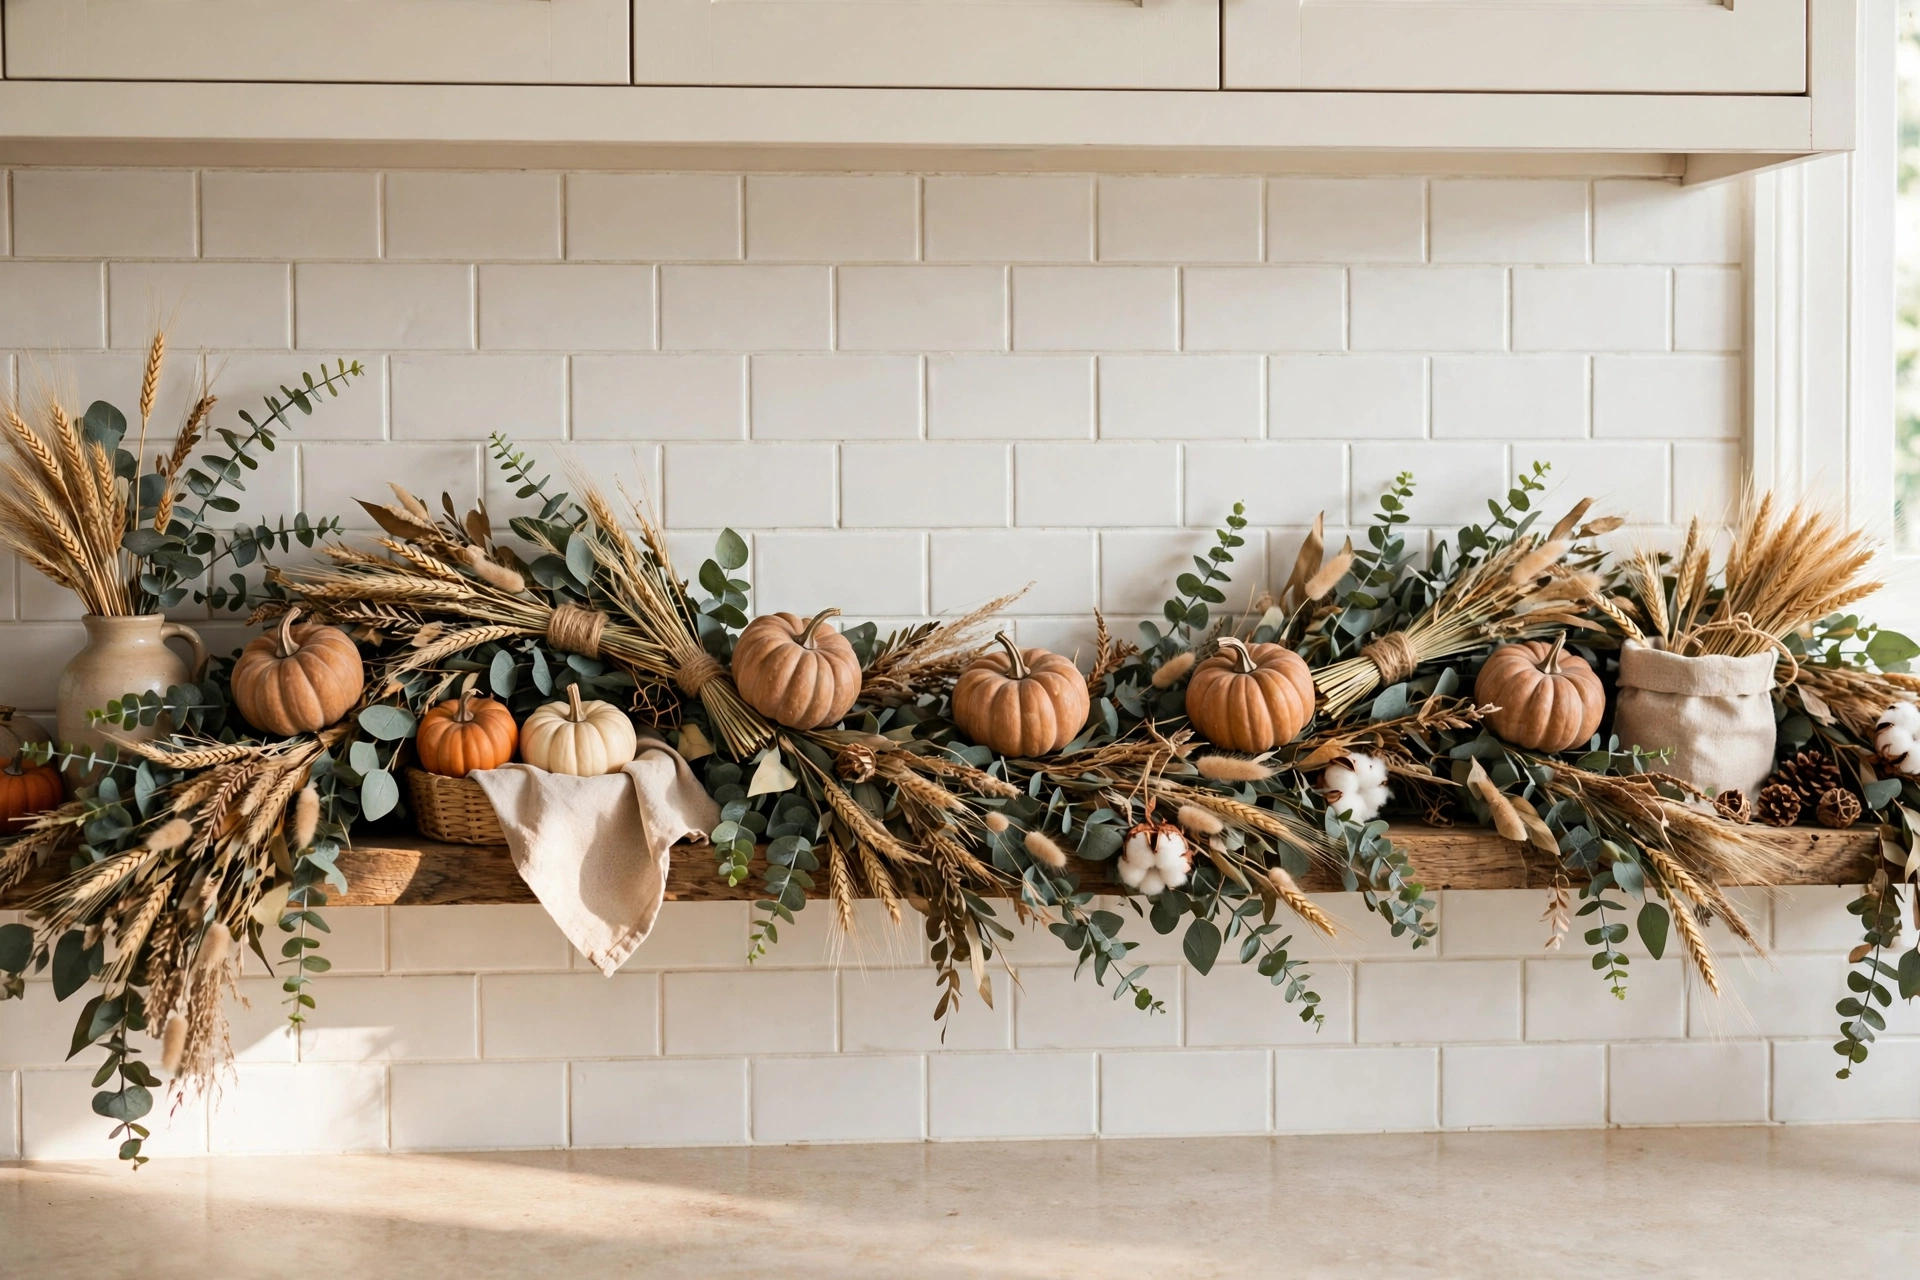
Why This Works:
- Dresses the hardest working wall in the kitchen beautifully
- Faux garland survives steam and splatter far better than real
- The 18 inch backsplash height is the perfect garland scale
- Lifts off in one piece for easy post-season storage
A 6 foot garland suits a 72 inch counter run; scale at roughly 1 foot of garland per 12 inches of counter. Wire 3 inch mini pumpkins every 12 inches with 22 gauge floral wire so nothing shifts when the range hood vibrates. Faux eucalyptus and wheat cost $18 to $30 for 6 feet versus $45 plus for fresh that wilts in kitchen heat within 5 days. Avoid real dried wheat within 18 inches of a gas burner, since it is genuinely flammable near open flame. The first thing to check before purchasing is depth: garlands over 6 inches deep crowd the 25 inch counter below and snag sleeves.
A common mistake during installation is forgetting that the backsplash gets splattered; choose wipeable faux materials over fabric leaves that stain. This suits households that cook daily because faux garland rinses clean under the tap. The limitation is the range hood zone: keep garland 24 inches from high heat. Compared with tiling an accent backsplash, a $25 garland delivers seasonal impact for a fraction.
Potion Bottle Collection

Why This Works:
- Turns an empty counter corner into a conversation piece
- Bottles are collectible, so the display grows more personal yearly
- Dark glass hides dust better than clear glass
- The crate keeps everything contained and portable
Corral bottles in a 12 by 18 inch wooden crate so the collection reads as one vignette, not scattered clutter. Choose bottles between 6 and 10 inches tall; the 4 inch range gives the grouping rhythm. Cork stoppers outperform screw caps for the apothecary look, though corks dry and crumble within two seasons in dry heated kitchens, so buy spares. Fill with dried lavender, black sand or faux specimens; avoid liquids near corked bottles that get handled, since seepage ruins labels. The first thing to check before purchasing is glass thickness: thin dollar store bottles chip at the lip, while 3mm craft glass survives.
In real homes, this approach works best on counters that are not primary prep zones, because the crate claims its footprint for the month. Homeowners who have tried this find that guests always ask about the bottles, making it the kitchen’s best party trick. The honest limitation is kid safety: tiny corks are choking hazards, so keep the crate above 36 inches in homes with toddlers. Compared with a $80 Halloween village set, a $30 bottle collection feels more grown up.
Halloween Kitchen Island Styling
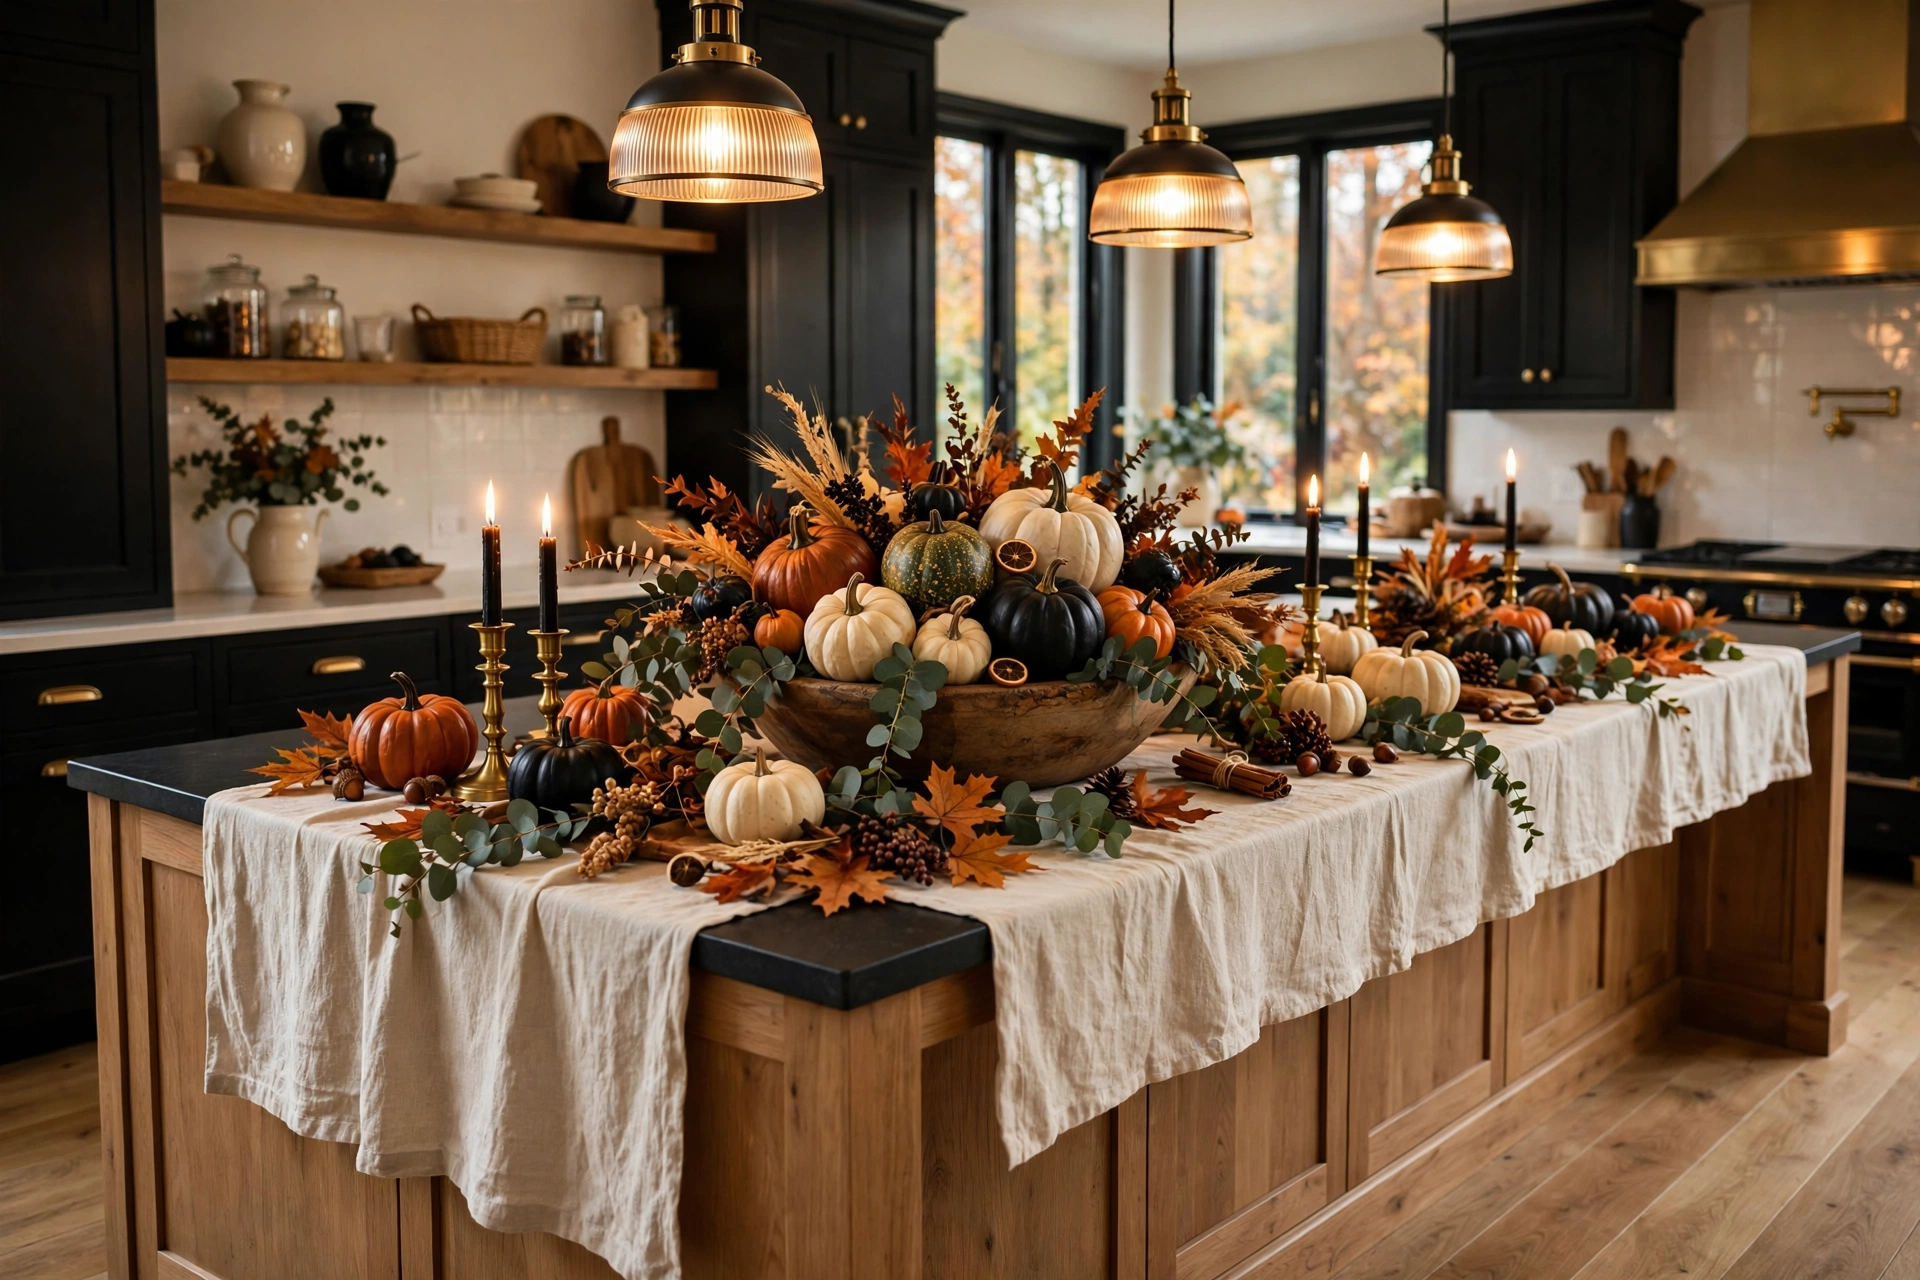
Why This Works:
- The island is the kitchen’s stage, visible from every angle
- Layering runner, bowl and candles builds designer depth
- Everything lifts off in minutes when it is time to cook
- One styled island can carry the whole room’s theme
A 96 inch island takes a 16 by 90 inch runner, leaving 3 inches of bare counter at each end for a finished look. Anchor the center with a 20 to 24 inch dough bowl filled with 4 to 8 inch pumpkins; the bowl’s 6 inch depth keeps the arrangement under the 12 inch sightline limit. Pendant lights should hang 30 to 36 inches above the island surface: higher washes the decor out, lower blocks views. Keep candles 12 inches from the dough bowl’s dried contents per fire safety guidance. Avoid real flame tapers on islands where kids pull up stools, since sleeves catch. The first thing to check before purchasing is island clearance: the NKBA recommends 42 to 48 inches on all sides, and decor should never eat into that walkway.
This halloween kitchen island styling suits open plan homes where the island faces the living room, because it sets the tone for the whole floor. Homeowners who have tried this find that one strong anchor piece beats five small ones scattered about. The trade-off is daily function: the styled island loses roughly 30 percent of its prep surface for the month. Compared with styling every counter, one island moment costs $60 to $90 and reads more intentional.
Dark Floral Centerpiece
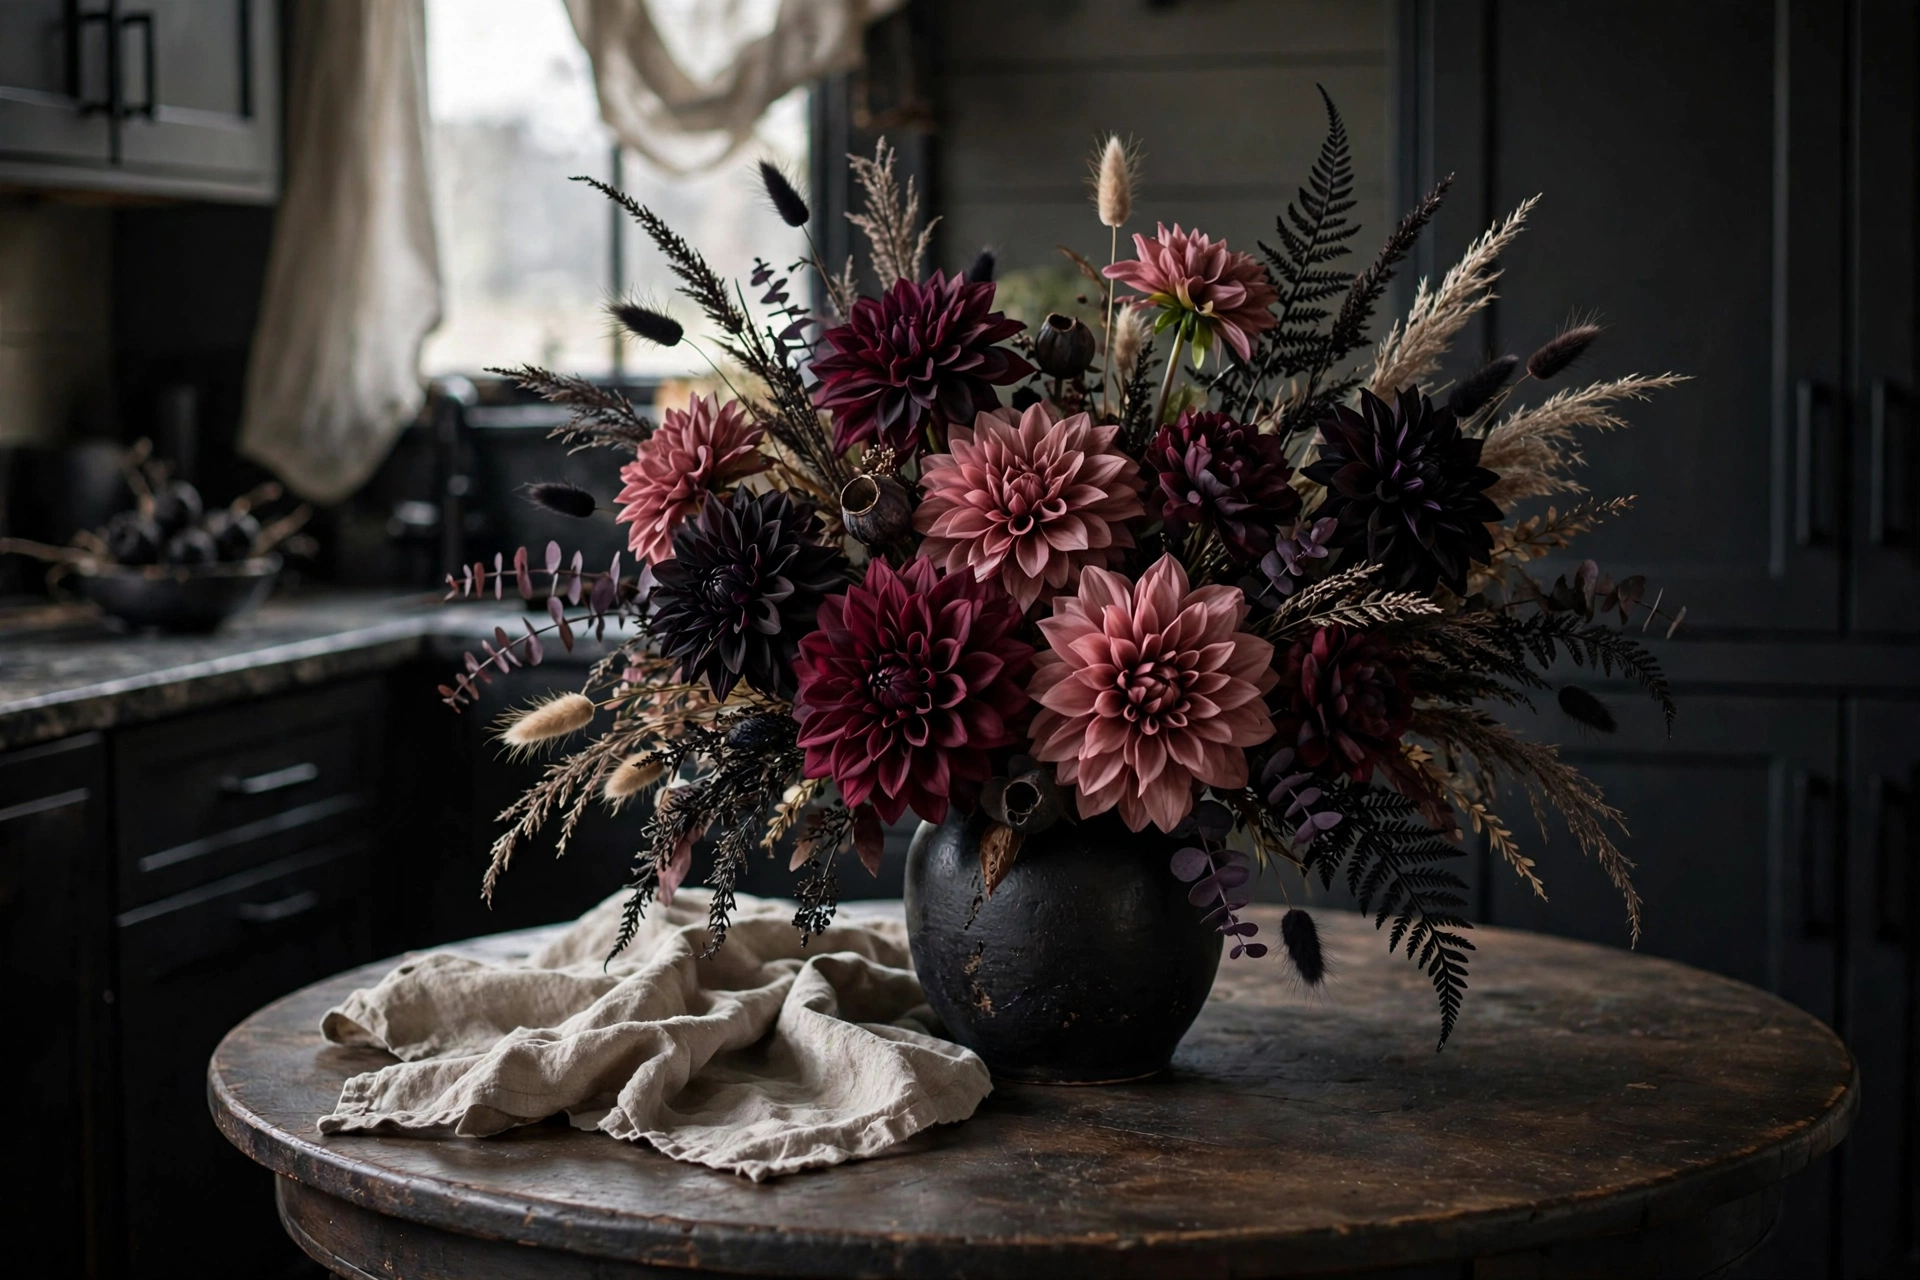
Why This Works:
- Flowers say elegant where plastic says party store
- Deep tones complement both light and dark kitchens
- Faux stems last all season with zero watering
- The arrangement moves from table to island to console easily
Keep the arrangement under 20 inches tall on a dining table so sightlines stay open across a 36 inch round top. A 10 inch vase with a 4 inch mouth holds stems upright; narrower mouths need floral foam, which adds $8. Faux dahlias and ranunculus at $6 to $10 per stem outperform real flowers that wilt in 5 days above heated kitchens. Mix 60 percent dark blooms with 40 percent dried grasses for texture without extra cost. Avoid eucalyptus near food serving areas if anyone has scent sensitivities, since the oils are strong. The first thing to check before purchasing is stem length: 18 inch stems suit a 10 inch vase, longer stems flop.
Homeowners who have tried this find that dark florals get more compliments than any other single Halloween piece. It suits anyone who finds traditional orange decor too loud, since burgundy reads autumn without screaming. The honest limitation is scale: one arrangement cannot carry a large open plan alone, so pair it with a runner. Compared with weekly fresh flowers at $35, a $45 faux arrangement pays for itself by week two.
Ghostly Linen Napkins
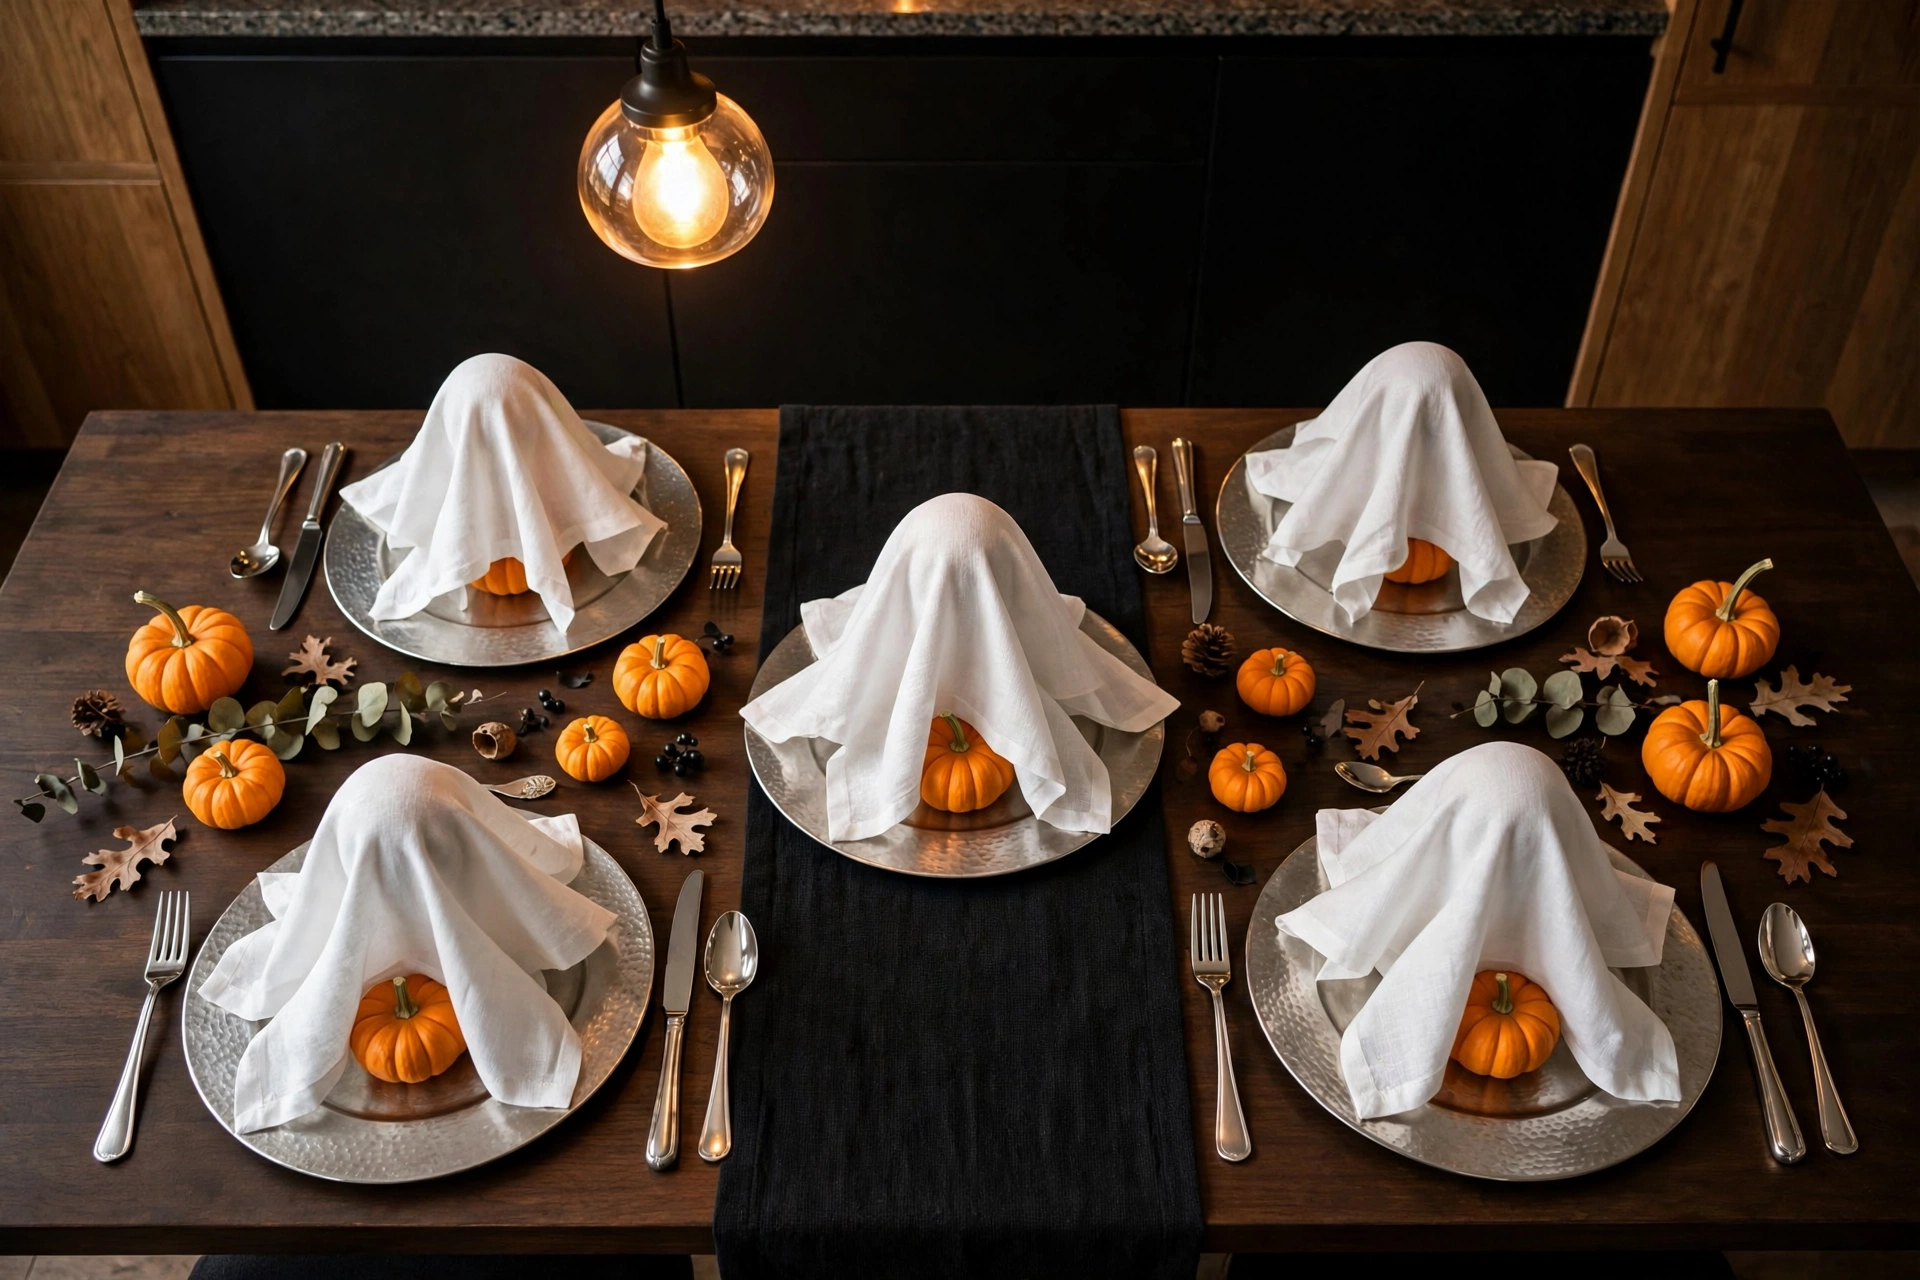
Why This Works:
- Costs nothing beyond napkins you already own
- Kids love them, adults find them charming not childish
- The fold takes 30 seconds once you learn it
- White brightens the dark Halloween palette beautifully
Drape a 20 by 20 inch white napkin over a 3 inch mini pumpkin and tie with black ribbon 12 inches long to form the ghost head. Set one on each 13 inch charger; the 3 inch ghost is proportional, not overwhelming. Cotton or linen napkins hold the fold, while polyester slips off the pumpkin within minutes. Use real ribbon rather than twine for the tie, because twine frays and looks messy at the table. Avoid scented drawer sachets stored with white napkins, since the fragrance transfers to fabric guests press to their faces. The first thing to check before purchasing is napkin weight: 6 ounce linen drapes best, lighter fabrics collapse.
A common mistake is making the ghosts too big; a 5 inch pumpkin under the napkin looks lumpy, not cute. This suits families because kids can fold their own, turning setup into an activity. The limitation is laundering: white napkins near pumpkin stems can pick up orange smudges, so wash promptly. Compared with $4 each Halloween napkin rings, the fold is free and more delightful.
Copper Cauldron Planter
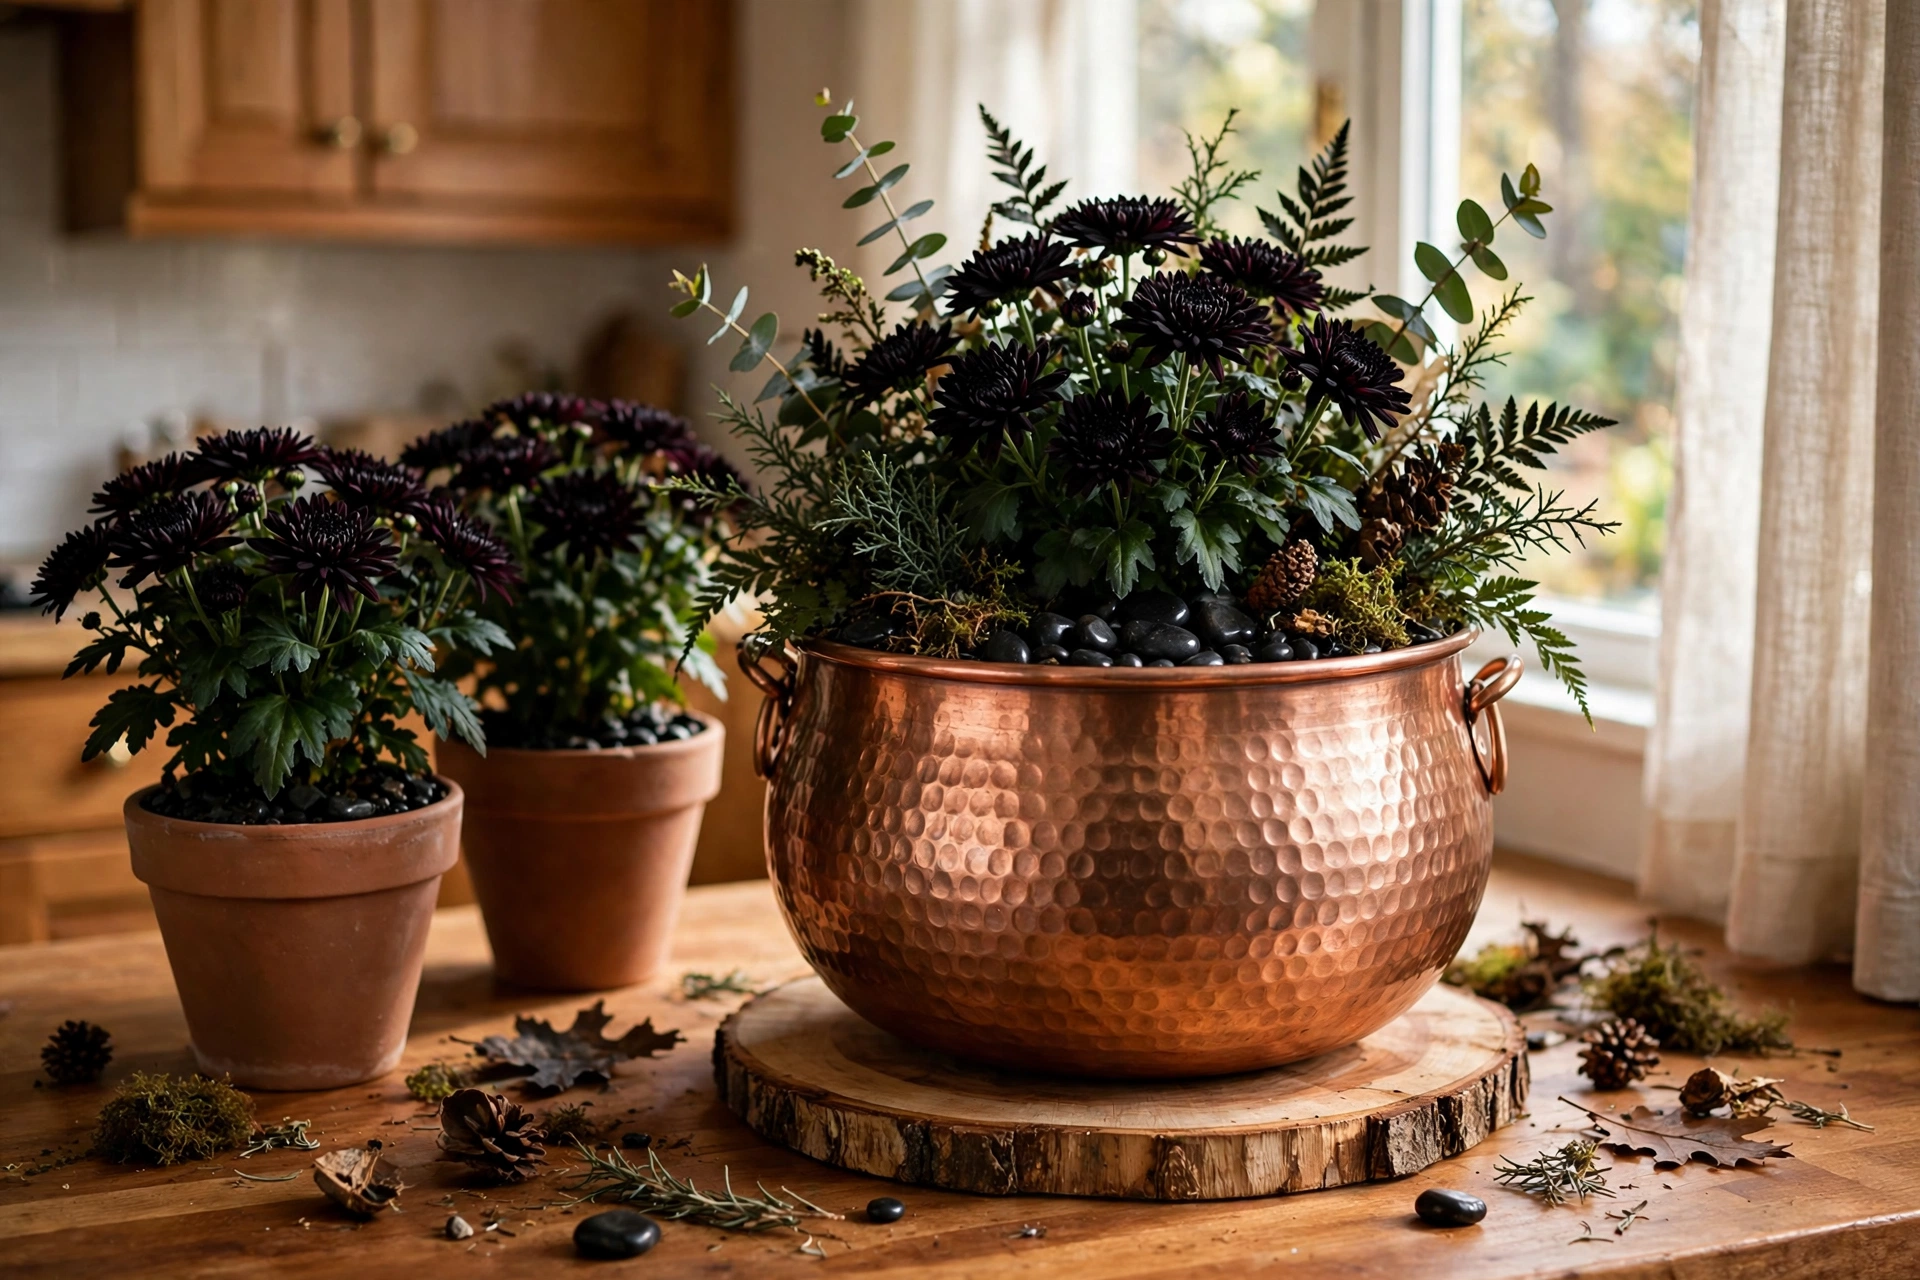
Why This Works:
- Doubles as a planter after Halloween with the mums still thriving
- Hammered copper patinas beautifully instead of looking worn
- Plants add life that balances all the dark Halloween tones
- The cauldron shape is iconic without being cartoonish
Choose a 10 to 12 inch diameter cauldron so standard 8 inch nursery mum pots drop straight inside without repotting. Line the cauldron with a plastic saucer 9 inches wide, because copper without drainage rots roots within two weeks of watering. Mums bloom 6 to 8 weeks in bright kitchen windows, far outlasting cut flowers. Avoid placing the cauldron within 12 inches of the stove, where heat and grease coat leaves. The first thing to check before purchasing is weight: a planted 12 inch copper cauldron reaches 10 pounds, so confirm the counter spot is not a slide out shelf.
In real homes, this approach works best in kitchens with a bright window sill zone, since mums demand 6 hours of light daily. Homeowners who have tried this find the copper glows richer each year as patina builds. The honest trade-off is watering discipline: mums in decorative pots dry faster, so check soil every two days. Compared with a $25 floral arrangement that dies, a $30 cauldron planter lives on.
Midnight Pantry Door
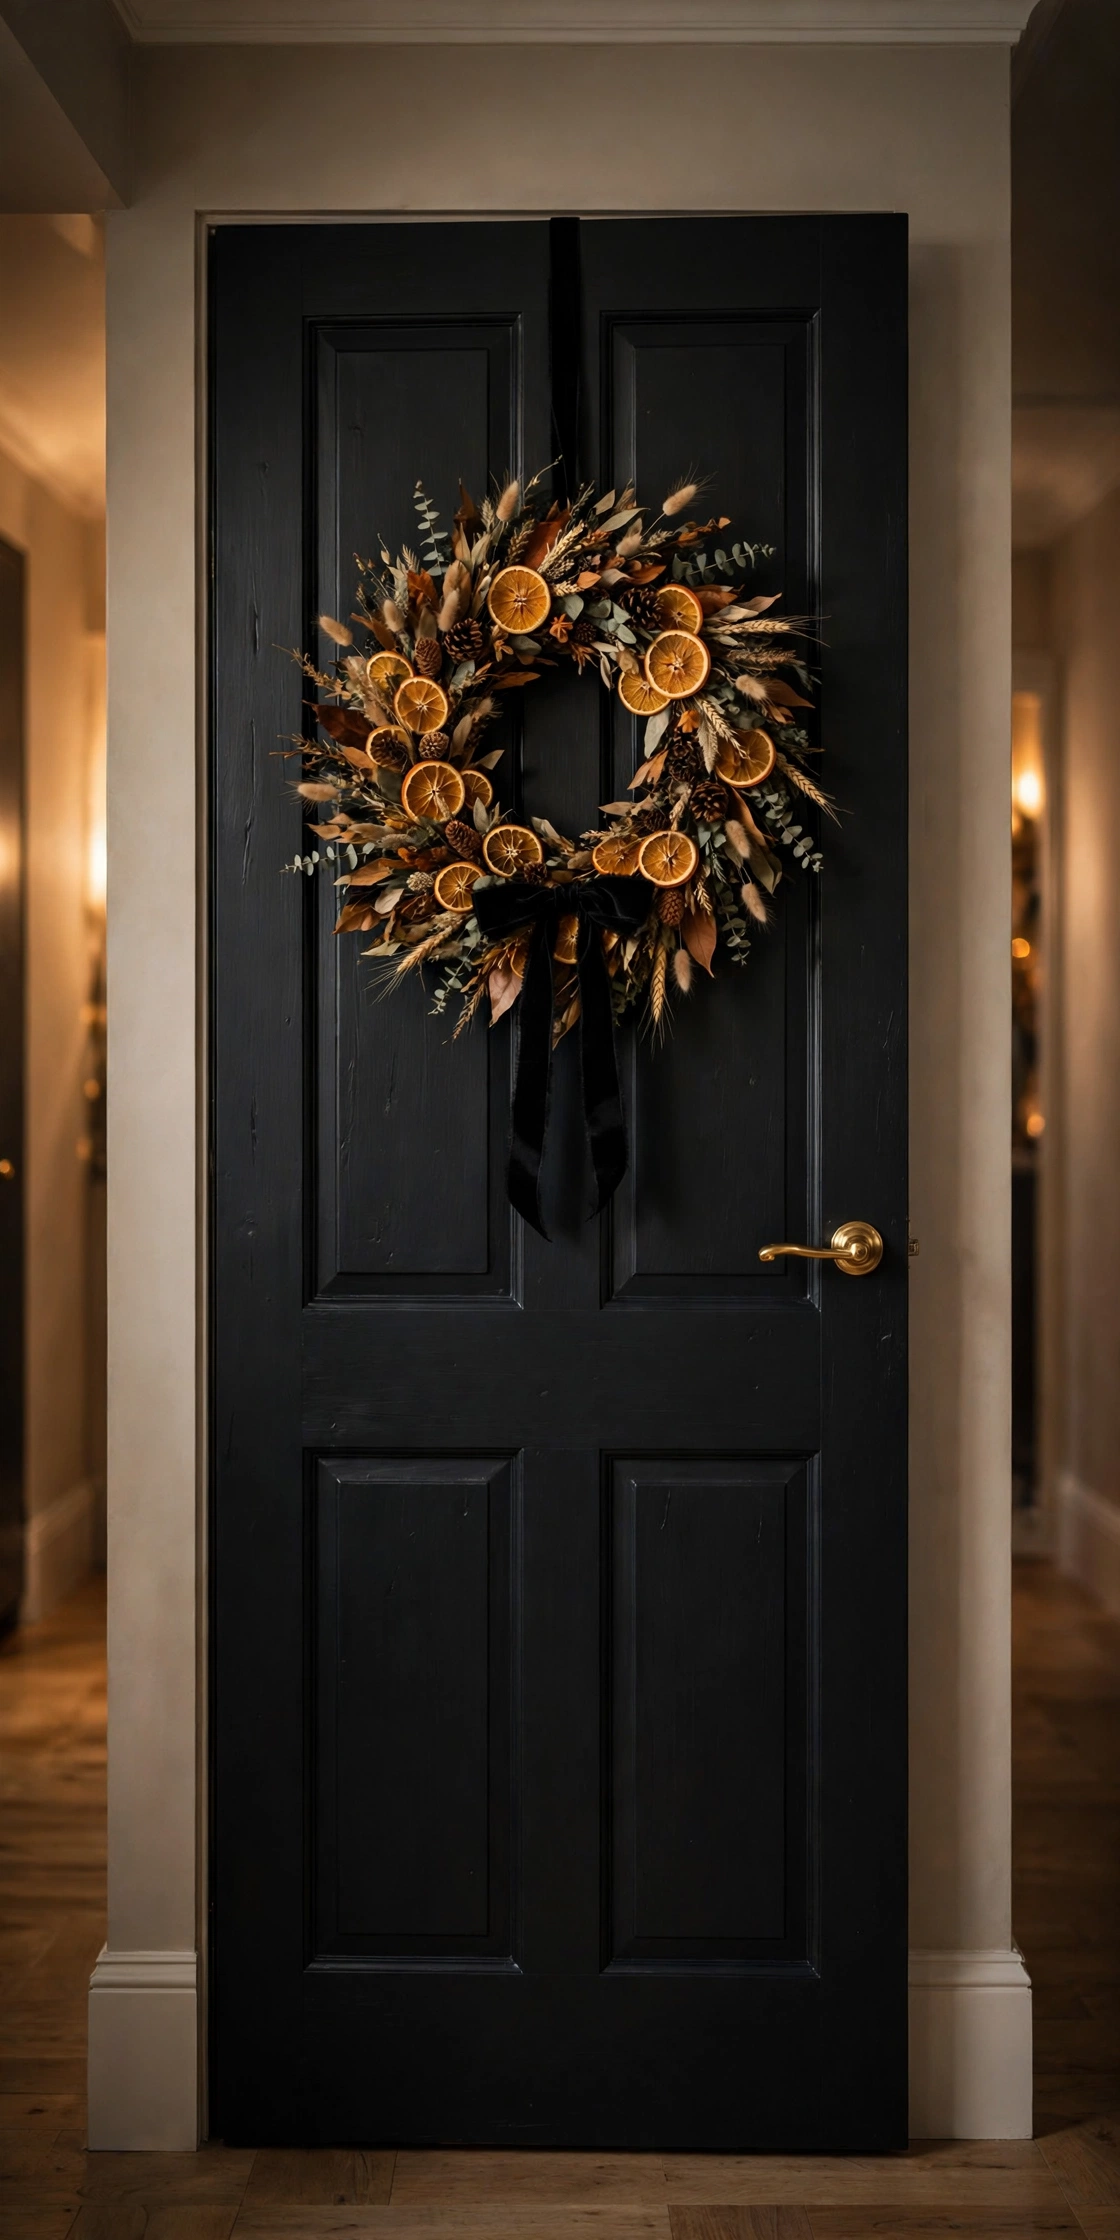
Why This Works:
- One painted door delivers more drama than a dozen small items
- Black paint makes gold hardware look expensive instantly
- The wreath is the only seasonal piece, so changeover is trivial
- A dark door hides the fingerprints every pantry door collects
A standard pantry door measures 28 to 32 inches wide; one quart of cabinet grade paint covers it with two coats. Use acrylic enamel in satin finish rather than flat wall paint, because satin wipes clean of kitchen grease while flat stains permanently. Hang a 20 inch wreath so its center sits at 57 to 60 inches, standard art height that suits most viewers. Sand with 220 grit between coats for a furniture smooth finish; skipping this step leaves visible brush texture. Avoid painting in humidity above 70 percent, since the enamel skins before leveling and looks orange peeled. The first thing to check before purchasing is existing finish: glossy oil paint needs a bonding primer, or the new coat peels within months.
Homeowners who have tried this find the black door becomes a year round favorite, not just a Halloween moment. It suits kitchens with white cabinets especially well, where the dark door anchors the room. The limitation is commitment: repainting back takes a full weekend. Compared with replacing the door at $200 plus, a $35 paint transformation is the budget move.
Candlelit Open Shelving
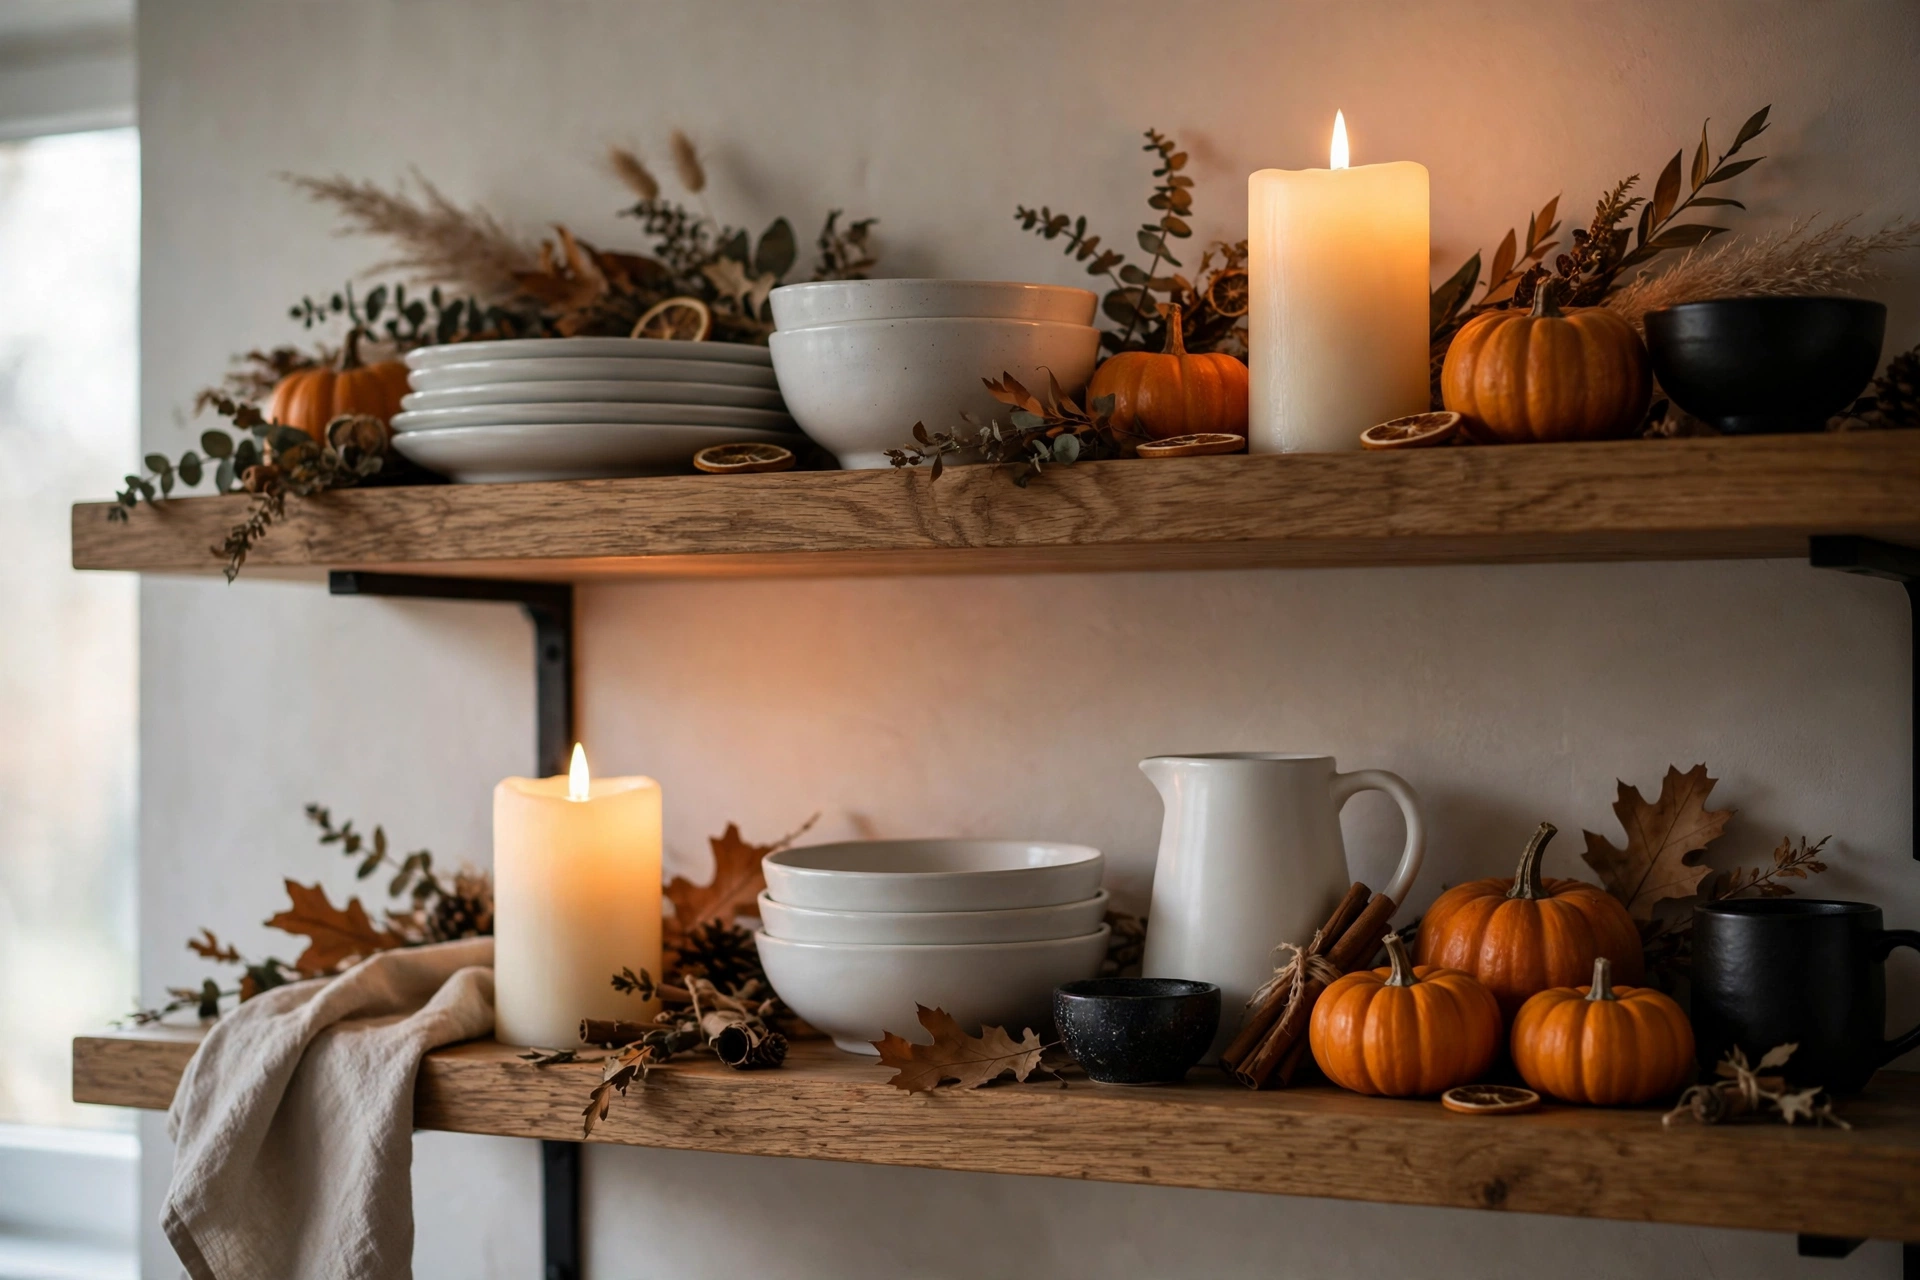
Why This Works:
- Candle glow makes everyday dishes look styled and special
- LED candles are safe on shelves near dried decor
- The 2700K warmth flatters wood tones beautifully
- Timers mean the shelves glow every evening automatically
Place 4 and 6 inch LED pillars among dishes, keeping flames 6 inches from shelf above; most open shelves sit 12 to 15 inches apart, which fits. Choose candles with a 6 hour on, 18 hour off timer so the display lights itself at dusk without daily attention. Real wax near dried florals on shelves violates the 12 inch clearance fire guidance, so flameless is the only safe choice here. Two AA batteries run a quality LED pillar 500 plus hours, roughly two full seasons. Avoid cool white LEDs above 3000K, which flatten the amber Halloween mood into office lighting. The first thing to check before purchasing is the flicker quality: cheap LEDs strobe visibly, premium ones mimic real flame.
A common mistake is clustering all candles on one shelf; spreading two per 36 inch shelf section balances the glow. This suits households with kids or pets because nothing hot or breakable sits at grab height. The trade-off is battery changes twice a season. Compared with hardwired picture lights at $150 per shelf, $30 of LED candles deliver similar warmth.
Harvest Table Runner
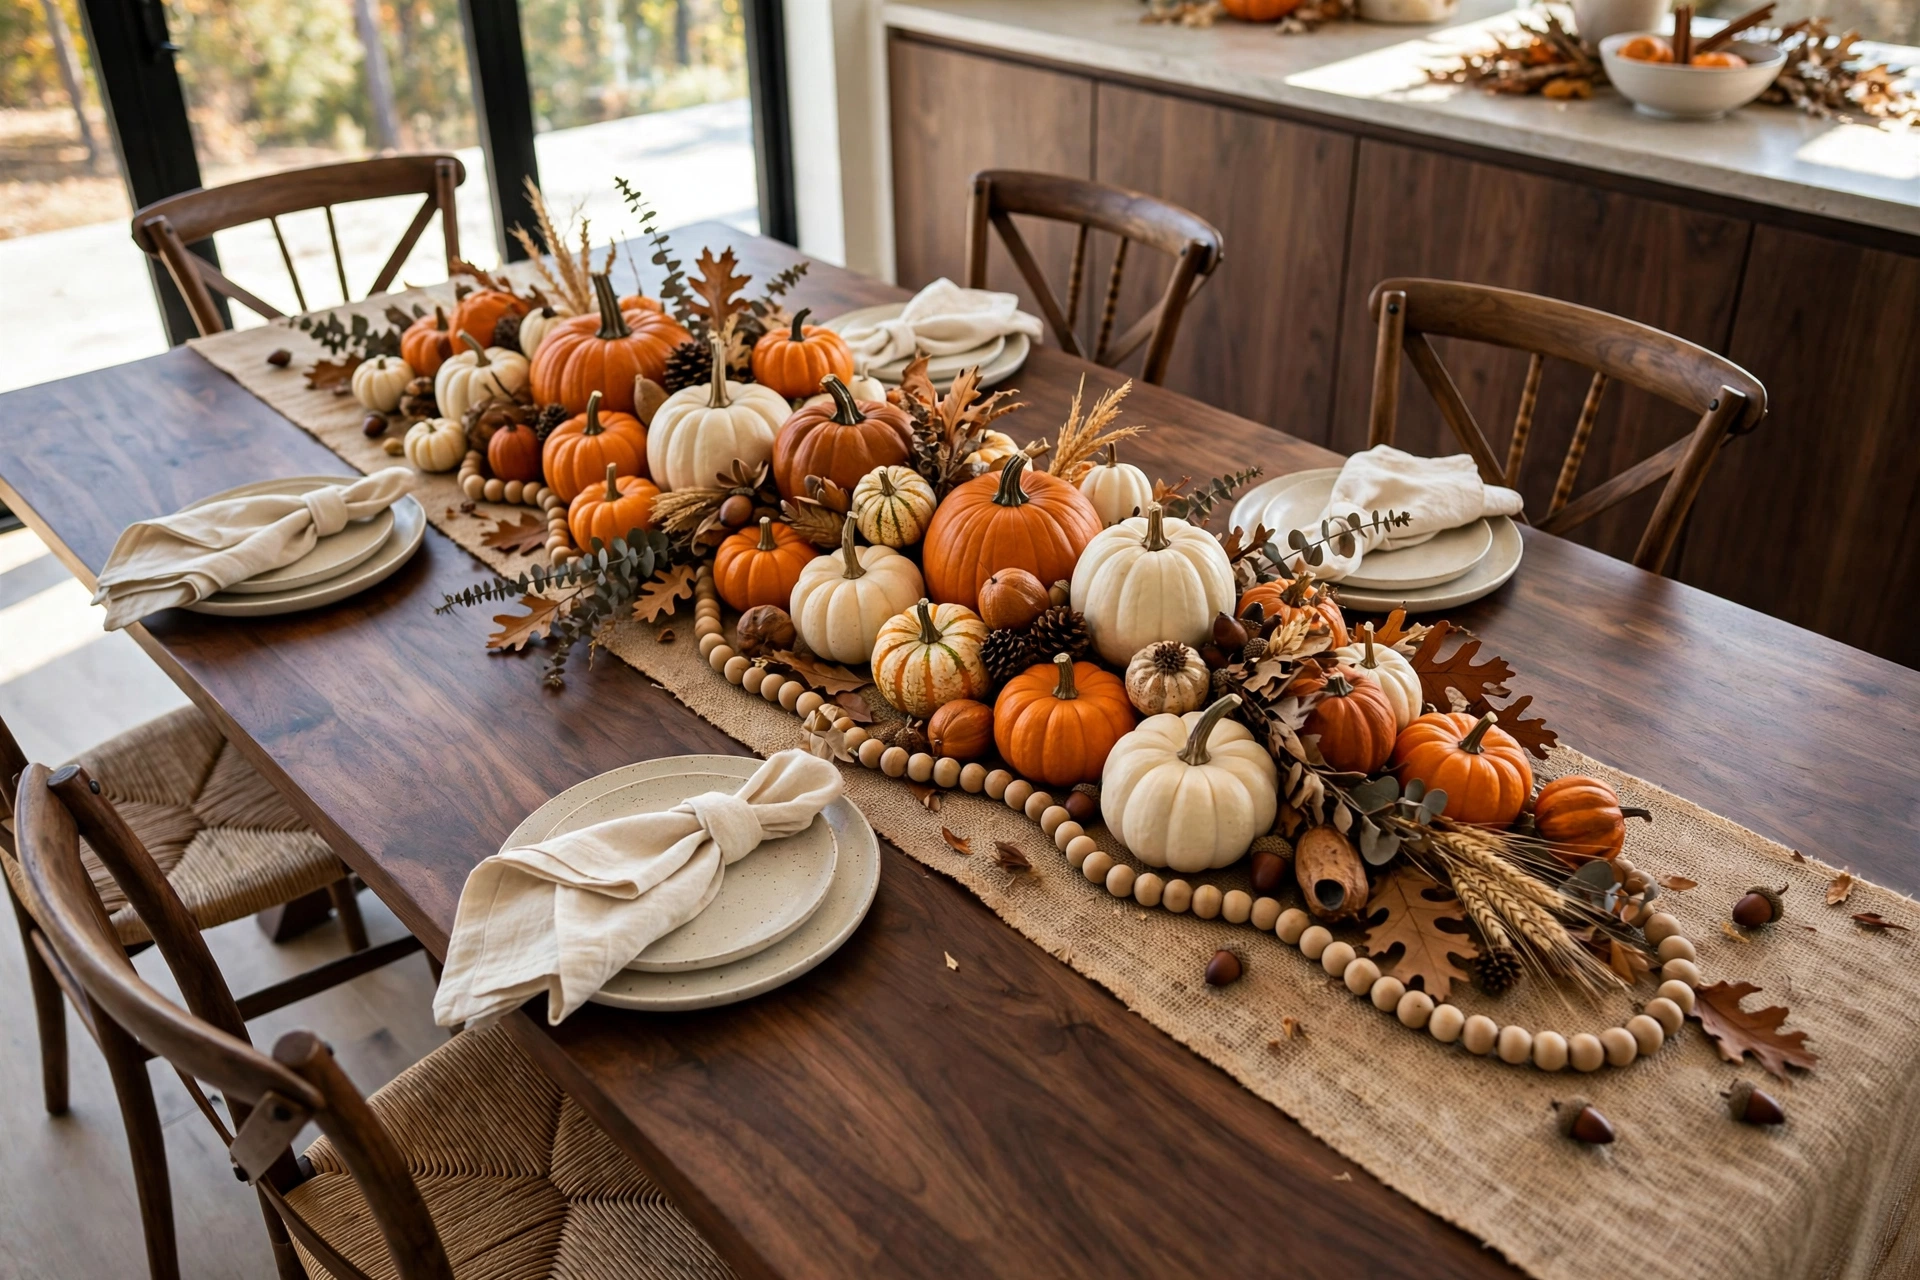
Why This Works:
- One runner plus pumpkins styles the whole table in minutes
- Burlap hides crumbs and wrinkles that show on flat cotton
- The look works from early October straight through Thanksgiving
- Everything stores flat in a single bin afterward
A 72 inch table needs a 14 by 96 inch runner for a 12 inch drop at each end; skimpy runners that barely cover the top look unfinished. Drape a 6 foot wood bead garland in loose S curves down the center, which reads abundant without blocking conversation. Pumpkins at 4 to 6 inches tuck between the beads; anything over 8 inches blocks sightlines across a 36 inch wide table. Burlap sheds fibers for the first two uses, so shake it outdoors before laying it near food. Avoid real mini pumpkins directly on light upholstery chairs nearby, since stems can snag fabric. The first thing to check before purchasing is runner width: 14 inches suits 36 inch tables, while 48 inch wide tables need 18 inches.
In real homes, this approach works best for the everyday kitchen table, because the runner survives daily meals under the decor. Homeowners who have tried this find the harvest look gets zero complaints from Halloween skeptics in the family. The honest limitation is washing: burlap is spot clean only, so use placemats for messy eaters. Compared with a $120 tablecloth, a $22 runner and $15 of pumpkins do the same job.
Eerie Halloween Kitchen Lighting
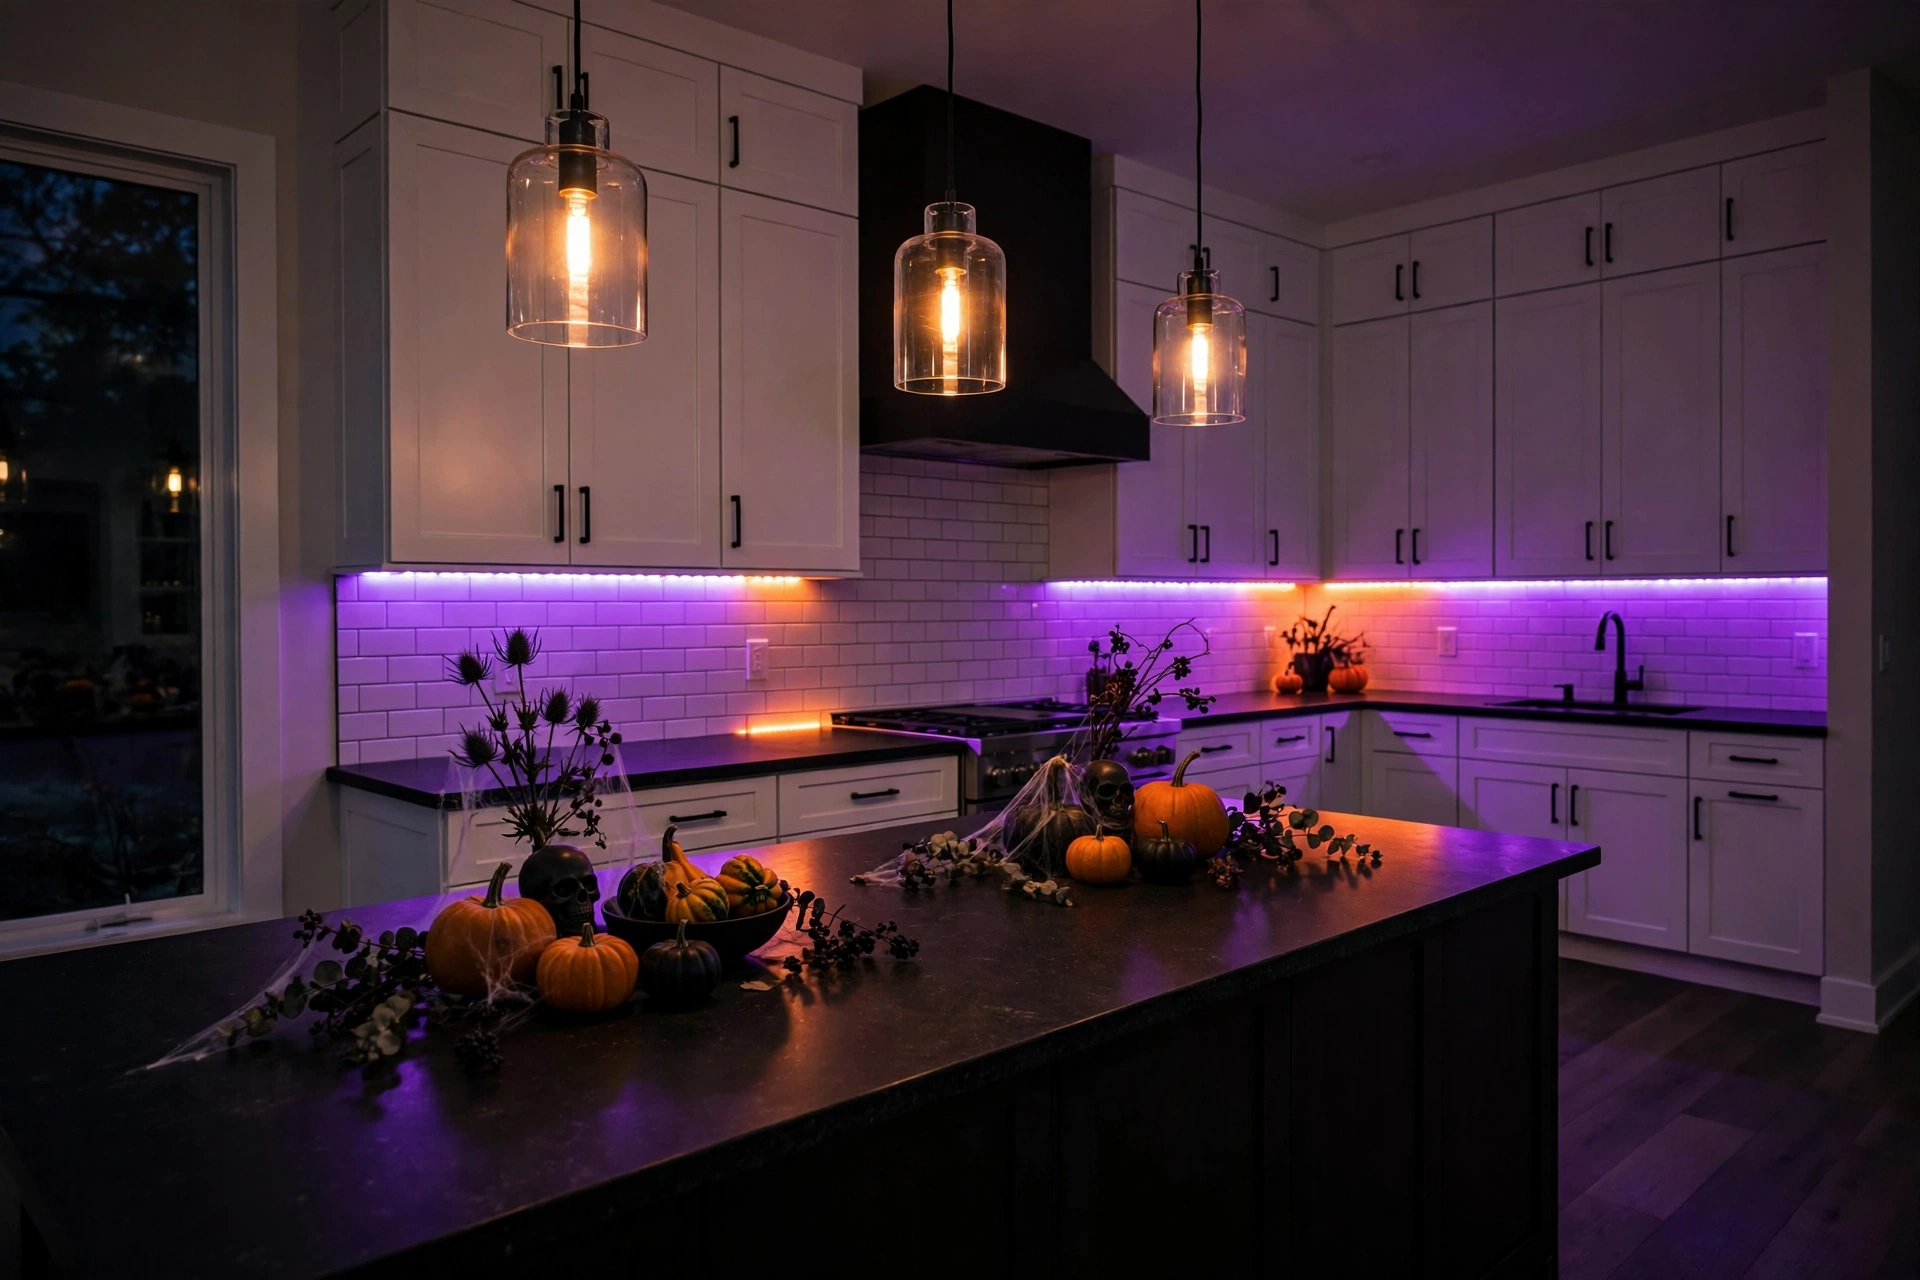
Why This Works:
- Colored light transforms the kitchen with zero physical decor
- LED strips peel off cleanly after the season
- Purple and orange flatter white cabinets dramatically
- The effect wows guests the second they walk in
Install adhesive LED strips along the underside of upper cabinets, 1 inch back from the front edge so the diodes hide and only glow shows. A 72 inch counter run needs one 16 foot strip at $25 to $40; cuttable every 2 inches at marked points. Choose RGB strips with a remote so orange for Halloween shifts to warm white for Thanksgiving. Keep strips 2 inches from the stove hood zone, where heat melts adhesive within days. If new outlets or hardwiring are needed for a permanent install, hire a licensed electrician: kitchen circuits carry 20 amps and mistakes trip breakers or worse. Avoid red lighting near food prep areas, since it makes meat look spoiled and unappetizing. The first thing to check before purchasing is cabinet underside depth: strips need a flat 0.5 inch channel, and some shaker cabinets have lips that block adhesion.
This eerie halloween kitchen lighting suits renters because peel and stick strips remove without damage. Homeowners who have tried this find guests photograph the kitchen more than any other room. The limitation is adhesive in steamy kitchens: wipe the surface with alcohol first or strips droop within a week. Compared with $200 smart bulbs throughout, one $35 strip delivers bigger drama.
Spellbook Recipe Stand

Why This Works:
- Actually useful: the recipe stays open while you cook
- Vintage books cost almost nothing and look incredible
- The stand folds flat for easy off season storage
- Guests always flip through it, making it interactive decor
A 10 by 14 inch stand holds open books up to 18 inches wide, which covers most vintage cookbooks. Prop it 12 inches from the backsplash so pages lie flat and readable at standing height. Thrifted 1960s cookbooks cost $3 to $8 and their aged pages need no styling help. Tie a dried herb bundle to the stand’s top with twine for the spellbook effect; keep herbs 12 inches from open flame. Avoid placing the stand within the 24 inch splatter zone beside a frying burner, where grease spots pages permanently. The first thing to check before purchasing is stand angle: 60 degrees suits reading while cooking, while steeper angles topple heavy books.
Homeowners who have tried this find the stand earns its counter space by actually getting used for October baking. It suits anyone who owns beautiful old books, since the display costs nothing extra. The honest trade-off is kitchen grime: wipe the stand weekly or flour dust dulls it. Compared with a $40 new recipe holder, a $10 thrifted stand plus $5 book does more.
Bat Silhouette Window
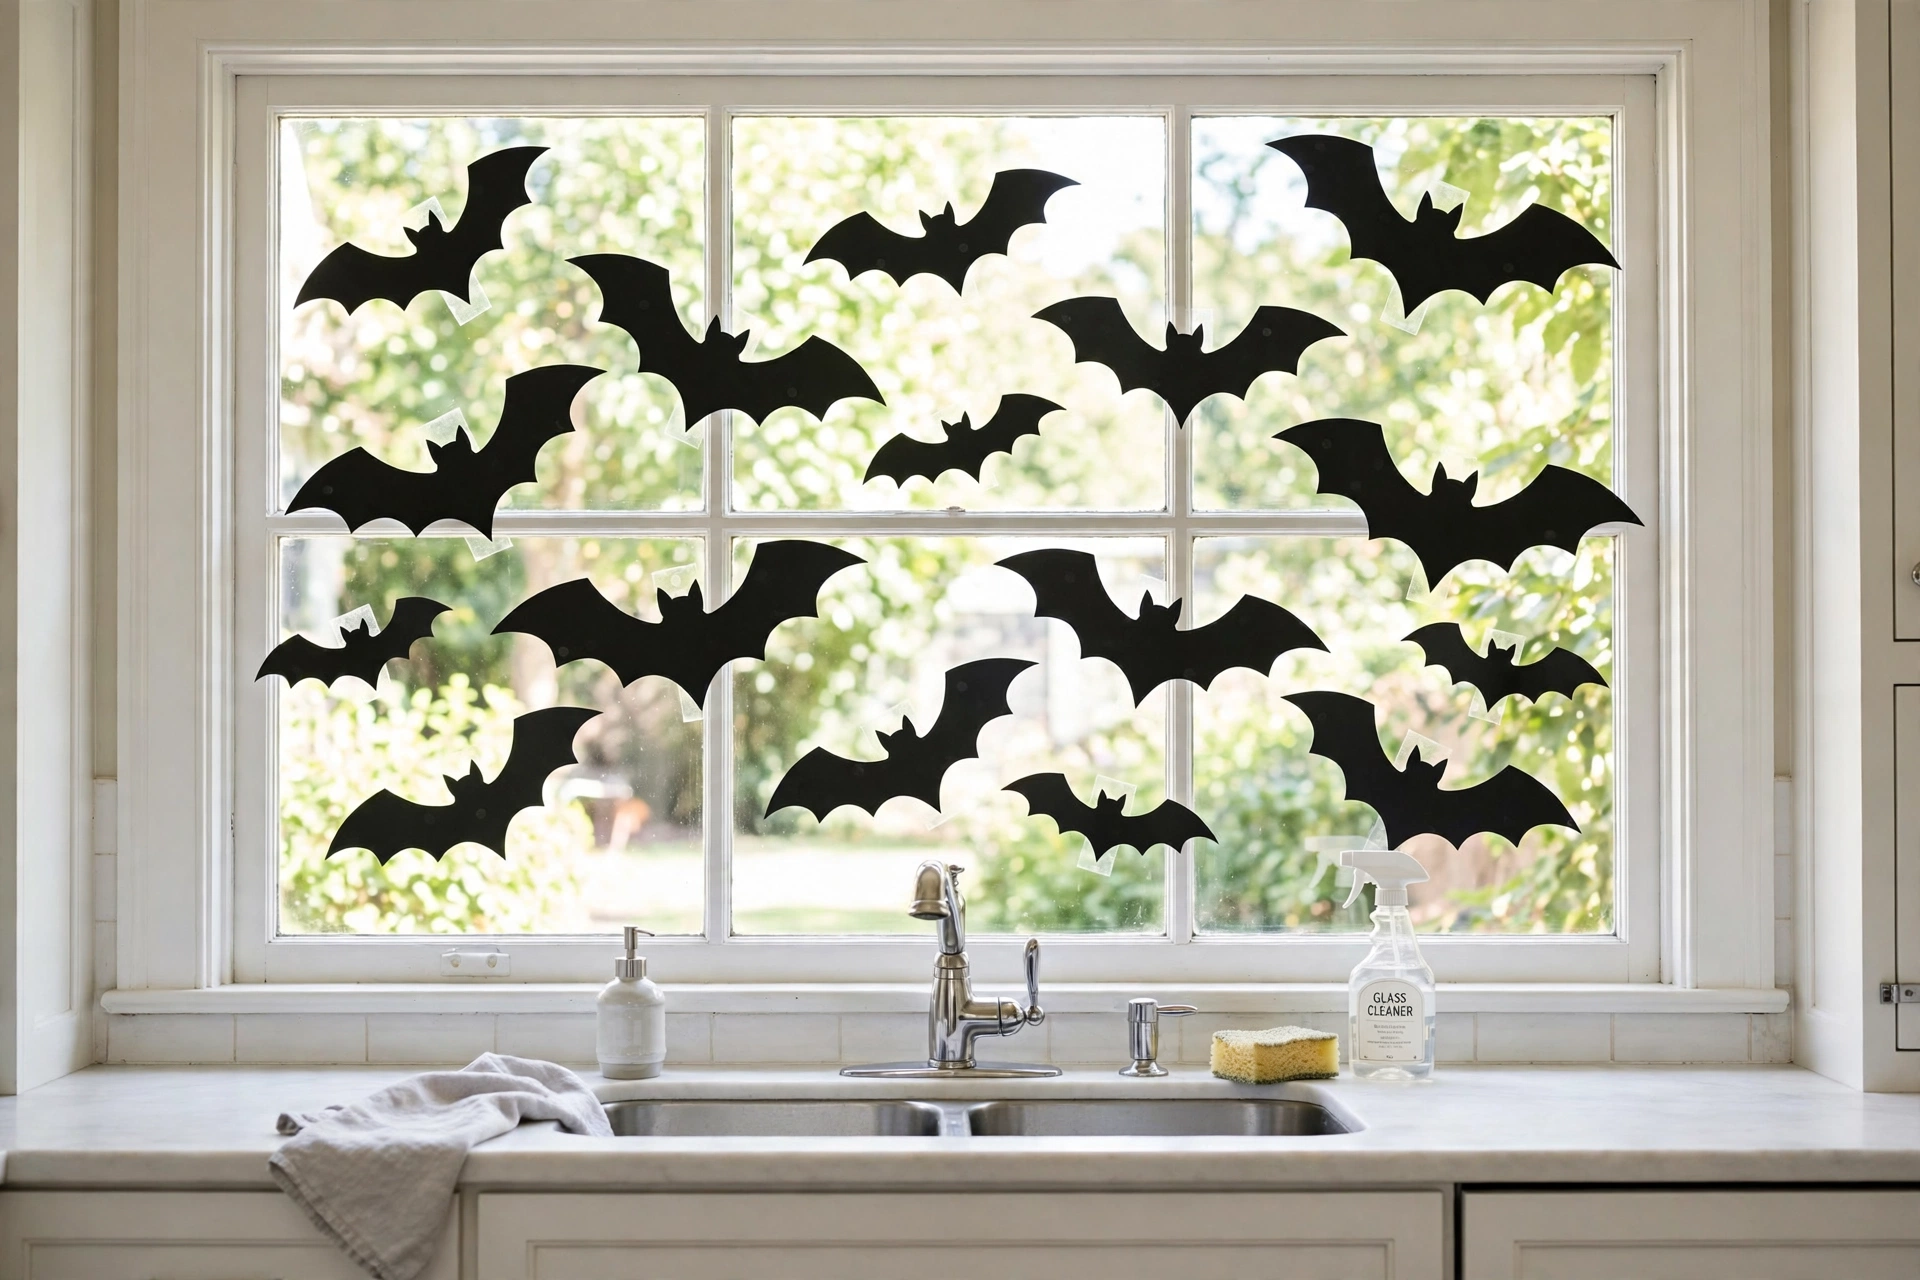
Why This Works:
- The window is prime real estate you see all day
- Backlighting makes simple cardstock look dramatic
- Removable dots mean zero damage to glass or trim
- Kids can place their own bats, making it a family project
Cut or buy bats in 4, 6 and 8 inch wingspans; the size variety reads as a flock in flight rather than stamps. Scatter 10 to 14 bats across a 36 by 48 inch window, denser at one corner and trailing off, which mimics real movement. Use removable adhesive dots rated for glass, not tape, which leaves residue that needs razor scraping. Cardstock at 65 pound weight holds its shape in window condensation, while printer paper wilts within days. Avoid covering more than 40 percent of the glass, because kitchens need daylight for safe chopping and cooking. The first thing to check before purchasing is dot rating: cheap dots fail above 80 degrees in sunny windows and bats slide down by noon.
In real homes, this approach works best on the sink window, where you stare while washing dishes all October. Homeowners who have tried this find it is the single most photographed spot in the house by visiting kids. The limitation is condensation: in cold climates, wipe the glass first or dots will not stick. Compared with $25 window clings that bubble, $8 of cardstock and dots looks sharper.
FAQs
What are the best halloween kitchen decor ideas for small kitchens?
Focus on vertical and contained pieces. A 12 by 18 inch tray corrals a spice station without eating prep space. Use the windowsill for amber glass and keep open shelf swaps under 8 inches deep. The Spruce notes that three well placed pieces beat a crowded counter in tight kitchens.
How much should I budget for Halloween kitchen decorations?
A festive kitchen costs less than expected. Budget tier ($30 to $60) covers mini pumpkins, LED candles and thrifted jars. Mid tier ($100 to $200) adds velvet runners, a wreath and quality garland. Premium ($300 plus) brings copper pieces and designer lighting. Reusable faux items spread cost across years.
Which colors suit halloween kitchen decor ideas best?
Follow the 60/30/10 rule: 60 percent matte black or charcoal, 30 percent warm metallics like brass or copper, 10 percent burnt orange or oxblood. The American Lighting Association notes 2700K warm light flatters metallics best. Avoid neon orange, which reads juvenile against quality materials.
How do I keep Halloween kitchen decor food safe?
Keep scented items 24 inches from prep zones and never store real food in unsealed decorative jars near the stove, where grease coats contents. Use LED candles instead of real flames near curtains and dried florals. Better Homes and Gardens recommends flameless options wherever kitchens mix decor with cooking.
When should I decorate the kitchen for Halloween?
Early October gives 3 to 4 weeks of enjoyment. Countertop displays go up first since they are quick. Save ladder work like high shelf styling for a weekend. Take down outdoor pieces within a week after Halloween; indoor velvet and glass transition easily into Thanksgiving.
Conclusion
Festive Halloween kitchens come down to three choices: contained vignettes, quality materials, and layered lighting. These halloween kitchen decor ideas show that the hardest working room can carry the season without losing function. Start with one corner, perhaps the coffee station or a single shelf, and build outward in odd numbered groupings. Measure your counters first, buy once, and keep everything within arm’s reach of daily routines. Follow HomelyCrafter on Pinterest for more seasonal styling ideas. Save this to your Pinterest boards so you can refer back to it!

Muhammad Israr is a home decor enthusiast and the writer behind Homely Crafter. He spends his days researching paint colors, layouts and budget-friendly styling ideas, then breaks them down into practical, easy-to-follow guides so you can decorate with confidence.
1 thought on “21 Bewitching Halloween Kitchen Decor Ideas for a Festive Touch”