
The Society of Motion Picture and Television Engineers recommends that your screen fill at least 30 degrees of your field of view, which is why a well-mounted big screen feels cinematic instead of just large. These TV wall ideas show you how to give that screen a worthy backdrop, from gallery walls and slatted panels to hidden mounts and art-mode frames. You will learn exact mounting heights, viewing distances, cable-hiding methods, and honest costs for every approach.
Each of the 22 ideas treats the TV as part of the design rather than an eyesore to apologize for. By the end, you will know precisely how high to hang, how far to sit, and which wall treatment fits your room and budget.
Gallery Wall Surround
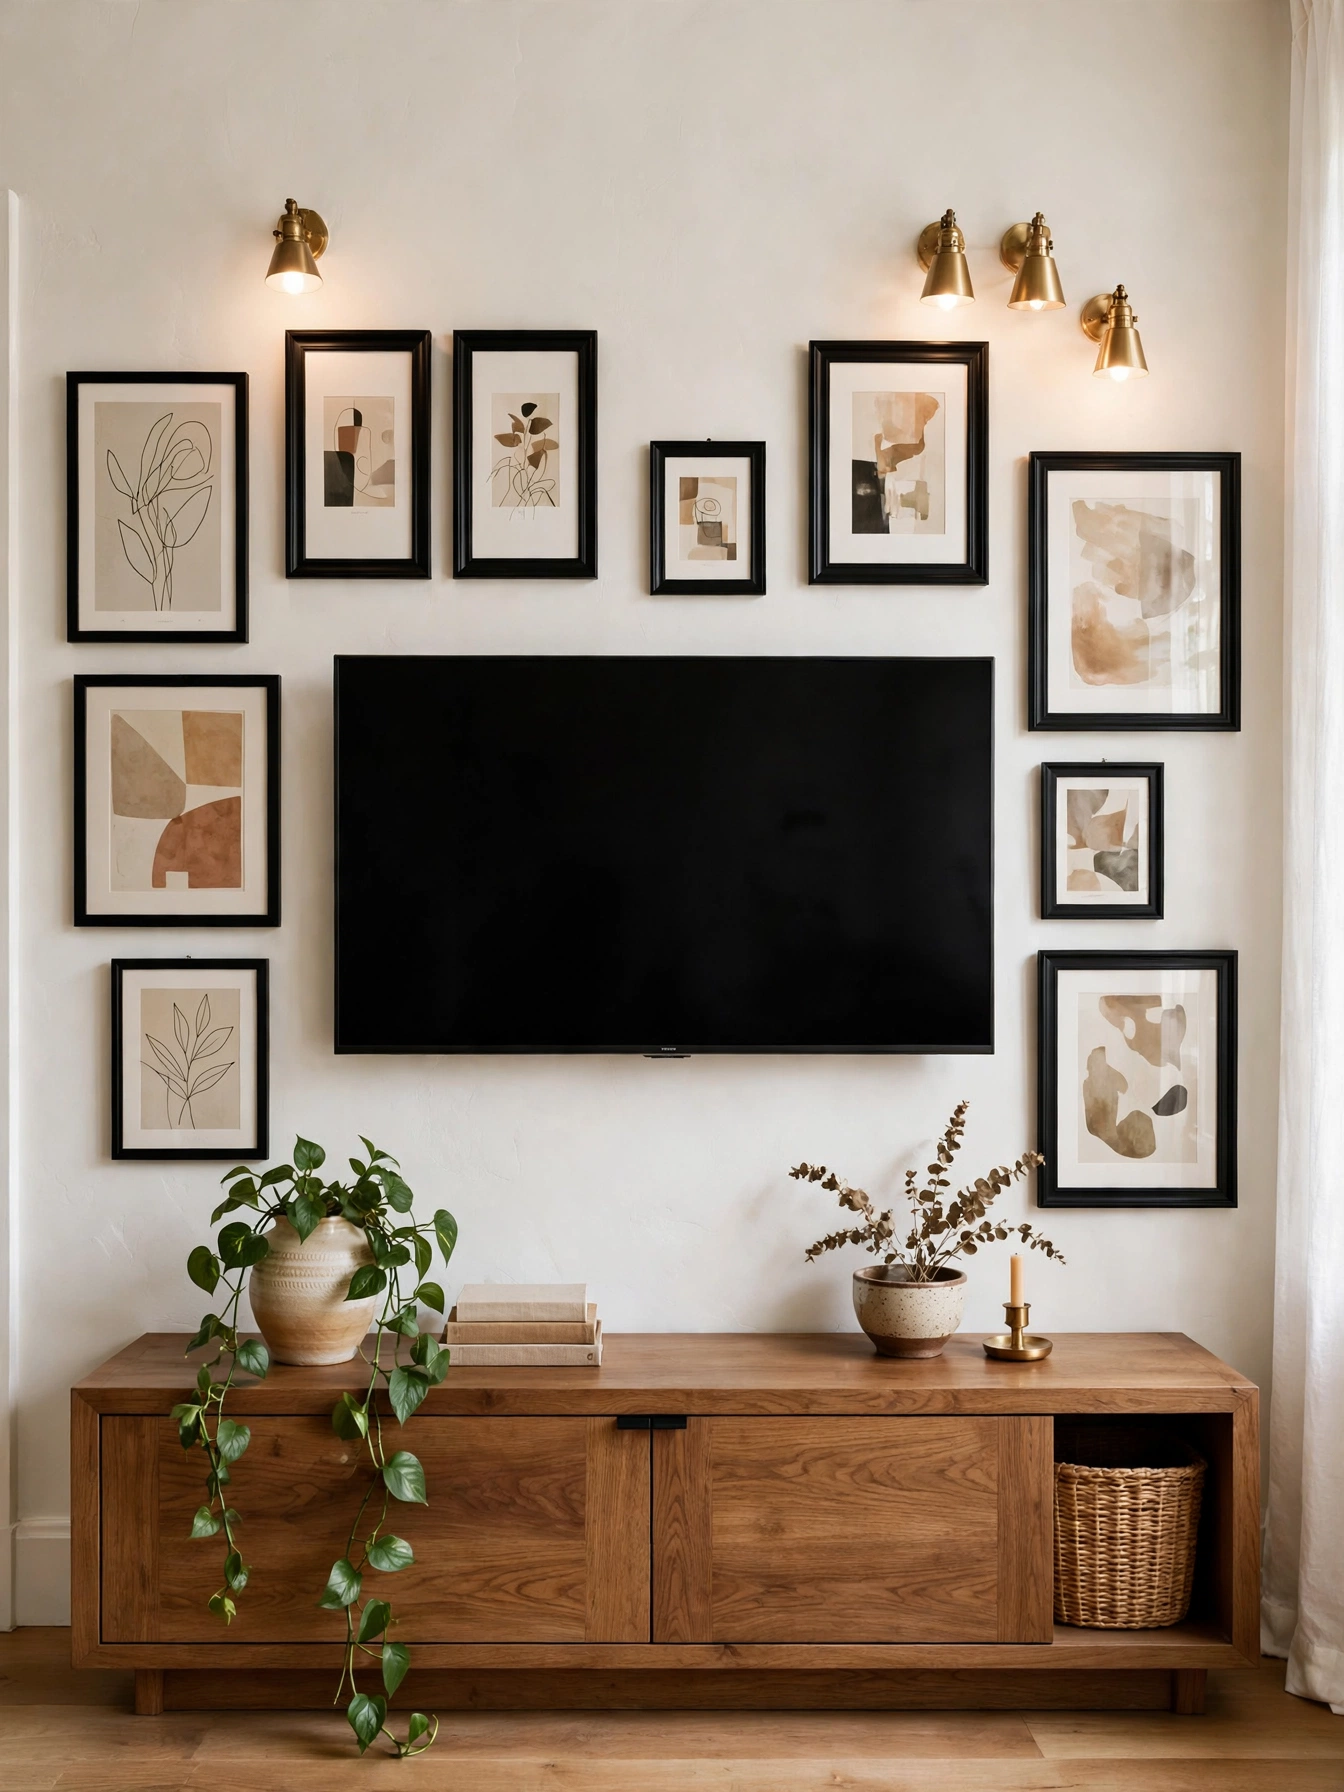
Why This Works:
- Art around the screen shrinks the black rectangle visually.
- The TV becomes one element in a composition, not the whole wall.
- Gallery walls cost far less than built-in millwork.
- You can refresh the art seasonally without touching the mount.
Begin with the TV mounted at 42 inches to center, the height HGTV recommends for seated eye level, then build the gallery around it keeping frames 3 to 4 inches from the screen edge. Plan the layout on the floor within a 10 by 8 foot zone, using kraft paper templates on the wall before drilling. Budget $15 to $40 per frame, so a twelve-piece surround runs $200 to $450 plus the $30 to $80 mount. Use a tilt mount rather than a fixed one, because the slight downward angle cuts glare from windows. Avoid hanging frames wider than the furniture below the TV, since oversized art unbalances the composition, and skip glass-fronted frames directly beside the screen, because competing reflections distract during viewing.
Renters with one good wall suit this idea, since it needs no construction. One drawback is dusting a dozen frames, so keep a microfiber wand handy. Versus a $3,000 built-in media wall, the gallery surround costs one-tenth and installs in a weekend. Start with the largest frames at the corners to anchor the arrangement.
Pro Tip: Choose art with at least one dark tone matching the TV bezel, because the shared color makes the screen disappear into the arrangement when it is off.
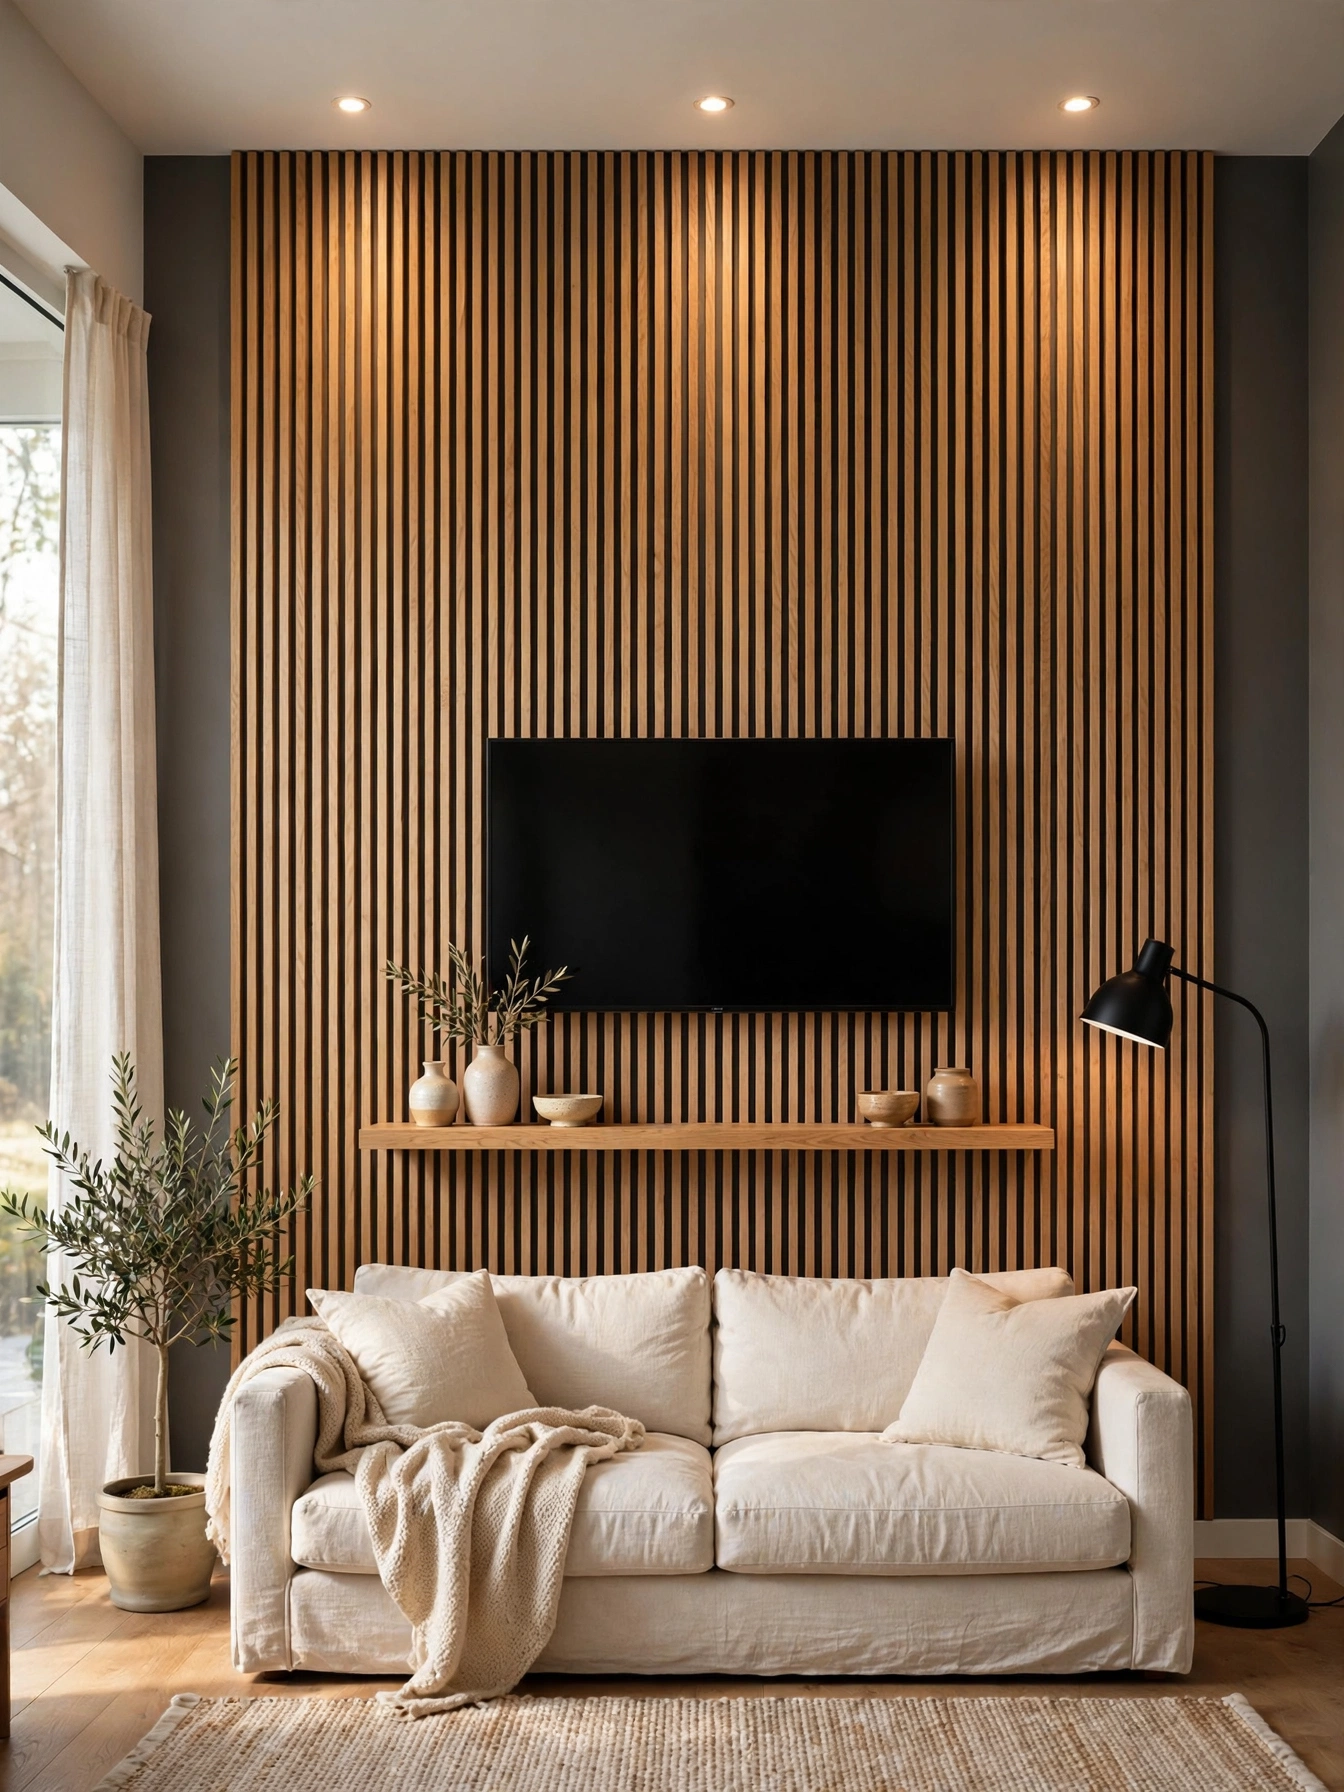
Slatted Wood Panels
Why This Works:
- Vertical slats add rhythm and texture that flat paint cannot match.
- Acoustic felt backing absorbs echo, improving both sound and viewing.
- The wood warms up the cold black screen beautifully.
- Panels install over existing walls with no demolition.
Acoustic slat panels cost $8 to $20 per square foot, so a 10 by 8 foot TV wall runs $650 to $1,600 in materials, and most panels mount with construction adhesive plus screws into studs every 24 inches. Drive the TV bracket through the panels into the wall studs behind, using lag bolts rated for at least four times the TV weight, since a 65-inch TV weighs 50 to 70 pounds. Standard panels measure 94 inches tall, trimming easily with a fine-tooth saw. Avoid mounting the TV only to the panels without hitting studs, because the bracket will pull free, and skip slats in rooms with heavy cooking grease nearby, since the grooves trap it.
Modern rooms with hard echoing surfaces suit this idea, since the felt backing genuinely improves acoustics. One drawback is cost: full-wall coverage adds up fast. Compared with painted drywall, slat panels cost ten times more but deliver the high-end hotel look buyers photograph. Run cables behind the panels before mounting the TV for a wire-free finish.
Pro Tip: Leave a 2-inch gap between the panel section and the side walls, because the shadow line makes the slatted area read as intentional architecture rather than wallpaper.
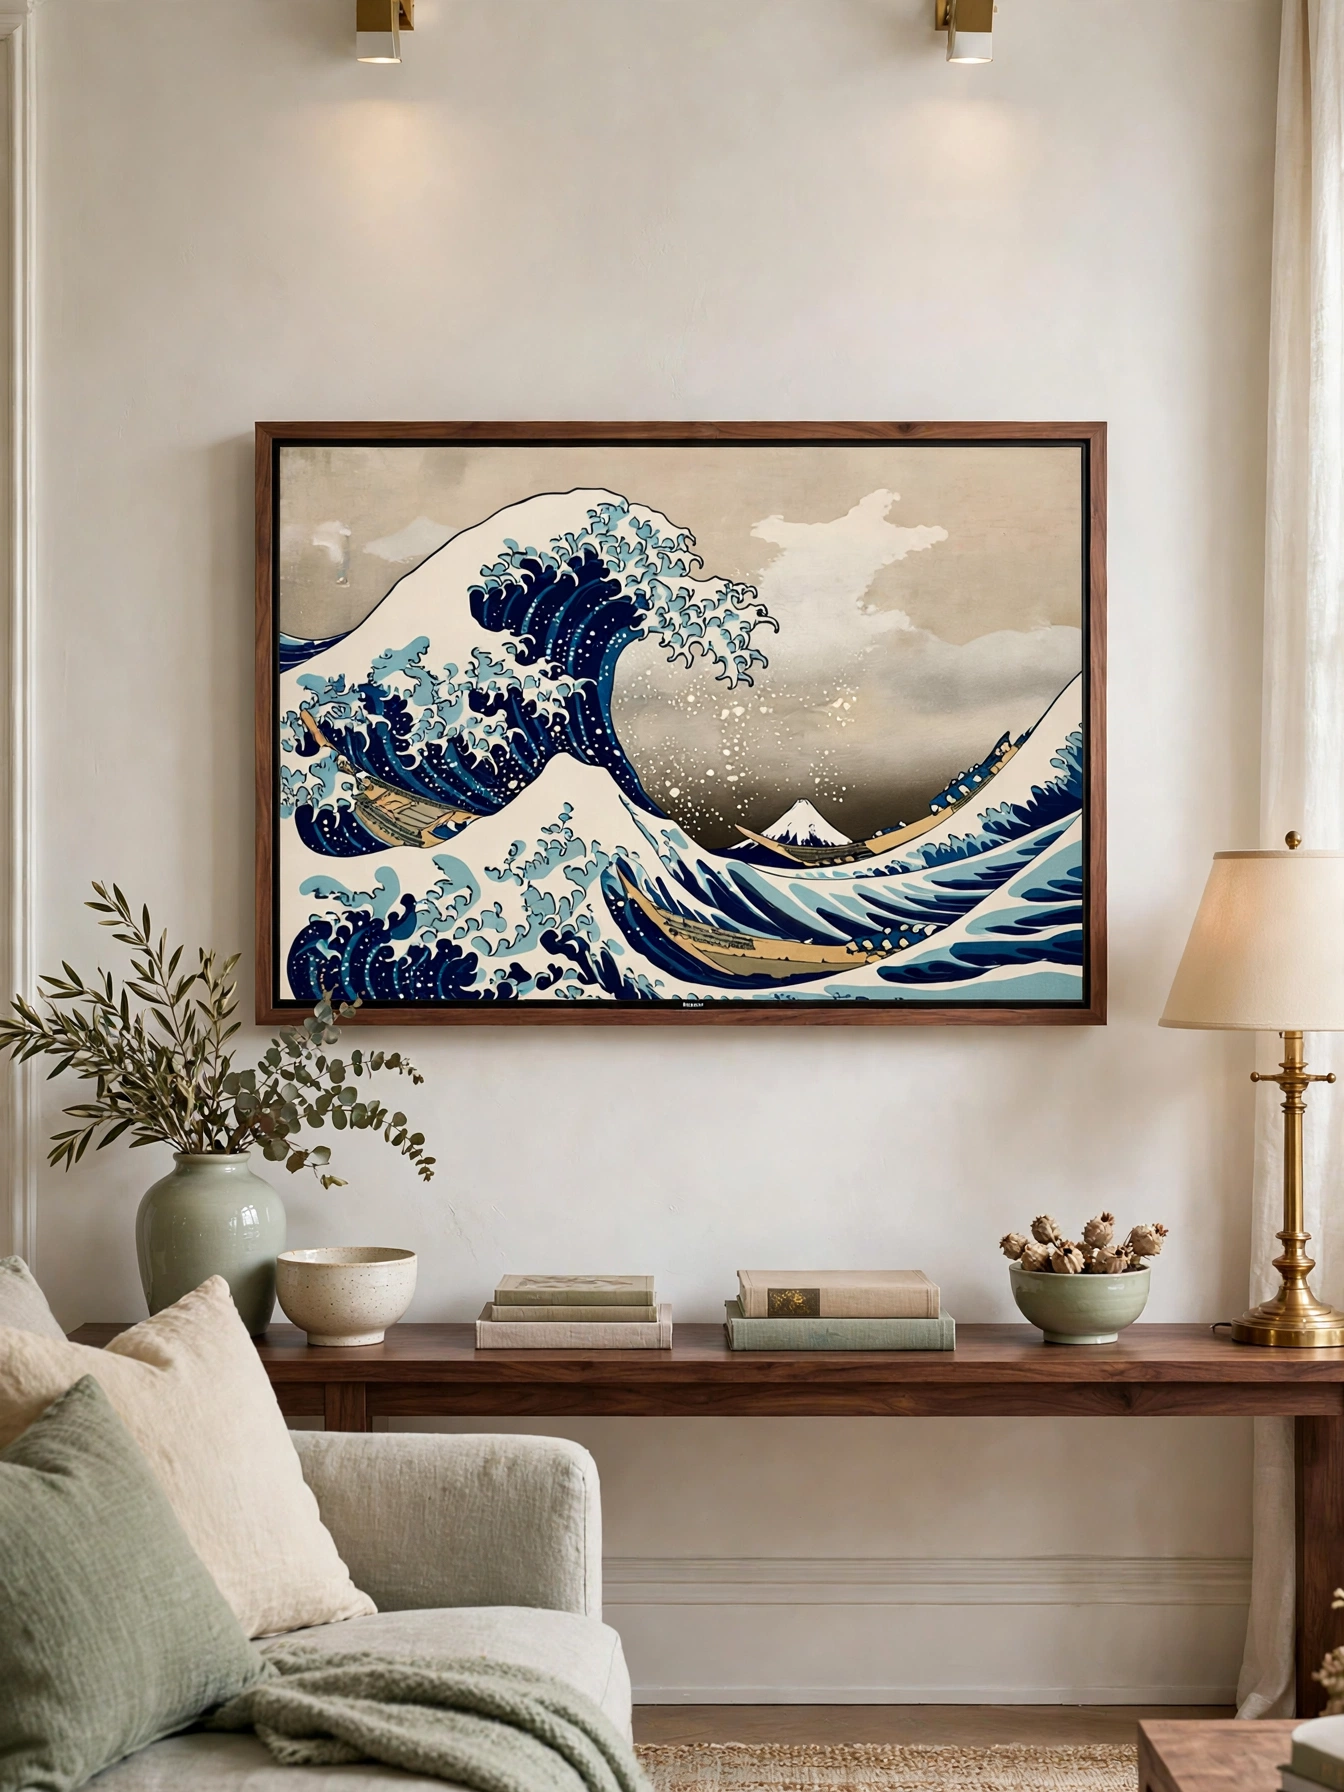
Frame TV Art Mode
Why This Works:
- Art mode turns the black screen into a gallery piece when not viewing.
- The flush no-gap mount sits nearly flat like real framed art.
- Matte anti-glare screens kill reflections that betray normal TVs.
- Guests genuinely mistake it for a painting, which is the whole point.
Frame-style TVs cost $1,000 to $3,000 depending on size, roughly 30 to 50 percent more than a standard TV of the same diagonal, and the no-gap mount holds the screen within 1 inch of the wall. Hang the center at 57 to 60 inches, true art height, rather than the 42-inch TV standard, since this piece lives as art most of the day. Run power through an in-wall rated kit or a recessed outlet directly behind the screen. Avoid placing it where direct sun hits the screen, because even matte displays wash out in strong glare, and skip art mode subscriptions if you prefer, since most models include a free rotating collection.
Design-first households that hate the black rectangle suit this idea. The catch is price: you pay a real premium for the disguise. Compared with hiding a standard TV behind sliding art at similar total cost, the frame TV needs no moving parts. Choose bezel colors that match your existing frames for the full illusion.
Pro Tip: Set the art mode brightness to match the room, usually 40 to 60 percent, because a glowing screen at full brightness looks like a TV, not a painting.
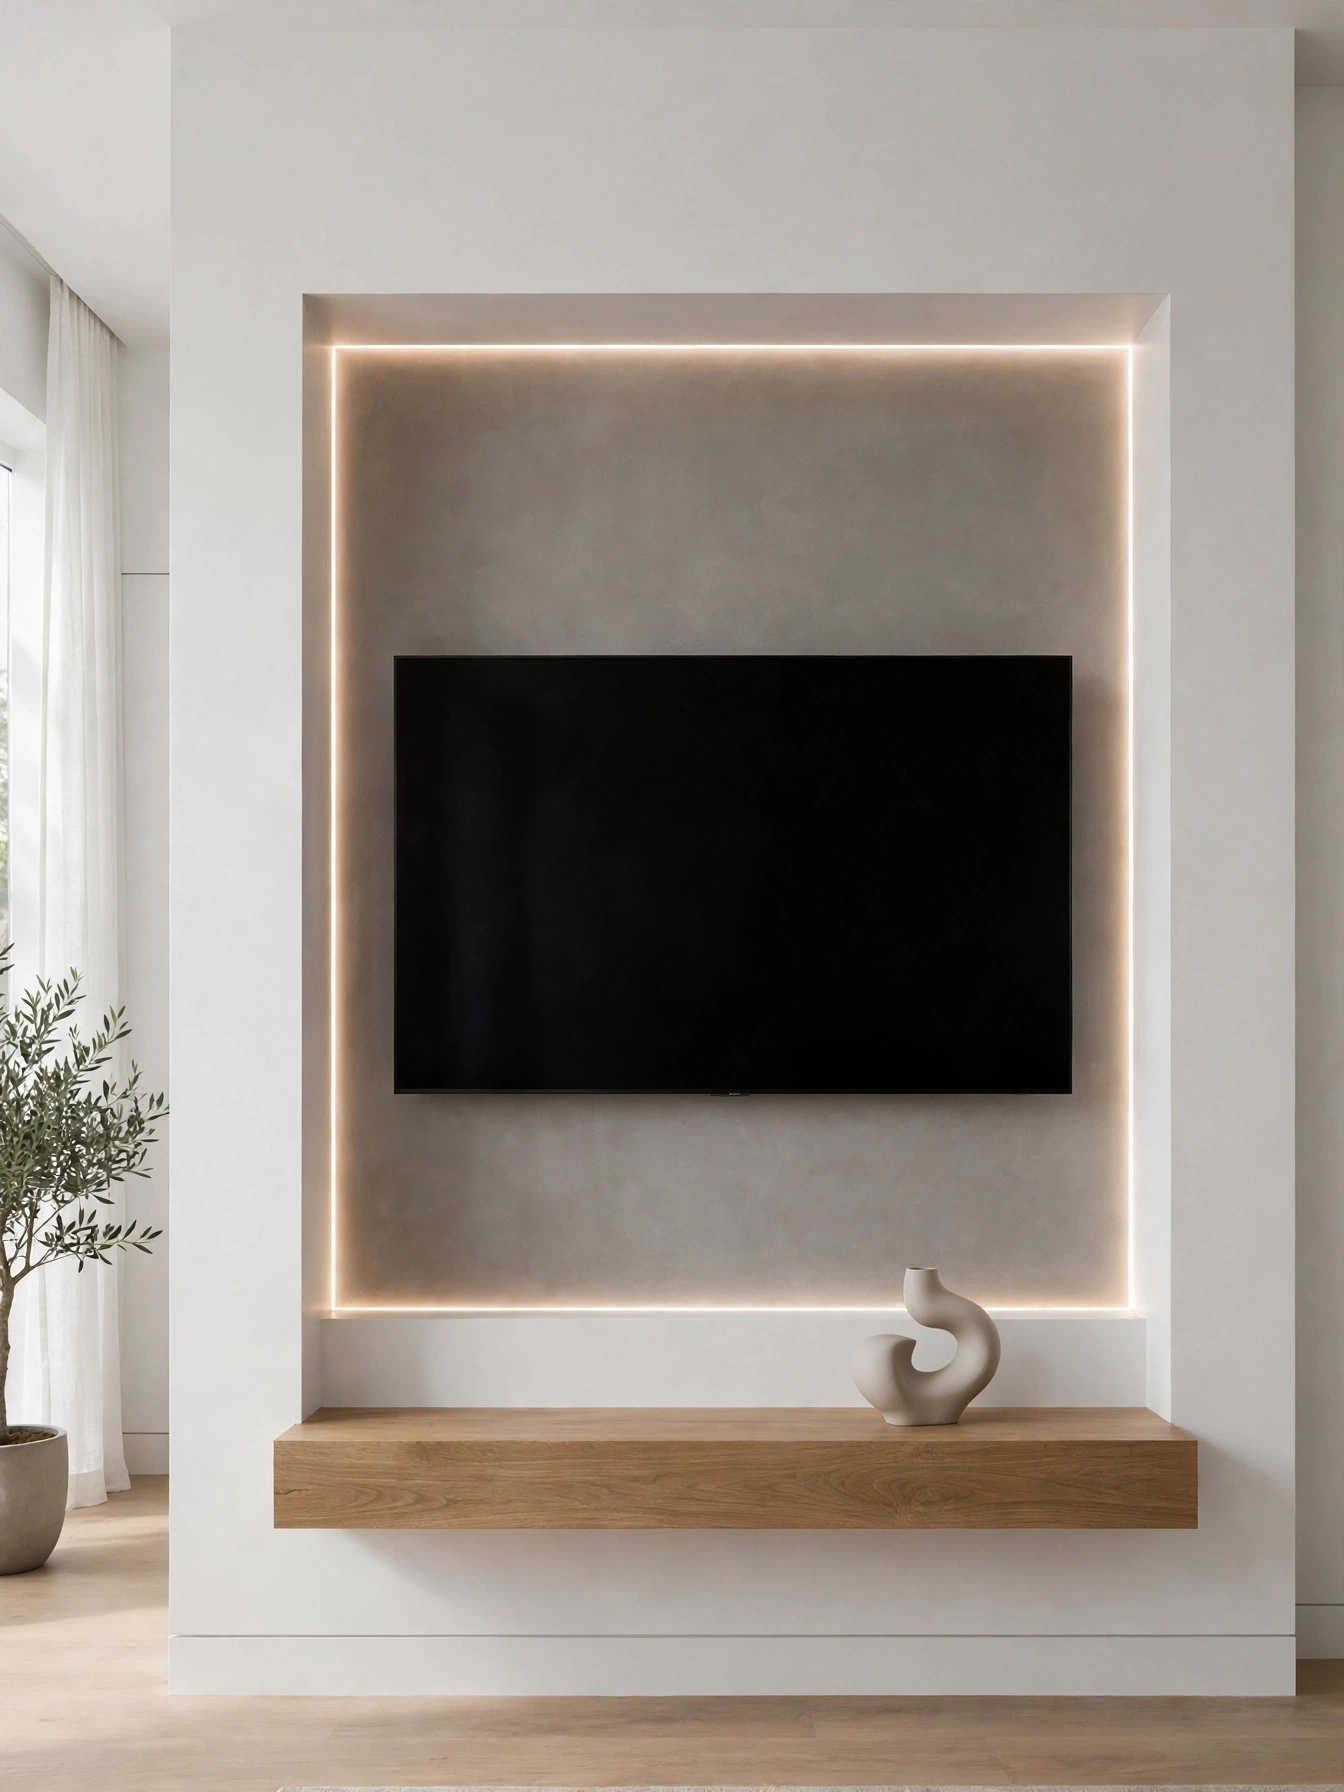
Recessed Wall Niche
Why This Works:
- A recessed screen sits flush, eliminating the floating black box look.
- The niche frames the TV architecturally, like a window to another world.
- Hidden LED edges add a premium glow for movie nights.
- Cables vanish completely inside the wall cavity.
Build the niche 4 inches wider and taller than the TV on each side, so a 65-inch screen needs roughly a 64 by 38 inch opening, framed with 2 by 4 lumber between existing studs. Hire a licensed electrician to add the recessed outlet and a pro to verify the wall is not load-bearing before cutting, since structural mistakes cost thousands to fix. Budget $500 to $1,500 for a contractor-built niche with electrical, or $150 to $300 in materials for skilled DIY. Line the niche interior with the wall color in matte finish to avoid reflections. Avoid recessing into exterior walls without checking insulation, because you will compress it and create a cold spot, and never cut studs without a proper header, since that compromises the wall structure.
New builds and renovations suit this idea, since open walls make the work easy. The catch is permanence: the niche fits one TV size, so upgrading means reframing. Compared with surface mounting at $50, a niche costs ten times more but looks custom forever. Plan the niche 2 inches larger than your dream TV size to allow future upgrades.
Pro Tip: Install a pull-string conduit from the niche to the floor during construction, because future cable upgrades then take minutes instead of requiring new drywall surgery.
Floating Oak Shelves
Why This Works:
- Floating shelves add storage and style without a bulky console.
- The horizontal lines balance the TV rectangle beautifully.
- Open shelves keep remotes and consoles accessible but tidy.
- Oak warms the tech-heavy zone with natural material.
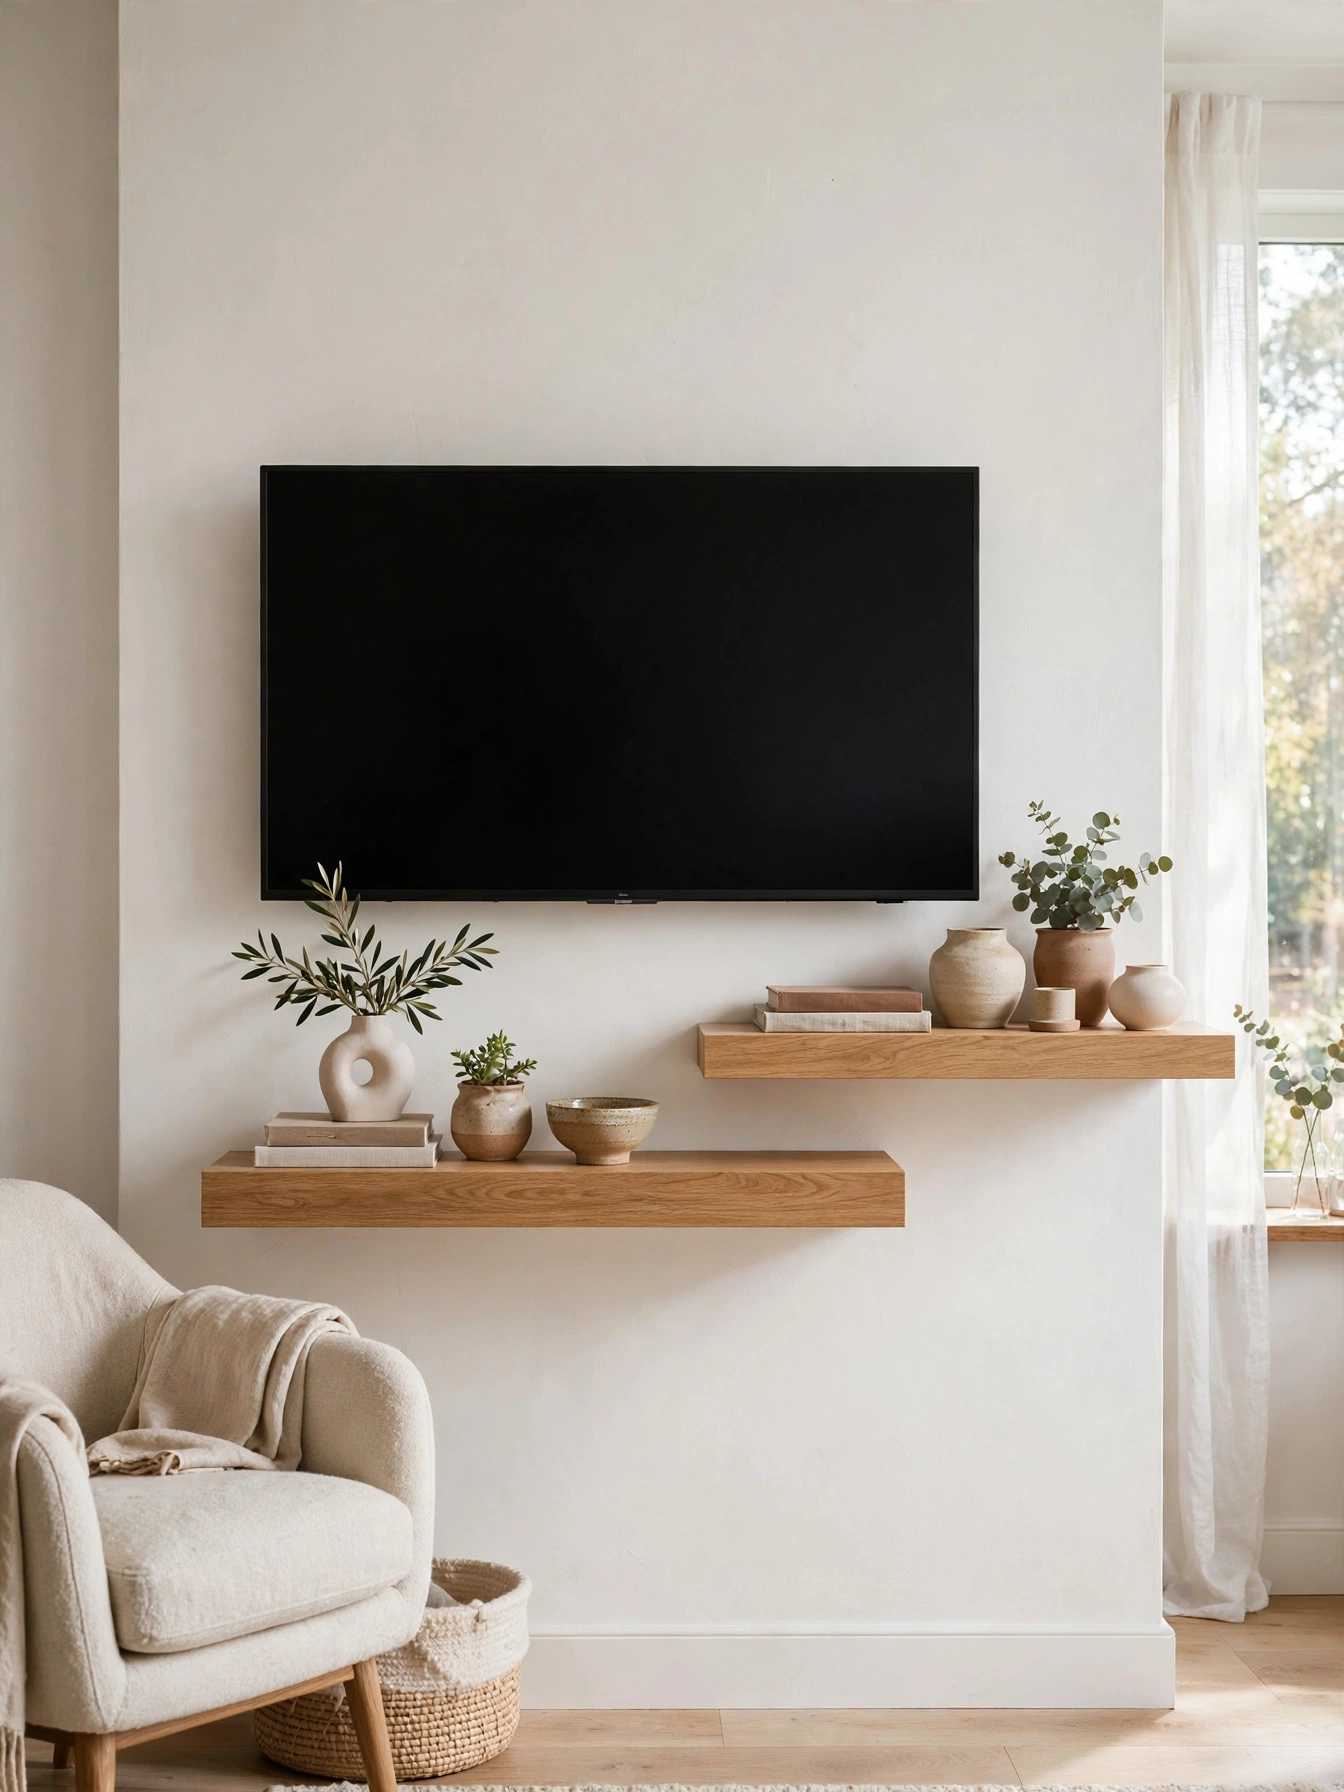
Mount shelves 12 to 18 inches below the TV and 8 to 12 inches to each side, using hidden steel brackets rated for 50 pounds per 36-inch shelf. Solid oak floating shelves run $80 to $250 each depending on length, with 48-inch shelves the most versatile. Drill brackets into studs, never drywall alone, since a loaded shelf pulls 30 or more pounds. Keep shelf depth at 10 to 12 inches, deep enough for books but shallow enough to stay sleek. Avoid glass shelves beside a TV, because they show every fingerprint and cable, and skip shelves wider than 60 inches without a center bracket, since oak sags visibly past that span under book weight.
Small rooms avoiding console bulk suit this idea. The downside is dust: open shelves need monthly wiping. Versus a $400 media console, two floating shelves cost half and keep floors clear. Style with the rule of thirds: books, objects, and breathing space in equal measure.
Pro Tip: Drill a 1.5-inch cable hole through the shelf near the wall, because routing console cables through the shelf itself hides them completely.
Dark Charcoal Backdrop
Why This Works:
- A dark wall makes the black screen nearly disappear when off.
- Charcoal adds cinema-like drama that white walls cannot touch.
- Brass and leather pop dramatically against the dark ground.
- One gallon of paint delivers the whole transformation.
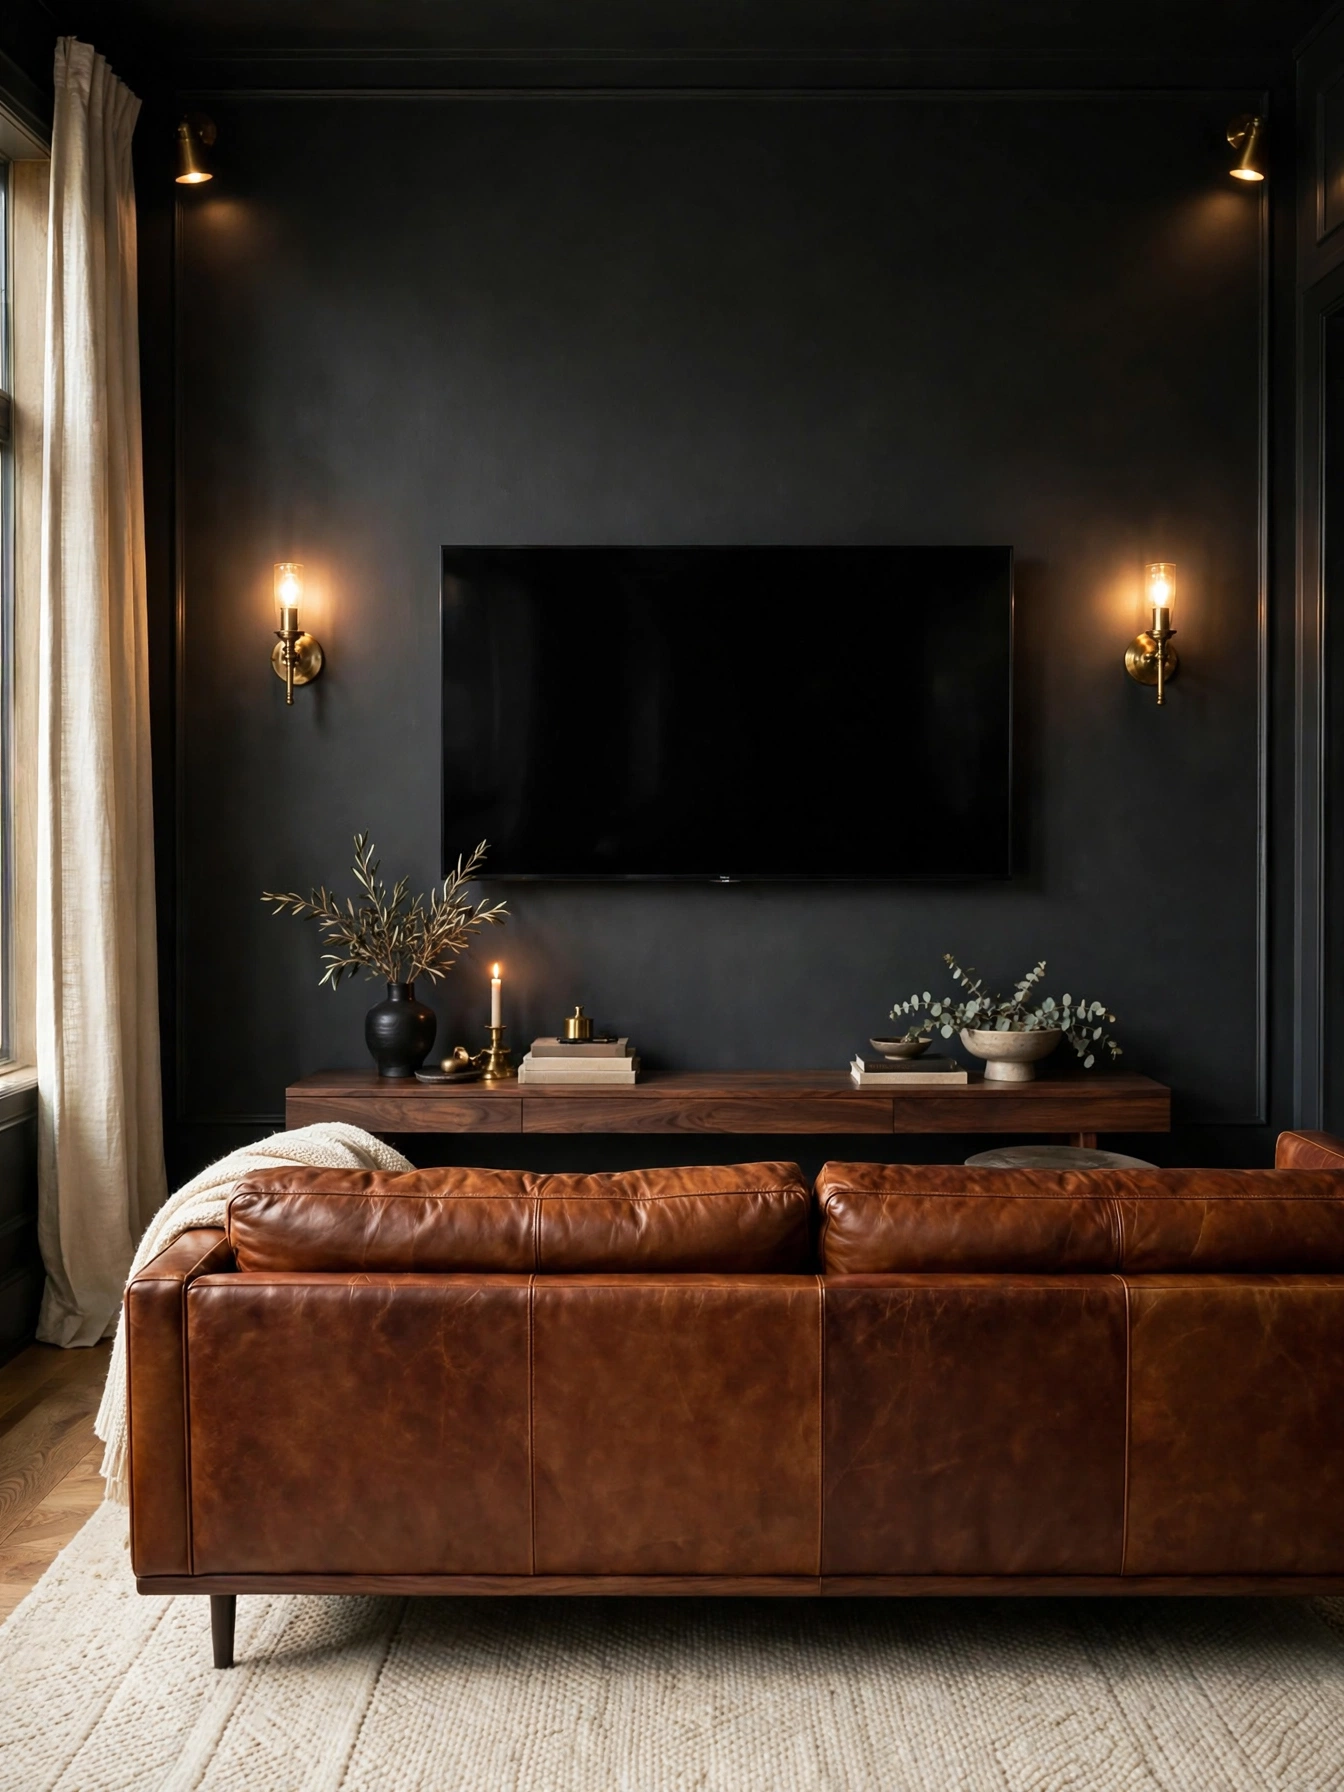
Choose a charcoal with a light reflectance value between 8 and 15, such as “Iron Ore SW 7069” or “Railings No. 31”, and apply two coats in matte finish, since any sheen shows roller marks on dark paint. A 12 by 9 foot wall needs one gallon for two coats at $40 to $70. Keep the other walls light and add 2700K warm lighting, because dark walls absorb up to 85 percent of light and rooms need compensation. Avoid charcoal in rooms with only one small window, since the light loss feels cave-like, and skip painting the ceiling dark too, because the double-dark box shrinks perceived height dramatically.
Movie lovers and evening rooms suit this idea, since dark walls shine after sunset. The snag is daylight: the drama fades in bright noon sun. Stacked against a $1,000 paneling project, the painted backdrop costs under $100 and repaints easily. Test the charcoal at night under your actual lamps before committing.
Pro Tip: Paint the wall behind the TV one shade darker than you think you want, because dark colors always dry one full shade lighter than the wet paint suggests.
Shiplap TV Wall Ideas
Why This Works:
- Horizontal shiplap lines contrast the TV rectangle in a pleasing way.
- The white boards keep the wall bright while adding real texture.
- Boards give endless anchor points for mounts and shelves.
- The coastal look softens the tech feel of a big screen.
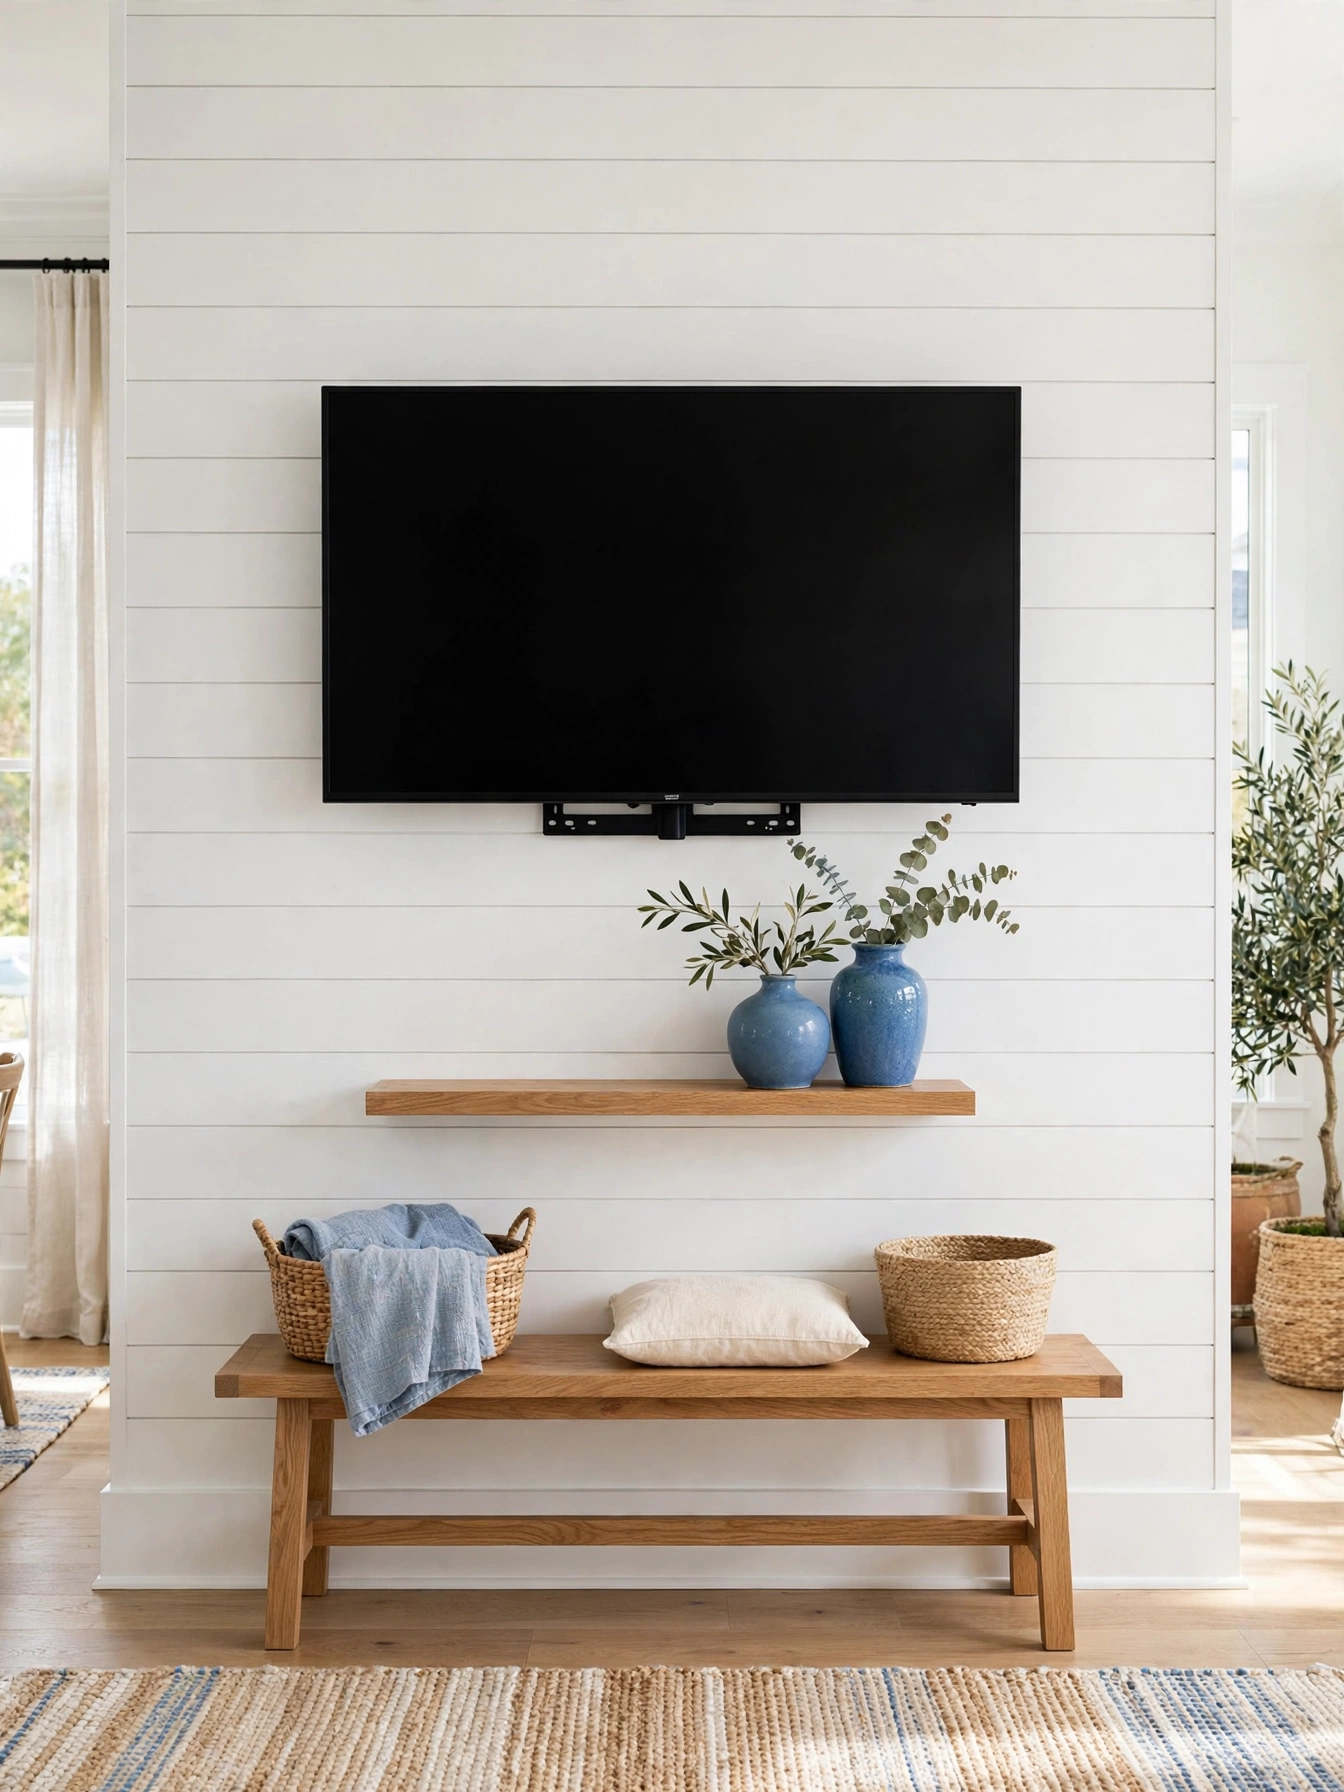
Install 6-inch pine shiplap at $2 to $7 per square foot, fastening each board into studs 16 inches on center with 2-inch brad nails, then mount the TV bracket through the boards into the studs with lag bolts. A 12 by 8 foot wall takes about 96 square feet plus 10 percent for waste. Paint the boards satin white after installation for wipeable durability. Run a horizontal cable channel behind the boards before mounting the TV. Avoid mounting the bracket to shiplap alone without stud contact, because boards pull away under a 60-pound load, and skip dark-stained shiplap behind the TV, since the screen blends in but the wall dominates the room.
Coastal and farmhouse rooms suit this idea. The downside is dust collecting in the grooves, so plan quarterly wipe-downs. Compared with drywall, shiplap costs five times more but adds the texture that makes TV walls photograph well. Keep the nickel gap consistent with a spacer for professional lines.
Pro Tip: Mark all stud locations on the floor with tape before the boards go up, because finding studs through finished shiplap later is guesswork.
Stone Veneer Cladding
Why This Works:
- Stone gives the TV wall the permanence of a fireplace feature.
- The rough texture makes the sleek screen look intentionally placed.
- Natural stone never goes out of style or needs repainting.
- It hides wall imperfections completely behind the cladding.
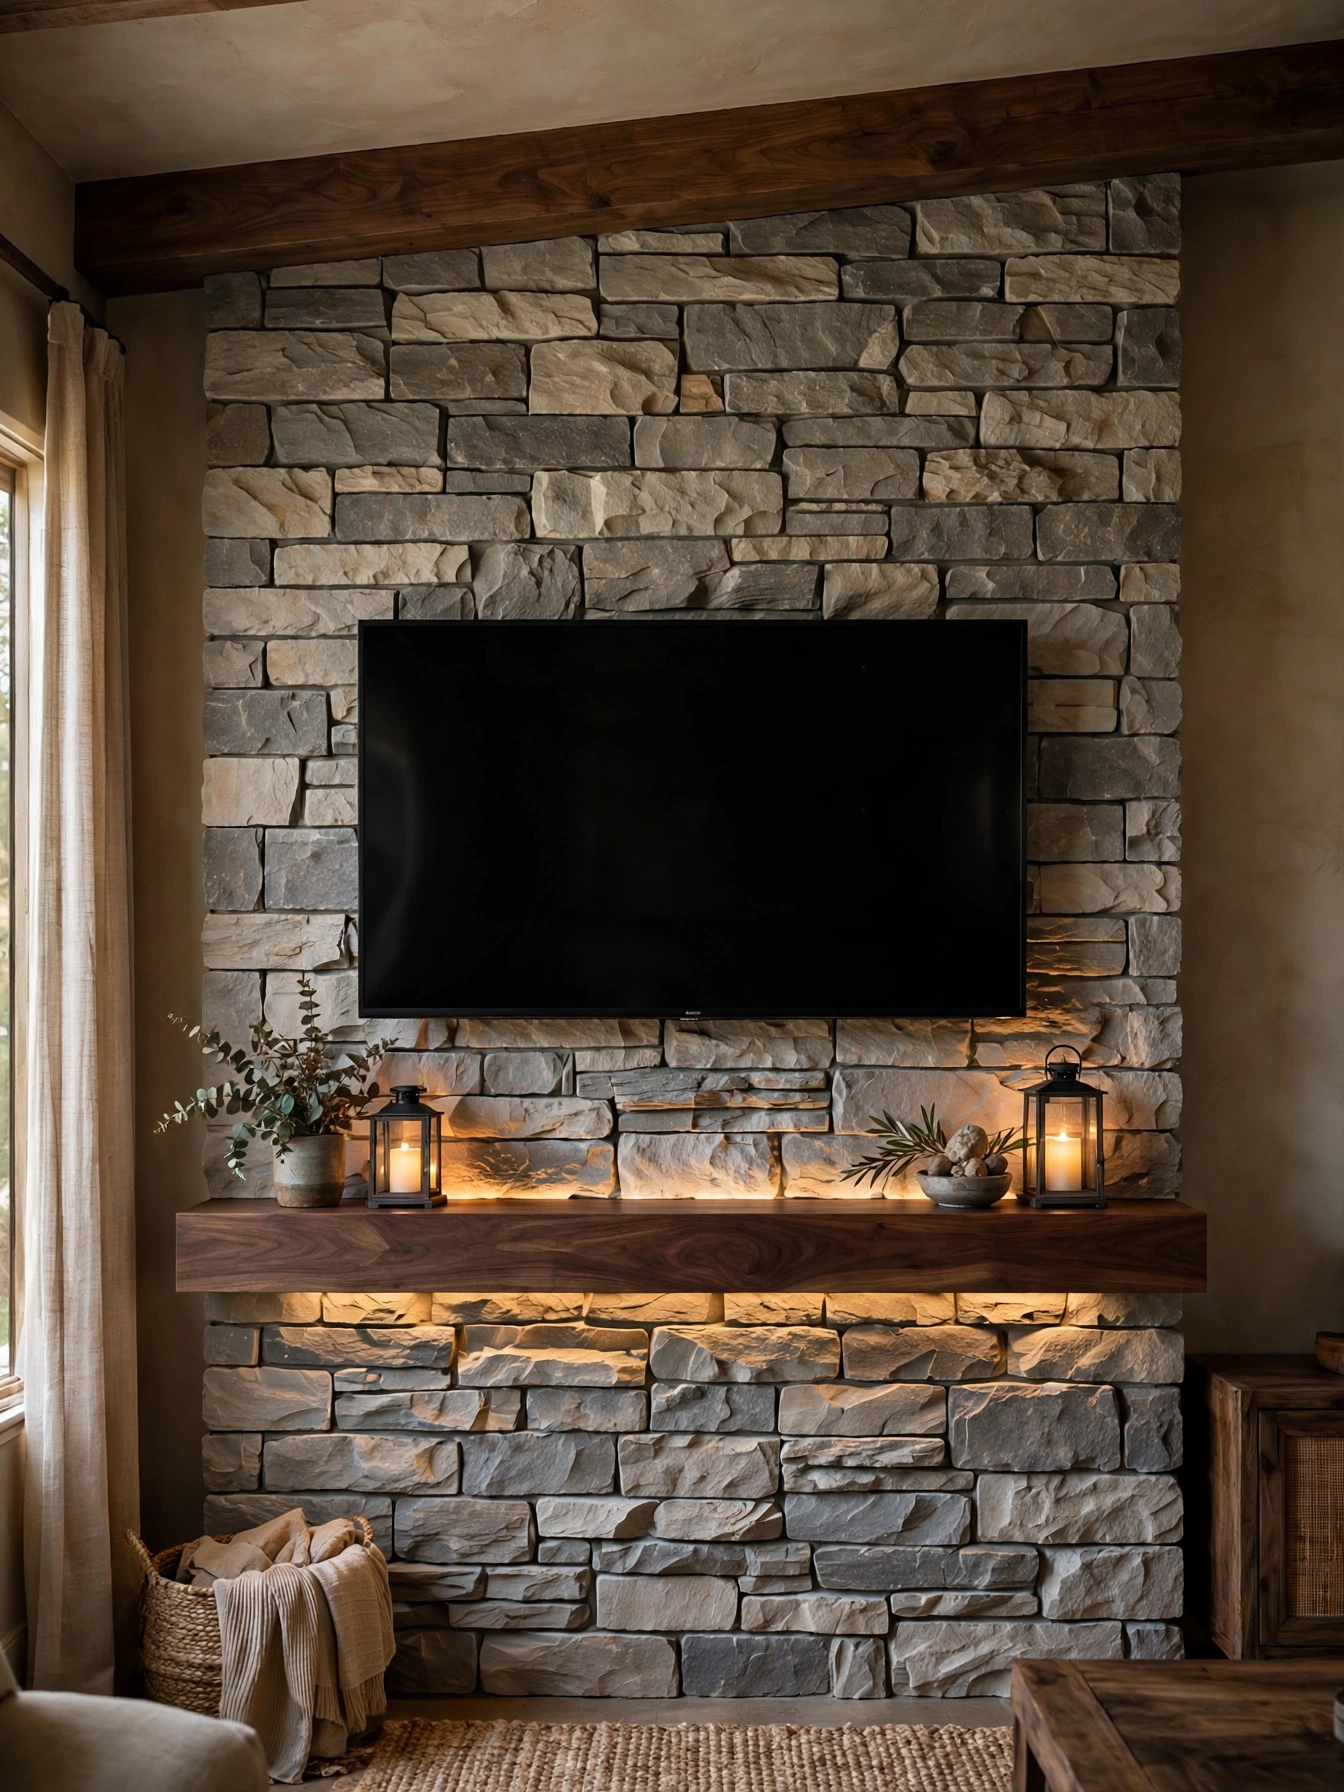
Manufactured stone veneer costs $8 to $15 per square foot installed DIY, or $15 to $30 professionally installed, so a 10 by 8 foot wall runs $650 to $2,400. Panels weigh 8 to 12 pounds per square foot, which standard drywall handles with proper adhesive and mechanical fasteners. Fix the TV bracket with sleeve anchors into the studs through the stone, not just the veneer. Choose ledgestone profiles under 2 inches deep so the TV sits close. Avoid real full-depth stone, which needs structural support and costs triple, and skip whitewashing the stone, since it fills the texture that justifies the material.
Rustic and transitional rooms suit this idea. Watch out for weight and dust: stone sheds fine grit for months. Stacked against a painted accent wall at $70, stone costs twenty times more but lasts the life of the house. Seal the stone yearly in kitchens or humid climates.
Pro Tip: Dry-fit the stone layout on the floor first and photograph it, because once mortar sets, rearranging a single stone means chiseling.
Bias LED Backlighting
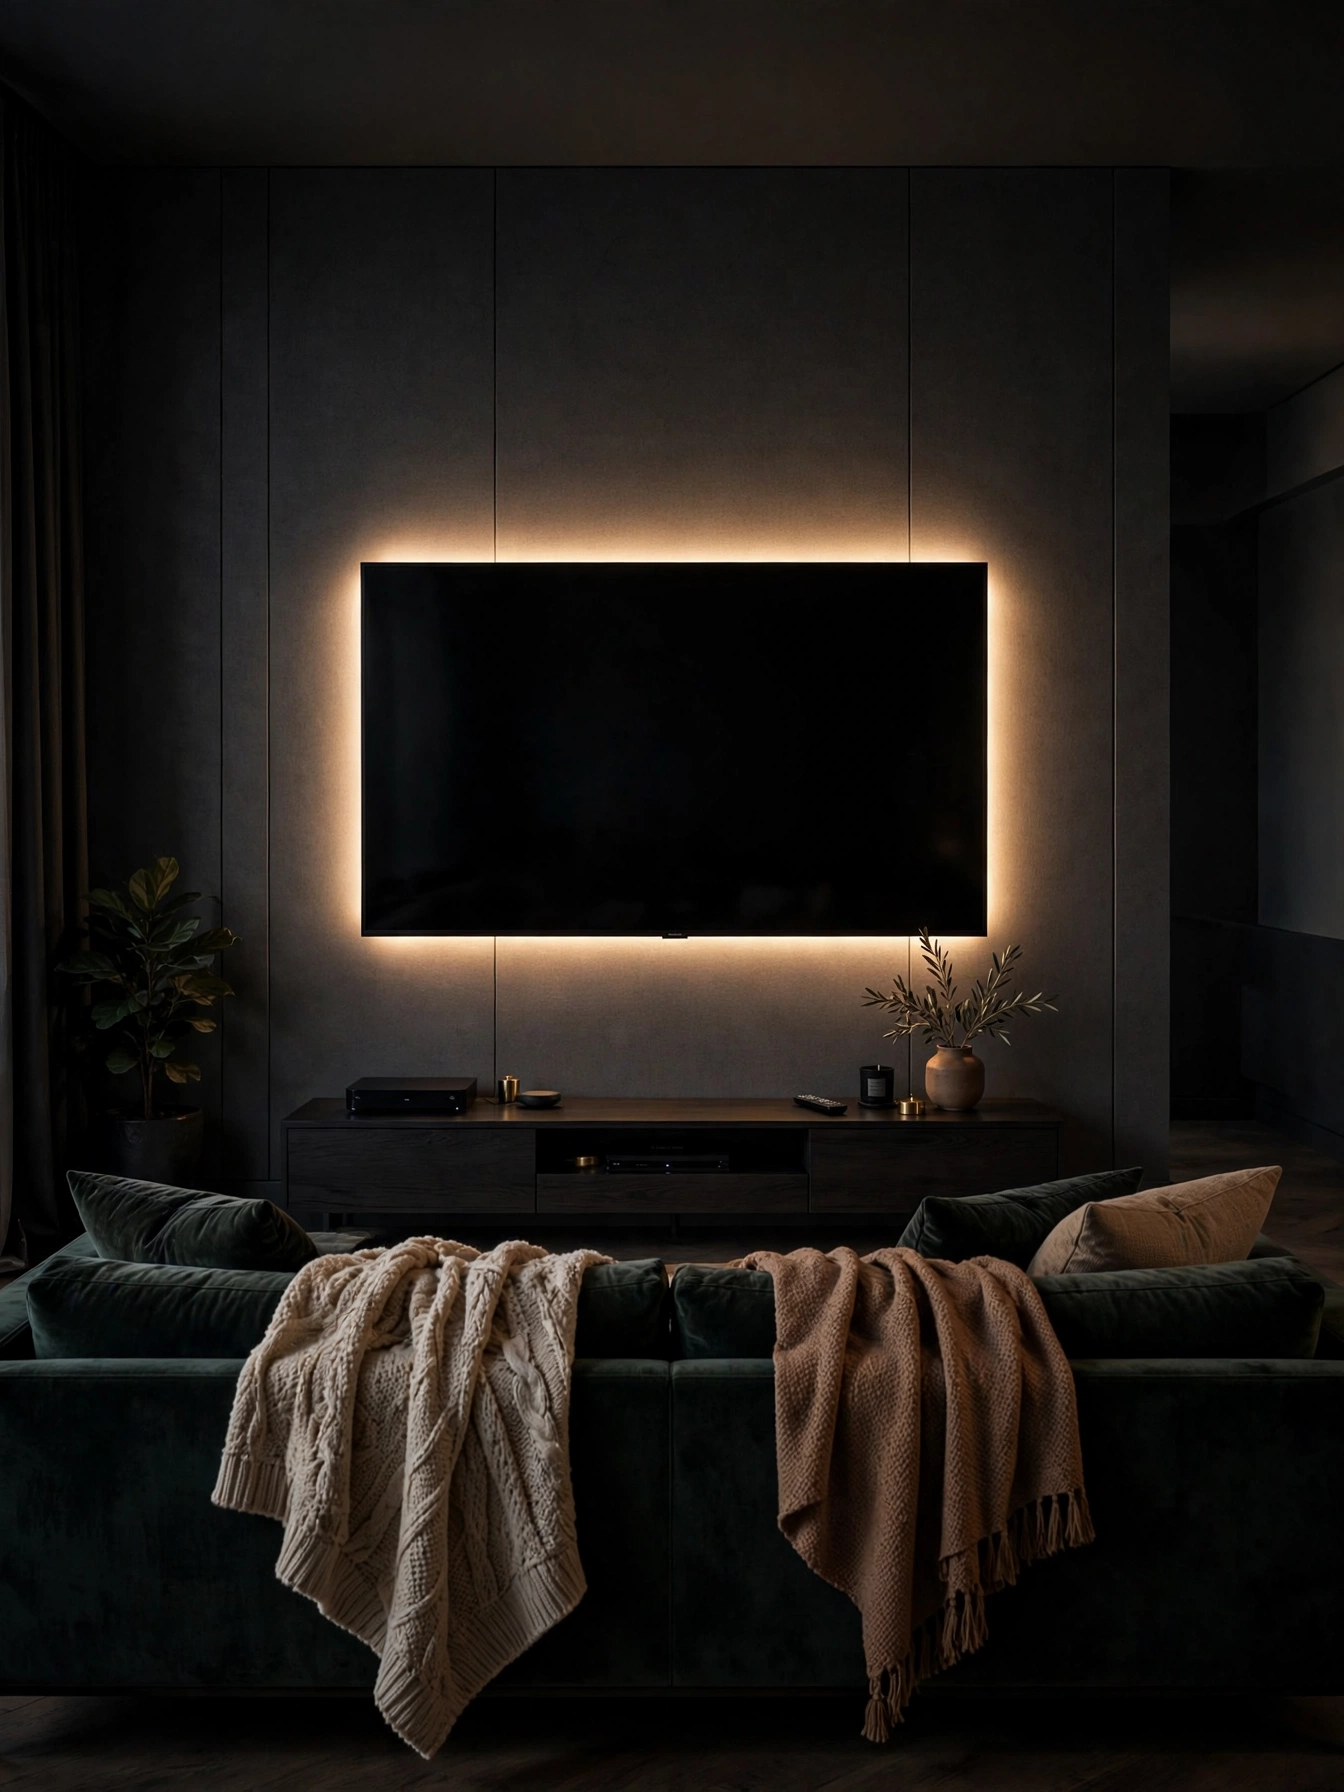
Why This Works:
- Bias lighting cuts eye strain by softening the contrast with dark rooms.
- The halo makes the screen look like it floats off the wall.
- The American Lighting Association recommends ambient light with screen viewing.
- It is the cheapest dramatic upgrade on this entire list.
Stick a 6500K daylight or 2700K warm LED strip 2 inches inside the TV rear edge, covering all four sides for an even halo, and power it from the TV USB port so it switches with the screen. Quality bias strips cost $20 to $50 for 65-inch TVs, and installation takes 15 minutes with no tools. Set brightness at 10 percent of the screen peak for the recommended effect. Avoid RGB rainbow modes for movie watching, because colored halos distort perceived screen color, and skip cheap strips without adhesive backing rated for heat, since TV backs run warm and weak glue fails within months.
Night viewers and gamers suit this idea best. Watch out for daylight: the effect vanishes in bright rooms. In contrast to a $200 smart lighting system, a simple bias strip delivers 80 percent of the ambiance. Choose white-only strips for the most accurate picture.
Pro Tip: Match the strip color temperature to your room bulbs, because a 6500K halo in a 2700K room looks clinical while matched light feels seamless.
Flanking Wall Sconces
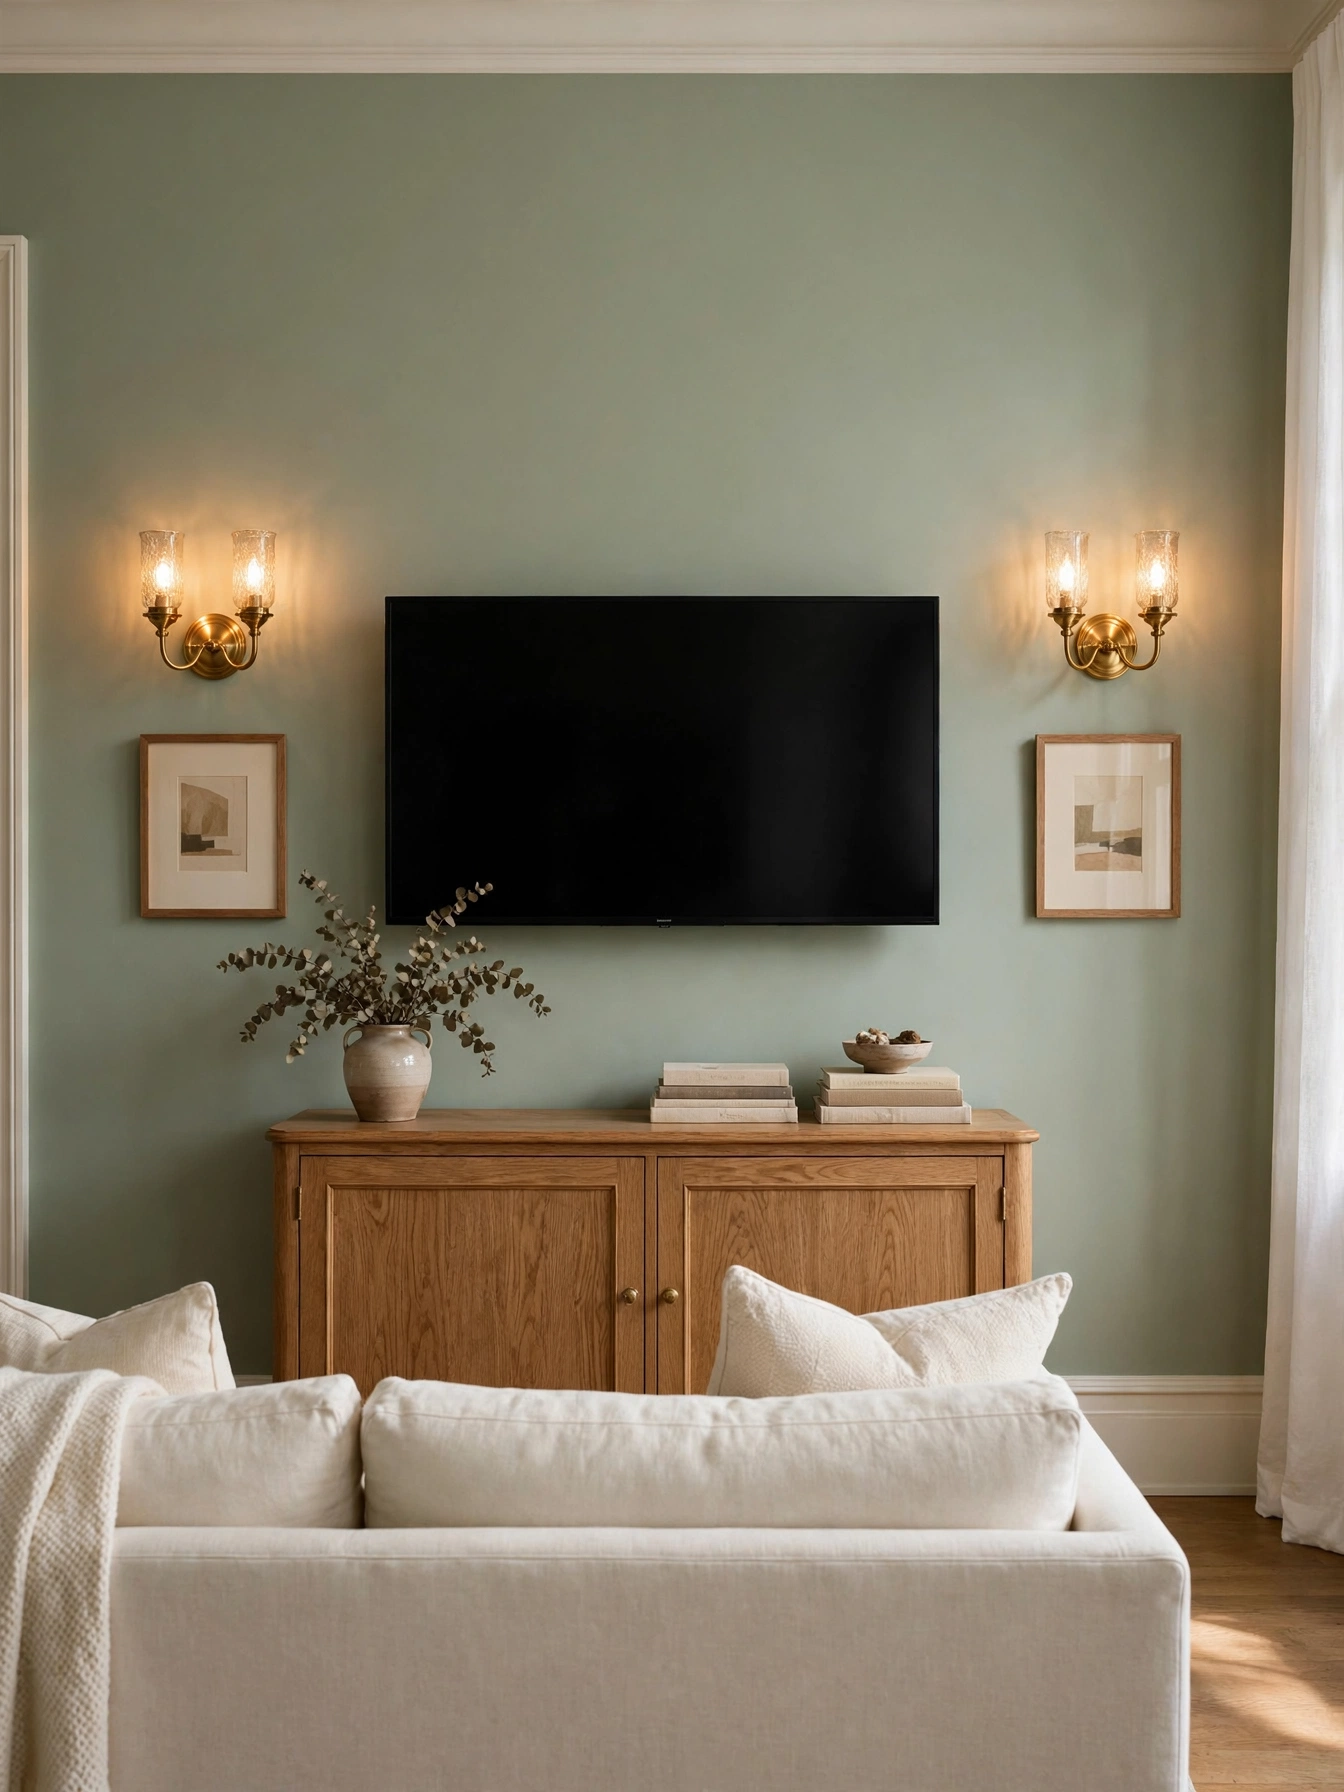
Why This Works:
- Symmetrical sconces frame the TV like art in a gallery.
- Warm side light balances the cool screen glow during viewing.
- Sconces add the layered lighting designers insist every room needs.
- Hardwired fixtures look custom and add real home value.
Mount sconces 60 to 66 inches from the floor to center, spacing them 24 to 36 inches from the TV edge depending on screen size, and choose shades that direct light up and down rather than at the screen. Hardwired sconces run $80 to $300 each plus $150 to $400 per fixture for electrician installation. Use 2700K dimmable bulbs and put the pair on a dimmer switch. Avoid plug-in cords draping down the wall, because visible cords ruin the custom look, and skip sconces with exposed bulbs at eye level, since the glare competes with the screen.
Formal living rooms suit this idea. One caveat is wiring cost: fishing wire through finished walls doubles the project price. Compared with table lamps at similar cost, sconces free up surface space permanently. Keep the sconce style consistent with other room metals.
Pro Tip: Wire the sconces to the same dimmer as the room’s main lights, because one-touch movie lighting beats juggling three switches every evening.
Painted Arch Backdrop
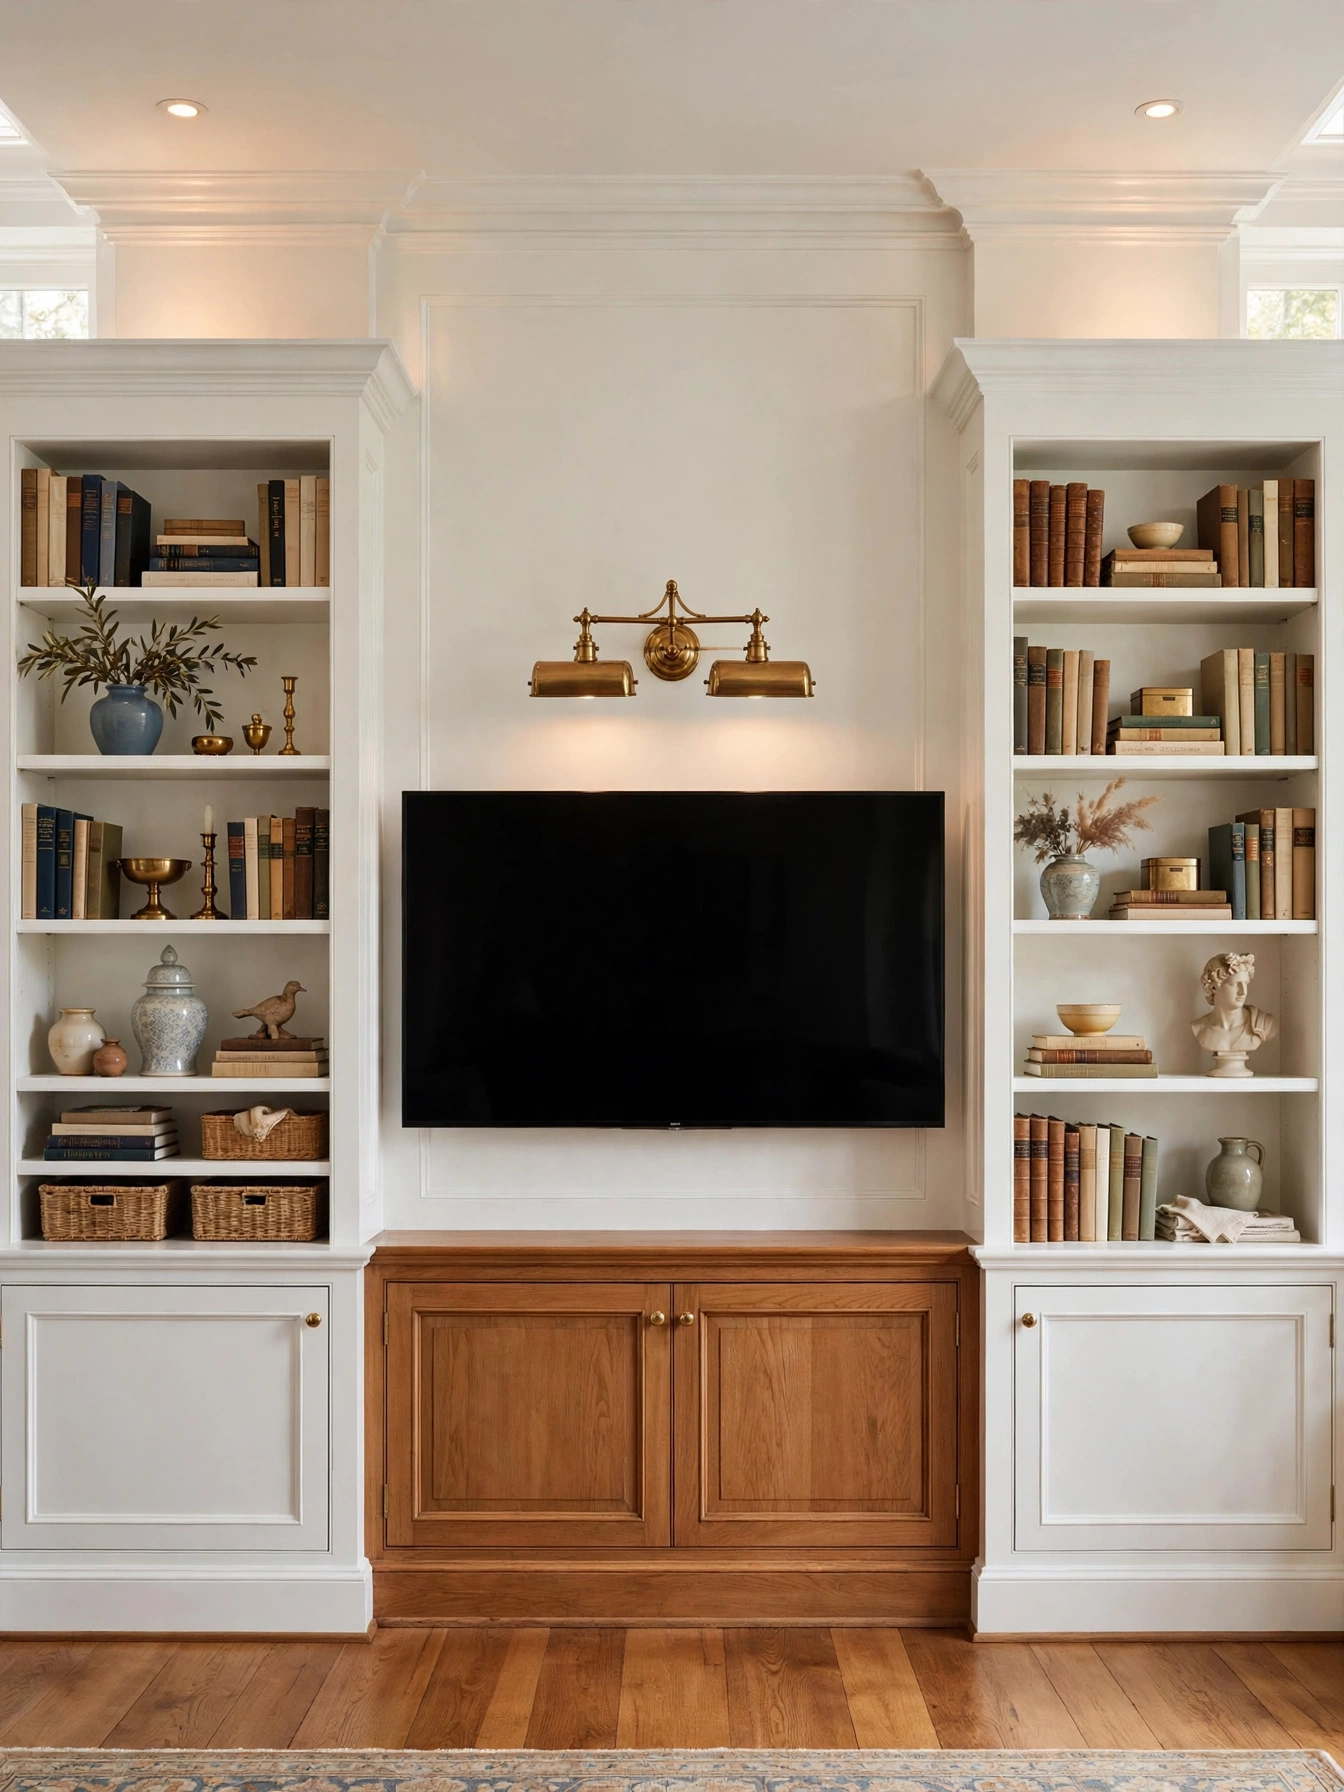
Why This Works:
- The arch frames the TV with pure paint, no construction needed.
- Curved shapes soften the hard rectangle of the screen.
- It creates a focal point that photographs beautifully.
- Repainting costs almost nothing when tastes change.
Paint the arch 2 feet wider than the TV on each side and extend it from 12 inches above the floor to 18 inches above the screen top, using a pencil, string, and nail as a compass for the curve. A quart of matte paint at $15 to $25 covers the typical arch with two coats. Use painter’s tape only on the straight sides, cutting the curve freehand with a 2-inch angled brush for the smoothest line. Avoid arches that touch the ceiling, because the curve then reads as a mistake rather than a design, and skip high-contrast color pairs, since the arch should frame the TV, not fight it.
Renters and trend lovers suit this idea, since it repaints in an afternoon. One caveat is style lifespan: arches may date. In contrast to a $500 paneling project, the painted arch costs under $30 and delivers similar focal power. Step back 10 feet to check the curve before the second coat.
Pro Tip: Trace the arch with a light pencil line first and live with the outline for 24 hours, because adjusting a pencil line is free while repainting is not.
Bookcase Flank Built-Ins
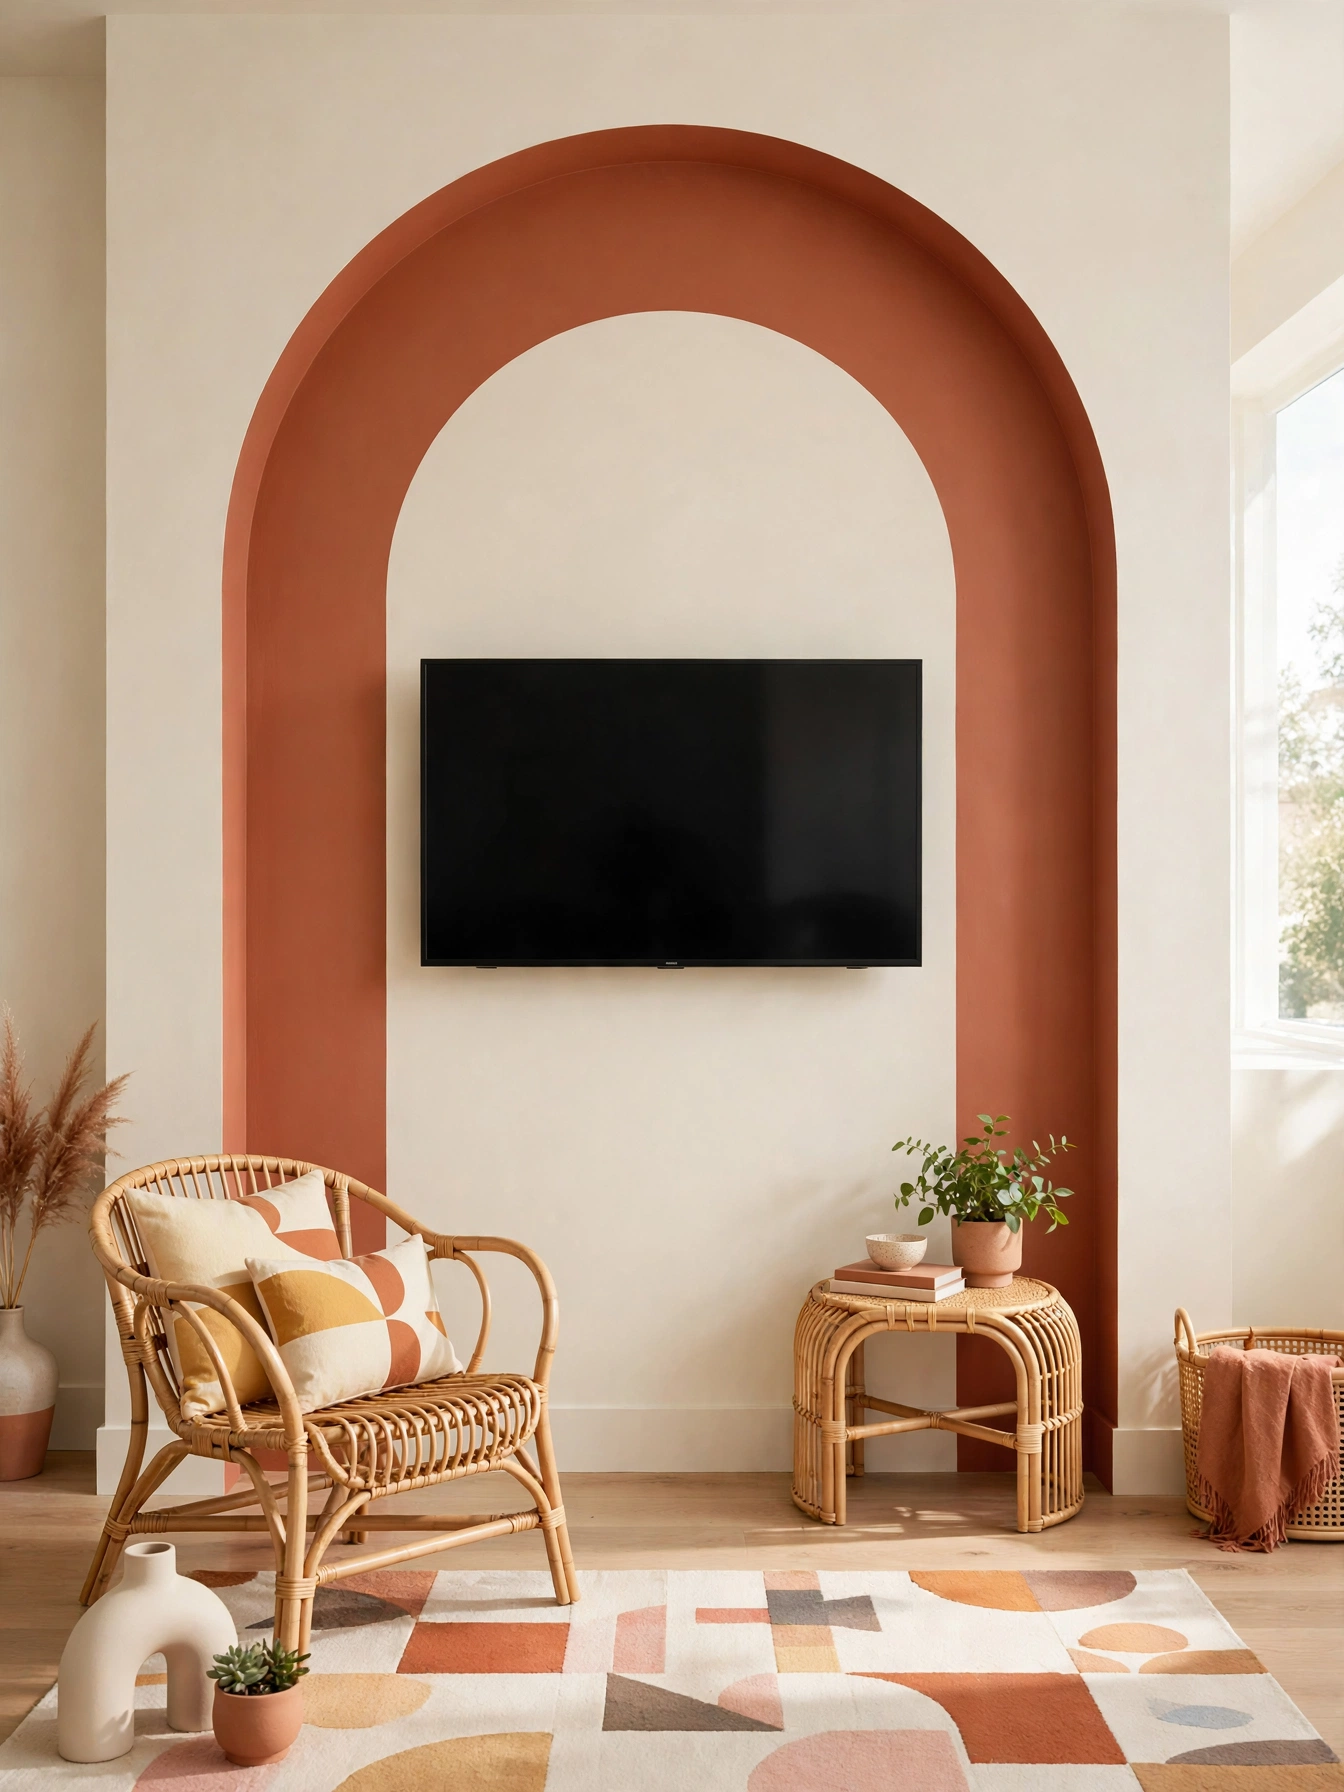
Why This Works:
- Flanking bookcases give the TV the symmetry of a traditional fireplace wall.
- Books add color and life that balance the black screen.
- Built-ins provide serious storage while looking custom.
- The composition increases perceived home value instantly.
Use bookcases 12 to 16 inches deep and 72 to 84 inches tall, spacing them so the TV plus a 6-inch gap on each side centers on the wall. Stock bookcases with added trim cost $400 to $1,000 for the pair, versus $4,000 to $10,000 for true custom millwork. Anchor every tall case to studs with L-brackets, since a loaded 84-inch bookcase can topple. Style shelves using the thirds rule: books, objects, and empty space. Avoid cramming shelves edge to edge, because packed shelves read as storage units, and skip mounting the TV before the cases are secured, since adjusting positions later scratches everything.
Book lovers and traditional rooms suit this idea. The hard part is dusting hundreds of books. Next to a media console, flanking bookcases cost more but deliver ten times the storage. Paint the cases the wall color for a seamless built-in look.
Pro Tip: Leave one shelf per case completely empty when styling, because the breathing room is what separates styled built-ins from crowded ones.
Microcement Plaster Finish
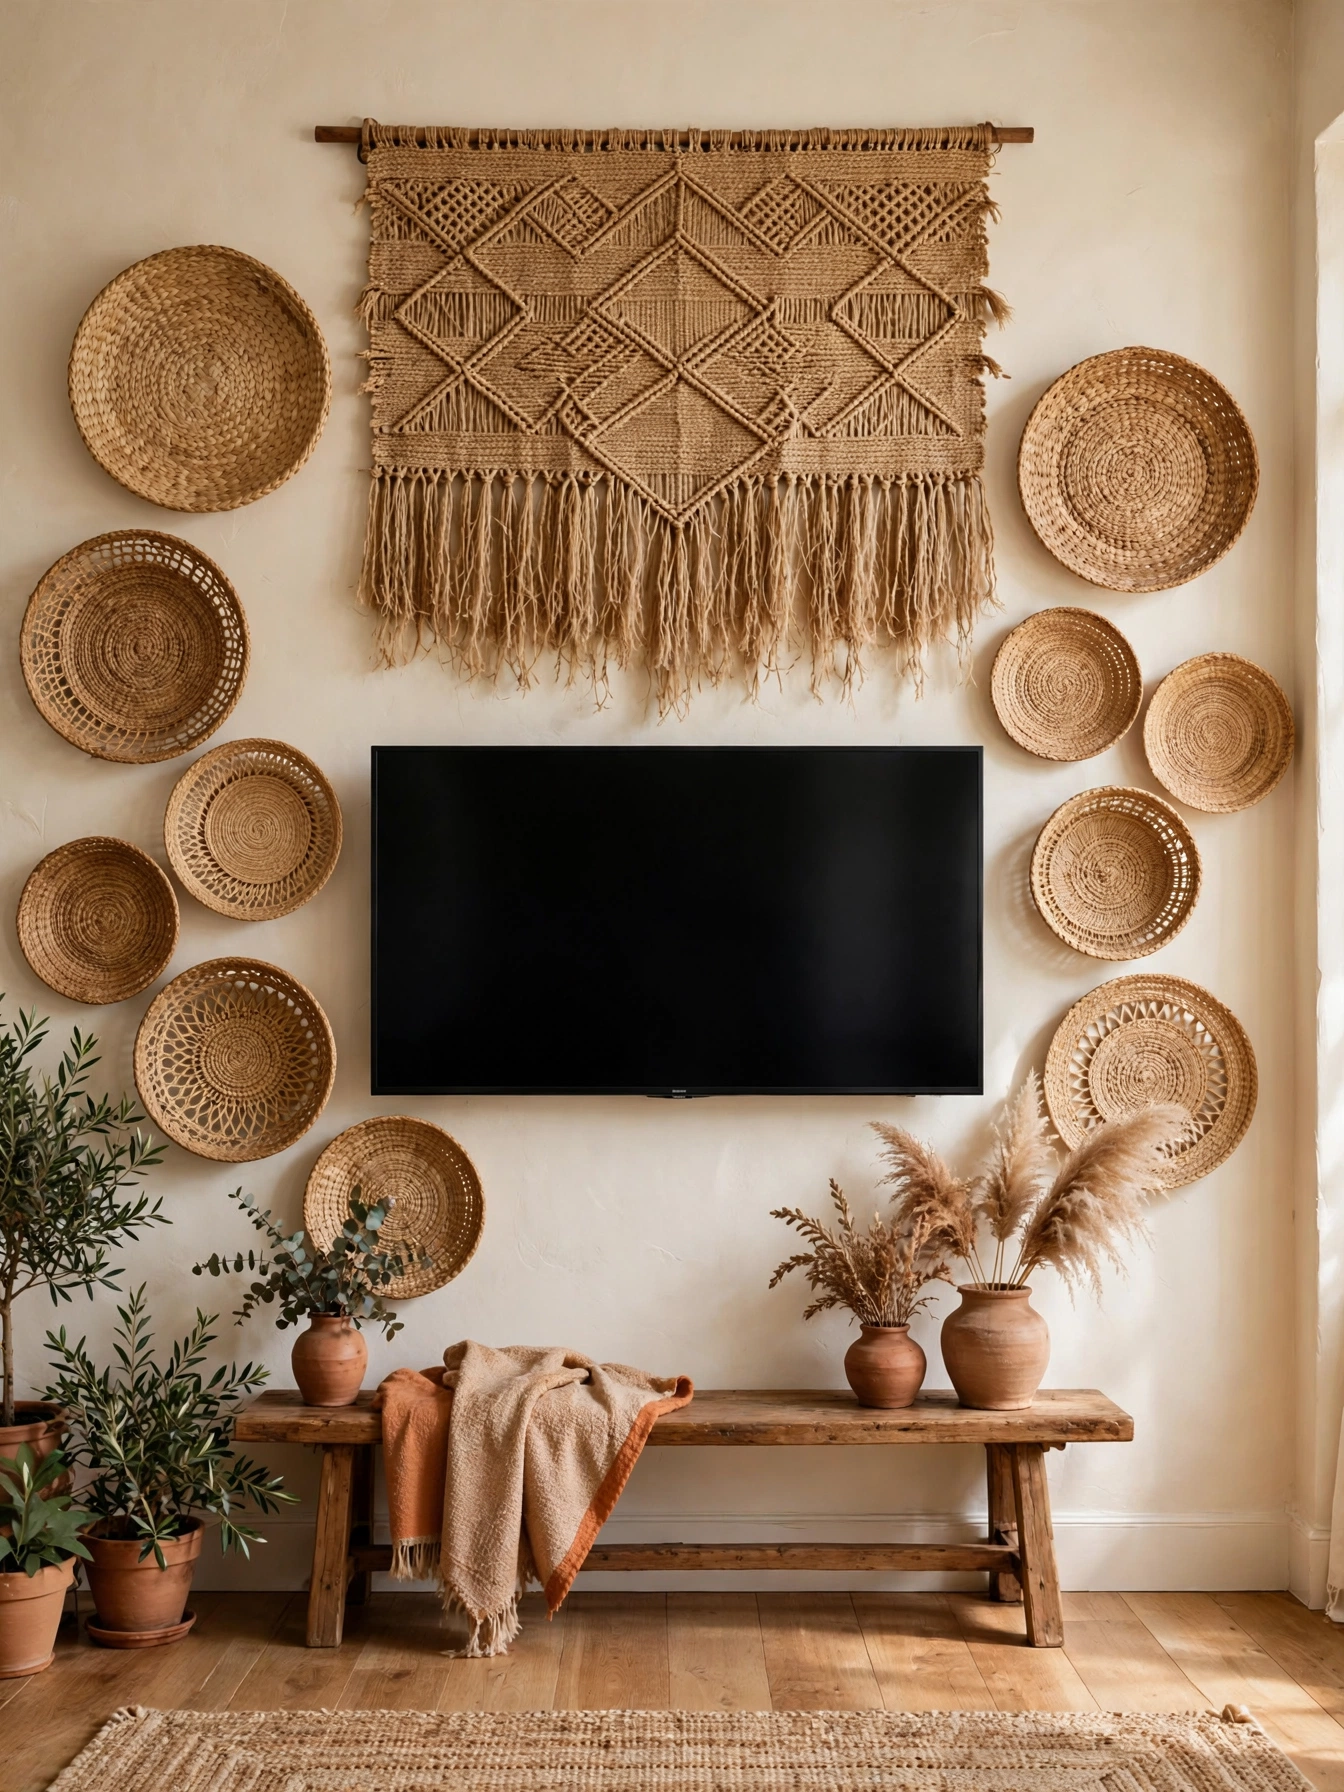
Why This Works:
- Seamless plaster gives the wall a poured-concrete gallery feel.
- The subtle trowel texture adds depth without any pattern.
- It hides drywall seams and patches completely.
- The matte finish kills glare around the screen.
Apply microcement in three thin coats with a steel trowel over primed drywall, sanding lightly between coats, and seal with two coats of matte polyurethane sealer. DIY kits cost $6 to $12 per square foot, so a 10 by 8 foot wall runs $500 to $950, while professional application reaches $15 to $25 per square foot. Each coat dries in 12 to 24 hours. Fix the TV bracket into studs as usual, since microcement adds no structural strength. Avoid applying over glossy paint without sanding and priming, because the plaster delaminates within months, and skip dark microcement behind the TV, since the screen vanishes but the heavy wall dominates small rooms.
Minimalist and modern rooms suit this idea. The hard part is skill: trowel work shows every hesitation. Compared with Venetian plaster at double the price, microcement is more forgiving for first-timers. Practice the trowel rhythm on a closet wall first.
Pro Tip: Work in 3 by 3 foot sections with a partner, because microcement sets fast and visible seams appear wherever one section dried before the next began.
Mirrored Panel Camouflage
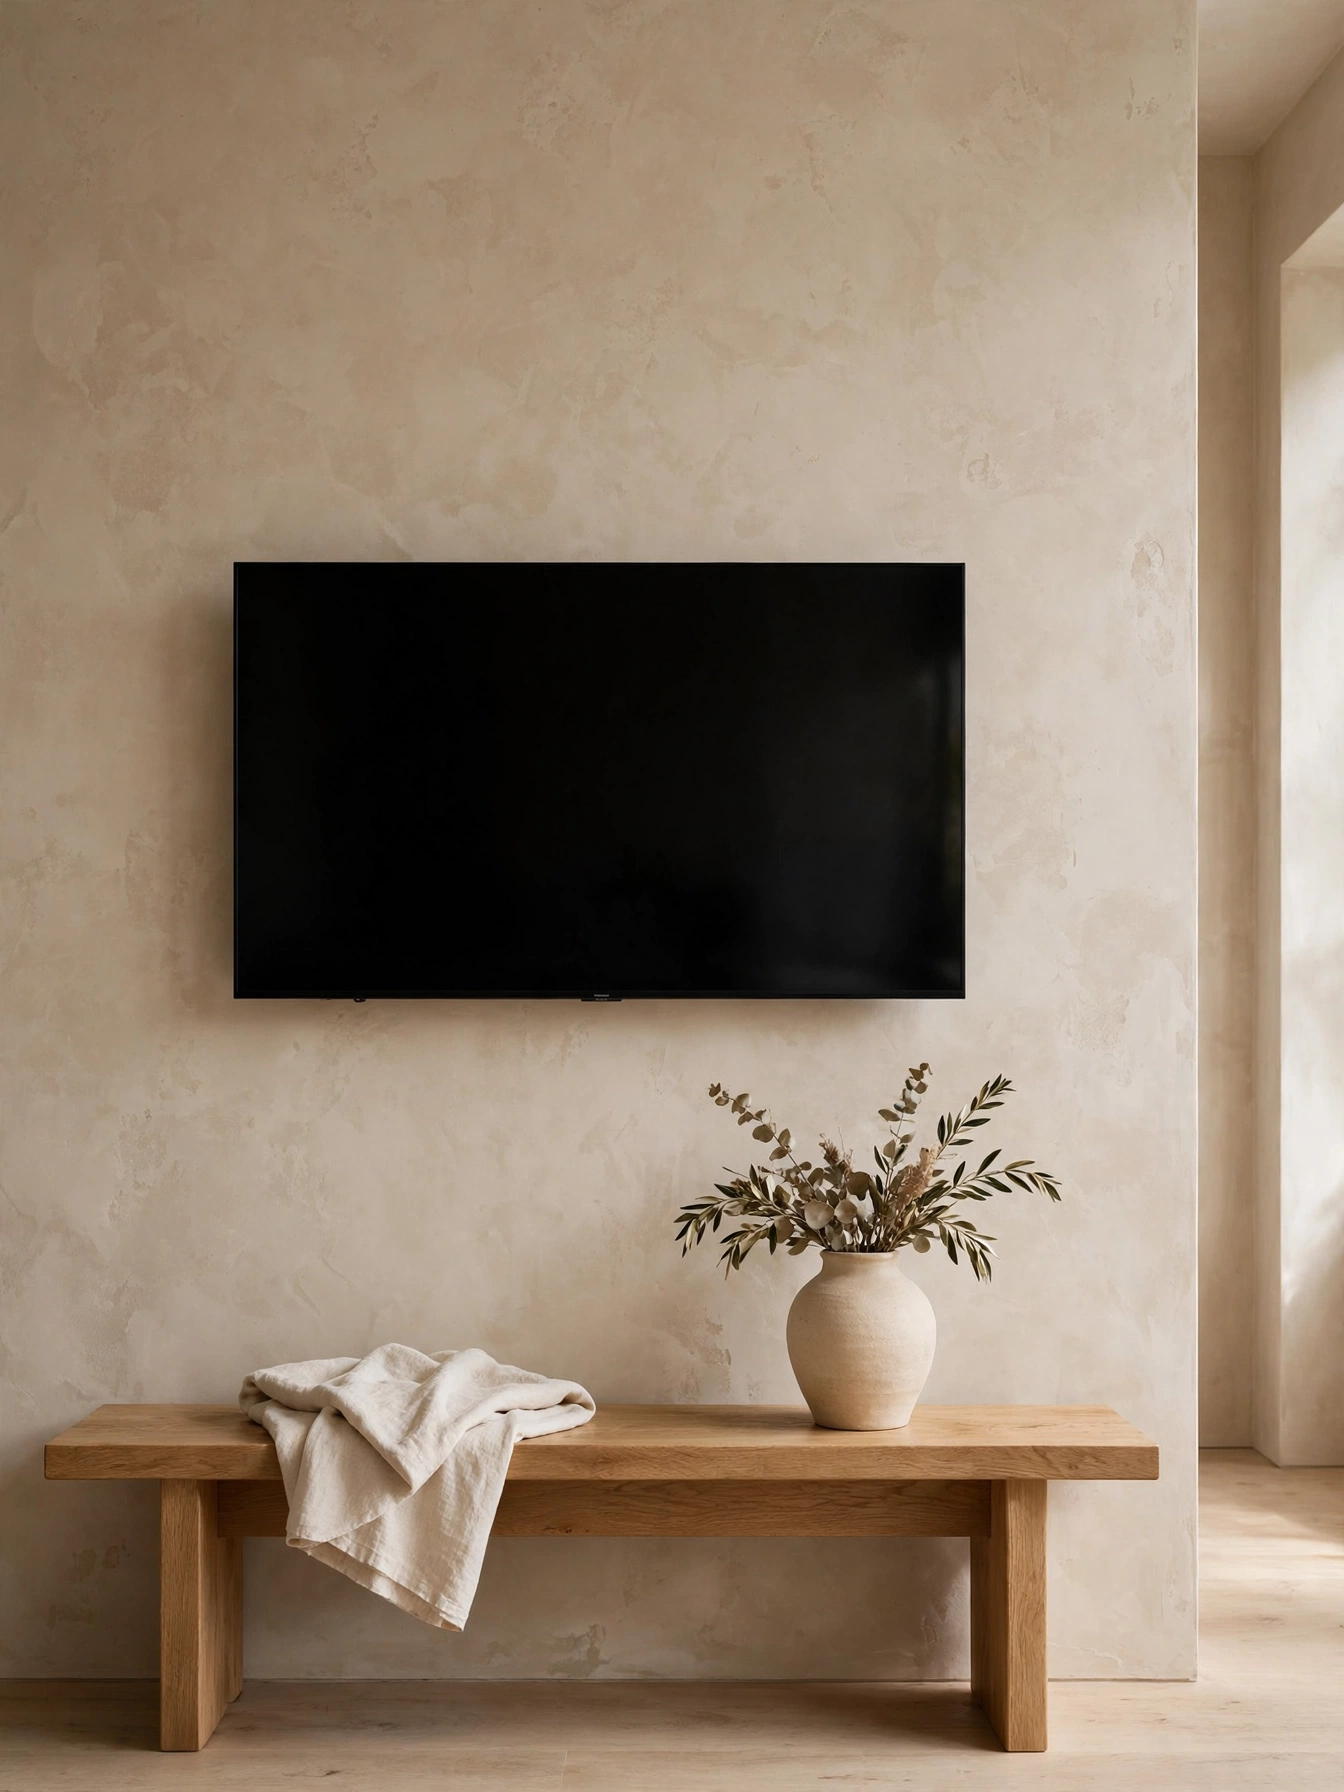
Why This Works:
- Mirrored panels hide the TV completely when closed.
- Mirrors double the perceived room size and light.
- The sliding mechanism feels like a luxury hotel feature.
- Smoked mirror reads sophisticated, never 1980s.
Install a sliding barn-door style track rated for at least twice the panel weight, since a 3 by 7 foot mirror panel weighs 40 to 60 pounds, and use tempered mirror for safety. Custom mirror panels run $400 to $1,200 depending on size and tint, plus $100 to $200 for heavy-duty track hardware. Set the TV on a slim fixed bracket so panels clear it by at least 2 inches. Avoid standard clear mirror floor-to-ceiling behind seating, because it doubles visual clutter, and skip sliding panels on carpet, since the bottom guide drags and derails.
Formal rooms where the TV must vanish suit this idea. The weak spot is fingerprints: mirrors need weekly wiping. Compared with motorized TV lifts at $2,000 or more, sliding mirrors cost half and never break down mechanically. Choose smoked or bronze tint to keep reflections soft.
Pro Tip: Add soft-close dampers to the track for $20, because a slamming 50-pound mirror panel is both startling and dangerous.
Woven TV Wall Ideas
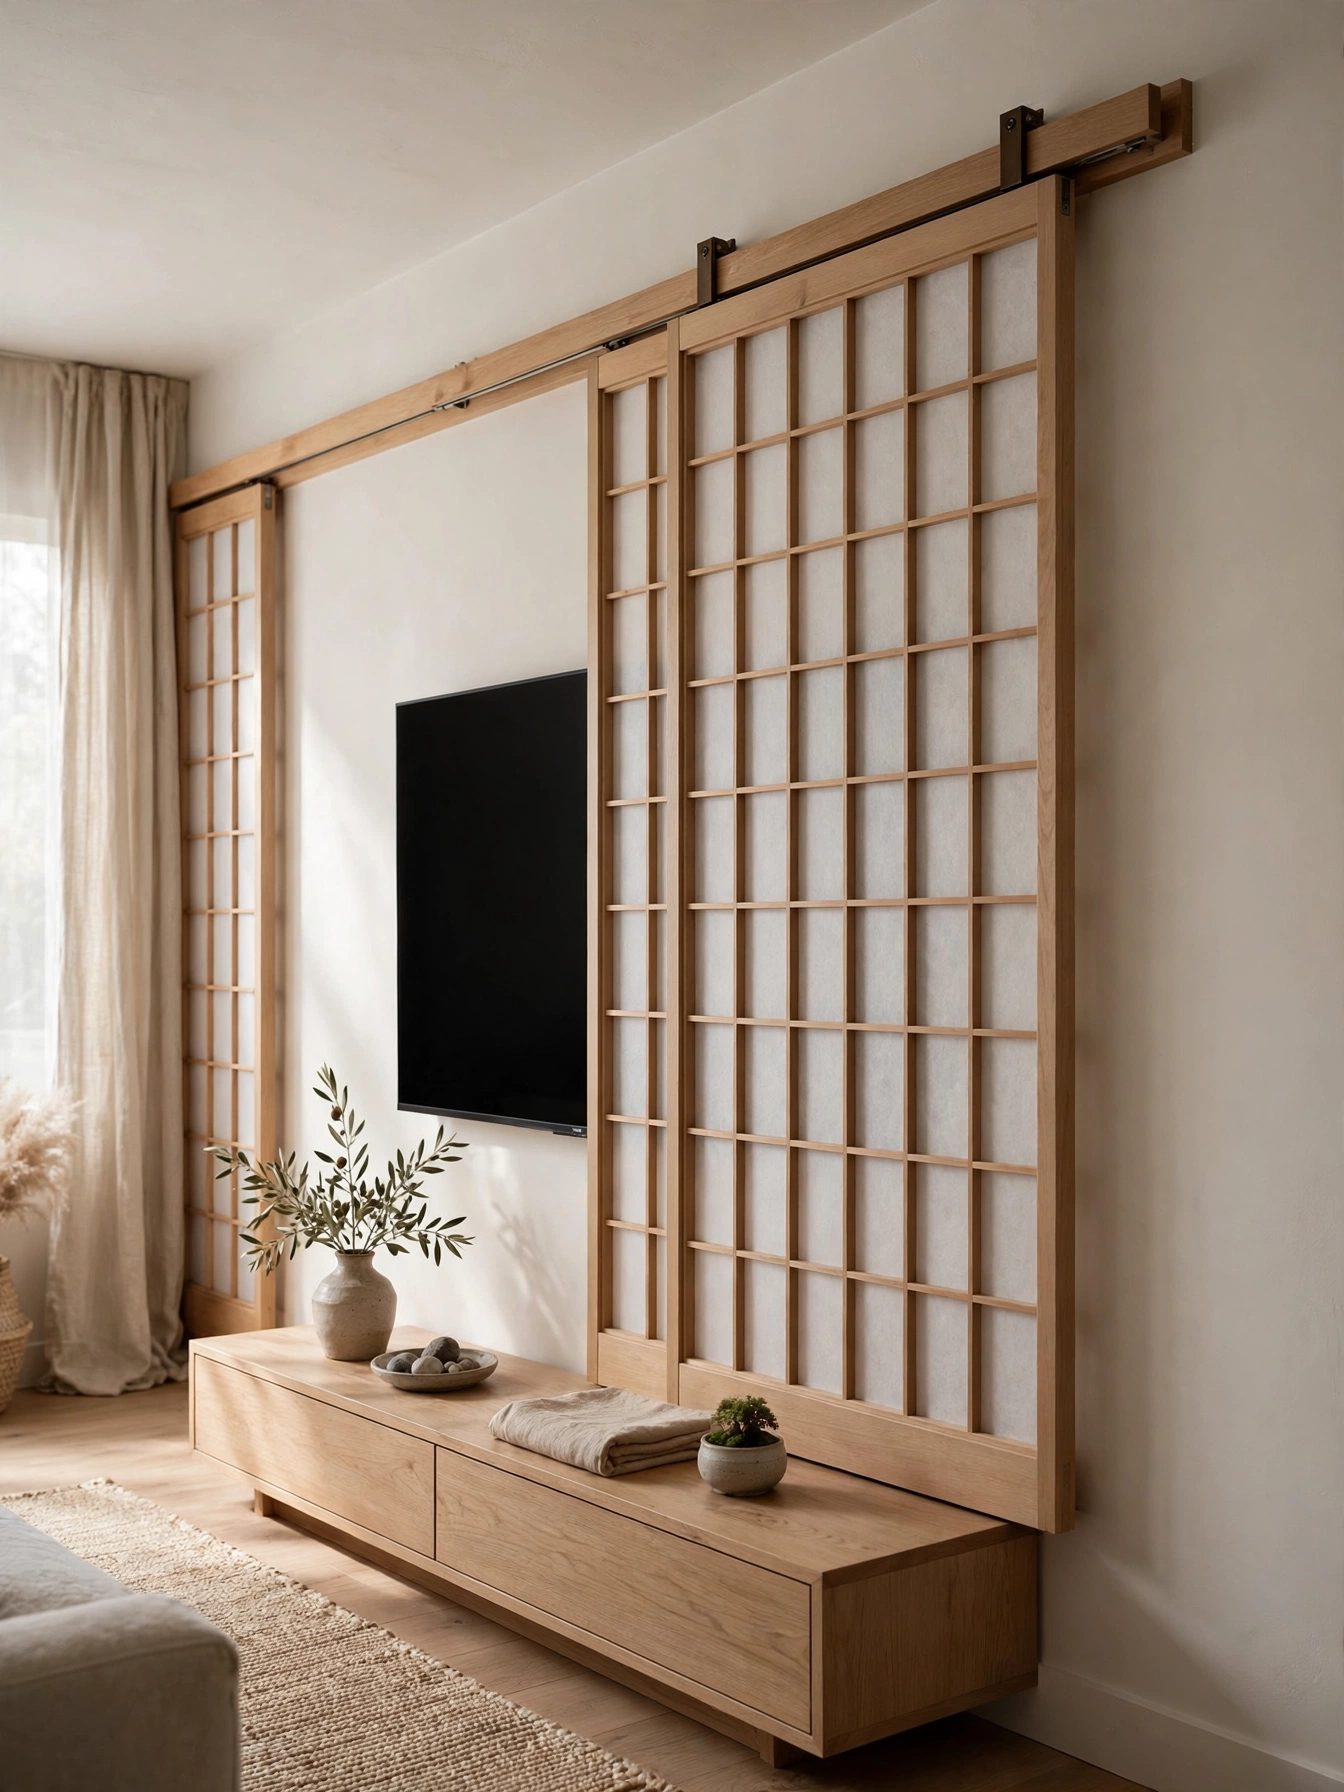
Why This Works:
- Woven pieces soften the tech rectangle with handmade warmth.
- Baskets weigh almost nothing and hang with a single nail each.
- The natural fibers add the texture flat walls lack.
- Everything rearranges in minutes when you want a change.
Arrange 7 to 11 baskets from 10 to 24 inches in diameter around the TV, keeping 4 to 6 inches between each piece and the screen edge. Wall baskets run $20 to $50 each, so the full surround costs $200 to $400. Start with the TV at 42 inches to center, then build outward with the largest basket as the anchor. Use a paper template layout on the floor before nailing. Avoid real food-service baskets with lacquer coatings near heat, since they off-gas, and skip hanging anything heavier than 5 pounds on drywall anchors alone around the TV, because a falling basket can crack the screen.
Boho and eclectic rooms suit this idea. Expect dust on open weaves: vacuum with a brush attachment twice a year. Next to a $600 art collection, the basket surround costs half and delivers more texture. Mix round and oval baskets for the most organic look.
Pro Tip: Spray the basket backs with a light matte sealer before hanging, because untreated seagrass sheds tiny fibers onto the TV top edge constantly.
Sliding Panel Covers
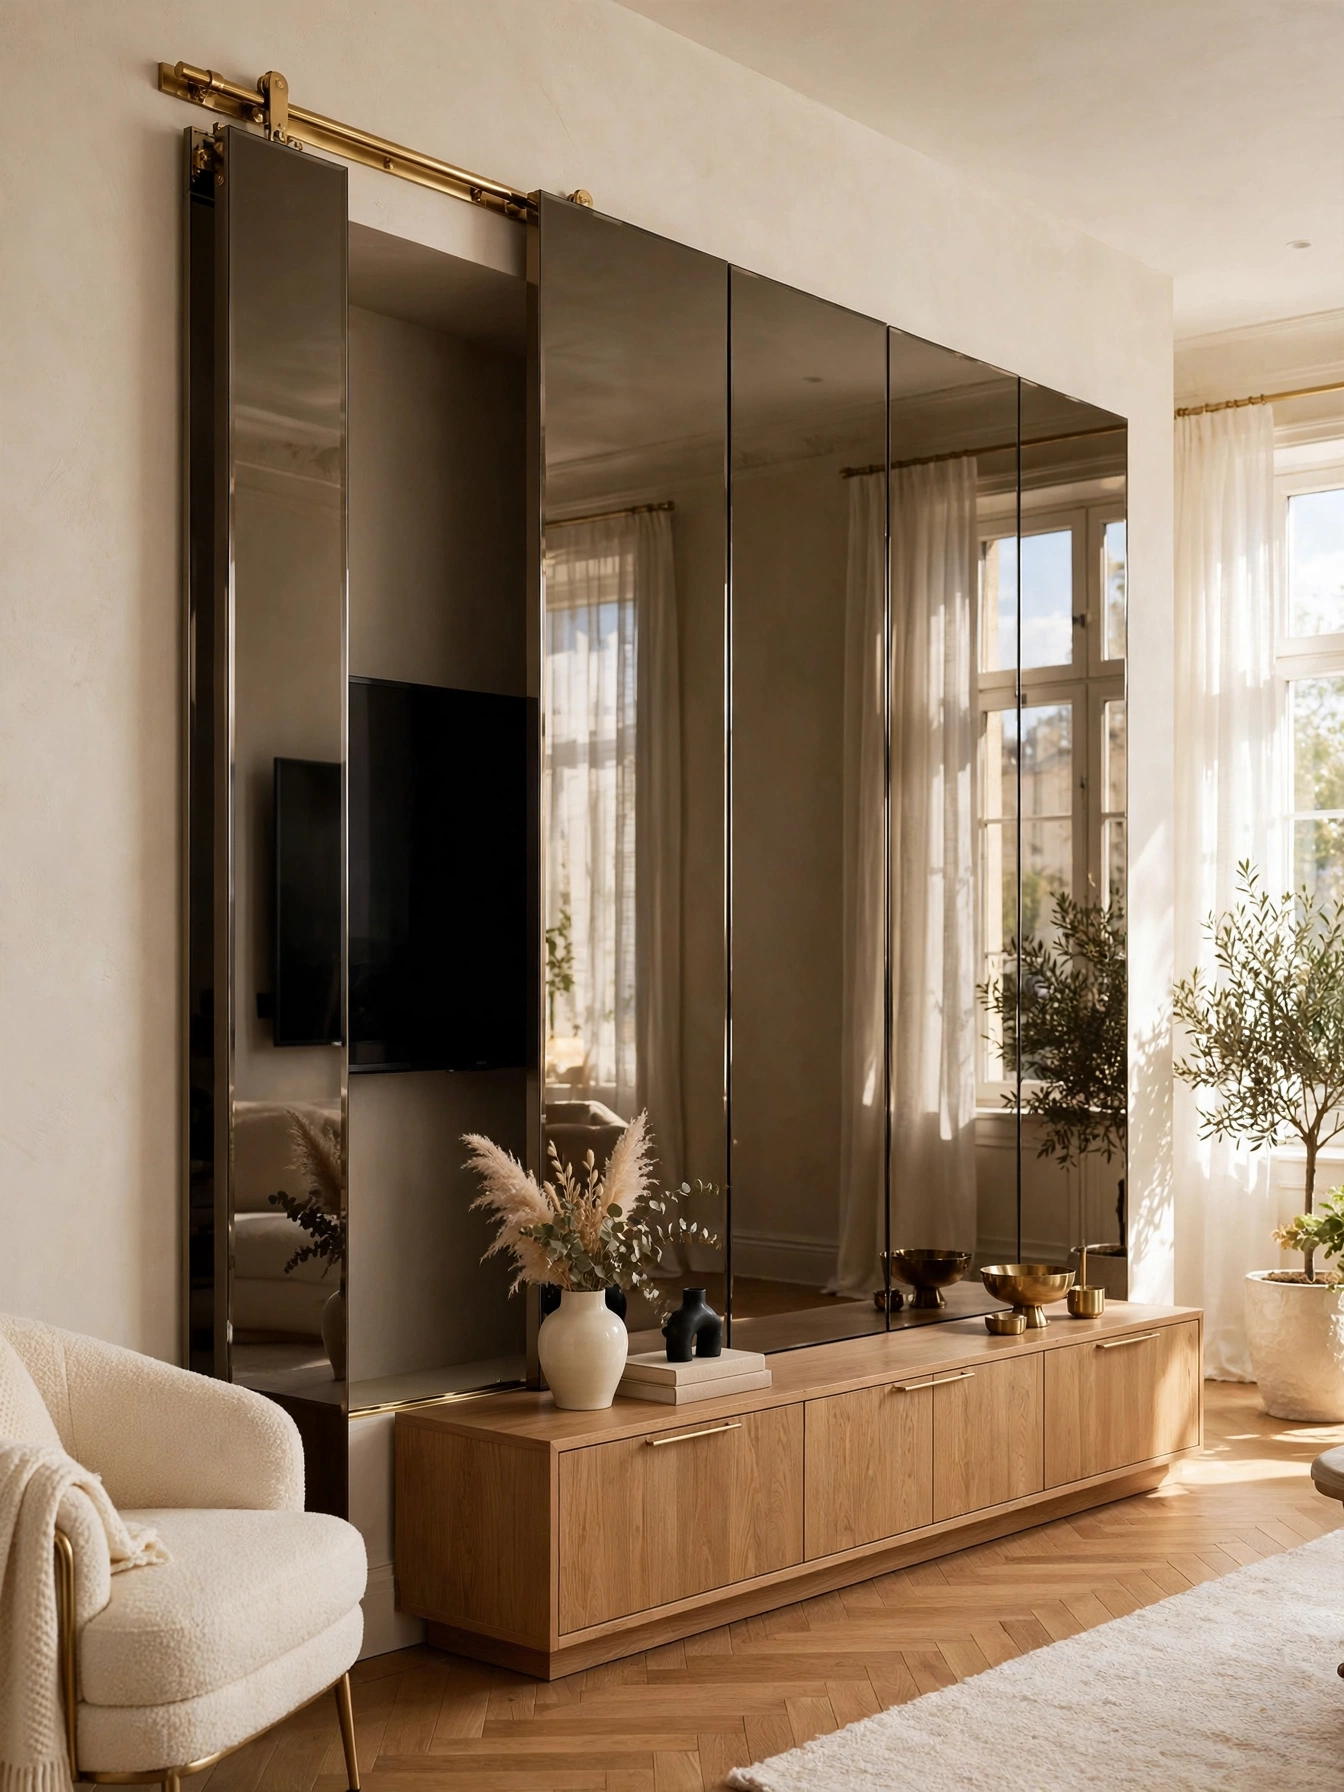
Why This Works:
- Sliding panels hide the TV completely for screen-free evenings.
- The wood-and-paper look adds authentic Japandi calm.
- Panels double as art when closed, not just covers.
- The mechanism is simple, with no motors to fail.
Build or buy two panels each covering half the TV width plus 4 inches of overlap, hanging from a ceiling or wall track rated for 30 pounds per panel. Shoji-style kits run $150 to $400 per panel, and track hardware costs $60 to $120. Seat the TV on a slim bracket so panels glide 3 inches clear of the screen. Keep the track level within 1/8 inch over its length, or panels drift open. Avoid heavy solid-wood panels on standard drywall tracks, because the weight pulls anchors out within a year, and skip paper inserts near fireplaces, since sparks and paper never mix.
Minimalist rooms and screen-time-conscious families suit this idea. Factor in wall space: panels need somewhere to slide, doubling the required width. Compared with motorized art lifts at $1,500 or more, manual panels cost one-fifth. Choose translucent inserts that glow softly with backlight.
Pro Tip: Add a magnetic catch at the closed position for $5, because panels that drift open an inch ruin the hidden-TV illusion.
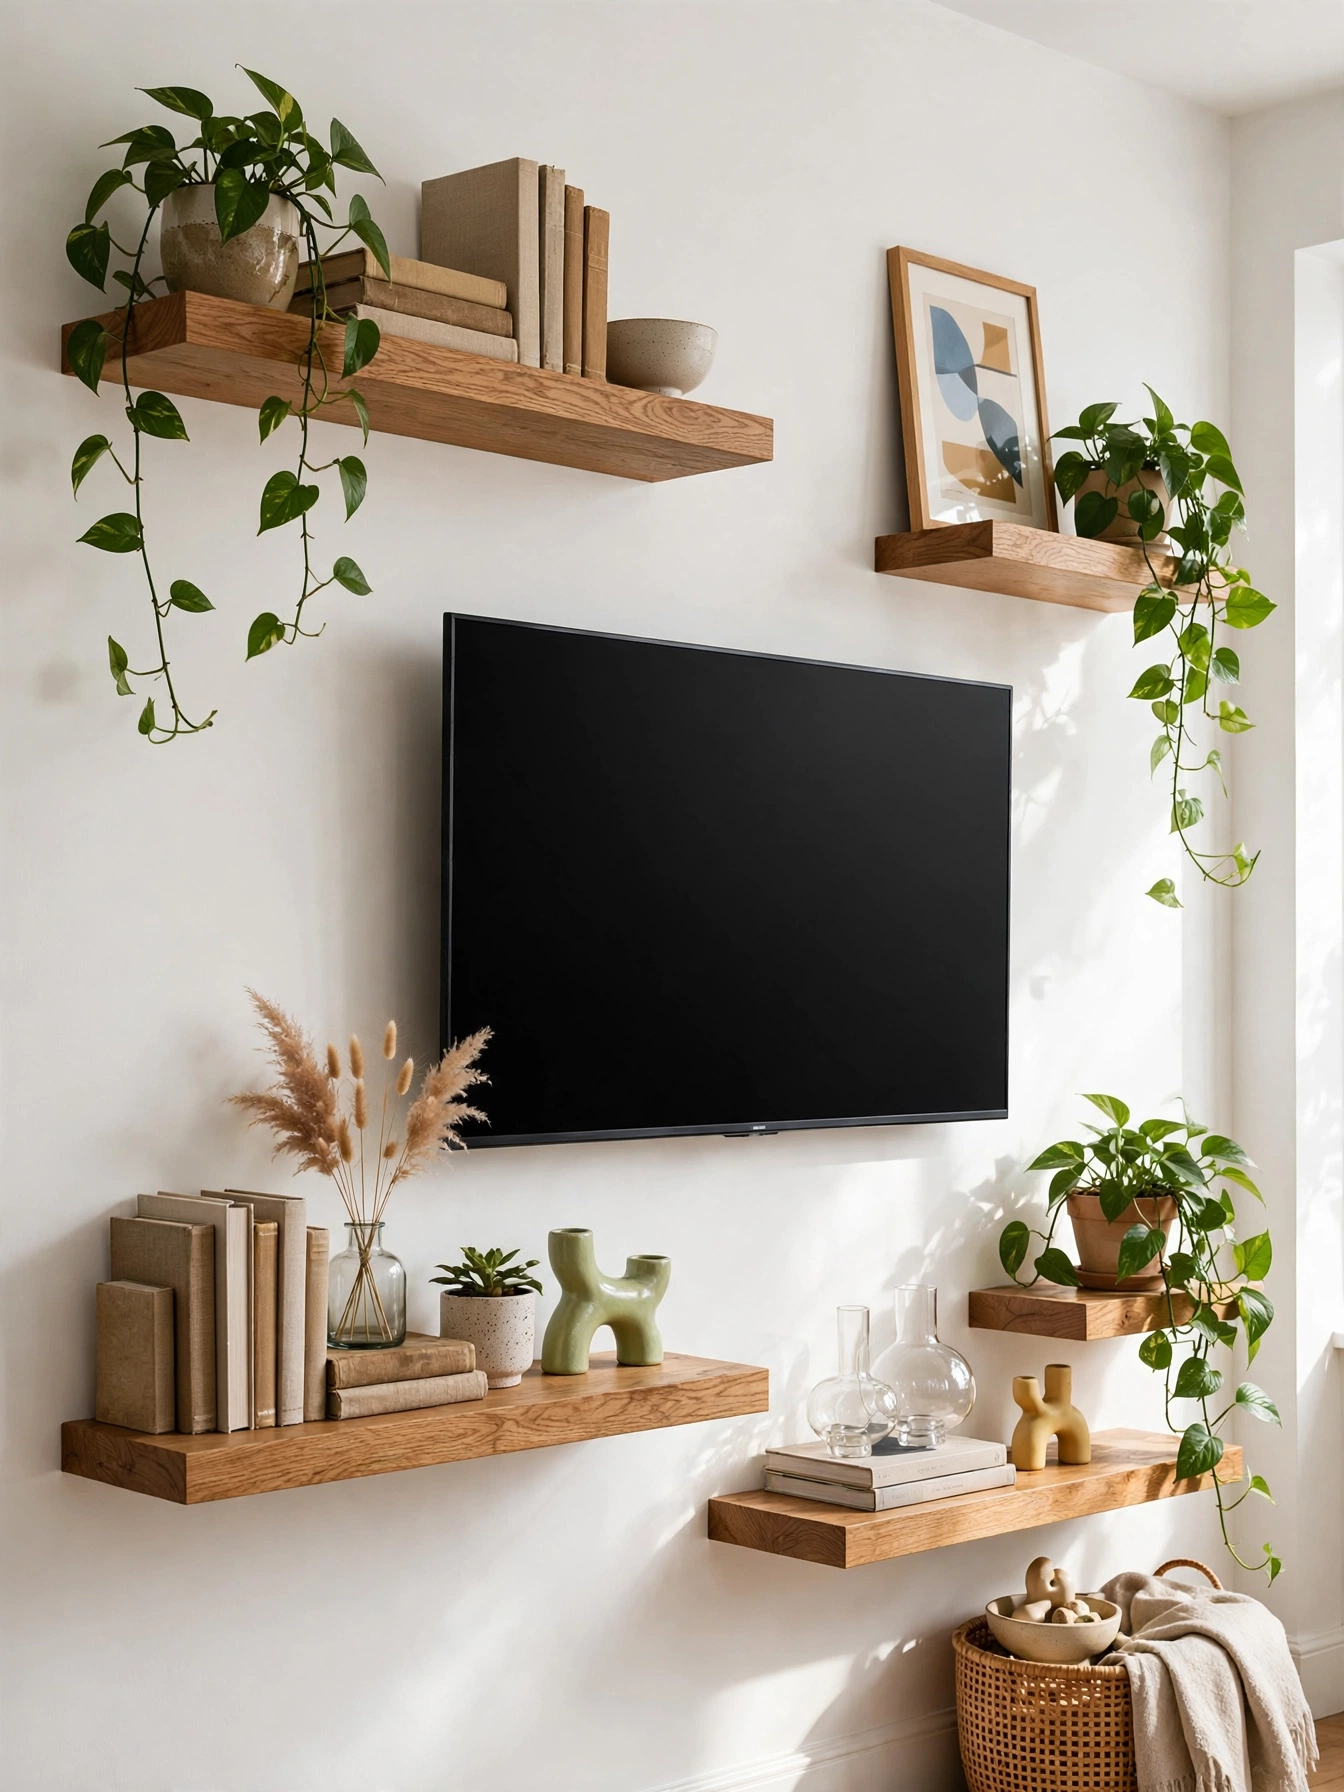
Asymmetric Shelf Styling
Why This Works:
- Asymmetry feels collected and personal, never showroom-stiff.
- Varied shelf lengths create visual rhythm around the screen.
- Plants and objects soften the technology zone.
- The layout adapts to any wall size or shape.
Set the TV off-center within the wall composition, then place shelves 12 to 24 inches long at heights varying by at least 8 inches, keeping every shelf 10 inches from the screen edge minimum. Use hidden brackets rated for 40 pounds per shelf, drilled into studs. Budget $60 to $150 per shelf. Style each shelf with the rule of three: one tall, one medium, one small object. Avoid perfect mirror symmetry, because near-symmetry looks like a mistake while true asymmetry looks intentional, and skip shelves above the TV, since reaching over the screen risks damage.
Creative households that hate matchy-matchy suit this idea. Keep in mind that balance is a skill: asymmetry needs an eye for weight. Compared with symmetrical built-ins, the freeform version costs half and feels more personal. Photograph the wall and flip the image to check balance objectively.
Pro Tip: Squint at the arrangement from across the room, because squinting reveals whether the visual weight balances even when the layout is uneven.
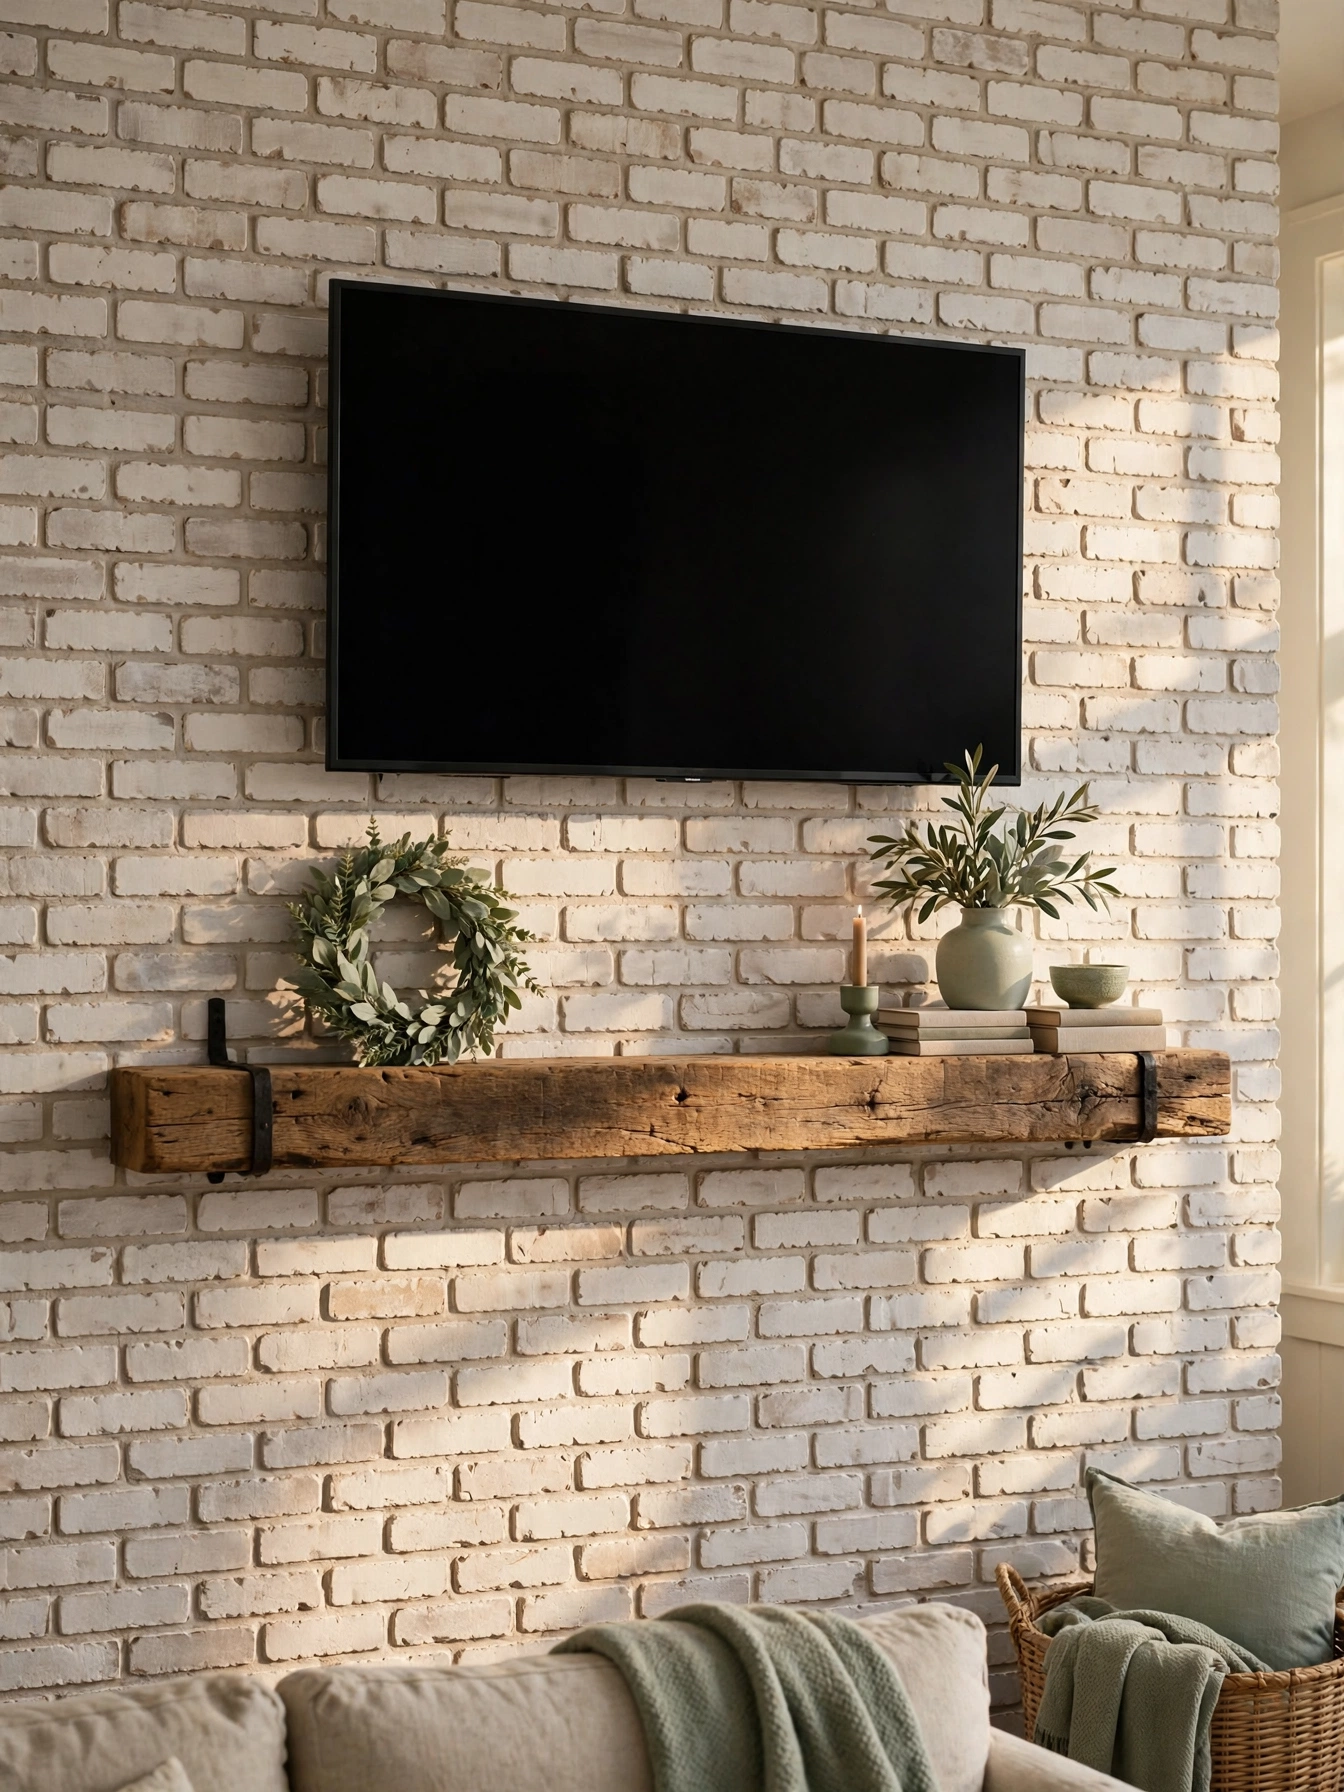
Brick Veneer Warmth
Why This Works:
- Brick gives the TV wall a loft-like authenticity.
- Whitewash keeps the texture while staying bright.
- The rough surface makes the sleek screen look deliberate.
- Thin veneer installs over drywall with no structural work.
Thin brick veneer costs $6 to $12 per square foot in materials, so a 10 by 8 foot wall runs $500 to $950, plus $200 to $400 in mortar and sealer. Each piece weighs under 3 pounds per square foot, which standard drywall handles with thinset mortar. Secure the bracket through the veneer into studs with 4-inch lag bolts. Whitewash with a 50-50 paint-water mix wiped back for texture. Avoid full red brick in small rooms, because the visual weight overwhelms, and skip sealing with glossy sealer, since shine kills the aged look.
Farmhouse and industrial rooms suit this idea. The drawback is dust settling in mortar joints, so vacuum with a brush head yearly. Compared with real brick at triple the cost plus structural work, veneer delivers the look for less. Order 10 percent extra pieces for cuts and breakage.
Pro Tip: Mix bricks from three different boxes as you lay them, because factory batches vary slightly and unmixed boxes create visible patchwork bands.
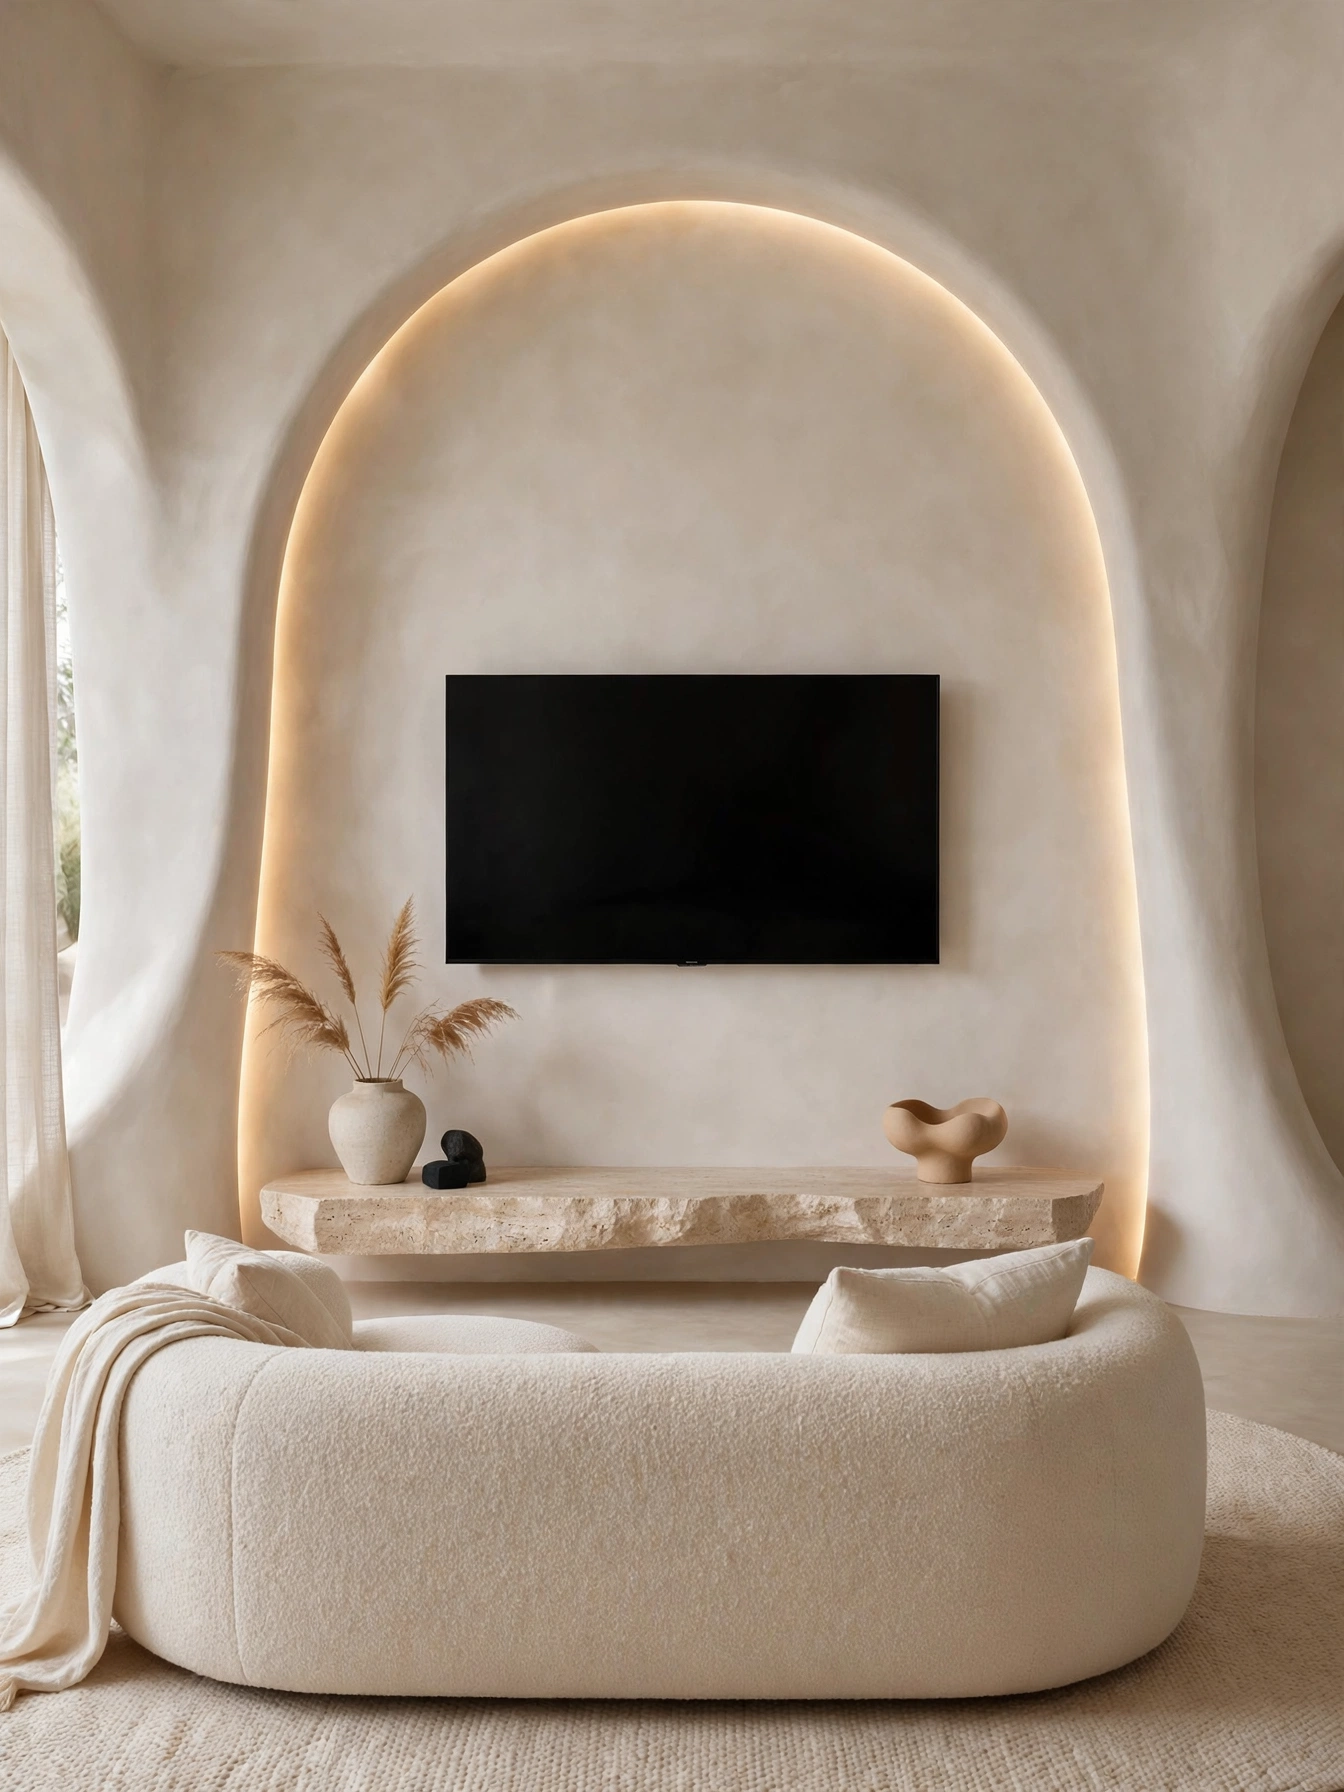
Curved Plaster Alcove
Why This Works:
- Curves turn the TV wall into sculpture, not just a surface.
- The alcove cradles the screen, making it feel integrated.
- Soft cove lighting traces the curve beautifully at night.
- Organic shapes are the defining trend in current interiors.
Frame the alcove with bent plywood or flexible drywall track, building the opening 6 inches wider than the TV on each side, and finish with two skim coats of plaster sanded to 120-grit smoothness. A contractor-built curved alcove runs $1,000 to $2,500, while skilled DIY framing costs $300 to $600 in materials. Run a dimmable LED strip in a recessed channel along the curve before plastering. Use an articulating arm so the TV pulls forward for cable access. Avoid tight curves under a 24-inch radius, because drywall cracks on sharp bends, and skip the alcove in rooms under 12 feet wide, since the depth eats precious floor space.
Design-forward homes suit this idea. Factor in cost and skill: curves are pro territory. Measured against a flat feature wall, the alcove costs five times more but photographs like architecture. Keep the plaster warm white to maximize the sculptural shadows.
Pro Tip: Light the cove at 2700K and dim it to 30 percent for evenings, because the curve shadow play is the whole point and bright light flattens it.
Living Plant Frame
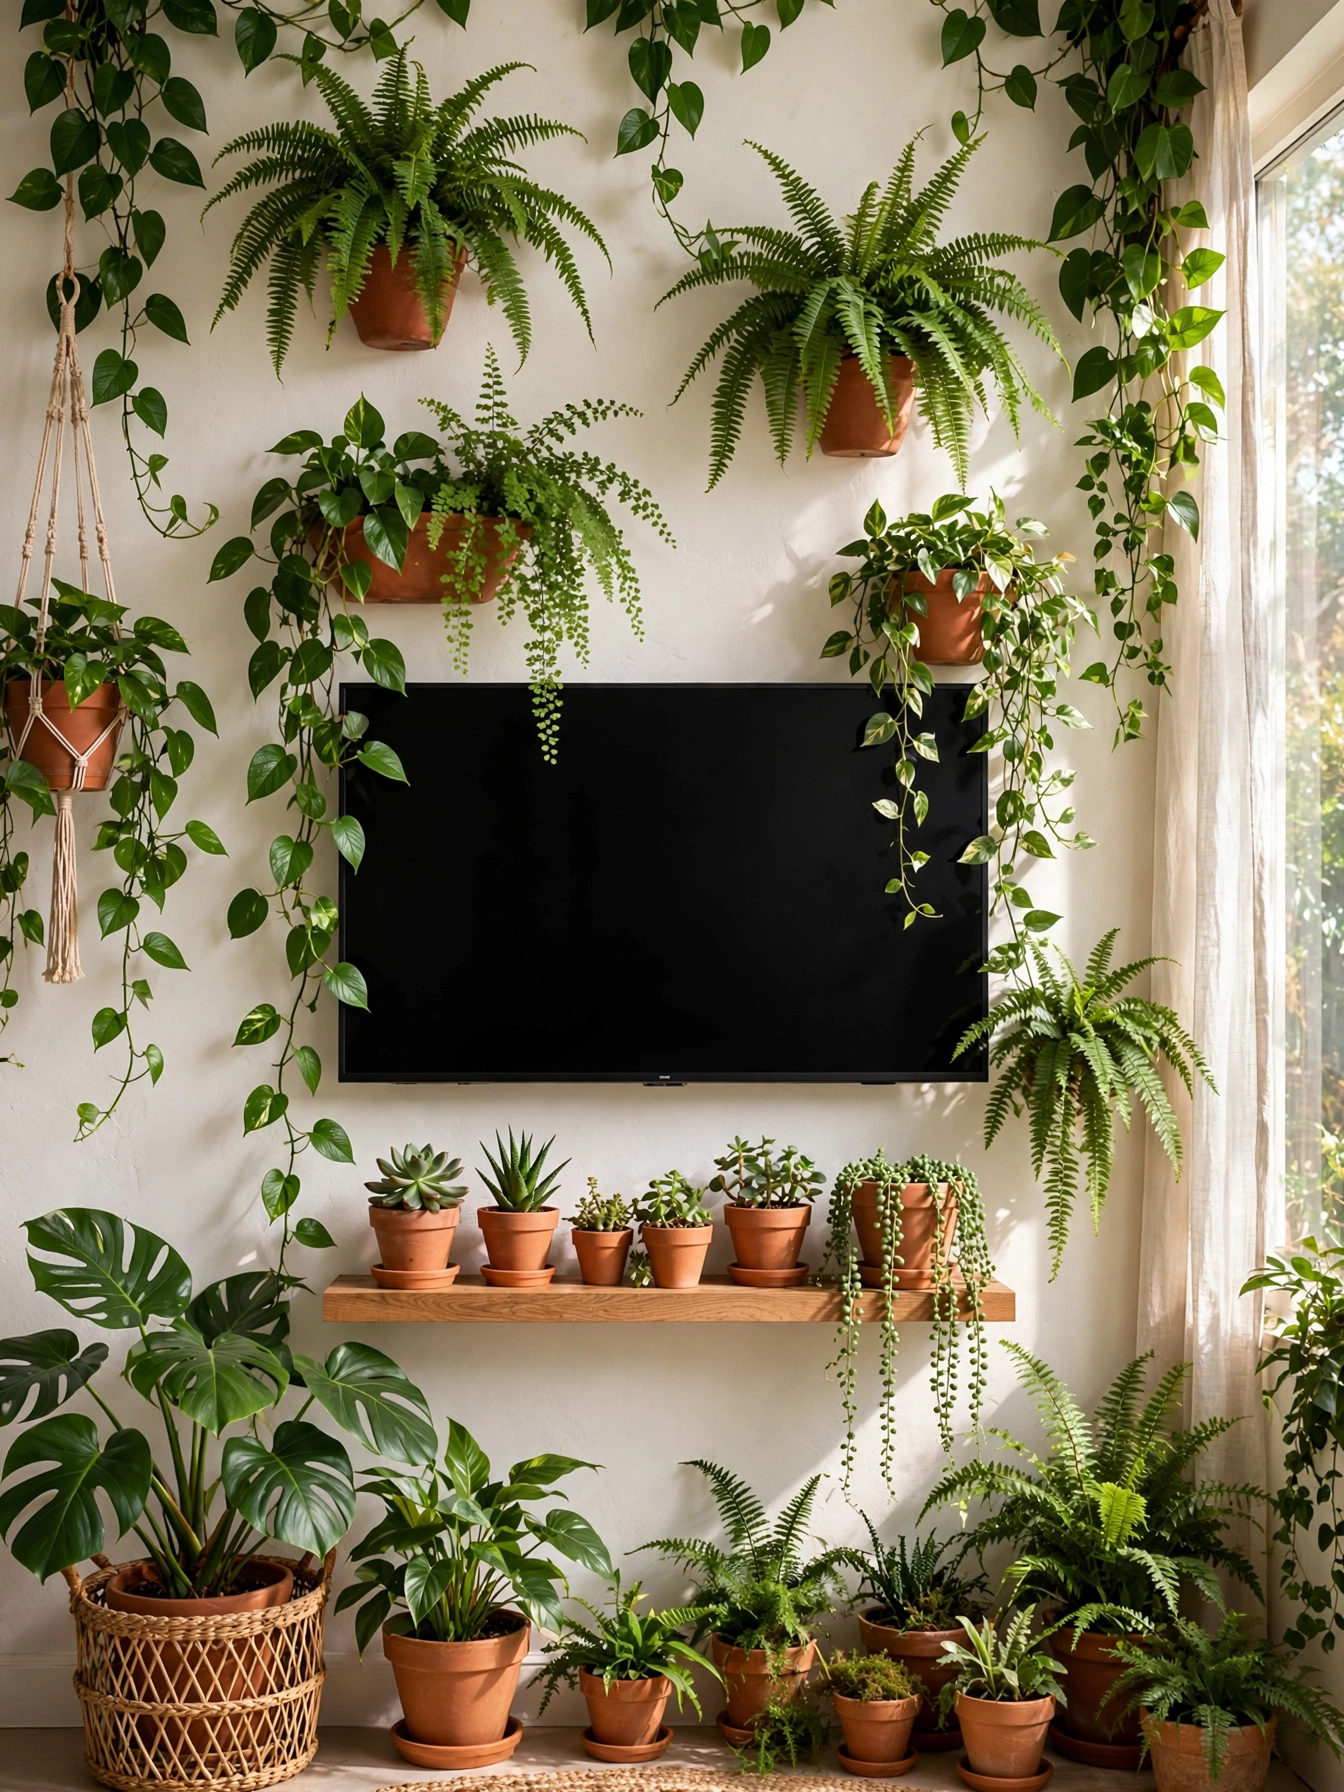
Why This Works:
- Plants literally bring the TV wall to life.
- Green foliage contrasts the black screen better than any paint.
- The jungle look is hugely popular and endlessly photogenic.
- Plants improve air quality while they decorate.
Mount wall planters 8 to 12 inches from the screen edge, keeping trailing plants trimmed 6 inches clear of vents, since blocked TV vents cause overheating. Wall-mounted planters run $15 to $40 each, and a full surround of 10 to 14 planters costs $200 to $400 plus plants. Choose low-light tolerant pothos and philodendron, which thrive 6 or more feet from windows. Water with a long-spout can to avoid splashing the screen. Avoid misting plants near the TV, because moisture and electronics never mix, and skip heavy ceramic planters on drywall anchors alone past 8 pounds, since they need stud mounting.
Plant lovers with bright rooms suit this idea. Expect maintenance: fourteen plants need weekly watering. Measured against a $500 art arrangement, the living version costs similar but grows. The Spruce notes that pothos tolerates the low light behind TVs better than most trailing plants.
Pro Tip: Line each wall planter with a plastic insert, because water seeping through porous planters stains walls within weeks.
Ledge TV Wall Ideas
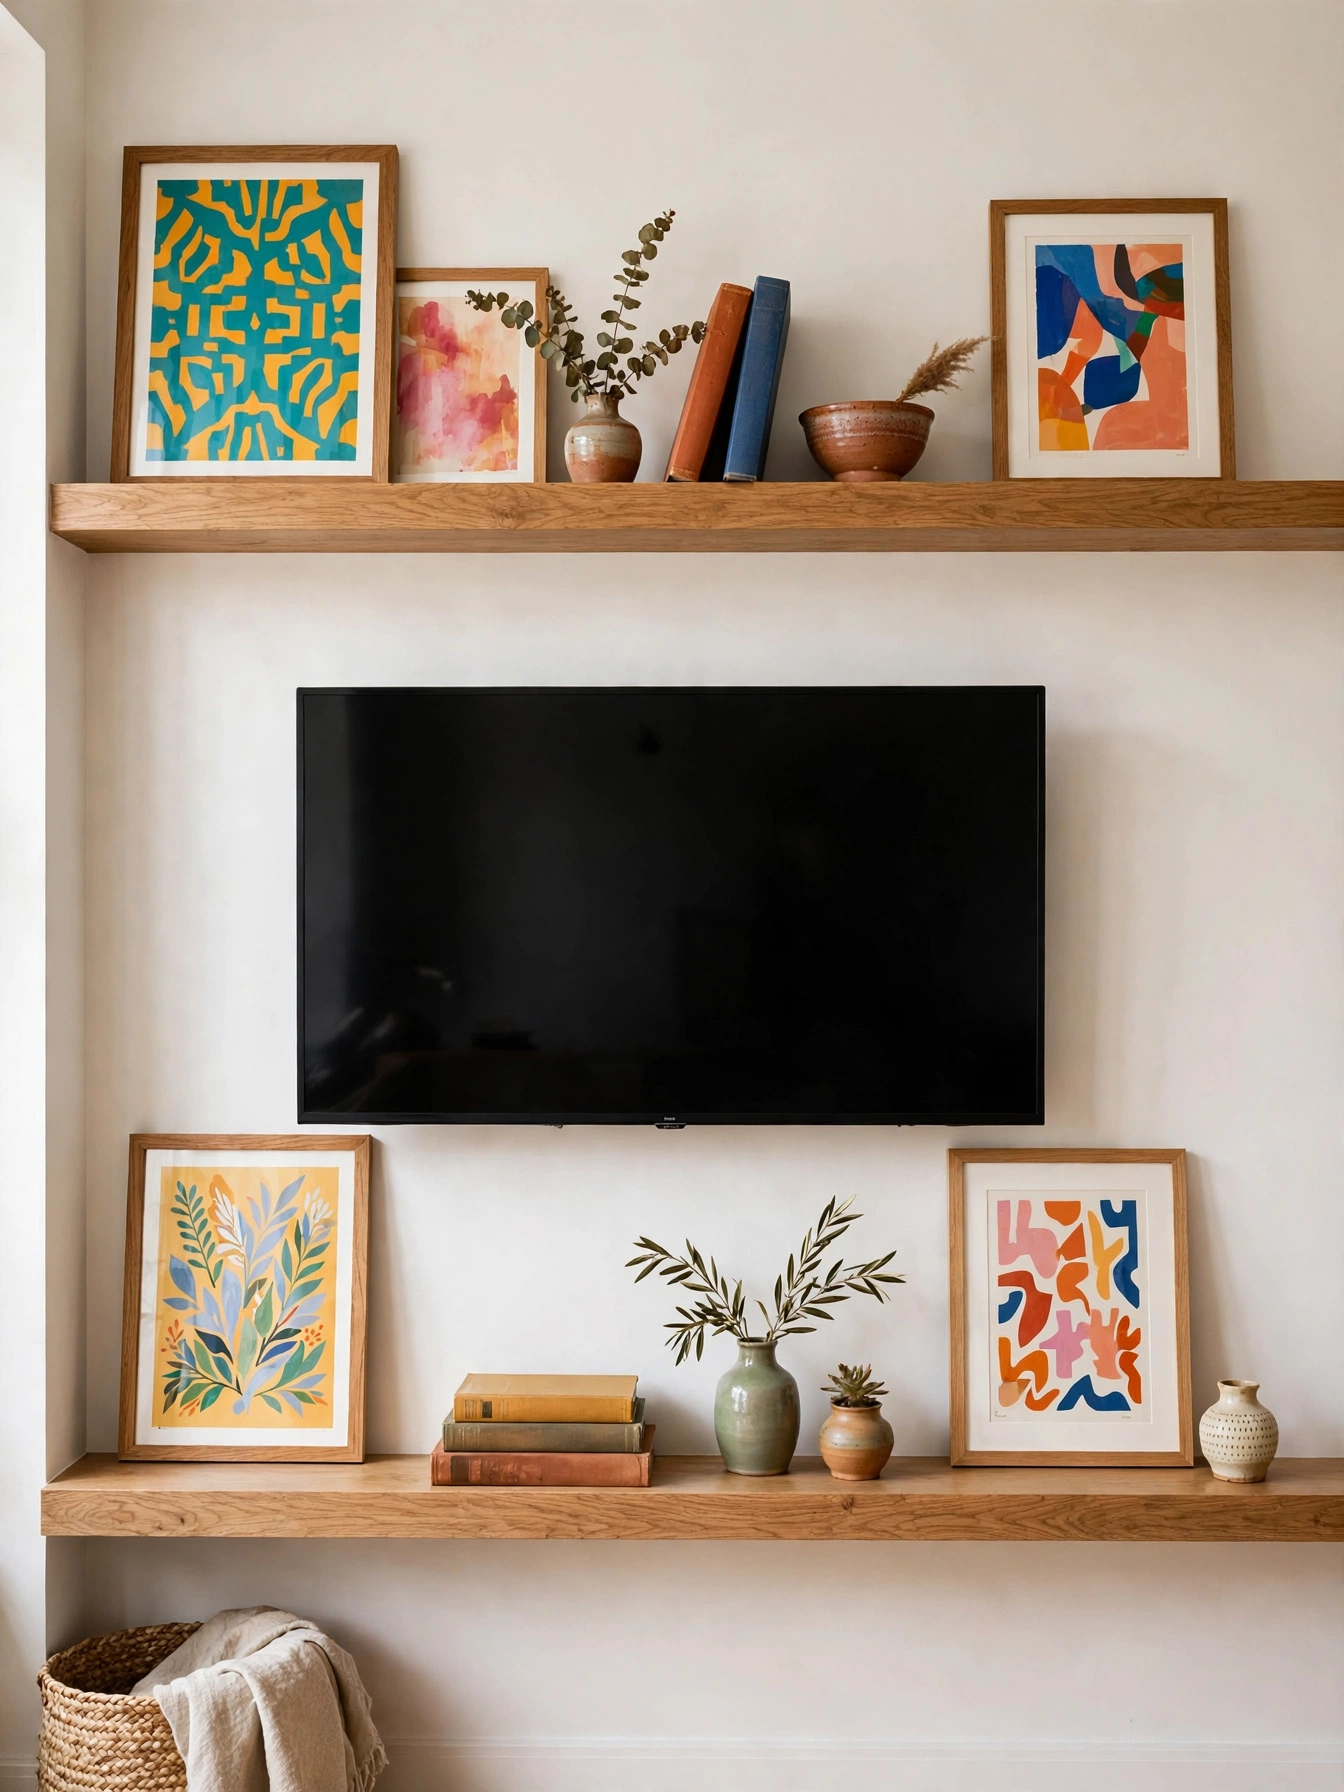
Why This Works:
- Picture ledges let you restyle the TV wall without new holes.
- Leaning art feels casual and changeable, perfect for indecisive decorators.
- Two ledges frame the screen top and bottom like a gallery.
- The whole system installs with four brackets and an afternoon.
Mount ledges 12 inches above and 12 inches below the TV, choosing 48 to 72 inch oak ledges at $30 to $80 each, and secure every bracket into studs since a loaded 72-inch ledge carries 25 or more pounds. Keep ledge depth at 3 to 4 inches, deep enough for frames but shallow enough to stay sleek. Lean frames at a slight 5-degree angle against the wall. Avoid stacking frames two deep, because the back row vanishes and the front row risks toppling, and skip ledges narrower than the TV, since short ledges make the screen look oversized.
Renters and frequent restylers suit this idea. The weak spot is dust on horizontal surfaces. Set against a full gallery wall of nailed frames, ledges cost similar but restyle in minutes. Start with three frames per ledge and add only what the composition needs.
Pro Tip: Put museum putty under the front edge of each leaning frame, because the vibration from a mounted subwoofer walks unsecured frames off ledges over time.
Statement Wallpaper Panel
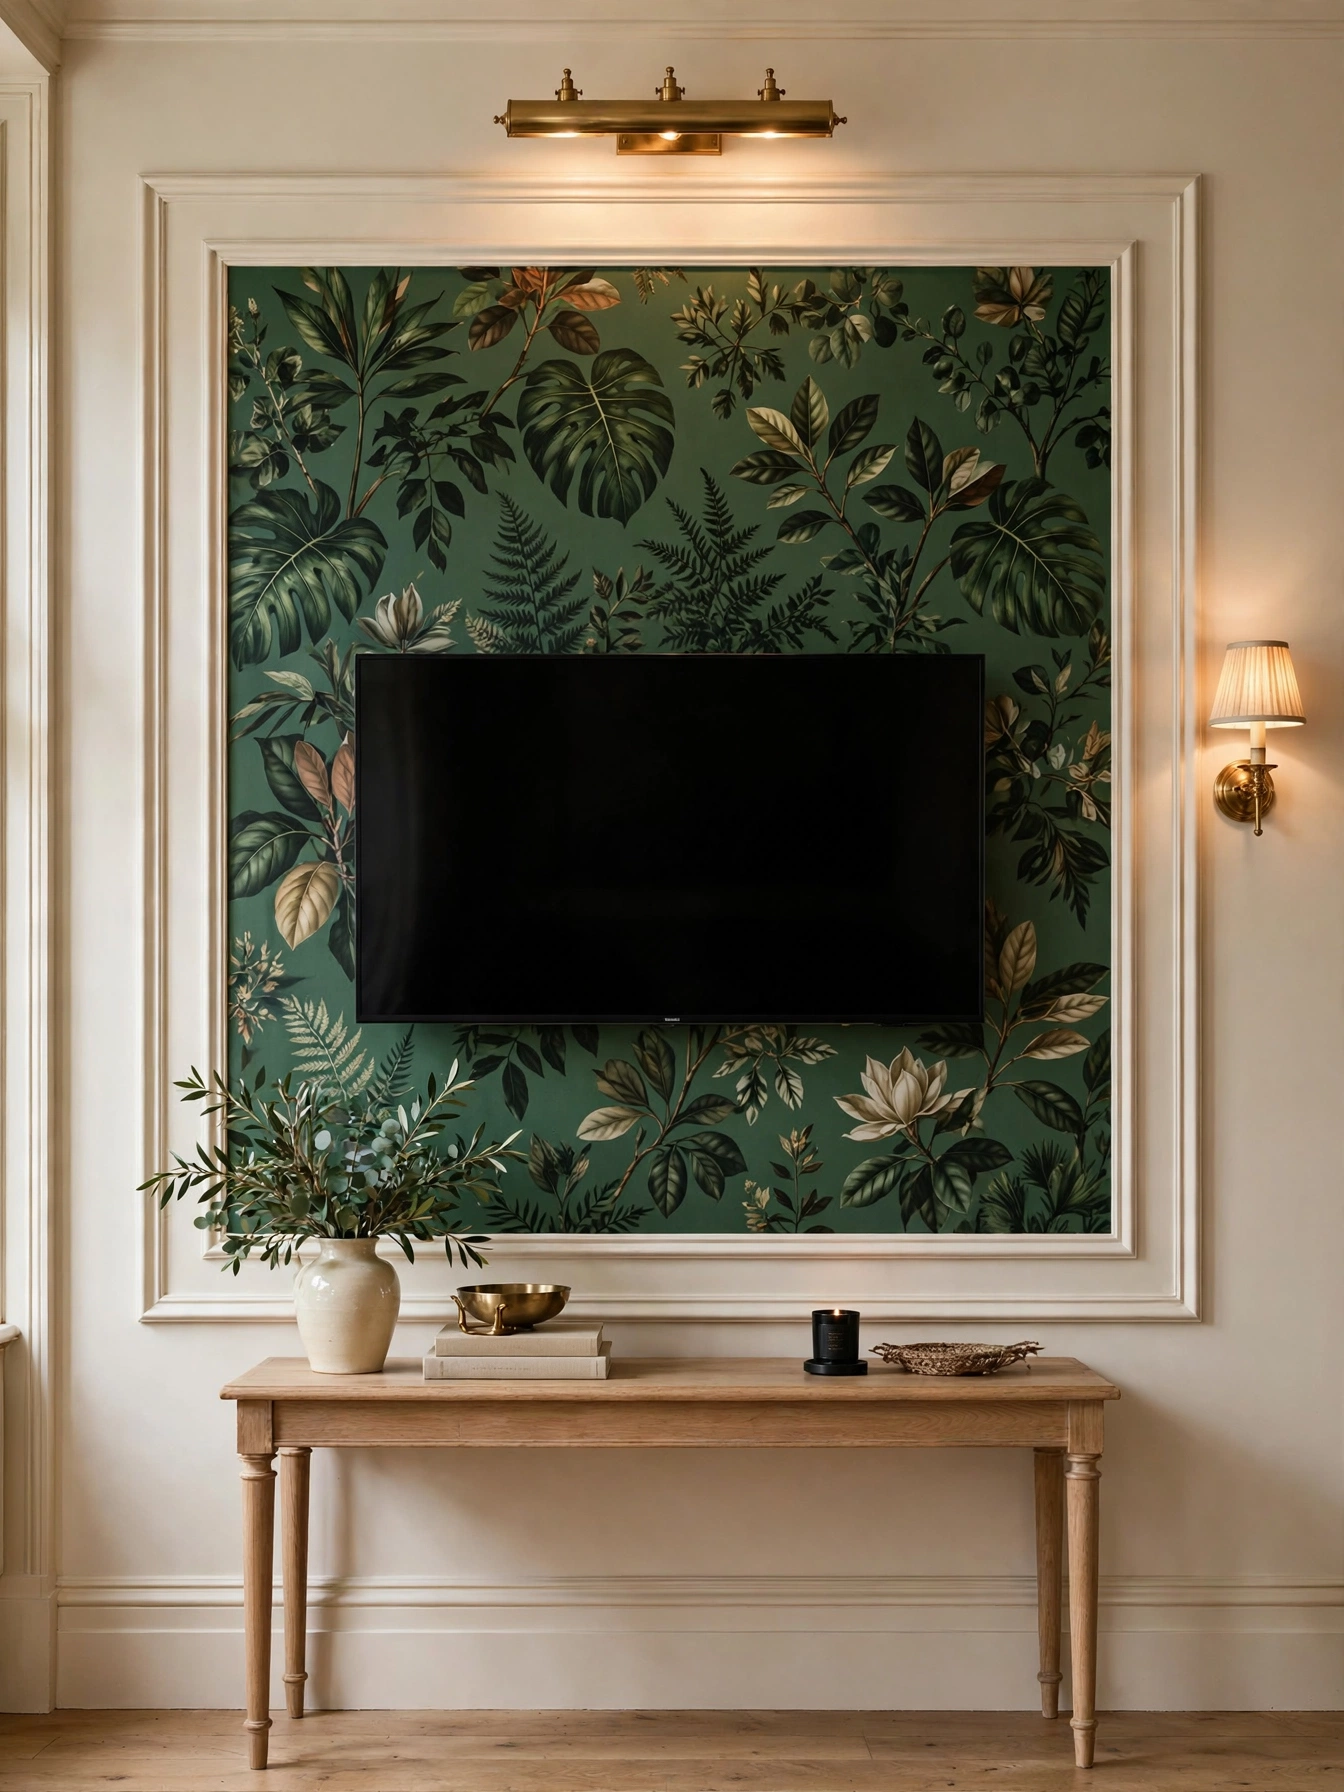
Why This Works:
- One wallpapered panel delivers drama without papering the whole room.
- Molding frames the paper like oversized art.
- The pattern distracts from the black screen beautifully.
- Peel-and-stick options make it fully renter-friendly.
Size the panel 2 feet wider than the TV on each side, typically 8 by 6 feet, and frame it with 2-inch molding painted the wall color. Quality wallpaper runs $50 to $150 per roll, and a panel needs 2 to 3 rolls, while peel-and-stick versions cost $40 to $90 per roll. Run the TV bracket through the paper into studs, cutting a neat X for the bolts. Choose large-scale patterns, since small prints turn to visual noise behind a screen. Avoid papering the full wall behind the TV, because the pattern then competes with the screen instead of framing it, and skip metallic wallpapers near windows, since the shine creates glare.
Pattern lovers afraid of full-room wallpaper suit this idea. Keep in mind pattern matching at seams, so buy 15 percent extra. Set against a $400 art piece, the wallpaper panel costs similar and covers far more wall. A picture light above the panel doubles the gallery effect at night.
Pro Tip: Center the wallpaper’s boldest motif directly behind the TV, because the screen covers the busy center and the calmer edges frame it.
FAQs
What are the best TV wall ideas for small living rooms?
Mount the TV with a slim bracket holding it within 2 inches of the wall to save 8 inches of floor depth. The Spruce recommends sitting 1.5 to 2.5 times the screen diagonal away, so a 55-inch TV needs 7 to 11 feet. Add floating shelves instead of a console.
How high should I mount my TV on the wall?
Center the screen 42 inches from the floor for seated viewing, the height HGTV recommends. Tilt the mount 5 to 10 degrees downward if the TV sits above 48 inches. Never mount above a fireplace mantel taller than 42 inches without a pull-down mount.
Which TV wall ideas hide cables completely?
An in-wall power kit routes cables behind drywall for $50 to $100 with no electrician needed. Paintable cord covers hide cables for $15 per 6-foot section. For the cleanest look, add a recessed outlet directly behind the TV during any wall project.
Can I mount a TV on any wall?
Drywall mounts safely to studs 16 inches on center using lag bolts rated for 4 times the TV weight. Brick and concrete need sleeve anchors and a hammer drill. Avoid mounting on partition walls thinner than 4 inches, since they lack the structure for 50-pound loads.
What size TV fits my living room wall?
The Society of Motion Picture and Television Engineers suggests the screen fill 30 degrees of your view, which means a 65-inch TV suits 8 to 10 foot viewing distances. Leave 6 inches of wall on each side of the screen for balance. Measure twice before buying.
Conclusion
These TV wall ideas prove the screen deserves a real design plan: mount at 42 inches to center, hide every cable, and give the wall texture or art so the TV belongs. Small rooms especially benefit, since a slim wall mount frees up to 8 inches of floor depth. Those three moves fix 90 percent of awkward TV walls. This weekend, measure your viewing distance and check it against the 1.5 to 2.5 times diagonal rule. Follow HomelyCrafter on Pinterest for more ideas. Save this to your Pinterest boards so you can refer back to it!

Muhammad Israr is a home decor enthusiast and the writer behind Homely Crafter. He spends his days researching paint colors, layouts and budget-friendly styling ideas, then breaks them down into practical, easy-to-follow guides so you can decorate with confidence.