
Put every Christmas countertop decoration through the coffee-maker test before it earns a spot: if it blocks the machine you reach for at 6 AM, it will be shoved aside by day two. That simple rule shapes all 23 of these christmas countertop decor ideas 2026, because kitchen counters have to work while they celebrate. Each display below fits beside real appliances, keeps prep space open, and respects heat and water.
This collection keeps each display inside a defined footprint, most between 12 and 24 inches wide, so the cutting board, the kettle, and the drying rack still have room. You will find exact tray sizes, garland lengths, jar volumes, and clearances from burners and sinks. Satin ribbon ties the whole set together, repeating in tags, bows, and swags without shouting.
Work through the ideas in order or jump straight to the counter that needs help first. Start with one display, live with it for two days, and keep it only if the coffee still brews without a shuffle.
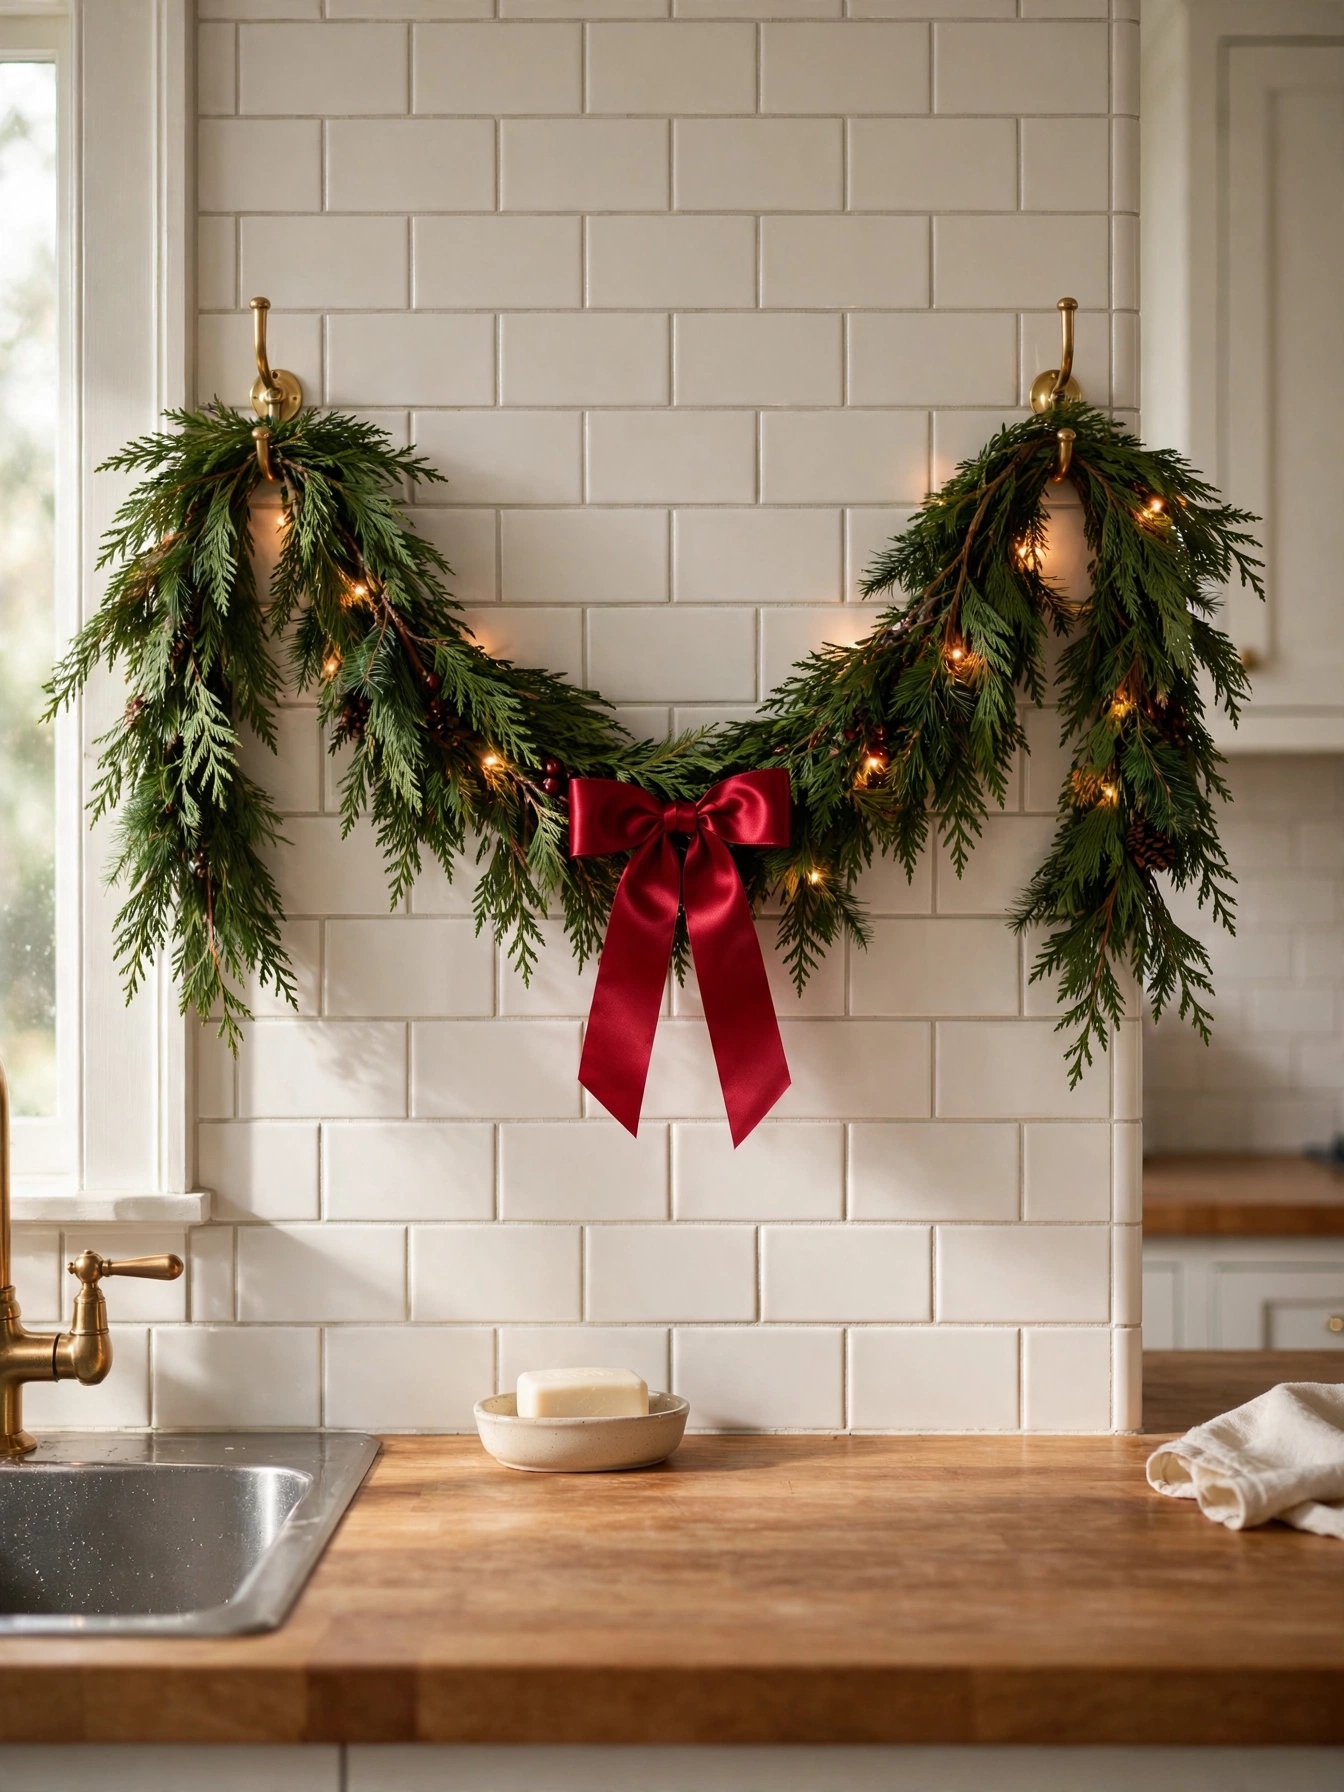
Garland Backsplash Swag
Why This Works:
- A 6-foot cedar garland spans a standard 48-inch backsplash with 12 inches of drape at each end
- Hang it 4 inches above the counter on 3 removable hooks rated for 3 pounds each
- Weave one 40-bulb micro LED strand through the garland at 6-inch spacing
- Tie a 2.5-inch satin ribbon bow at the center and keep every needle a foot clear of the nearest burner
Drape a six-foot cedar garland along the backsplash ledge between the sink and the stove, letting 12 inches spill past each end of a 48-inch run. Pin it with three removable hooks set 18 inches apart and rated for three pounds each, so the swag cannot slide when you wipe the counter. Fresh garland stays green about two to three weeks indoors when kept away from heat, which sets your install window for mid-December. Avoid plastic garland with a glossy finish because it reflects kitchen light harshly and reads as fake from six feet away.
Narrow galley kitchens gain the most from this swag because it decorates vertical space without stealing a single inch of prep area. The cedar scent greets you at the sink, and the ribbon bow repeats at the window for a matched pair. The trade-off is needle drop: fresh cedar sheds onto the counter after about ten days, so shake the garland over the trash every third morning. If your backsplash sits behind a gas range, switch to faux cedar there and keep real greenery on the sink side.
Pro Tip: Mist the cedar lightly every four days with a spray bottle. One ten-second misting keeps the needles supple for twenty-one days instead of fourteen.
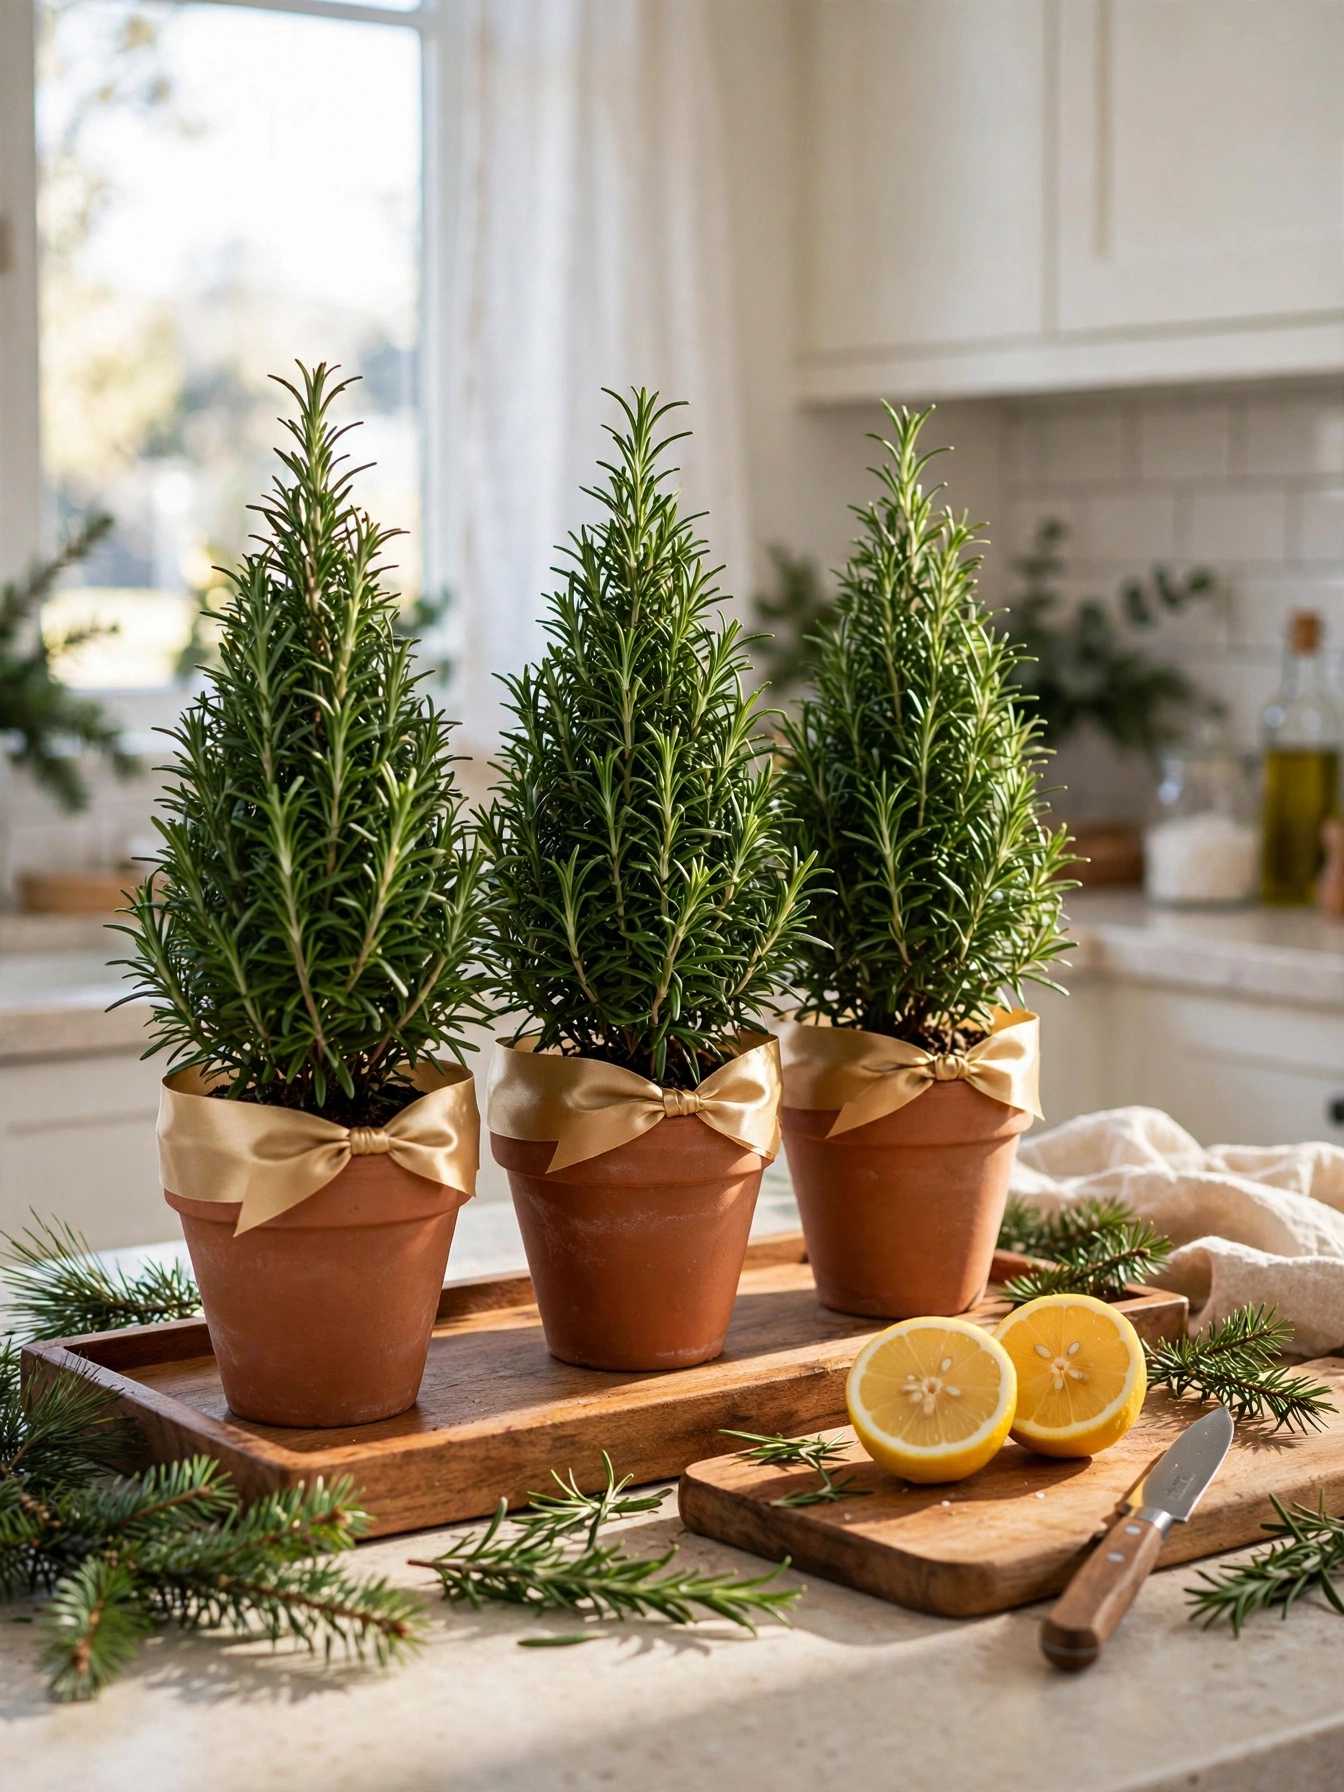
Rosemary Tree Trio
Why This Works:
- Three rosemary cones at 10, 12, and 14 inches tall create a stepped trio on one tray
- Set each cone in a 4-inch terracotta pot with a saucer to catch watering drips
- Rest the trio on an 18-inch by 12-inch wooden tray, 24 inches from the sink faucet
- Wrap one 18-inch length of gold satin ribbon around each pot as a collar
Group three rosemary cones in graduated heights of ten, twelve, and fourteen inches on an eighteen-inch wooden tray beside the prep zone. Each cone grows in a four-inch terracotta pot with a saucer underneath, which catches the two ounces of water each plant needs twice a week. Keep the tray twenty-four inches from the faucet so dish spray never soaks the foliage, and rotate each pot a quarter turn every three days for even growth. Avoid placing the trio inside a closed cabinet overnight because still air encourages mold on rosemary in under a week.
Cooks who snip fresh herbs daily get a working decoration here, since rosemary seasons roast potatoes and stuffing straight from the counter. The cones read as miniature trees, so they carry Christmas without a single ornament. One drawback is light: rosemary wants six hours of bright light daily, and a north-facing counter will yellow the lower needles within three weeks. In a dim kitchen, swap one cone for a faux rosemary cone and keep two live ones by the brightest window.
Pro Tip: Snip from the top two inches of each cone only. Cutting higher keeps the cone shape intact for eight weeks instead of collapsing it.
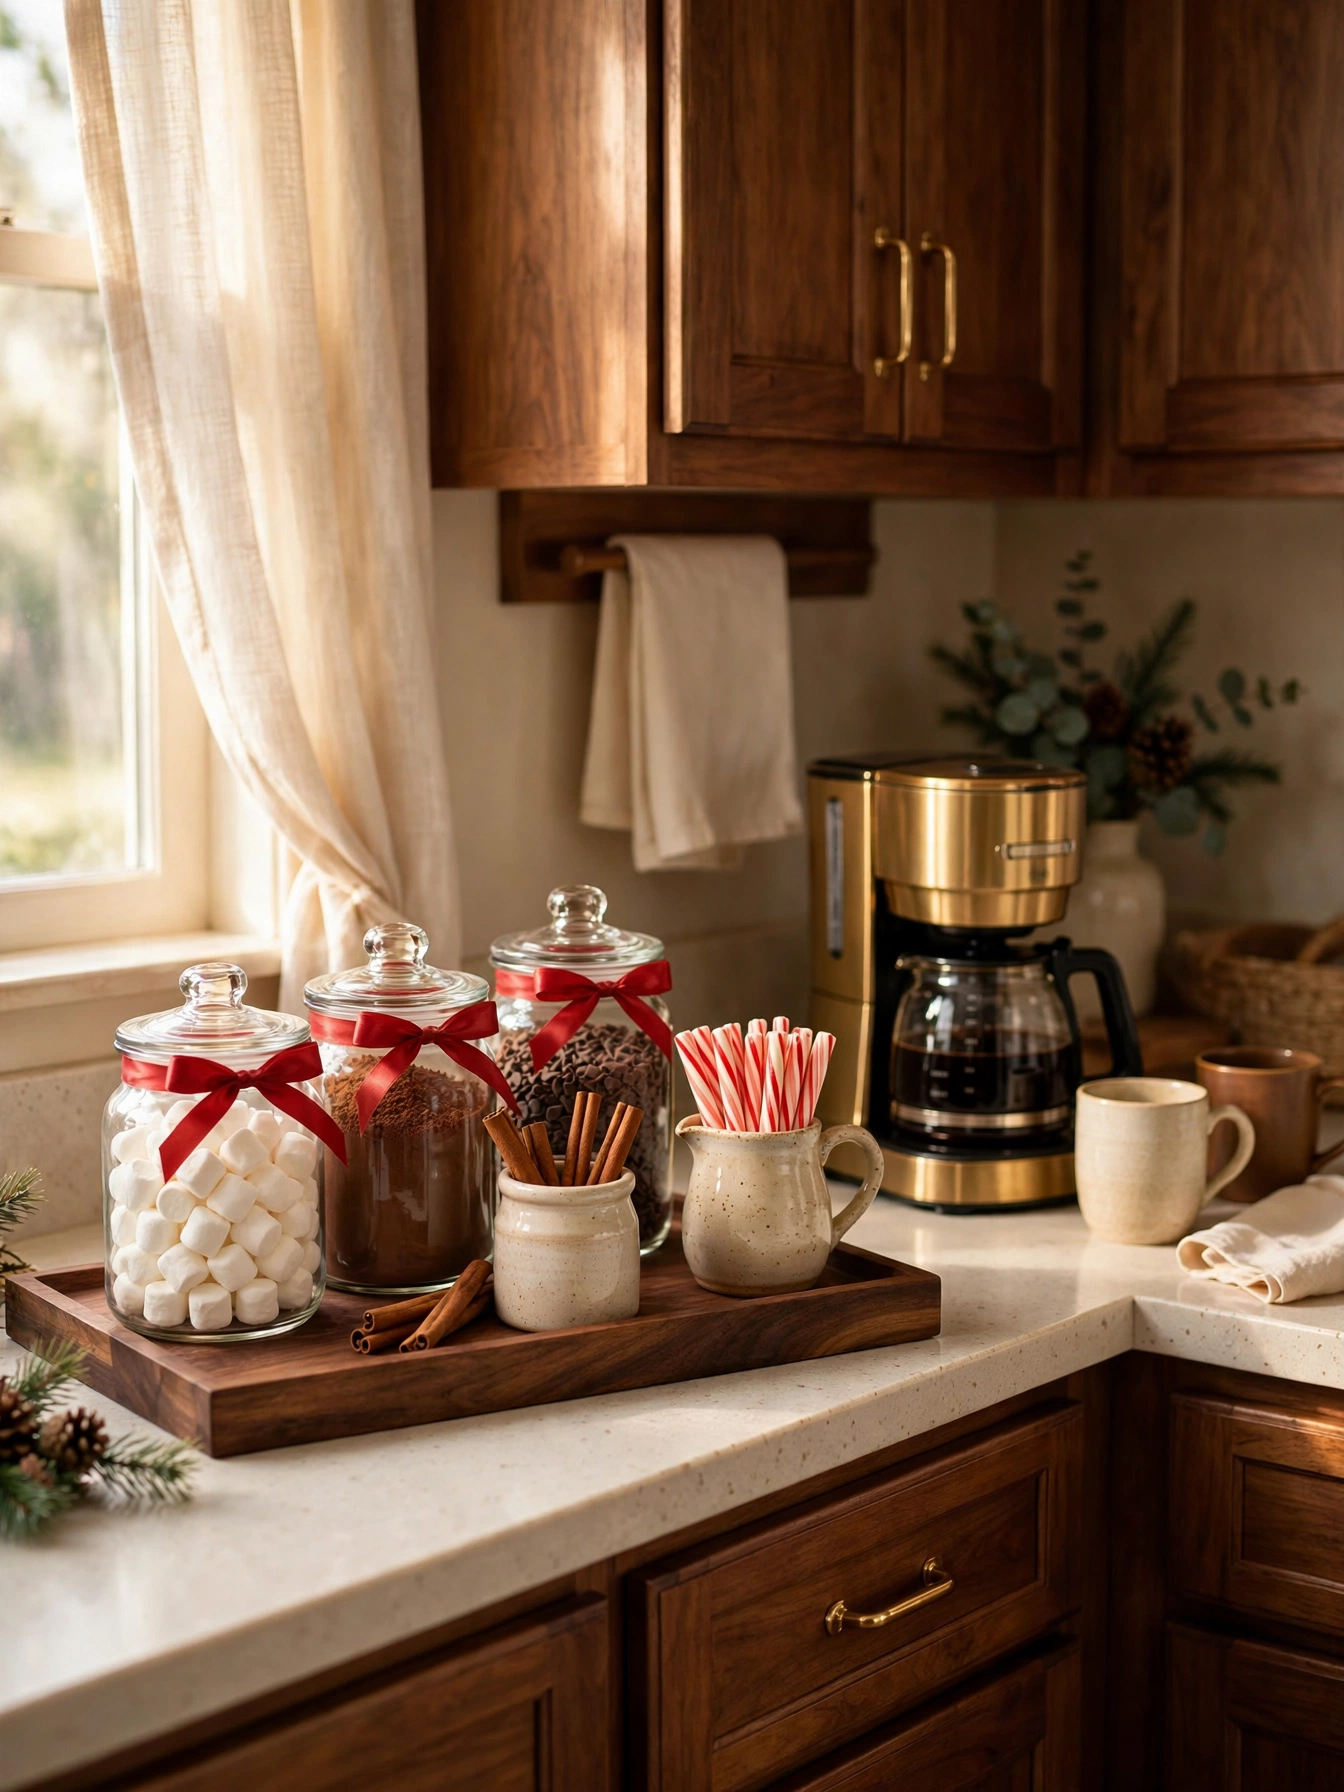
Christmas Countertop Decor Ideas 2026: Cocoa Bar
Why This Works:
- A 16-inch by 12-inch walnut tray holds the whole cocoa bar inside one 24-inch counter zone
- Two 32-ounce glass jars hold cocoa mix and mini marshmallows with airtight lids
- Four 12-ounce mugs hang from a 10-inch mug rail at the back of the tray
- Keep the tray a full 18 inches beside the coffee maker so steam never fogs the jars
Corral the cocoa bar on a sixteen-inch walnut tray set beside the coffee maker, with two thirty-two-ounce jars, four mugs, and a small pitcher of peppermint sticks. Fill one jar with cocoa mix and the other with mini marshmallows, leaving two inches of headroom in each so a scoop fits without spilling. The ten-inch mug rail at the back keeps handles off the counter and frees roughly forty square inches of tray space for a creamer pitcher. Avoid storing chocolate squares in an open bowl here because steam from the coffee maker softens them within an hour and they bloom white by evening.
Families with early risers use this station hardest, since kids can build their own cocoa while adults brew coffee alongside. The tray contains every crumb and drip, so cleanup means lifting one board and wiping beneath it. The catch is sugar creep: cocoa dust settles on the tray daily, so a thirty-second wipe each night keeps the station presentable. If your counter runs under forty-eight inches total, shrink the bar to one jar and two mugs rather than crowding the prep zone.
Pro Tip: Freeze peppermint sticks in a zip bag for twenty minutes before displaying them. Chilled sticks snap cleanly and stay glossy for three weeks instead of going sticky.
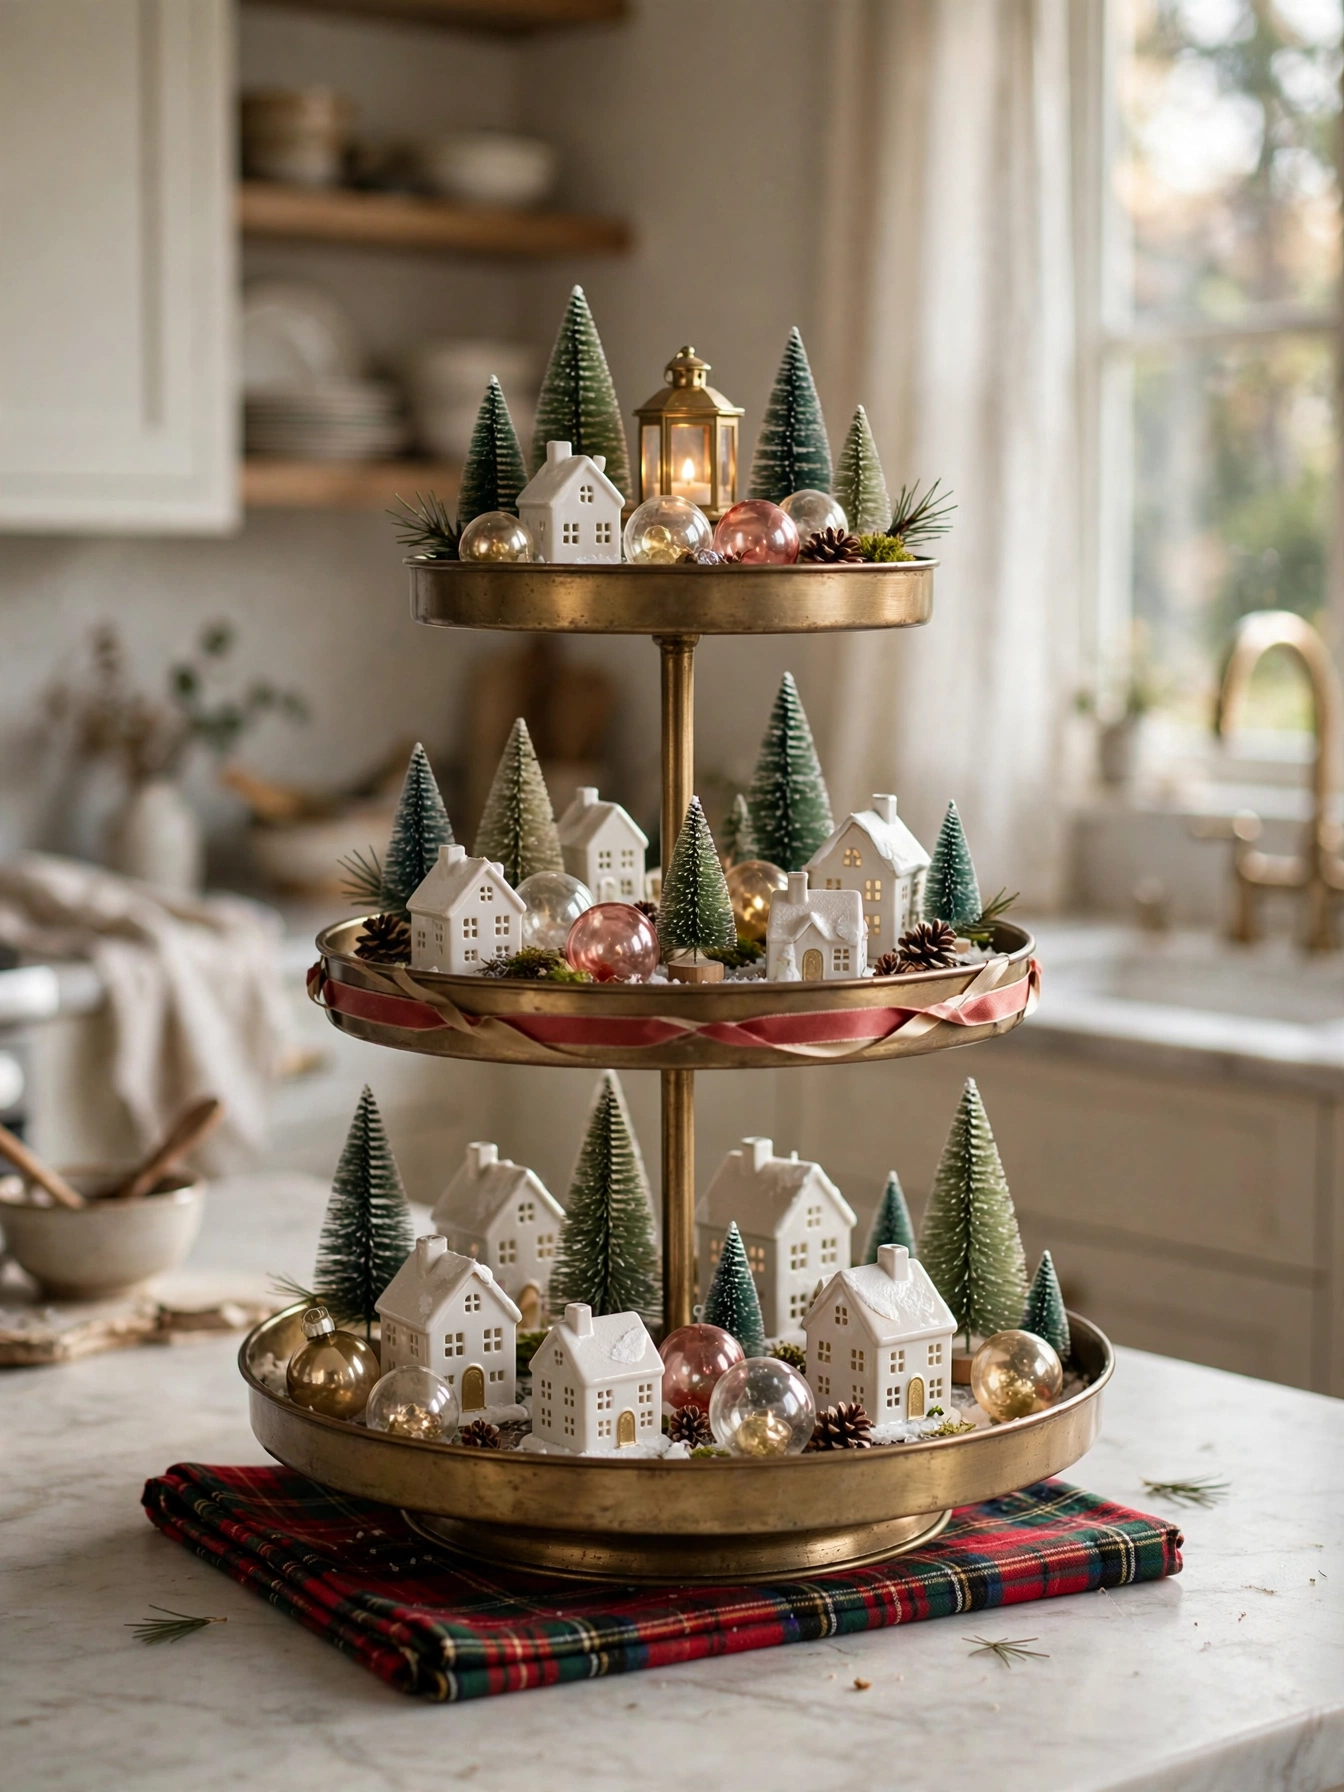
Tiered Tray Display
Why This Works:
- A three-tier tray stands 22 inches tall with 12-inch, 10-inch, and 8-inch rounds
- Style 15 to 18 mini items total, five or six per tier, so no shelf looks crowded
- Leave six inches between the tray base and the counter edge to protect the walkway
- Anchor the bottom tier with a 5-inch ceramic house that weighs at least 14 ounces
Build the tiered tray from the bottom up, placing the heaviest pieces on the twelve-inch base round and the lightest on the eight-inch top. Tuck five or six mini items per tier, mixing a ceramic house, two bottle-brush trees, three ornaments, and a small sign, with two inches of breathing room between pieces. Tiered trays run about eighteen dollars at budget level, thirty-five dollars mid-range, and sixty dollars premium, and the mid-range metal frames hold up best under daily bumps. Avoid stacking three tall items on the top tier because the tray turns top-heavy and tips when someone brushes past it.
Renters lean on this display because it needs no hooks, no nails, and no wall contact at all. One tray carries the whole Christmas story for a studio counter that cannot host five separate vignettes. The weak point is dust: seventeen small objects collect a visible film within seven days, so a quick feather-duster pass each Sunday keeps it fresh. If the tray wobbles on a tile counter, press four felt pads under the base and the rocking stops.
Pro Tip: Photograph the tray once you finish styling it. One phone photo rebuilds the exact layout in nine minutes after holiday cooking clears the counter.
Peppermint Candy Display
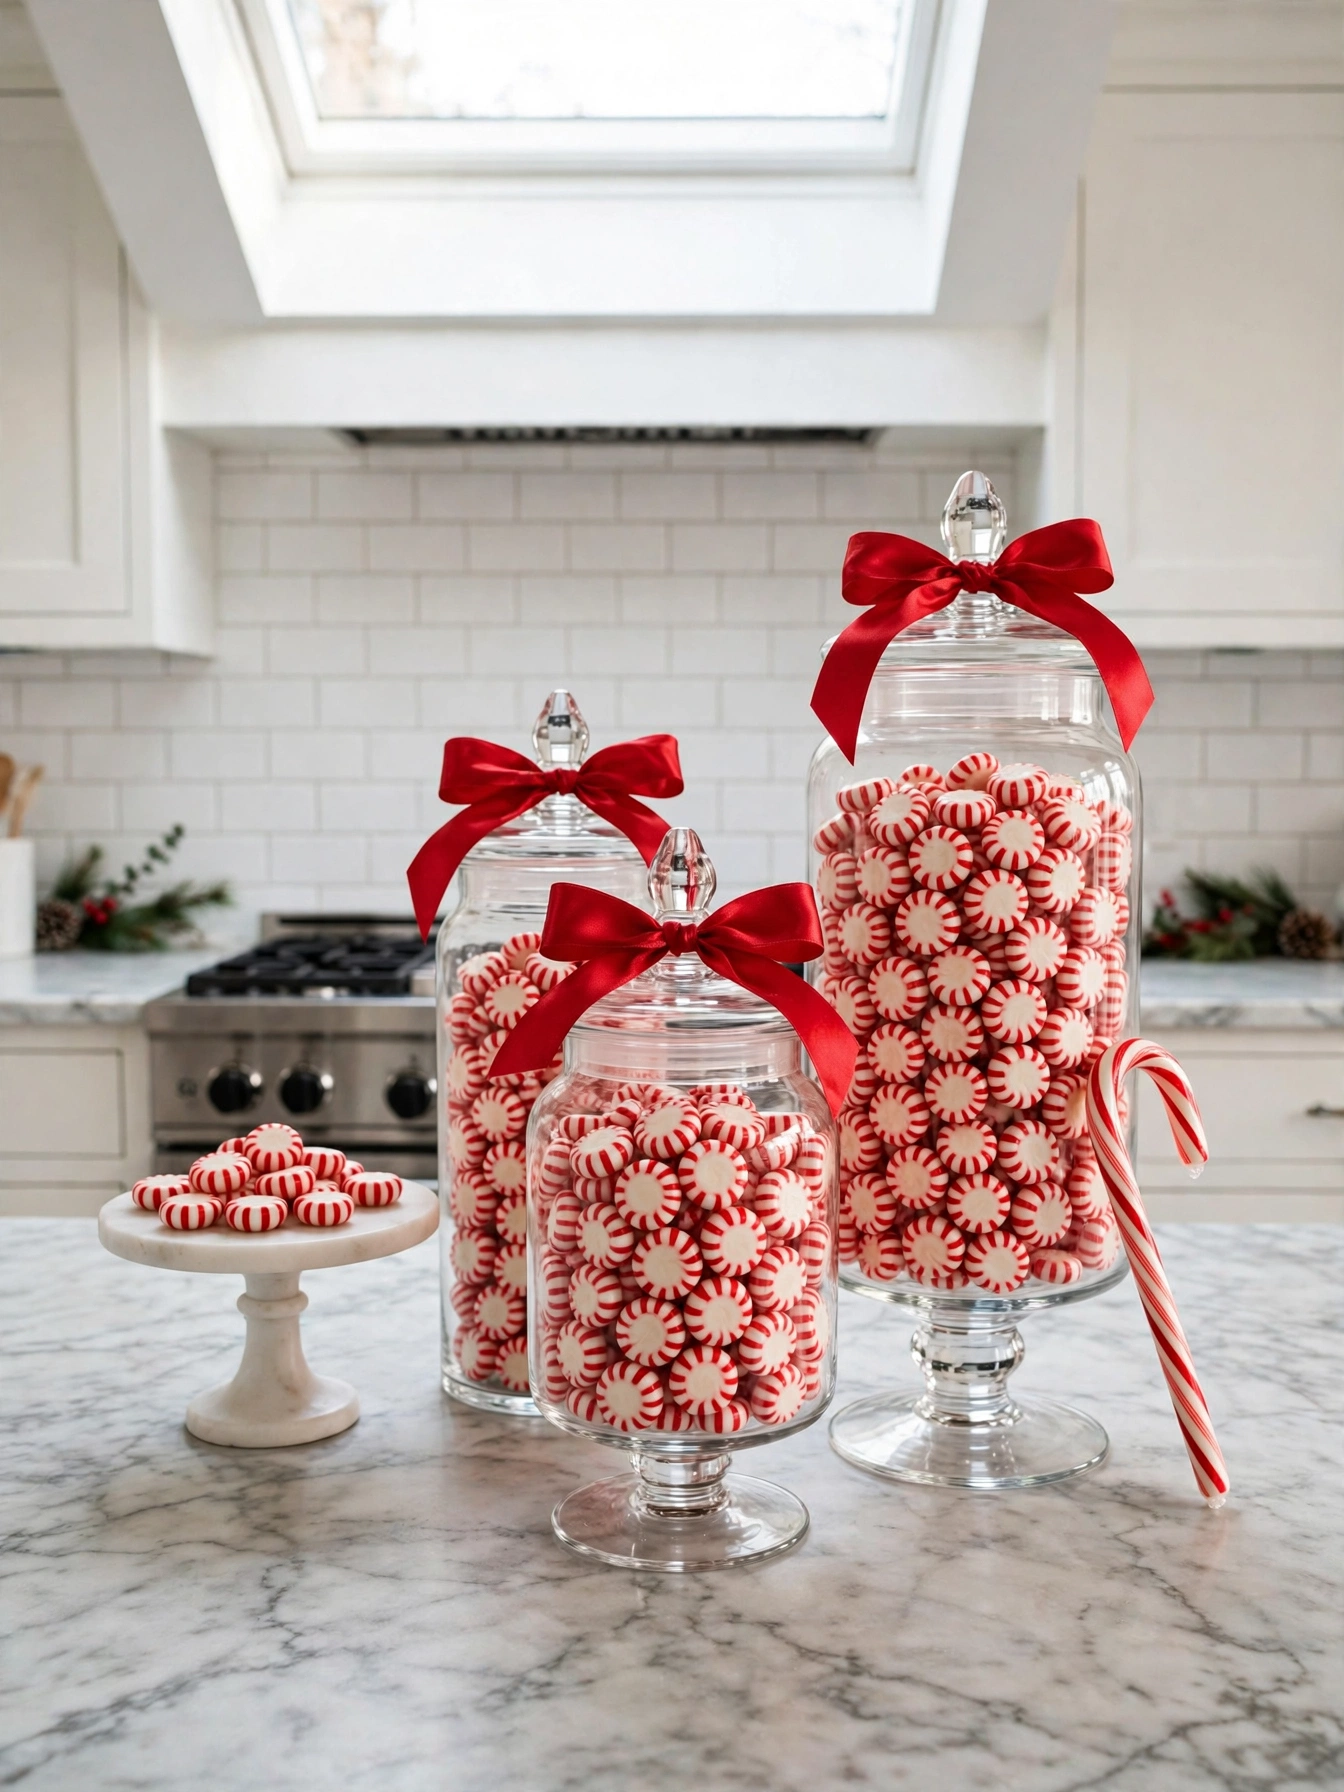
Why This Works:
- Three apothecary jars at 10, 8, and 6 inches tall hold candy in graduated volumes
- Fill the tallest jar with 24 six-inch candy canes standing upright
- Drop 40 peppermint rounds into the middle jar and 30 wrapped kisses into the smallest
- Set the jars 12 inches from the stovetop, since heat softens peppermint within an hour
Line up three apothecary jars in descending heights of ten, eight, and six inches along the back of the counter, lids on tight. Stand twenty-four candy canes upright in the tallest jar, pour forty peppermint rounds into the middle one, and layer thirty wrapped kisses in the smallest. The lids matter because open candy absorbs kitchen odors in about three days and turns tacky near a boiling kettle. Avoid placing any jar within twelve inches of the stovetop or a sunny window, since peppermint softens at roughly ninety degrees and the stripes bleed together.
Children spot the candy jars first and ask for one after dinner, which makes the display a small nightly ritual rather than background decor. Adults appreciate that everything stays sealed, counted, and off the prep surface. The compromise is fading: candy colors dull after about fourteen days under kitchen light, so refresh the front jar weekly and rotate older candy to the back. In a house with toddlers, move the jars to the back twelve inches of counter and keep the smallest jar up high.
Pro Tip: Slip one silica gel packet behind the candy in each jar. The packet holds humidity down for four weeks and stops the canes from sticking together.
Eucalyptus Stem Bundle
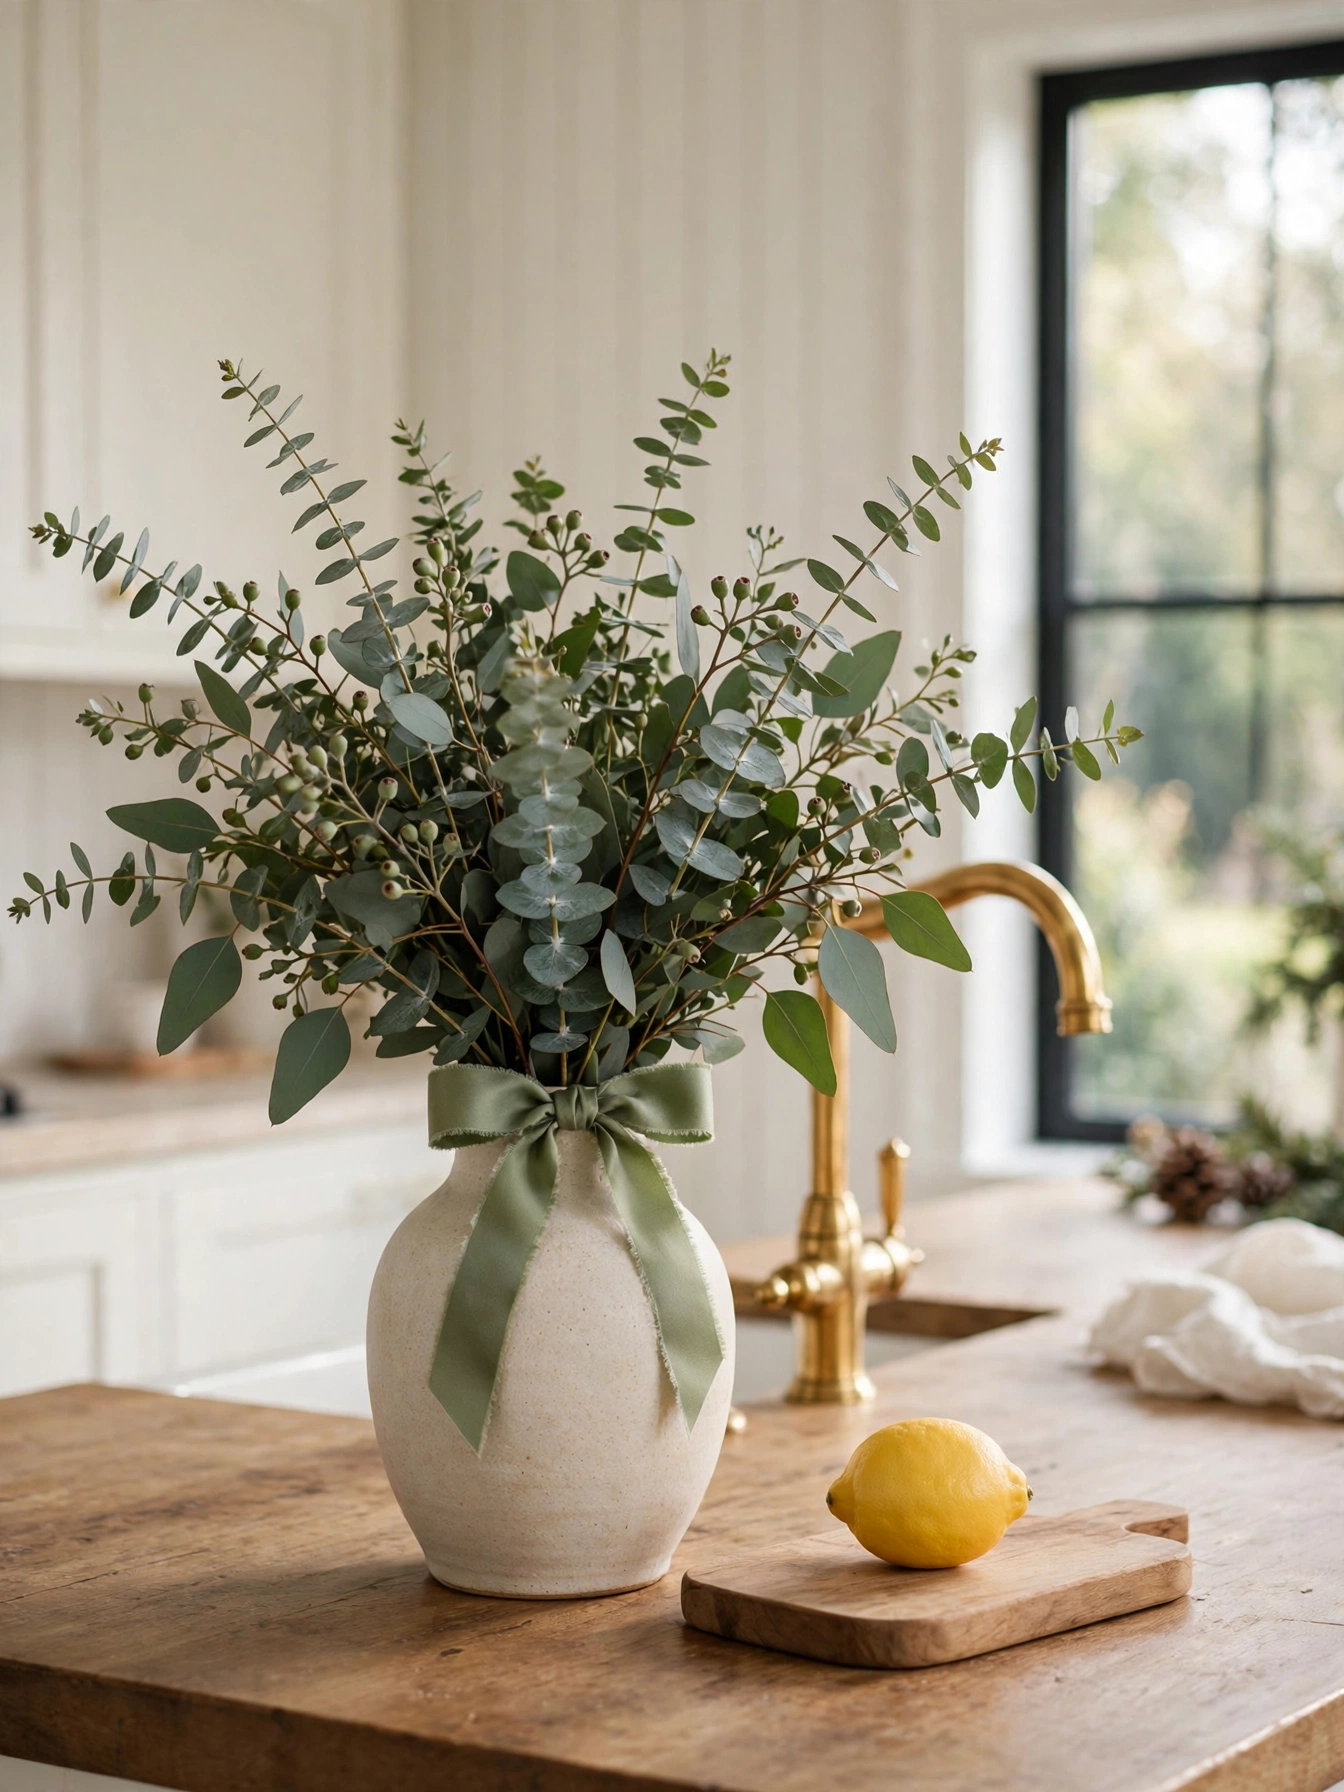
Why This Works:
- Bundle twelve eucalyptus stems, each 20 inches long, with one 18-inch satin tie
- Rest the bundle in a nine-inch stoneware vase filled with three inches of water
- Give the vase 14 inches of clearance from the faucet, six inches out from the backsplash
- Trim each stem at a 45-degree angle and re-trim every five days for uptake
Tie twelve eucalyptus stems into a loose bundle with an eighteen-inch length of sage satin ribbon, then stand the bundle in a nine-inch stoneware vase. Cut each stem at a forty-five-degree angle before placing it in three inches of water, which keeps the leaves hydrated for roughly ten days. Position the vase fourteen inches from the faucet so splashes never reach the leaves, and leave six inches between the vase and the backsplash for airflow. Skip dried eucalyptus near the stove because the papery leaves ignite faster than fresh stems and shed constantly onto the prep surface.
The scent carries furthest in kitchens with a gentle draft from the window, so one bundle perfumes the whole room without a plug-in. The silver-green leaves pair with any cabinet color, from white to navy. One limitation is leaf drop: expect five to eight leaves on the counter each week, and a two-minute sweep handles them. If anyone in the house has plant allergies, choose faux eucalyptus in the same vase and the look holds without the pollen.
Pro Tip: Add one teaspoon of white vinegar to the vase water. The vinegar slows bacterial growth and extends the bundle life to fourteen days.
Candle Window Sill
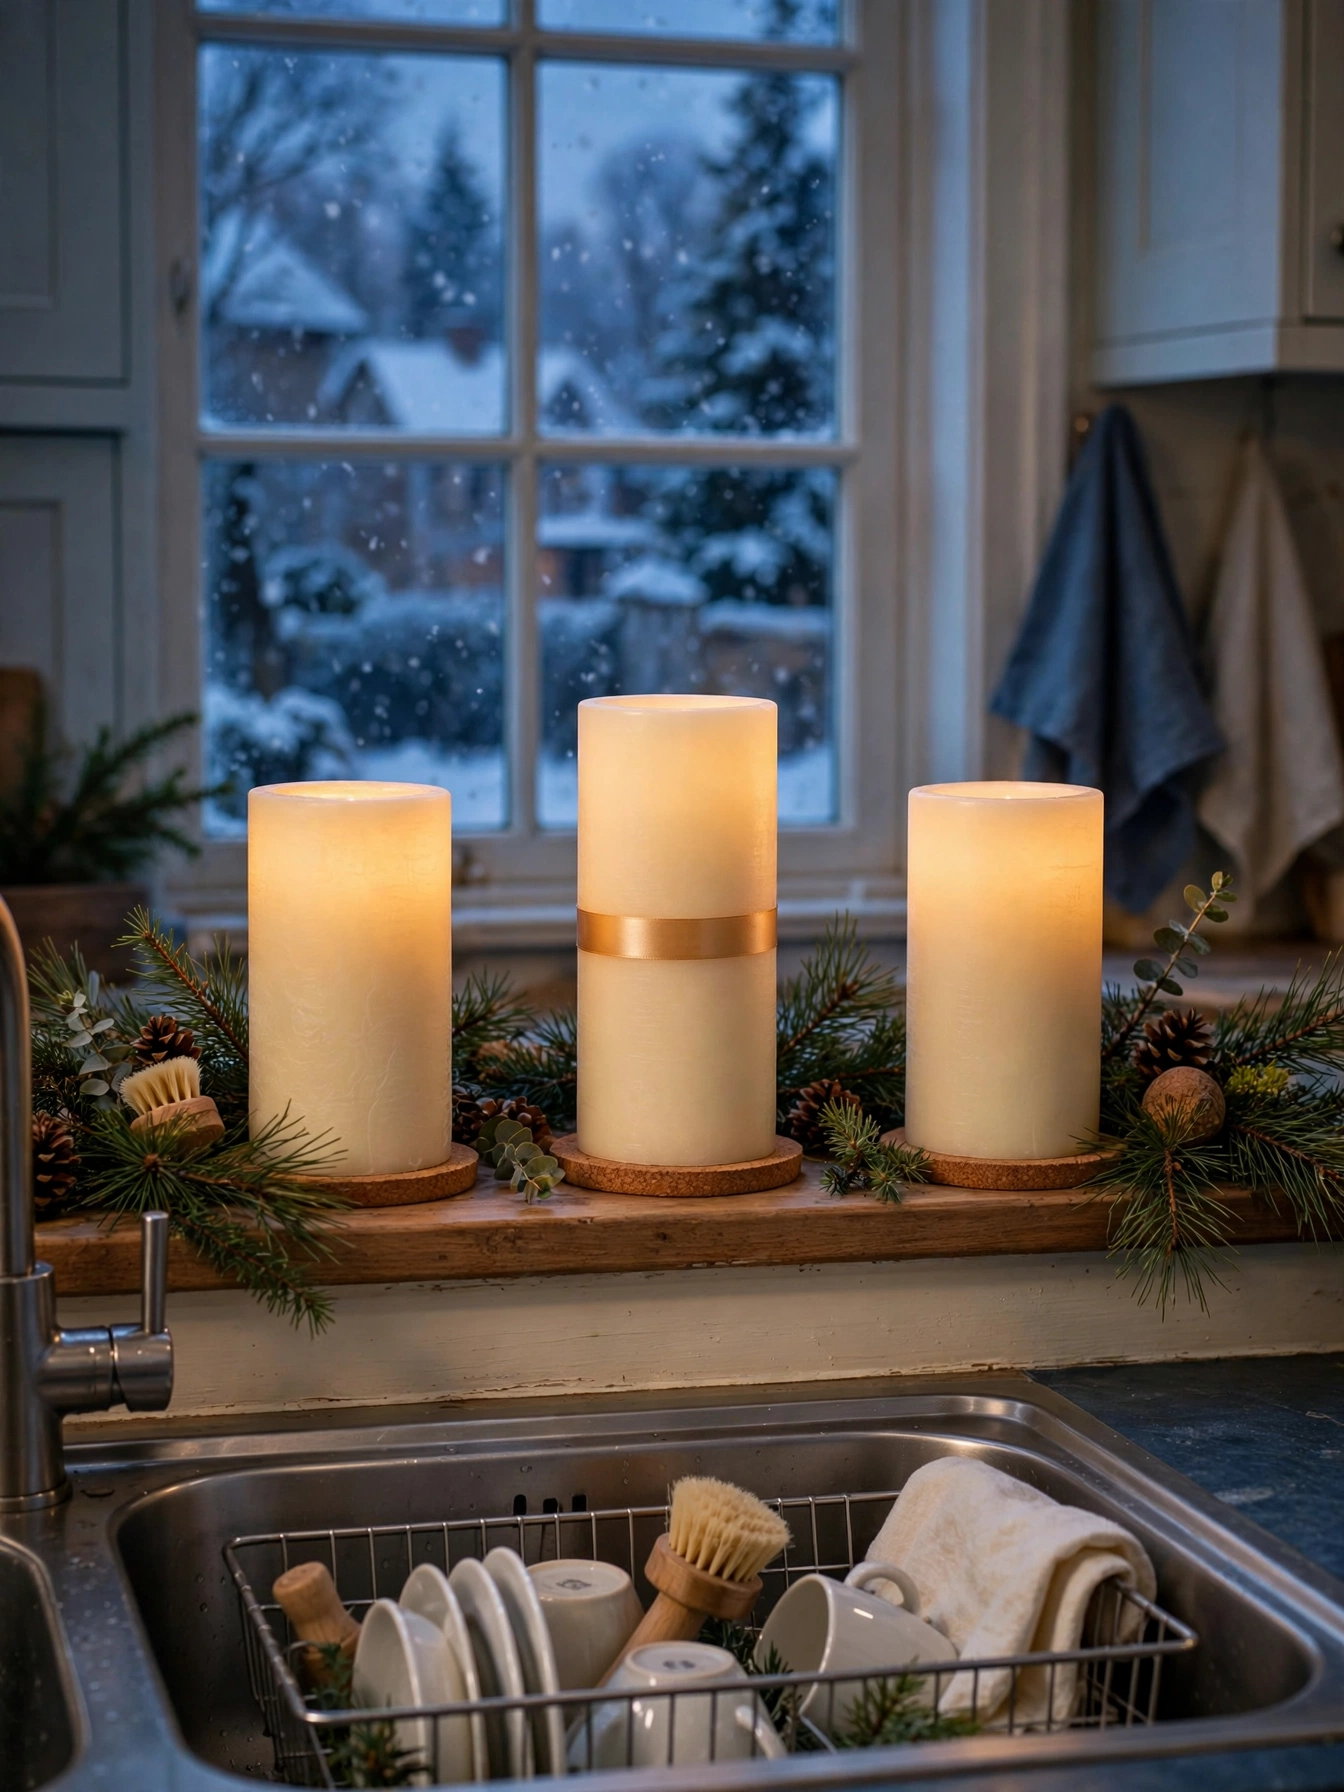
Why This Works:
- Three flameless pillars at five, four, and three inches tall stand on a six-inch-deep sill
- Set each pillar on a four-inch cork coaster to protect painted sills from wax rings
- Keep every pillar 12 inches from curtain fabric and eight inches from the window glass
- Run all three on a six-hour timer starting at 5 PM for 21 evenings per battery set
Set three flameless pillars on the kitchen window sill in descending heights of five, four, and three inches, each resting on a four-inch cork coaster. Flameless candles remove the open-flame risk entirely, which matters on a sill above a sink where dish towels and paper towels gather. Burning candles should never be left unattended and should stay at least twelve inches from anything that can catch fire, so flameless is the safer choice here. Avoid real taper candles on a narrow sill because a six-inch-deep ledge leaves no margin for a bumped elbow.
Evening dishwashing feels different beside a glowing sill, since the warm light softens the darkest corner of the kitchen. The timer means the glow starts itself at five and ends before bedtime without a second thought. The drawback is battery swaps: three pillars eat six AA batteries every three weeks, so keep a spare pack in the junk drawer. In kitchens where the sill holds plants, move one plant aside rather than crowding candles against wet soil.
Pro Tip: Choose pillars with a flicker mode and a warm 2700K glow. The flicker reads as a real flame from eight feet away, while steady light looks like a nightlight.
Cookie Jar Holiday Swap
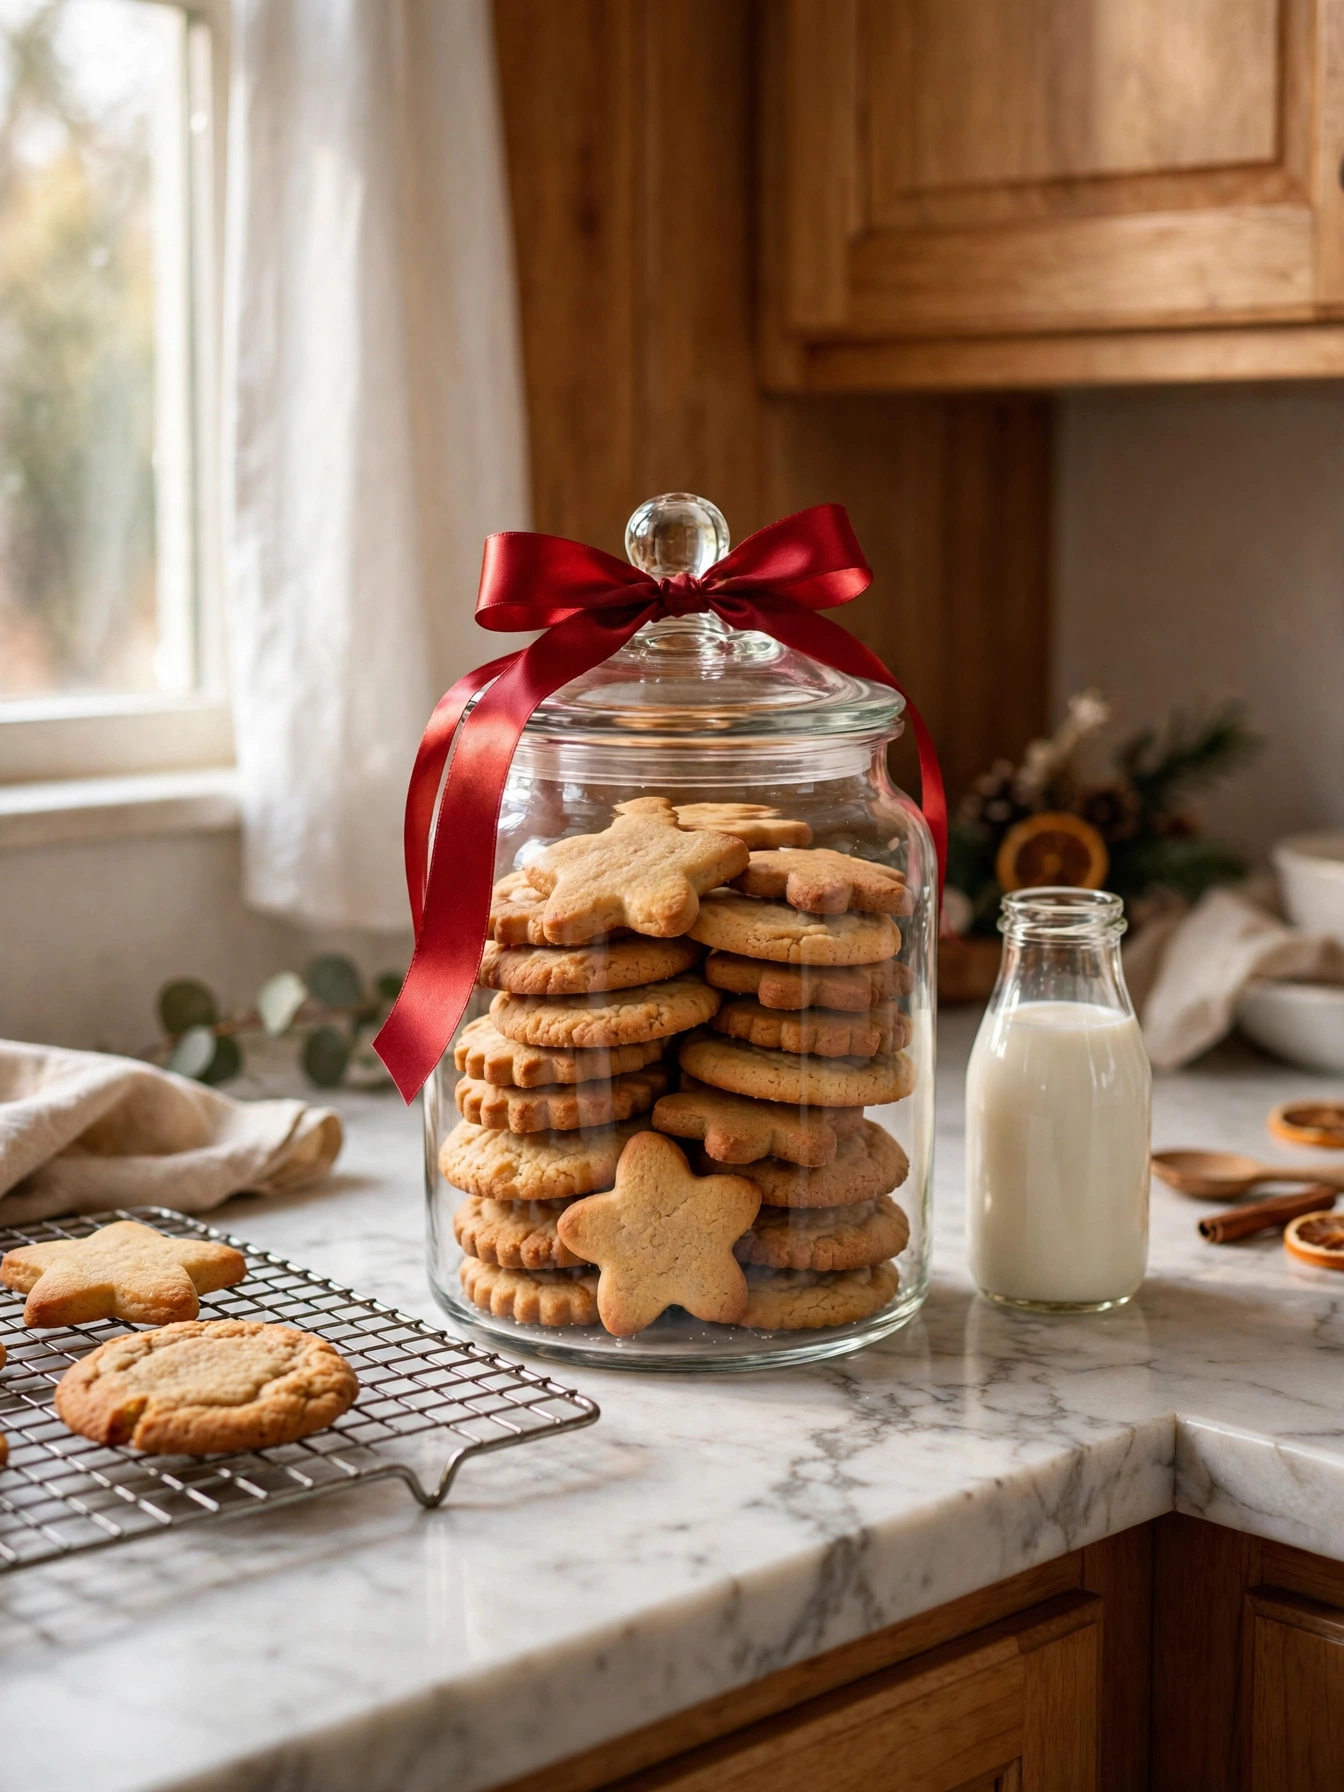
Why This Works:
- A 64-ounce glass cookie jar, 10 inches tall with an eight-inch lid, anchors one corner
- Fill it with 18 to 22 cookies in two layers separated by one sheet of parchment
- Stand the jar 18 inches from the stove and eight inches from the counter edge
- Tie a four-inch-wide satin ribbon around the lid knob for a finished look
Swap the everyday cookie jar for a sixty-four-ounce glass jar, ten inches tall, and fill it with eighteen to twenty-two cookies in two parchment-separated layers. The glass shows the stack, so guests see the contents without lifting the lid and letting in air. Keep the jar eighteen inches from the stove and eight inches behind the counter lip, where it stays visible but out of the prep lane. Avoid metal tins with loose lids for daily cookies because they seal poorly and the cookies stale in about three days instead of five.
Bakers who rotate batches through December keep this jar working, since each new tray refreshes the display without extra decorating. The ribbon on the lid knob signals that the jar belongs to the season, not to everyday storage. The weak point is staleness: even a good seal gives cookies about five days, so bake smaller batches twice a week. If the jar sits in direct afternoon sun, move it to the shaded end of the counter or the chocolate chips will melt through the dough.
Pro Tip: Tuck one slice of white bread into the jar beside the cookies. The bread keeps the cookies soft for five days, and you replace the slice every three days.
Utensil Crock Greens

Why This Works:
- A seven-inch stoneware crock with a five-inch opening holds tools plus three green sprigs
- Tuck three ten-inch cedar sprigs behind the tools, never in front of the handles
- Keep the crock 12 inches off the nearest burner, six inches behind it to the backsplash
- Choose tools with 12-inch handles so grips clear the rim by five inches
Stand a seven-inch stoneware crock beside the stove, filled with everyday tools plus three ten-inch cedar sprigs tucked behind the handles. The sprigs rise above the tool grips and read as greenery, while the crock keeps spatulas and spoons within a twelve-inch reach of the burner. Pick tools with twelve-inch handles so the grips clear the rim by five inches and you never fish for a short handle. Avoid silk or plastic greenery inside a crock this close to heat because the stems can warp at roughly one hundred forty degrees and shed fibers into the food zone.
Daily cooking keeps this vignette honest, since the crock earns its counter space with every meal. The cedar adds Christmas without adding a single extra object to a busy stove wall. One compromise is wilting: fresh sprigs dry out within seven days above a hot stove, so swap them every Sunday while the oven preheats. If your stove wall lacks twelve inches of clear counter, move the crock to the sink side and keep only heat-safe tools near the burner.
Pro Tip: Wrap the sprig stems in one damp paper towel inside the crock. The towel holds moisture for four days and doubles the sprigs fresh window.
Cutting Board Display
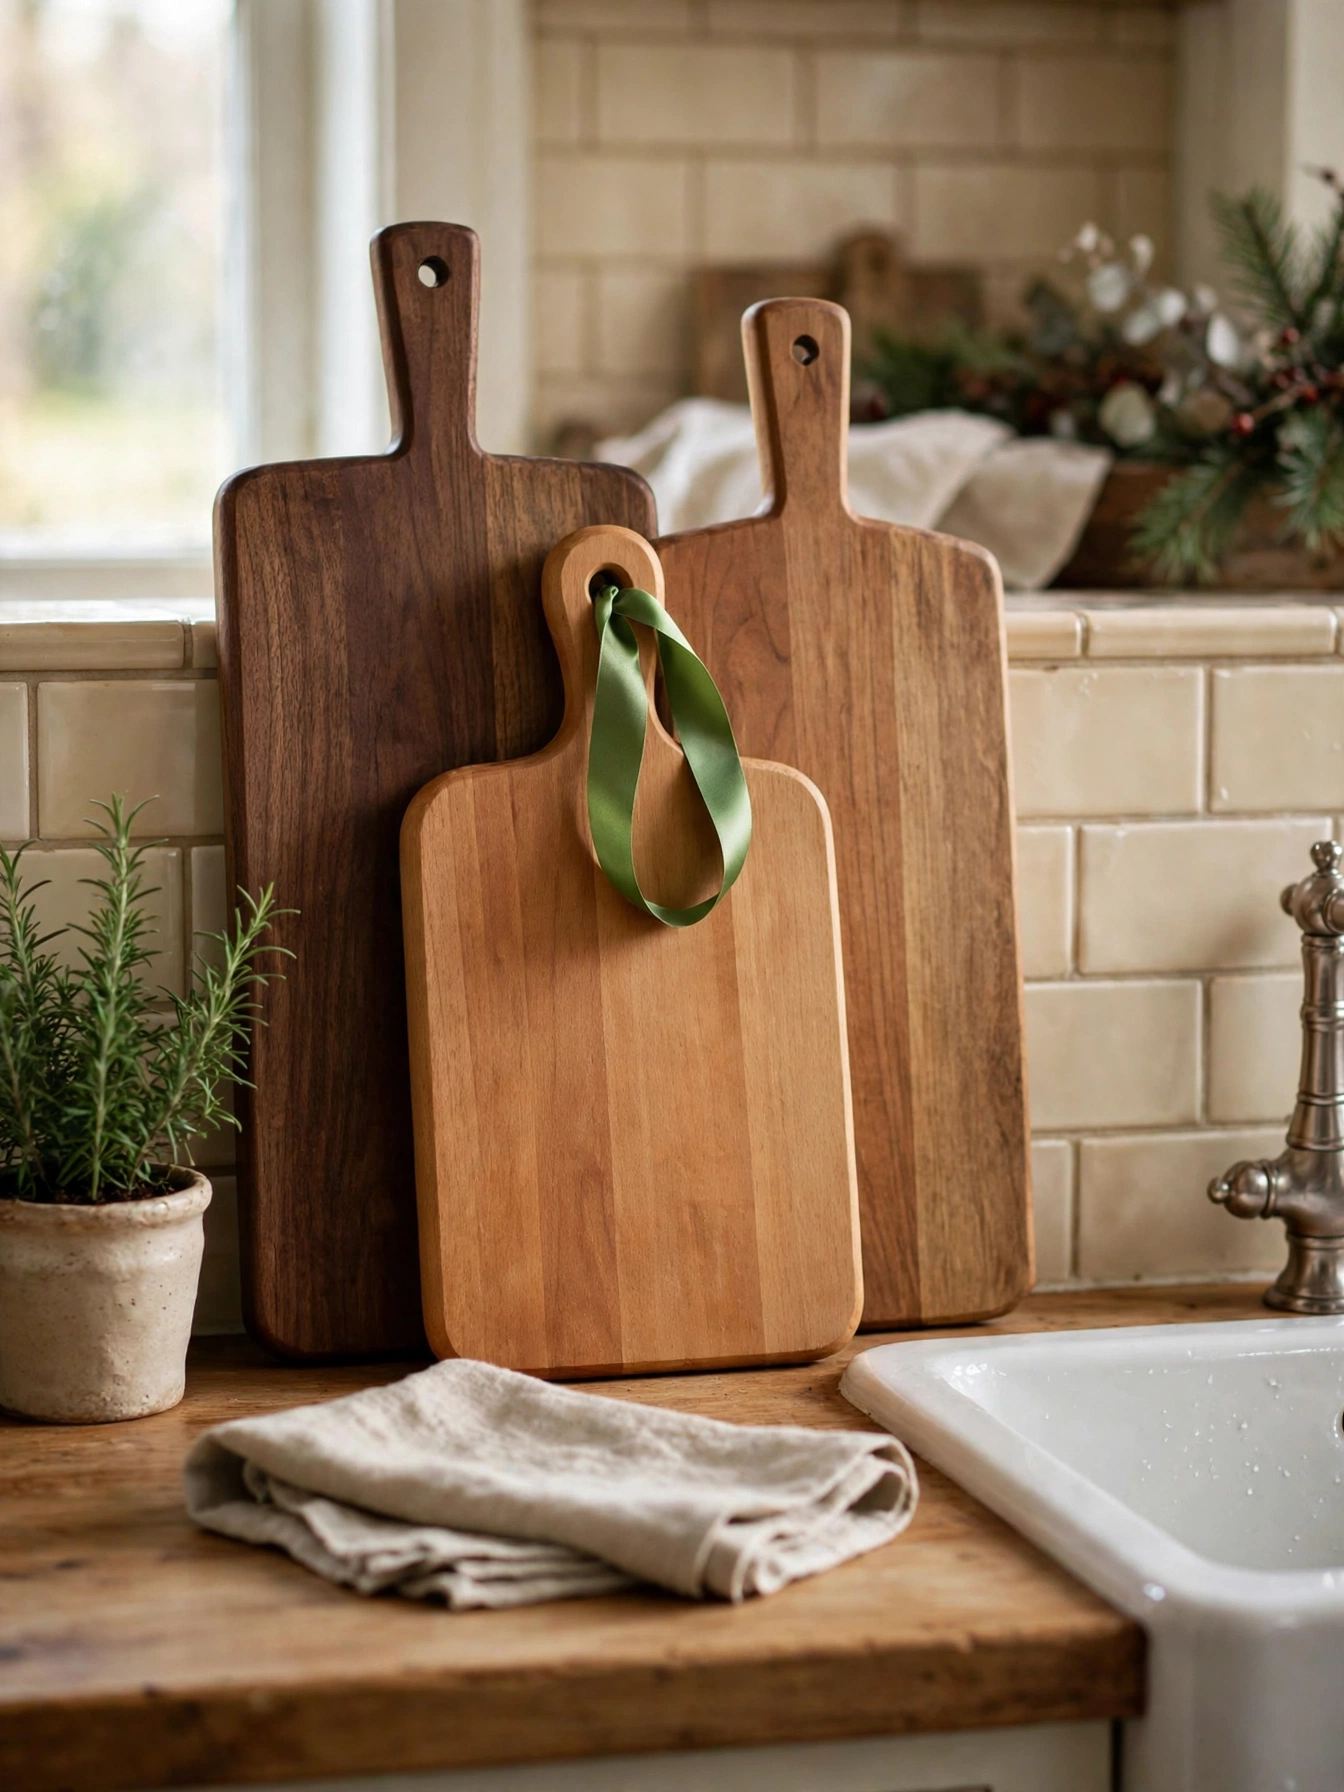
Why This Works:
- Lean three boards at 18, 14, and 11 inches tall against the backsplash in descending order
- Leave a four-inch gap between boards so each wood grain shows separately
- Set the tallest board 24 inches from the sink to dodge constant splashes
- Tie a six-inch satin loop through the handle hole of the front board
Lean three wooden cutting boards against the backsplash in descending heights of eighteen, fourteen, and eleven inches, each overlapping the next by about one inch. The layered boards add warmth and height to a bare stretch of counter without spending a dollar on new decor. Keep the tallest board twenty-four inches from the sink so dish spray never swells the end grain, and wipe each board dry after cooking. Avoid leaning boards in front of an outlet you use daily because the daily pull to reach the plug will topple the whole row within a week.
Farmhouse kitchens absorb this look without any new purchases, since the boards already live in a drawer nearby. The display doubles as storage, freeing a drawer for lids and wraps. The catch is maintenance: wood boards want food-safe mineral oil every four weeks, and a dry board cracks along the grain. If your boards are plastic, skip the lean and hang one wooden board alone, since plastic reads as clutter against tile.
Pro Tip: Oil the display boards with one teaspoon of mineral oil each on the first of the month. A sixty-second rub keeps the grain rich through February.
Christmas Countertop Decor Ideas 2026: Baking Station
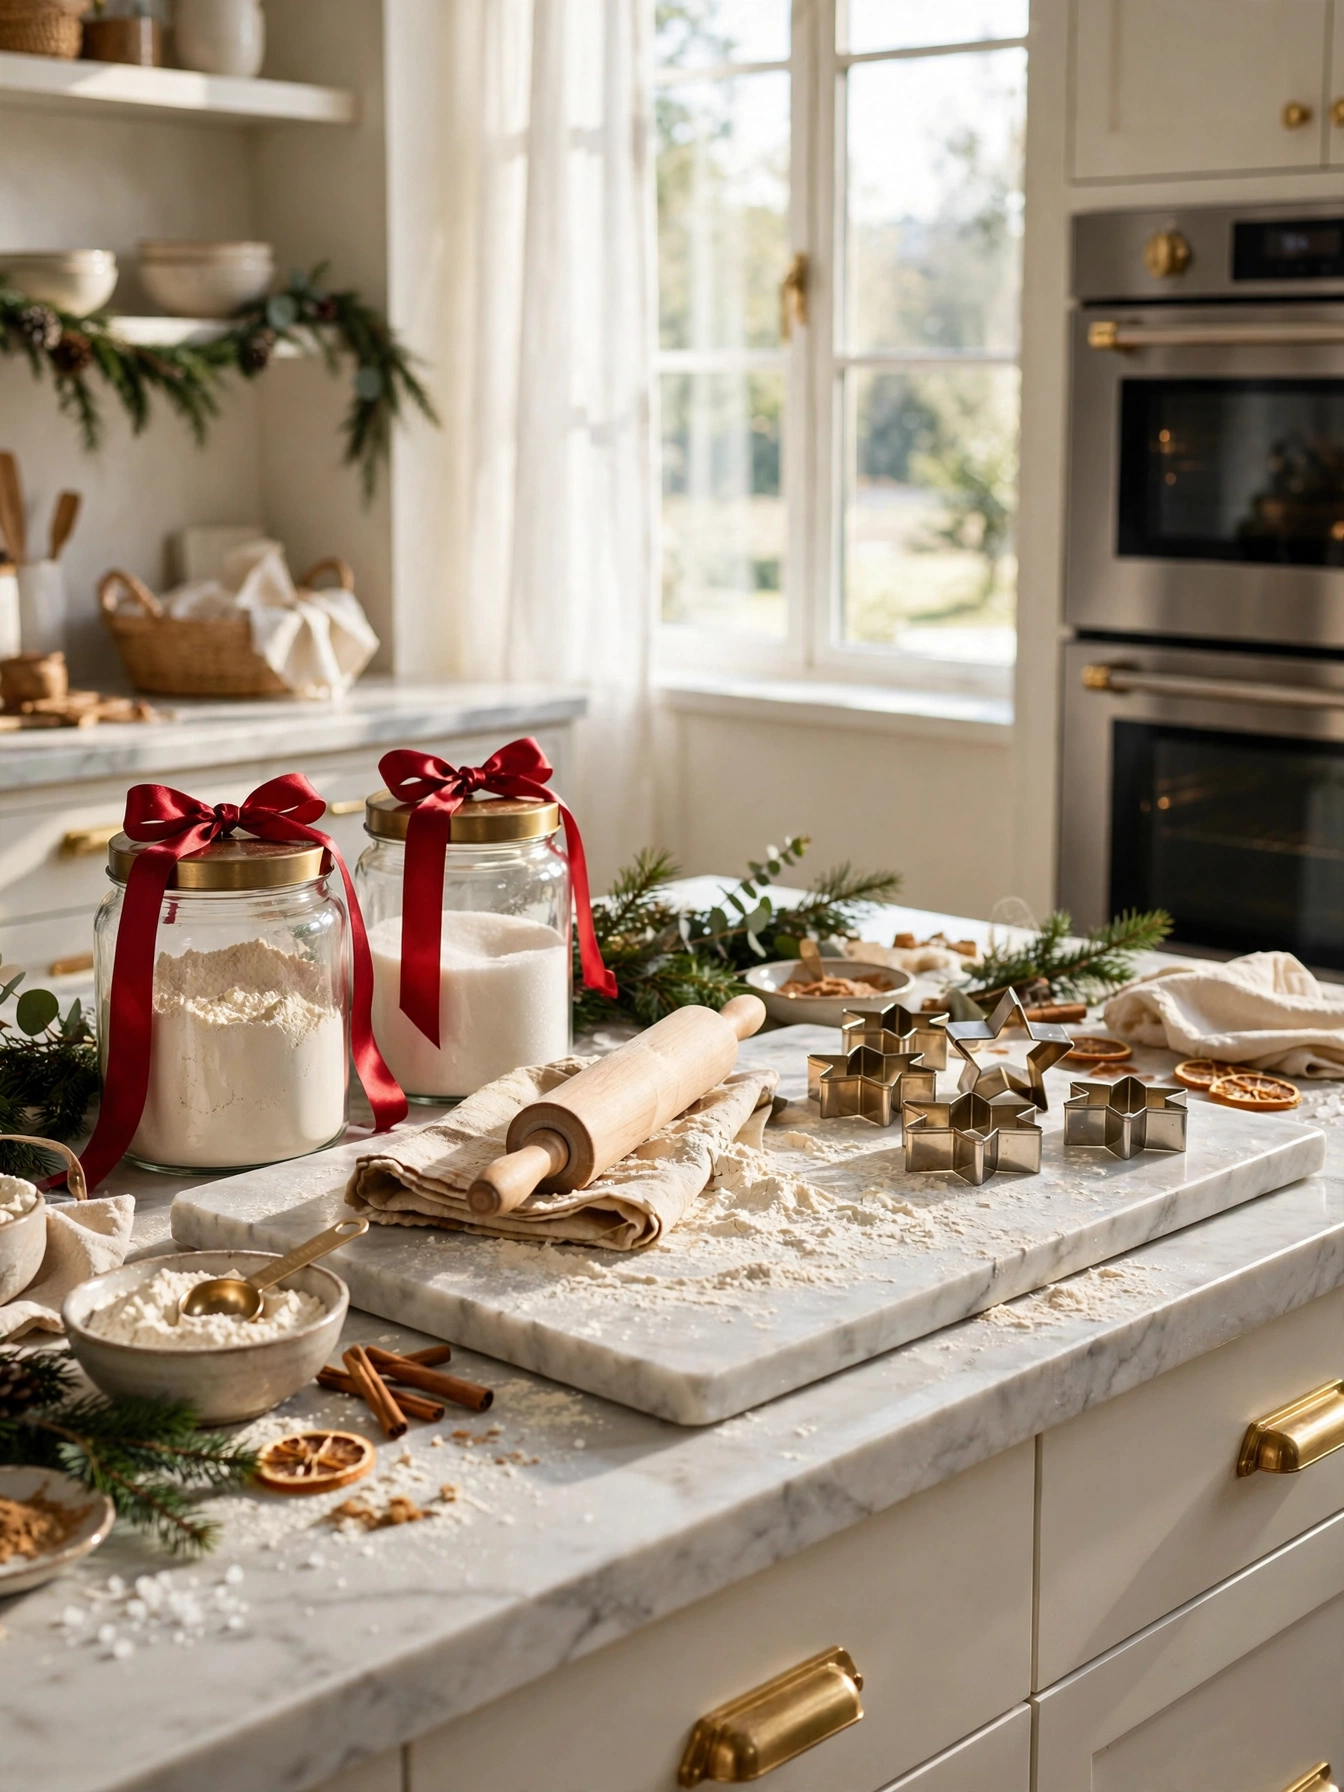
Why This Works:
- A 24-inch by 18-inch marble slab defines the baking station inside one counter zone
- Two 64-ounce canisters hold flour and sugar with one-cup scoops inside each
- Rest an 18-inch rolling pin and a 12-inch whisk across a folded tea towel
- Keep the slab 36 inches from the sink so flour dust never reaches clean dishes
Claim a twenty-four-inch stretch beside the oven for a baking station built on an eighteen-inch marble slab. Two sixty-four-ounce canisters hold flour and sugar, each with a one-cup scoop inside, while an eighteen-inch rolling pin rests across a folded towel. The marble slab catches flour dust and lifts out for a thirty-second rinse, which beats scrubbing grout lines. Avoid open bags of flour on the counter because a torn bag spills roughly four cups across the surface and the dust reaches every nearby jar.
Weekend bakers spread out here first, since the station keeps every tool inside arm’s reach during a cookie marathon. The canisters also stop the mid-recipe hunt for the sugar bag in the pantry. The trade-off is flour dust: even careful bakers scatter a thin film daily, so wipe the slab after each session. In kitchens under ten feet of counter, shrink the station to one canister and the rolling pin, and store the second canister in the pantry.
Pro Tip: Chill the marble slab in the fridge for twenty minutes before rolling pie dough. Cold marble keeps butter firm for twelve minutes longer than a warm board.
Ornament Bowl Center
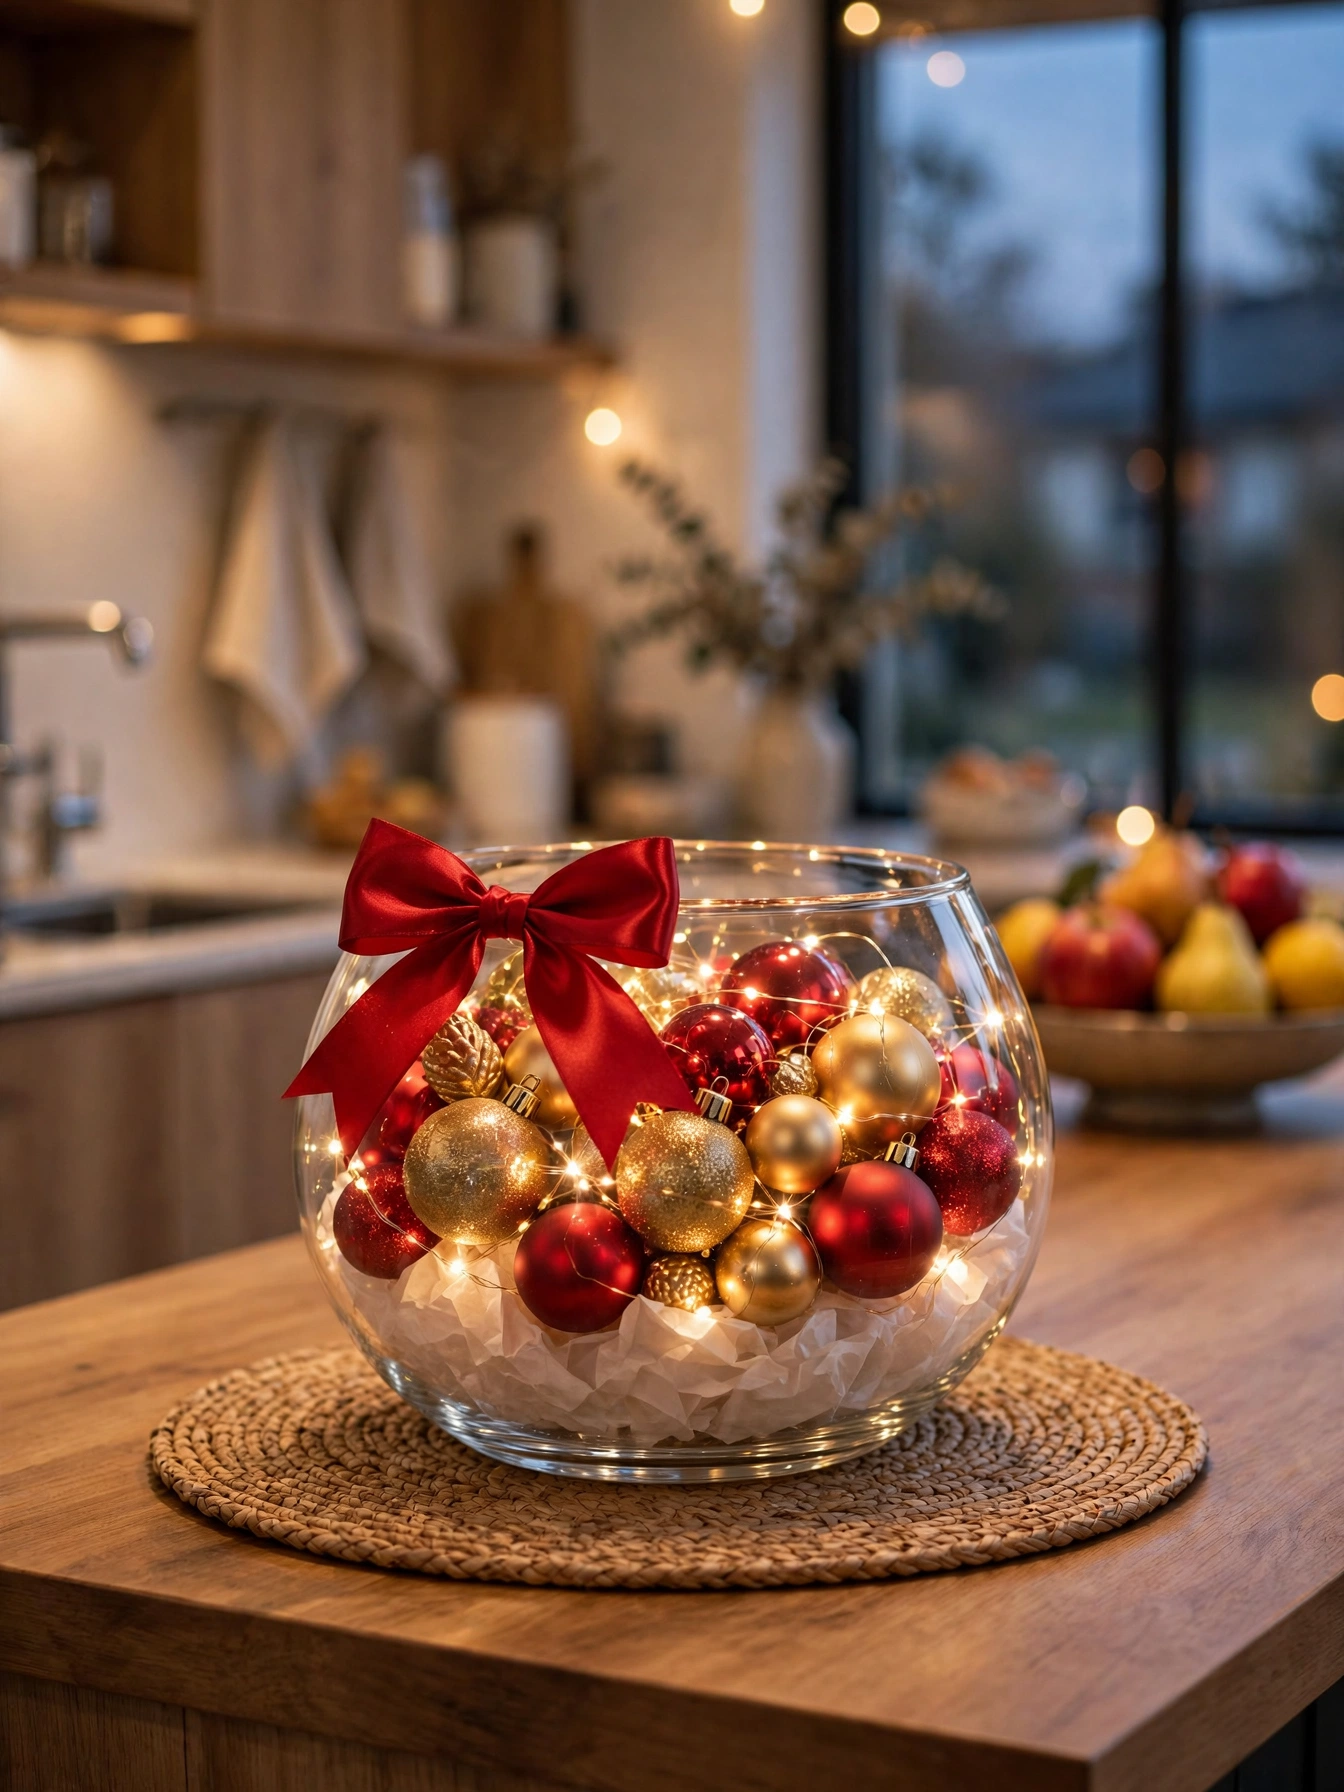
Why This Works:
- A 12-inch glass bowl holds 18 shatterproof ornaments in two-inch to three-inch sizes
- Weave one 20-bulb micro strand around the bowl base, never through the ornaments
- Set the bowl 10 inches in from the counter rim on a 16-inch round placemat
- Mix matte and shiny finishes in a 60-40 split for depth under kitchen light
Fill a twelve-inch glass bowl with eighteen shatterproof ornaments in two-inch to three-inch sizes, mixing matte and shiny finishes in a sixty-forty split. Loop a twenty-bulb micro strand around the bowl base rather than through the ornaments, so the bulbs reflect in the glass and multiply the sparkle. Rest the bowl on a sixteen-inch round placemat ten inches back from the counter edge, where elbows and bags pass without contact. Use shatterproof ornaments in high-traffic spots because glass shards on a food prep surface create a real cleanup problem.
Leftover ornaments finally earn a job here, since every household owns a box of spares with no tree space left. The bowl turns that overflow into the counter centerpiece for zero extra spending. One drawback is dust: glass bowls show every speck by week three, so a two-minute wipe with a microfiber cloth each Sunday keeps it bright. If you have cats, skip the bowl at the counter edge and move it to the back twelve inches, since paws target shiny objects at hip height.
Pro Tip: Place a two-inch layer of white tissue at the bottom of the bowl first. The tissue lifts the ornaments higher, hides gaps, and cuts the ornament count by thirty percent.
Potted Poinsettia Row
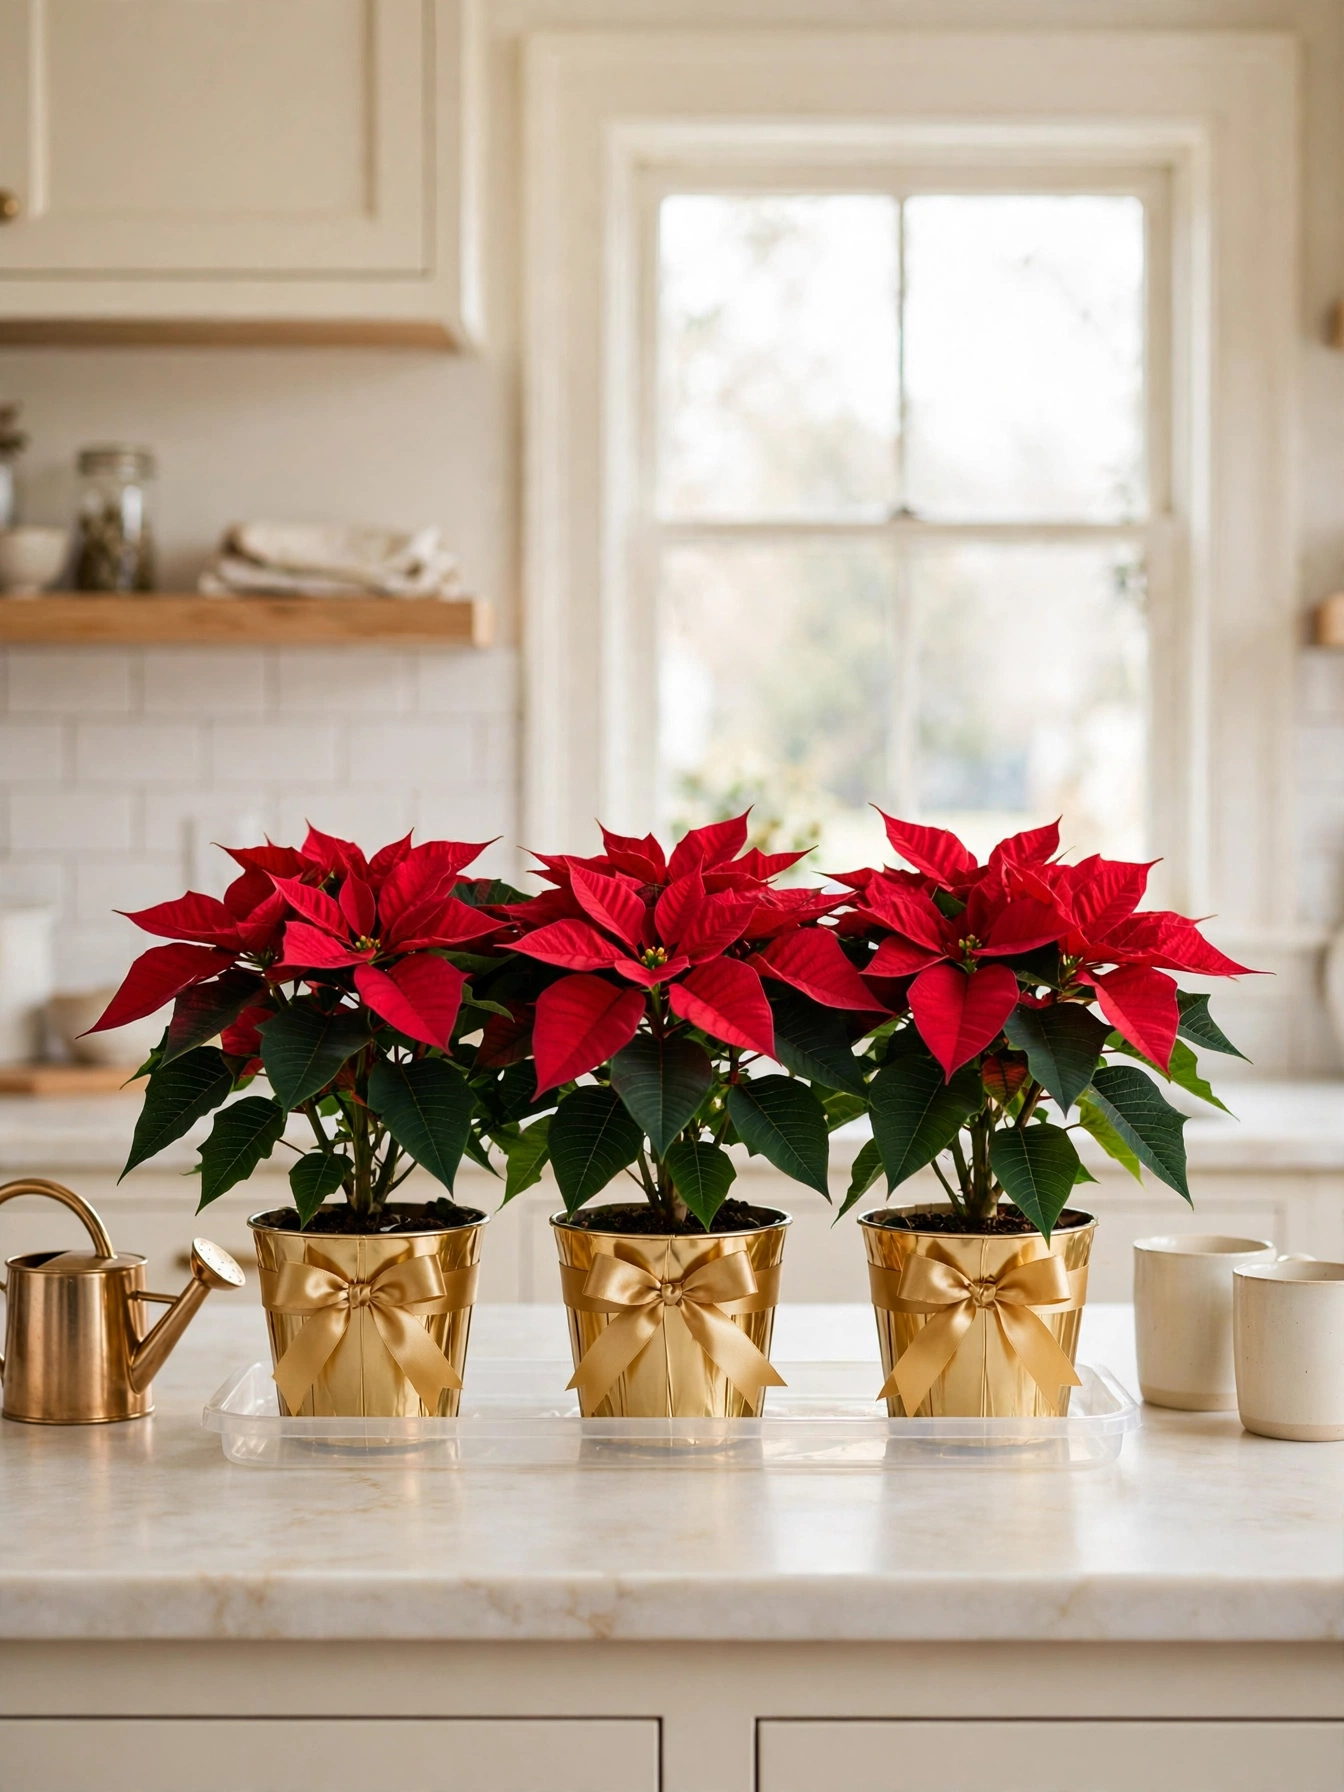
Why This Works:
- Three poinsettias in six-inch pots stand 12 to 14 inches tall on one tray
- Line them on a 24-inch by eight-inch drip tray with two inches between pots
- Water each plant with four ounces weekly and empty the tray after 30 minutes
- Keep the row six feet from heating vents and 36 inches from cold drafts
Arrange three poinsettias in six-inch pots along a twenty-four-inch drip tray on the far counter stretch, leaving two inches between pots for airflow. Each plant wants four ounces of water weekly, and the tray must be emptied thirty minutes after watering so roots never sit in standing water. Position the row six feet from any heating vent and thirty-six inches from a drafty door, since both extremes drop bracts within days. Avoid placing poinsettias beside ripening fruit because ethylene gas from bananas and apples accelerates leaf drop in under a week.
Red blooms rescue kitchens that skew gray or white, since one row adds the only living color on the counter. The plants cost less than a bouquet and last through New Year with basic care. The catch is pets: poinsettia leaves irritate mouths and stomachs if nibbled, so keep the row on a high shelf if dogs or cats counter-surf. If a plant drops leaves after week two, check the soil moisture before blaming light, since overwatering causes most mid-December losses.
Pro Tip: Slip each nursery pot inside a six-inch foil-wrapped cachepot. The foil hides the plastic, catches drips, and lifts the display for three dollars per plant.
Spice Jar Ribbon Tags

Why This Works:
- Twelve four-ounce spice jars line an 18-inch shelf riser in two rows of six
- Tie a one-inch satin ribbon around each lid with a two-inch by three-inch paper tag
- Label each tag in pencil so cinnamon, nutmeg, and cloves stay identifiable
- Keep the riser 12 inches from the stove to protect ribbon from steam
Dress twelve four-ounce spice jars with one-inch satin ribbon ties and two-inch by three-inch paper tags, then line them on an eighteen-inch shelf riser in two rows of six. Pencil labels beat ink here because pencil survives kitchen humidity for the full season without smudging. Set the riser twelve inches from the stove so steam never softens the tags, and sort the jars by use: baking spices front, savory spices back. Avoid adhesive labels on warm jars because the glue loosens in about five days and the labels curl off the glass.
Gifting starts here because a finished row of twelve tagged jars makes a ready hostess gift in a nine-inch gift box. Daily cooking benefits too, since the tags end the sniff-and-guess routine at the spice shelf. One compromise is ribbon fade: red ribbon near steam dulls within three weeks, so choose deep green or gold for jars nearest the stove. If your counter lacks eighteen inches of free depth, split the jars into two rows of six on separate shelves.
Pro Tip: Write the fill date on the back of each tag. Ground spices lose strength after six months, and the date stops you from using stale nutmeg in January.
Sleigh Serving Tray
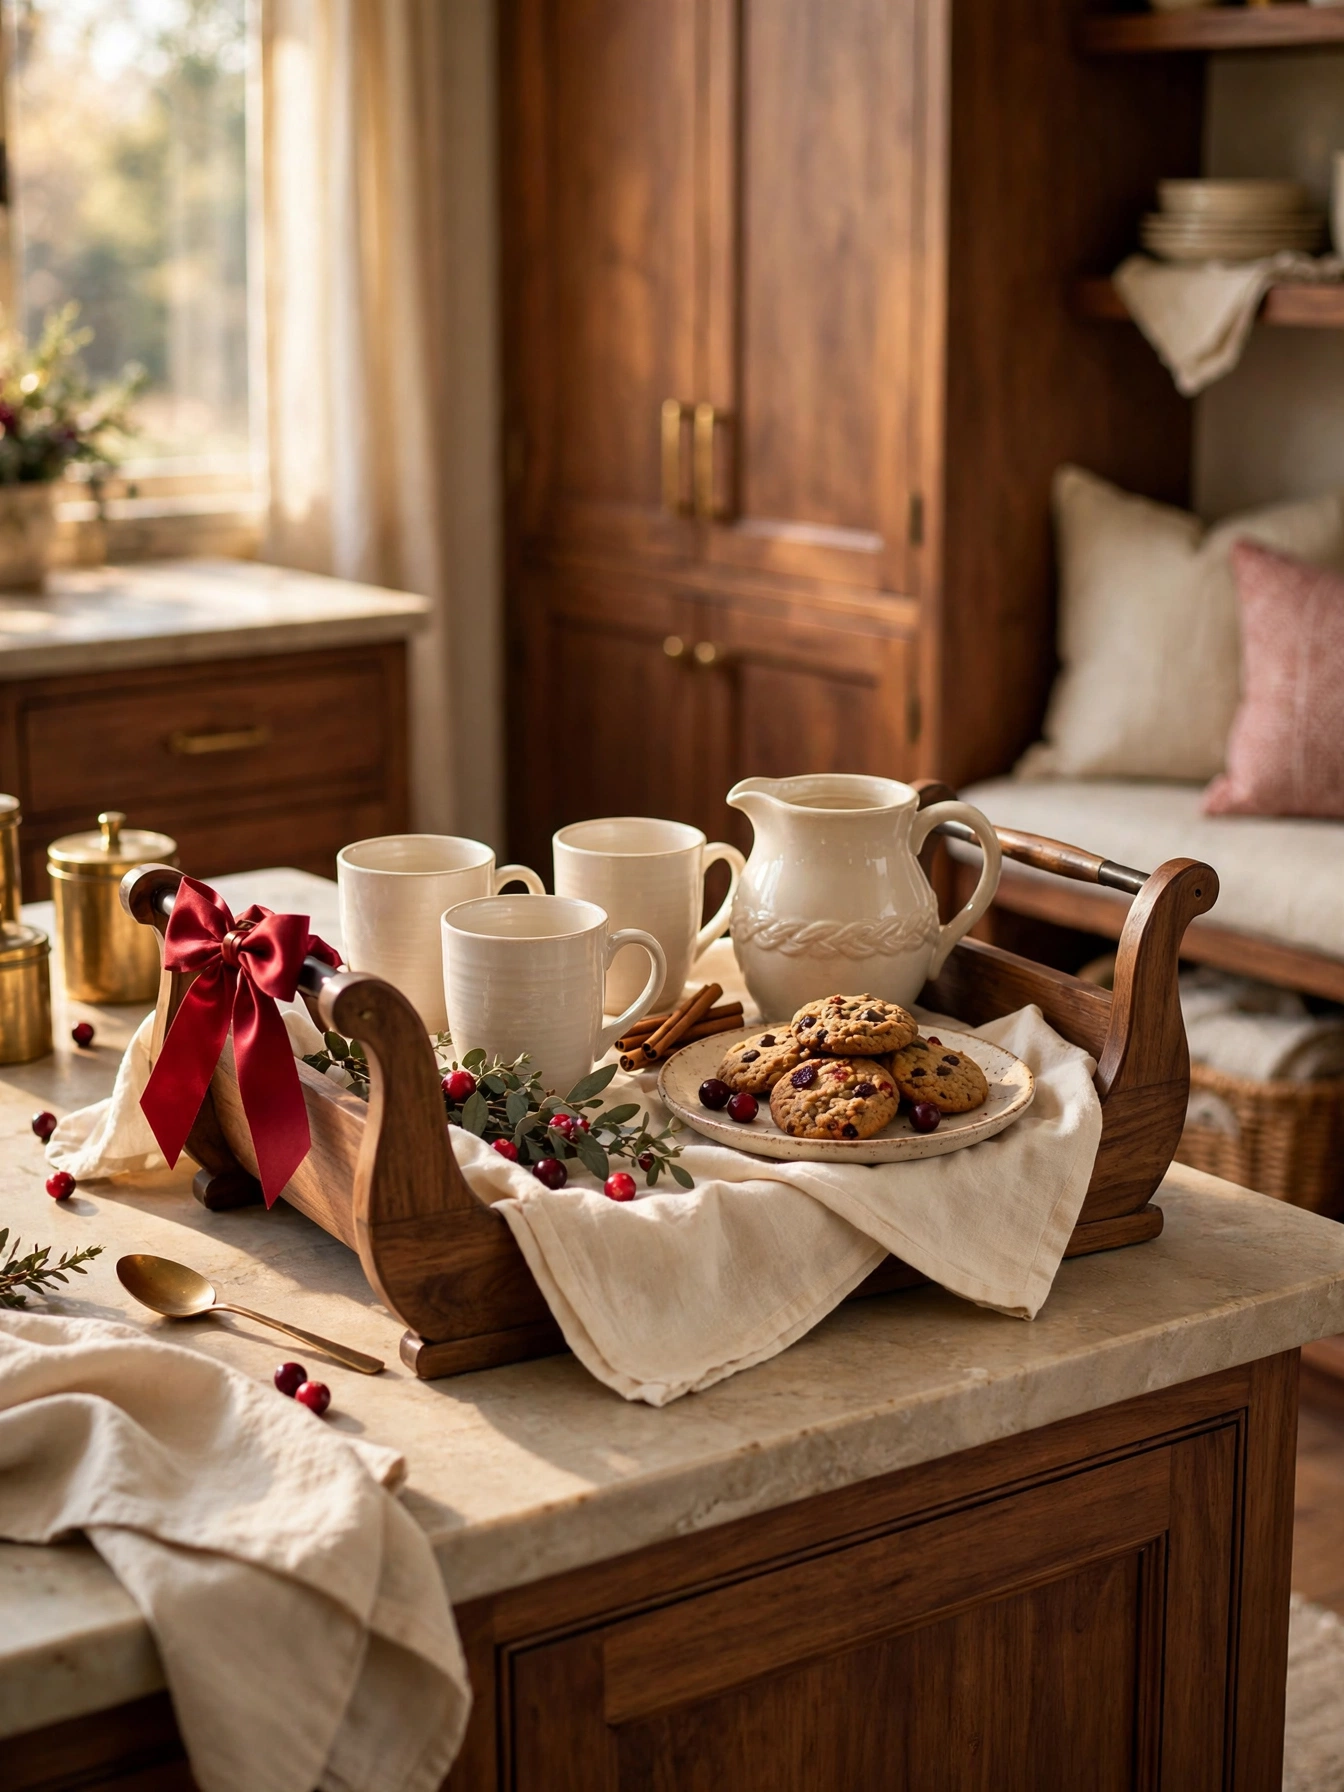
Why This Works:
- A 20-inch by 14-inch sleigh tray with four-inch sides carries drinks and snacks
- Load it with six 12-ounce mugs, one 32-ounce pitcher, and a 10-inch snack plate
- Keep the loaded tray under eight pounds so one person lifts it safely
- Park the tray 12 inches from the counter edge with handles facing outward
Load a twenty-inch sleigh tray with six twelve-ounce mugs, one thirty-two-ounce pitcher, and a ten-inch snack plate for a self-serve drink station. The four-inch sides contain drips and stop mugs from sliding when the tray moves, which matters on a slick stone counter. Keep the loaded tray under eight pounds by filling the pitcher only three-quarters full, since a full pitcher alone adds two pounds. Avoid glass pitchers on a metal tray because the base scratches within a week; a ceramic pitcher or a cork mat underneath protects the finish.
Hosts who serve drinks from the counter skip the back-and-forth to the dining room, since guests pour for themselves. The sleigh shape signals Christmas without a single word on the tray. The weak point is weight: eight pounds gets heavy after two trips, so park the tray near the seating area during a party. If your counter runs narrow, choose a sixteen-inch tray and cut the mug count to four.
Pro Tip: Line the tray with a twelve-inch by sixteen-inch tea towel. The towel absorbs drips for six hours and washes clean after the party.
Frosted Glass Canisters
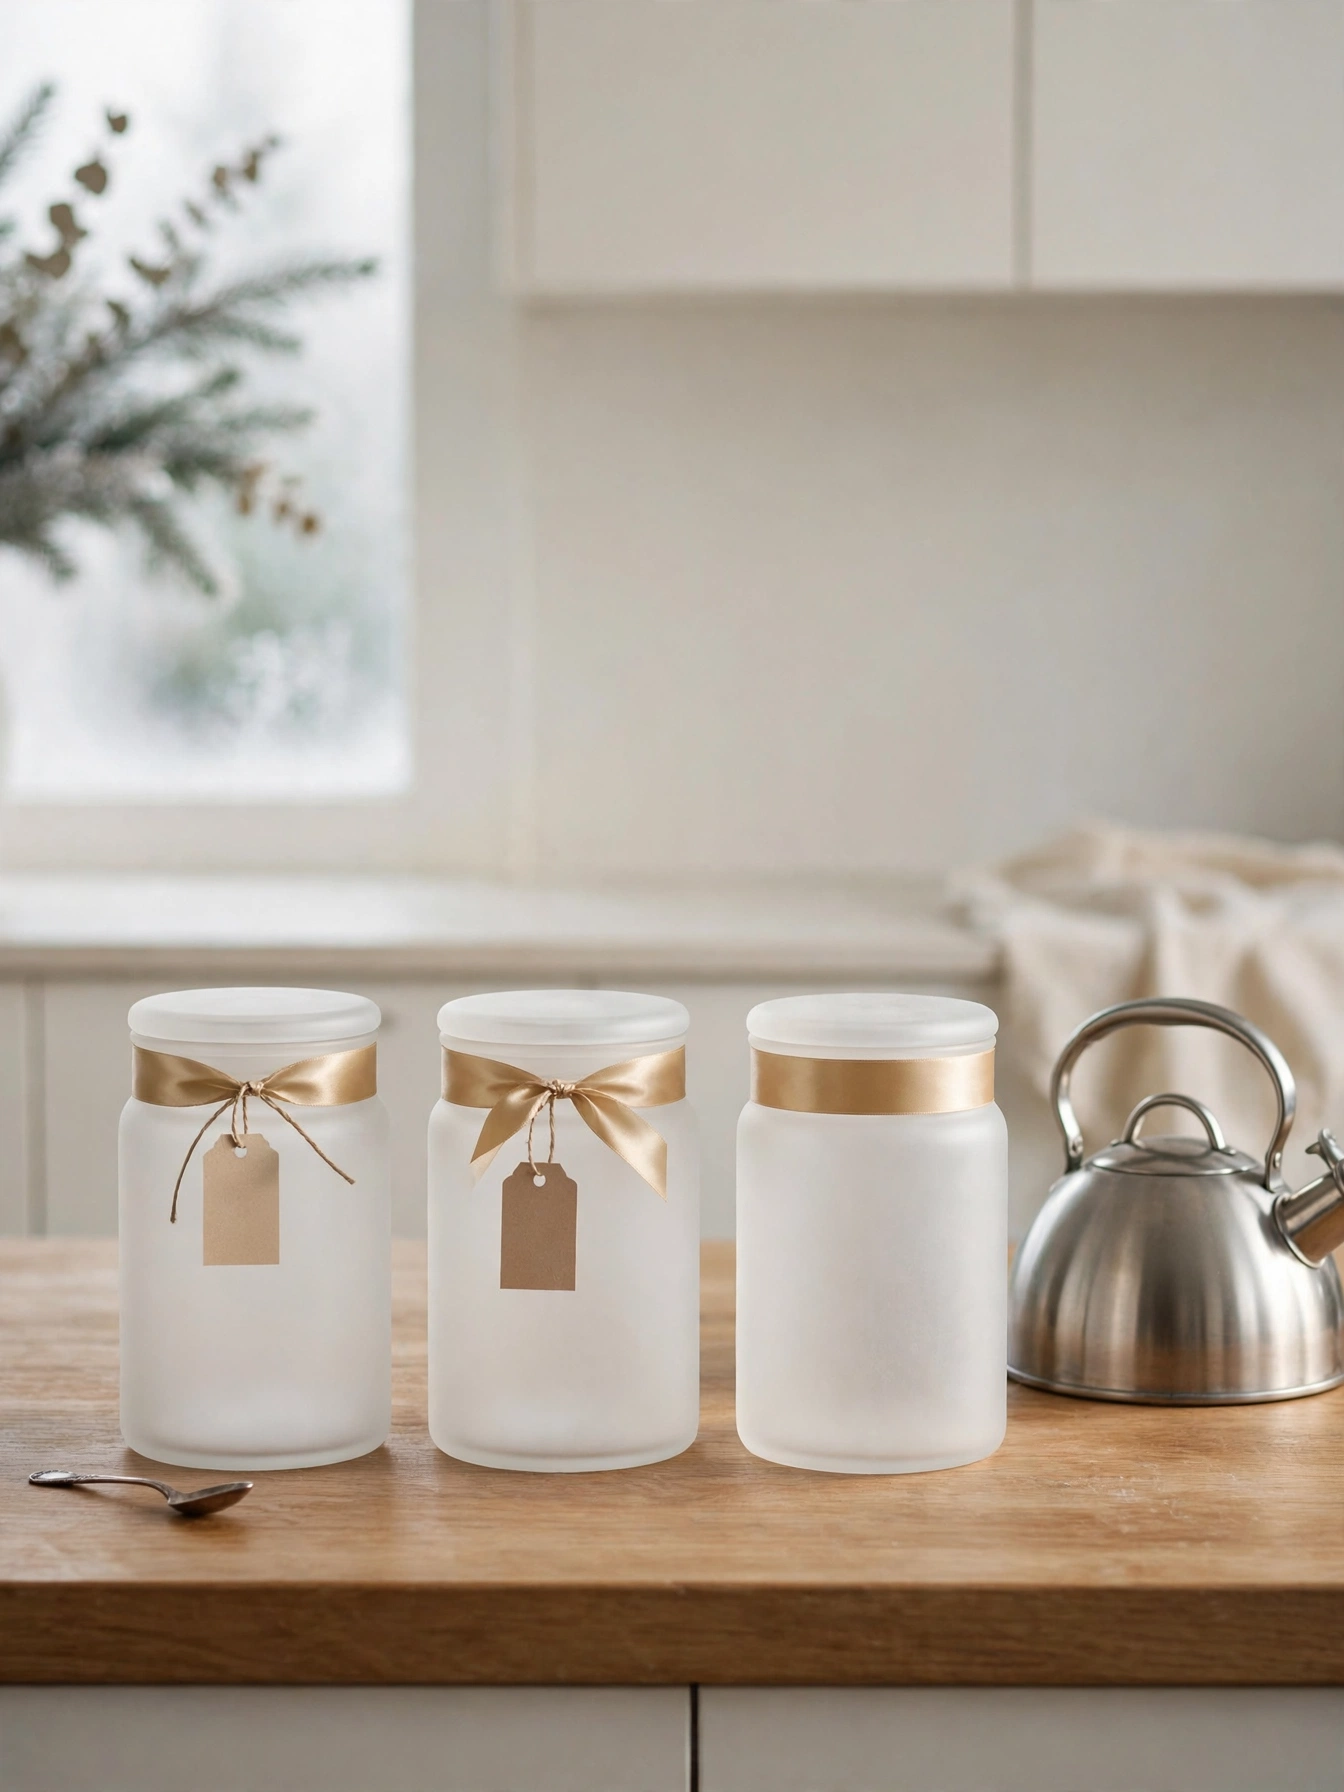
Why This Works:
- Three frosted canisters at 10, eight, and six inches tall hold 32, 24, and 16 ounces
- Store coffee beans, tea bags, and sugar in that order from tallest to shortest
- Set the trio a foot off the sink and six inches clear of the backsplash
- Seal each lid with a one-inch satin band to mark the holiday set
Replace open canisters with a frosted trio sized ten, eight, and six inches tall, holding thirty-two, twenty-four, and sixteen ounces. Fill the tallest with coffee beans, the middle with tea bags, and the smallest with sugar, so the morning routine flows left to right. Frosted glass hides the contents just enough to keep the counter calm while the shapes still read as a set. Avoid clear canisters for coffee beans because light degrades the beans within two weeks, while frosted glass slows that loss noticeably.
Minimalist kitchens stay calm when storage matches, since three identical canisters replace five mismatched bags and boxes. The satin band on each lid ties them to the season without permanent decoration. One limitation is identification: frosted glass hides contents, so guests guess which jar holds sugar, and a small tag on each lid solves it. If your counter already holds a coffee station, move the trio to the opposite end to balance the visual weight.
Pro Tip: Store beans in the tallest canister with the bag folded inside. The bag keeps the beans fresh for fourteen days longer than loose storage.
Berry Pick Vase
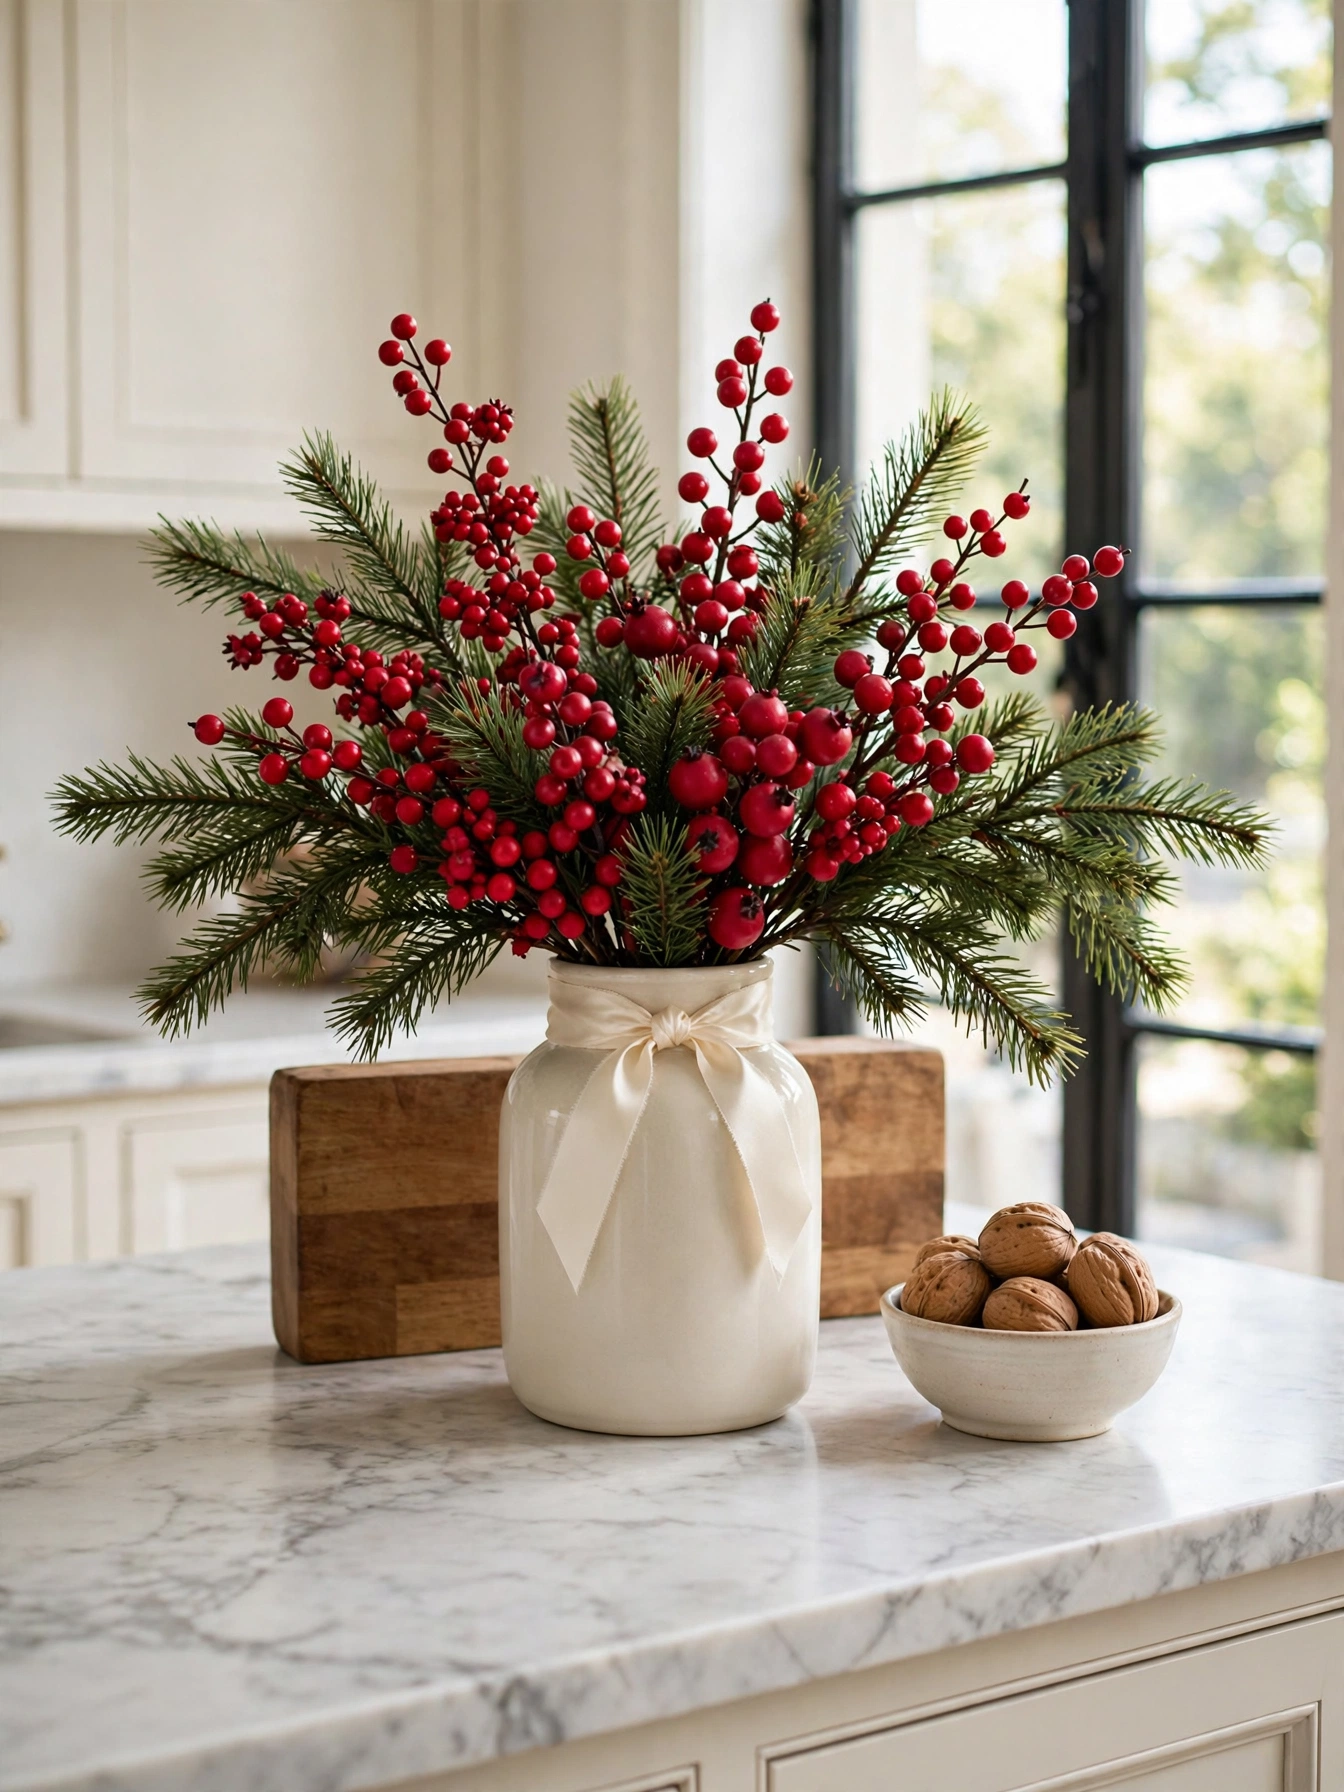
Why This Works:
- Fan eight berry picks, each 18 inches long, inside a 10-inch ceramic vase
- Choose matte red berries over glittered ones to dodge glitter on the counter
- Stand the vase a full 14 inches off the stove, eight inches out from the backsplash
- Add two 16-inch pine sprigs behind the berries for green contrast
Fan eight berry picks, each eighteen inches long, inside a ten-inch ceramic vase, then tuck two sixteen-inch pine sprigs behind them for green contrast. Matte red berries beat glittered ones here because glitter sheds onto the counter with every bump and sticks to damp hands. Stand the vase a full fourteen inches off the stove so heat never softens the pick wires, and eight inches out from the backsplash for a clean silhouette. Avoid real winterberry stems in a food prep zone because the berries drop within five days and the juice stains light stone.
Color-starved white kitchens wake up with one vase of red berries, since the color reads from the doorway. The arrangement takes four minutes and needs no water, no trimming, and no cleanup. The drawback is stiffness: faux picks hold one shape all season, so bend each wire once at setup and leave it alone. If the vase tips easily, drop a two-pound bag of rice inside the base for ballast.
Pro Tip: Spray the berry picks with one light coat of clear hairspray. The coating stops shedding for six weeks and keeps the matte finish intact.
Christmas Countertop Decor Ideas 2026: Coffee Mug Tree
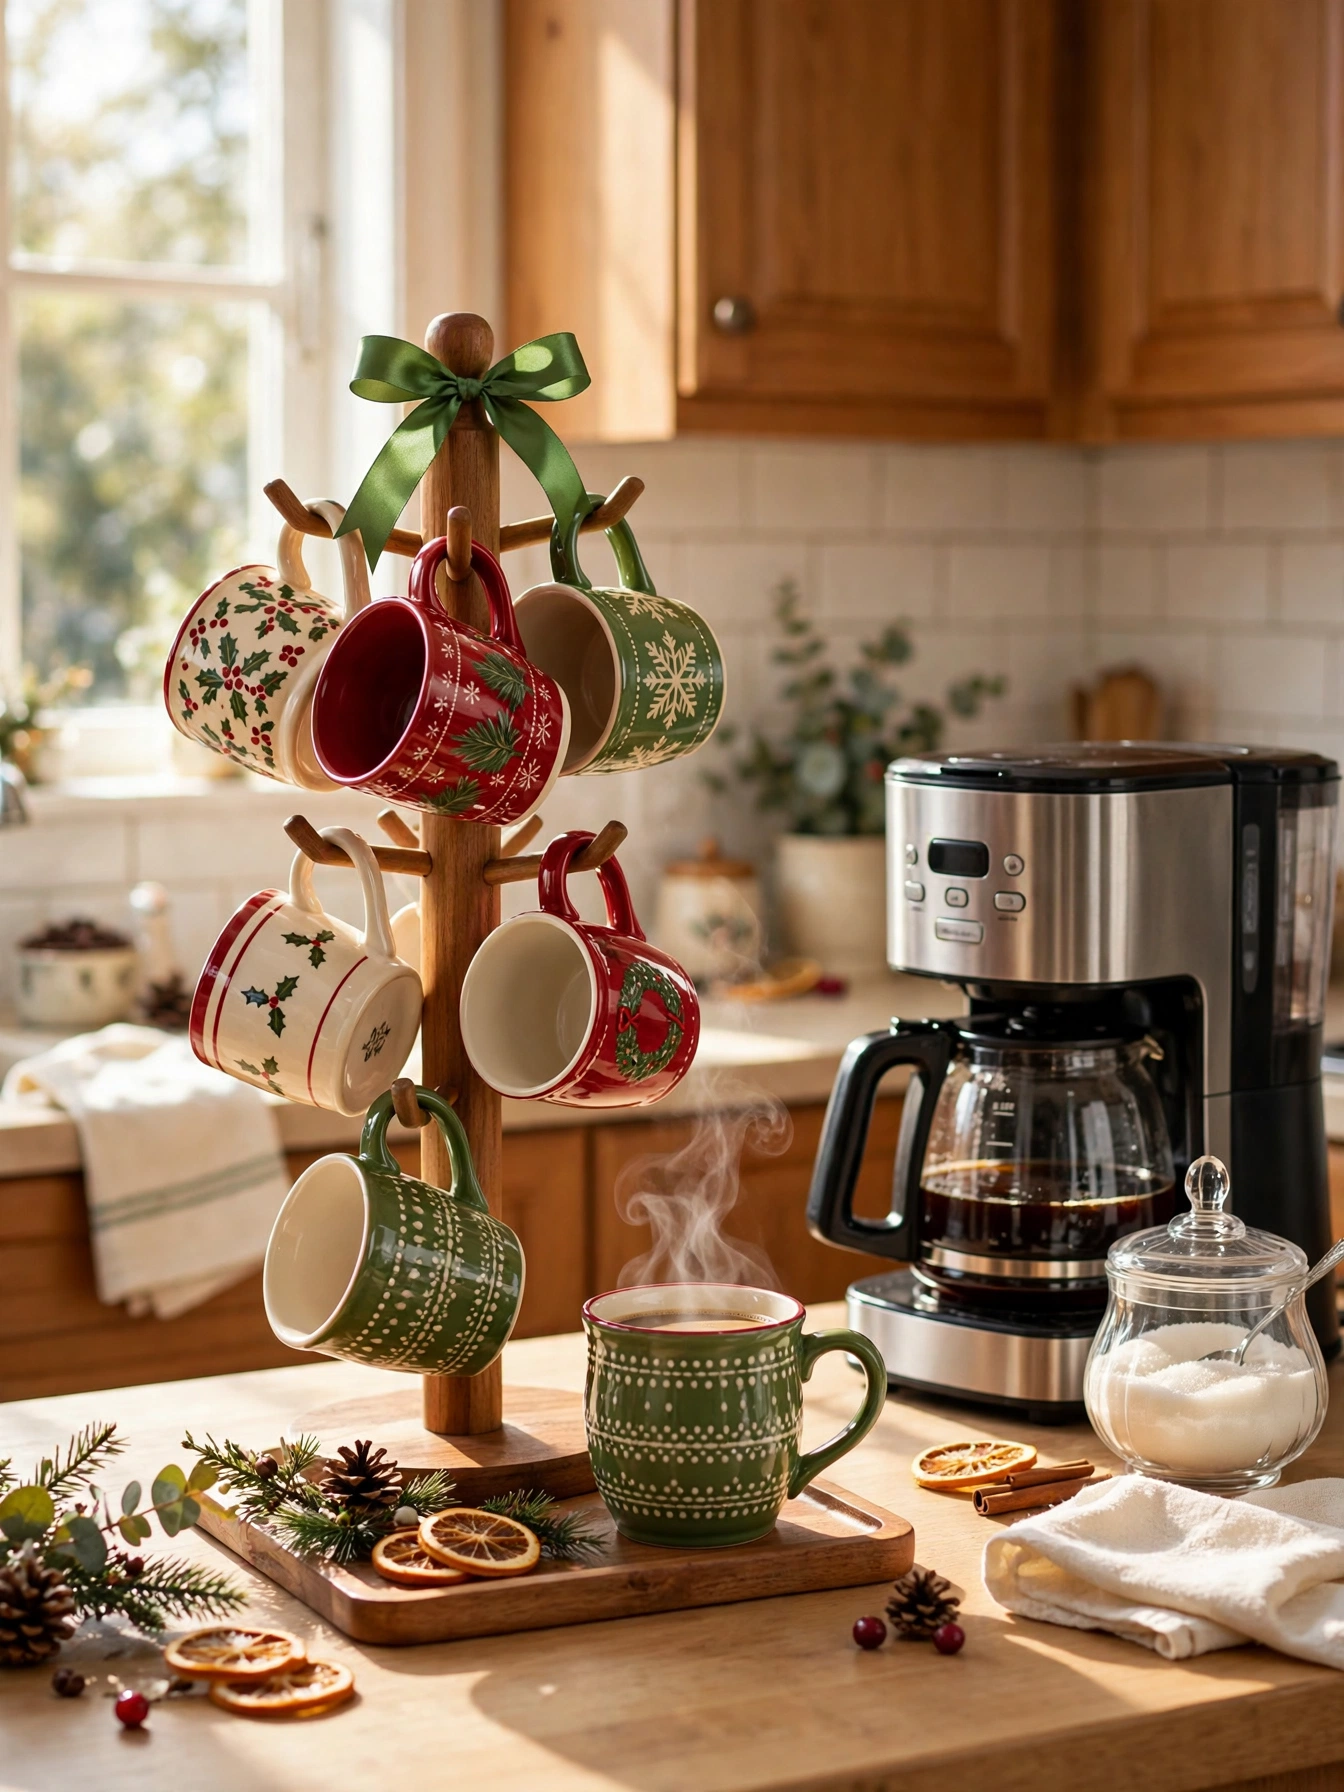
Why This Works:
- A 15-inch mug tree with six hooks holds six 12-ounce mugs on an eight-inch base
- Space hooks three inches apart so mug handles never tangle
- Set the tree 18 inches from the coffee maker inside a 20-inch morning zone
- Hang the lightest mugs on top and the heaviest stoneware on the bottom hooks
Anchor a fifteen-inch mug tree beside the coffee maker, with six hooks spaced three inches apart holding six twelve-ounce mugs. The eight-inch base needs a flat stretch of counter, so test the tree on the spot for one morning before committing the space. Hang the lightest mugs on the top hooks and the heaviest stoneware on the bottom pair, which keeps the center of gravity low and stops tipping. Avoid tall trees over eighteen inches because they wobble when a mug is pulled one-handed, and a falling tree breaks two mugs on a tile floor.
Coffee drinkers reach for this station first, since the mugs wait within arm’s reach of the machine. The tree also frees a full cabinet shelf for plates and bowls. The catch is weight: six full stoneware mugs load about seven pounds onto one base, so keep the base on a non-slip mat. If your mugs run larger than fourteen ounces, drop the count to four and leave two hooks empty.
Pro Tip: Turn every mug handle outward on a diagonal slant. Outward handles grab cleanly with one hand and shave two seconds off each pour.
Tea Towel Holiday Set
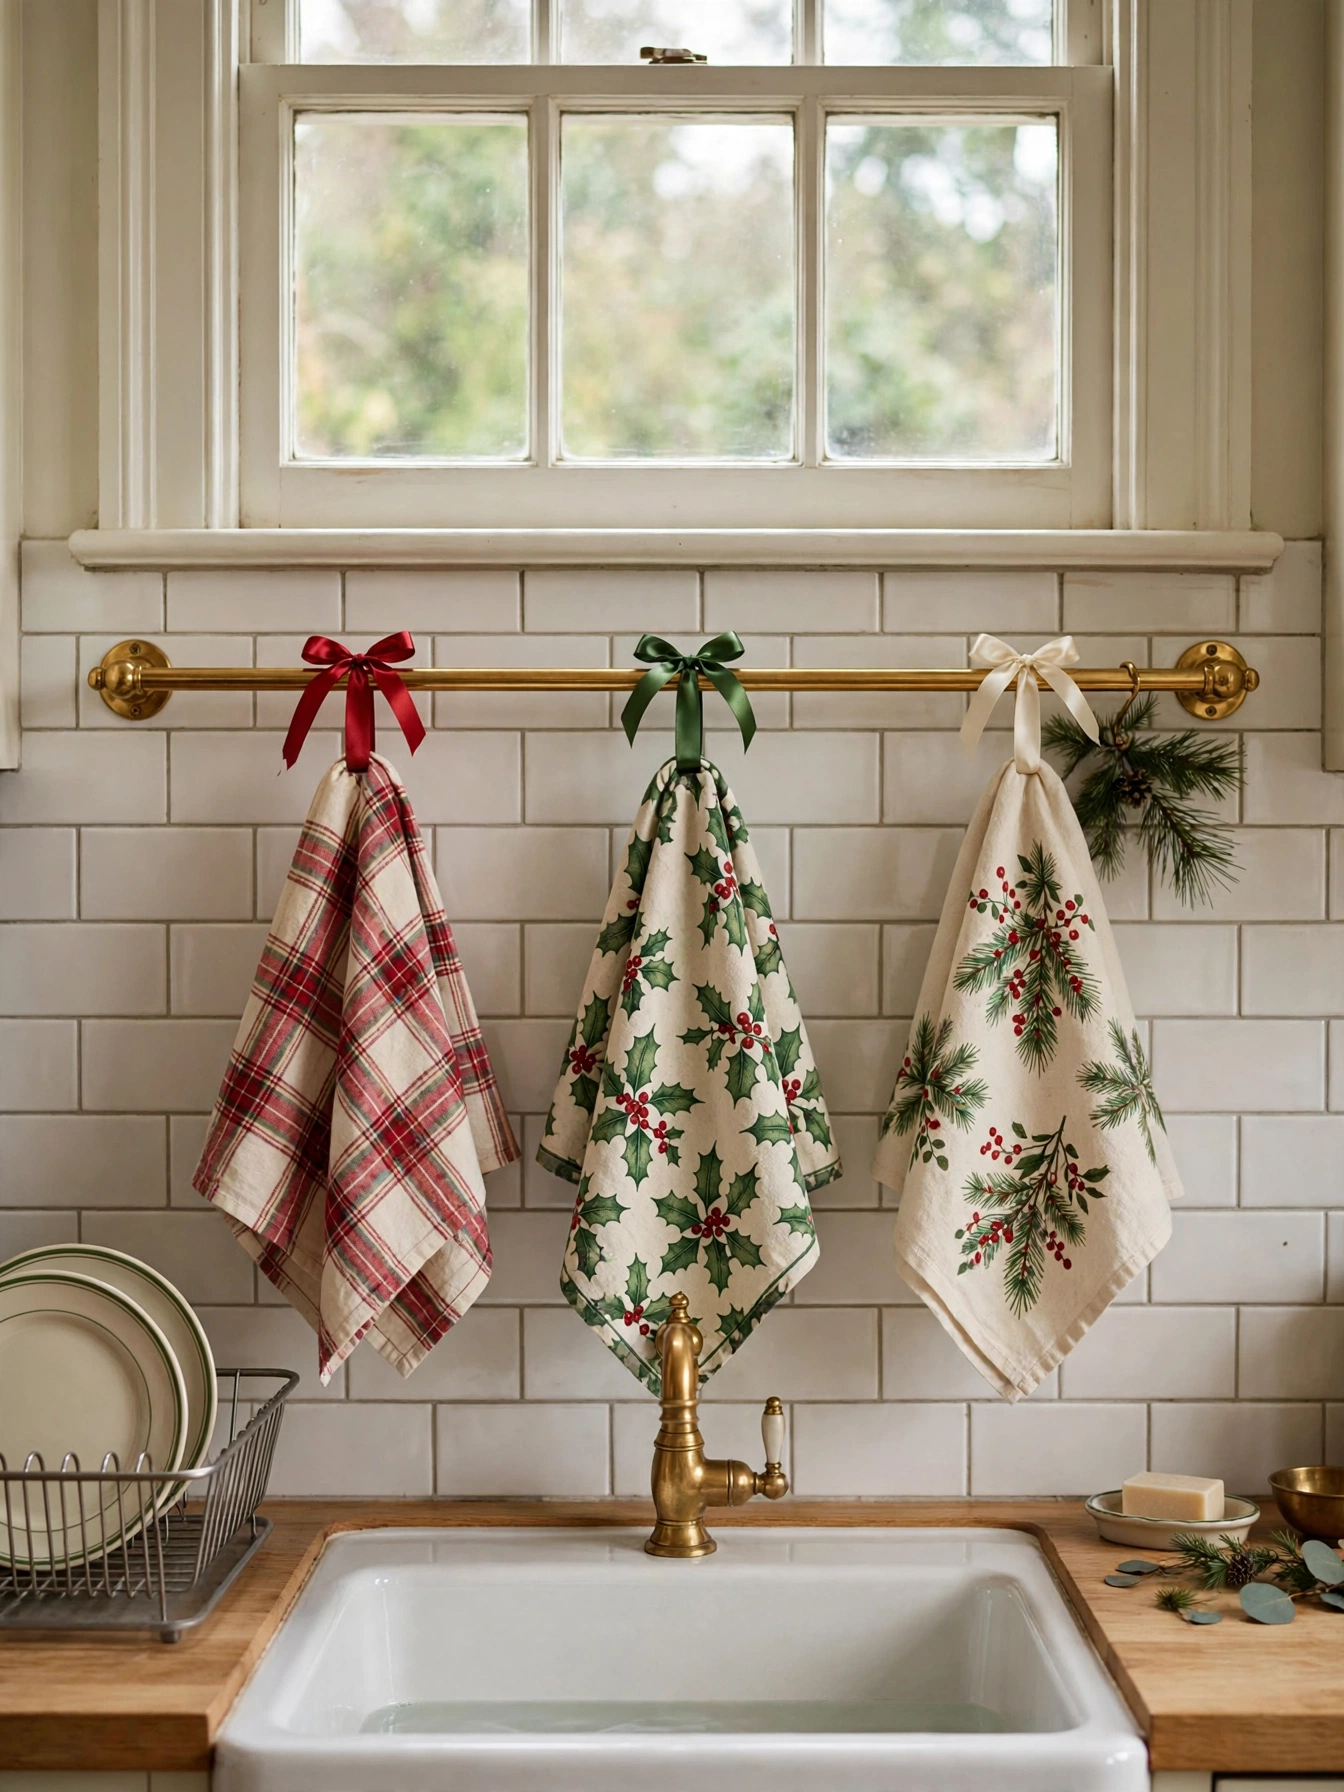
Why This Works:
- Hang three tea towels, each 18 inches by 28 inches, over a 24-inch towel bar
- Fold each towel in thirds so the printed band shows at 20 inches of length
- Mount the bar a foot away from the nearest burner, 36 inches above the floor
- Rotate the front towel every three days to spread wear evenly
Hang three holiday tea towels, each eighteen inches by twenty-eight inches, over a twenty-four-inch towel bar beside the sink. Fold each towel in thirds so the printed band shows at roughly twenty inches of visible length and the hems line up. Mount the bar twelve inches from the nearest burner and thirty-six inches above the floor, where hands reach it without stretching. Avoid hanging towels over a gas burner because a twenty-eight-inch towel swings within eight inches of the flame and the fabric can scorch in seconds.
Small kitchens benefit fastest from textile swaps, since three towels change the whole room for under twenty dollars. The towels also work hard, drying dishes and wiping counters between displays. One compromise is staining: red dye transfers to white towels in the first wash, so launder the holiday set separately in cold water. If your oven door doubles as the towel bar, move the set to a hook twelve inches from the oven vent to dodge heat.
Pro Tip: Buy towels in a cotton-linen blend at 200 GSM or higher. Heavier towels dry dishes in one pass and hold their shape for three seasons.
Wood Bead Garland
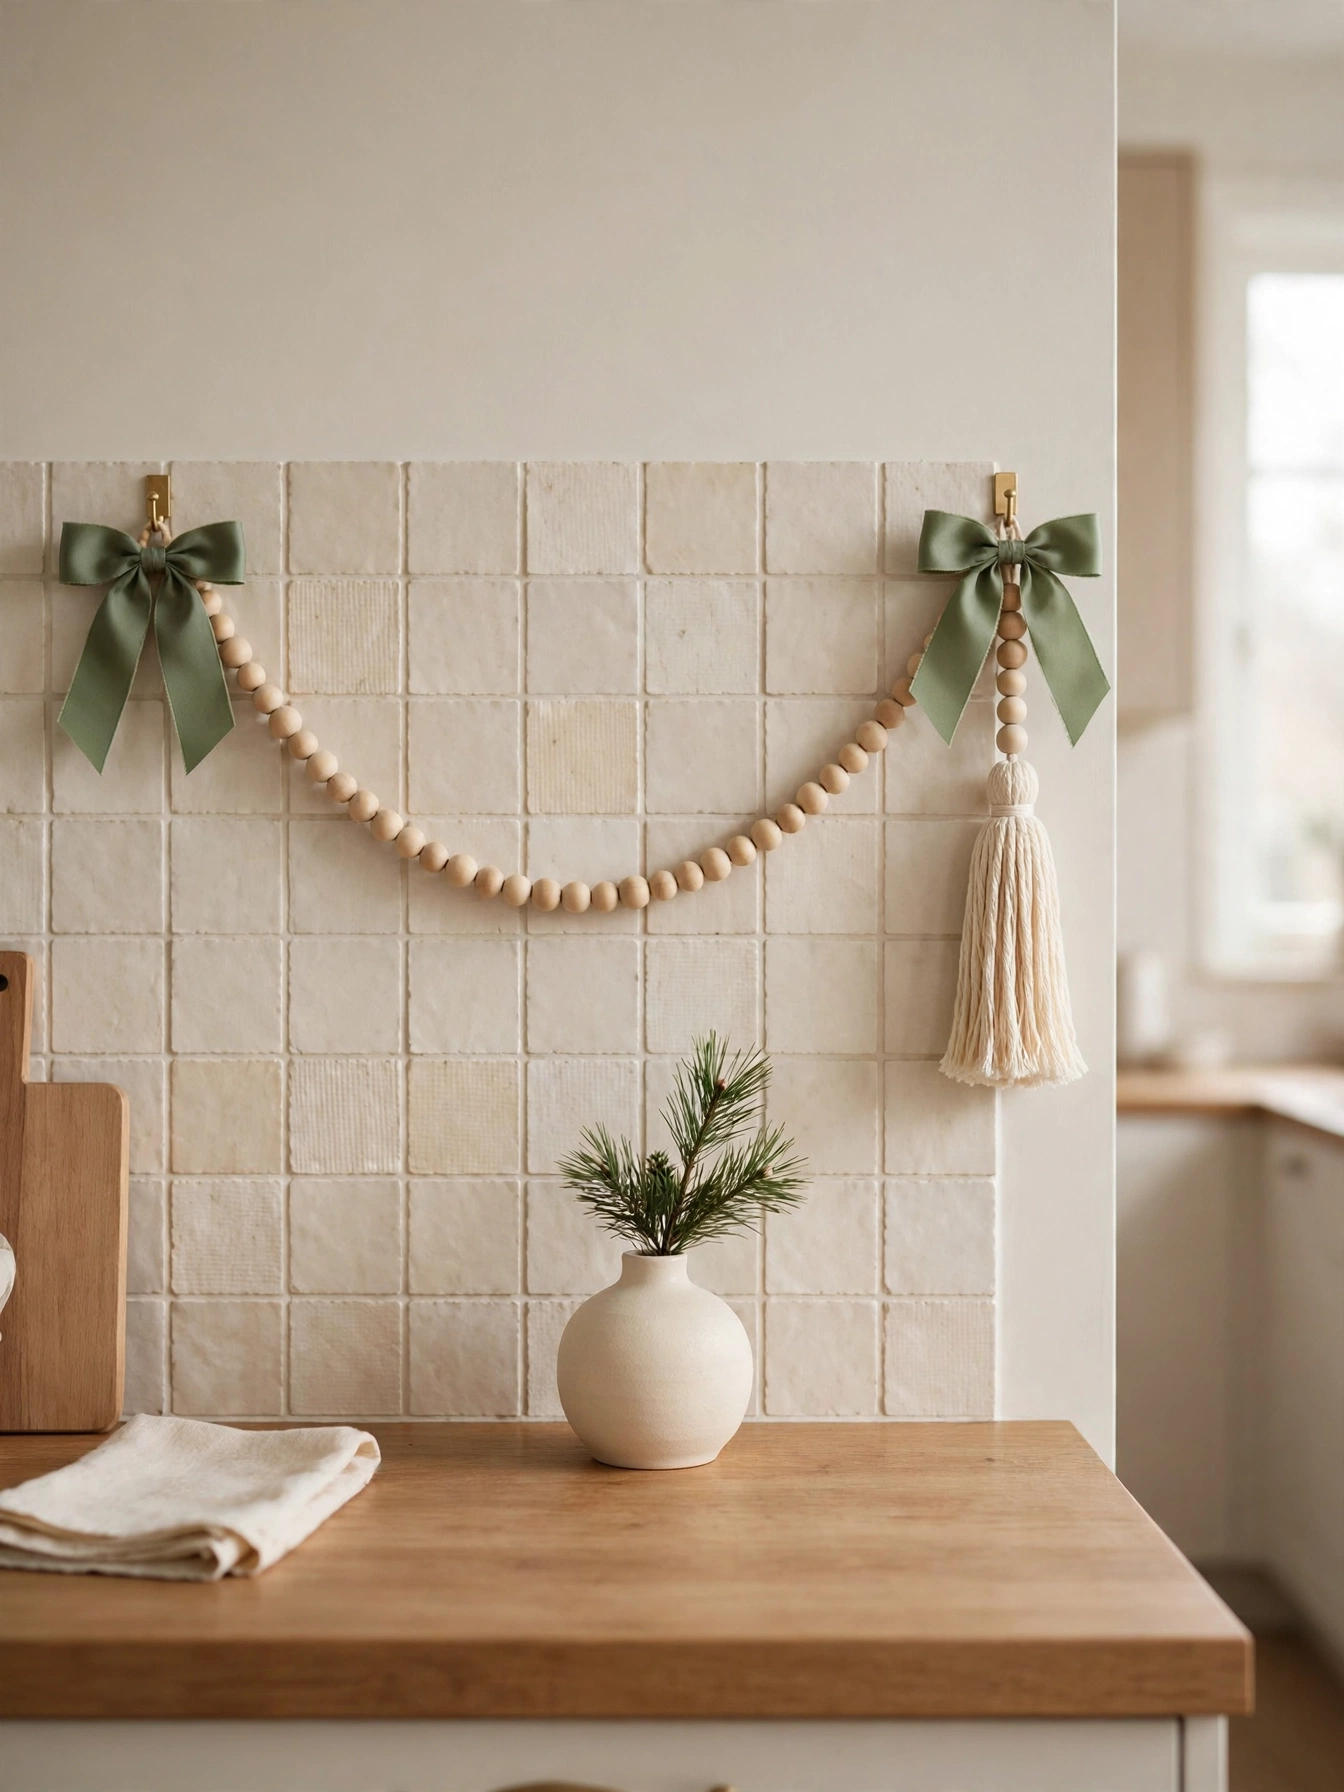
Why This Works:
- A 72-inch wood bead garland with 0.8-inch beads drapes in three 24-inch swags
- Pin the garland with three clear hooks spaced 24 inches apart along the backsplash
- Let each swag dip six inches at center for a soft, even curve
- Finish one end with a five-inch tassel and a two-inch satin ribbon knot
Drape a seventy-two-inch wood bead garland along the backsplash in three twenty-four-inch swags, pinning it with three clear hooks spaced twenty-four inches apart. Each swag dips six inches at center, which reads as relaxed rather than sagging. The zero-point-eight-inch beads suit kitchen scale, since larger beads overpower a standard eighteen-inch backsplash. Avoid draping the garland across a window you open daily because the beads catch in the sash and the strand snaps within a week.
Neutral kitchens keep this garland up past Christmas, since bare wood beads read as winter rather than holiday-specific. The garland also layers well, sitting behind a tray or in front of a cutting board display. The weak point is rolling: dropped beads travel across tile floors, so string the garland over the counter, never over the sink. If the beads feel too plain, tie a two-inch satin bow at each hook for a holiday accent.
Pro Tip: Knot the garland at each hook with one wrap of clear fishing line. The line stops sliding for the full season and stays invisible from three feet away.
Cookie Tin Display
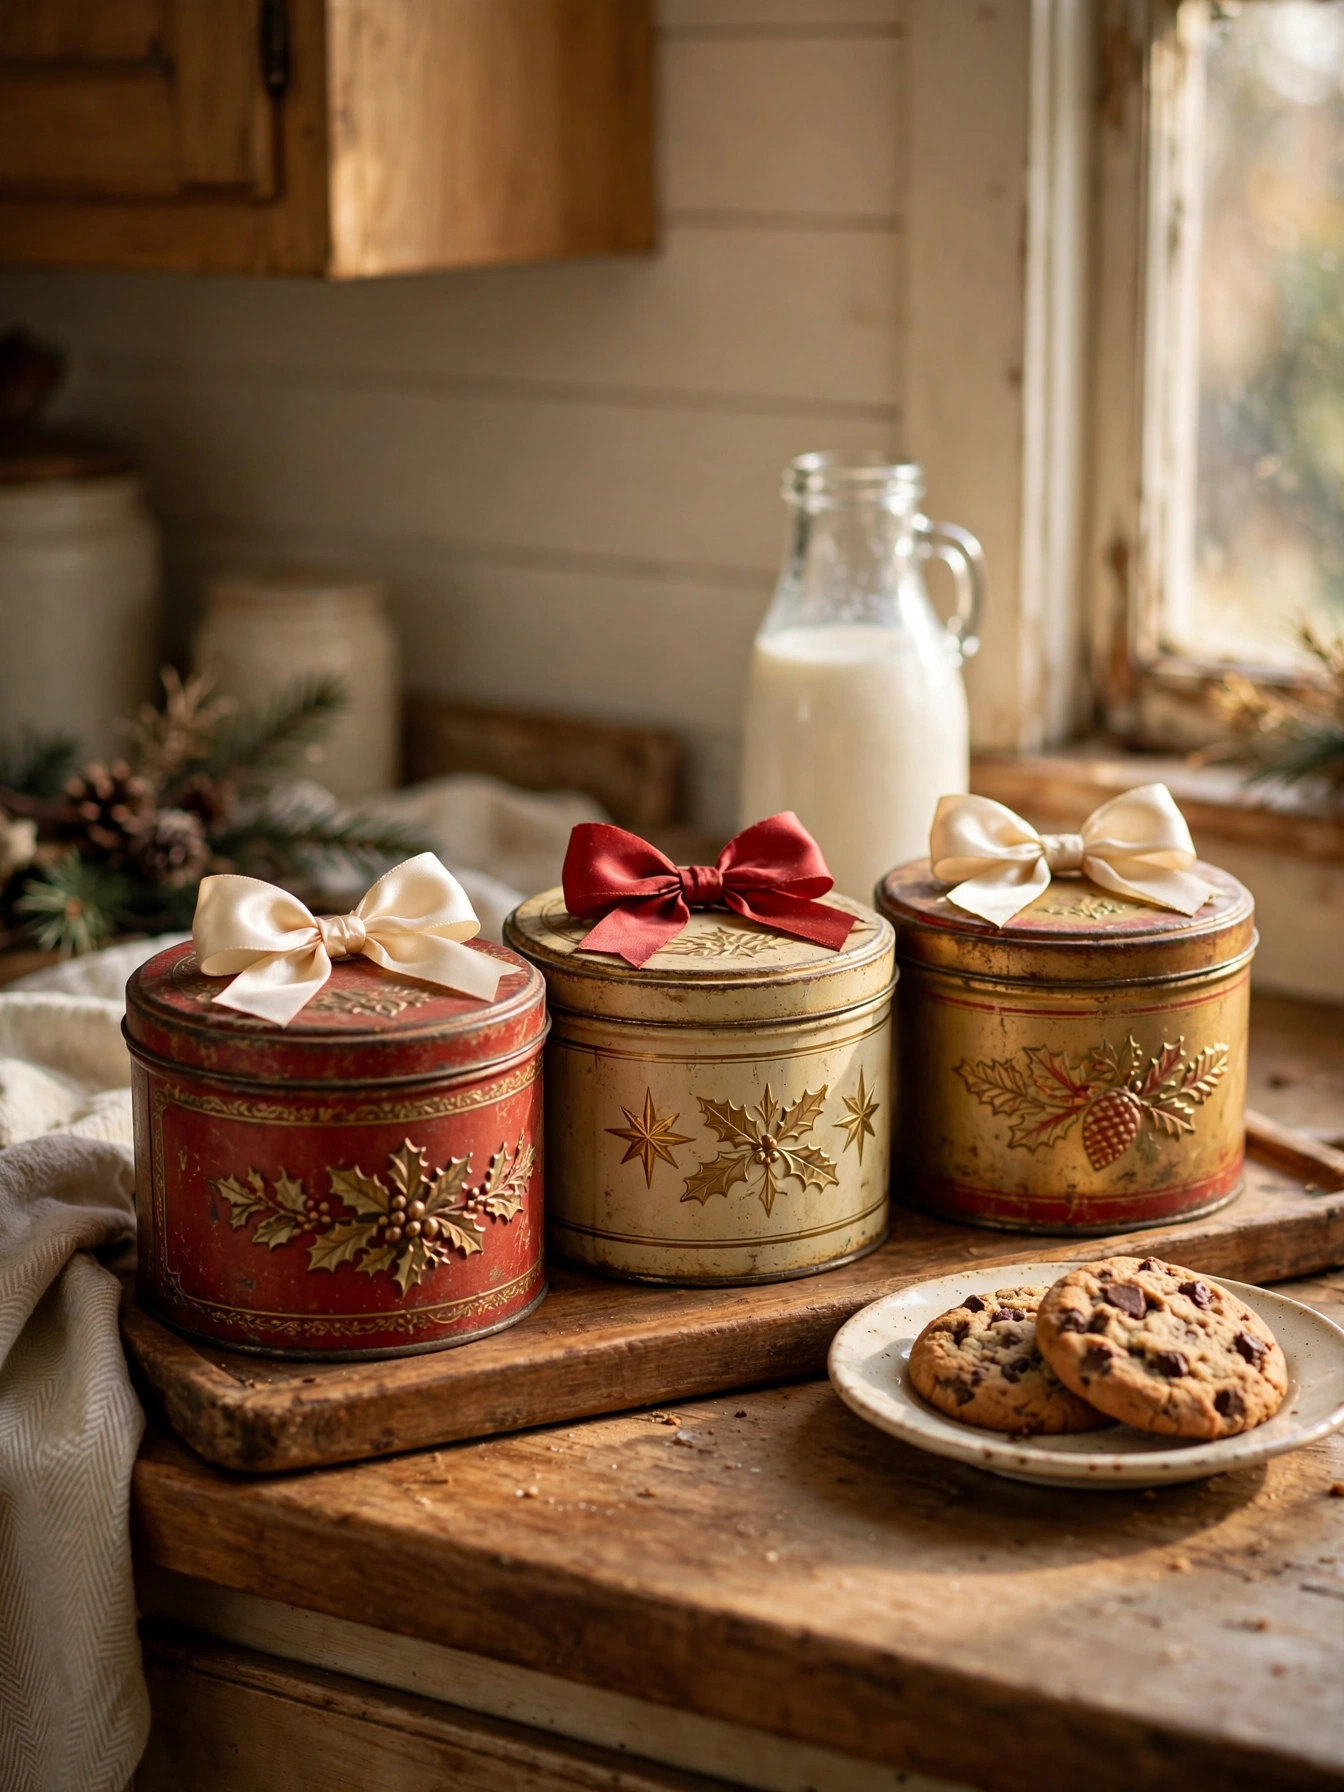
Why This Works:
- Line three vintage tins at seven, six, and five inches tall on an 18-inch tray
- Pack 12 cookies per tin in two layers with parchment between them
- Keep the tray 10 inches inside the counter edge, 14 inches off the stove
- Tie a three-inch satin bow on each tin lid for a matched set
Line three vintage cookie tins in heights of seven, six, and five inches along an eighteen-inch tray on the rear counter run. Pack twelve cookies per tin in two parchment-separated layers, which keeps the bottom layer from crushing. Set the tray ten inches in from the counter front and fourteen inches from the stove, where the tins stay visible but out of the cooking lane. Avoid stacking the tins because the lids dent under weight and a dented lid never seals again, cutting cookie freshness to three days.
Gift tins from previous years finally get a second life here, since the display turns storage into decoration. Guests open a tin, take a cookie, and the display resets itself. The drawback is denting: thin vintage tins dent if knocked, so keep the tray against the backsplash and away from the main walkway. If the tins smell of last year spices, wash them with baking soda and air-dry for twenty-four hours before filling.
Pro Tip: Label each tin on the bottom with masking tape. The label names the cookie inside, so guests stop opening all three tins to find one flavor.
Copper Pot Greenery
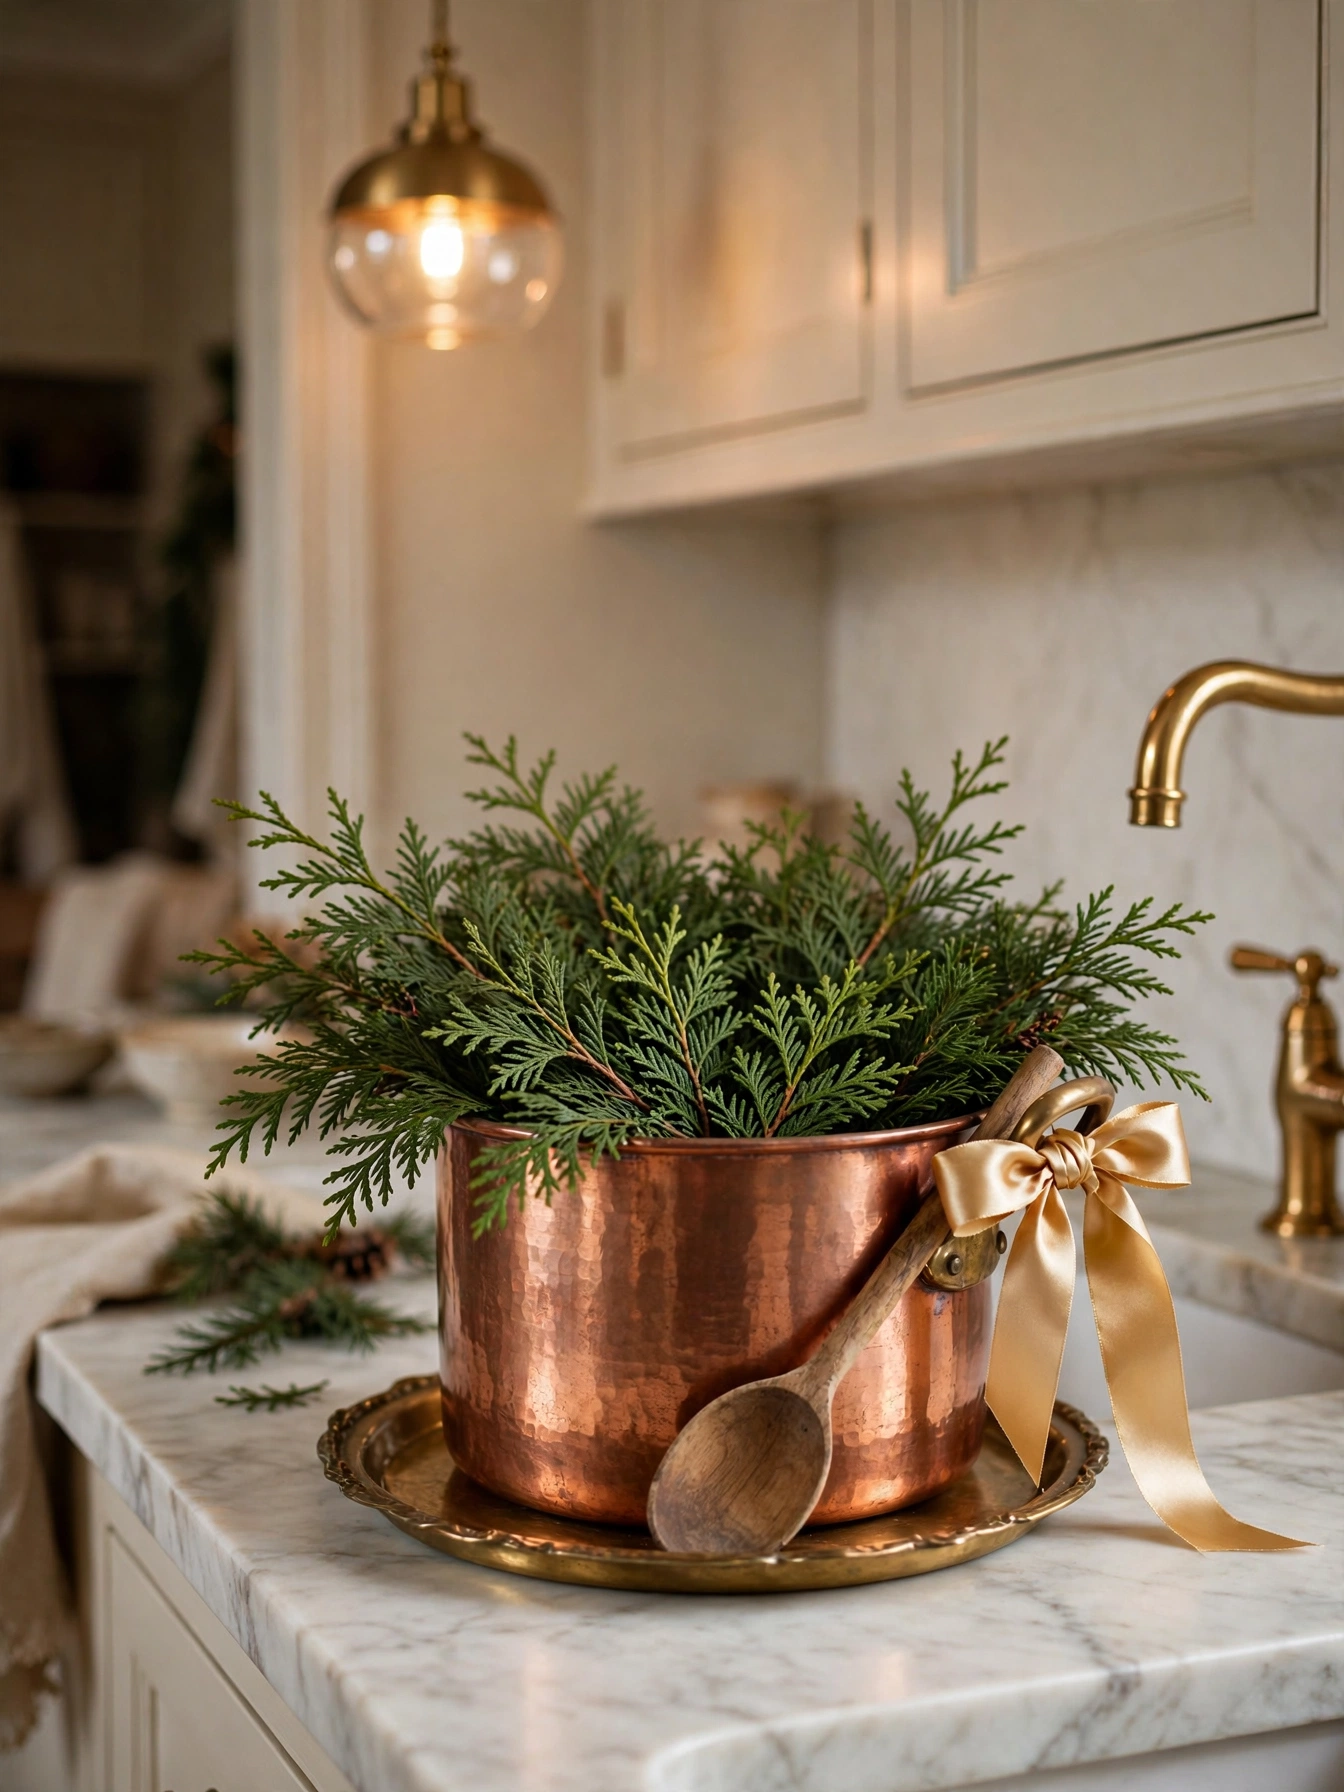
Why This Works:
- A 10-inch copper pot with a 3-inch rim holds three 16-inch cedar sprigs
- Tie a two-inch satin ribbon around the pot handle in a simple knot
- Stand the pot 18 inches off the nearest burner, eight inches clear of the backsplash
- Polish the copper with one tablespoon of vinegar and salt before displaying
Set a ten-inch copper pot on the counter and fill it with three sixteen-inch cedar sprigs, tied at the handle with a two-inch satin ribbon knot. The pot needs no water, since the sprigs are decorative, and the copper glows under kitchen light. Polish the pot first with one tablespoon of vinegar mixed with salt, rubbing for two minutes until the finish brightens. Avoid placing the pot within eighteen inches of the burner because direct heat discolors the copper in one afternoon and the sprigs dry out twice as fast.
Warm metal softens kitchens full of stainless steel and white tile, since copper adds the only warm tone on the counter. The pot also anchors a corner that otherwise collects mail and keys. One compromise is tarnish: copper dulls within four weeks in a humid kitchen, so a quick polish each month keeps it bright. If the pot has a tin lining, skip the vinegar polish and wipe it with a soft cloth instead.
Pro Tip: Coat the polished copper with one thin layer of beeswax. The wax holds the shine for eight weeks instead of four.
Star String Lights
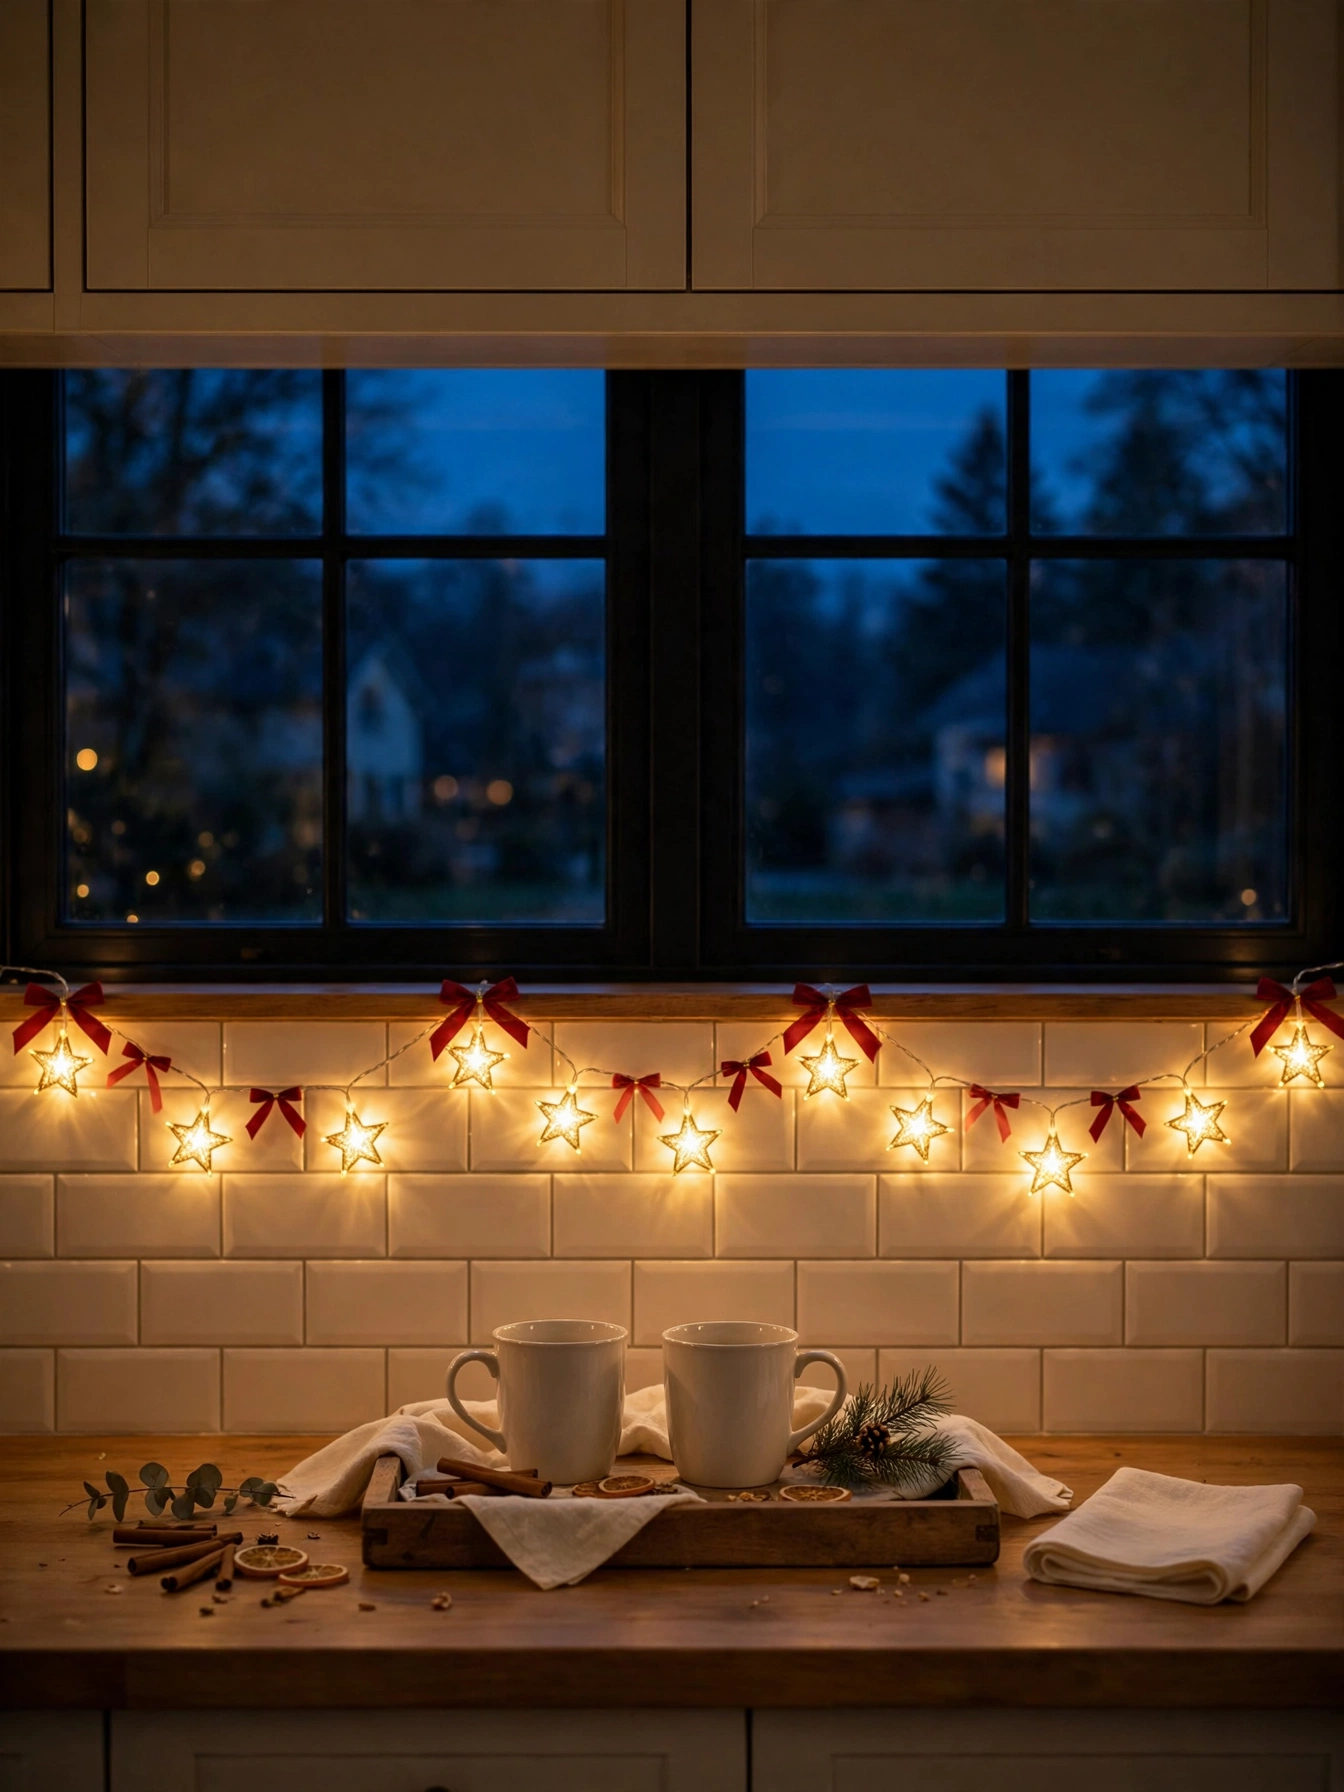
Why This Works:
- Clip a 33-foot string of 50 star LEDs along the backsplash at 12-inch clip spacing
- Space the stars three inches apart for even sparkle across six feet of counter
- Keep the string 12 inches from the faucet and 18 inches from the stovetop
- Run the lights on a six-hour timer from 5 PM to 11 PM nightly
Clip a thirty-three-foot string of fifty star LEDs along the backsplash, spacing the clips twelve inches apart and the stars three inches apart. The stars cover six feet of counter with an even sparkle that reads as festive without a single garland. Keep the string twelve inches from the faucet and eighteen inches from the stovetop, since water and heat both shorten LED life. Avoid plug-in strings with thin cords near the sink because a nicked cord near water creates a shock risk that no display is worth.
December evenings end at the counter with this glow on, since the stars light the room while dinner dishes wait. The timer handles the whole routine, switching on at five and off at eleven. The limitation is outlets: if the nearest outlet sits behind the stove, hire a licensed electrician to add a safe outlet. If your backsplash lacks a clip-friendly edge, use clear adhesive clips rated for one pound each.
Pro Tip: Buy a string with a warm 2700K star glow and a memory timer. The memory function restarts the six-hour cycle at the same time daily without a single reset.
FAQs
How much counter space should I keep clear with christmas countertop decor ideas 2026?
Reserve at least twenty-four inches of open counter between displays for chopping, mixing, and setting down hot pans. Measure from the front edge to the backsplash, then subtract each display footprint. Kitchens under ten feet of total counter should run two displays maximum, not five.
How do I keep garlands and candles safe near the stove?
Hold every open flame twelve inches from greenery, curtains, and paper, and never leave a burning candle unattended. Unattended candles are a leading cause of home candle fires in December. Flameless pillars give the same glow with zero flame risk near the stove.
Can christmas countertop decor ideas 2026 work in a small kitchen?
Yes, a twenty-four-inch tray holds one display and leaves the rest of the counter free. Choose vertical pieces like a mug tree or a tiered tray, which use eight inches of footprint. Group displays in odd numbers, so one tray plus one vase beats five scattered items.
How often should I refresh fresh greenery on the counter?
Swap fresh greenery every fourteen days, sooner if needles drop daily or stems feel brittle. Mist cedar and eucalyptus every four days and re-trim stems on the slant for uptake. Faux greenery skips maintenance entirely and suits counters beside hot stoves.
How long does it take to style one countertop display?
Plan forty-five minutes for a single display, including measuring, hanging, and styling. A tiered tray takes twenty minutes, while a full garland with lights needs sixty minutes. Style in daylight, which prevents uneven spacing that shows at night.
Conclusion
Keep three rules in mind: every display earns its inches beside the coffee maker, greenery stays clear of heat and water, and one tray contains each vignette. The 23 christmas countertop decor ideas 2026 above succeed because they respect real cooking, from the cocoa bar to the baking station to the star lights. Start with one display this weekend, the garland swag or the tiered tray, and test it for two days before adding a second. Follow HomelyCrafter on Pinterest for more ideas. Save this to your Pinterest boards so you can refer back to it!

Muhammad Israr is a home decor enthusiast and the writer behind Homely Crafter. He spends his days researching paint colors, layouts and budget-friendly styling ideas, then breaks them down into practical, easy-to-follow guides so you can decorate with confidence.