
Harvest gold is back on kitchen walls, avocado green is back on cabinets, and burnt orange is back on backsplashes. The 1970s palette returned to home decor in the last few years, and the 2026 version keeps the warmth while dropping the excess. These 70s kitchen ideas use the decade as an accent, not a costume, so the kitchen reads retro without looking like a film set.
The 25 ideas below name the exact paints, tile sizes and measurements behind each look, and they are honest about where the decade flatters a room and where it dates one. Small doses, modern pairings and clear things to skip run through the whole set, so the retro touches stay under control. You can begin with a single $30 can of paint over one weekend, and build from there only if the first wall still feels right. The goal is a kitchen that feels warm and a little playful, not a museum of one decade.
Harvest Gold Accents
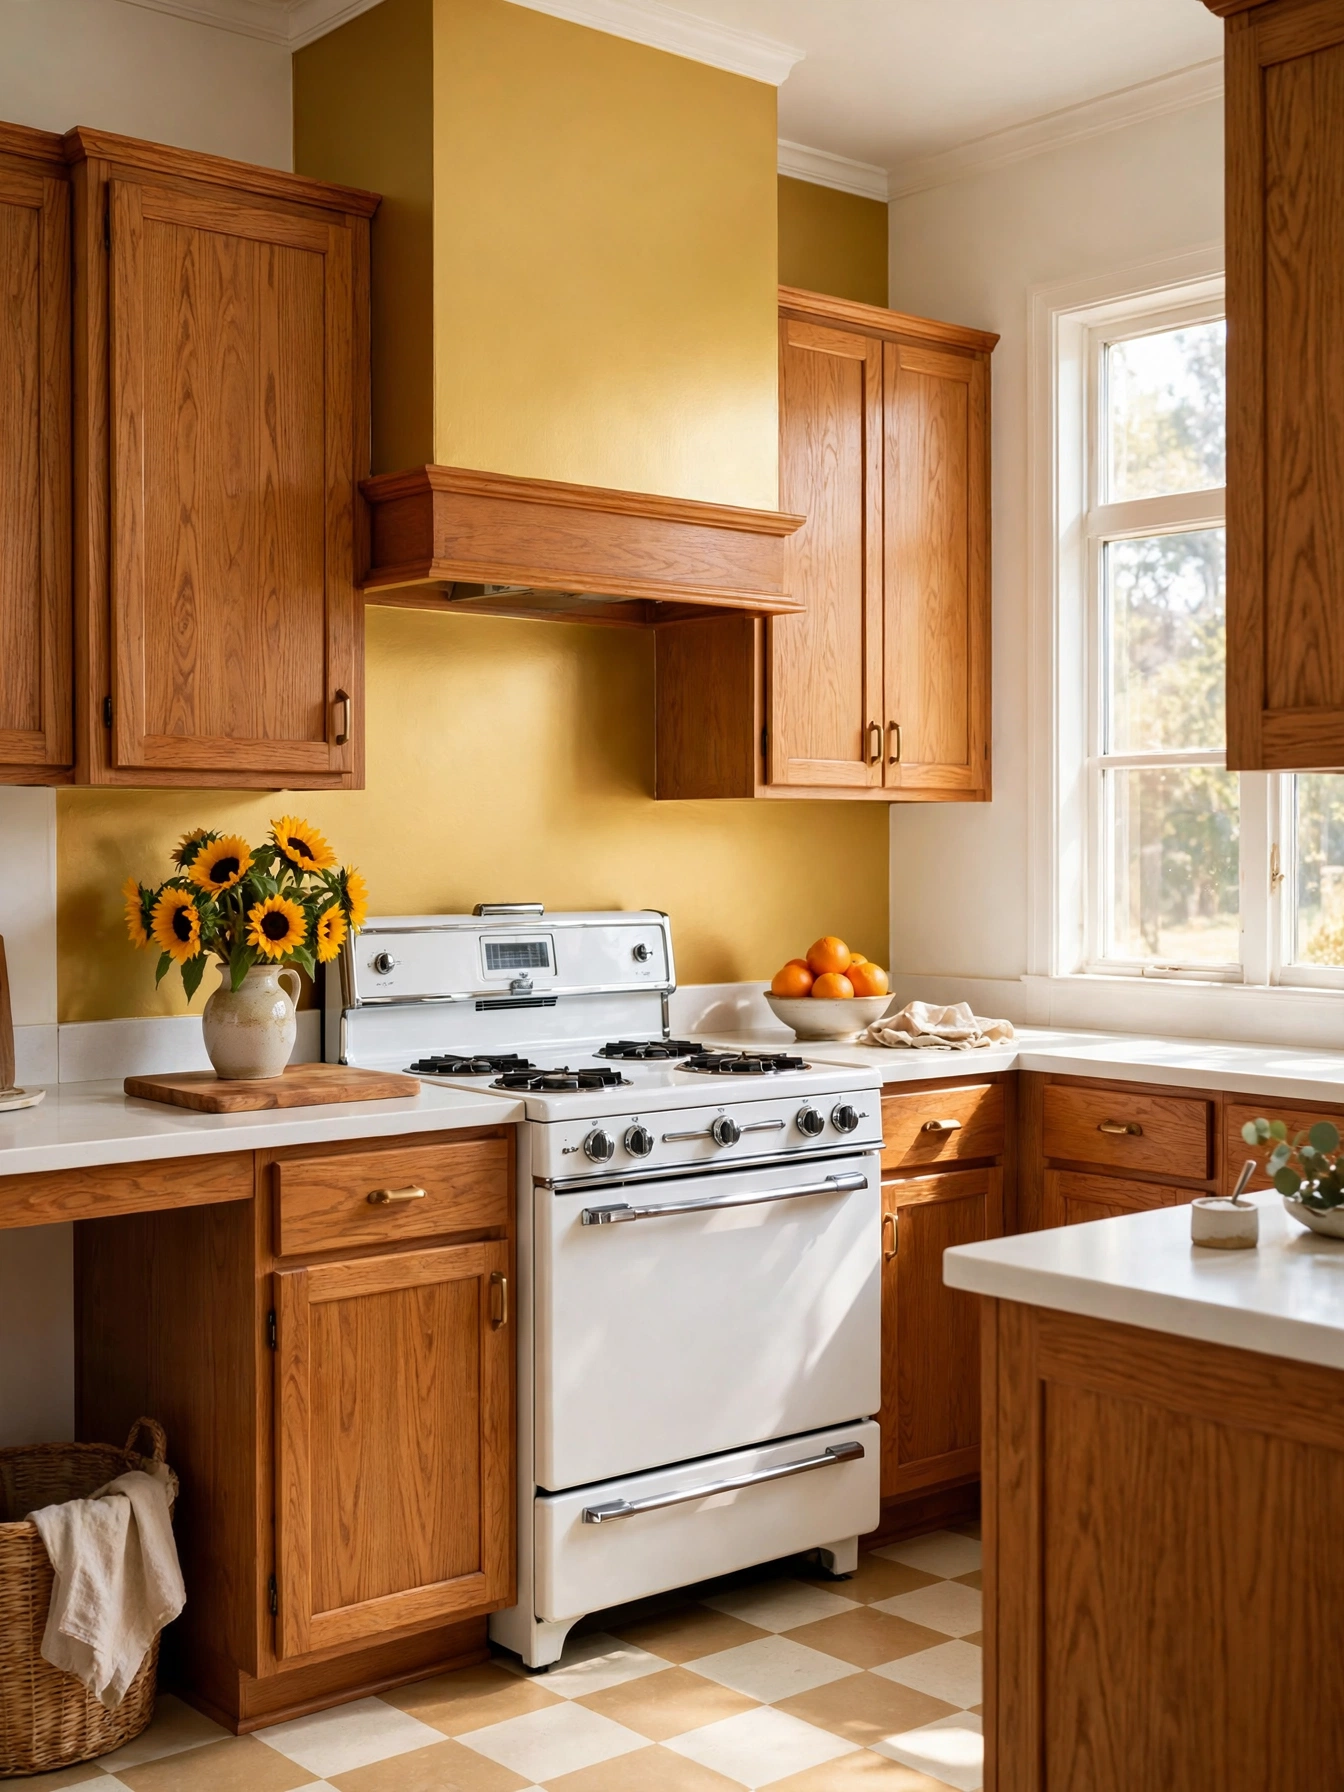
Why This Works:
- A single gold wall warms a white kitchen without repainting the cabinets
- Gold pairs with warm wood, not cool gray, for a true 70s feel
- Matte paint hides wall flaws better than gloss in a busy kitchen
- One accent wall costs a single gallon and a Saturday afternoon
Harvest gold works as an accent, not a wall-to-wall color. The 60-30-10 rule keeps the room balanced: 60 percent warm white, 30 percent wood tones and 10 percent harvest gold, so the color reads as a highlight rather than a takeover. A matte or eggshell finish hides bumps on an older wall, so paint the wall behind the stove or the breakfast nook, where the gold frames the cooking zone instead of surrounding it. The Spruce notes that warm retro colors pair best with wood tones and cream, not with cool grays, which turn gold muddy. Skip gold on all four walls, because the room turns dark and the color loses its charm within weeks.
A gold accent wall gives a plain white kitchen its warmth back, and the cabinets never need a drop of paint. The color lifts a plain white kitchen in one afternoon, yet it can feel heavy in a north-facing room with little sun. One gallon of paint costs $30 to $60 and covers a 12 by 8 foot wall with two coats, which leaves money for new hardware. A full gold kitchen locks the color into every wall, and stripping it back takes a full repaint of the whole room.
Avocado Green Cabinets
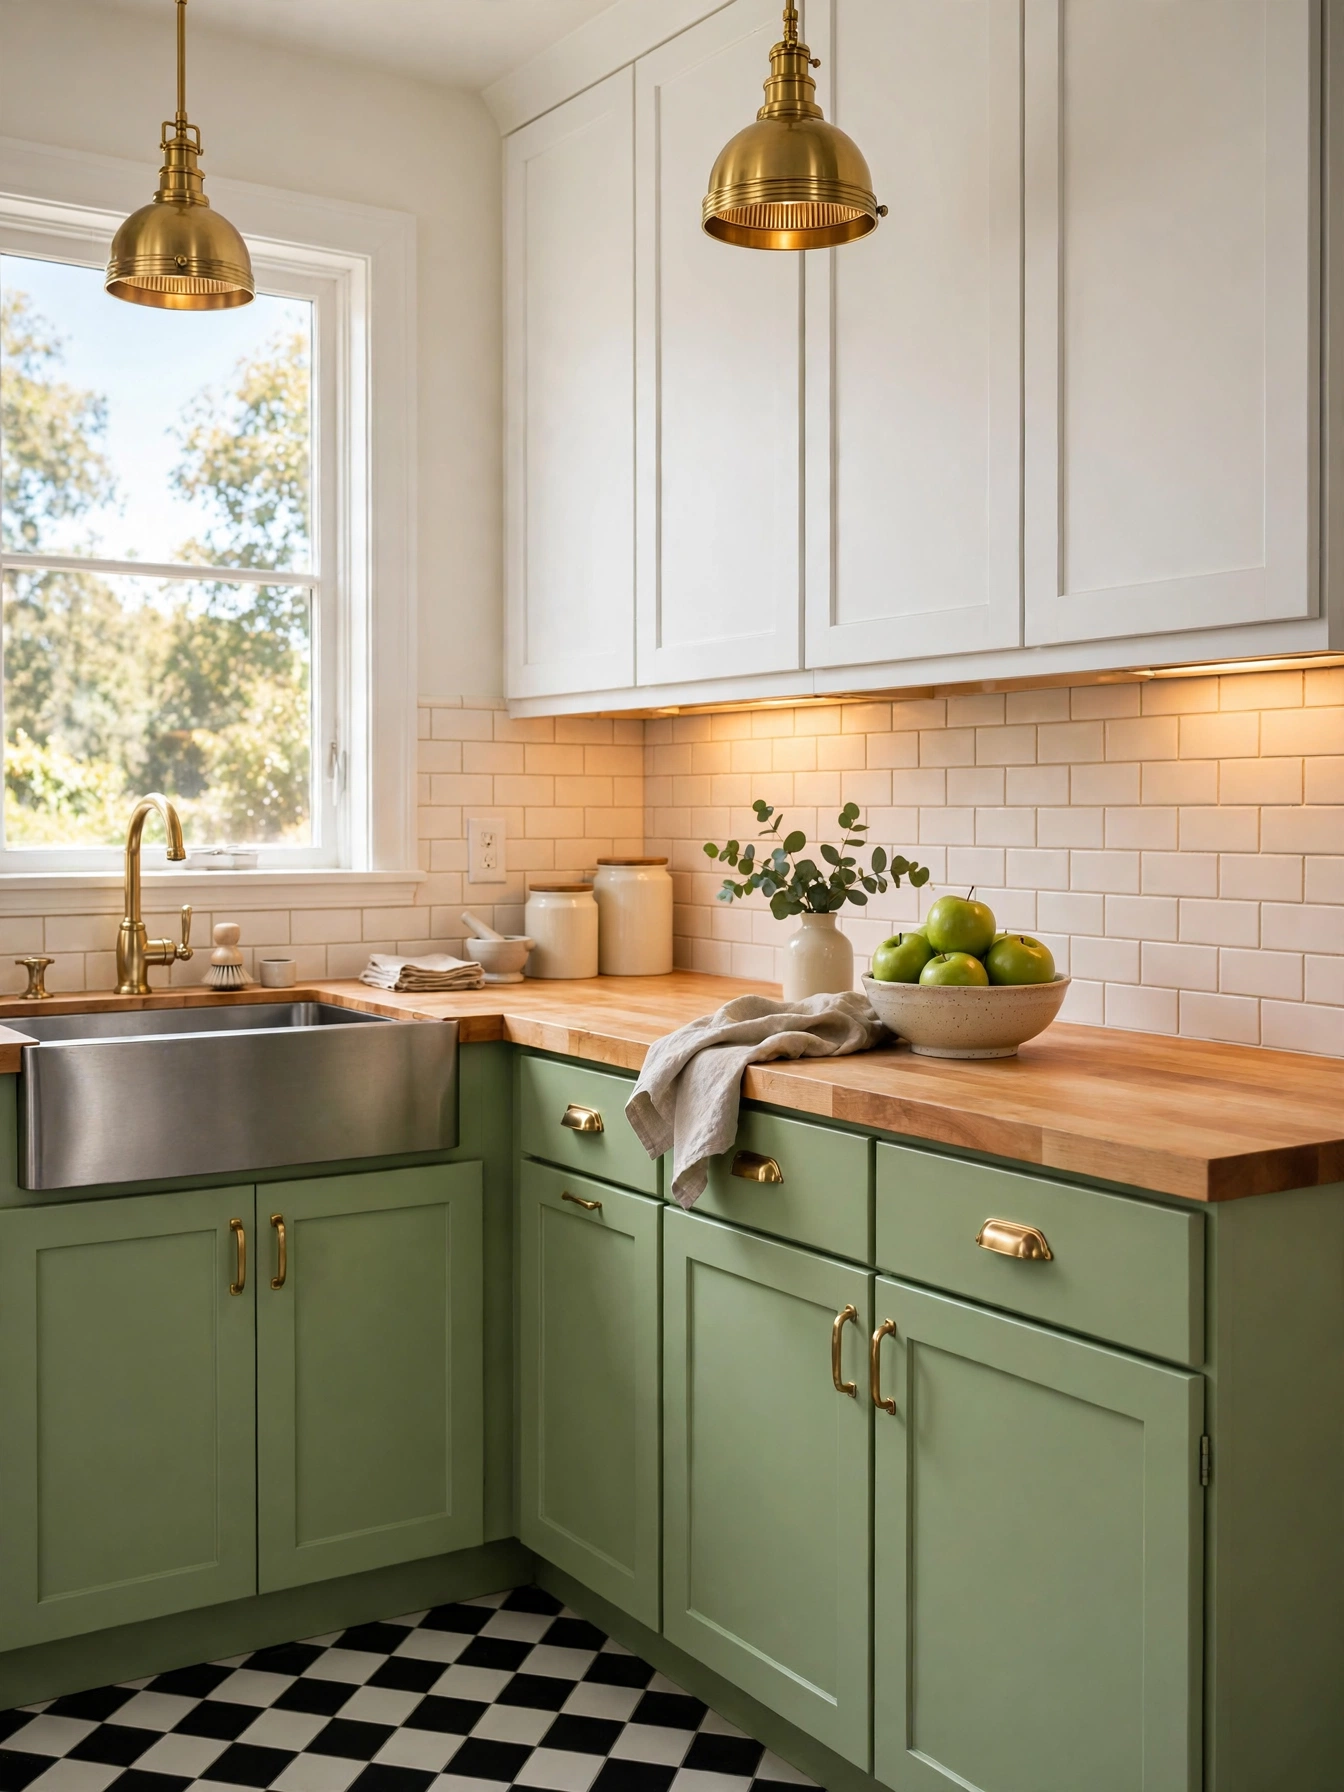
Why This Works:
- Green lower cabinets ground the room while white uppers keep it bright
- Satin paint wipes clean and hides fingerprints better than flat paint
- Brass pulls tie the green to the faucet and the lighting
- Painting costs a fraction of replacing the cabinet boxes
Avocado green belongs on the lower cabinets, where it grounds the room like a garden hedge. Paint the base cabinets avocado and keep the uppers white or cream, so the contrast reads at a glance and the room stays bright. Use a cabinet paint rated for kitchen use in a satin finish, applied in two coats over a bonding primer, since base cabinets take more kicks and splashes than wall cabinets. Sand the old finish with 120 grit paper first, because paint peels off a glossy surface within months. The Spruce notes that painted cabinets need a satin or semi-gloss finish, which wipes clean and hides fingerprints better than flat paint.
Green cabinets change the whole kitchen for the price of paint, and a gallon at $30 to $60 covers a standard run of base cabinets with two coats. It feels dated fast when it covers every surface, so keep the uppers light and the countertop warm wood or white quartz. Avocado pairs with brass and wood, while chrome hardware cools the look and fights the retro warmth. A full cabinet replacement costs about ten times as much and takes weeks, while paint finishes in a weekend.
70s Kitchen Ideas in Harvest Gold
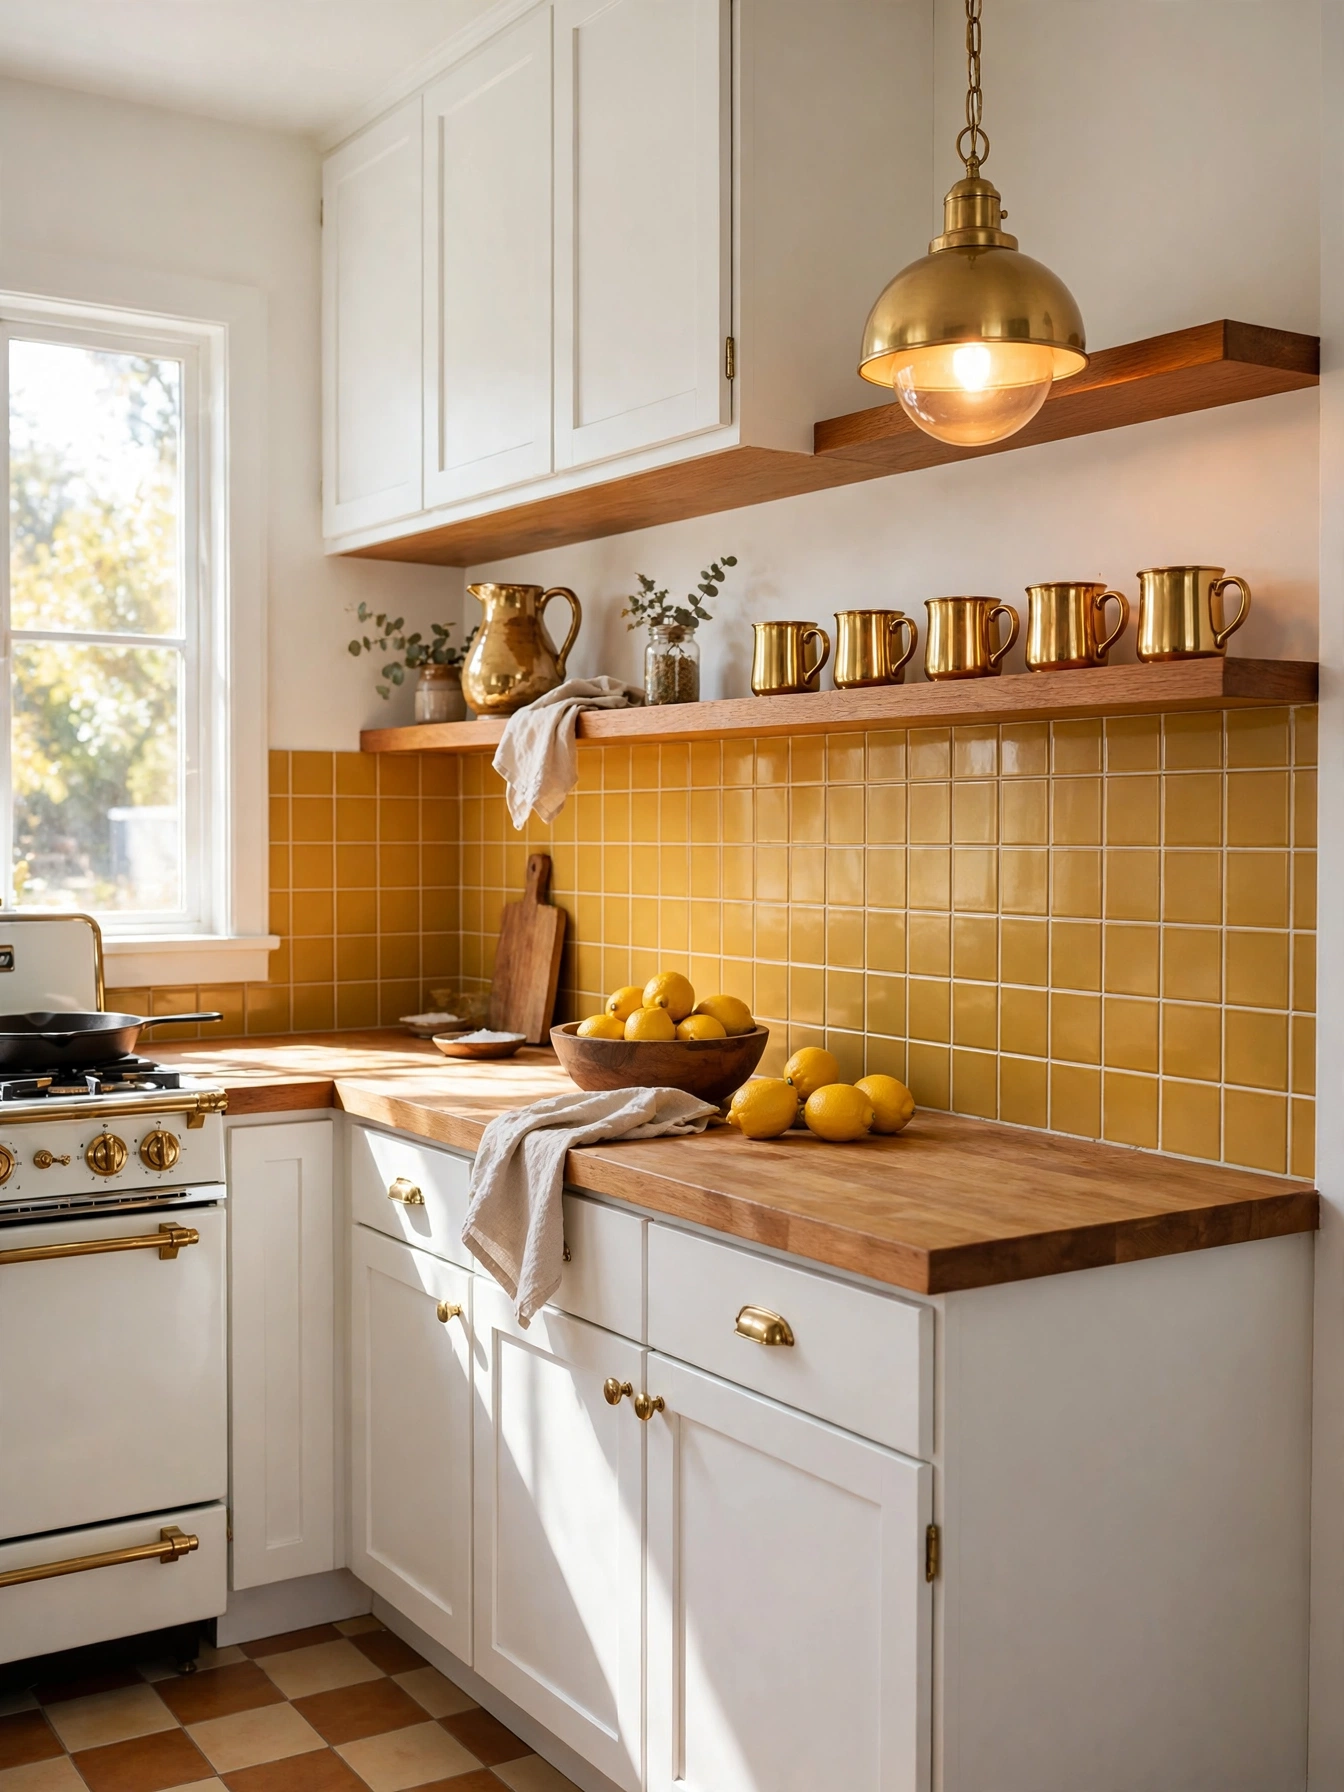
Why This Works:
- Gold tile on one wall gives the color a hardworking job
- Warm wood shelves soften the gold and add a natural layer
- White cabinets stop the gold from overwhelming the room
- A gold pendant repeats the color at eye level without paint
Between the countertop and the upper cabinets, an 18 inch band of harvest gold tile puts the decade on one wall, and that height is the standard backsplash measurement. Choose 3 by 6 inch subway tiles in a glossy gold glaze, and set them with a 1/8 inch grout line so the pattern stays crisp. The gloss bounces light across the room, while a matte tile in the same color absorbs it and reads darker. Seal the grout with two coats of grout sealer, since cooking grease stains unsealed grout within months. HGTV recommends keeping a bold backsplash to one wall, because the color stays a feature instead of becoming the whole room.
One wipe-clean band of tile puts the whole decade on the wall, without repainting a single cabinet. The tile handles splashes and heat better than painted drywall, and the gold hides tomato sauce stains that show on white tile. The trade-off is commitment: tile stays for a decade, while a painted wall changes in a day. A painted gold wall costs about a fifth of the tile version, but it stains near the stove and needs repainting each year. Gold tile for one 10 foot wall totals $150 to $300 with adhesive and grout included.
Burnt Orange Backsplash
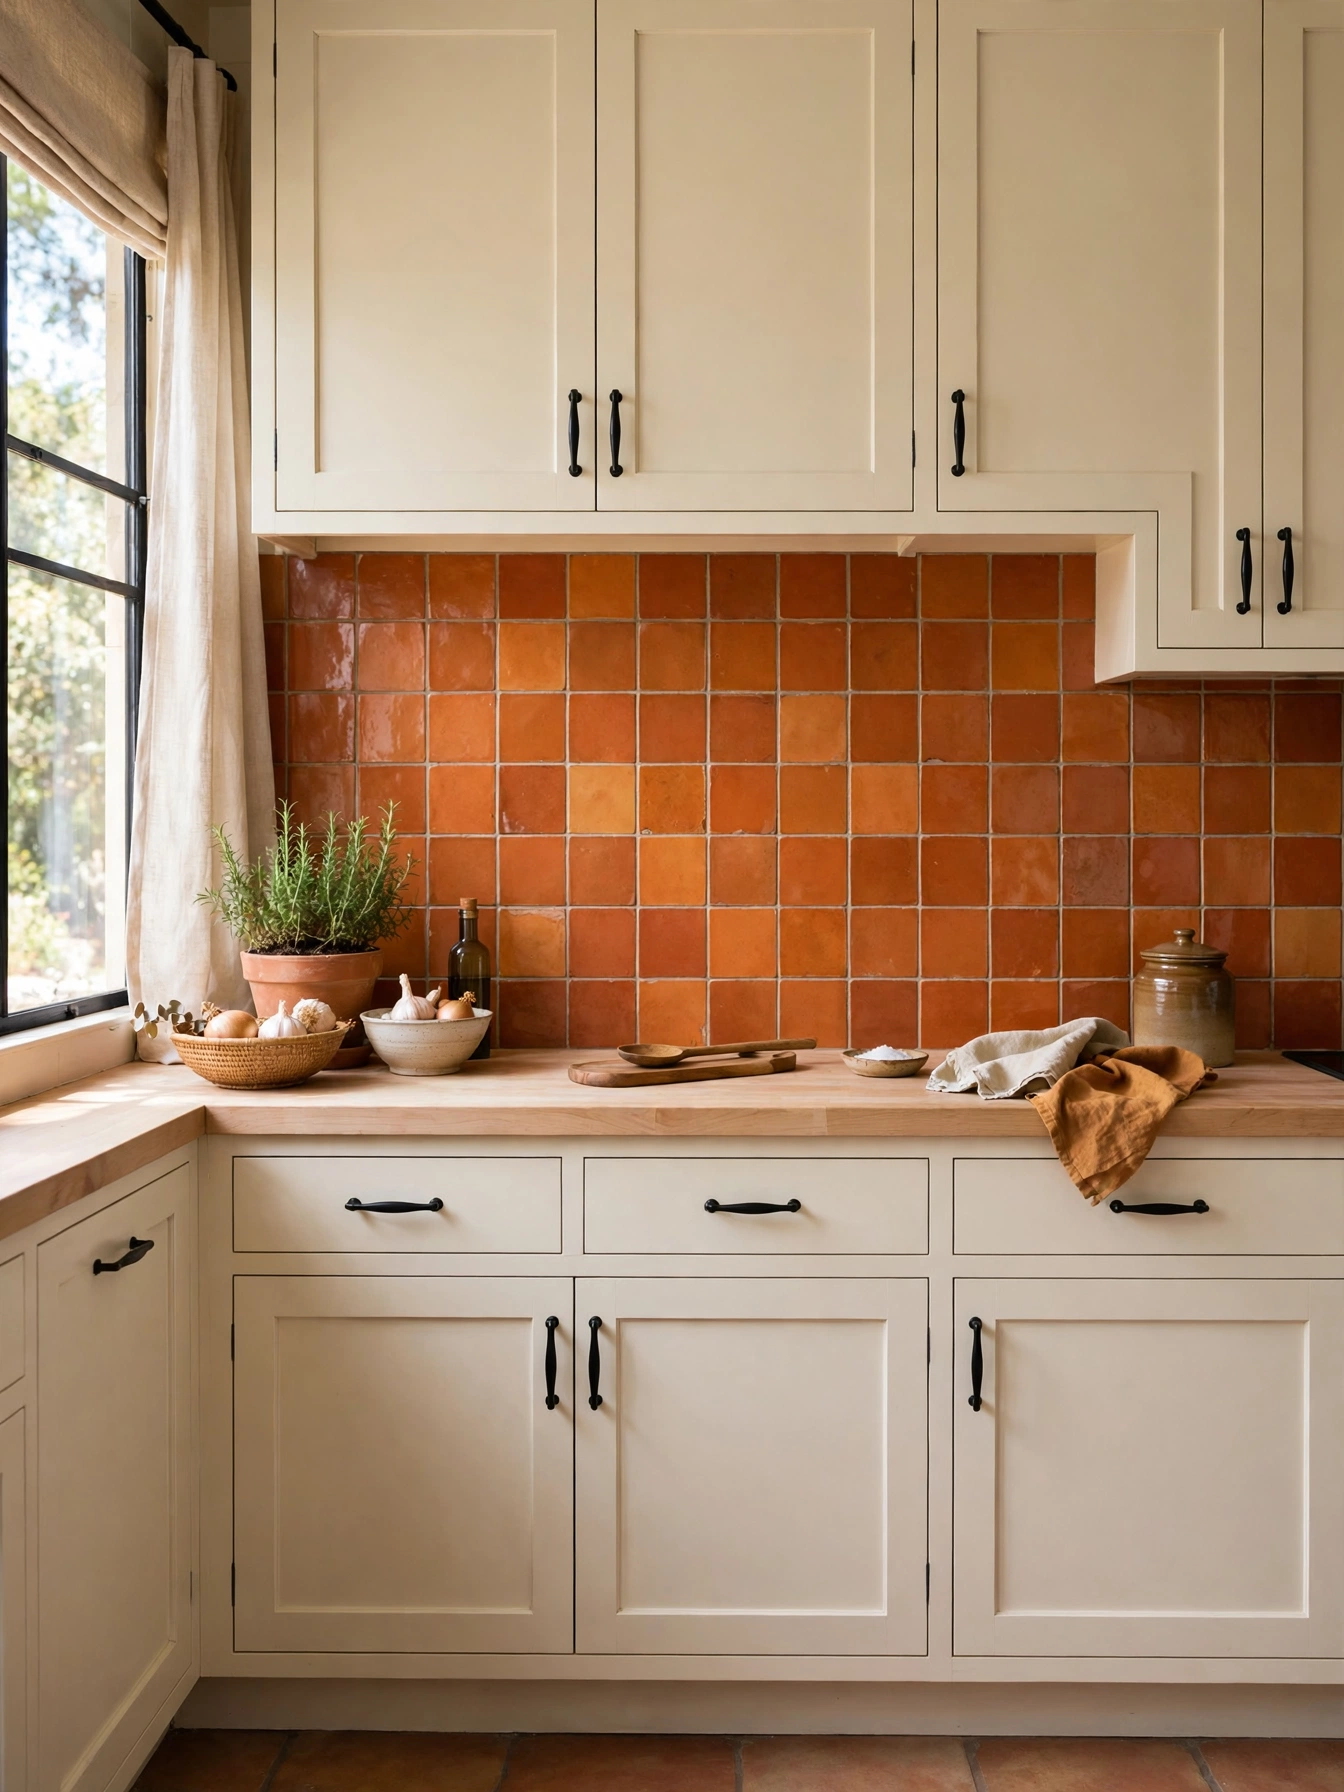
Why This Works:
- Burnt orange adds heat to a cream kitchen without a full repaint
- A 3 by 6 inch subway tile keeps the pattern calm and classic
- The color hides cooking stains better than white tile
- Orange pairs with cream, wood and black in equal measure
Burnt orange wakes up a cream kitchen the way a sunset wakes up a pale sky. Run the tile 18 inches high from the countertop to the upper cabinets, which is the standard backsplash height in most kitchens. Glossy burnt orange subway tiles at 3 by 6 inches go up in a running bond pattern with 1/8 inch grout lines. The gloss reflects the under-cabinet light and makes the orange glow after dark, while a matte finish reads flatter and more muted. Keep the grout a warm gray rather than bright white, since white grout yellows beside orange tile within a year.
The color earns its place here, since the tile takes splashes that would stain a painted wall. Orange tile for a 10 foot wall costs $120 to $250 with adhesive and grout, and plain white tile for the same area comes in near half that. It wipes clean with a damp cloth, and the warm tone makes the whole kitchen feel like late afternoon. The color can overpower a small kitchen, so keep the rest of the room cream and wood.
Warm Wood Tones
Why This Works:
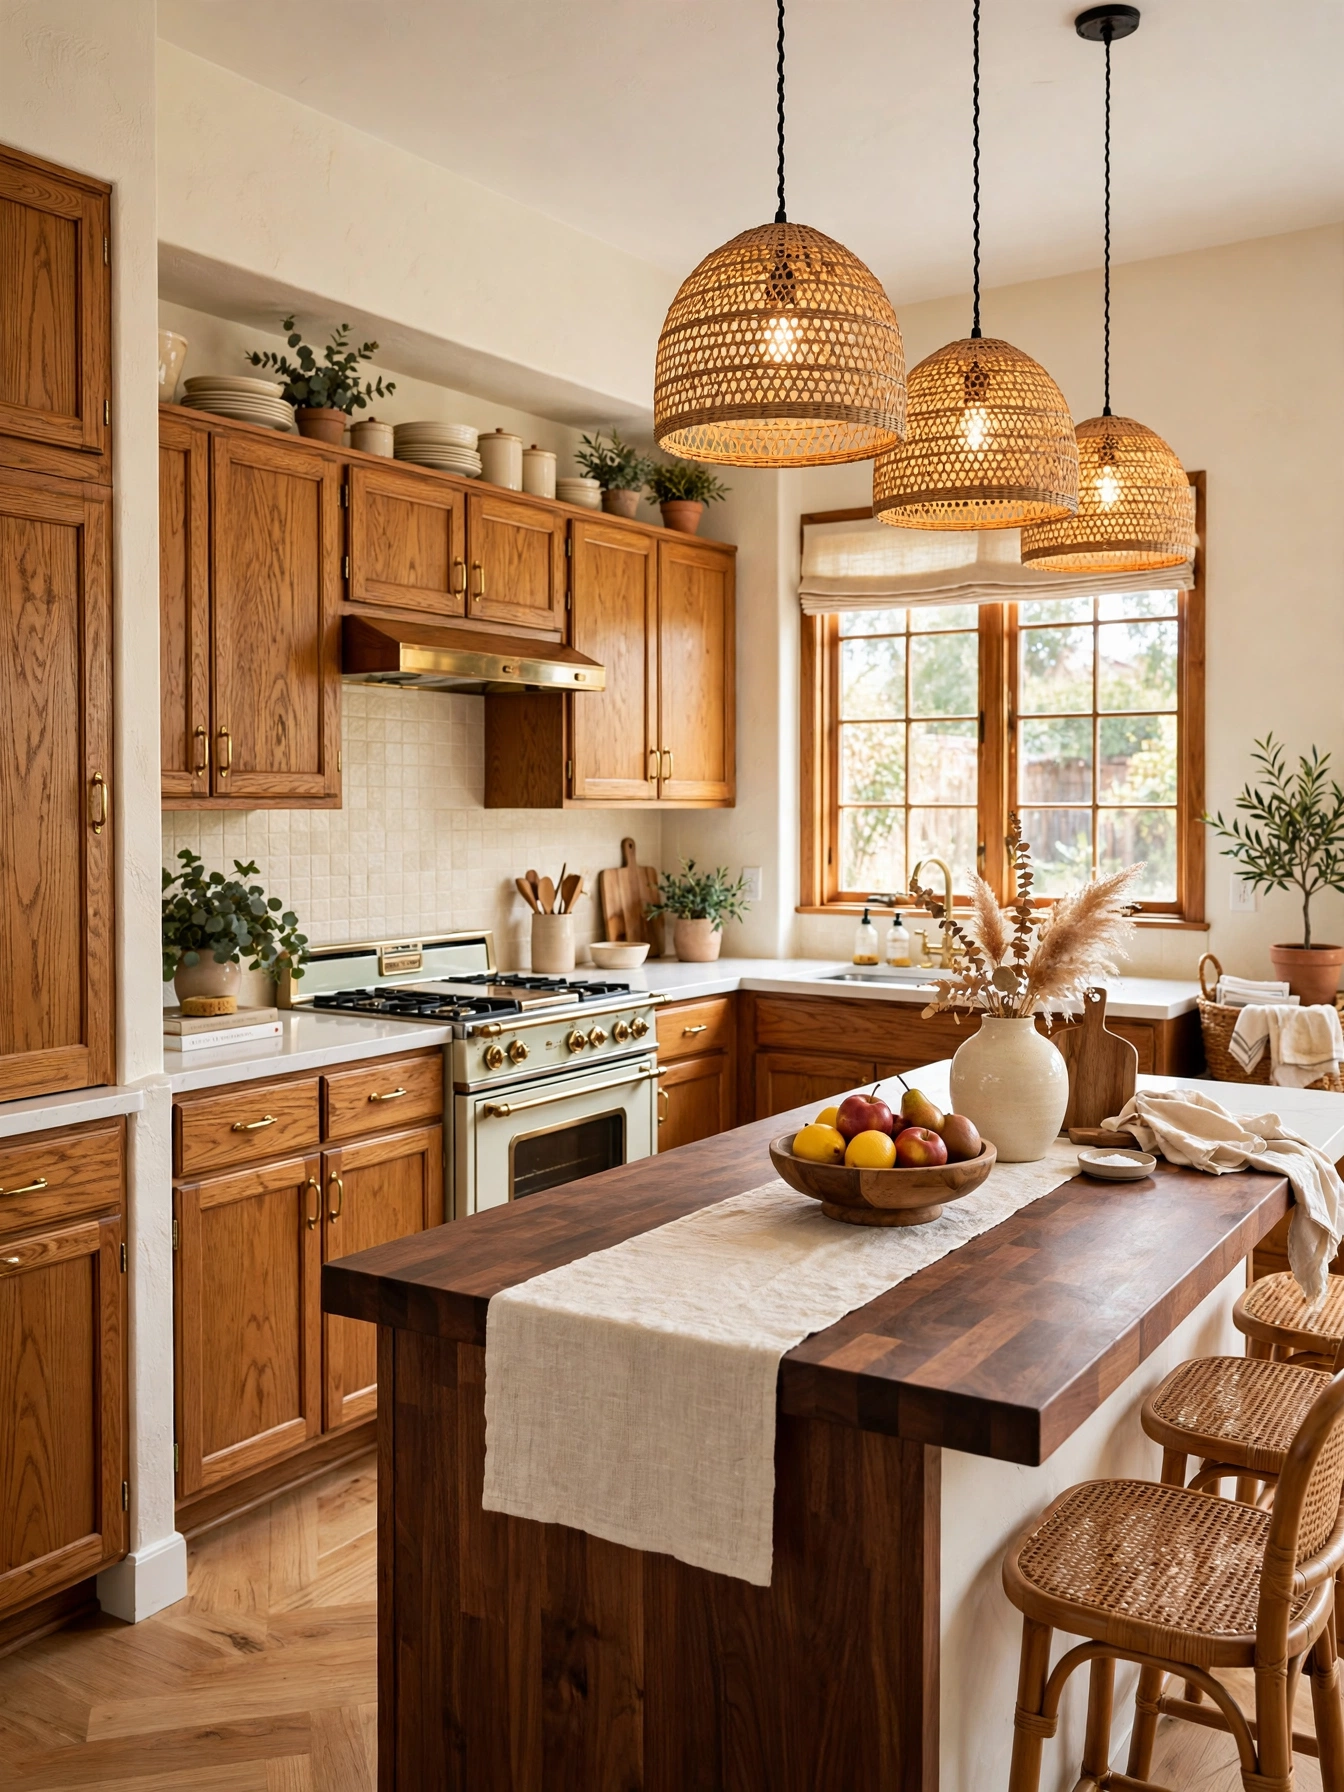
- Honey oak and walnut together give the 70s warmth without dark paneling
- Wood grain adds pattern to a kitchen with plain painted walls
- A walnut island top contrasts with lighter oak cabinets
- Wood tones age gracefully, unlike a trendy paint color
Timber was the decade’s favorite material, and warm wood grain still looks right in a modern kitchen, which is why this revival starts with wood. Mix two wood tones at most: honey oak for the cabinets and dark walnut for the island top or the open shelves, so the room reads layered rather than matched. A satin sheen suits the wood finish, since gloss highlights every scratch and flat finish shows grease. The National Kitchen and Bath Association recommends a 36 inch counter height, and a butcher block top at 1.5 inches thick finishes exactly there on a standard 34.5 inch base. Seal the wood with food-safe mineral oil every month for the first year, then every 3 months after that, or the top dries and cracks.
Warmth without a bold wall color is the whole point here, and the wood grain does the work. The grain hides crumbs and dust better than a flat painted surface, and the tones pair with harvest gold, avocado and burnt orange alike. The trade-off is upkeep: wood needs oil and gentle cleaners, while laminate wipes with anything. For a 60 by 30 inch island, a walnut butcher block top comes in at $400 to $800, while quartz for the same size runs about twice that.
Bold Geometric Tile
Why This Works:
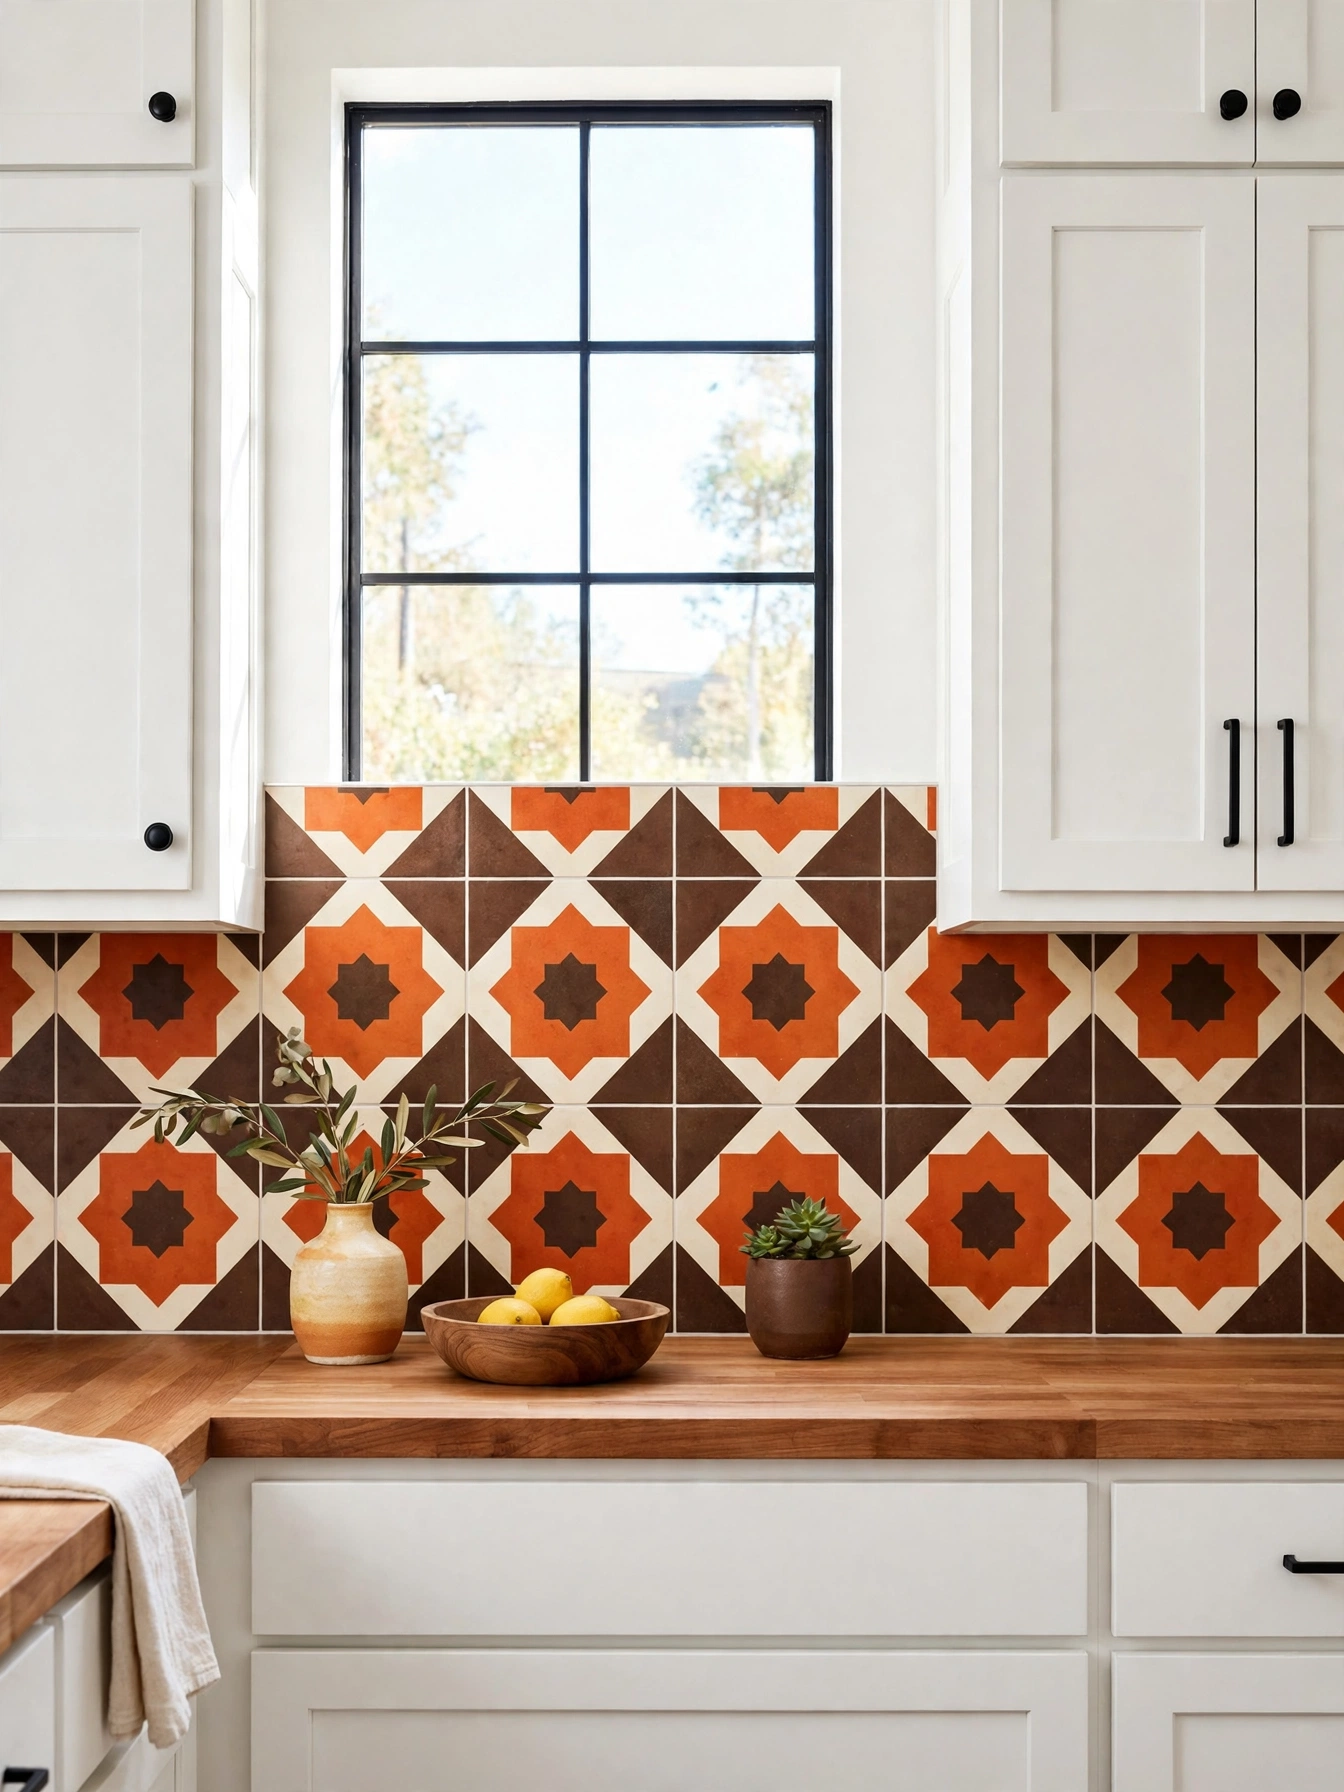
- One band of pattern gives the kitchen a focal point without a full remodel
- Orange and brown cement tile sets the decade’s colors into a hard-wearing surface
- A repeating diamond reads graphic from across the room
- The pattern hides splashes and crumbs better than plain tile
One band of geometric tile gives the kitchen its boldest pattern, and the quiet cabinets around it keep the look in check. Cement tiles at 8 by 8 inches in a repeating diamond or star pattern go up with 1/8 inch grout lines so the geometry stays sharp. Cement tile measures about 5/8 inch thick, so the backsplash edge needs a metal trim strip to finish cleanly against the wall. Limit the pattern to the backsplash only, since a full wall of geometry overwhelms a small kitchen within weeks. Never set cement tile with standard thinset alone, because the porous body needs a sealer before grouting or the grout stains the face.
One fearless band of pattern is all this kitchen needs, and the cabinets and counters around it can stay quiet. The pattern hides splashes and crumbs better than a plain tile, yet a bold pattern like this dates faster than a quiet tile. Cement tiles are priced at $5 to $12 per square foot, and a 10 foot backsplash needs about 15 square feet, so the tile works out at $75 to $180 before adhesive. Ceramic lookalikes wipe easier and skip the pre-grout sealer. The printed pattern stays flat, where real cement tile shows depth and variation in the glaze.
Retro Checkerboard Floor

Why This Works:
- Black and white squares anchor the whole retro scheme
- A diagonal layout makes a narrow kitchen read wider
- Vinyl tile installs in a day and forgives a dropped pan
- Squares in black and white work beside any 70s wall color
Black and white squares underfoot set the retro tone for the whole room, so the walls and cabinets need to stay quiet around them. Black and white tiles at 12 by 12 inches go down on the diagonal so the room reads wider than it is. Vinyl tile at 1/8 inch thick installs over a level subfloor with adhesive, while ceramic needs a 1/4 inch grout line and a sealed surface. A mid gray grout works best, since white grout shows every crumb on a kitchen floor within a day. Skip a checkerboard in a galley kitchen under 8 feet wide, because the pattern crowds the walls and the room feels narrower.
Vinyl checkerboard for a 10 by 12 foot kitchen adds up to $150 to $300 in tile and adhesive, a small outlay for a full retro floor. The black squares show dust and the white squares show crumbs, so the floor asks for a quick mop more often than a plain one. Ceramic tile lasts decades longer than vinyl and resists dents from dropped pans, while vinyl feels softer underfoot and installs in a day. Cleaning is the price: the pattern needs a weekly mop to stay crisp, and a busy family may prefer a quieter floor.
Macrame Plant Hangers
Why This Works:
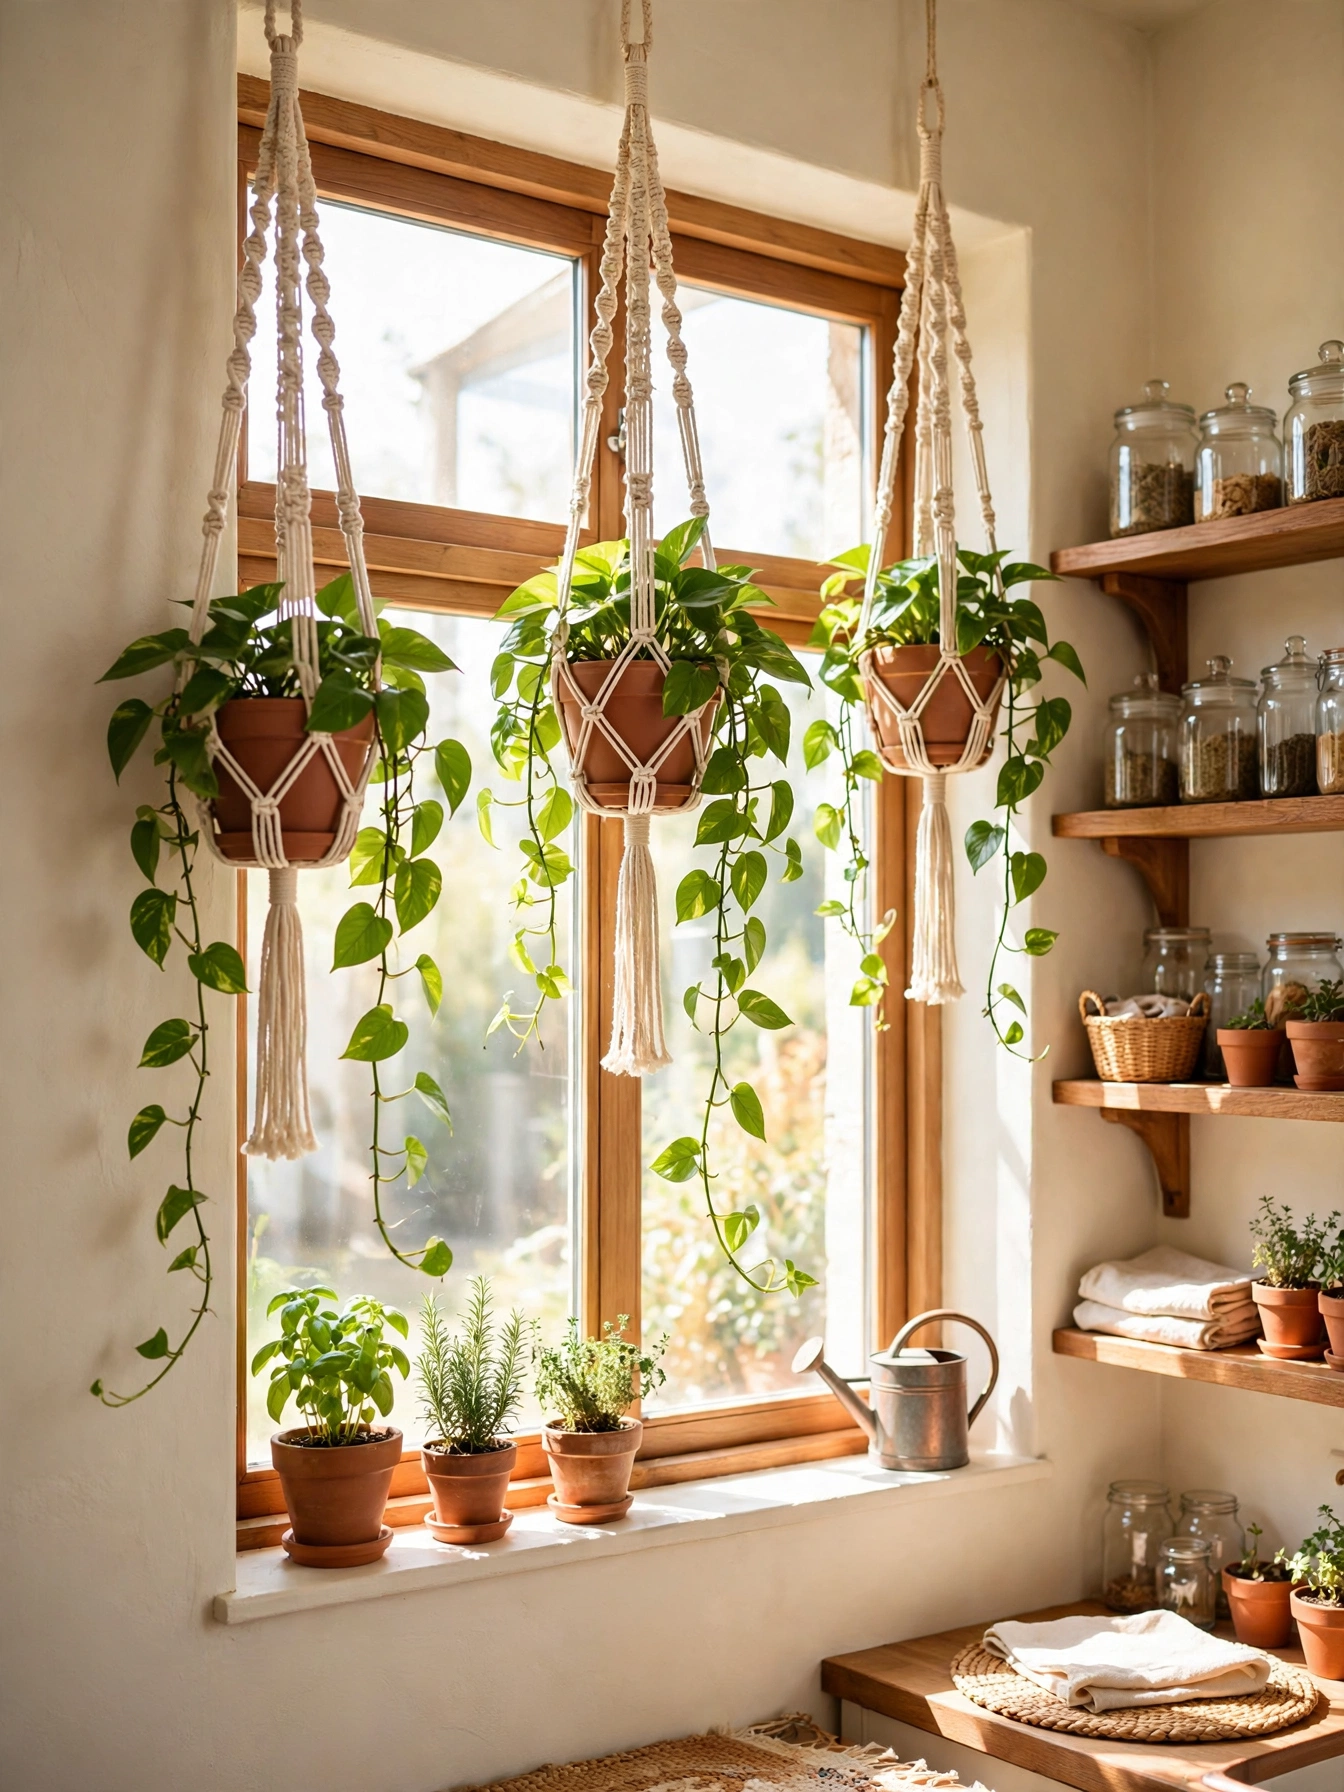
- Trailing plants soften hard cabinets and tile without taking counter space
- Cotton cord in cream matches the warm 70s palette
- A hanger by the window gives plants the sun they need
- The knots add handmade texture that flat decor cannot copy
Knotted cotton gives the kitchen its softest 70s texture through macrame hangers, and they cost almost nothing to make. Hang the planter from a ceiling hook rated for 25 pounds, screwed into a joist, since a hook in drywall alone pulls out under a watered plant. A pot 6 to 8 inches across holds a pothos or a spider plant without crowding the window. Space the planter 12 inches from the wall so the leaves never brush the paint, and trim the cords so the pot sits at eye level. Never hang a planter above the stove, because steam and grease coat the leaves within weeks.
Green near the prep counter changes how the kitchen feels, and the hanger gives it up without taking surface space. The plants soften a hard kitchen, yet they need weekly watering and a wipe of the leaves each month. A hanging planter draws the eye upward, which makes a low ceiling feel taller, while a potted plant on the counter eats work space. Herbs in a hanger sit too far from the chopping board to snip easily, so keep cooking herbs on the counter and trailing plants in the hangers. A finished hanger costs $15 to $40, a DIY kit with cotton cord runs $10 to $20, and a ceiling hook adds about $5.
Smoked Glass Pendants
Why This Works:
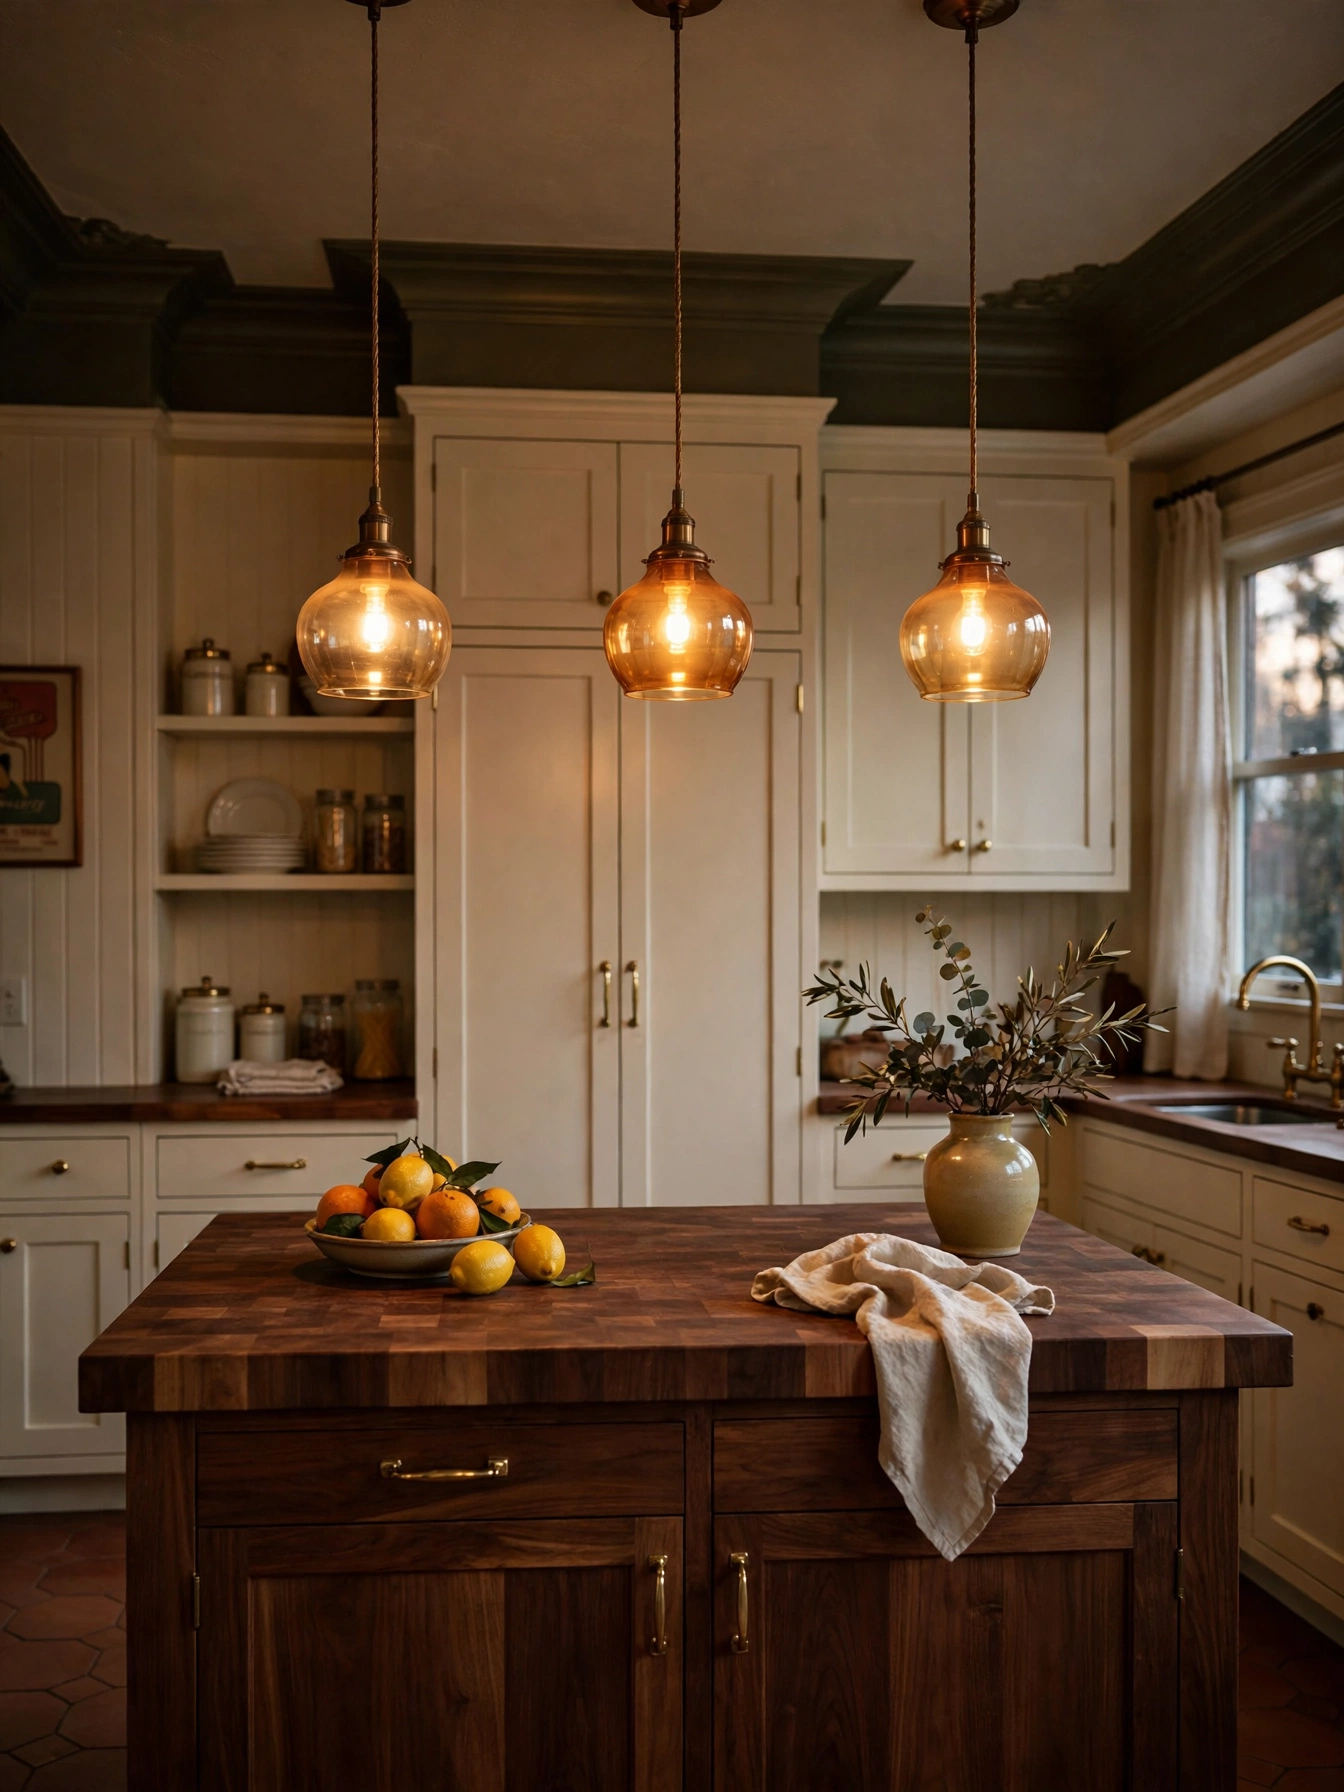
- Amber glass throws a warm glow that flatters food and faces
- Three shades in a row light a full island evenly
- Smoked glass hides the bulb and softens the glare
- The pendants repeat the warm 70s palette at eye level
Smoked glass throws a warm amber glow across the counter, which is the fastest way to get a 70s evening mood. Mount each shade 30 to 36 inches above the counter so the light lands on the work surface instead of in the cook’s eyes. Space the pendants 24 to 30 inches apart, and pick shades 10 to 12 inches across for a 72 inch island. Fit warm LED bulbs at 2700K and 800 lumens, since cooler bulbs turn the smoked glass gray instead of amber. Smoked glass collects dust on the inside, so wipe each shade with a microfiber cloth once a month.
After a long day, amber light makes dinner prep feel calm, and the pendants do that work for free. Three quality pendants cost $150 to $400, and a kitchen without existing ceiling wiring needs a new circuit on top of that. A licensed electrician should run any new ceiling circuit, since the wiring must meet local code and a mistake above a stove risks far more than a dark kitchen. Glass shades show dust and need a monthly wipe, while metal shades hide it better for a similar outlay.
Vinyl Bar Stools

Why This Works:
- Mustard vinyl gives the retro color in a wipe-clean seat
- Chrome frames match the faucet and the appliance trim
- A 24 inch seat pairs with a 36 inch counter exactly
- Vinyl survives spills that would stain fabric in a week
Vinyl bar stools are the most practical 70s seat, because the surface wipes clean after every meal. A 24 inch seat pairs with a 36 inch counter, and 24 inches of width per person keeps elbows from colliding. Look for a steel frame with a footrest at 12 inches high, and a seat shell rated for 250 pounds. Vinyl in mustard, avocado or burnt orange gives the retro color without painting a wall. Skip vinyl stools with a thin foam pad, since the seat flattens within a year and the frame shows through.
Most mornings, the family eats at the counter, and these seats are built for exactly that routine. The vinyl wipes in seconds, yet it sticks to bare legs on a hot day and cracks after years in direct sun. Wood stools feel warmer and age better, while vinyl costs less and asks nothing after a spill. A pair of vinyl stools comes in at $80 to $160, under half the price of the same pair in molded wood.
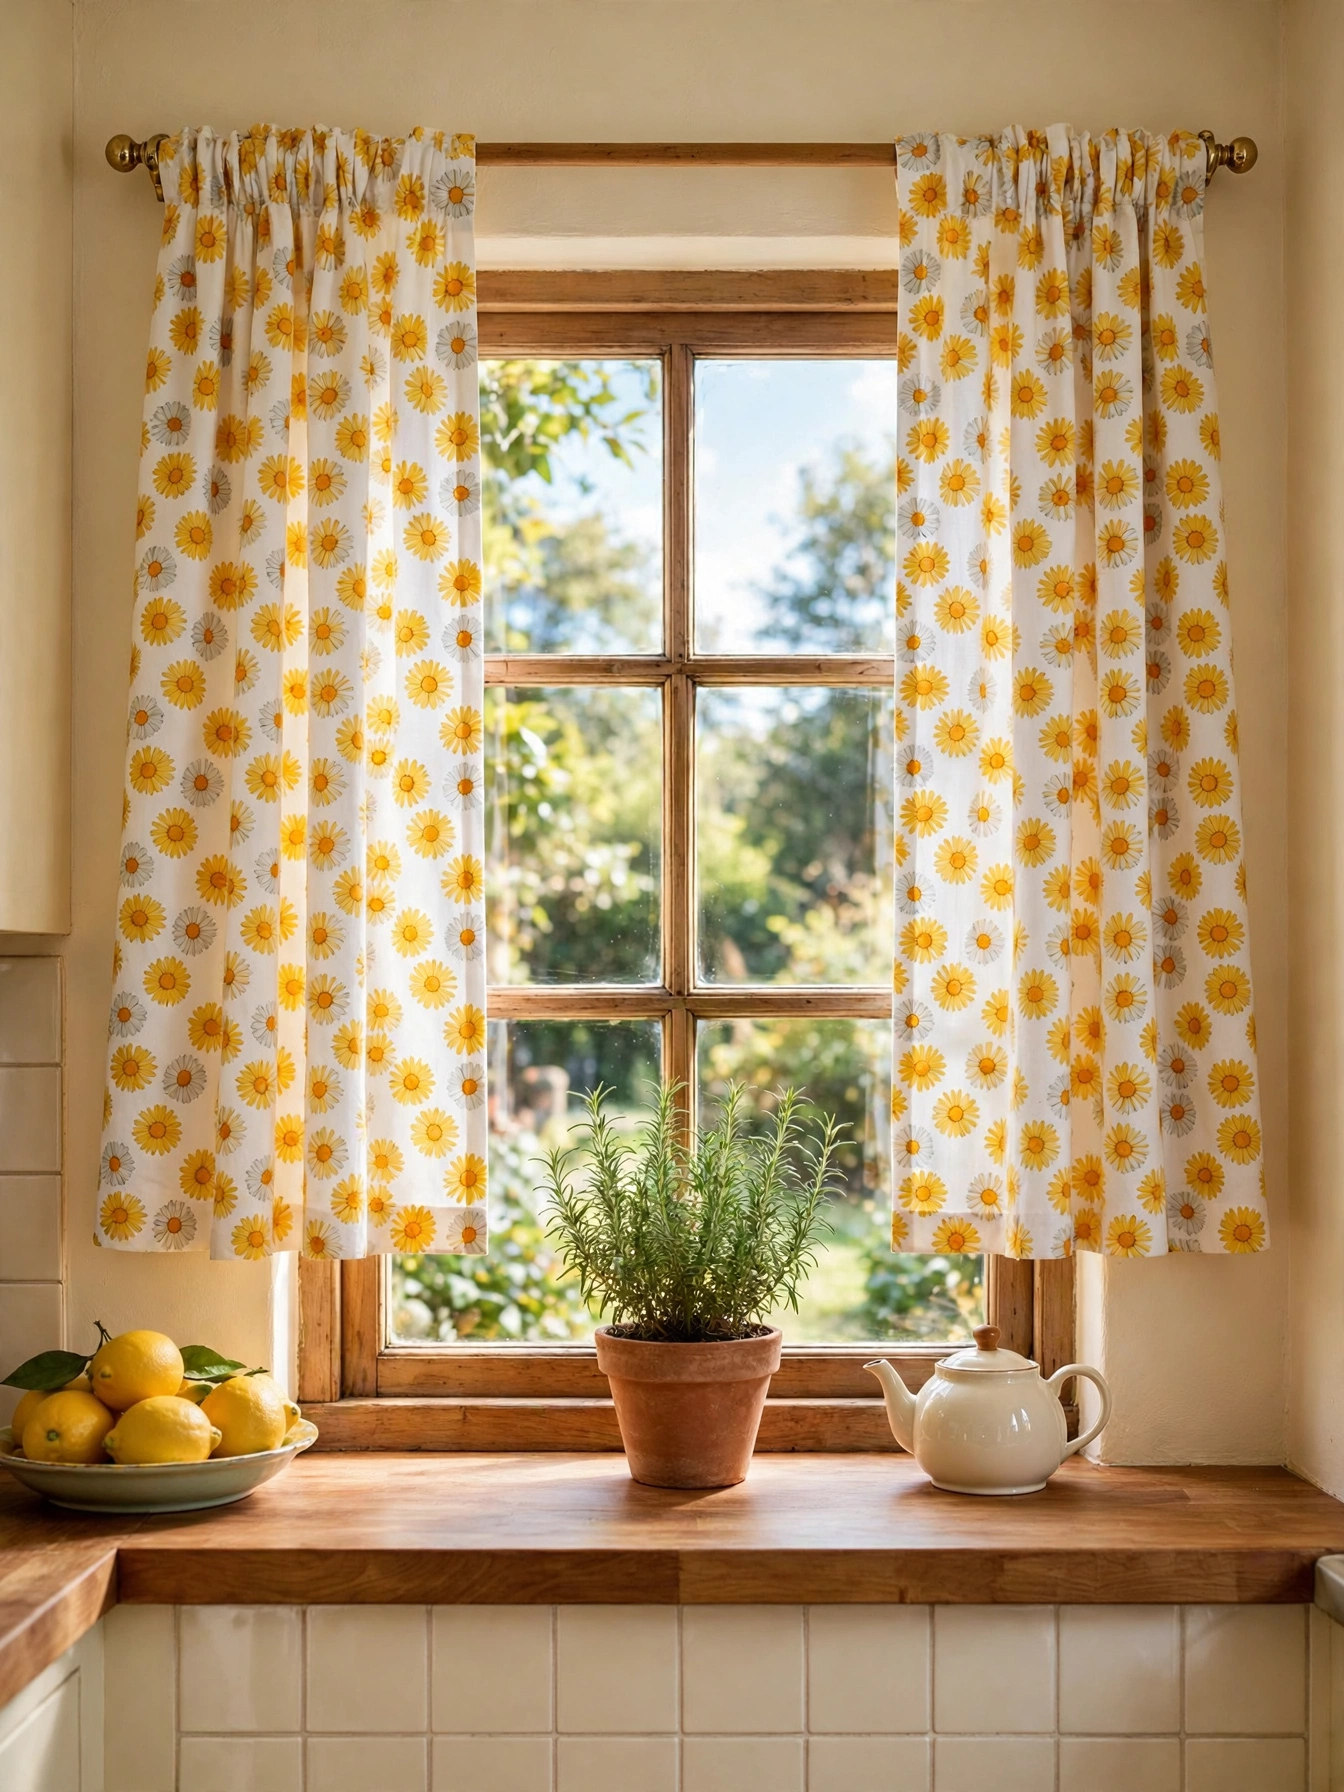
Daisy Print Curtains
Why This Works:
- Yellow daisies on cream fabric brighten a small window instantly
- Cotton curtains wash easily after a month of cooking steam
- The print adds pattern without touching a wall or a cabinet
- Fabric softens a kitchen full of hard tile and steel
In one afternoon, daisy print curtains dress the kitchen window in the friendliest 70s pattern. Hang the rod 4 to 6 inches above the window frame, and let the fabric fall to the sill or the floor. A cotton or linen blend in cream with yellow or orange daisies keeps a small kitchen bright, since the light colors bounce the daylight around. Curtains should measure 2 to 2.5 times the window width, so the fabric gathers instead of hanging flat. Skip heavy blackout fabric in a kitchen, because it blocks the daylight and holds cooking smells.
One rod and two panels change the whole window, which is why this idea works so well for renters. The print softens a plain window, yet the fabric needs a wash every month in a kitchen full of steam. Ready-made panels sell for $25 to $60 a pair, cheaper than one roman shade for the same window. Blinds sit in the same price range and wipe clean, but they cannot match the softness of fabric at a breakfast window.
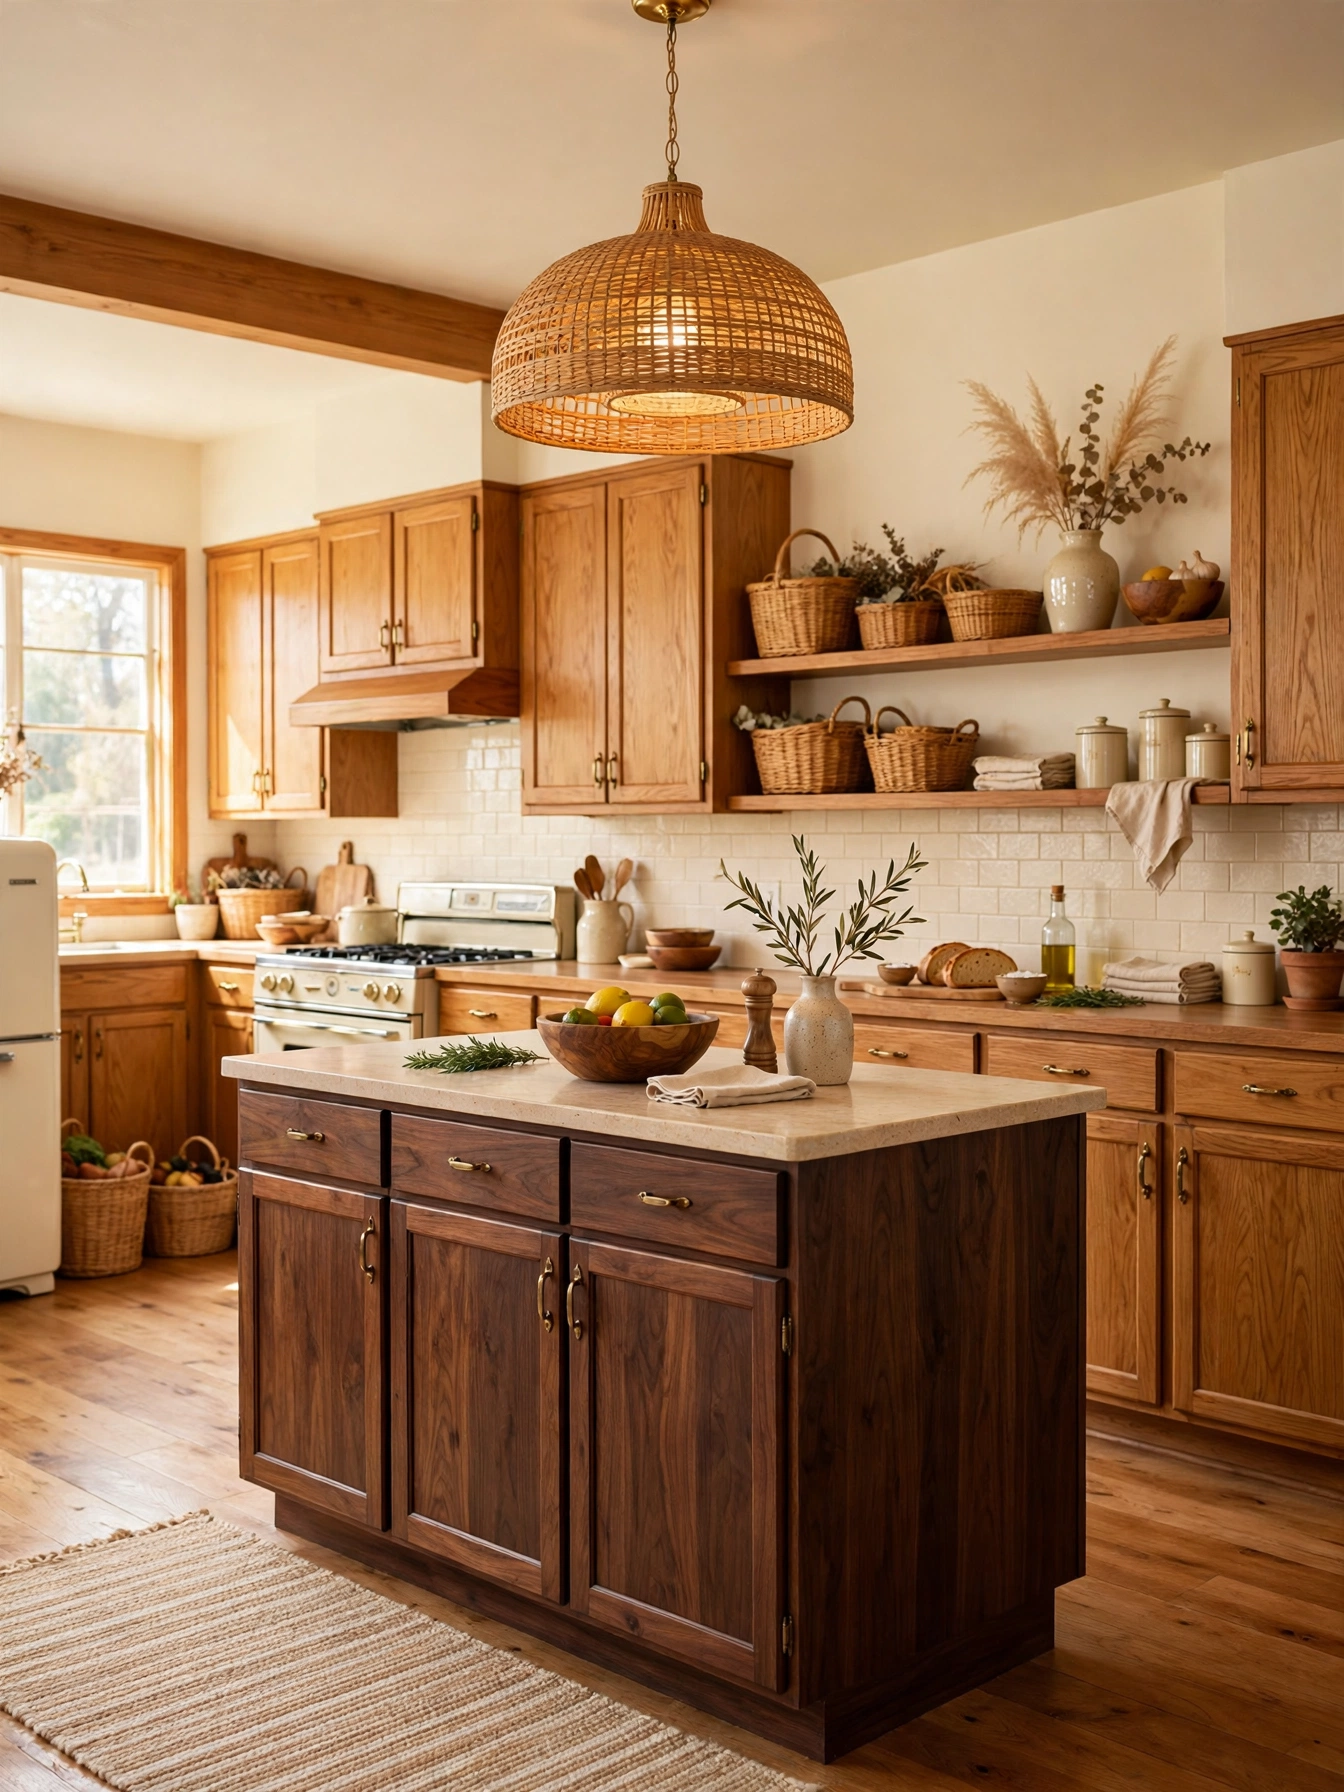
70s Kitchen Ideas with Wood Tones
Why This Works:
- Two wood tones give the 70s warmth without dark paneling
- Honey oak cabinets keep the room bright while walnut adds depth
- Cream walls stop the wood from feeling heavy
- Rattan and baskets add texture without a new color
Wood tones make the 70s revival livable, because timber never dates the way a bold paint color can. Keep the palette to two woods: a honey oak for the cabinets and a darker walnut for the island or the shelves. Warm white walls at 60 percent of the room keep the wood from feeling heavy, following the 60-30-10 rule. Add a rattan shade or a woven basket for texture, since wood alone can read flat in a modern kitchen. Never mix a third wood tone, because the room loses its calm and the cabinets start competing with the floor.
A wood-toned update starts at $100 to $250 for stain, oil and new hardware, a small spend for a change that reaches the whole room. A wood kitchen suits a household that wants warmth without a bold color on the walls. The tones pair with every 70s accent, yet they need oil and gentle cleaners to stay rich. Painted cabinets refresh for less money, while wood holds its value longer and never needs a color decision.
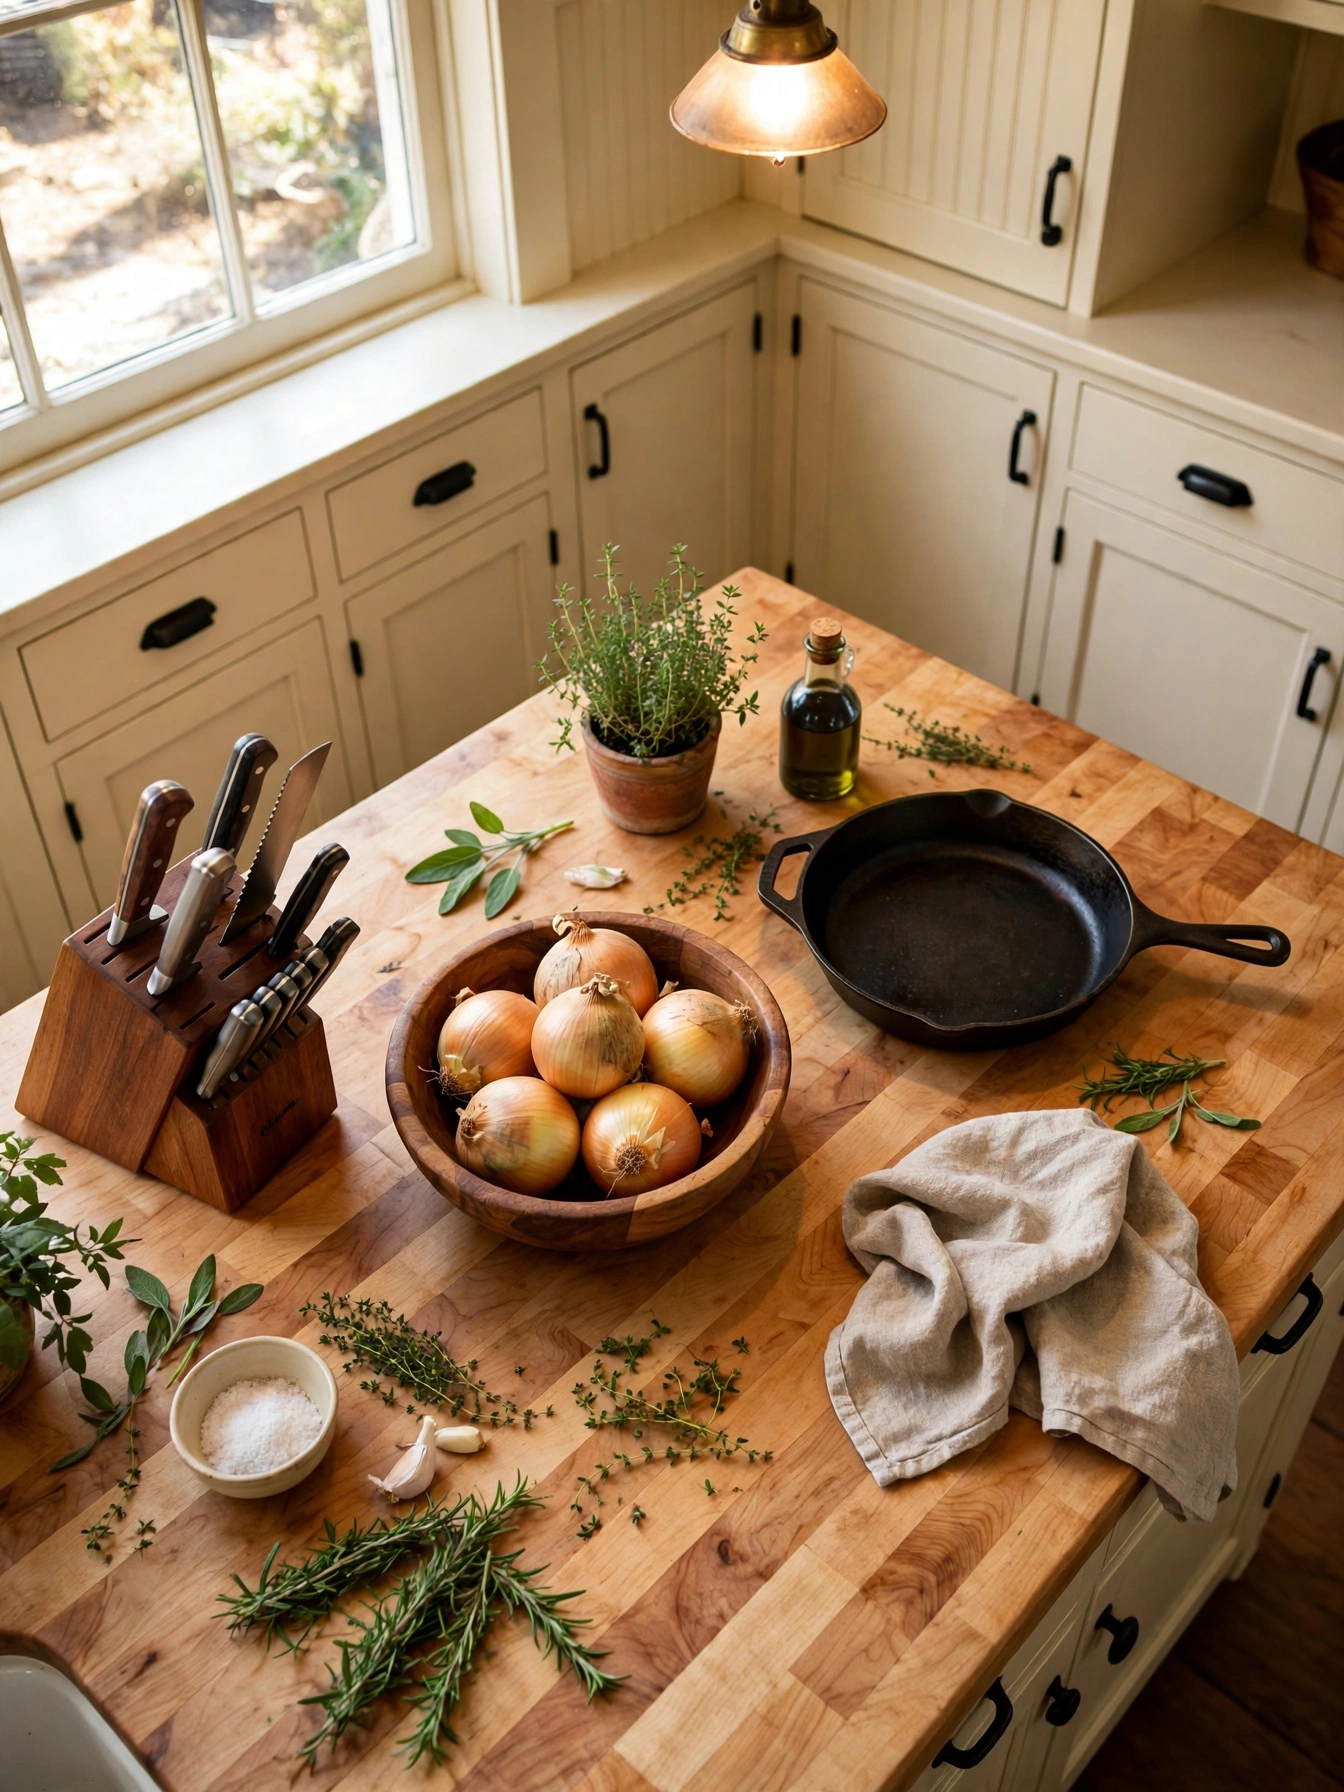
Butcher Block Counters
Why This Works:
- A 1.5 inch maple top takes knife cuts and sands smooth again
- Wood feels warm under hands, unlike stone on cold mornings
- The grain hides crumbs better than a flat painted surface
- Butcher block costs about half the price of quartz per square foot
A wood countertop turns chopping into the easy part of dinner, because the surface takes a knife without complaint. Pick hard maple or walnut at 1.5 inches thick, and ask for end-grain boards, which resist dents better than edge-grain. Rub food-safe mineral oil into the top monthly through the first year, then once a season after that, so the wood never dries out. Wipe up standing water right away, since a puddle left overnight lifts the grain and leaves a dark ring. Leave a 6 inch stone or metal drip edge beside the sink, or repeated splashes will stain the wood edge within weeks.
A daily cook who chops on the counter will feel the difference at once, since the surface heals with sanding. The wood feels warm under hands on cold mornings, unlike stone, which stays cool to the touch. Oiling takes 20 minutes a month, and once a year the top needs a light sanding to remove knife marks. Quartz asks nothing afterward and costs roughly twice as much per square foot, while laminate cannot be sanded or repaired. Maple for that same 60 by 30 inch run comes to $300 to $600, a figure quartz doubles for the identical footprint.
Earthy Ceramic Dishes

Why This Works:
- Terracotta and mustard put the 70s palette on the table
- Matte stoneware hides utensil marks better than glossy porcelain
- Open shelves show the color without painting a wall
- A full set costs less than one accent wall of tile
At every meal, earthy ceramics show the 70s palette right on the table. Stoneware in terracotta, mustard and cream with a matte glaze hides utensil marks and survives daily use. Stack plates 8 inches high at most, since taller stacks chip the rims when they slide. Stoneware fires at a higher temperature than earthenware, so it resists chips and survives the dishwasher. Skip thin porcelain for daily use, because it chips on a tile counter and costs three times as much to replace.
Setting a full table most nights is where earthy dishes earn their keep, adding color without a single painted wall. A 16 piece stoneware set costs $60 to $120, which covers four place settings with mugs included. The matte glaze hides scratches, yet it stains from coffee and tomato sauce if it is never soaked. White porcelain looks cleaner and matches everything, while earthy stoneware adds the retro warmth that white cannot.
Retro Refrigerator Style

Why This Works:
- One rounded fridge gives the whole kitchen a retro anchor
- Cream styling pairs with any 70s color on the walls
- Modern cooling inside means no vintage power bill
- The shape softens a room full of straight cabinets
One rounded fridge in cream can carry the retro look for the whole kitchen, and a second statement piece would only crowd it. A modern unit with vintage styling at 18 cubic feet fits a family of four without a second fridge. Look for an energy rating of at least 3.5 stars, since a real vintage fridge costs far more to run each year. Leave 2 inches behind the fridge so air moves, and level it with the adjustable feet. Never buy a genuine 1970s fridge for daily use, because the insulation has aged and the power bill doubles.
A single rounded fridge gives the kitchen all the retro character it needs, with the plain cabinets around it left bare to let it stand out. The rounded shape softens a room full of straight cabinets, yet the door shelves hold less than a standard side-by-side. The retro model asks for a style-first choice, since its curved doors and smaller shelves give up space for shape. A new retro-style fridge is priced at $1,500 to $3,000, twice the price of a plain top-freezer model.
Rattan Pendant Shades

Why This Works:
- Woven rattan softens the light into a warm glow
- Natural fiber pairs with wood tones and earthy colors
- The shades hide the bulb and cut the glare
- Rattan adds texture without a new paint color
Woven rattan shades add 70s texture to the kitchen without a single bold color. Shades 14 to 16 inches across fit a standard island, hung 30 to 36 inches above the counter. Rattan diffuses the bulb into a soft glow, while a metal shade throws a hard pool of light. Mount the shades away from the stove, since grease settles into the weave and needs a brush to remove. Rattan over a sink needs a sealed finish, because steam swells the fibers and the shade sags.
Texture and warmth at breakfast need no remodel, and the rattan weave delivers both. The weave softens the light, yet it collects dust and needs a monthly brush. A pair of rattan shades runs $60 to $140, under the price of one designer glass pendant. Glass pendants wipe clean and show the bulb, while rattan hides the bulb and warms the room.
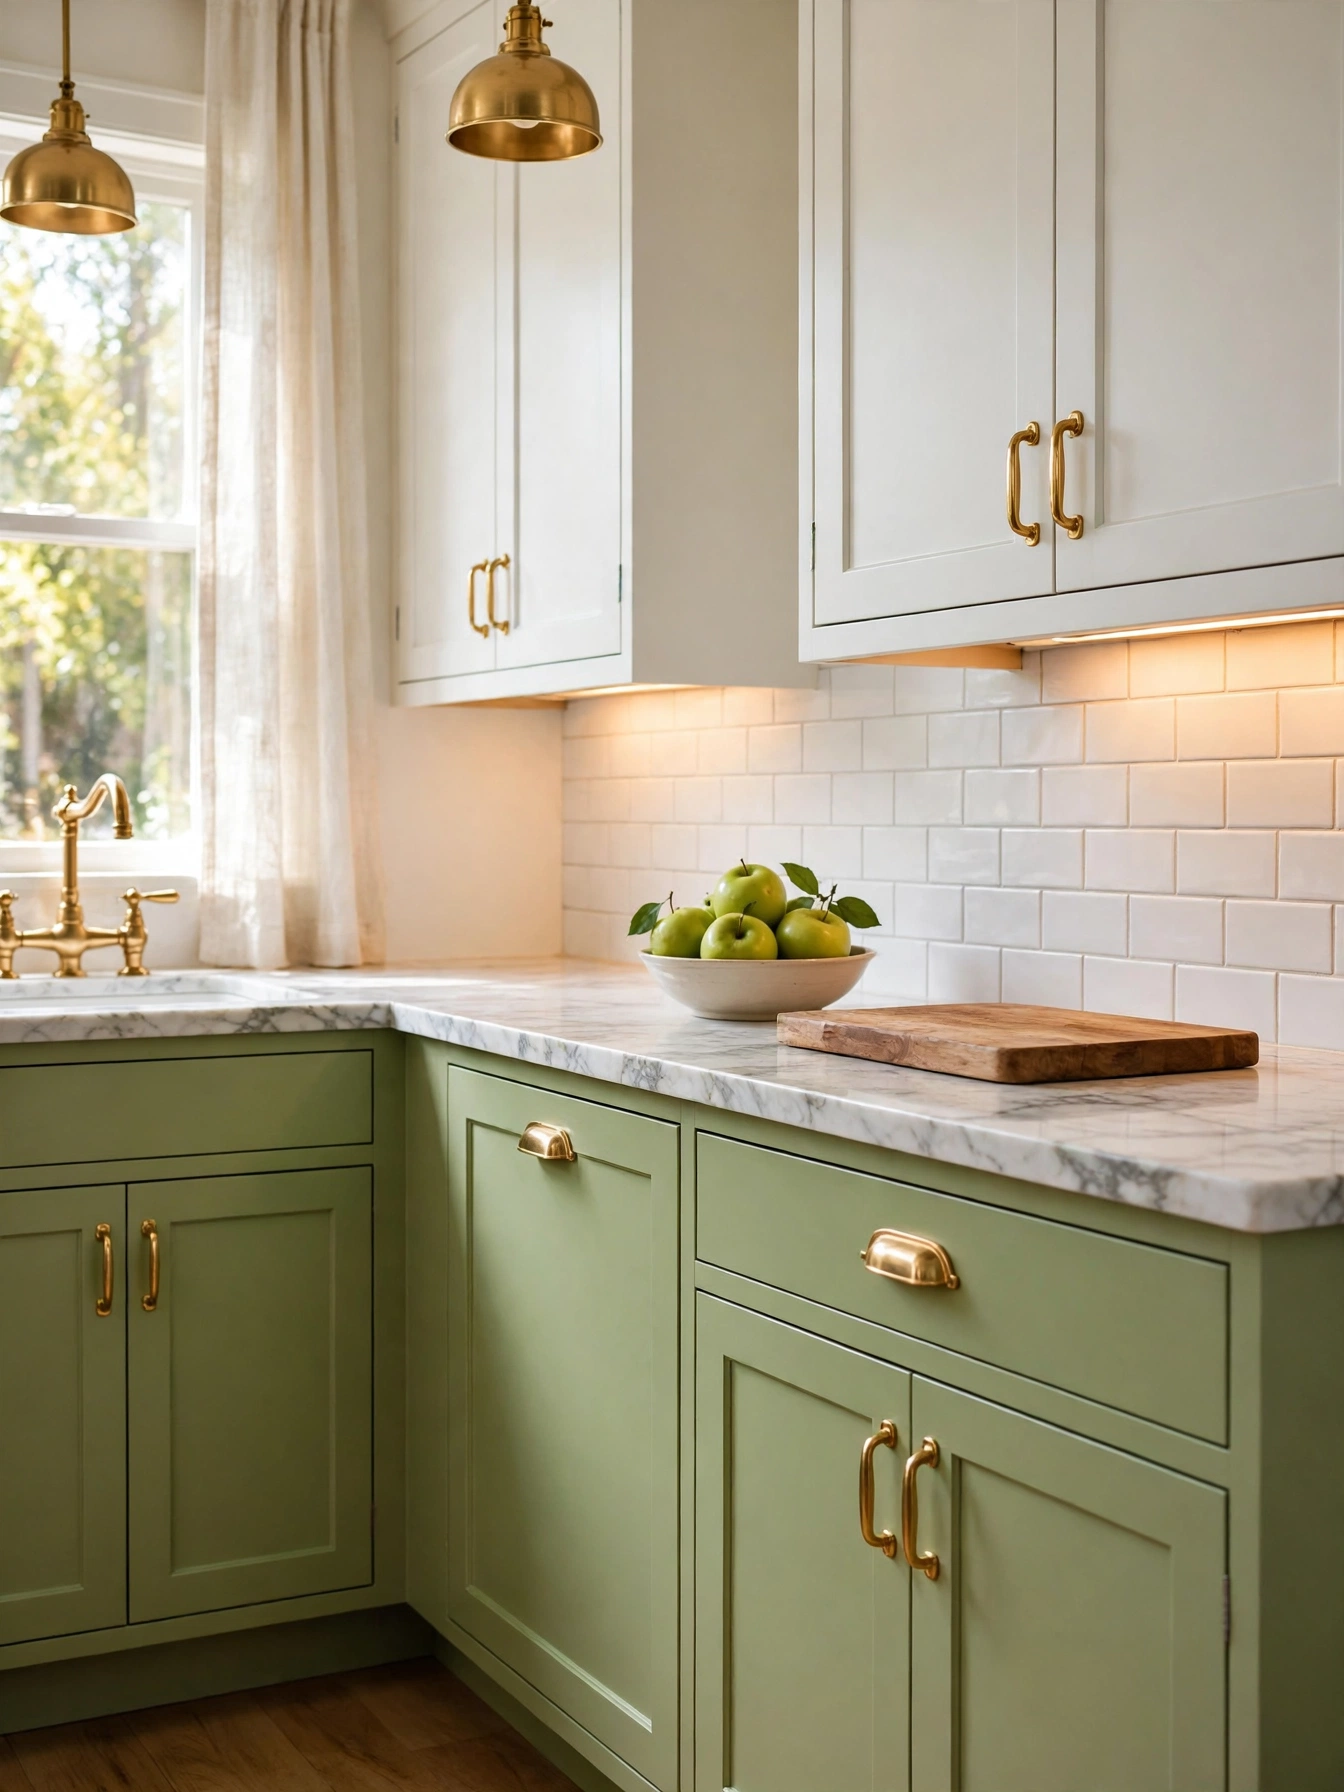
Warm Brass Hardware
Why This Works:
- Brass pulls warm up green or wood cabinets instantly
- One finish across pulls and faucet reads as a single decision
- The metal ages gracefully and gains character with touch
- Swapping hardware needs only a screwdriver and an hour
Swapping in brass pulls takes an hour and a screwdriver, yet it changes how the whole kitchen reads. Pulls with a 3 to 5 inch center-to-center spacing fit most cabinet doors without new holes. Unlacquered brass darkens with touch over time, while lacquered brass keeps its shine for years. Match the pulls to the faucet finish, so the metals read as one decision instead of two. Skip brass on white shaker cabinets with chrome appliances, since the mixed metals fight each other.
New brass pulls for a full kitchen come to $40 to $80, a small sum for a swap that changes the whole room. Renters love this swap, because it needs only a screwdriver and leaves no trace on moving day. The warm metal pairs with wood and earthy colors, yet it shows fingerprints faster than matte black. Matte black hardware runs close in price and hides prints, while brass adds the retro glow that black cannot.
Patterned Wallpaper Border
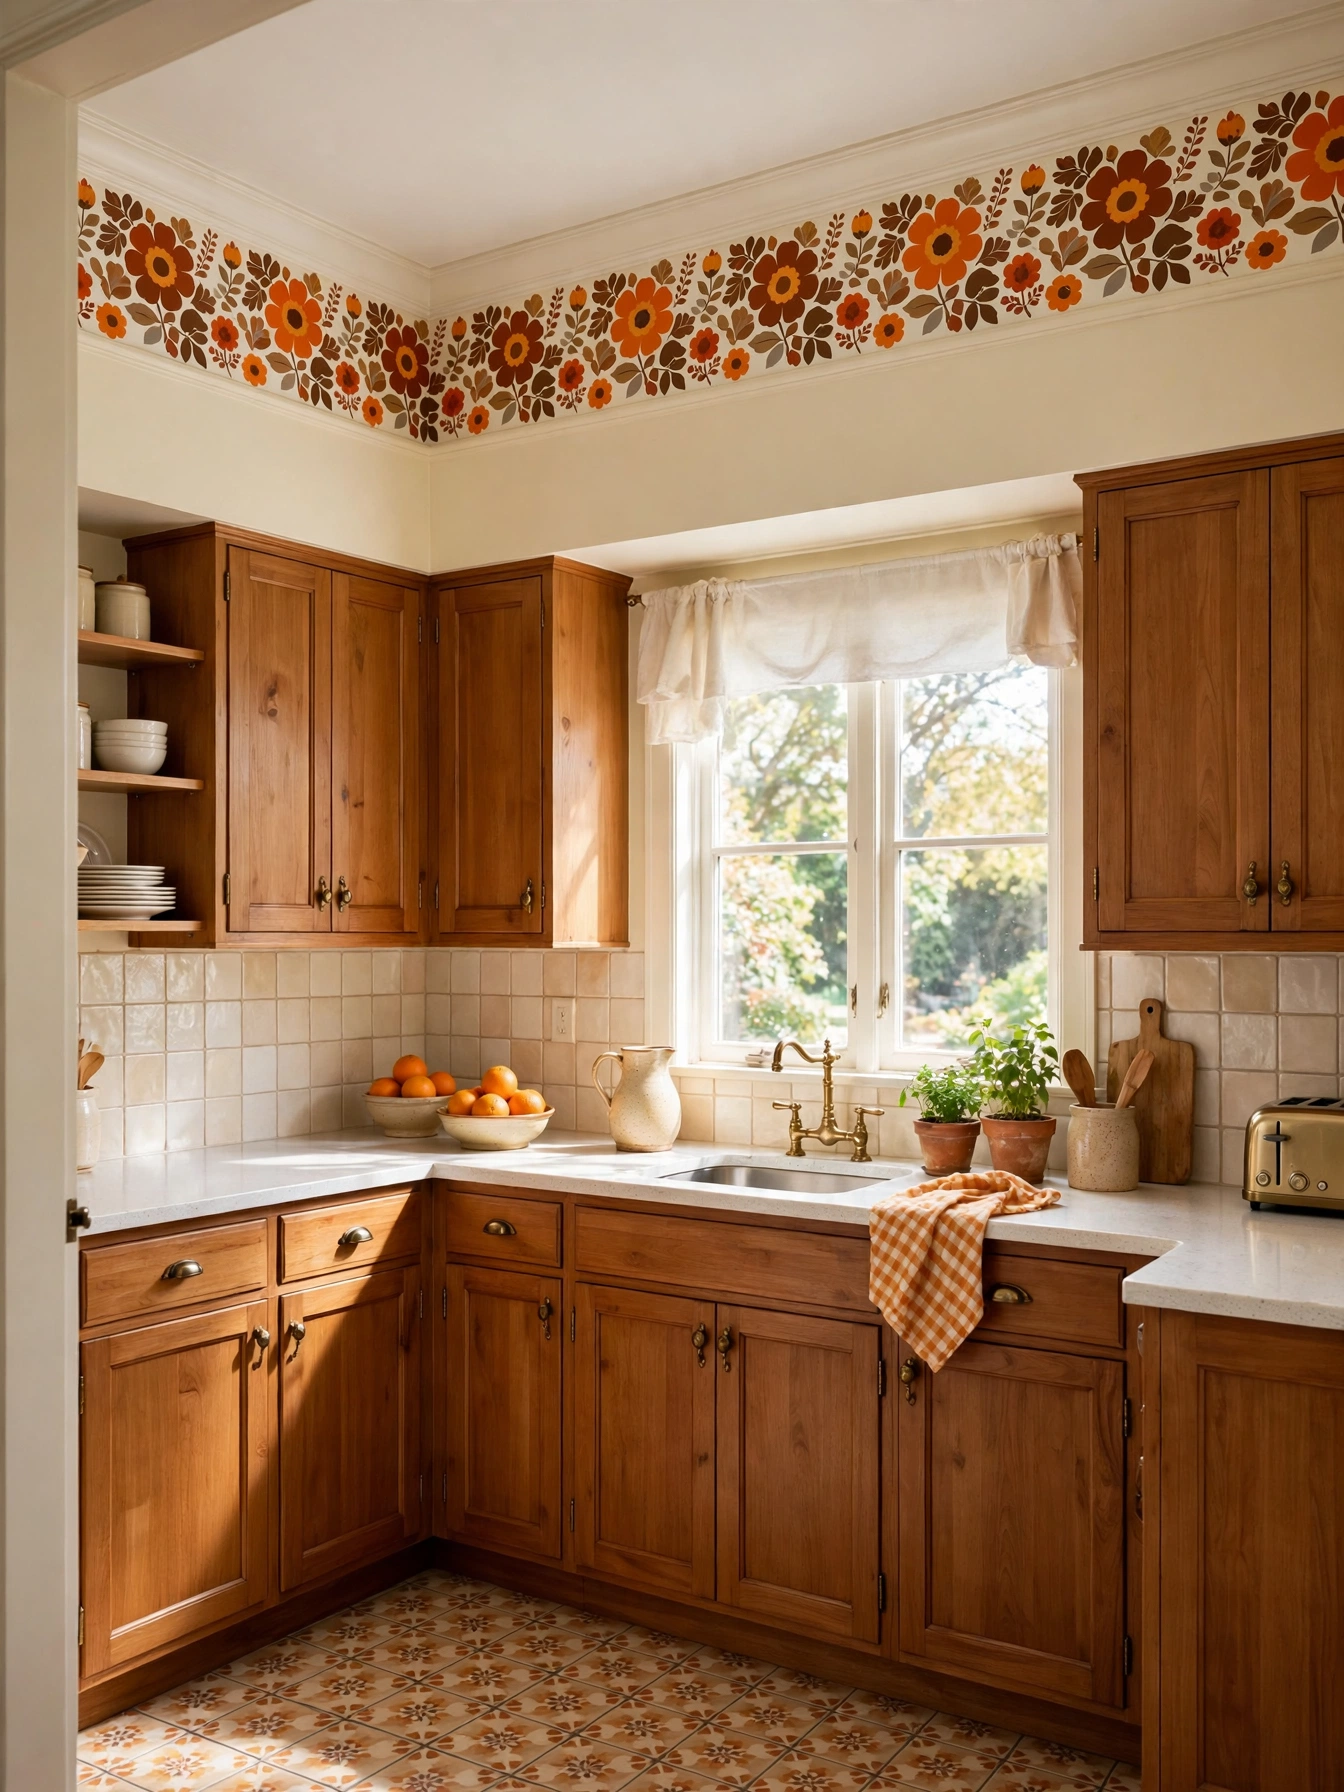
Why This Works:
- A border adds pattern at the ceiling, where it frames the room
- Peel-and-stick paper removes cleanly when tastes change
- The print ties the wall color to the cabinets
- One roll finishes a standard kitchen in an afternoon
A wallpaper border adds 70s pattern at the ceiling line, where it frames the room instead of filling it. A border 6 to 8 inches wide in a bold floral or geometric print hangs at 84 inches high. Peel-and-stick paper suits a kitchen, since it removes cleanly and survives steam better than pasted paper. Match the border colors to the cabinets, so the pattern ties the room together instead of floating alone. Never run a border behind the stove, because heat and grease peel the edges within months.
Pattern without commitment is the appeal here, since the border peels off cleanly when tastes change. The border draws the eye up, which makes a low ceiling feel taller, while a full wall of pattern can close the room in. Peel-and-stick paper removes without damage, yet it lifts at the corners in a steamy kitchen if the edges are never pressed. Painted trim stays put through steam and never peels, though its flat color cannot match the detail of a printed border. One roll of peel-and-stick border is $20 to $45 and covers about 15 feet, which finishes a standard kitchen in a single afternoon.
Shag Rug Runner
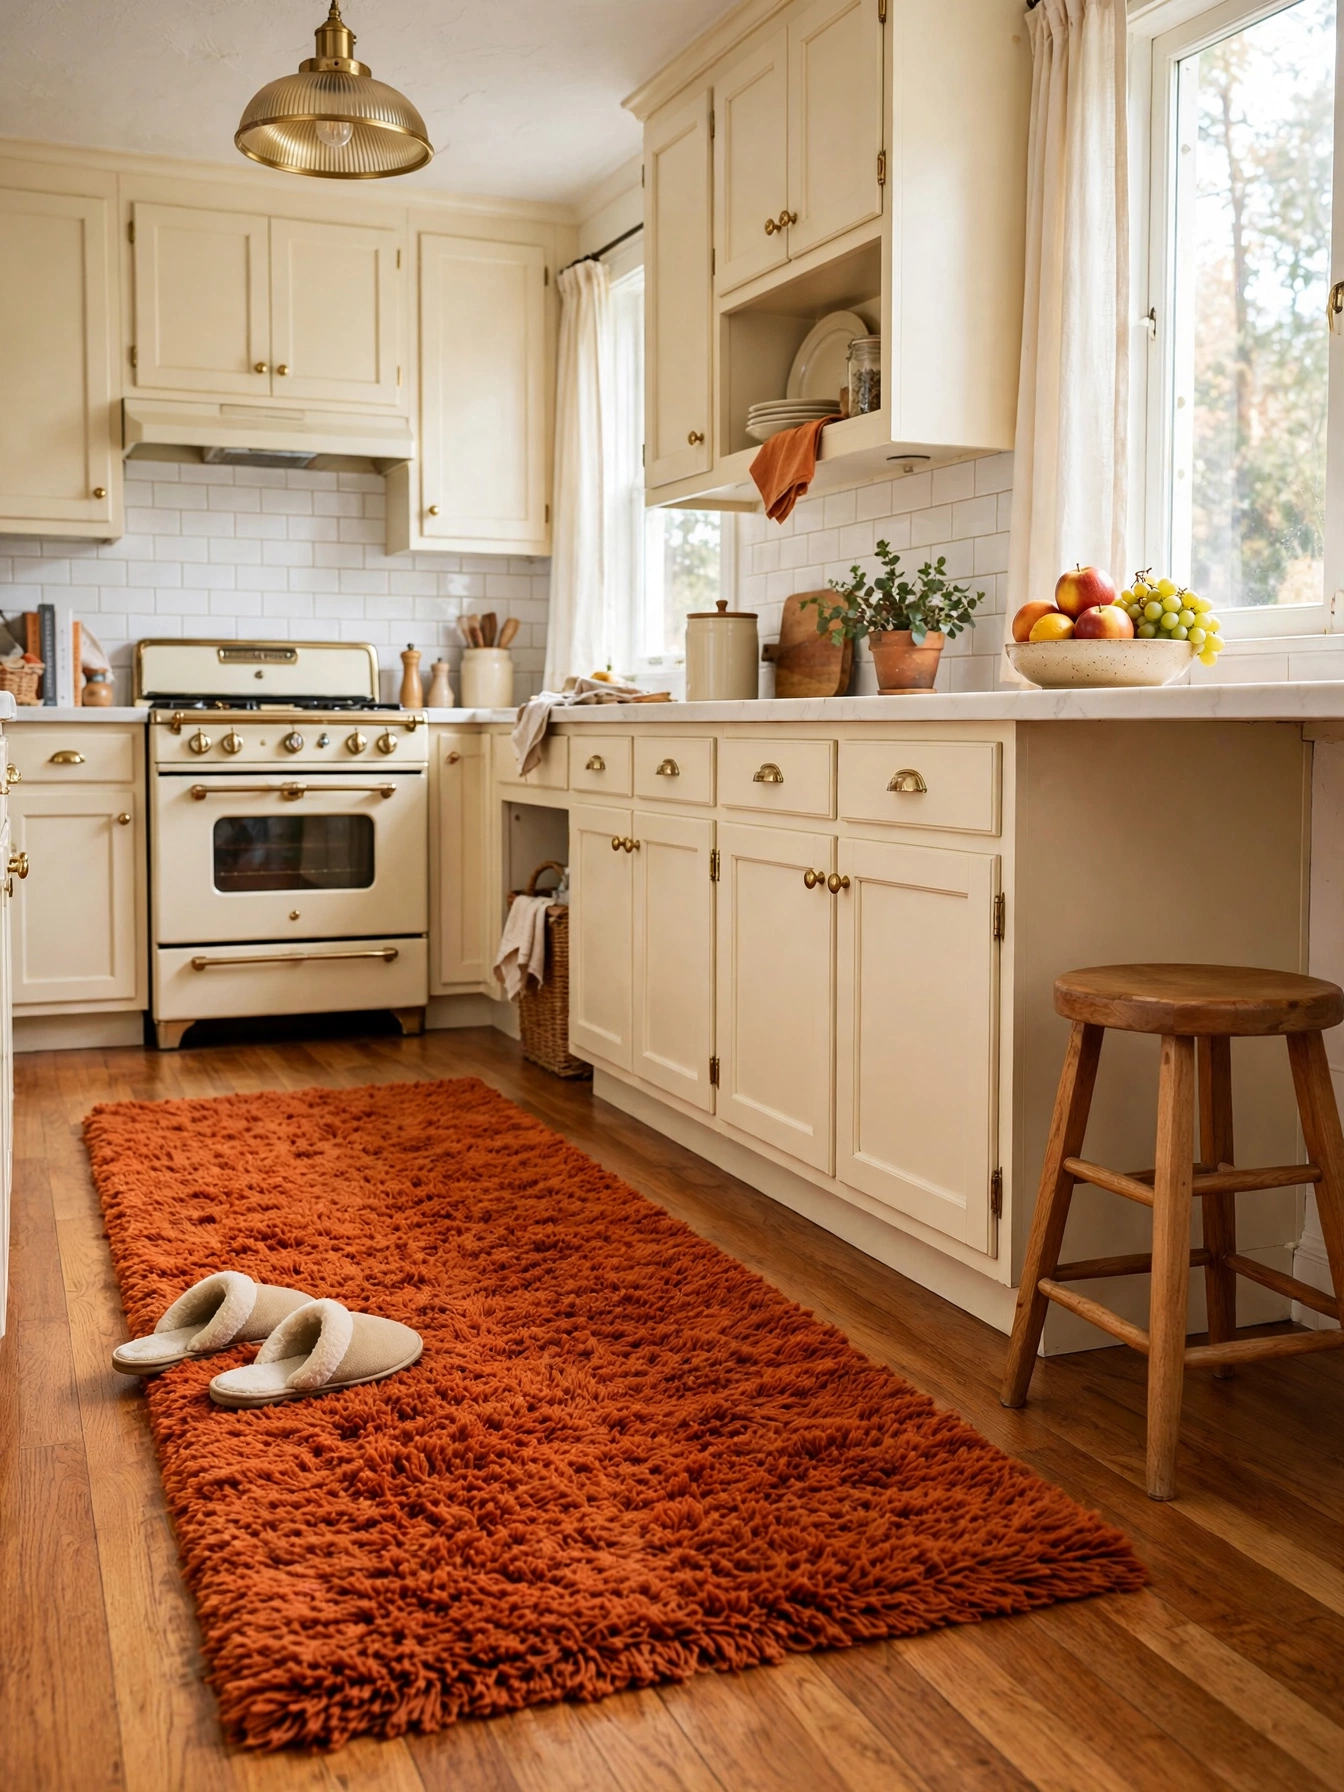
Why This Works:
- Thick pile cushions the feet where the cook stands longest
- Burnt orange adds the 70s color at floor level
- The rug warms a hard tile or wood floor in winter
- A runner defines the work zone without a remodel
Underfoot, right where the cook stands, a shag runner lays down the softest 70s texture. A runner 2 feet wide and 6 feet long with a pile about 1 inch high cushions the feet without tripping anyone. Pick a low-shed synthetic fiber, since wool sheds for months and costs twice as much. Lay a non-slip pad underneath, cut 1 inch smaller than the rug on every side, so the edges never curl. Never place a shag rug beside the stove, because grease drops into the pile and never fully comes out.
Standing at the counter for an hour is easier on a soft floor, and the shag runner delivers exactly that. A 2 by 6 foot runner goes for $40 to $90, below the price of one anti-fatigue mat in the same size. The pile cushions the feet, yet it traps crumbs and needs a weekly shake outside. A flat-weave runner asks about the same money and cleans easier, while shag feels softer and looks more retro.
Copper Cookware Display
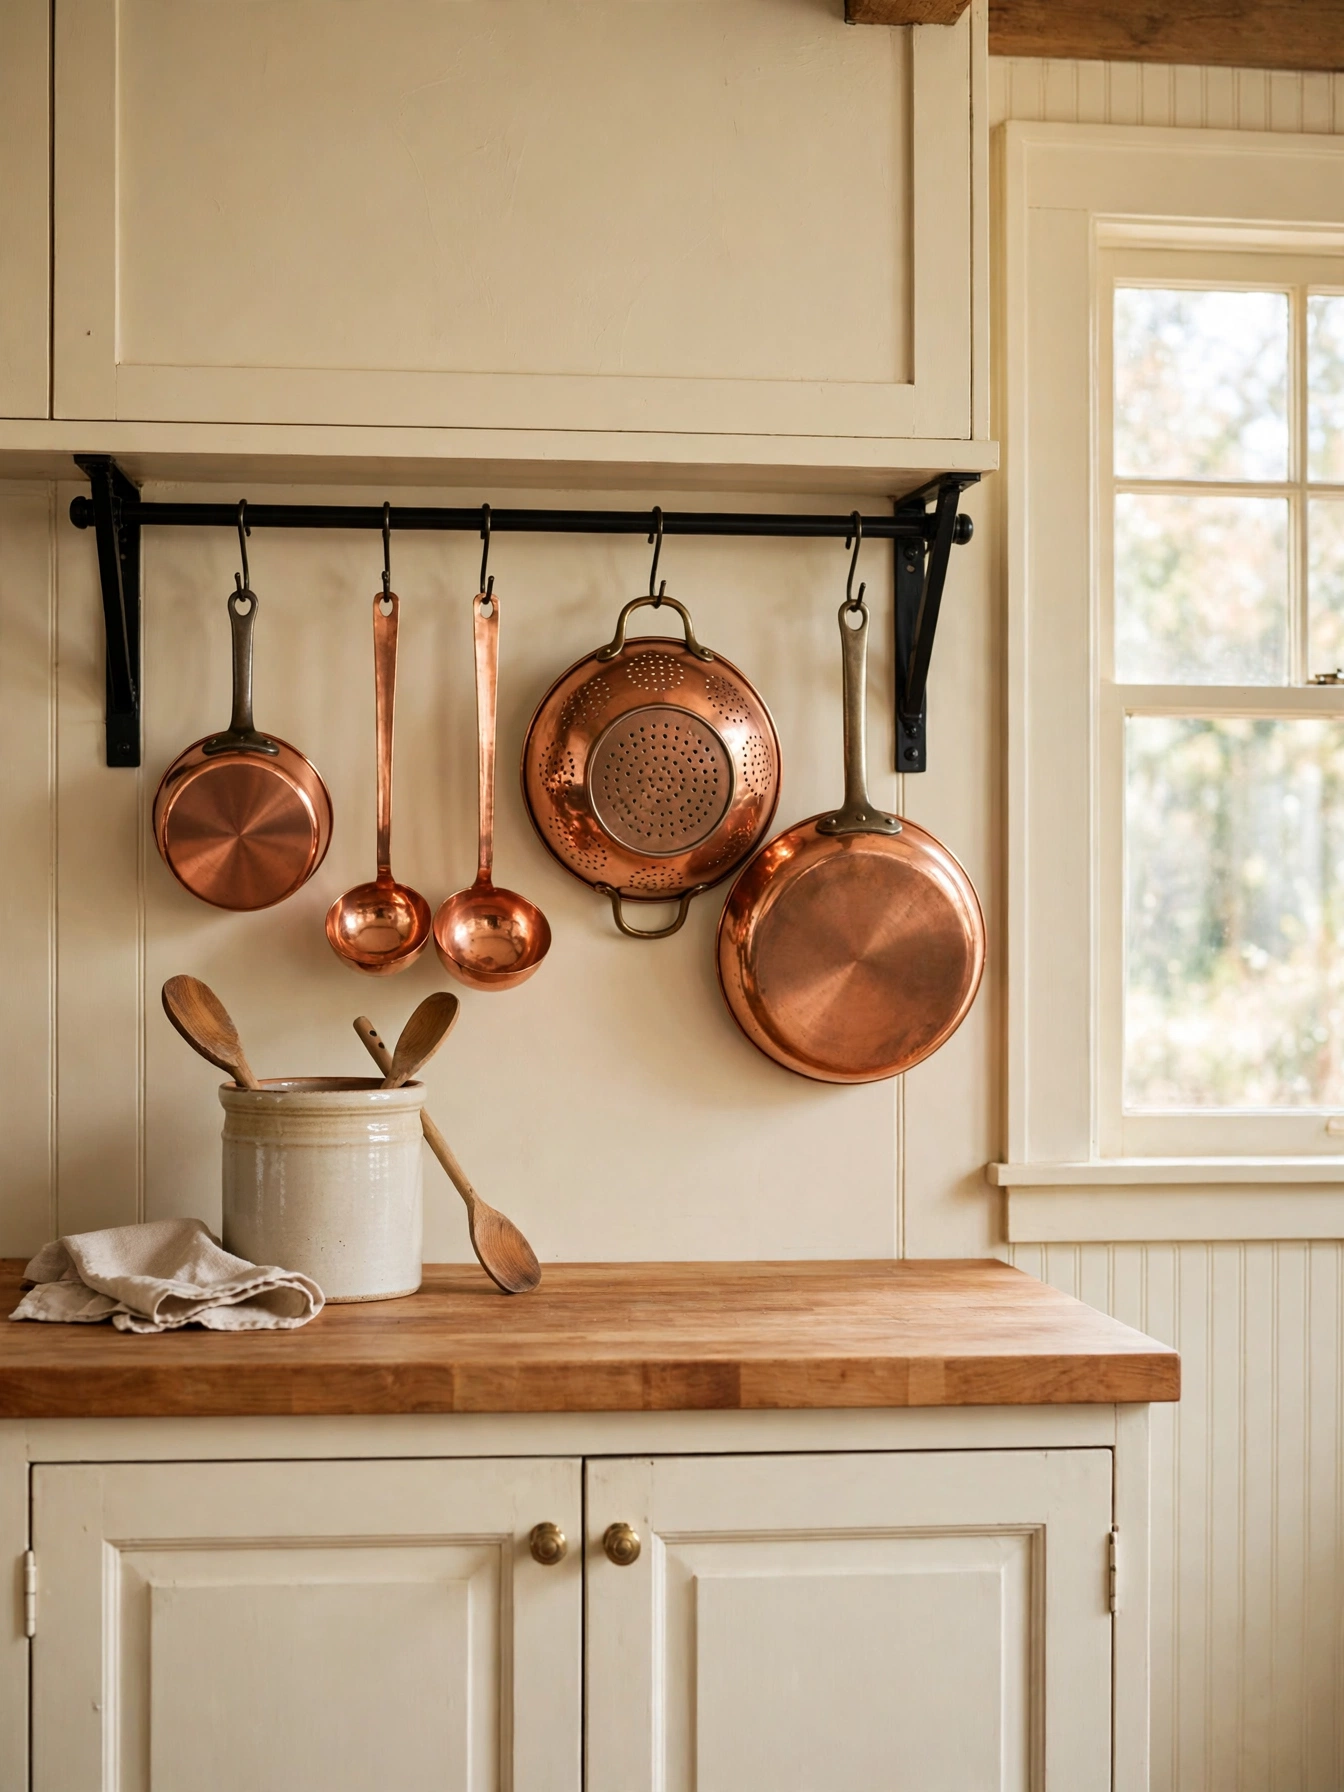
Why This Works:
- Gleaming copper turns everyday pans into wall decor
- A rail keeps the three most-used pans within arm’s reach
- Warm metal repeats the brass and wood tones below
- Hanging frees a full cabinet for lids and baking sheets
Copper pans hung on a wall rail turn cookware into the kitchen decor. Mount a steel rail 36 inches long at 60 inches high, with S-hooks rated for 25 pounds each. Set the heaviest pans nearest the wall studs, since the rail carries the most weight at its anchors. Copper needs a polish every month to stay bright, while a lacquered finish keeps the shine with only a wipe. Never hang copper above the stove, because the heat darkens the finish and the handles stay hot.
The same three pans get used every day, so hanging them within arm’s reach saves a cabinet trip each time. The pans stay visible, so the cook grabs the right one without opening a cabinet, yet the display needs a monthly polish. The warm glow on the wall is the payoff, and it only asks for a quick polish each month to stay bright. A 36 inch wall rail with hooks goes for $30 to $70, and a set of three copper pans adds $100 to $250 on top of that.
70s Kitchen Ideas for Small Kitchens
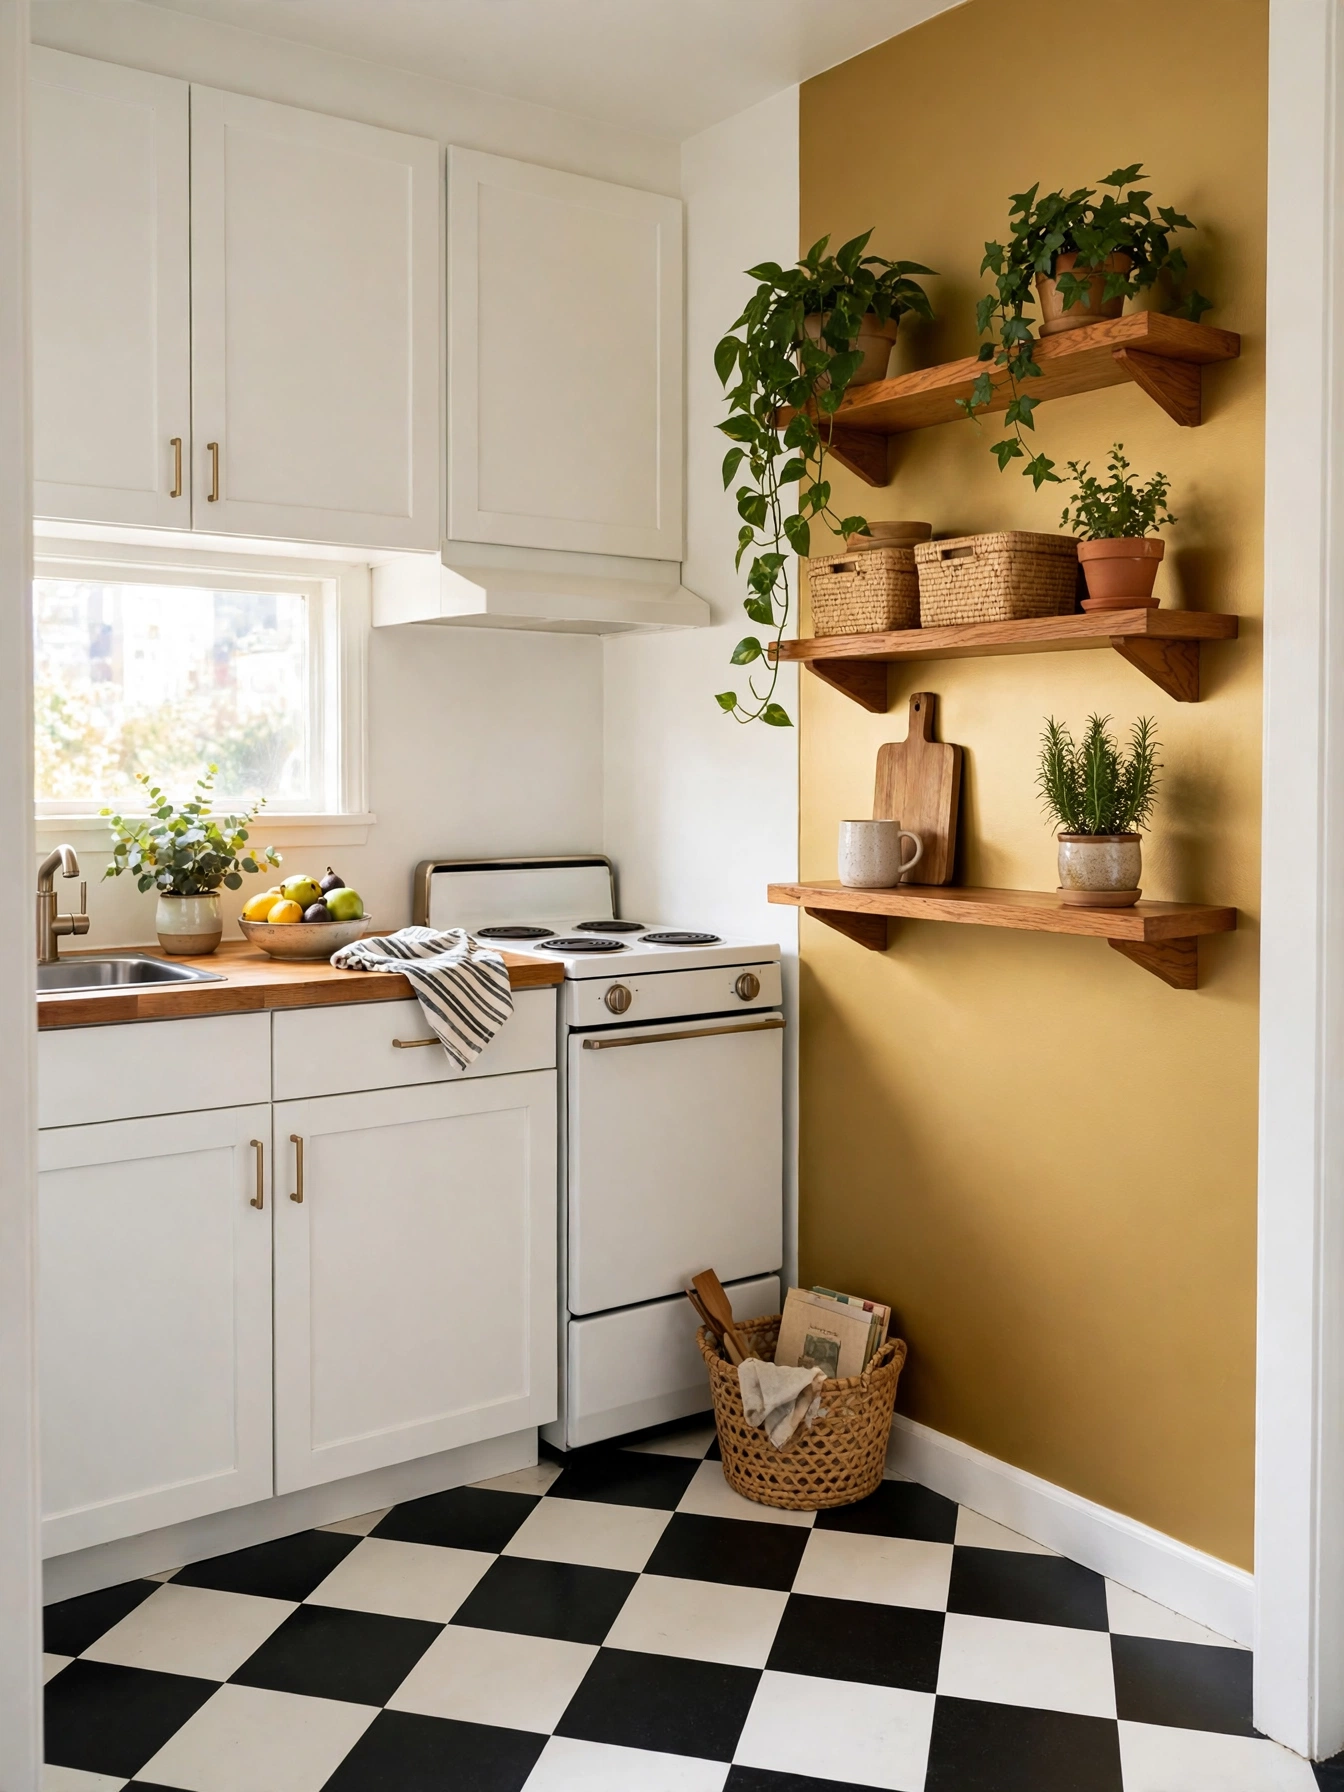
Why This Works:
- One gold wall gives the retro feel without repainting the cabinets
- A checkerboard floor adds pattern at ground level
- White cabinets keep the small room bright and open
- Open shelves store dishes without closing the walls in
A small kitchen takes the 70s best in small doses, because one bold wall fills the whole room. Paint a single accent wall in harvest gold or avocado, and keep the other three walls warm white. A 12 by 12 inch checkerboard floor gives the retro feel without a single new cabinet. Open shelves at 12 inches deep hold dishes and plants without closing the room in. Skip a retro fridge in a kitchen under 100 square feet, since the rounded shape eats floor space the room cannot spare.
Character on a paint budget is the goal in a first home, and one wall plus a floor deliver it. One gold wall and a checkerboard floor set the retro mood, while the white cabinets keep the room bright and easy to clean. Paint, a checkerboard floor and open shelves total $200 to $400 for a 10 by 10 foot kitchen, which is less than one new cabinet run. A remodel costs ten times as much, while the accent approach finishes in a single weekend.
Amber Glass Storage
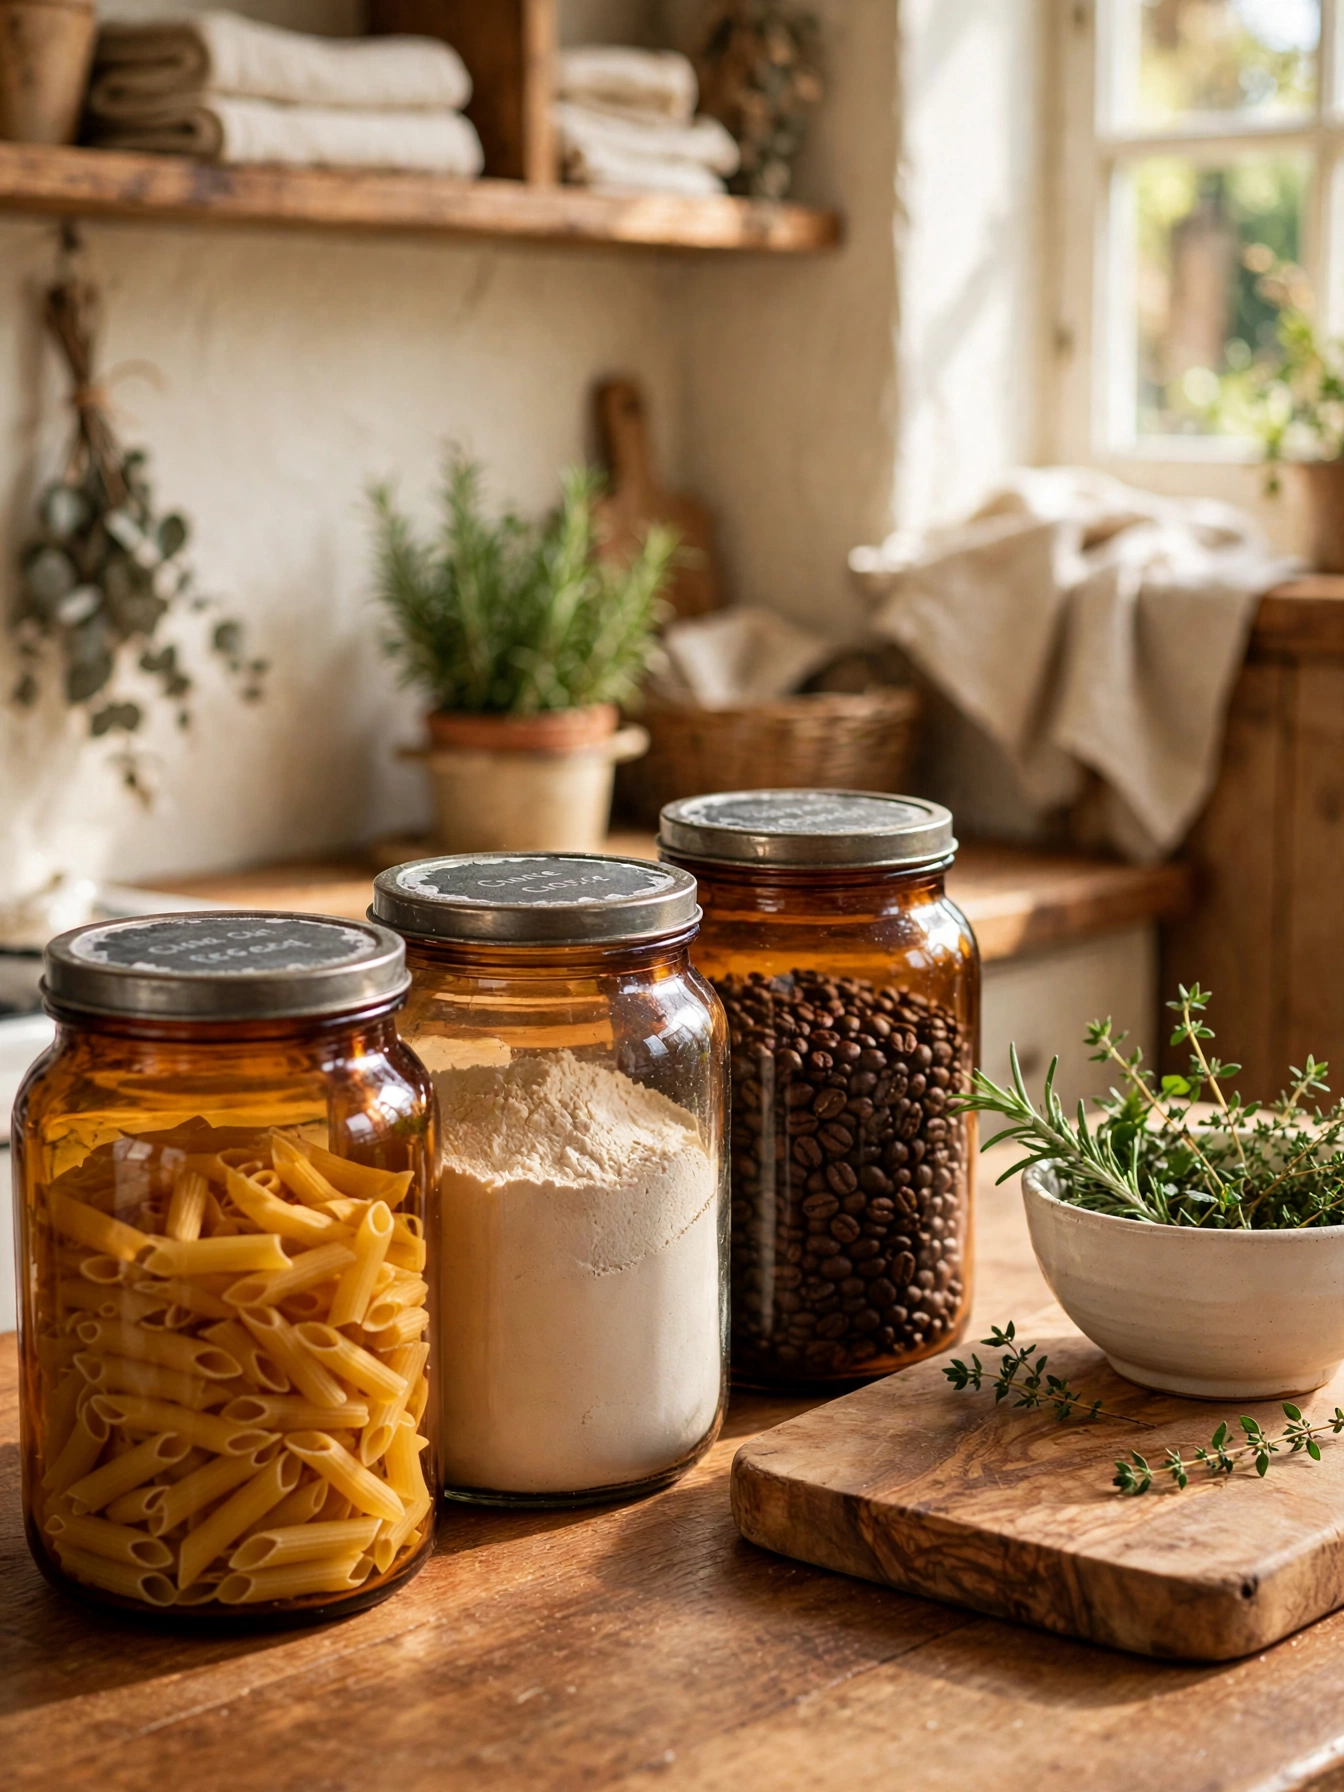
Why This Works:
- Amber glass blocks UV light, so food stays fresh longer
- The warm glow adds 70s color to the countertop
- Airtight lids keep flour dry and coffee fragrant
- Matching jars turn a cluttered counter into a calm row
Morning light catches amber glass jars on the counter, throwing a warm 70s glow across the room. Jars at 32 ounces hold flour and sugar, while 16 ounce jars fit spices and coffee. Amber glass blocks UV light, so pasta and spices stay fresh twice as long as they do in clear glass. Fit airtight lids with a silicone seal, since a loose lid lets moisture in and the flour clumps. Never store amber jars above the stove, because the heat fades the labels and warms the contents.
A set of six amber jars is $25 to $50, a modest spend for a countertop change with real impact. The pantry stays visible without clutter, which matters most when the household buys flour and coffee in bulk. The jars keep food fresh, yet they chip if they knock together on a crowded shelf. Clear glass comes in near the same price and shows the contents better, while amber protects food from light and adds the retro color.
Terracotta Tile Floor
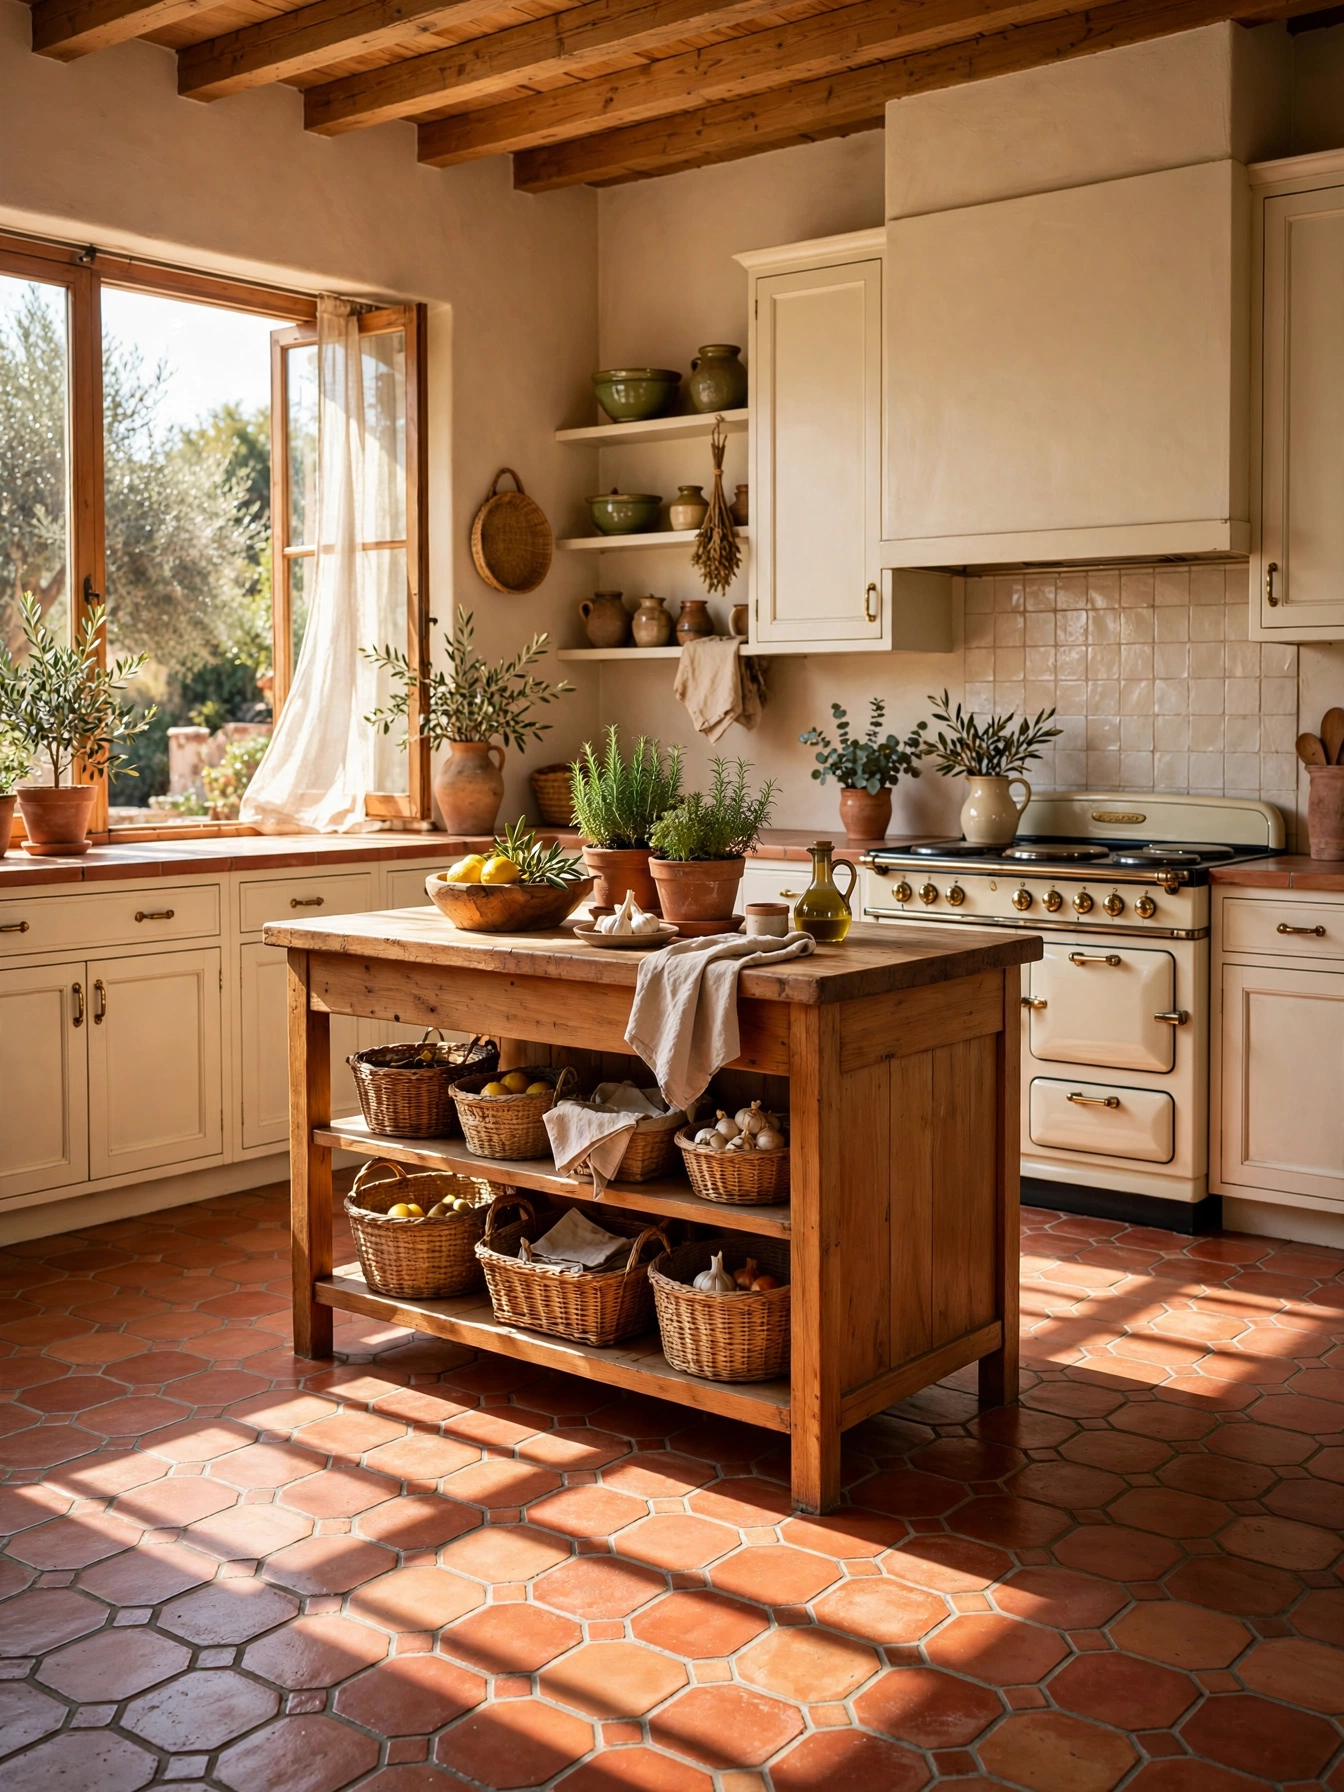
Why This Works:
- Warm terracotta tones ground the whole retro palette
- Natural variation in the tile adds character no print can copy
- The floor stays cool in summer and holds sun heat in winter
- Terracotta pairs with cream cabinets and wood without a fight
Earthy warmth spreads underfoot with terracotta tile floors, and they hold up better with age than any other floor option. Choose 12 by 12 inch tiles with a 1/4 inch grout line, and seal them with two coats of penetrating sealer. Terracotta varies in tone from tile to tile, so mix tiles from three boxes before laying them. The tile stays cool in summer and holds heat from the sun in winter, which suits a sunny kitchen. Skip unsealed terracotta in a kitchen, because tomato sauce and oil stain the surface within days.
Natural materials and a weekly mop go together, and terracotta rewards both. The warm tones pair with wood cabinets and cream walls, yet the tile chips if a heavy pan drops on a corner. Real terracotta gains character with every year, and the color variation deepens instead of fading. Sealing takes an afternoon each year, and a busy family may prefer a floor that asks nothing. Terracotta tile sells at $3 to $8 per square foot, and a 10 by 12 foot kitchen needs about 120 square feet, so the tile works out at $360 to $960 before adhesive.
Vintage Wall Clock

Why This Works:
- A round clock adds the retro shape without a permanent change
- Bold numerals read clearly from across the room
- The clock anchors a bare wall better than a picture
- One battery a year is the only upkeep it needs
A round clock with bold numerals adds a quiet retro note to a bare wall, and it earns its place simply by telling the time. A clock 12 inches across hangs at 60 inches high in a standard kitchen, which is eye level for most adults. A simple round face with bold numerals reads best, since a fussy face is hard to read across the room. A battery movement keeps the clock silent, while a ticking movement suits a kitchen where the sound feels nostalgic. A clock above the stove fogs up, because steam clouds the glass and grease coats the face.
Every kitchen needs a clock, and the retro shape adds character without a single permanent change. A vintage-style clock sells for $20 to $60, below the cost of a cabinet pull set for the whole kitchen. The clock needs one battery a year, yet it anchors a bare wall better than any picture. A smart display costs more and shows the weather, while a simple clock never needs a password or an update.
Groovy Open Shelving

Why This Works:
- Earthy dishes on open shelves show off the 70s palette
- Wood brackets add warmth that metal brackets cannot
- The shelves make a small kitchen feel larger
- Two shelves cost a third of matching wall cabinets
Open shelves show off the earthy dishes and amber jars, which is the whole point of collecting them. Mount shelves 12 inches deep on brackets spaced 16 inches apart, screwed into the wall studs. Use 3/4 inch thick boards, since thinner boards sag under a full load of stoneware. Set the shelves 18 inches above the counter, which is the standard gap under an upper cabinet. Never load a shelf past 25 pounds per bracket, because the fixings pull out of the wall over time.
Display lovers keep their dishes tidy without thinking about it, and open shelves reward that habit. The shelves make a small kitchen feel larger, yet they need a weekly wipe in a room full of steam. Open shelves turn the dish collection into the wall decor, and the room needs no picture or print to finish the wall. Two wood shelves with brackets add up to $50 to $120, and matching wall cabinets run about three times that amount.
FAQs
What are the best 70s kitchen ideas for a modern home?
Use the 60-30-10 split: warm white takes 60 percent of the room, wood tones take 30 percent, and harvest gold or avocado takes the last 10 percent. A $30 to $60 gallon of paint covers one accent wall, and retro colors read best as accents rather than whole-room schemes.
Which 70s colors work best in a kitchen today?
Harvest gold, avocado green and burnt orange lead the revival, and each one works best under a 10 percent accent cap. Two coats of satin cabinet paint cover old white cabinets, and warm wood tones balance the color so the room reads retro without feeling dark.
How much does a 70s kitchen update cost?
A paint-only update costs $60 to $120 for two gallons and a brush set, while new cabinet pulls add $40 to $80 for a full kitchen. Tile and lighting push the total toward $300 to $500, so start with paint and hardware before buying anything bigger.
Can 70s kitchen ideas work in a small kitchen?
Yes, when the decade stays on one wall. A single harvest gold accent wall and a 12 by 12 inch checkerboard floor give a small kitchen the retro feel, while open shelves at 12 inches deep keep the room bright. Hang pendants 30 to 36 inches above the counter.
What 70s materials are easiest to update later?
Paint, hardware and textiles change fastest: two coats of paint cover an accent wall in one afternoon, and new pulls swap in with a screwdriver. Cabinets in satin paint wipe clean with a damp cloth and show fewer fingerprints than flat paint. One $30 gallon reverses the look.
Conclusion
Treat the decade as an accent, not a full costume, and a 70s kitchen stays charming instead of dated. One harvest gold wall or a set of avocado cabinets makes a good first step, with wood tones kept warm and modern and the bold patterns kept small. Paint one wall this weekend, live with it for a week, and add the next retro touch only if the first one still feels right. Follow HomelyCrafter on Pinterest for more ideas. Save this to your Pinterest boards so you can refer back to it!

Muhammad Israr is a home decor enthusiast and the writer behind Homely Crafter. He spends his days researching paint colors, layouts and budget-friendly styling ideas, then breaks them down into practical, easy-to-follow guides so you can decorate with confidence.
1 thought on “25 Retro 70s Kitchen Ideas That Bring Back the Fun”