
A kitchen island takes about 9 square feet of floor, yet it is the surface everyone crowds around. The difference between an island that helps and one that blocks traffic comes down to a single measurement: the walkway around it. According to the National Kitchen and Bath Association, kitchens need 42 to 48 inches of clear space on every side of an island, and anything under 36 inches turns a busy kitchen into a bottleneck. These kitchen island ideas are built around numbers like that, so the island fits the room instead of fighting it.
This guide covers 21 island designs, from breakfast bars and prep sinks to waterfall edges and rolling carts, with exact heights, overhangs, clearances and material grades. Inside are measurements to check with a tape measure and honest notes on cost and limits. Measure first, then pick the island that matches how the household really cooks, eats and gathers.
Breakfast Bar Seating
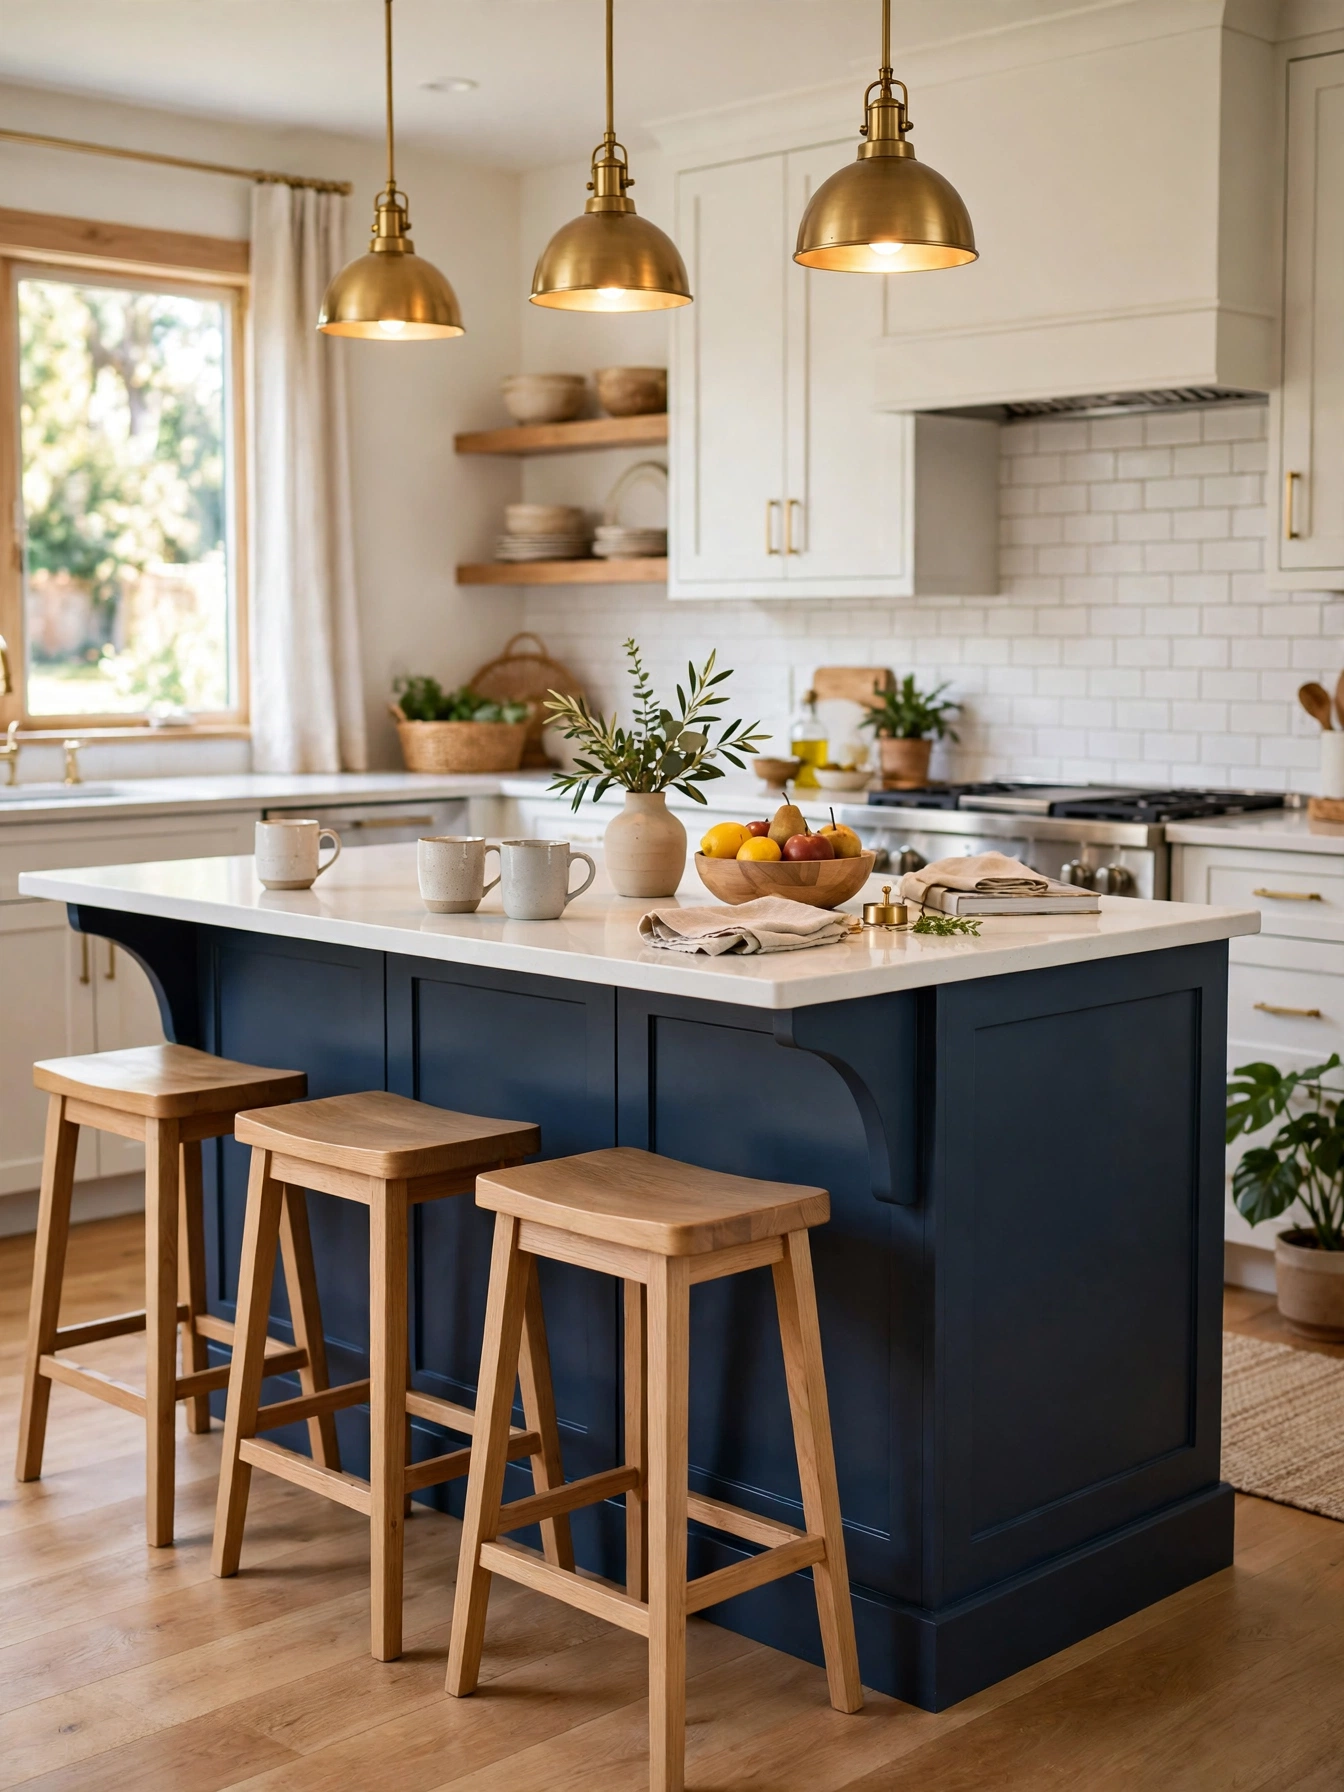
Why This Works:
- A 12 inch overhang gives knees room without stealing floor space
- Counter stools at 24 inches high match a 36 inch counter exactly
- Three stools fit a 72 inch island with 24 inches per seat
- The bar side keeps breakfast mess off the main cooking counter
Breakfast bar seating starts with height, and the math is simple: a 36 inch counter pairs with 24 inch counter stools, while a 42 inch raised bar needs 30 inch bar stools. Allow 24 inches of width per person, so a 72 inch island seats three and a 96 inch island seats four. The countertop must extend 12 to 15 inches past the cabinet for knee room, and the overhang needs steel brackets rated for 100 pounds when it passes 12 inches. Do not use a 10 inch overhang and hope for comfort, since knees hit the cabinet and sitters perch on the stool edge. Allow three and a half to four feet of walkway behind seated diners, which keeps the cook moving while the family eats.
Behind the stools, the walkway adds 18 to 24 inches to the island footprint, so a tight kitchen may fit only two stools instead of three. Backless stools tuck fully under the counter and save 6 inches. Stools with backs feel better for long sits and need more clearance behind them. Budget 150 to 400 dollars per stool. Solid wood and metal last far longer than lightweight plastic.
Waterfall Edge Countertops

Why This Works:
- The stone wraps down the sides, hiding cabinet seams and scuffs
- A 2 centimeter slab looks slim while a 3 centimeter slab reads solid
- Mitered corners make the vein pattern flow without a visible joint
- Hard surfaces wipe clean in seconds after a spill
A waterfall edge runs the countertop material down the sides of the island to the floor, and the slab thickness sets the look. Choose 2 centimeter quartz for a slim modern edge or 3 centimeter for a heavier statement, and match the veining across the mitered joint so the pattern flows without a break. The island itself should measure at least 48 inches long for the waterfall to read as a design feature rather than a thick border, and the side panels need a level floor, since a 1/4 inch slope shows as a gap at the base. Skip waterfall edges on islands under 36 inches long, since the stone overwhelms the cabinet and leaves little room for seating or storage. Quartz resists stains better than marble, which etches when lemon juice or vinegar sits on it for more than a few minutes.
Measure the floor for level before ordering, and budget a full day for installation. Expect to pay 800 to 2,500 dollars more than a standard countertop, and plan on a skilled fabricator for the mitered joint rather than a first-time installer. Marble brings drama and demands sealing every 6 months. Quartz costs more upfront and asks almost nothing afterward.
Two-Tone Island Finish
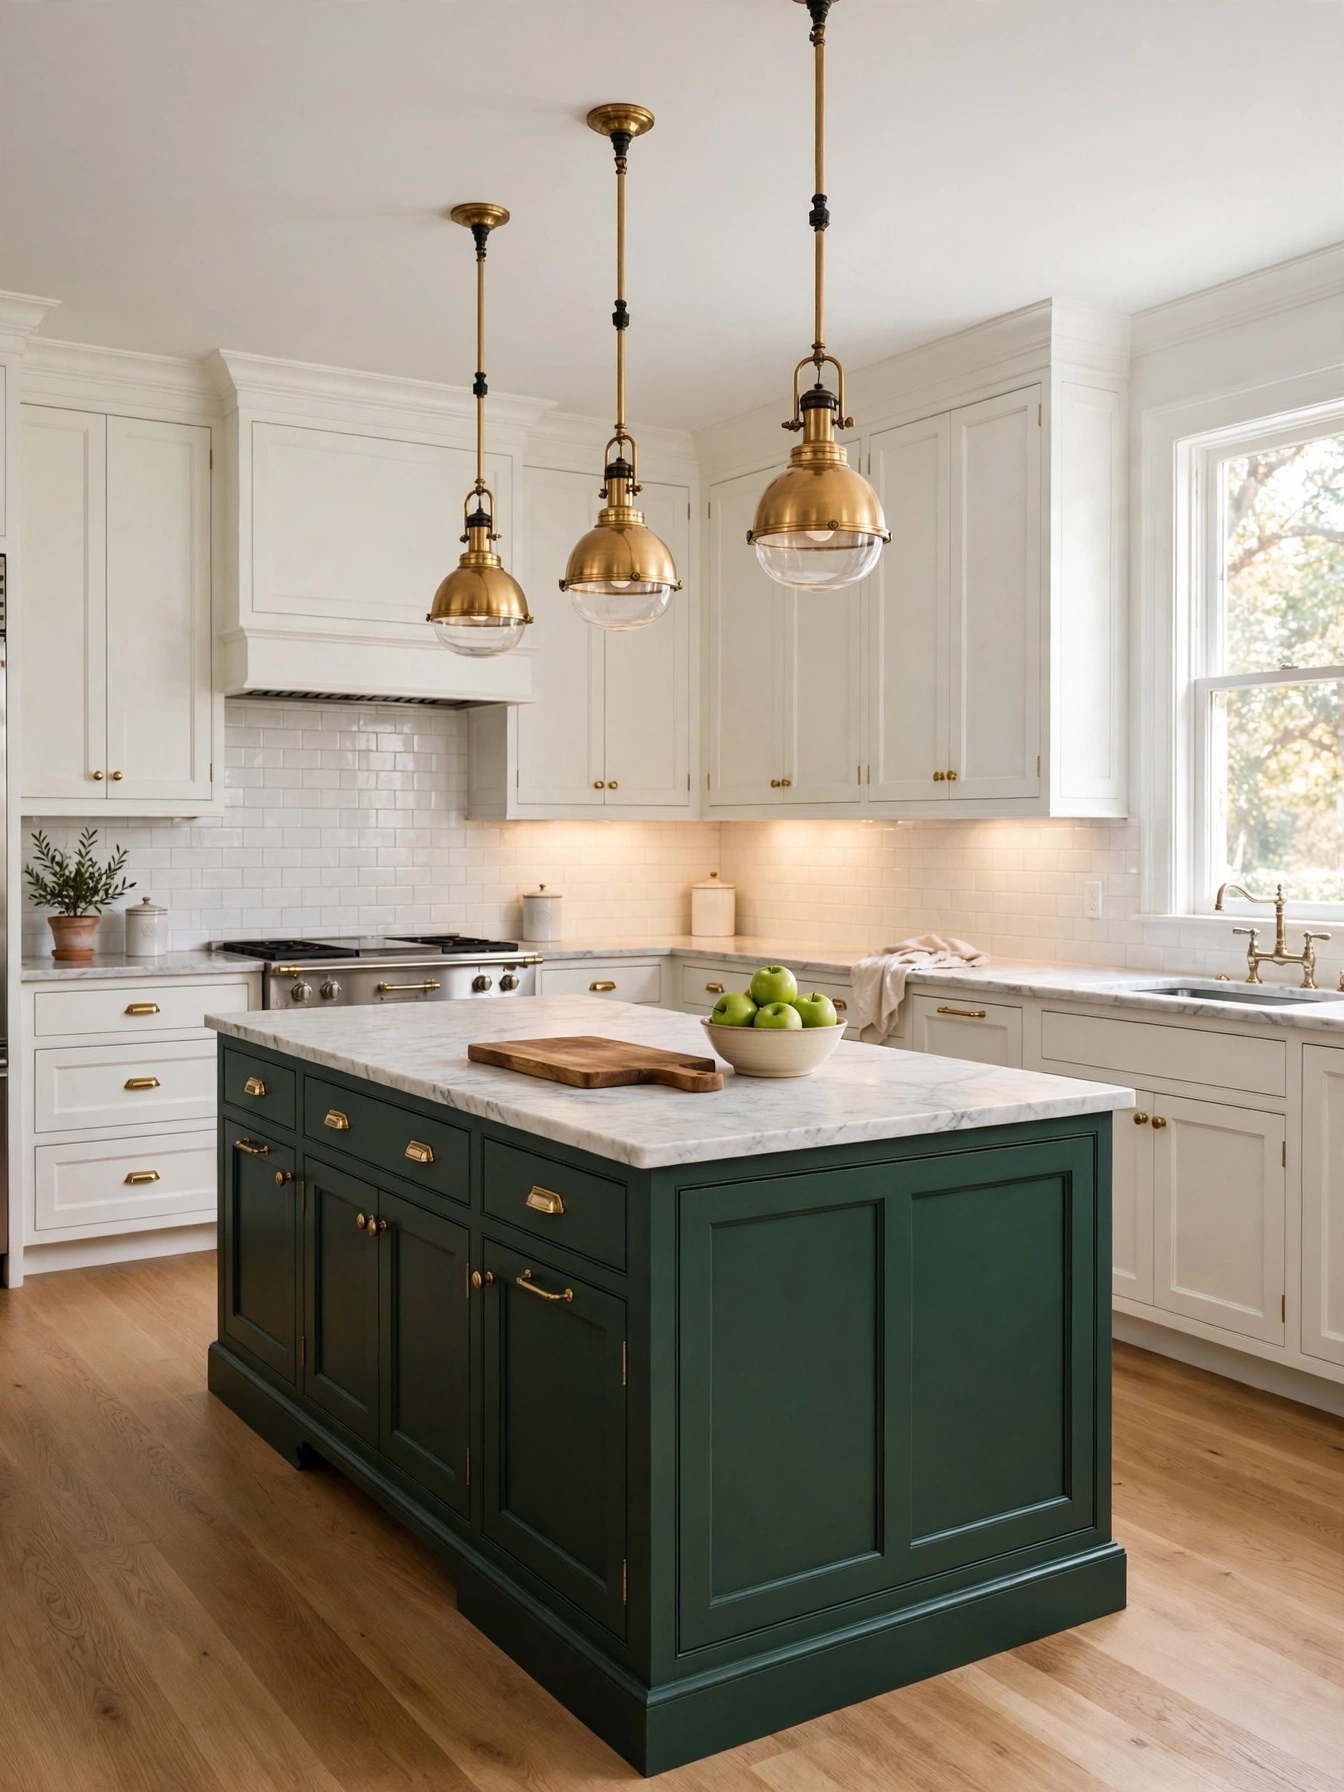
Why This Works:
- A dark island anchors the room while white cabinets keep it bright
- Painted maple holds color better than raw pine under daily use
- Brass pulls tie the island color to the faucet and lighting
- Two tones cost nothing extra beyond a second paint color
A clear gap between the island color and the perimeter makes two-tone work: the island needs to read darker or warmer, not a shade apart. Paint the island a deep tone such as forest green, navy or charcoal, and keep perimeter cabinets white or cream so the contrast reads at a glance. Use a durable cabinet paint rated for kitchen use, applied in two coats over primer, since island bases take more kicks and bumps than wall cabinets. Keep the countertop light, such as white quartz, to balance the dark base and bounce light across the room. The Spruce notes that painted islands need a satin or semi-gloss finish, which wipes clean and hides fingerprints better than flat paint.
Repainting an island costs 300 to 700 dollars, so the fix is cheap if the color grows tiresome. A trendy color can date the kitchen in 5 years. Navy and forest green have stayed popular for a decade. A bold island color lets a cautious kitchen feel designed without a full remodel, and it works for homeowners who want change on a paint budget. Test the color on a 2 foot by 2 foot board and live with it for a week before committing.
Prep Sink Station

Why This Works:
- A second sink cuts the walk between washing and chopping to zero
- A 15 inch prep sink fits an island as short as 60 inches
- A gooseneck faucet clears tall pots and stockpots easily
- Two sinks let one person wash while another cooks
Size decides whether a prep sink helps or crowds the counter, since it adds a second work zone to the island. Choose a 15 by 15 inch bar sink for islands under 72 inches long, or an 18 by 16 inch sink for islands 84 inches and longer. The sink needs a 36 inch drain run to the main line and a water supply line of 1/2 inch, and the island base must hold a garbage disposal unit of at least 1/2 horsepower if one is planned. Do not place a prep sink closer than 12 inches to the island edge, since splashes reach the floor and the countertop loses its landing space. A licensed plumber should handle the new supply and drain lines, because kitchen plumbing must meet local code and a leak inside a cabinet goes unnoticed for weeks.
Plan the sink before the countertop is cut, since moving it later means a new slab. Two cooks stop queuing for the same tap, since one rinses vegetables at the island and the other works at the main sink. Stainless steel at 16 gauge resists dents better than 18 gauge. With plumbing, a prep sink costs 1,200 to 3,000 dollars and takes 15 inches of drawer space for the basin and pipes. A composite granite sink hides water spots and costs about 30 percent more.
Mobile Island on Casters
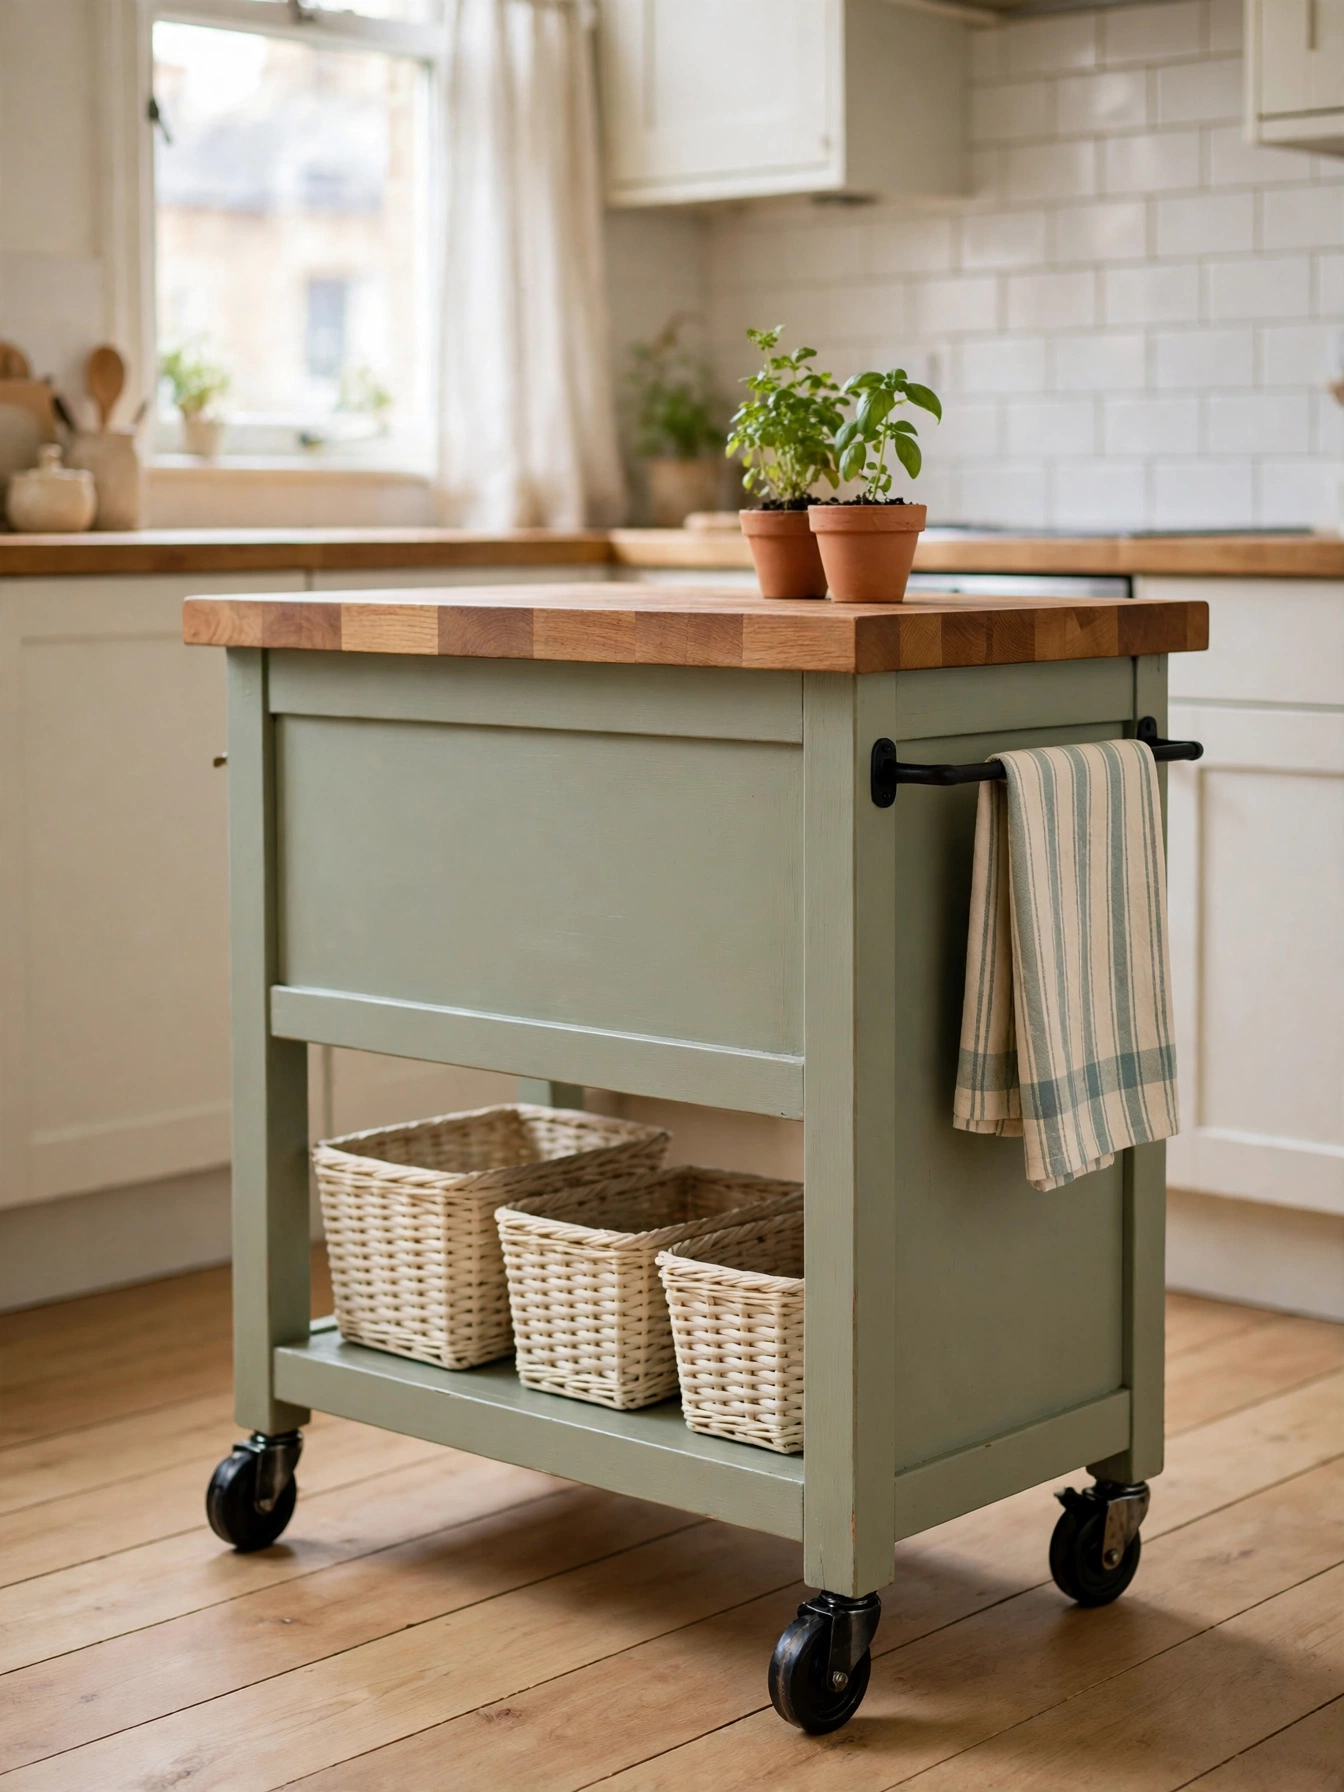
Why This Works:
- Locking casters rated for 125 pounds each keep the island steady while cooking
- A 36 by 24 inch top adds prep space without a permanent footprint
- Rolling it aside opens a 48 inch path for parties and cleaning
- Open shelves below hold baskets that slide out easily
A mobile island suits kitchens where a fixed island would block traffic, and the casters decide whether it works. Choose four locking casters rated for at least 125 pounds each, so the island holds 300 pounds of countertop, food and equipment without wobbling. Keep the top 36 inches high to match standard counters, and size it 36 by 24 inches for a small kitchen or 48 by 30 inches for a larger one. The butcher block top should measure 1.5 inches thick, since thinner tops flex under a heavy mixer. Skip casters without locks, since the island drifts during chopping and the movement dulls knife work.
Lock all four casters before chopping, and oil the butcher block every month to stop it drying out. Roll the island to the wall when floor space is needed, then roll it back for dinner prep. A loaded mobile island tops out near 300 pounds, which rules out a heavy stone slab or a full set of cast iron. Butcher block weighs less than quartz and suits the format. A laminate top costs less and chips at the edges within a year.
Kitchen Island Ideas with Storage
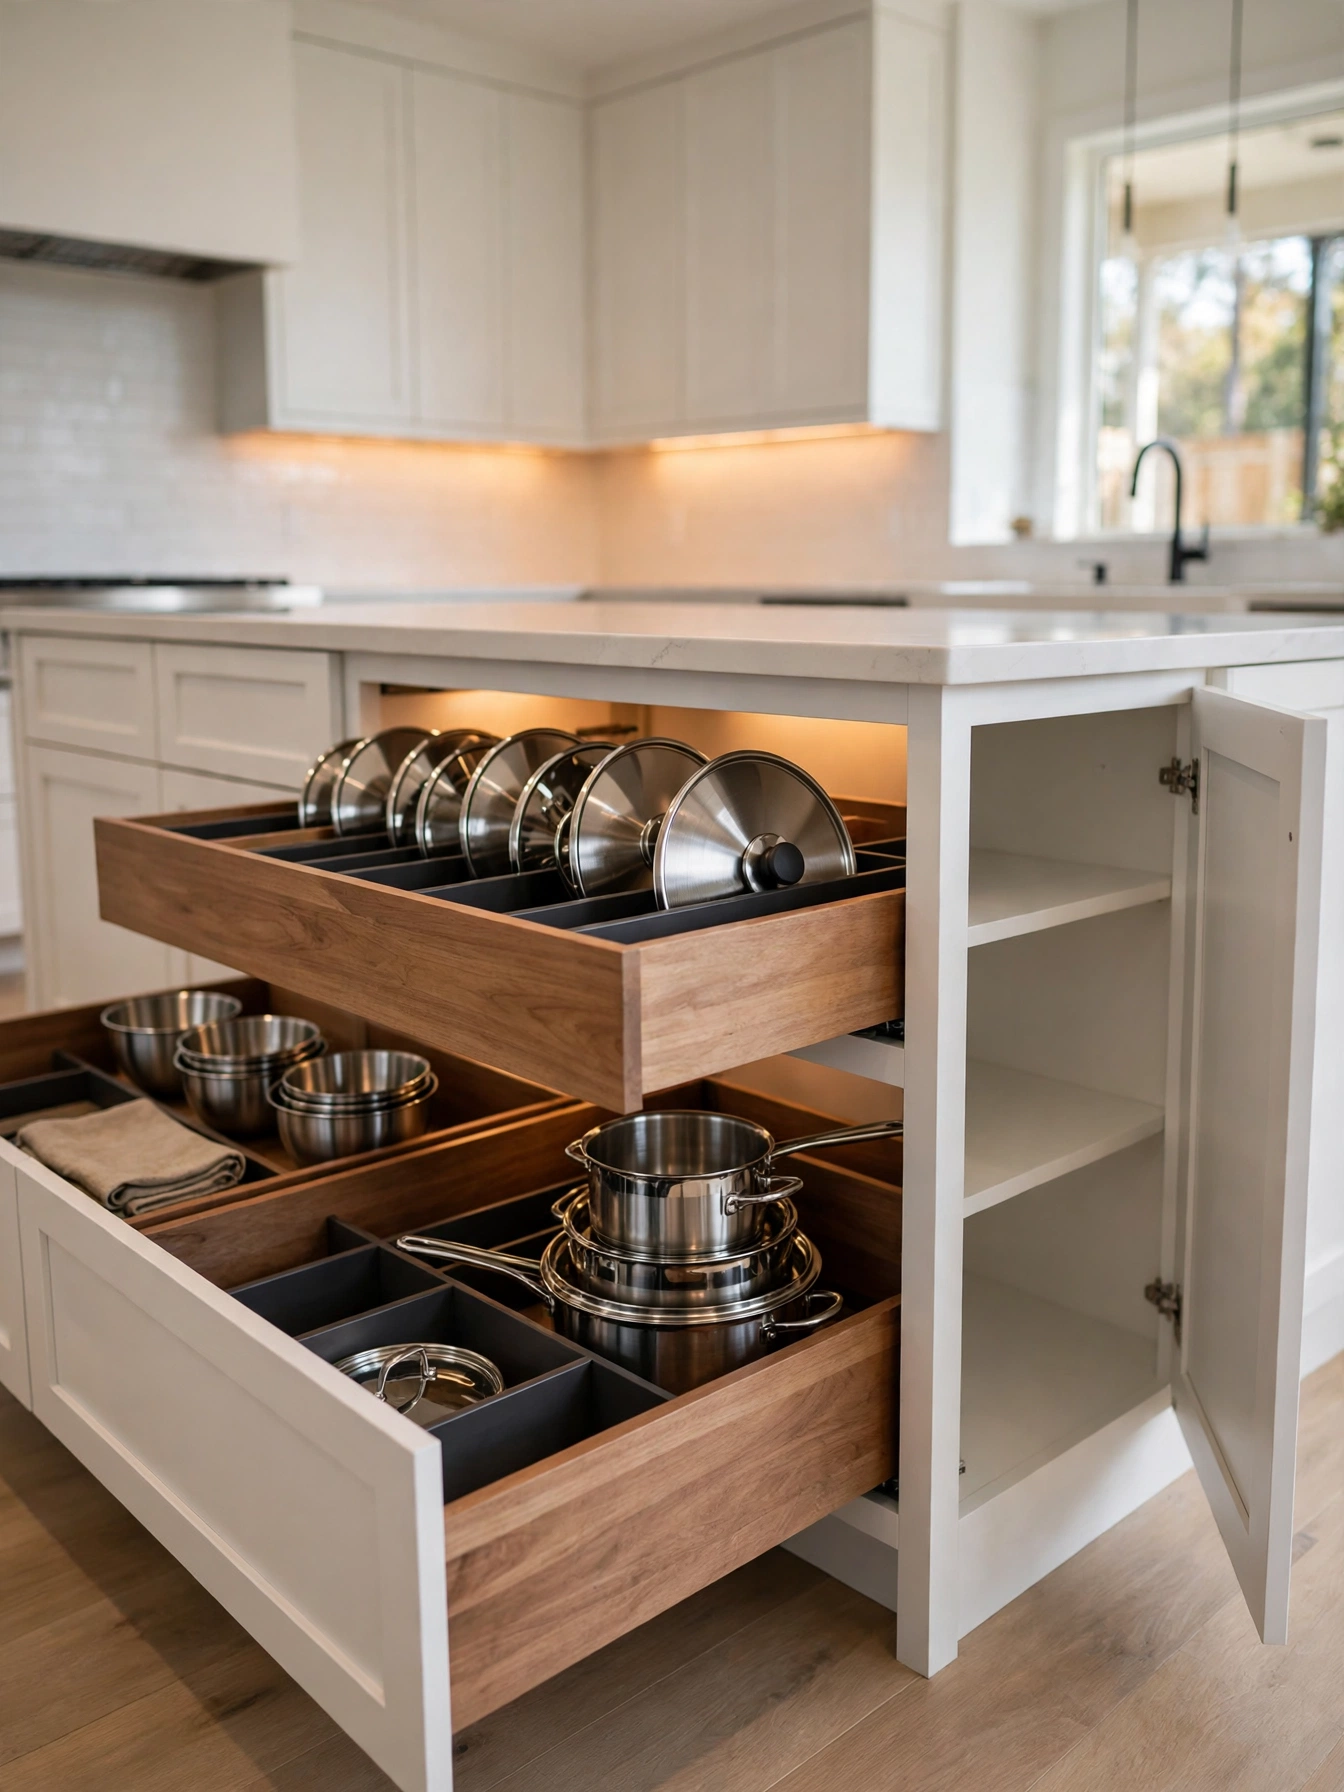
Why This Works:
- Deep drawers hold 40 pounds of pots where a shelf would hide them
- Full-extension slides rated for 100 pounds bring the back row forward
- A 36 inch wide drawer fits a 12 inch skillet with room to spare
- Dividers stop lids from sliding into a noisy pile
Storage islands earn their floor space by holding what the rest of the kitchen cannot, and drawer depth is the number that matters. Build drawers 22 inches deep and 10 to 12 inches tall, mounted on full-extension soft-close slides rated for 100 pounds. A 36 inch wide drawer fits a full set of pots, while a 24 inch drawer suits baking sheets and mixing bowls. Leave 18 inches of clearance in front of open drawers, and keep the total island width at 24 to 30 inches so drawers do not crowd the walkway. Do not mix shallow 6 inch drawers with deep ones on the same face, since the layout looks uneven and the shallow drawers waste vertical space.
Drawer dividers at 6 inch intervals keep lids upright and stop the daily rummage. Heavy cast iron lifts easily from a drawer at waist height. Open shelves cost less and show pretty dishes. They collect dust and need constant tidying. A bank of deep drawers costs 800 to 2,000 dollars, roughly double the price of open shelving, and the weight adds up, so the island base needs a solid frame rated for the load.
Pendant Light Trio
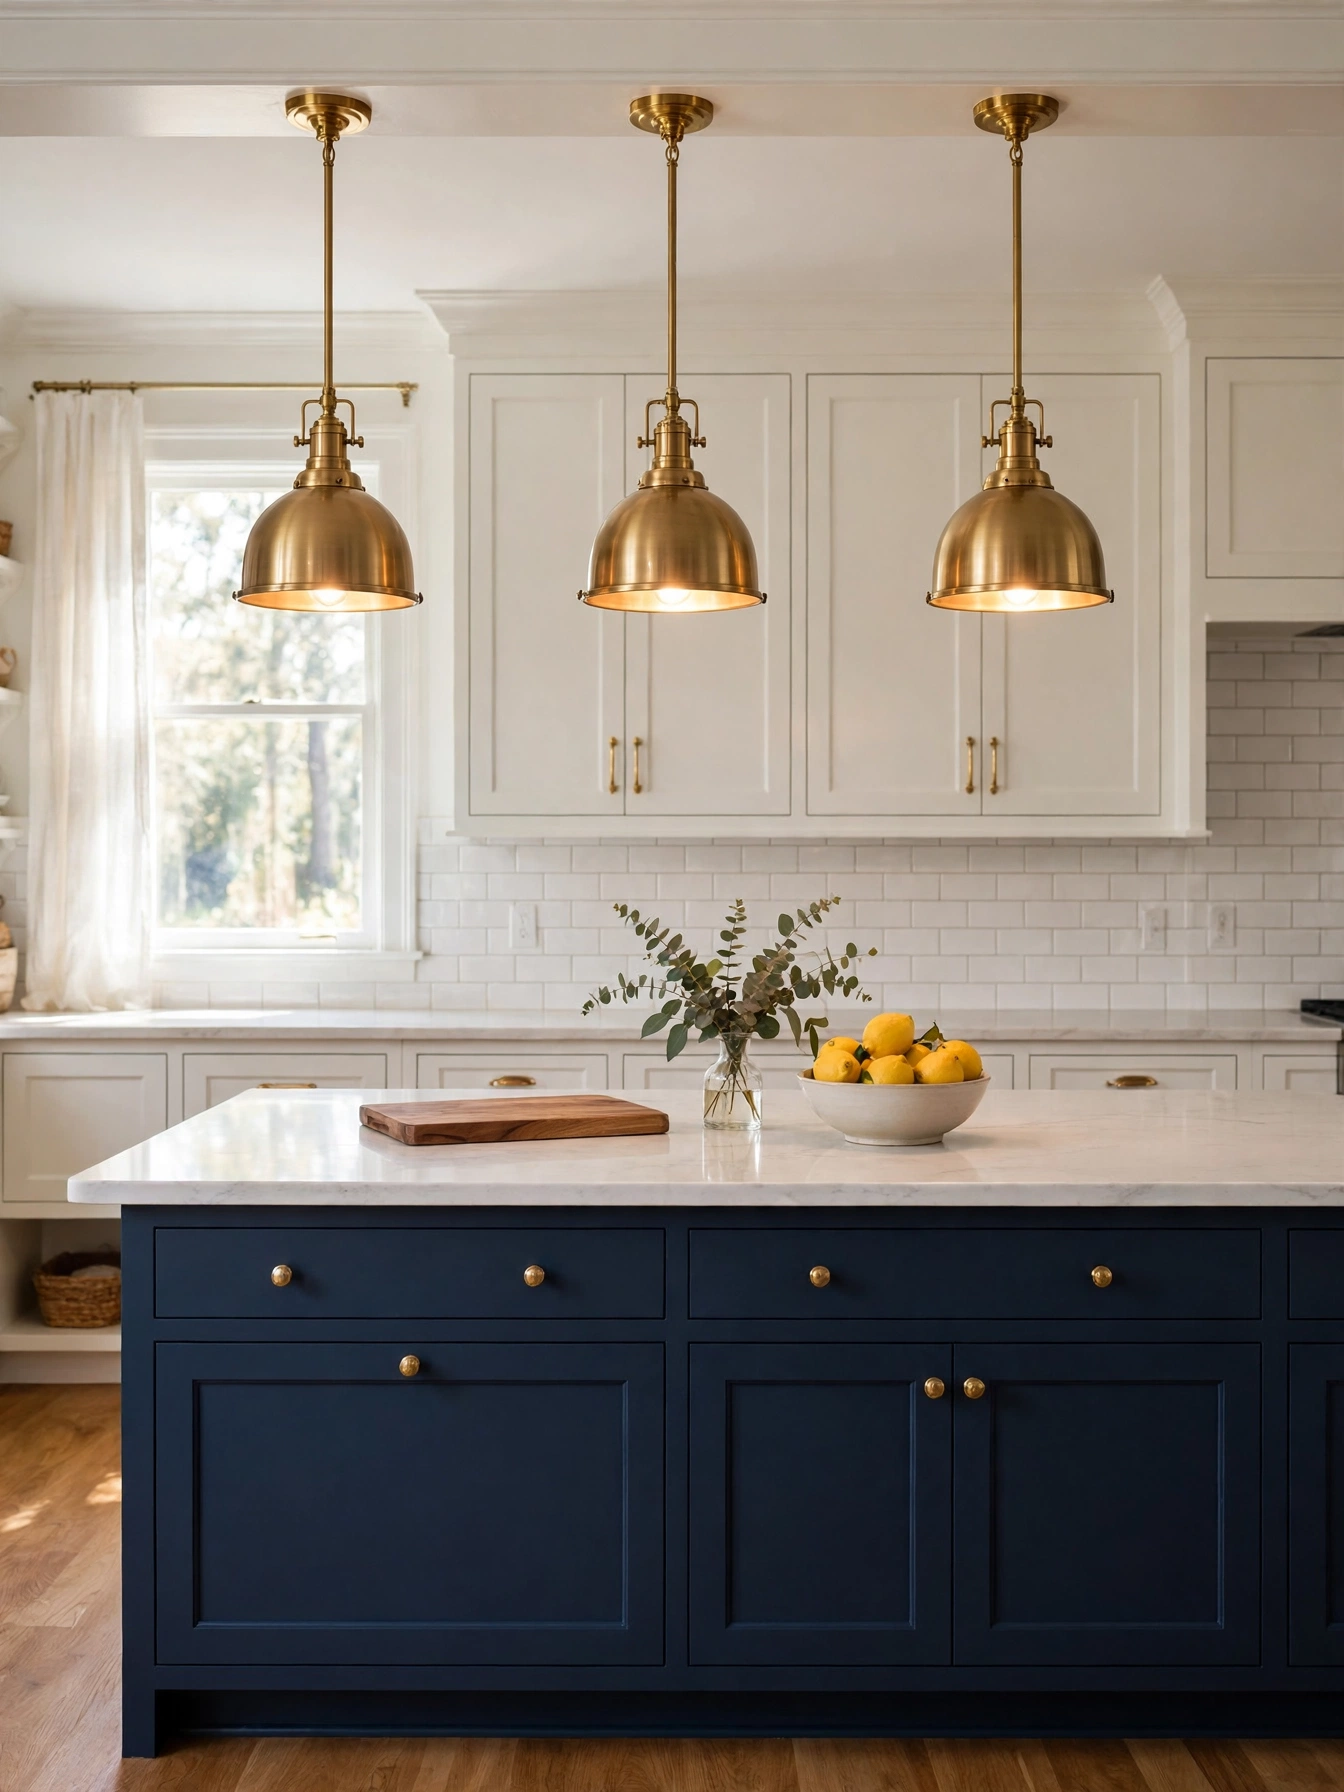
Why This Works:
- Three pendants at 30 inches above the counter light the full island evenly
- Warm 2700K bulbs make food look fresh and the room feel calm
- Brass shades tie the island lighting to the faucet and hardware
- Dimmable bulbs shift the island from work light to dinner mood
Pendant lights over an island follow a spacing rule that keeps the glow even. Hang each pendant 30 to 36 inches above the countertop, and space them 24 to 30 inches apart center to center. A 72 inch island takes three pendants of 10 to 12 inches diameter, while a 96 inch island takes three of 14 inches or four of 10 inches. Choose LED bulbs at 2700K to 3000K and 800 lumens each, which lights the work surface without glare. New island circuits run through the ceiling, and local code sets the rules for that wiring.
A dimmer switch adds about 40 dollars and turns the island from a work zone into a dinner setting in one slide. The light lands on the cutting board instead of the cook’s back. Three quality pendants run 300 to 900 dollars installed, and a kitchen without existing ceiling wiring needs a new circuit on top of that. Glass shades show dust and need a monthly wipe. Metal shades hide dust better.
Open Shelf Display

Why This Works:
- Open shelves put daily plates within reach of the table
- A shelf 12 inches deep holds a full dinner plate without overhang
- Displaying pretty dishes adds color without extra decor
- Shelves cost half the price of the same space in drawers
An edited display, not a stuffed one, is what makes open island shelving look intentional. Keep shelves 12 inches deep and 14 inches tall, which fits a stack of dinner plates and a row of bowls without crowding. Place the most-used shelf at 24 to 36 inches high, the easy reach zone from a standing position, and reserve the lowest shelf for heavier items such as a Dutch oven. Never load open shelves with mismatched plastic containers, since the clutter shows from every seat in the room. The shelf boards need a 3/4 inch thickness to span 30 inches without sagging under a full load of plates.
Limit each shelf to one category, plates on one, bowls on the next, so the display stays calm. Plates travel 3 feet from island to table instead of across the kitchen, so setting the table takes fewer steps. Weekly wiping comes with the territory, and anyone who prefers closed storage will find the constant tidying a chore. Glass shelves look light and show every fingerprint. Painted wood hides dust better and costs about 40 percent less.
Butcher Block Top
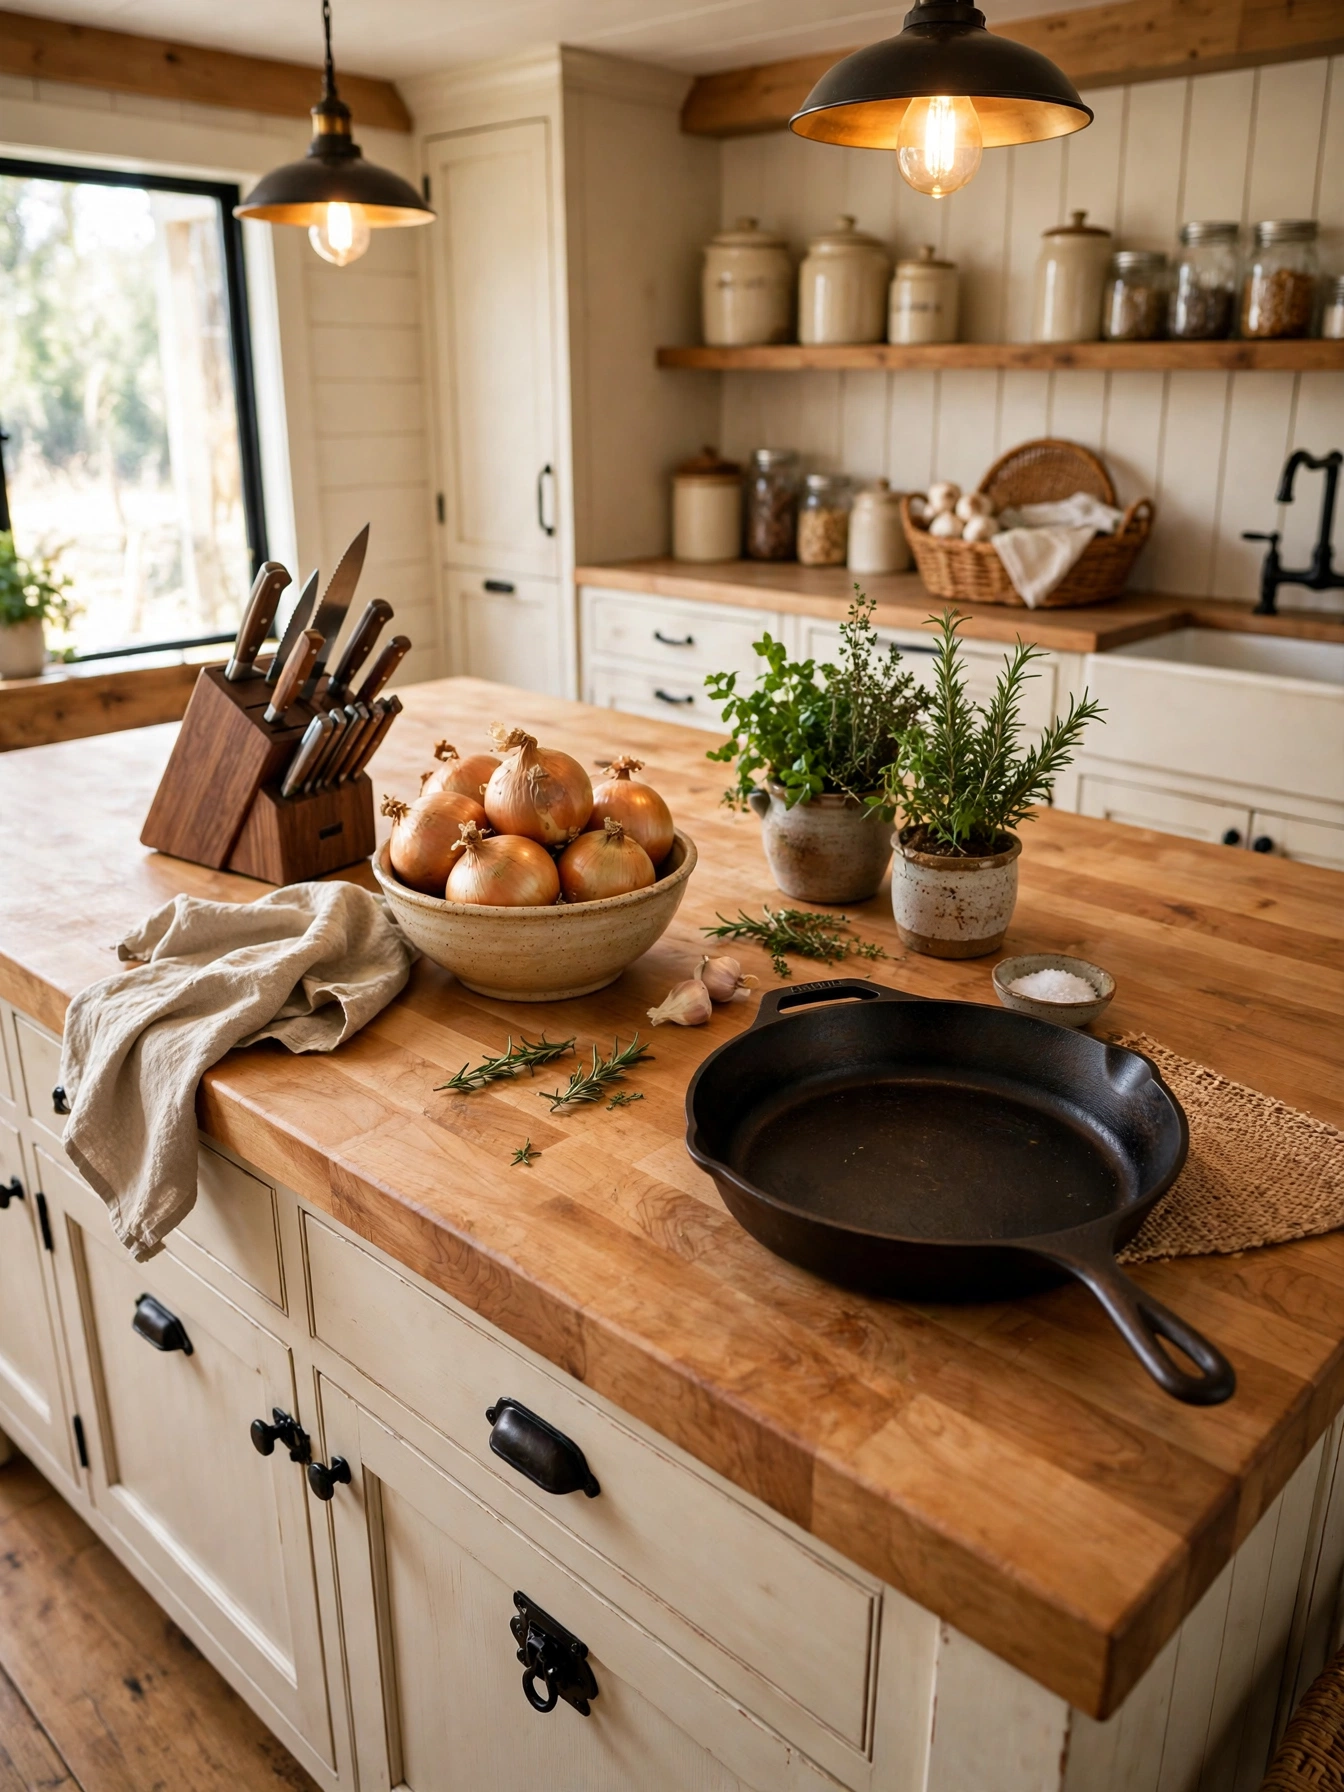
Why This Works:
- A 1.5 inch maple top takes knife cuts and sands smooth again
- Wood feels warm under hands, unlike stone on cold mornings
- Food-safe mineral oil keeps the surface sealed and stain resistant
- Butcher block costs about half the price of quartz per square foot
Butcher block brings warmth that stone cannot, and thickness decides how long it lasts. Choose a top 1.5 inches thick in hard maple or walnut, with end-grain construction for the hardest surface, since edge-grain boards dent faster under heavy use. Seal the top with food-safe mineral oil every month for the first year, then every 3 months after that, and keep standing water off the surface, since a puddle left overnight raises the grain and leaves a dark ring. Do not install butcher block beside a sink without a 6 inch stone or metal drip edge, because repeated splashes stain the wood edge within weeks. A top of 60 by 30 inches weighs about 90 pounds, so the island base needs a frame that carries the load without flexing.
Oiling takes 20 minutes a month, and once a year the top needs a light sanding to remove knife marks. The surface doubles as a cutting board and forgives a slipped knife, which is why daily chopping feels easier here than on stone. Quartz costs roughly twice as much per square foot as laminate and asks nothing afterward. Laminate cannot be sanded or repaired. Pick maple for a pale, classic look or walnut for a darker, richer tone.
Built-In Microwave Drawer
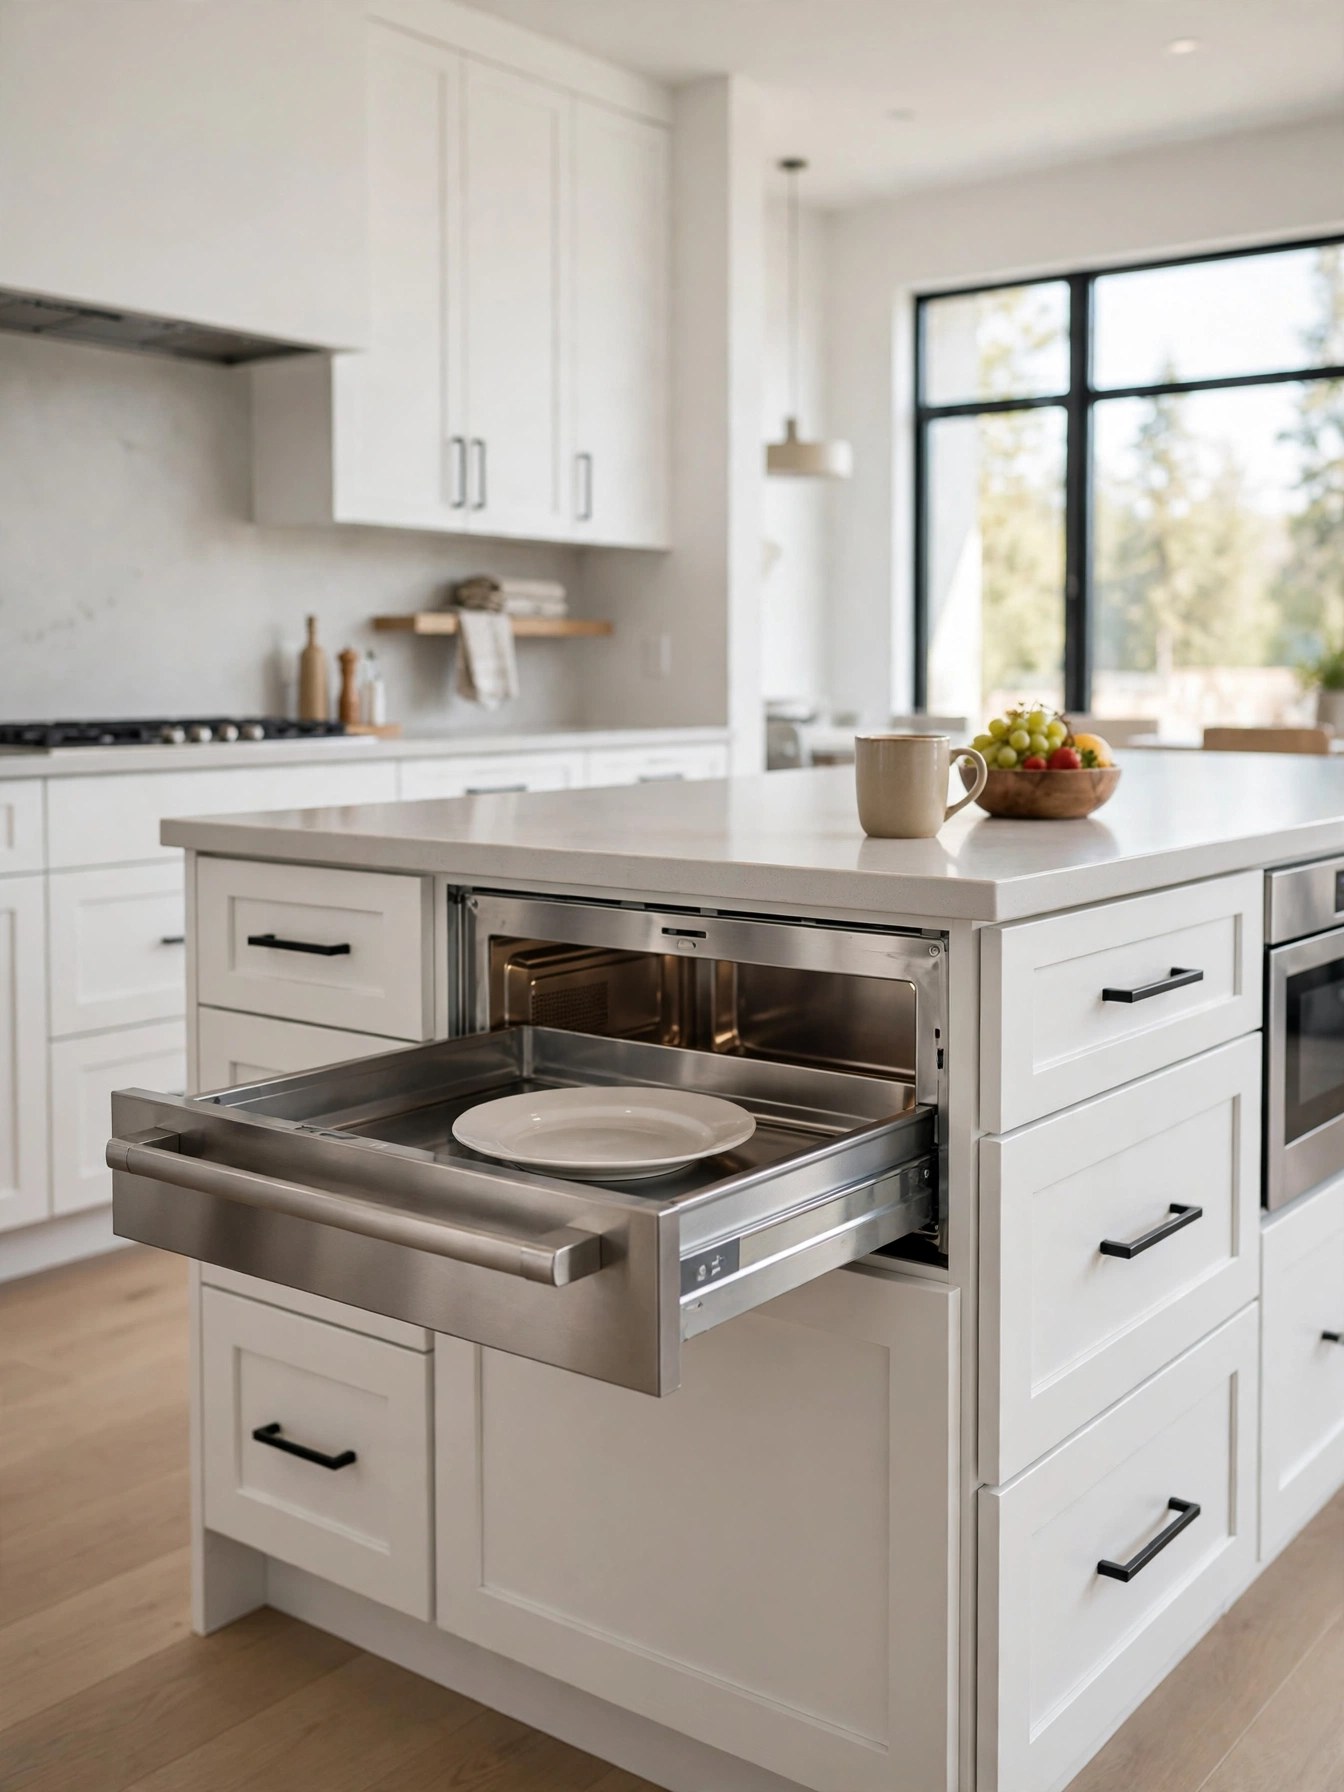
Why This Works:
- A drawer at 30 inches high lifts food out safely without reaching up
- The countertop above stays clear for prep and serving
- A 24 inch drawer fits a standard 11 inch dinner plate
- Children can reach it without climbing onto a chair
Choose a 24 inch or 30 inch drawer model, and build the island cabinet opening to the manufacturer’s spec, usually 22.5 inches wide for a 24 inch unit. Mount the drawer so the opening sits 30 to 36 inches above the floor, which keeps hot food at a safe lifting height. The drawer needs a dedicated 20 amp circuit, and the island base must leave 3 inches of ventilation space behind the unit. Never install a microwave drawer under a cooktop, since the heat from below shortens the electronics and voids most warranties. The new circuit must meet code, and the load adds up fast, so plan the circuit before the cabinet goes in.
Measure the opening twice, since a drawer built 1/2 inch too small will not fit at all. Drawer models cost 1,200 to 1,800 dollars against 150 dollars for a countertop unit, and the appliance takes 24 inches of storage from the island. The drawer sits low enough for a 10-year-old to reheat lunch without a step stool. Countertop microwaves cost far less and move easily. They eat 2 square feet of counter and collect grease on the outside.
Kitchen Island Ideas for Families
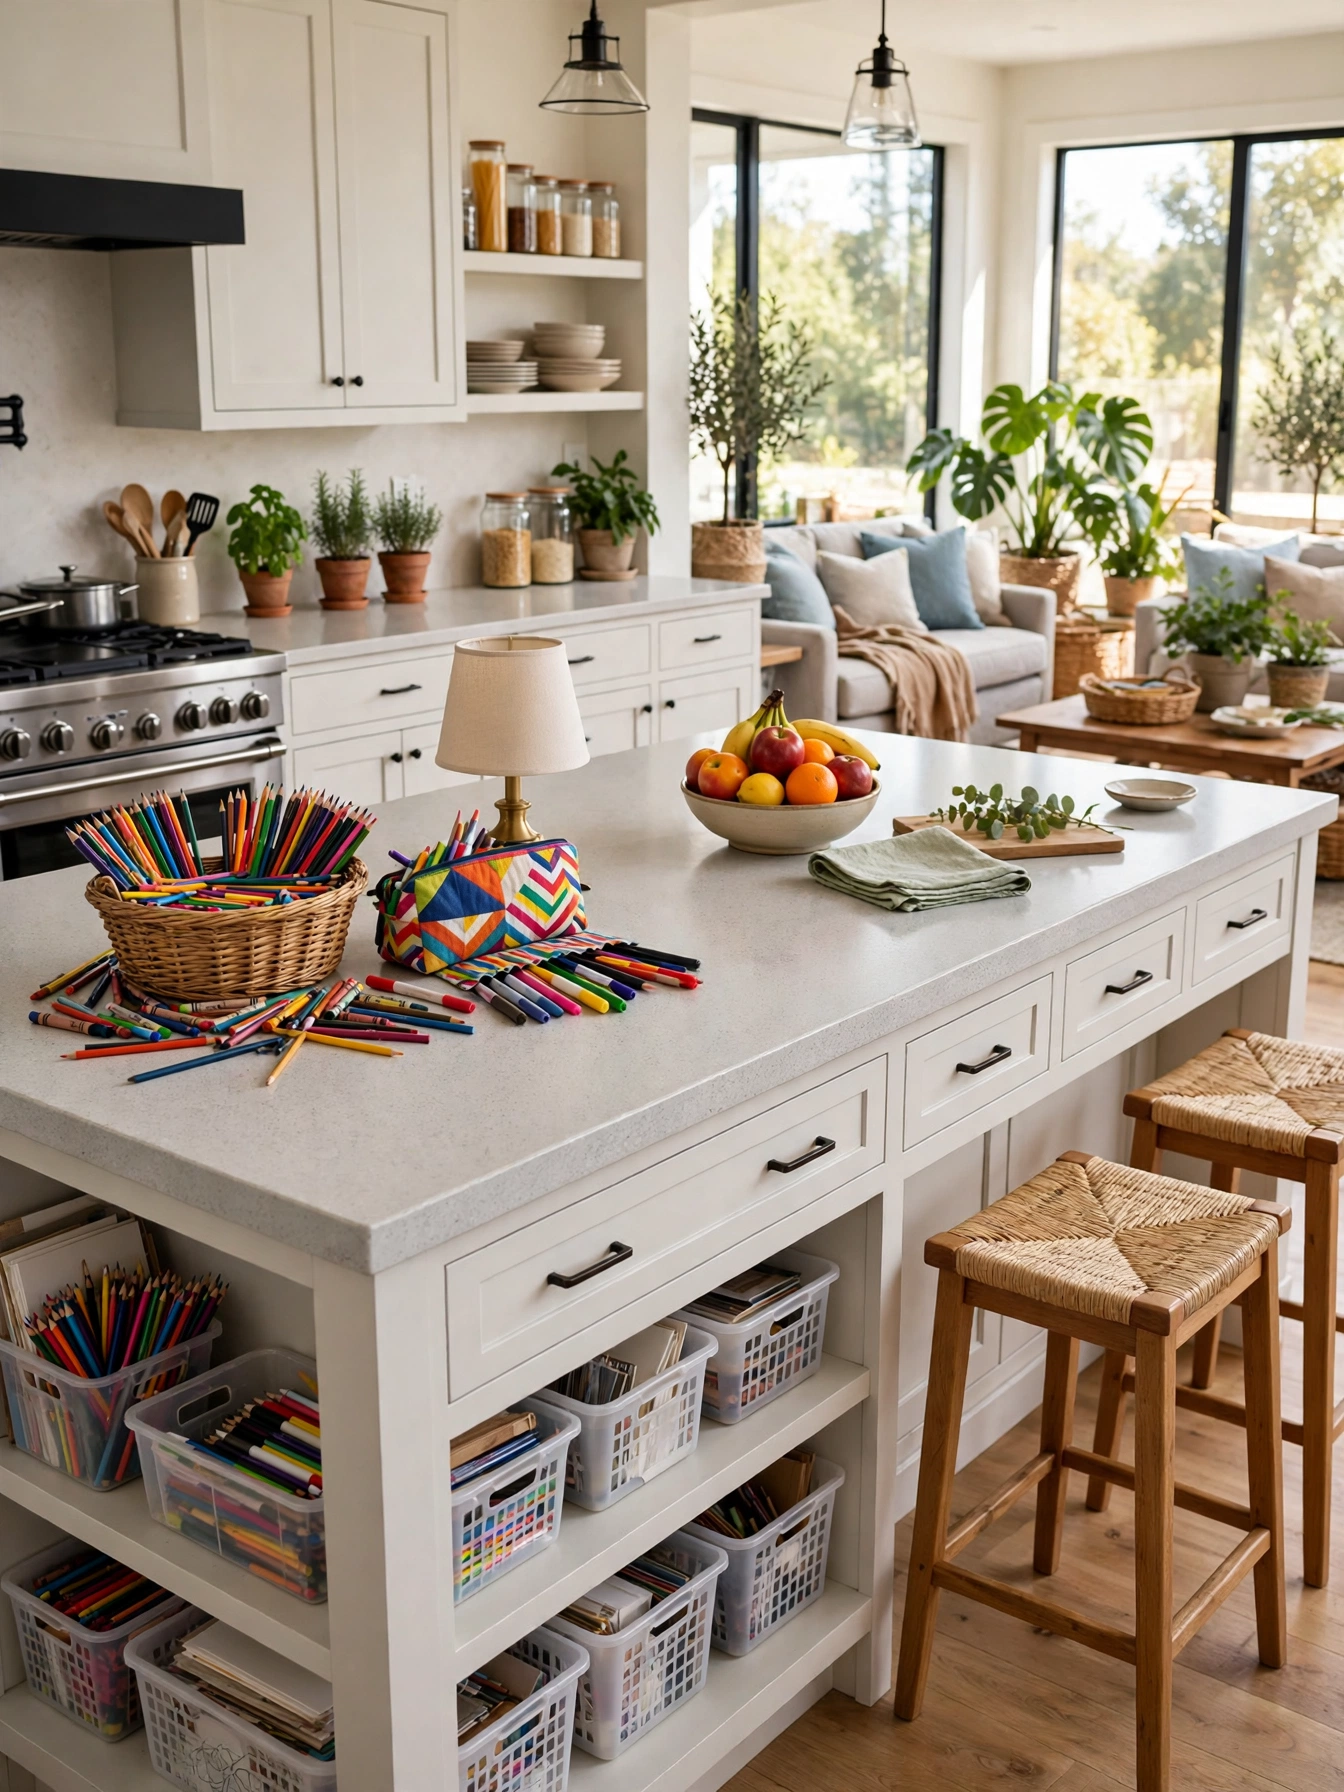
Why This Works:
- A 96 inch island seats four for homework and dinner at once
- Quartz resists juice stains and marker ink better than marble
- A homework drawer keeps supplies in one spot instead of spread out
- Rounded countertop corners protect small heads at running height
Family islands take more abuse than any other kitchen surface, so the materials need to match the traffic. Pick a quartz countertop at least 3 centimeters thick, since it resists stains from juice, marker ink and tomato sauce without sealing. Round the countertop corners to a 1 inch radius, which softens the edge at a child’s head height of 36 to 42 inches. Size the island 84 to 96 inches long and 36 inches wide, which seats three to four on the bar side with 24 inches each. Skip marble in a house with small children, because a single spill of orange juice etches the surface in under 10 minutes.
A 96 inch island needs a kitchen of at least 15 feet by 13 feet to keep 42 inch walkways on all sides. Homework, snacks and dinner prep share one surface in the same hour. A dedicated drawer for school supplies, 12 inches wide and 6 inches deep, keeps the counter clear between uses. Laminate costs about a third of quartz and handles stains well. It scratches under homework tools and cannot be repaired.
Wine Fridge Island

Why This Works:
- A dual-zone fridge holds reds at 60 degrees and whites at 45 degrees
- A unit 24 inches wide stores 46 bottles without a separate wine room
- The glass door shows the collection while keeping it chilled
- Placing it in the island keeps drinks near the dining area
Temperature zones are what separate a real wine fridge from a small fridge, and a dual-zone unit in the island makes the kitchen an entertaining space. Choose a dual-zone model 24 inches wide and 34 inches high, holding 46 bottles, with reds at 60 degrees Fahrenheit and whites at 45 degrees. The unit needs 1/4 inch of ventilation space on each side and a dedicated 15 amp circuit, and the island base must be at least 24 inches deep to hold it. Do not install a freestanding wine fridge inside a cabinet, since the compressor overheats without front ventilation and fails within a year. Keep the unit away from the oven side of the island, where heat pushes the compressor to run constantly.
A quality dual-zone unit costs 800 to 2,000 dollars, and 46 bottles sounds generous until a collection grows. Check the opening against the manufacturer’s spec, since a 1/2 inch error means the door will not open fully. Bottles stay at serving temperature with the dining table steps away. A beverage center costs less and chills cans and wine together. It holds wine at one temperature only, which fits casual drinkers better.
Hidden Recycling Station

Why This Works:
- Two 13 gallon bins sort recycling without a single bin on the floor
- Full-extension slides rated for 75 pounds handle a full load of glass
- A small compost caddy on the counter keeps scraps out of the trash
- Hiding bins inside the island keeps the kitchen looking clean
Bins as easy to reach as the trash make recycling a habit, and the island is the natural spot. Fit a pull-out frame holding two 13 gallon bins, one for cans and glass and one for paper, inside a 24 inch wide island cabinet. Mount the frame on full-extension slides rated for 75 pounds, since a full bin of glass weighs about 40 pounds. Keep the pull-out at 30 inches high or lower so lifting a full bin out stays easy, and line each bin with a standard 13 gallon bag. Do not mix compost into the recycling bin, since food residue contaminates the whole load and the hauler may reject it.
Empty the glass bin before it tops 40 pounds, and keep spare liners in the cabinet beside it. The station slides out with one pull, so bins stop cluttering the floor between recycling days. Two 13 gallon bins fill fast in a large household, and the station takes a full cabinet from the island. A single-bin pull-out costs less and suits small households. A triple-bin unit adds a trash bin and needs a 30 inch wide cabinet.
Island Charging Station

Why This Works:
- USB-C outlets fast-charge a phone to about 50 percent in 30 minutes without a wall wart
- A pop-up outlet on the countertop hides when not in use
- A cable basket keeps cords off the cooking surface
- Charging at the island keeps devices in sight while cooking
Install a pop-up outlet unit with two standard sockets and two USB-C ports, rated for 15 amps, flush into the countertop near the seating end. Add a wall outlet on the island end panel at 12 inches above the floor, which serves a tablet stand or a small speaker. The island needs a dedicated 20 amp circuit for the outlets, and the wiring must run through the floor in conduit rated for kitchen use. Never use a standard indoor extension cord to power an island, since it creates a trip hazard and violates most local codes. Wiring under the floor needs protection from moisture, so the conduit choice matters as much as the outlet itself.
Pop-up outlets cost 80 to 200 dollars. A tablet stays upright on its stand and charges during dinner prep, so the recipe stays visible through every step. A simple end-panel outlet costs about 40 dollars installed. Wireless charging pads built into the countertop cost more and charge slower, so a USB-C outlet remains the practical choice for most homes. Every charger invites another cable, so keep a small basket for cords beside the station to stop the clutter spreading.
Curved Island Ends

Why This Works:
- A curve with a 12 inch radius softens the island and opens the walkway
- Rounded ends let traffic flow around the island without sharp corners
- The curve adds one extra seat at the end without extra length
- Curved cabinets read custom and lift the whole kitchen
Curved island ends change how a kitchen moves, because a rounded corner lets people pass without the hip check a square corner delivers. Order the island base with a 12 inch radius on each end, and match the countertop curve to the same radius so the overhang stays even at 12 to 15 inches. The island should measure at least 72 inches long for the curve to read as a design choice, and the cabinet doors on the curve need a 15 inch radius minimum to open without binding. Skip tight curves under 8 inches, since the cabinet maker cannot bend the door properly and the finish cracks at the bend. The countertop fabricator templates the curve on site, which adds a day to the schedule but keeps the fit exact.
Check the walkway after the curve is installed, since the rounded end returns 6 inches of floor space to the room. The curve guides foot traffic from the cooking zone to the dining area without a hard corner. A straight island with rounded countertop corners costs far less and softens the edge. It cannot match the flow of a true curve. Curved cabinets cost 1,000 to 2,500 dollars over a straight island, with another 300 to 500 dollars for the countertop template.
Double Island Layout
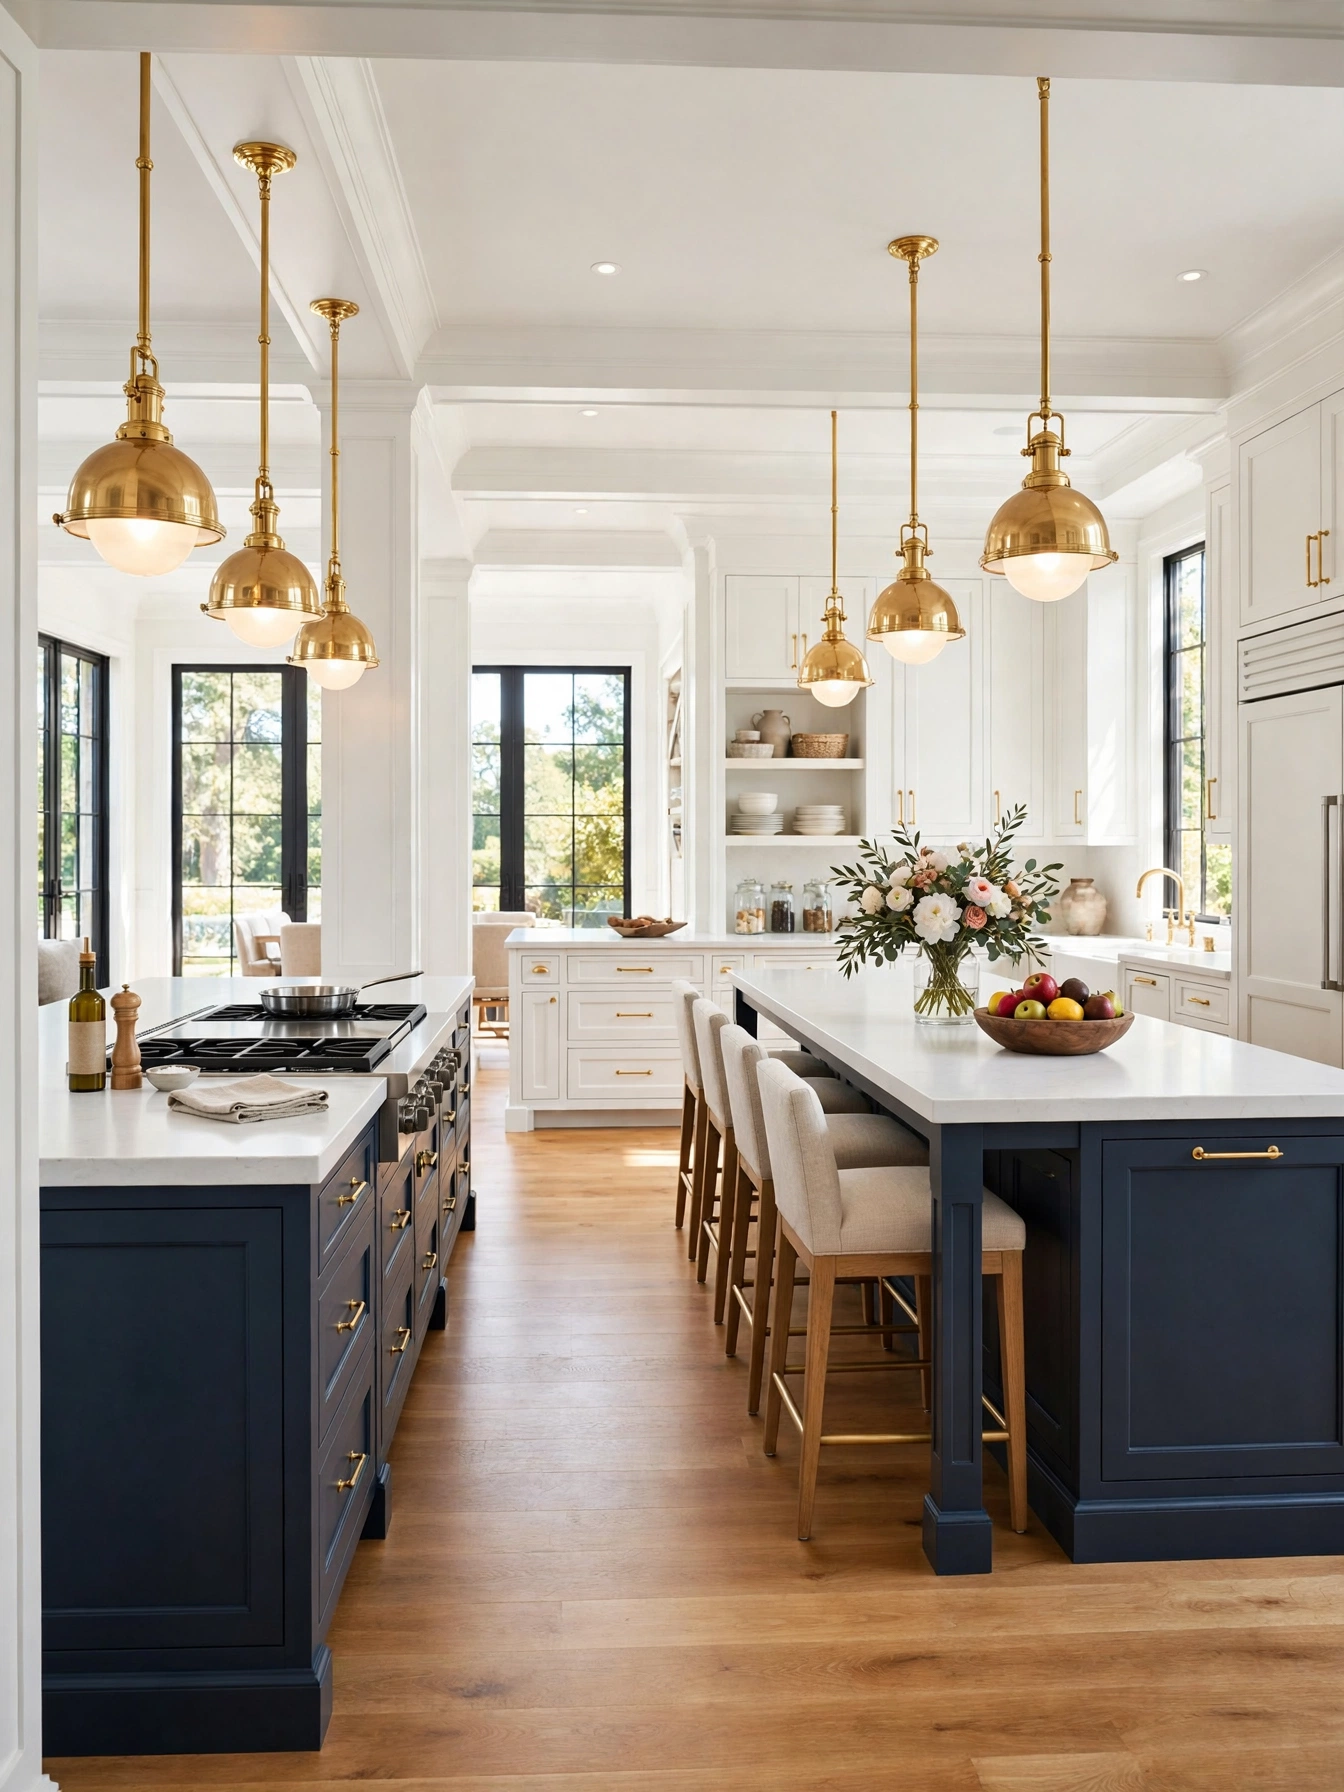
Why This Works:
- Two islands split cooking and seating so the zones never collide
- A 48 inch gap between islands lets two cooks pass with trays
- One island holds the cooktop while the other stays clear for guests
- Matching bases tie the pair together as one design
Double islands suit only large kitchens, and the gap between them decides whether the pair works. Keep 48 inches between the two islands, and 42 to 48 inches on the outer sides, which lets two people pass with a hot tray. Size the cooking island 84 inches long with the cooktop centered, and the seating island 96 inches long with four stools at 24 inches each. Each island needs its own electrical circuit, and the cooking island needs a vent hood or a downdraft unit rated for at least 600 CFM. Do not install double islands in a kitchen under 18 feet by 20 feet, since the walkways shrink below 36 inches and the room feels crowded instead of grand.
Plan the plumbing and venting before the floor goes down, since moving a drain later costs thousands. Two islands cost 8,000 to 20,000 dollars installed, roughly double a single large island, and the pair takes the floor space of a small dining table. Conversation and heat stay in separate zones. A single 120 inch island costs about half as much and seats six. It cannot separate cooking from conversation.
Kitchen Island Ideas for Small Kitchens
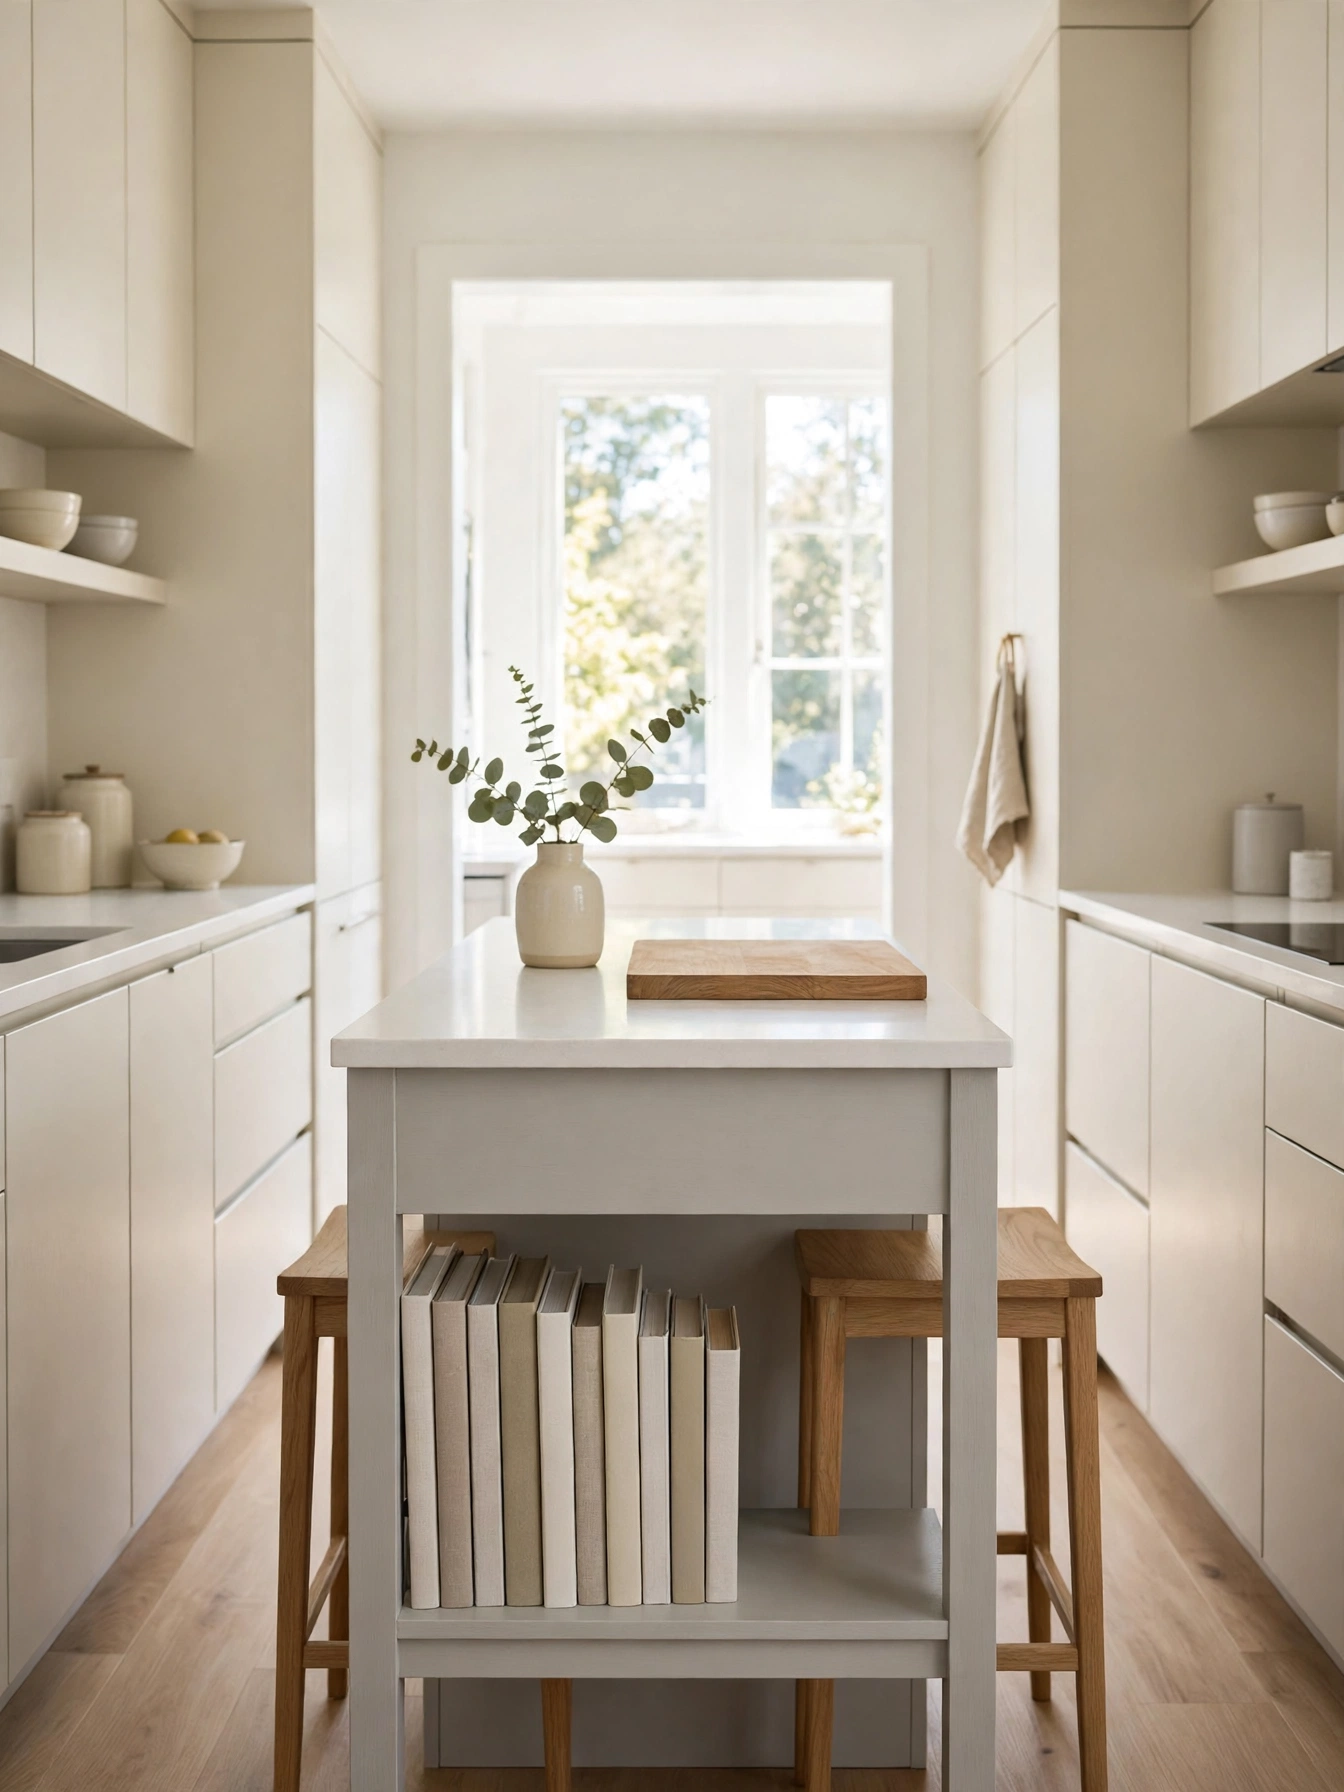
Why This Works:
- An island 24 inches wide fits a galley kitchen that a standard island cannot
- Slim stools at 16 inches wide tuck fully under the counter
- A 36 inch walkway on each side keeps the galley moving
- The narrow shelf below holds cookbooks that once filled a cabinet
Small kitchens can still hold an island when the dimensions shrink to match the room. Build the island 60 inches long and 24 inches wide, which leaves 36 inches of walkway on each side of a 10 foot wide galley. Keep the countertop 36 inches high and the overhang at 12 inches, so two slim stools of 16 inches width fit side by side with 24 inches of elbow room each. The island base should hold one bank of drawers 18 inches deep, which stores utensils without crowding the walkway. Skip a sink or cooktop on a small island, since the plumbing and venting eat the storage and the countertop shrinks to a strip.
Choose light colors for the base, since a pale island reads smaller and keeps the galley bright. The footprint of just 10 square feet still gives a prep surface and a breakfast spot. A 24 inch island holds one drawer bank and a shelf, not a full set of pots. A rolling cart costs less and moves away when the room needs space. It cannot match the stability of a fixed island.
Farmhouse Island Style
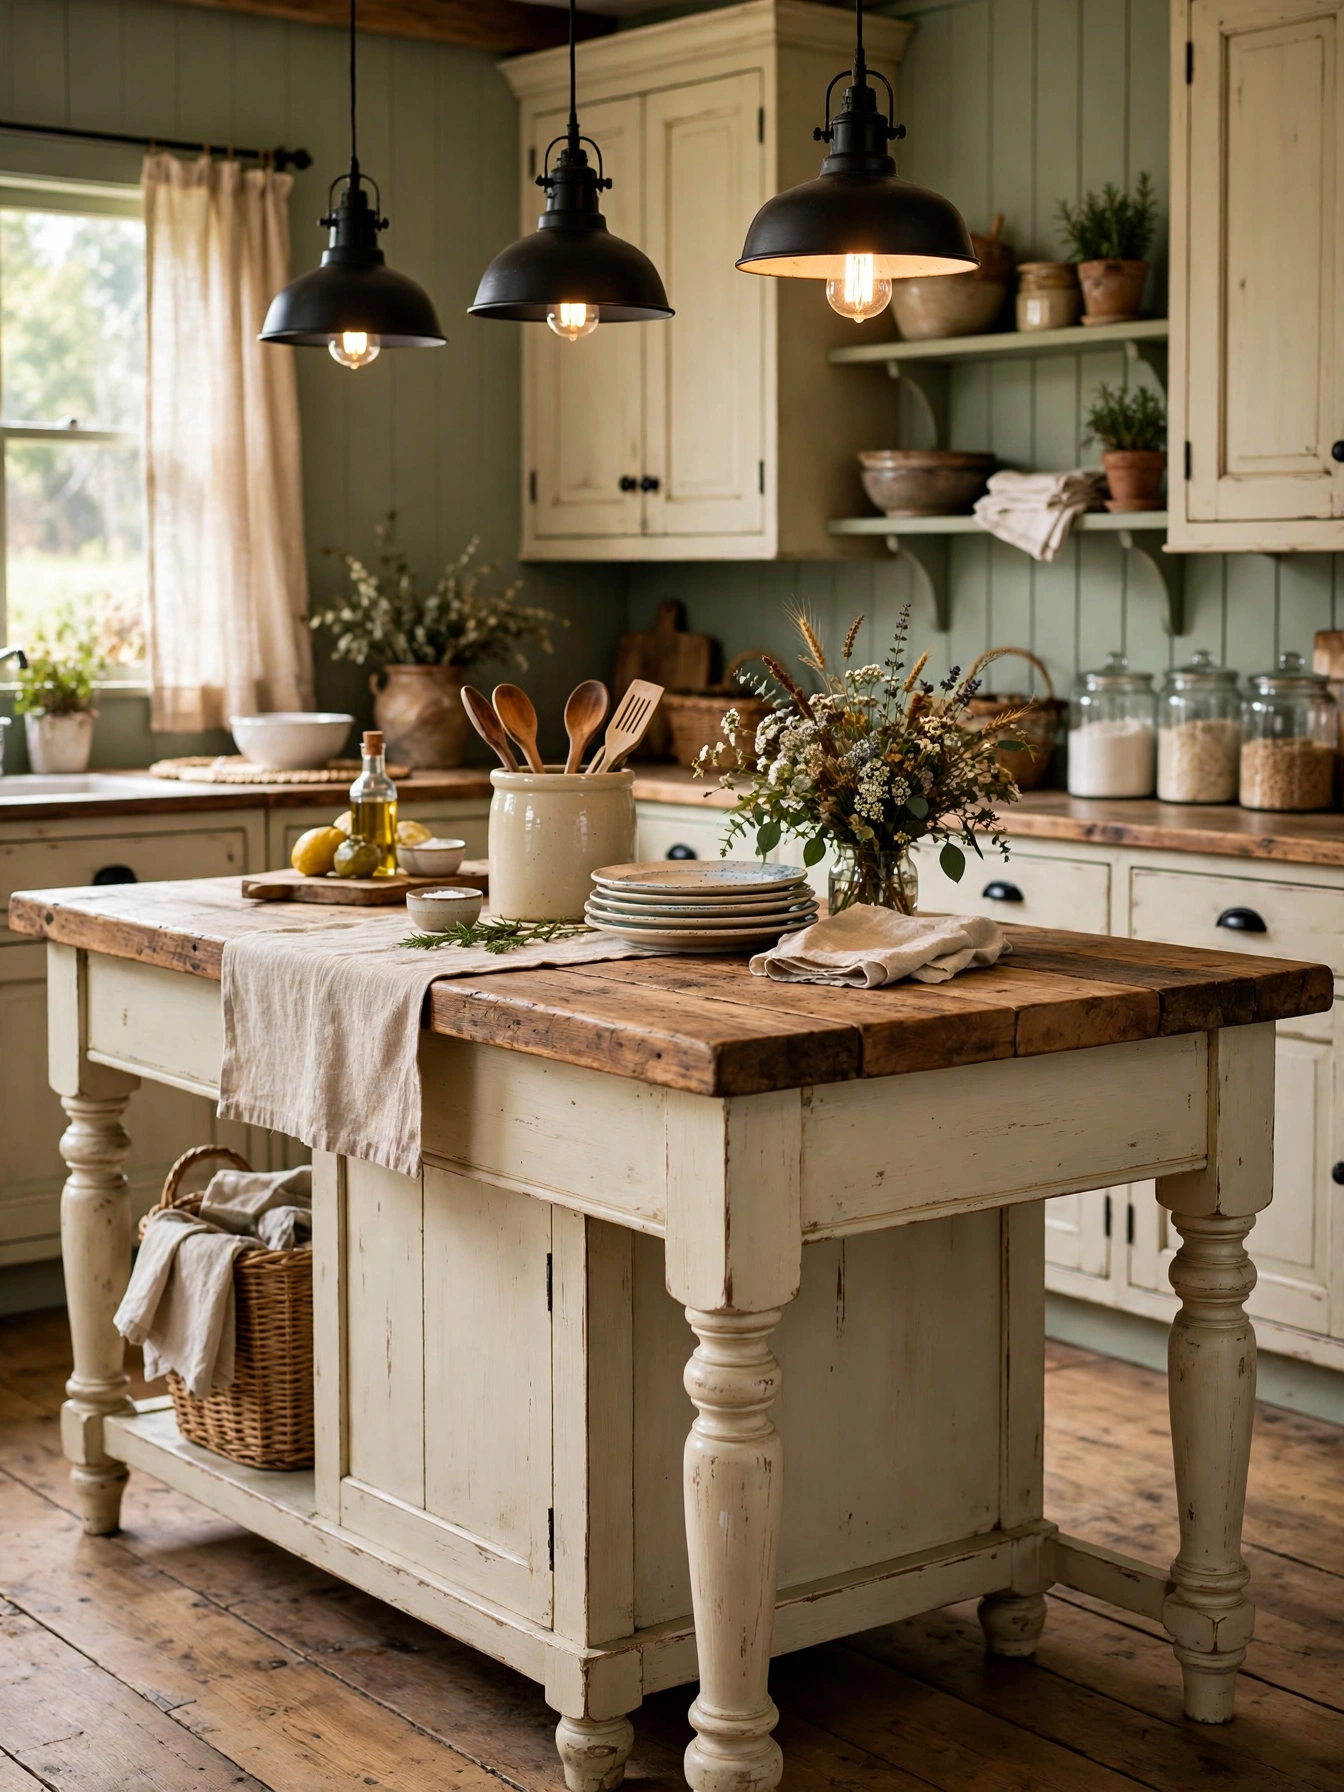
Why This Works:
- Turned legs and a wood top give the island a furniture look
- A 2 inch thick top reads substantial without a stone slab
- Open lower shelves show baskets and crocks that suit the style
- Black hardware ties the island to the faucet and lighting
Choose turned wood legs 4 inches square at the corners, with a 2 inch thick wood countertop in maple or reclaimed oak. Keep the island 72 to 84 inches long and 30 inches wide, which still leaves the walkway clear for a farmhouse kitchen. Paint the base cream or soft sage in a satin finish, and add a beadboard panel on the seating side for texture. Avoid glossy finishes on a farmhouse island, since the shine fights the relaxed style and shows every fingerprint. The wood top needs food-safe oil every 3 months, and the base paint should be rated for kitchen use so it survives daily bumps.
Three colors keep the island calm: cream, wood and black. The island anchors the room without feeling formal, and the furniture look softens a kitchen full of hard surfaces. A wood top marks more easily than quartz, and the open shelves need regular dusting. The wood-look quartz edge runs roughly double laminate and asks nothing afterward. A laminate top cannot be refinished.
Island Herb Garden
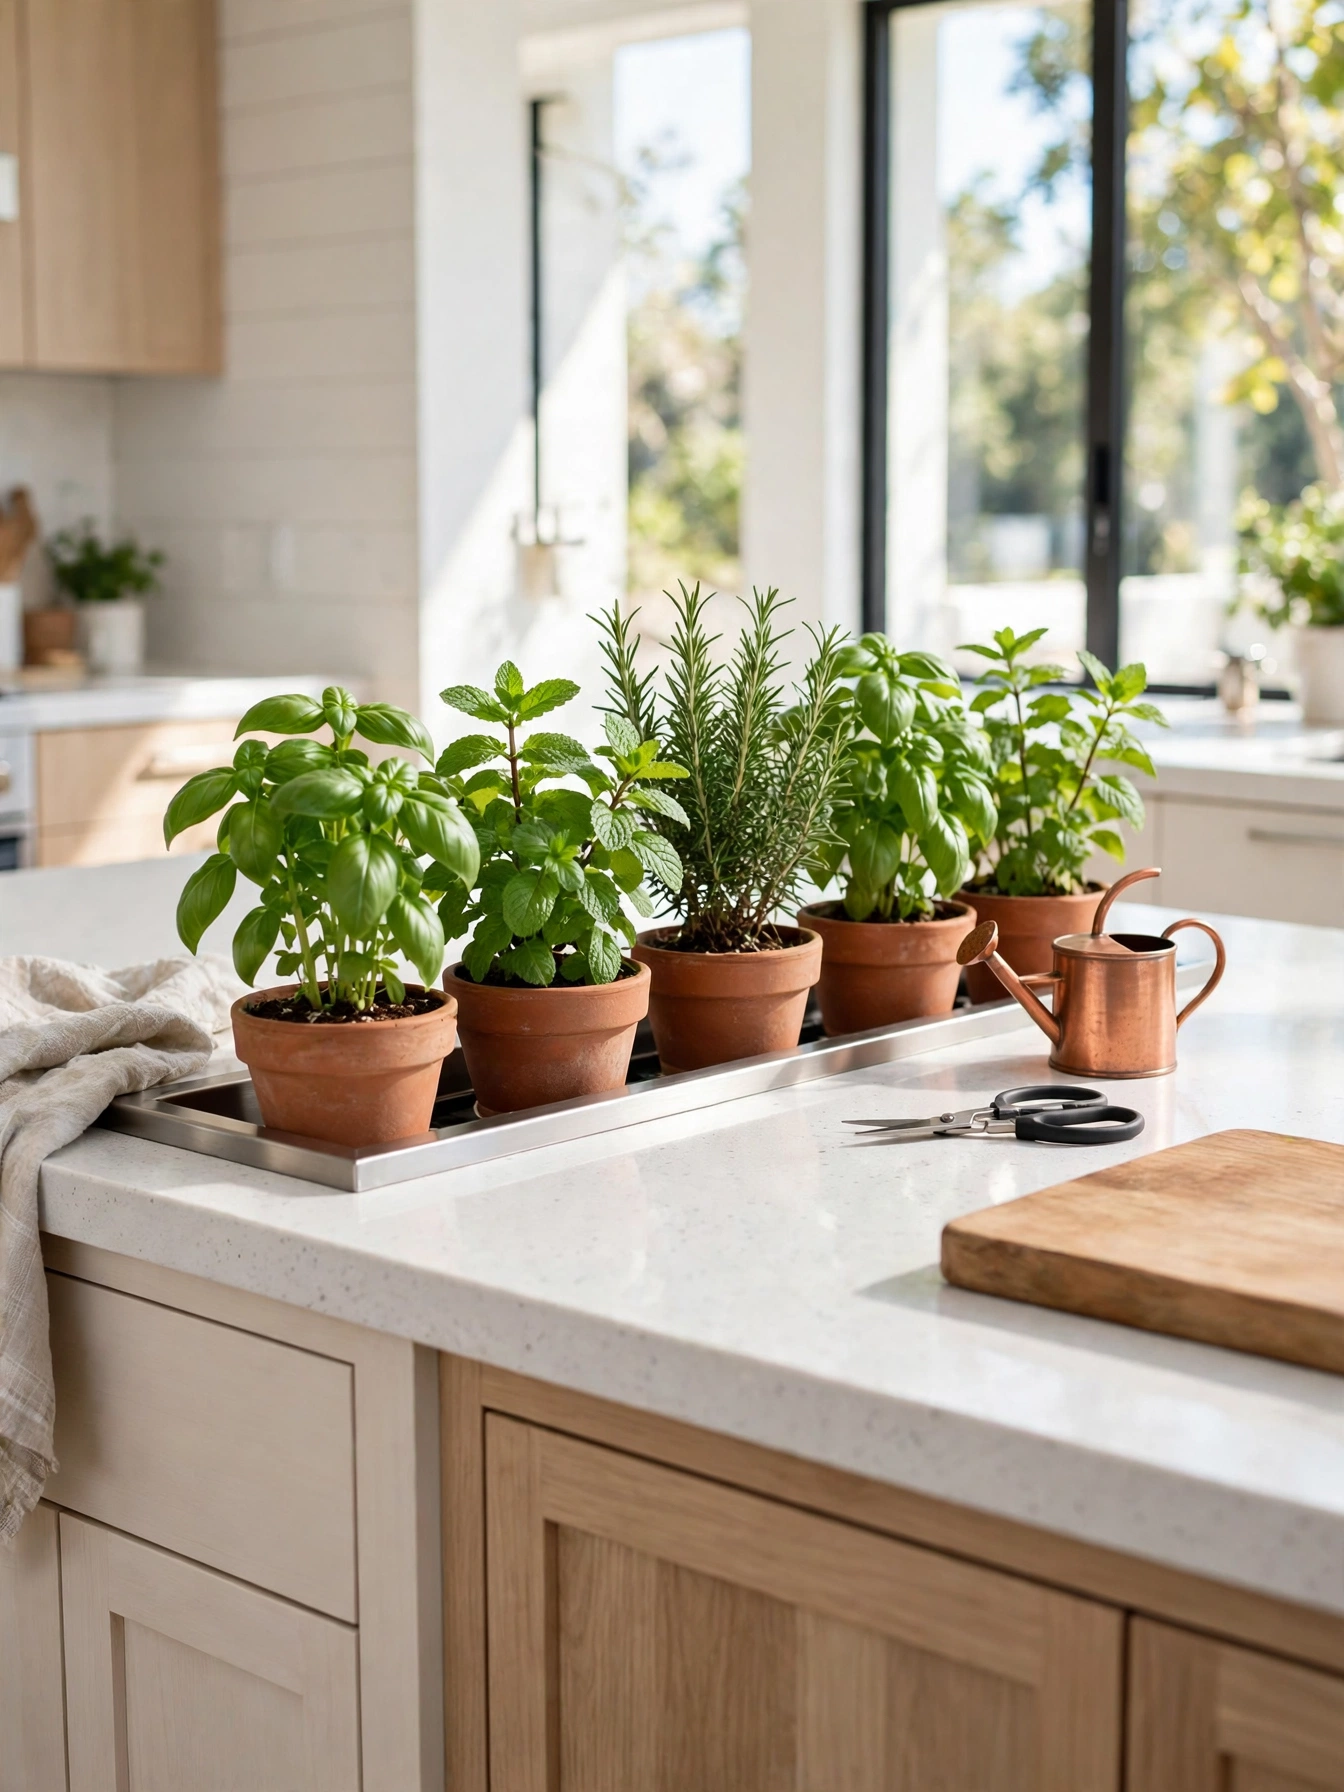
Why This Works:
- A recessed planter keeps herbs within arm’s reach while cooking
- Terracotta pots drain well, so basil roots stay healthy for months
- Fresh herbs cut from the island beat dried herbs in every dish
- The green row adds living color without taking counter space
Set a recessed stainless steel planter tray 24 inches long, 6 inches wide and 4 inches deep into the countertop, and line it with terracotta pots of 4 inch diameter. Each pot needs a drainage hole and a 1 inch layer of gravel at the bottom, so water never pools around the roots. Place the island near a window that gives the herbs 6 hours of direct sun, or add a 12 inch LED grow light rated at 2700K above the planter. Do not plant mint in the same tray as basil, since mint spreads fast and crowds the other herbs within weeks. Water basil every 3 days and rosemary once a week, since rosemary prefers dry soil.
Store a small pair of herb scissors in the drawer below, and harvest no more than a third of any plant at once so it keeps growing. An island far from a window needs a grow light at 40 to 80 dollars, plus a power outlet. The planter sits beside the chopping board, so a snip of basil lands in the pan in seconds. A windowsill herb garden costs less and gets better sun. It sits away from the chopping board.
Cooktop Island Venting
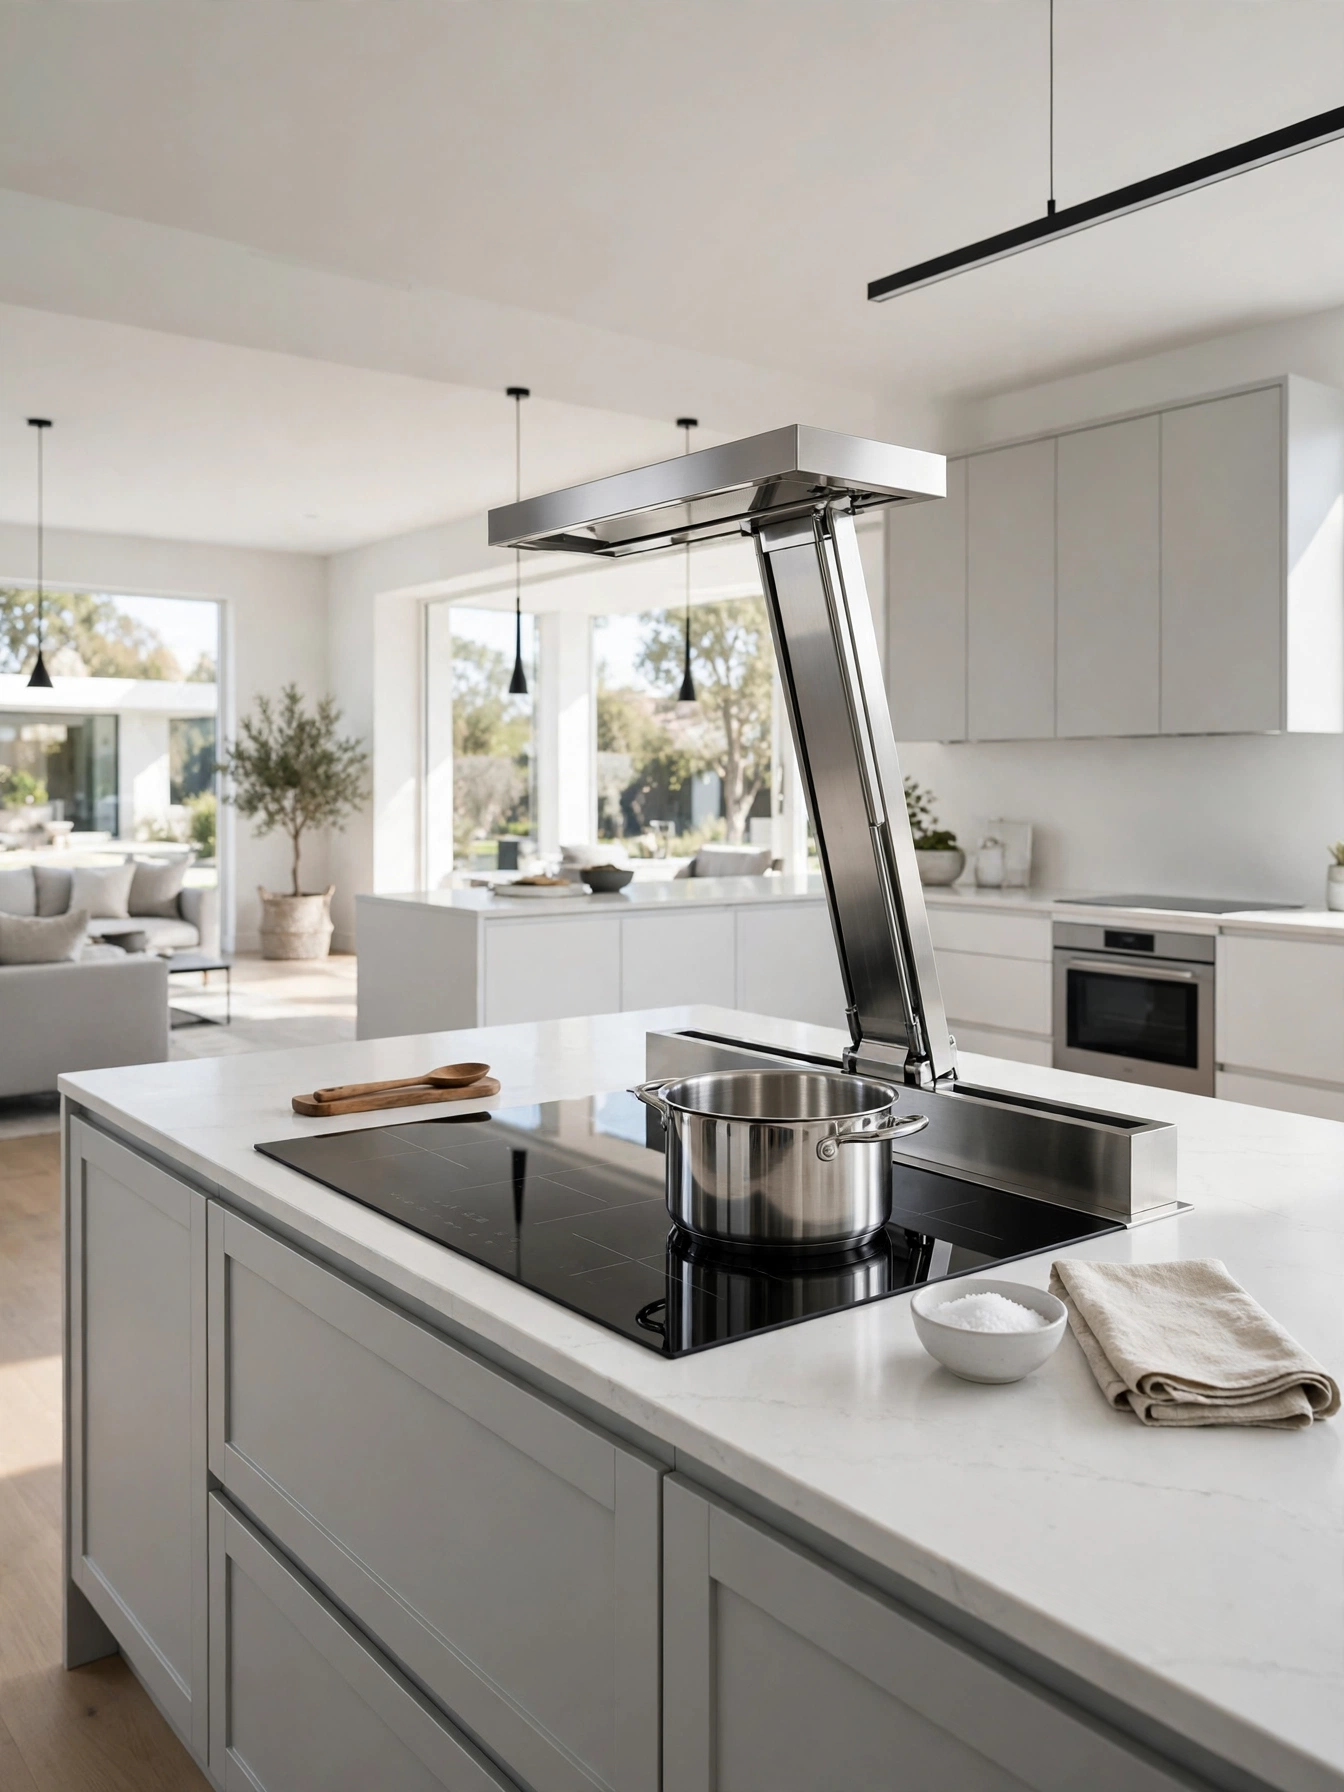
Why This Works:
- A downdraft vent rated for 600 CFM clears smoke without a hanging hood
- An induction cooktop stays cool to the touch seconds after the pan lifts
- A 30 inch cooktop leaves 24 inches of counter on each side for prep
- Island cooking faces the room, so the cook joins the conversation
Venting is the part that makes or breaks a cooktop on the island, since the cook faces the room while working. Choose a downdraft vent rated for at least 600 CFM for a 30 inch cooktop, or 900 CFM for a 36 inch model, and duct it outside through the floor rather than recirculating it. The cooktop needs a dedicated 40 amp circuit for induction or a gas line rated for 60,000 BTU, and the island base must leave 6 inches of clearance around the vent motor. Never vent a cooktop into the cabinet or the room, since grease builds up inside the island and the air stays smoky. The new circuit or gas line must meet local code, and a mistake here risks far more than a cold dinner.
A downdraft system costs 1,500 to 3,500 dollars installed. Leave 24 inches of counter on each side of the cooktop for landing space, and never place the cooktop closer than 12 inches to the island edge. The cook faces the room instead of a wall, so conversation continues with dinner on the burner. An overhead island hood costs about the same and blocks sightlines across the room. Gas cooktops give instant flame control, and induction boils water in about half the time and keeps the surface cool.
Island with Bookcase Ends
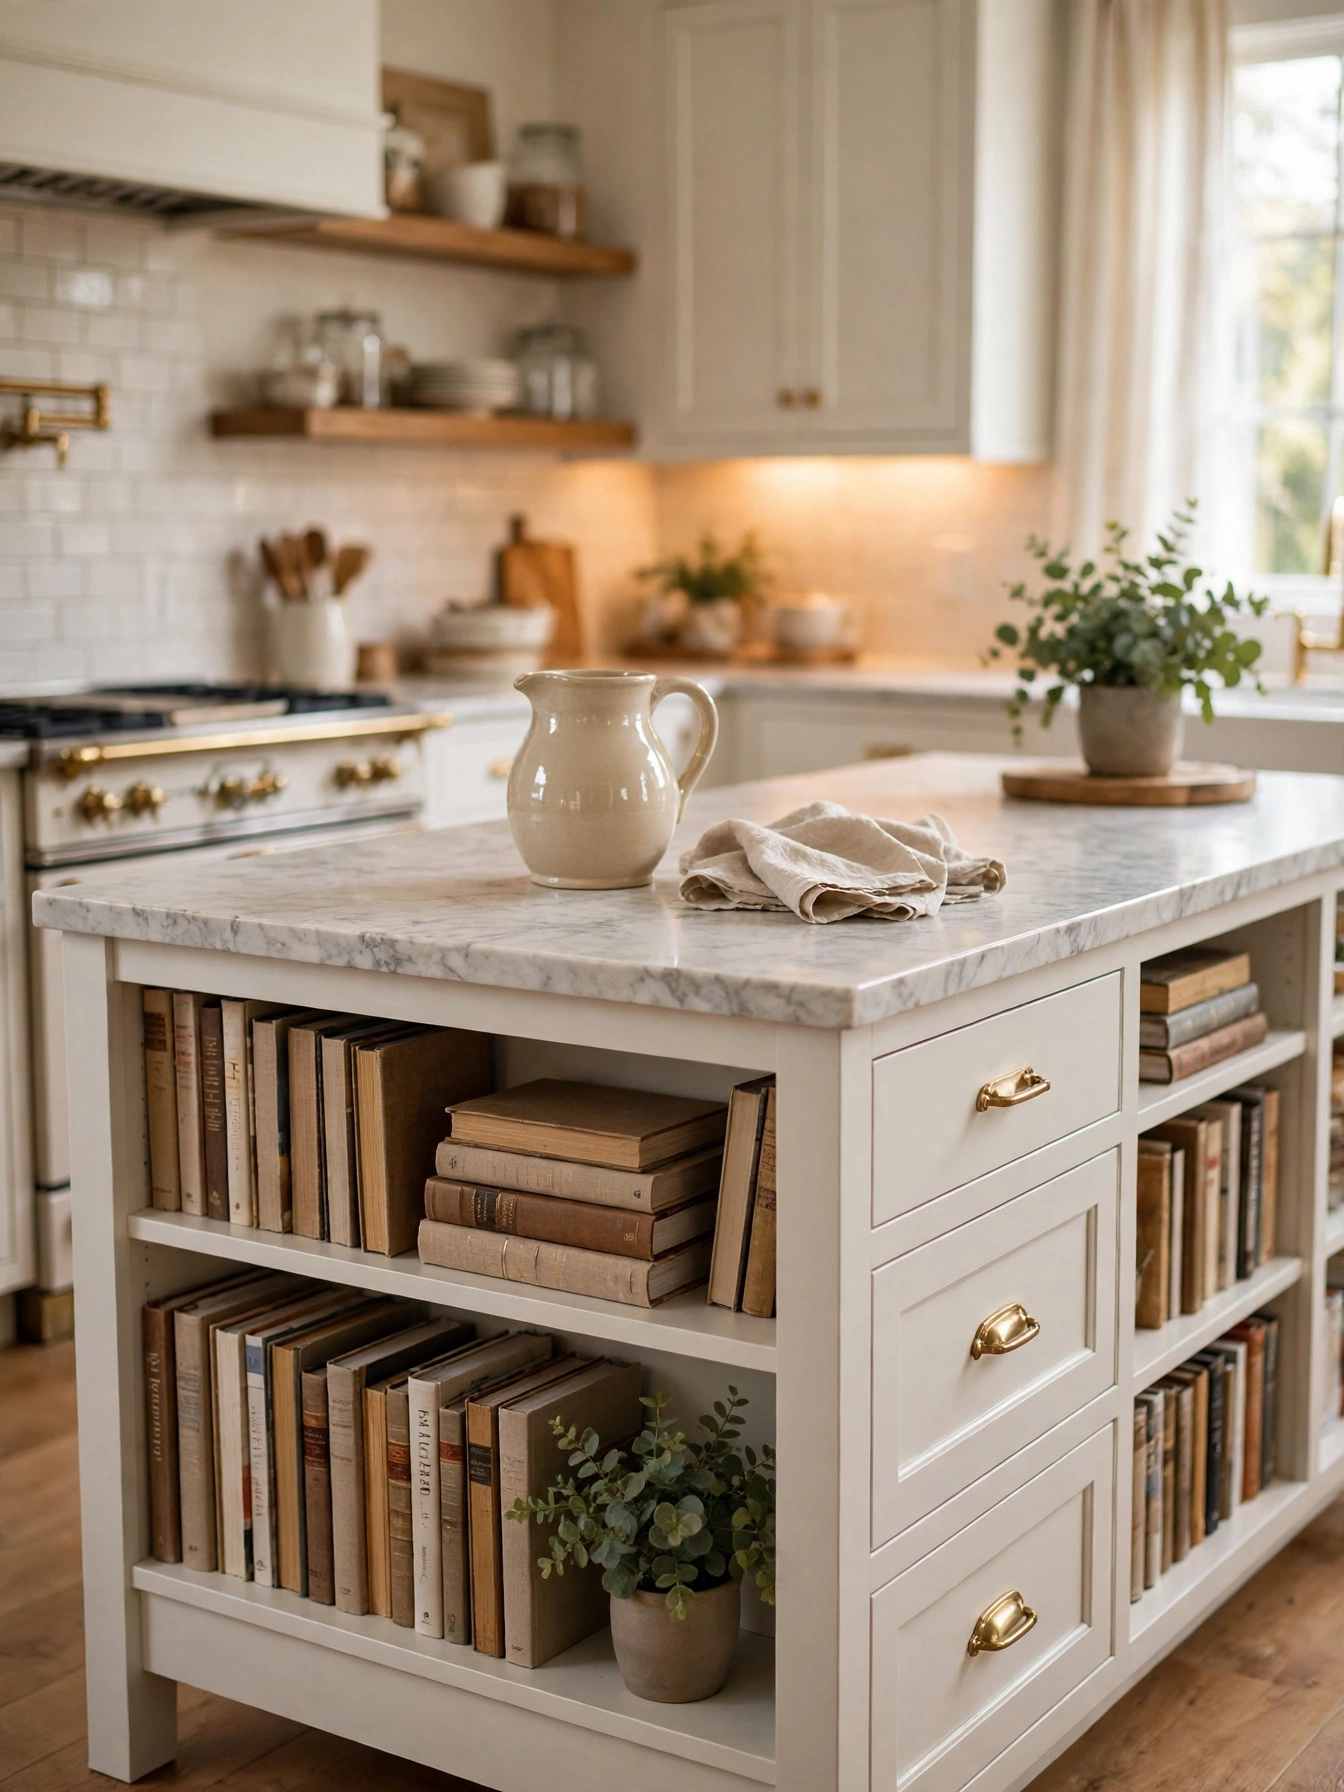
Why This Works:
- Bookcase ends use the island ends that cabinets usually waste
- Shelves 10 inches deep hold cookbooks without crowding the walkway
- Displaying cookbooks adds personality that plain panels cannot
- The shelves cost less than a matching bank of drawers
Shelf depth is the number to get right when the dead ends of an island become display and storage. Build open shelves 10 inches deep and 12 inches tall at each end of the island, with a 3/4 inch thick board that spans 24 inches without sagging. A 96 inch island takes two bookcase ends of 12 inches width each, which leaves 72 inches of drawer space in the middle. Keep the lowest shelf 6 inches above the floor, since books stored at floor level collect dust and mop water. Do not overload the shelves with heavy art books, since a full shelf of cookbooks weighs about 30 pounds and the island ends need a solid frame.
Keep each shelf to books and one small object, such as a pitcher or a plant, so the display stays tidy. The recipes sit beside the cooking zone instead of across the room, so the right page is open before the pan heats. Open shelves at the island ends need a wipe every week, and the books must stay dry in a room full of steam. Closed cabinets cost about the same and hide the clutter. They cannot show a collection.
FAQs
What are the best kitchen island ideas for a small kitchen?
A slim island of 60 by 24 inches fits a 10 foot wide galley with 36 inch walkways on each side. Use slim 16 inch stools, one bank of 18 inch deep drawers, and skip a sink or cooktop so the countertop stays useful for prep and breakfast.
How much clearance do I need around a kitchen island?
Allow three and a half to four feet on every side, and never less than 36 inches for a single cook. Leave that same clearance behind the stools, so the cook can pass while the family eats. That range is the one to measure against before ordering.
What countertop height works best for kitchen island ideas?
A standard island countertop sits 36 inches high, matching the rest of the kitchen, and pairs with 24 inch counter stools. A raised bar section at 42 inches needs 30 inch bar stools. The Spruce recommends 36 inches for prep work, since it keeps wrists level while chopping.
How much overhang do I need for island seating?
Allow 12 to 15 inches of countertop overhang for knee room, with steel brackets rated for 100 pounds when the overhang passes 12 inches. Each seat needs 24 inches of width, so a 72 inch island seats three people comfortably.
What is the best countertop material for a kitchen island?
Quartz at 3 centimeters thick suits most families, since it resists stains from juice and tomato sauce without sealing. Butcher block costs about half as much per square foot and sands smooth again, while marble needs sealing every 6 months and etches when citrus sits on it for 10 minutes.
Conclusion
Kitchen island ideas work best when the measurements come first and the style follows, and three choices carry the most weight. Keep 42 to 48 inches of clearance on every side, pick a countertop that matches how the household really cooks, and size the seating at 24 inches per person with a 12 to 15 inch overhang. Start with one move today: measure the walkways with a tape measure, then sketch the island size that fits. Follow HomelyCrafter on Pinterest for more ideas. Save this to your Pinterest boards so you can refer back to it!

Muhammad Israr is a home decor enthusiast and the writer behind Homely Crafter. He spends his days researching paint colors, layouts and budget-friendly styling ideas, then breaks them down into practical, easy-to-follow guides so you can decorate with confidence.
7 thoughts on “21 Practical Kitchen Island Ideas for Everyday Cooking”