
At 7 AM the kitchen runs on autopilot and a timer. Coffee brews while lunchboxes open on the counter, someone asks where the keys went, and the toast pops up just as a school bag zipper sticks. In those ten minutes, a kitchen either helps or fights you, and the difference usually comes down to small systems, not a remodel. The Spruce puts it plainly: an organized kitchen saves time because every tool has a set home, and these kitchen hacks build exactly that kind of order.
Below are 25 kitchen hacks that cut the small frictions out of cooking, cleaning and storage. Each one names the measurements, the materials and the setup steps, so you can copy it in an afternoon and feel the difference at breakfast the next morning.
Labelled Pantry Bins
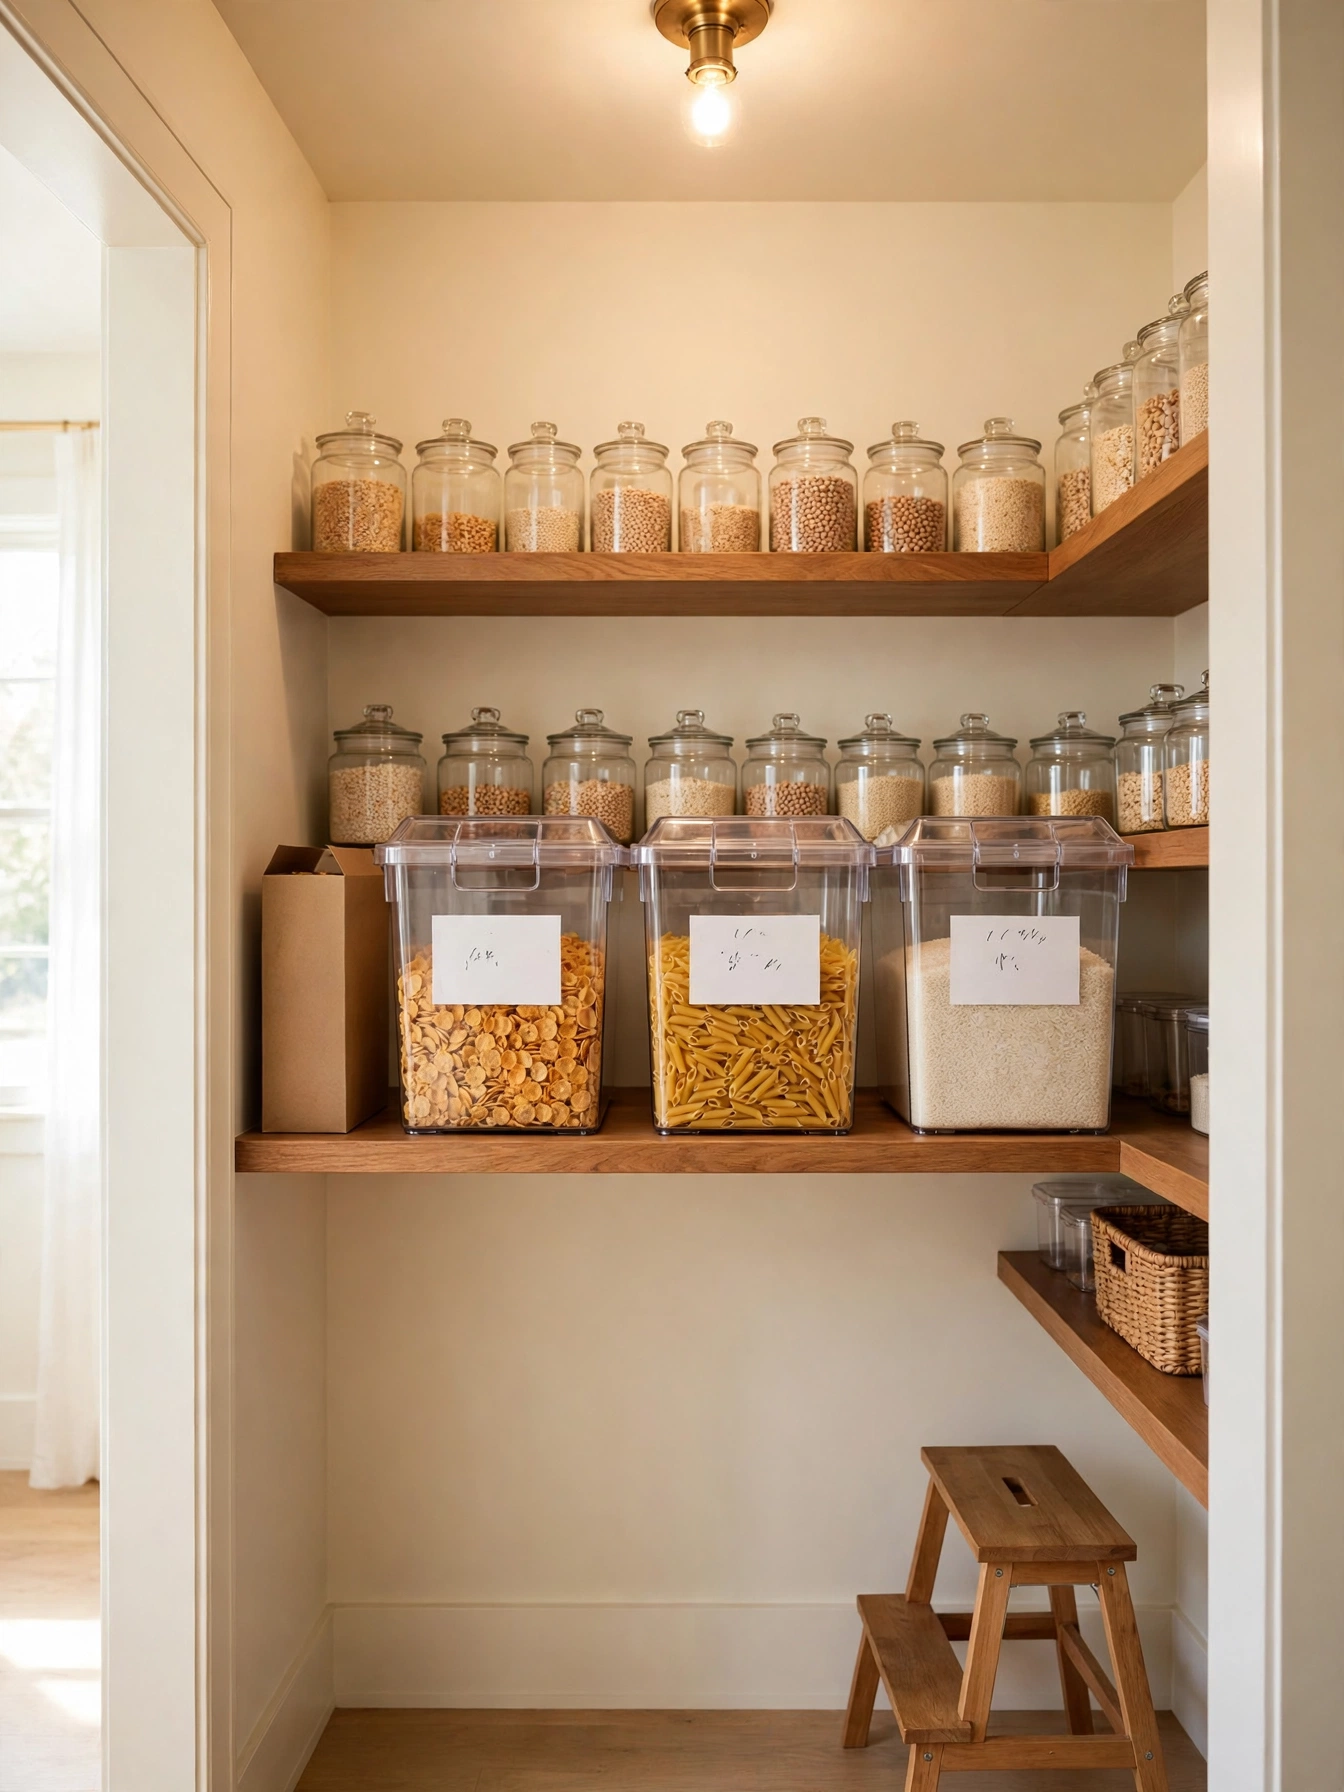
Why This Works:
- Labels cut the morning search down to seconds
- Clear bins show stock levels at a glance
- One bin per category stops mixed piles
- Matching bins make deep shelves look calm
A pantry hunt in the morning rush usually ends with open boxes and no cereal in sight. Standard pantry shelves run 12 to 16 inches deep, so a bin 12 inches deep and 8 inches wide fits without overhang. Choose bins with a front label slot and a 2 inch high label, placed on the front face where it reads from 3 feet away. Leave a 3 inch gap between bins so a hand fits around each one, and keep the heaviest bin, usually rice or flour, on the lowest shelf. Avoid a bin that overhangs the shelf, because the overhang blocks the door and tips the bin forward when it slides out. Clear plastic shows the level inside without lifting the lid, so the morning check takes a single glance.
A labelled bin system pays for itself on the first grocery run, when the empty bin shows exactly what to buy. One common slip is labelling bins before deciding the categories, which leads to relabelling within a week, so sort the food into groups first and label second. Bins slide on smooth wood shelves, and a thin non-slip liner under each bin stops the drift. Upkeep is the catch: labels need a fresh line when a category changes, and a bin that holds snacks for a month will need wiping inside every few weeks.
Lazy Susan Corners
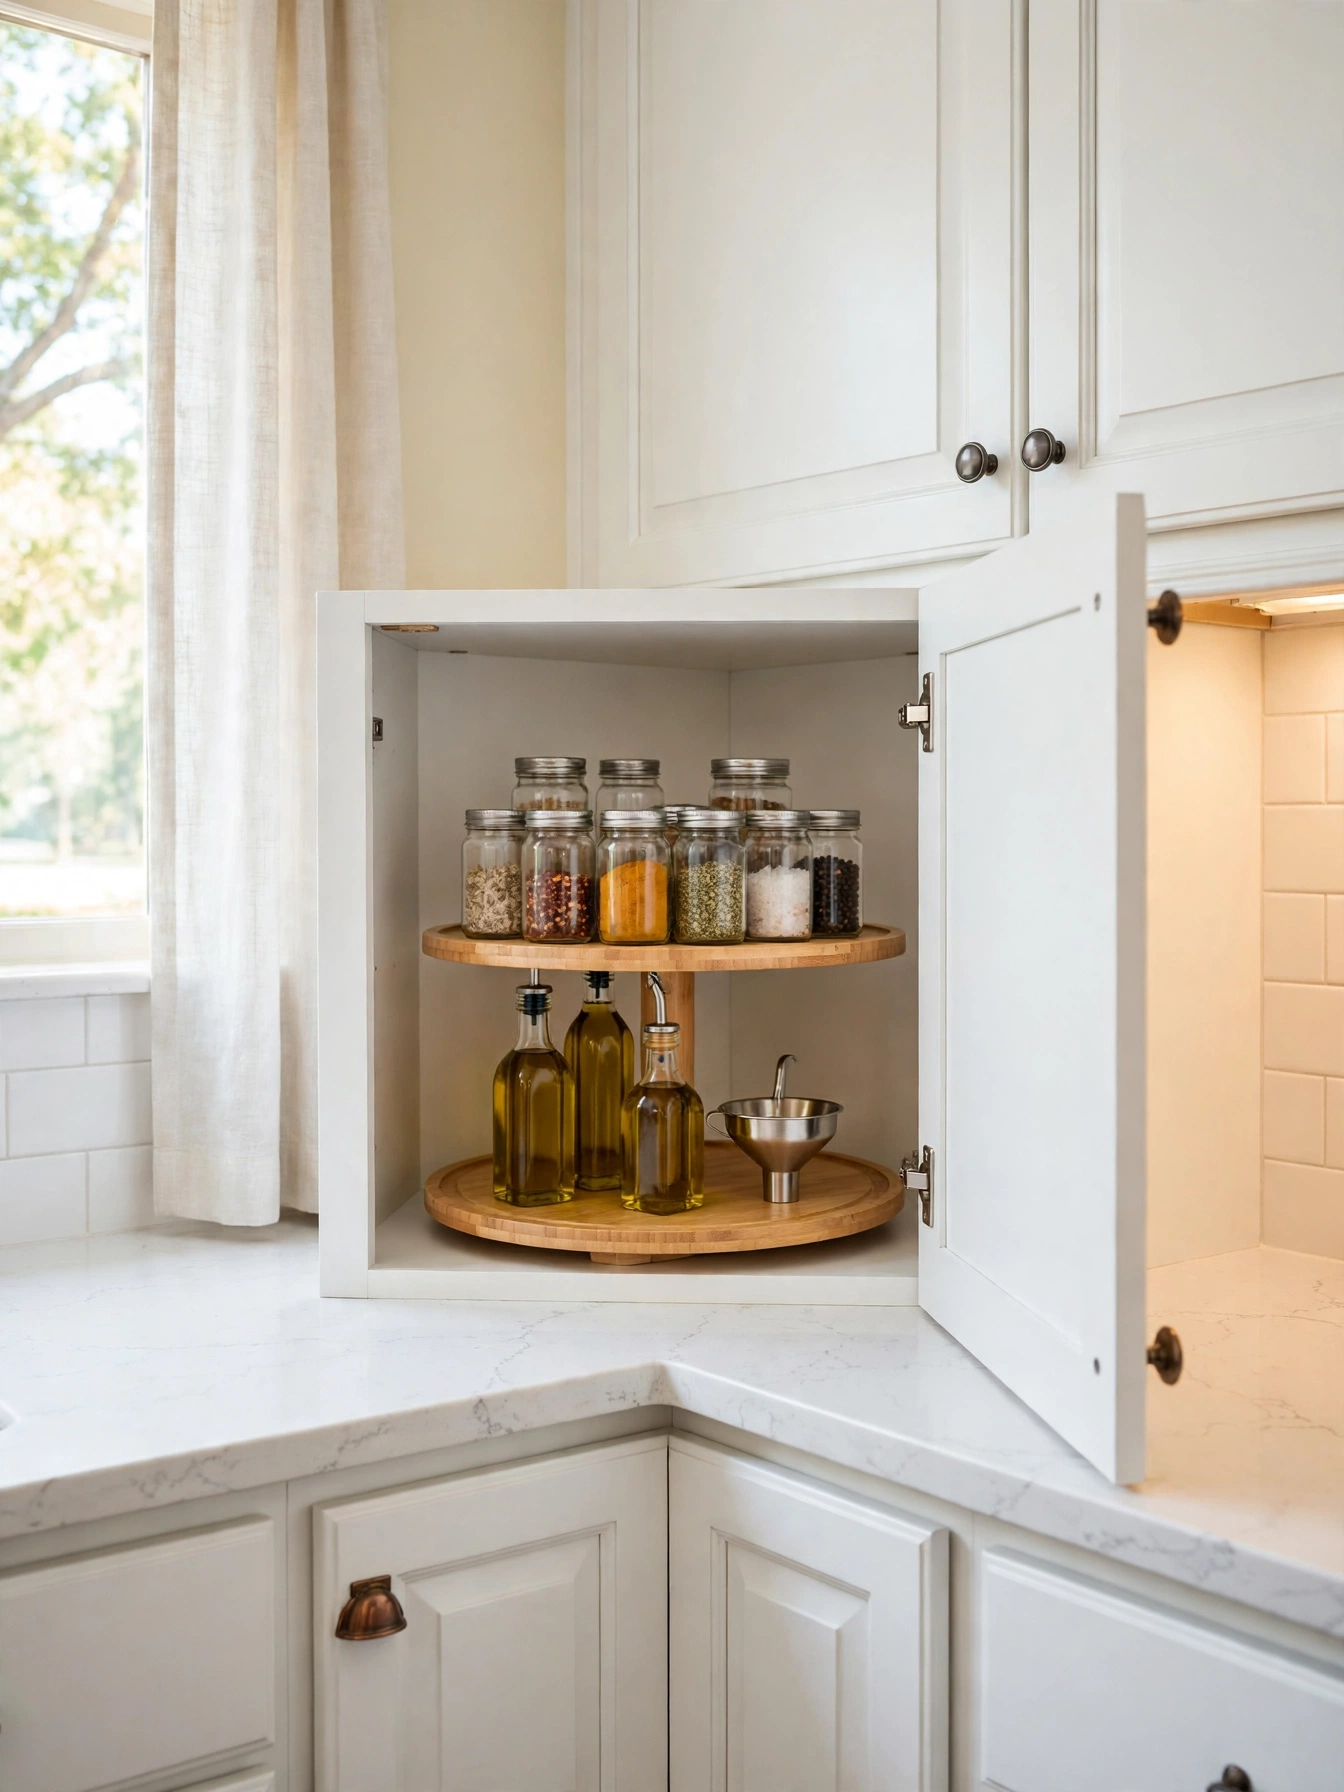
Why This Works:
- One spin brings back-corner jars forward
- Two tiers double the usable height
- Round trays stop bottles hiding behind each other
- Bamboo wipes clean after an oil drip
Inside a 36 inch corner base cabinet, a 28 inch diameter turntable leaves a 4 inch margin on each side and spins without catching the walls. Pick a two-tier model with 12 inches between tiers, so standard 8 inch oil bottles fit below and 4 inch spice jars fit above. The cabinet door opening usually measures about 15 inches wide, so choose a turntable that ships in two halves or check that the assembled disc fits through the opening before ordering. Measure the door opening before ordering, since a turntable over 30 inches wide jams against the frame in a 36 inch cabinet and the spin stops halfway. The spin brings the back row forward in one turn, and nothing hides behind the oil bottles.
The round shape leaves the sharp corner triangles unused, and one spin puts the back row within arm’s reach. Heavy jars belong near the center, where the bearing carries the weight, and light jars ride the edge. A turntable that wobbles under load usually has a bearing rated below the weight on it, so check the rating on the box. With the spin running smooth, the corner stops being the place where jars go to expire.
Magnetic Knife Strip
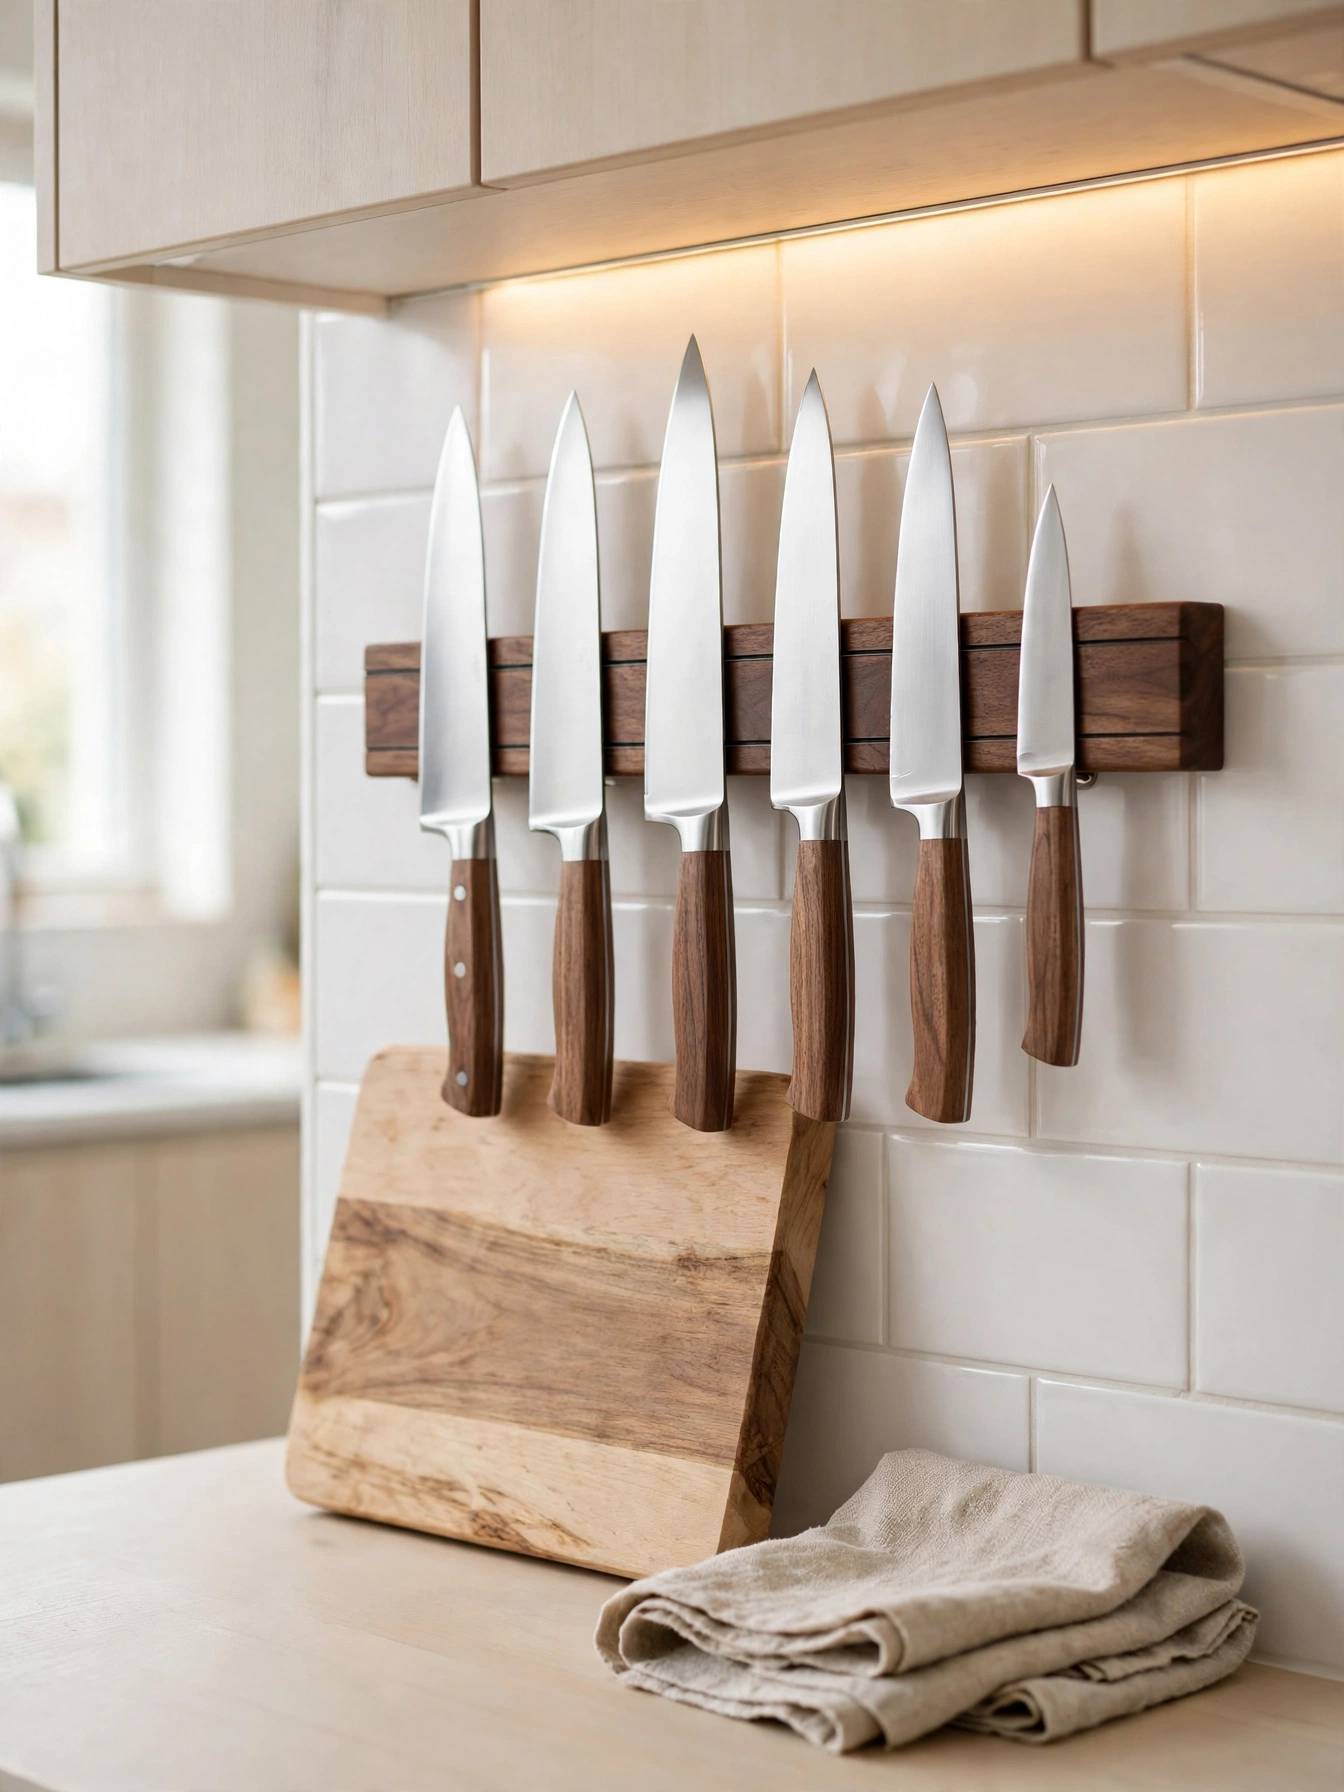
Why This Works:
- Knives stay visible and within arm’s reach
- The strip frees 12 inches of counter space
- Blades stay sharper than in a crowded drawer
- Wood warms up a steel-heavy wall
Knives belong where the cutting happens, at arm height and off the counter. A strip mounted 18 inches above the countertop sits above the splash zone and below eye level, in line with the upper cabinets. A strip 18 inches long holds 6 to 8 knives, and the screws must bite into wall studs spaced 16 inches apart, since a loaded strip can weigh 10 pounds or more. Drill the tile with a diamond bit and a slow speed, and if the backsplash is porcelain tile, hire a professional to drill it, because porcelain cracks under a standard bit and one slip ruins a whole tile. Mount the strip on a clear stretch of backsplash between the sink and the stove, where the blades stay dry and away from steam. Raw meat juice dries into a sticky film on the magnet, so a damp cloth after prep keeps the strip clean.
A strip changes how cooking flows, since the right knife hangs in sight through the whole prep. Strong magnets can chip a thin blade if it snaps on hard, so place each knife flat against the strip and roll it on gently. Store the longest blade at the end farthest from the main walkway, out of reach of small children. The habit takes a week to form, and after that the drawer feels like a step backward.
Pull-Out Trash Bin
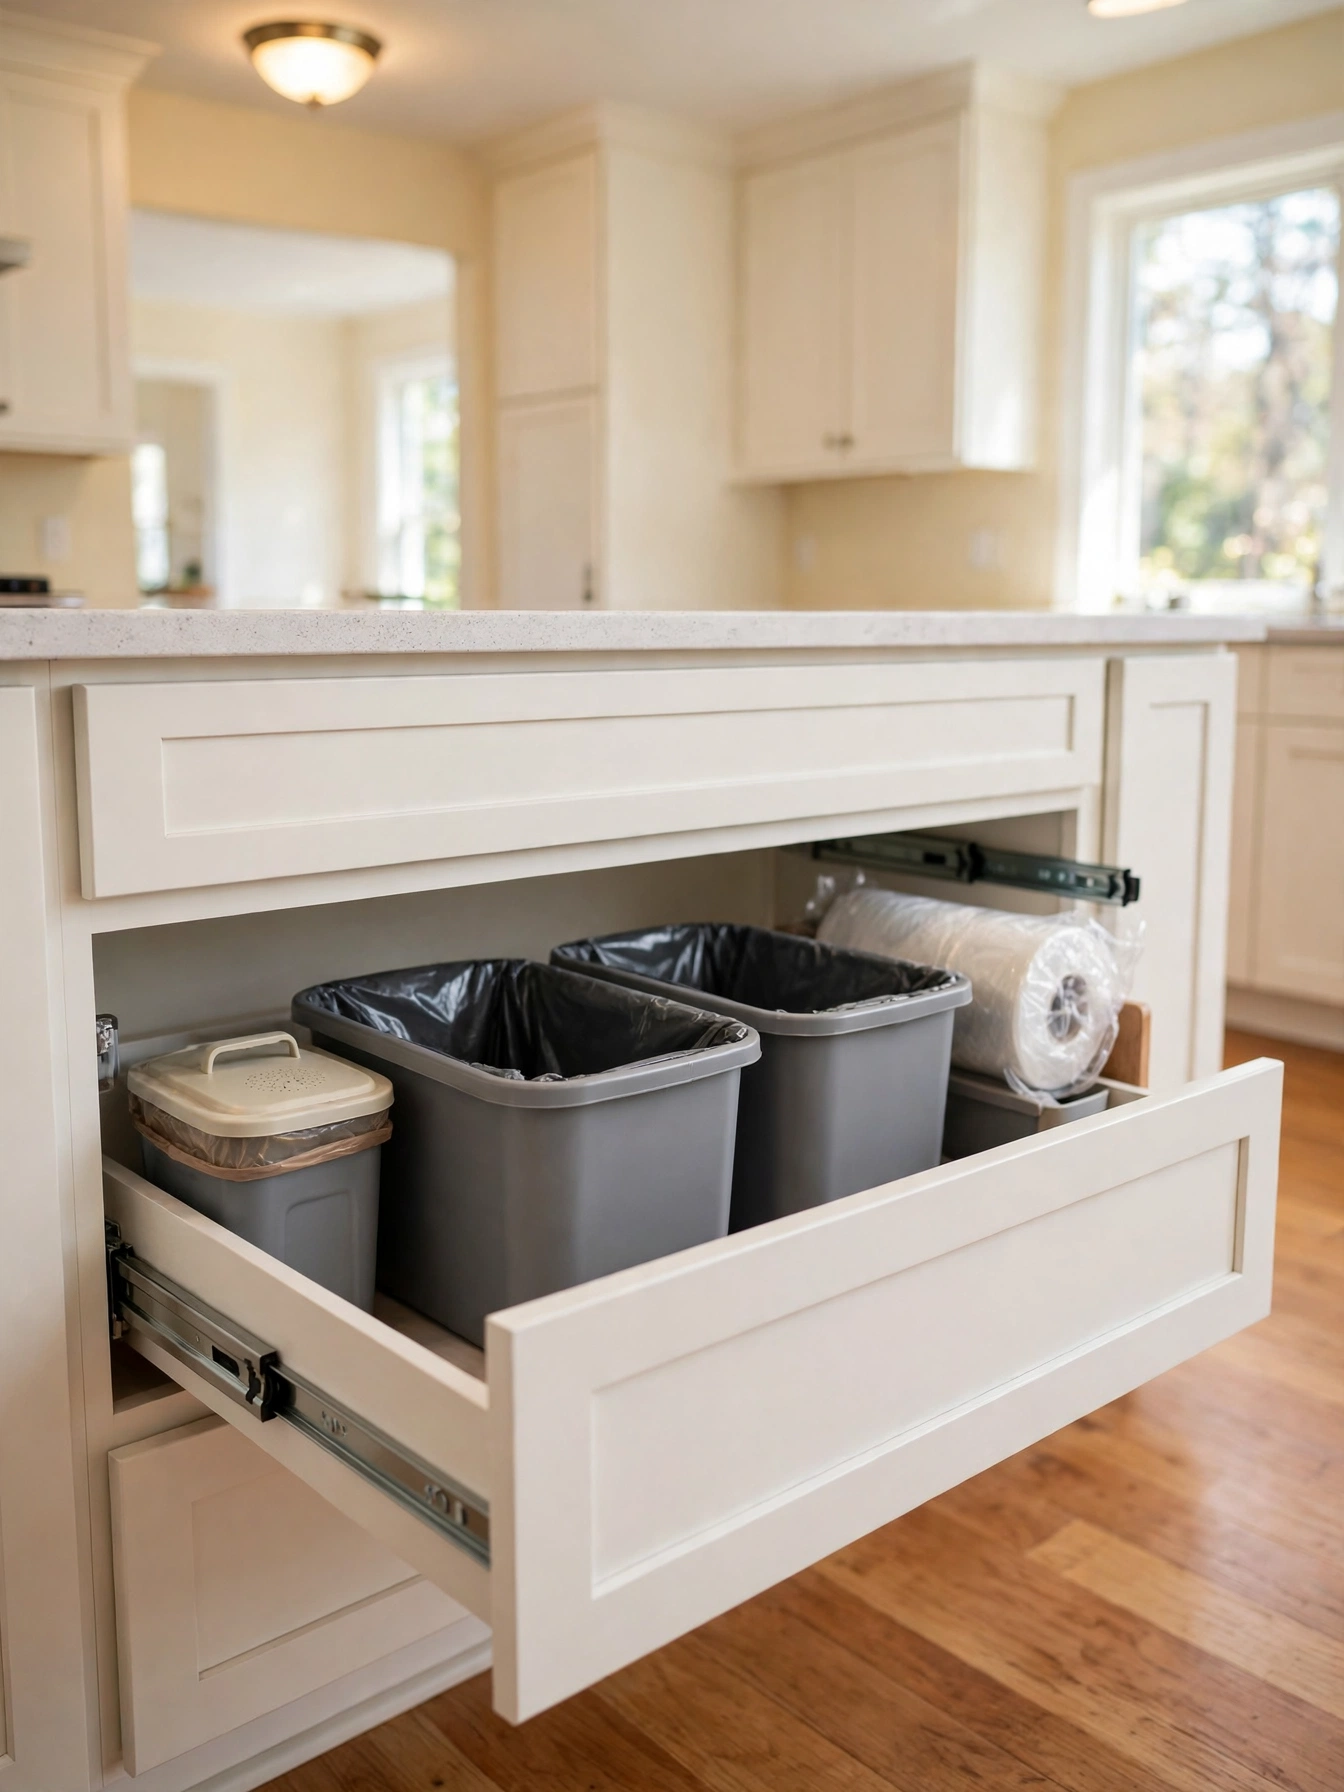
Why This Works:
- Trash hides behind a cabinet door
- The bin glides out with one hand
- Two bins split trash from recycling
- Bags stay in reach right beside the bin
A freestanding bin always ends up in the walkway, usually in front of the dishwasher. An 18 inch cabinet takes a frame holding a pair of 35 quart bins side by side, and the full-extension slides should rate for 100 pounds so a full bin glides out without tipping. The National Kitchen and Bath Association sets 42 inches as the figure for a one-cook work aisle, so leave that much clear floor in front of the cabinet and the bin clears the dishwasher door when both open at once. Mount the frame with 4 screws into the cabinet floor, and check that the door front aligns with the neighboring drawers before tightening. Two open doors collide in a 36 inch gap, so the pull-out sits away from the dishwasher, and a single bin under 27 quarts fills before dinner ends in a cooking household. Spare bags ride on the side of the frame, so the next bag is right there when the full one comes out.
The pull-out earns its cabinet by ending the freestanding bin that always sits in the walkway. One full cabinet becomes trash duty, which is the lost storage, and bags tear if the bin overflows, so empty it when it reaches three quarters full. A lid on the bin cuts odors. Many cooks leave the lid off during prep and close it after dinner, when the bin sits shut overnight. Wipe the frame monthly, because drips collect under the bins where nobody looks.
Morning Kitchen Hacks
Why This Works:
- Breakfast gear gathers in one spot
- A tray keeps the station off the whole counter
- Mugs on hooks free the shelf above
- The setup cuts five minutes off the rush
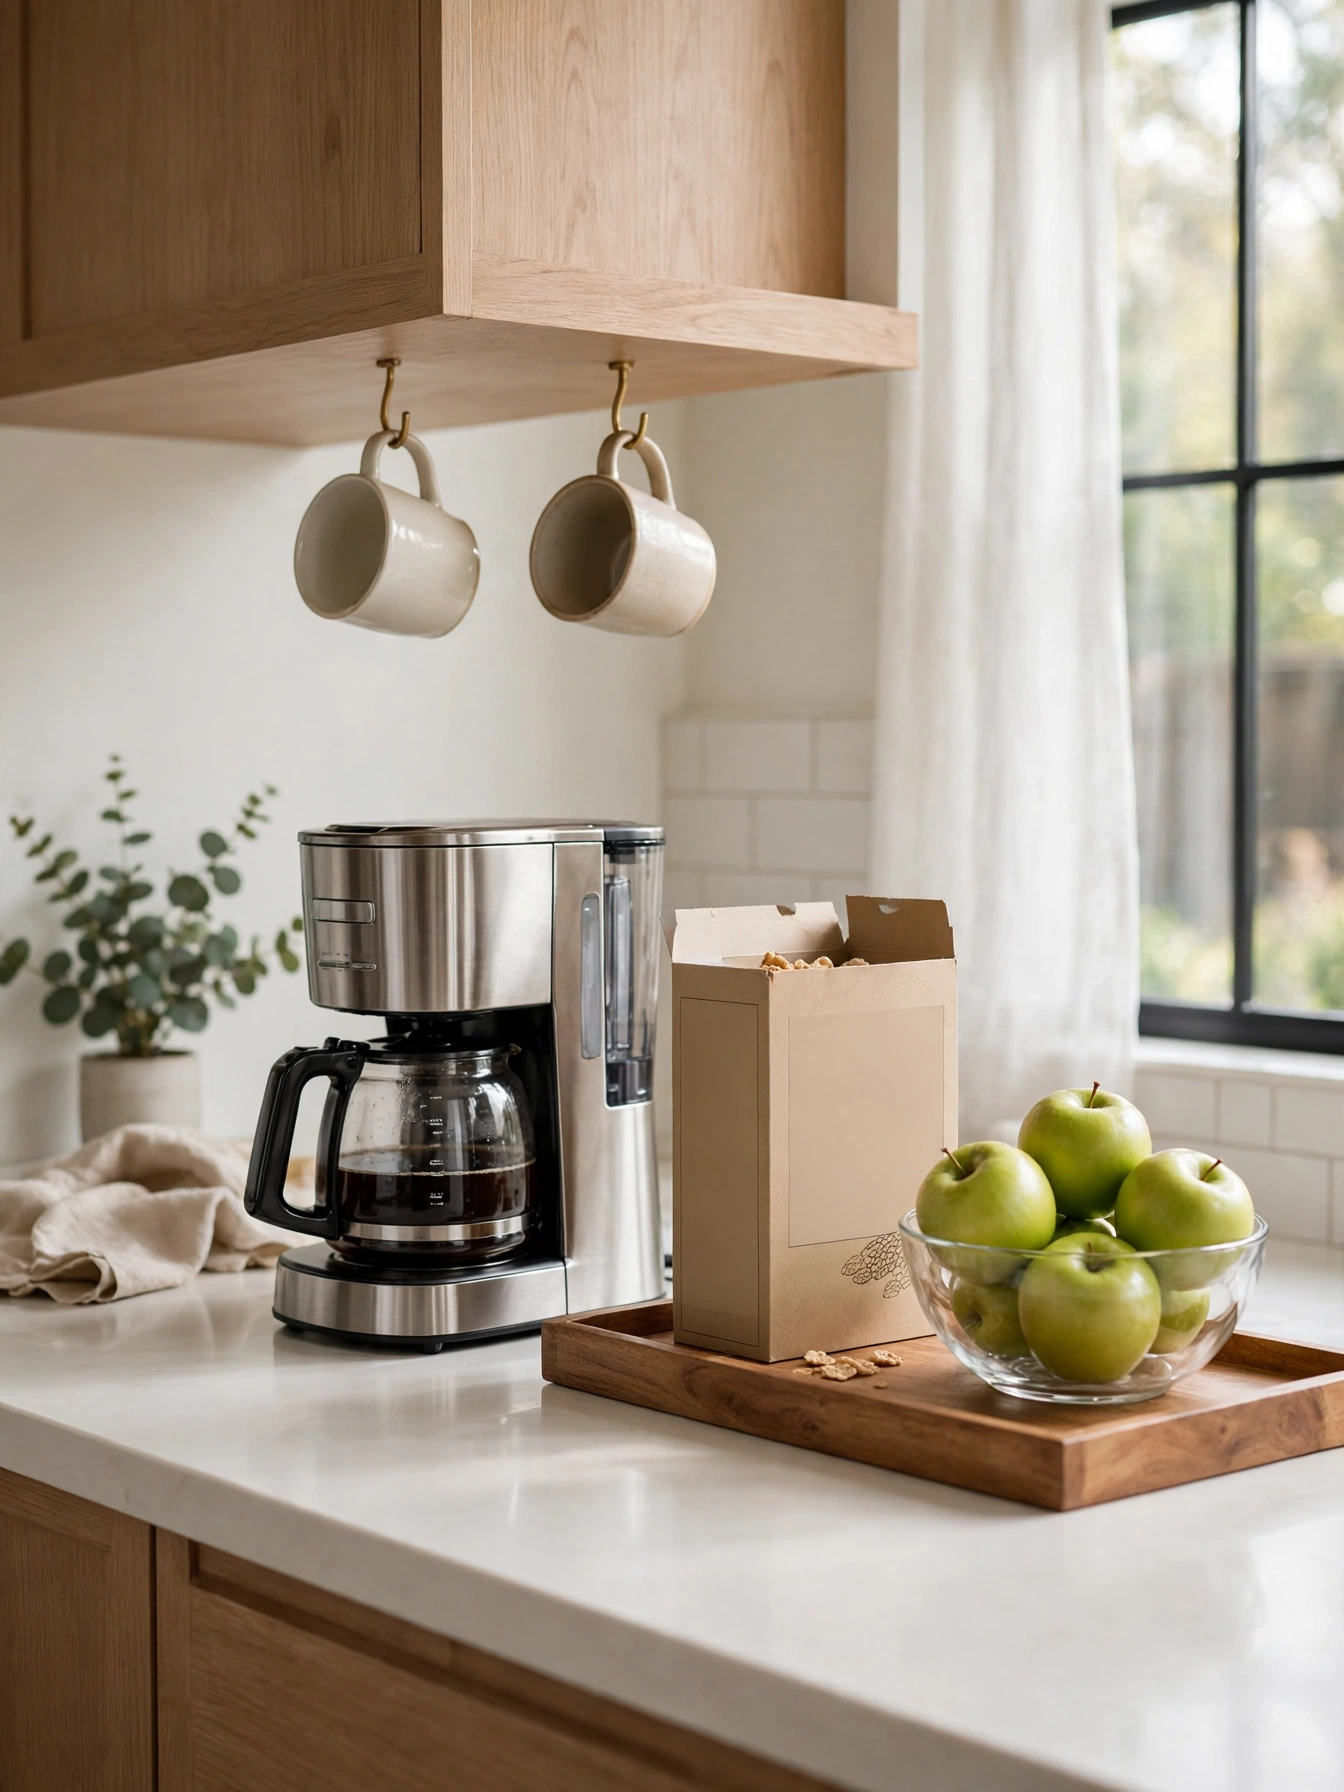
Breakfast runs on coffee, cups, cereal, bowls and fruit, all used in the same rush. A tray 18 inches wide by 24 inches long beside the coffee maker holds the morning gear, and the maker sits within 12 inches of the outlet so the cord stays off the counter. Hang mugs on hooks spaced 6 inches apart under a shelf 18 inches above the 36 inch counter, which leaves room for the coffee maker below. Place the station outside the work triangle, since the sink to stove path runs 4 to 9 feet and a tray in that path becomes an obstacle during cooking. A tray holding 12 items is just clutter with a border, so the station holds the breakfast kit and nothing else. Cereal, bowls and fruit all sit on the tray, and the counter beside it stays clear for lunchboxes.
The station holds its counter space because the coffee, cups and cereal wait on one tray, and the morning search shrinks to a single reach. Without a nightly tidy, the station becomes a dumping ground within days, so the last person in the kitchen each night clears it back to the tray. Bowls and spoons belong on the tray, not beside it, and the fruit bowl stays put so it anchors the zone. After a week, the morning stops feeling like a search and starts feeling like a routine.
Herb Freezer Cubes
Why This Works:
- Fresh herbs last 3 months frozen
- One cube seasons a whole pot
- Oil keeps the leaves green and bright
- Cubes drop straight into a hot pan
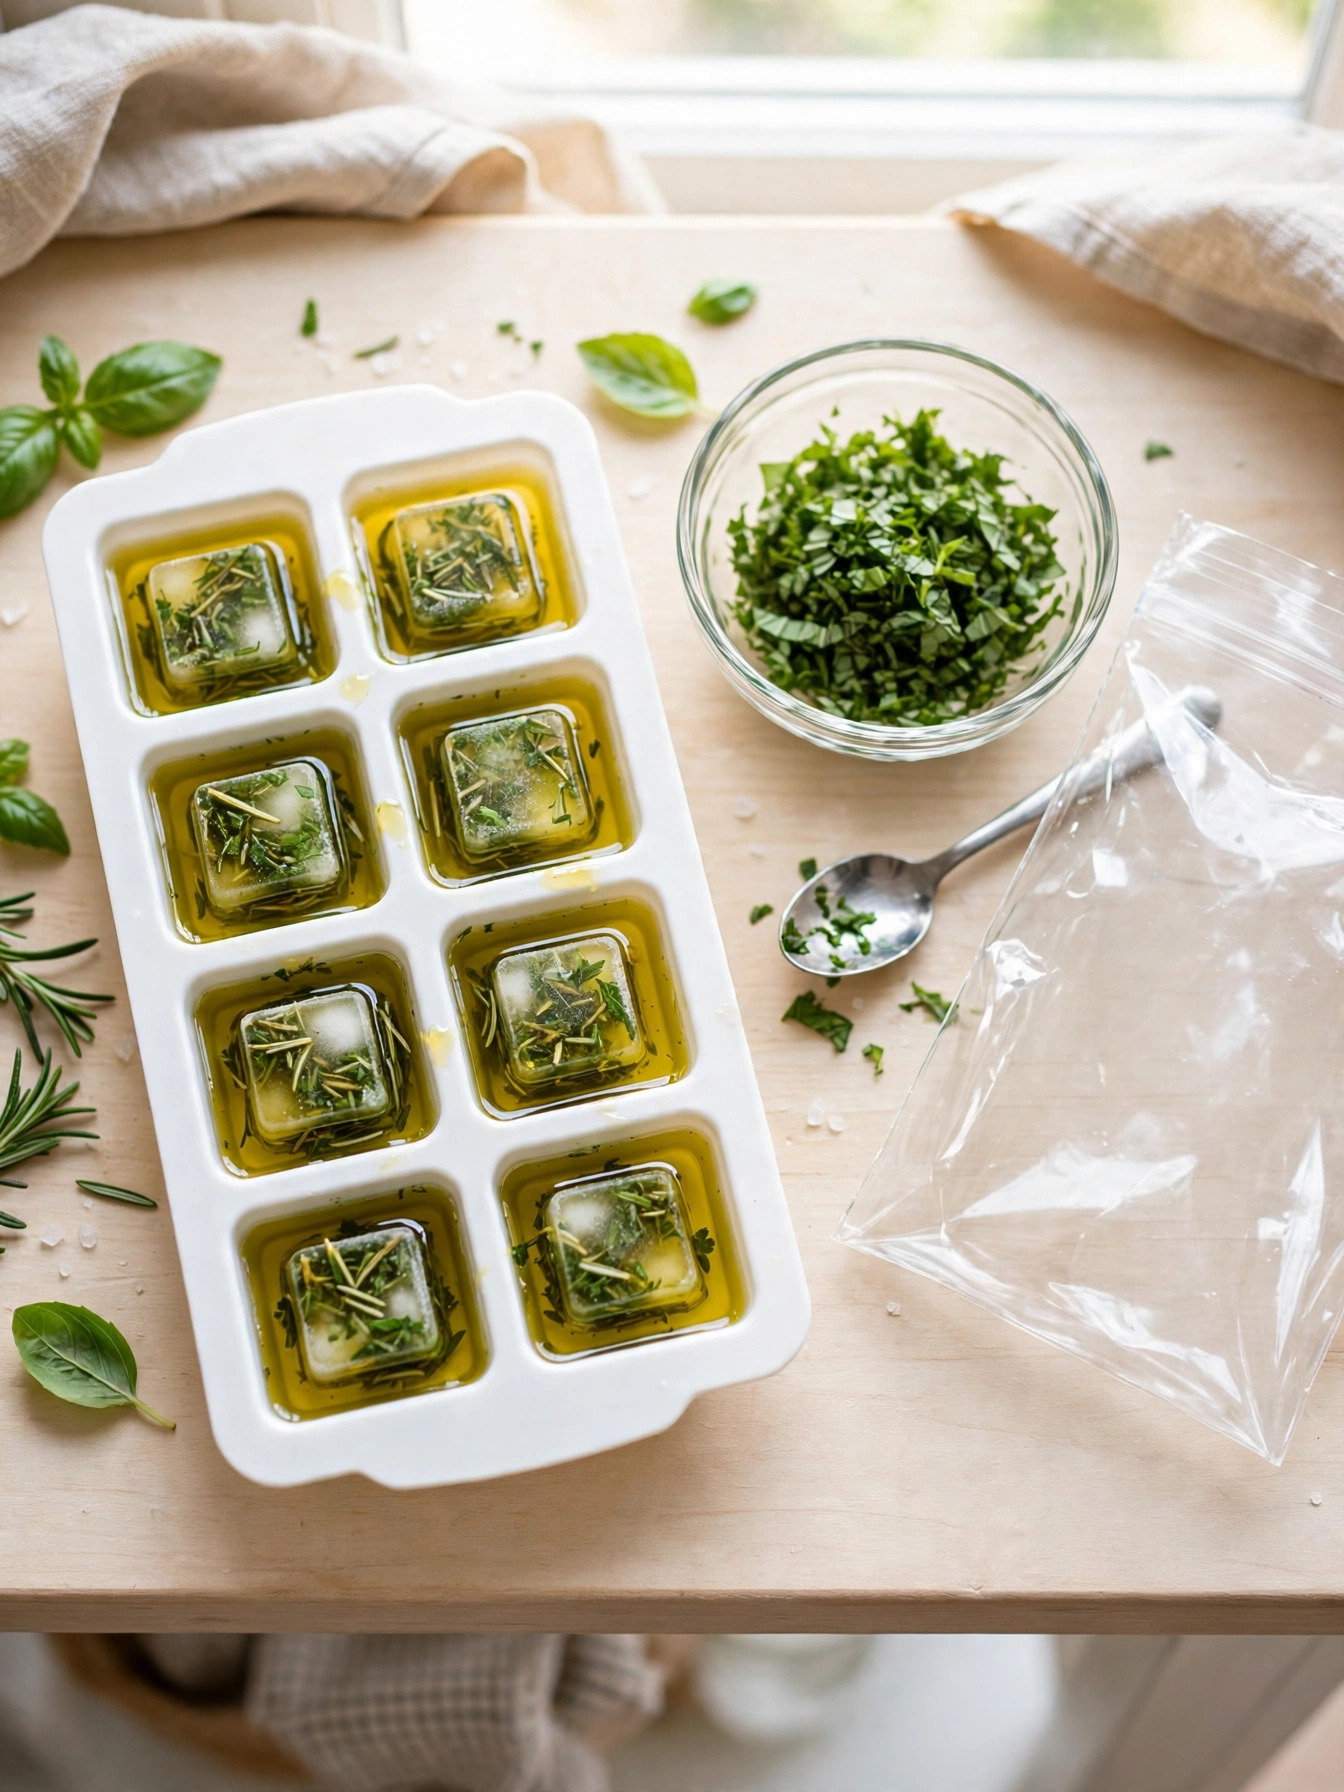
A tray of herb cubes turns a Sunday handful of basil into a month of weeknight seasoning. Finely chopped herbs pack 1 tablespoon to each cube, topped with 1 tablespoon of olive oil, which fills a standard 1 ounce cube slot exactly. Freeze the tray for 4 hours until solid, then move the cubes into a labelled freezer bag and use them within 3 months for the best flavor. Wet herbs frozen without oil turn black and limp, and woody stems from rosemary and thyme stay tough even after cooking, so chop leafy herbs for the tray and save the stems for stock. The labelled bag sits flat in the freezer, and the cubes keep their green color for the full 3 months.
Frozen cubes suit soups, stews and pan sauces, where they melt into the dish in seconds. A cube goes straight from the freezer into the pan. A thawed cube turns watery and dull before it ever reaches the dish. Label each bag with the herb name and the date, because basil and parsley cubes look identical after a month in the freezer. A single tray of 14 cubes covers about a month of weeknight cooking, and the whole job takes 15 minutes on a Sunday.
Sink Caddy Rail
Why This Works:
- Sponges dry fast instead of sitting wet
- The rail frees the whole sink ledge
- Hooks keep the brush off the counter
- Steel resists rust in a wet zone
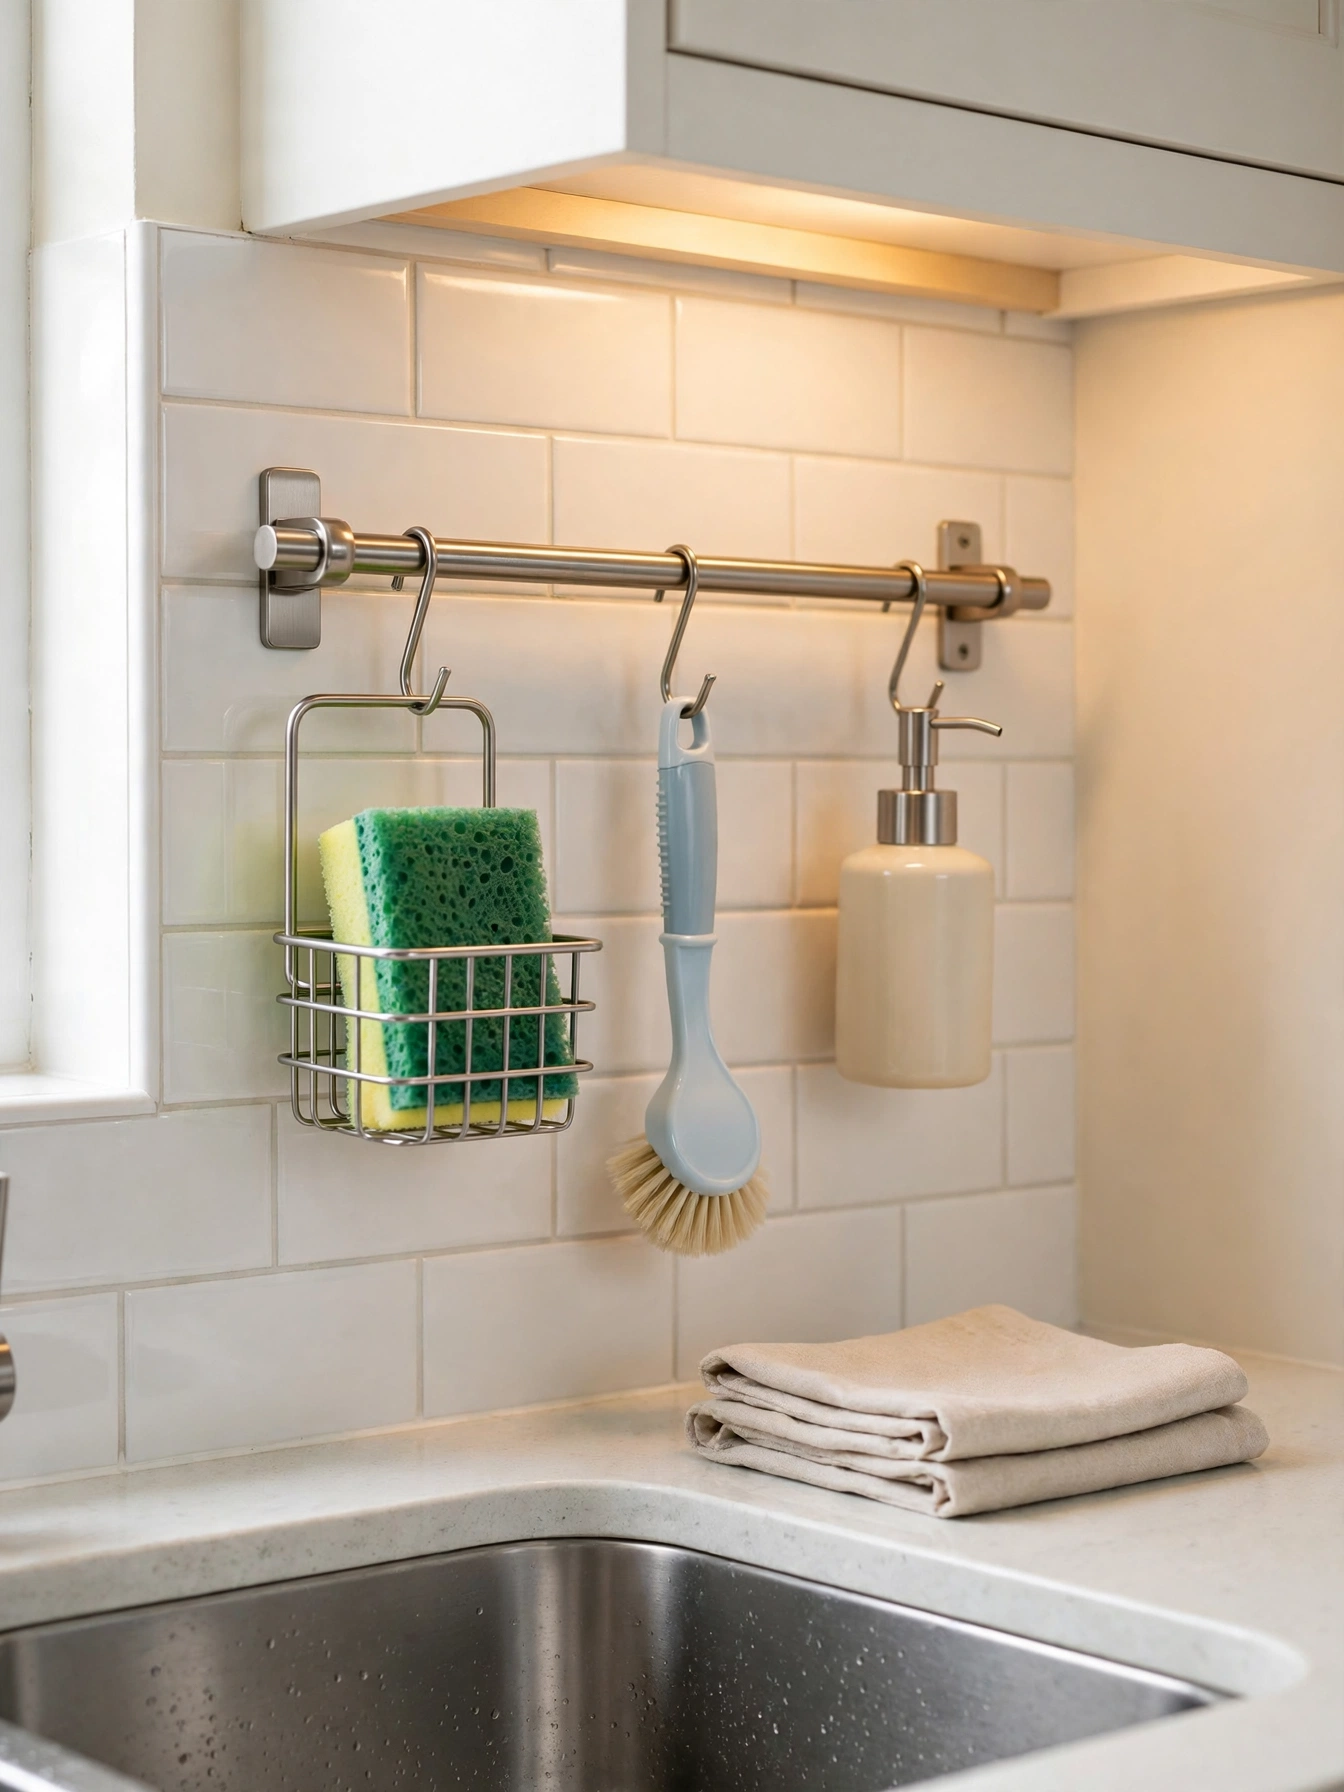
A sponge left on the sink ledge never dries, and the puddle under it spreads across the counter. A 24 inch rail fixed 6 inches above the counter on the backsplash puts the sponge within reach without crowding the faucet. Choose 304 grade stainless steel, which resists rust in a wet zone, and fix the rail with 2 screws into the wall, since suction cups fail on textured tile within days. Hang the sponge holder on the rail end, 6 inches from the faucet, so drips fall straight into the sink. Rails over 30 inches long hang past a single basin and drip onto the counter, and a heavy soap bottle pulls a suction hook straight off the tile. A basic stainless rail costs about 20 to 35 dollars, and hooks add 3 to 5 dollars each. The brush hangs on the next hook over, and the soap bottle stays on the counter where its weight cannot pull anything down.
The rail works because the tools dry between uses, with air moving around the sponge and the brush. The sponge holder needs a rinse under the tap each night, since trapped water turns it slimy within days. A full bottle of dish soap swings and slides on a hook, so the rail carries brushes and sponges only. Wipe the rail weekly, because hard water leaves white spots on steel within days. Sponge on the rail means the sink ledge stays clear and the counter stays dry.
Over-Sink Board
Why This Works:
- The board adds 544 square inches of counter
- Chopping happens right over the sink
- Scraps slide straight into the basin
- A thick board stays put while cutting
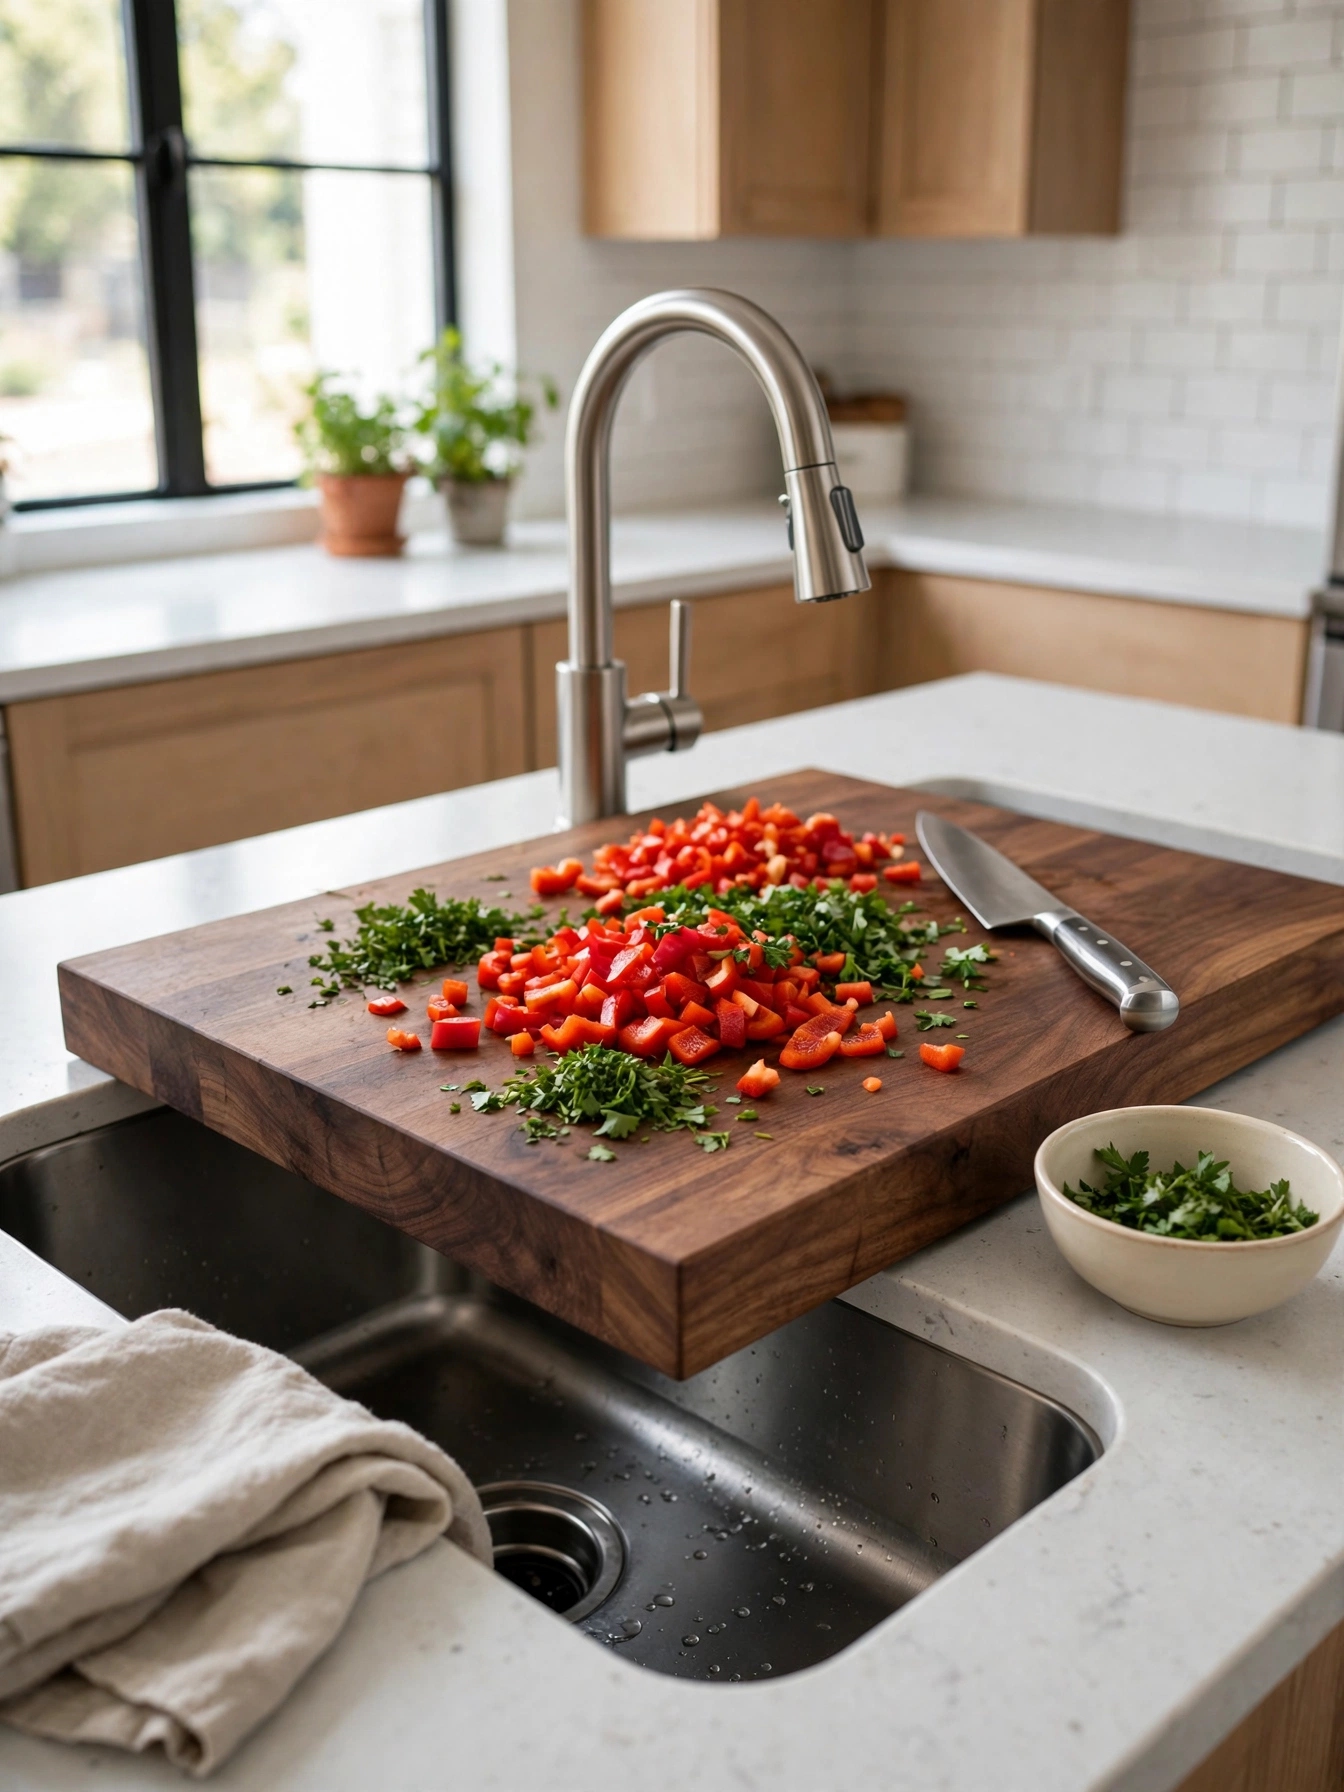
Chopping over the sink keeps scraps one slide away from the basin. A board 32 inches by 17 inches and 3/4 inch thick rests across a standard 30 inch sink, with 1 inch of board past the rim on each side. Fit food-grade silicone feet on the underside, 1 inch in from each corner, so the board grips the sink rim and never slides mid-cut. Keep the board clear of the faucet deck, since a board resting on the faucet wobbles with every cut and risks chipping the spout. A board under 1/2 inch thick flexes under a heavy knife and cracks along the grain within months. Wipe the board dry after rinsing, since standing water darkens the wood at the edges.
During prep, the covered sink becomes a second work surface, and the board sits steady enough for a full chopping session. Chopping runs first and rinsing second, with the rinse waiting until the board lifts off. Wet vegetables drip onto the board, not the floor, and a quick rinse under the tap cleans it in seconds. Store the board upright in a 2 inch slot beside the range, where it dries fast and stays within reach.
Tension Rod Dividers
Why This Works:
- Sheets stand upright instead of stacking
- Rods install faster than a fitted divider
- No screws or drilling needed
- The setup moves when the cabinet changes
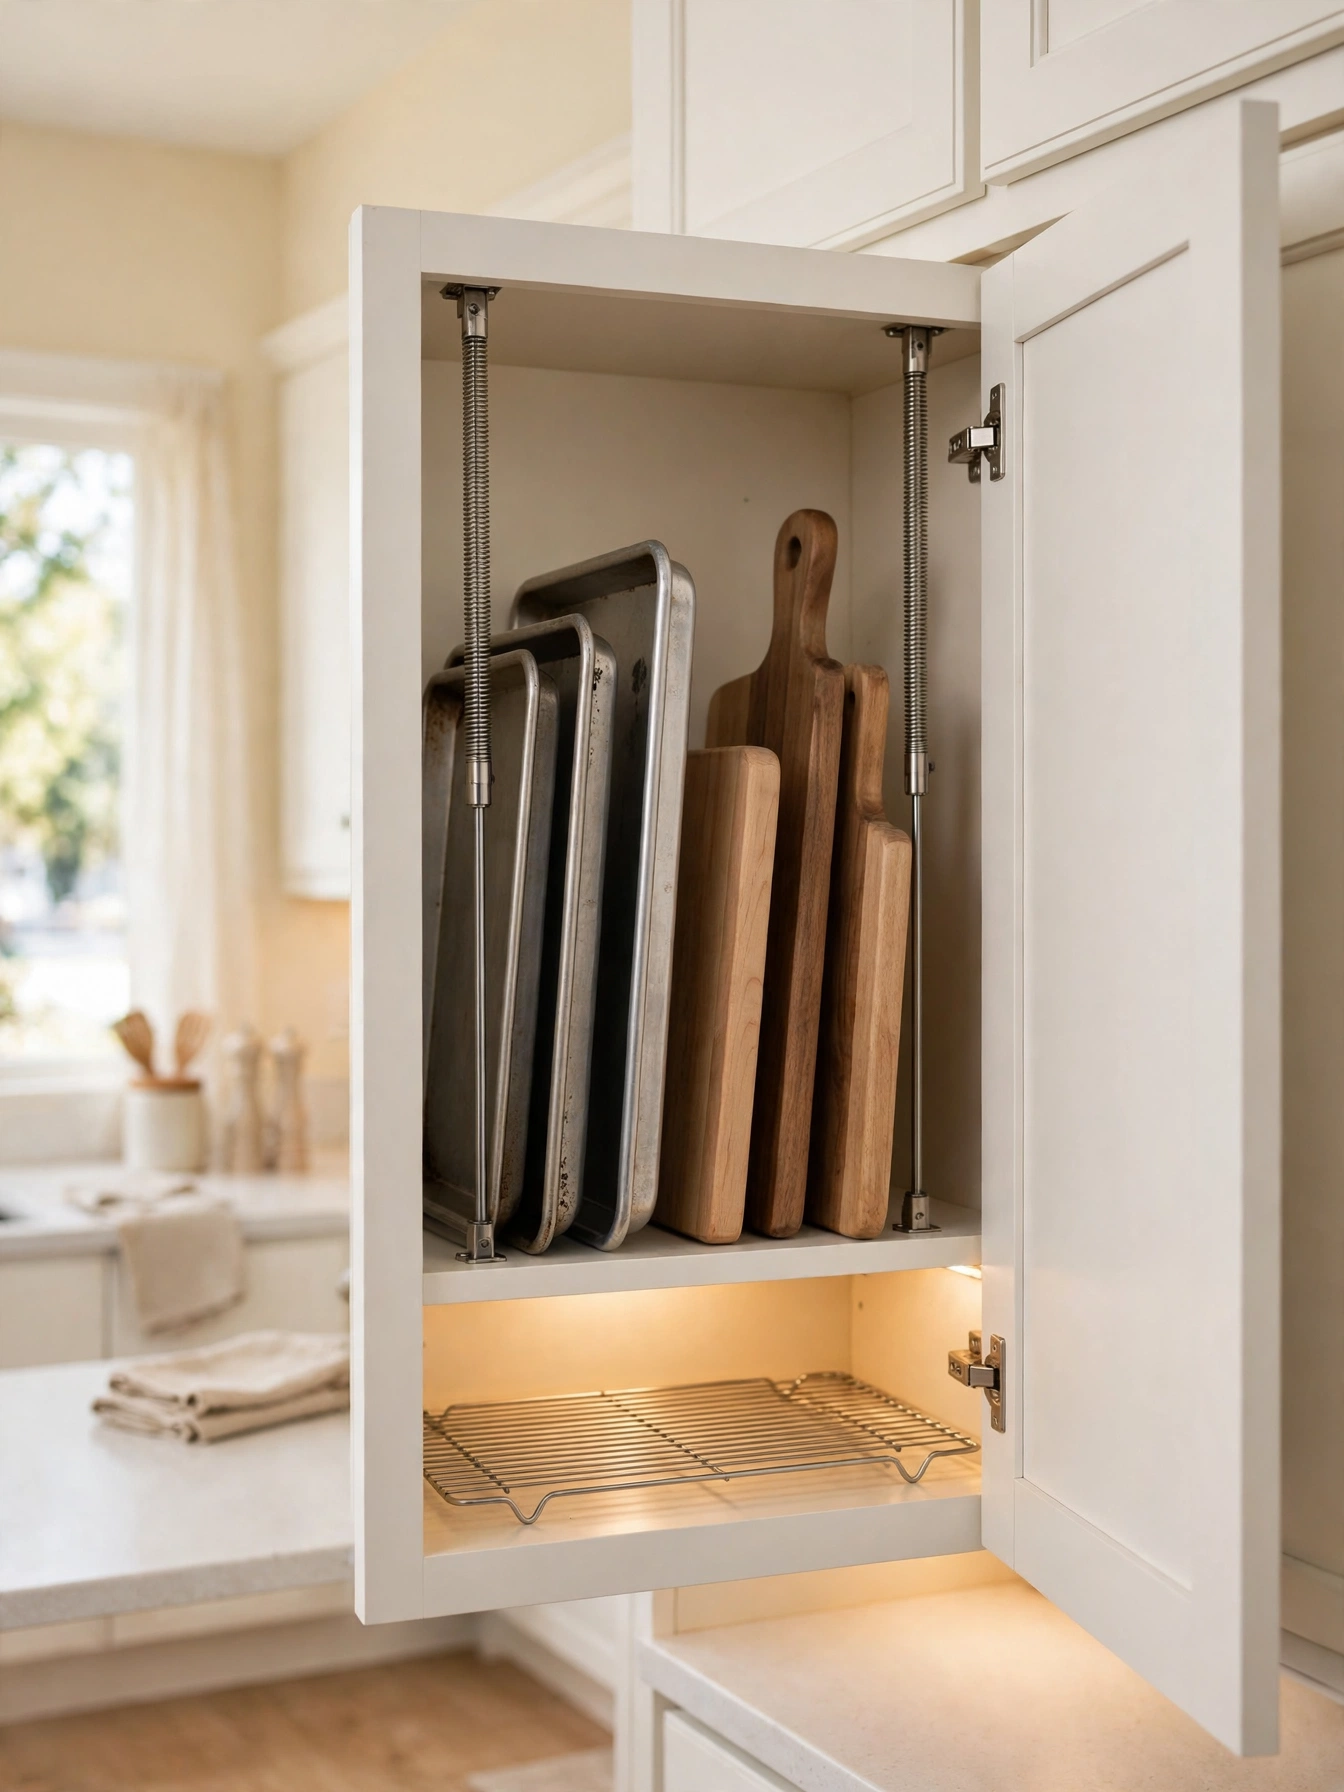
Baking sheets stacked flat always bury the one at the bottom. Spring rods sized 18 to 28 inches fit inside a standard 24 inch cabinet, and a rod placed every 2 inches creates slots that hold baking sheets upright without tipping. Press each rod firmly until the spring bites, then test it with a full baking sheet before loading the rest, since a rod that slips under weight drops the whole row. Press the rod ends against flat cabinet walls. A spring rod cannot hold tension past 28 inches, and the rod sags within weeks. The rods move to another cabinet whenever the layout changes, and the whole setup comes out with no holes left behind.
The divider system fits a cabinet that holds flat pans, lids and boards, which stack badly and slide everywhere. Sheets slide in from the top. Pushing one in sideways catches the rod ends and knocks the row over. A stack of cast iron lids bends a rod under its weight, so heavy items belong on a solid shelf. Check the rods once a month, since steam and vibration loosen the spring over time. Two minutes of tightening keeps the whole row standing straight.
Drawer Organizer Trays
Why This Works:
- Every utensil has a visible slot
- Compartments stop the drawer jumble
- Bamboo resists moisture better than plain wood
- A tray lifts out for a fast clean
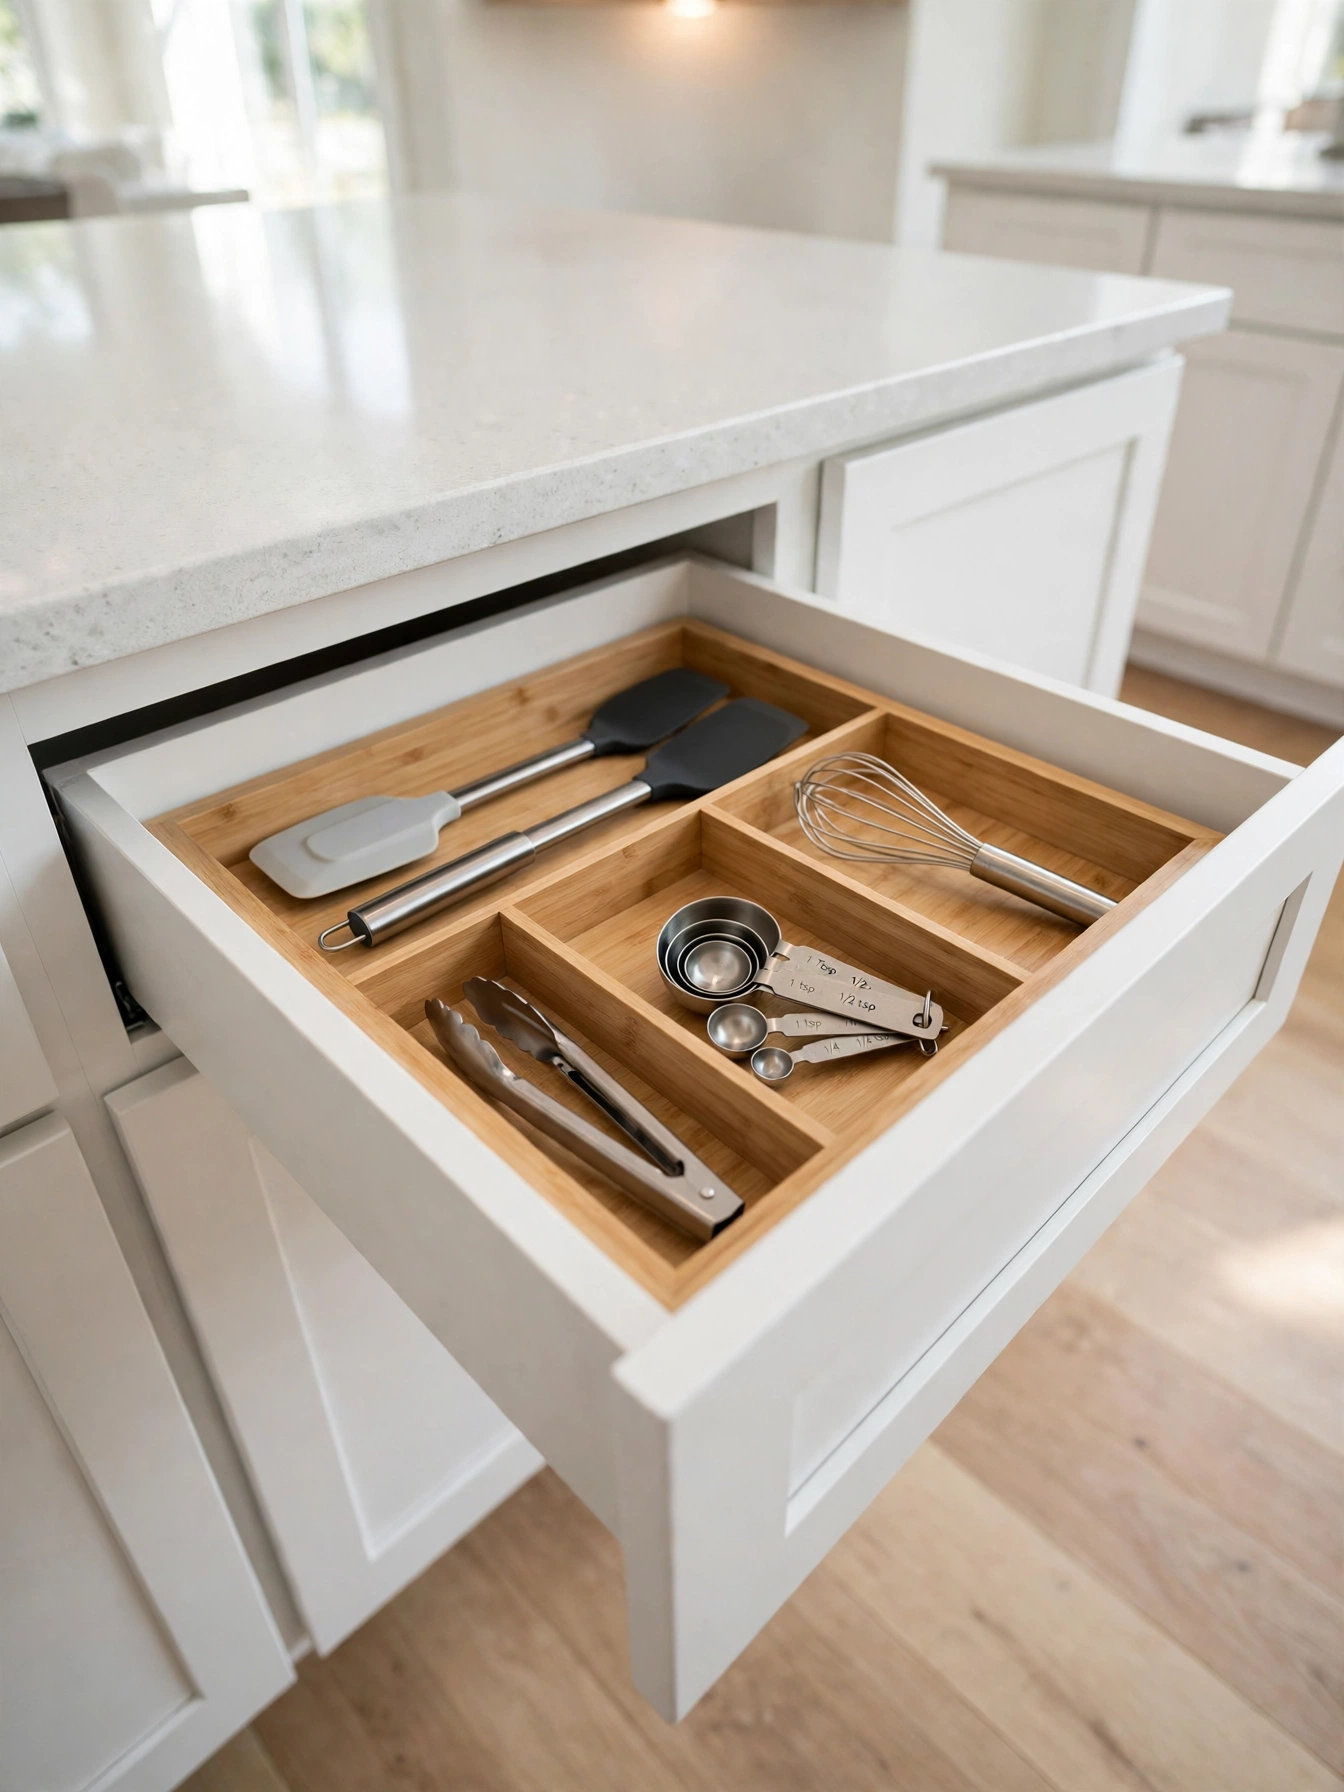
A utensil drawer without dividers turns into a tangle by the second week. A standard utensil drawer runs 18 inches wide and 21 inches deep, so a tray 12 inches by 18 inches leaves room at the back for long-handled tools. Choose compartments 3 inches wide for spatulas and tongs, with a depth of 2.5 inches so handles stay below the drawer rim. A 3 inch dead gap at the back collects loose items and defeats the purpose of the tray, and plastic trays under 1/8 inch thick crack at the corners within a year. Bamboo resists warping from steam, and the tray lifts out for a fast clean when crumbs collect underneath.
A tray changes the drawer from a jumble into a map, where the whisk is always in the same slot. Fixed compartments waste room when an odd-shaped gadget arrives, so leave one compartment empty for newcomers. Sort by use, so the tools for stirring sit together and the tools for serving sit together. A sliding tray needs a non-slip pad underneath, which stops the drift.
Pot Lid Rack
Why This Works:
- Lids stop sliding off stacked pots
- The door holds six lids in dead space
- Glass lids stay visible through the rack
- Pots stack lower without lids on top
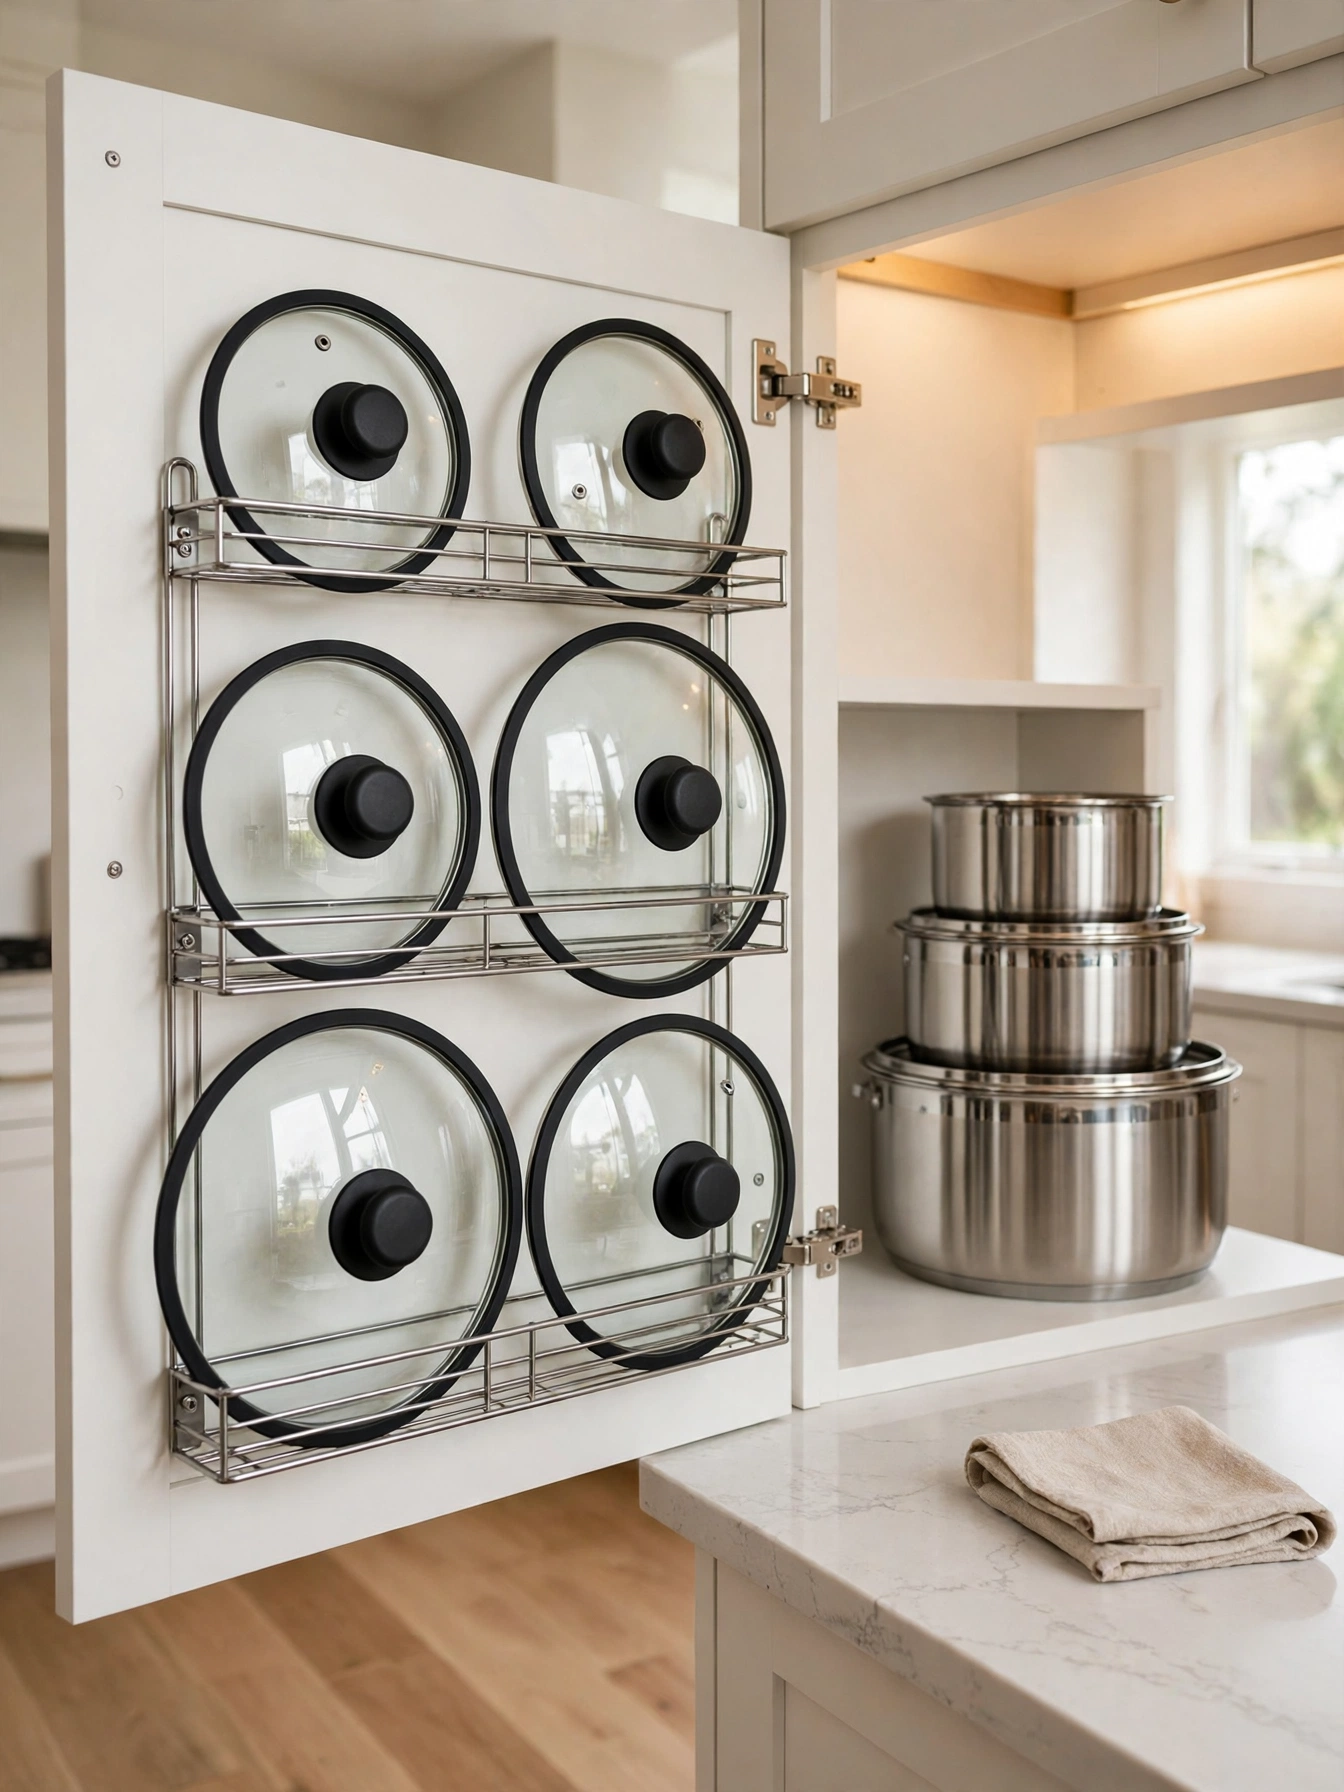
Lids stacked on pots slide off every time the cabinet opens. A door-mounted rack holds six lids on a standard 24 inch cabinet door, using 1/2 inch screws driven into a door 3/4 inch thick. Space the rack bars 3 inches apart, so a 12 inch lid and a 10 inch lid sit in separate slots without clashing. Avoid adhesive racks on painted doors, because kitchen heat loosens the glue and the rack drops within months, and avoid mounting the rack on a door that opens against the dishwasher, since the lids swing into the open dishwasher door. Six lids on the door clear a whole shelf inside the cabinet for the pots themselves.
A cabinet near the stove is the best spot for the rack, since lids are needed mid-cook. Six lids add several pounds to the door, so check the hinge screws twice a year and tighten any that loosen. Heaviest lids belong near the hinge side, where the door carries the weight best. Lids on the door free the pots to stack neatly inside, and the cabinet stops rattling every time it opens.
Magnetic Spice Jars
Why This Works:
- Spices move off the counter entirely
- Labels face out for a fast grab
- Small jars suit the spices used weekly
- The fridge side becomes useful storage
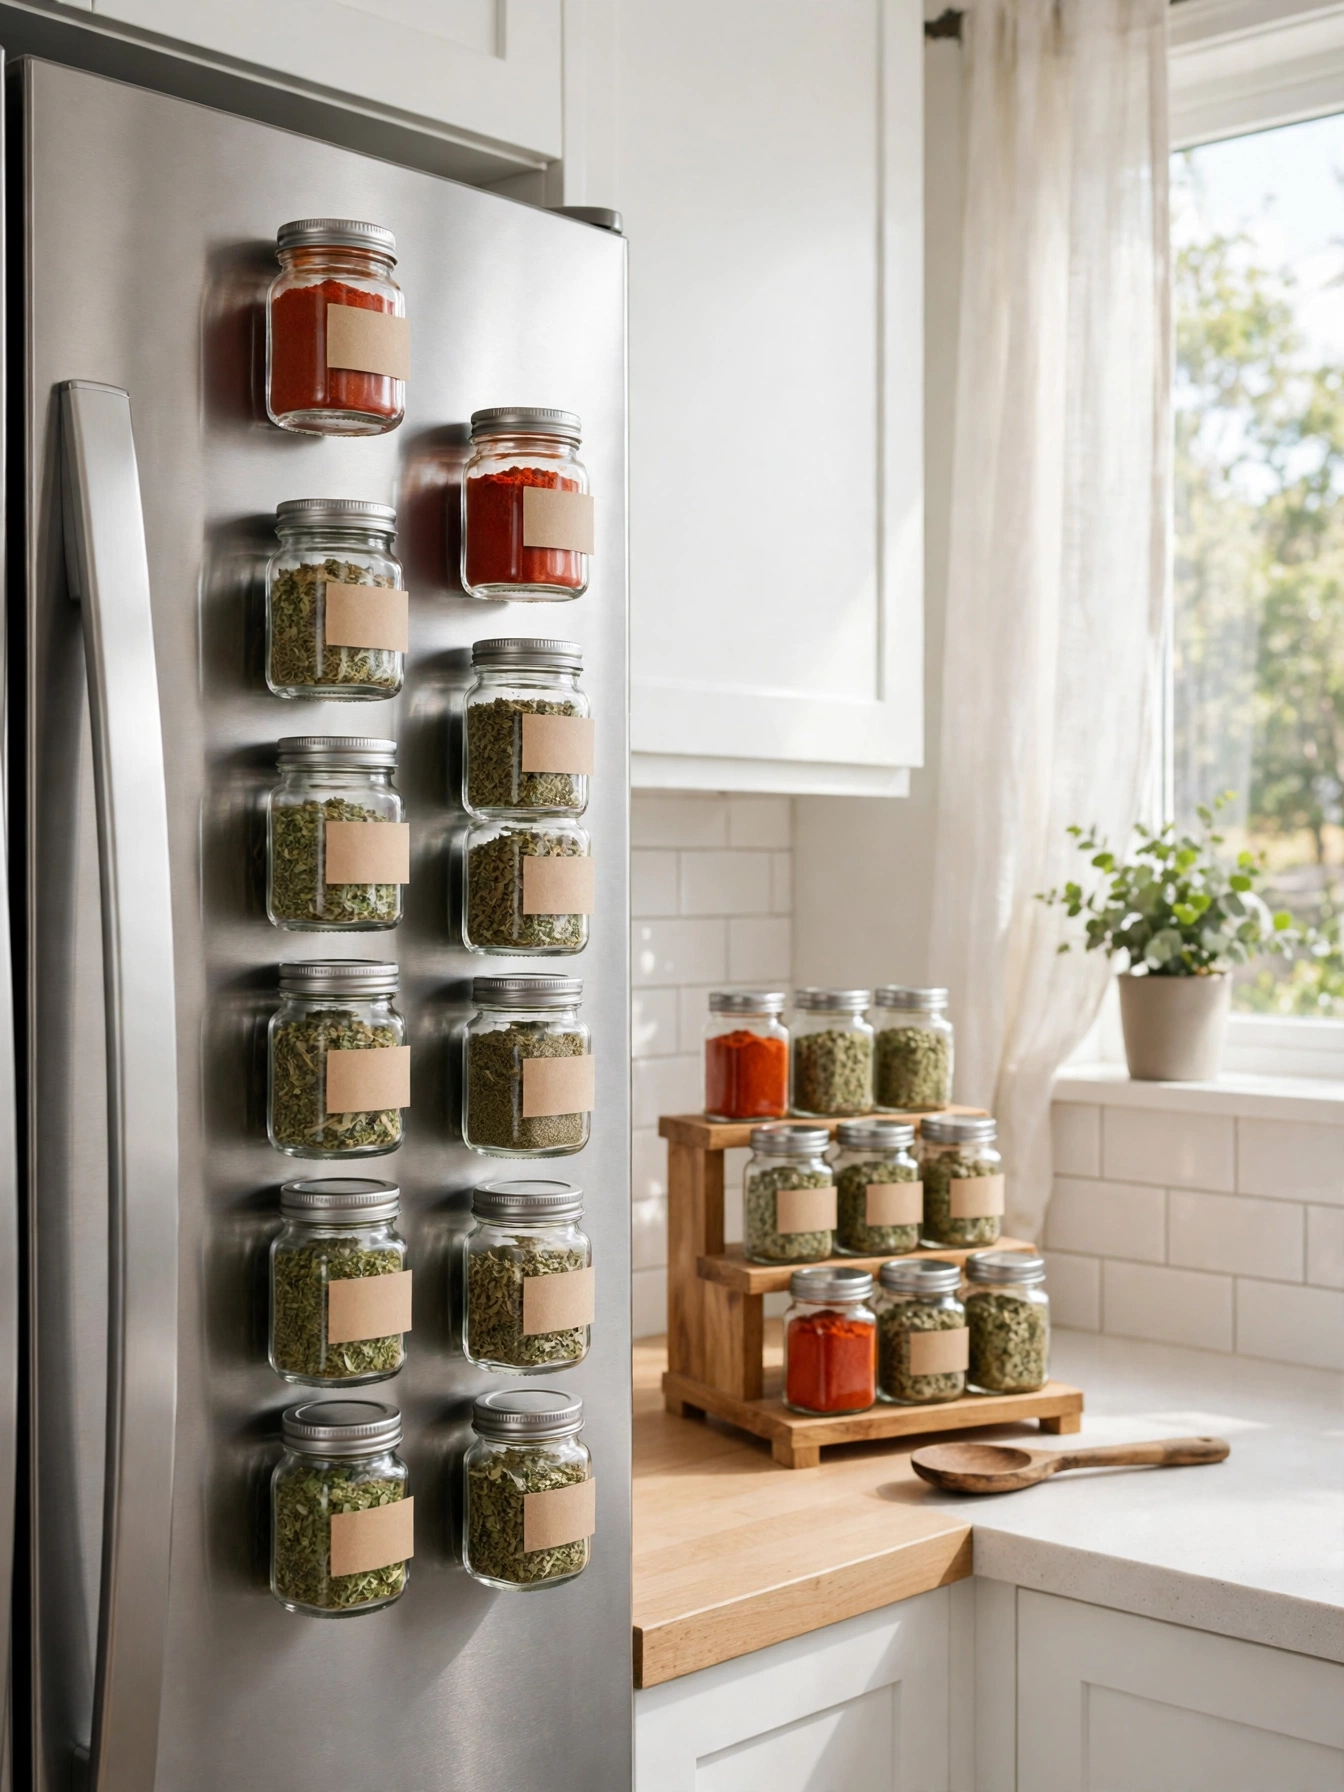
Spices get used when the label faces out and the jar sits at eye level. Jars 2.5 inches across hold 4 ounces of spice and sit on magnets rated for 10 pounds each, so a full jar hangs steady. Mount them on the fridge side or on a steel sheet 12 inches by 18 inches fixed to the wall, and keep the sheet 18 inches above the counter so the jars sit at eye level. Heat and steam above the stove dull the flavor within weeks, and jars over 3 inches wide knock each other off a crowded fridge side when the door closes. The magnets hold through a full jar, and a jar slides off the sheet with one hand when the cooking starts.
Small jars need refilling often. The refill takes a minute, and the jars stay fresh because the spice turns over faster. The most-used spices sit at eye level and the rare ones higher, so the daily grab never needs a stretch. Label the lid and the jar, because a jar turned sideways loses its label in a second. A set of 12 jars covers the weekly spices for most kitchens.
Under-Shelf Baskets
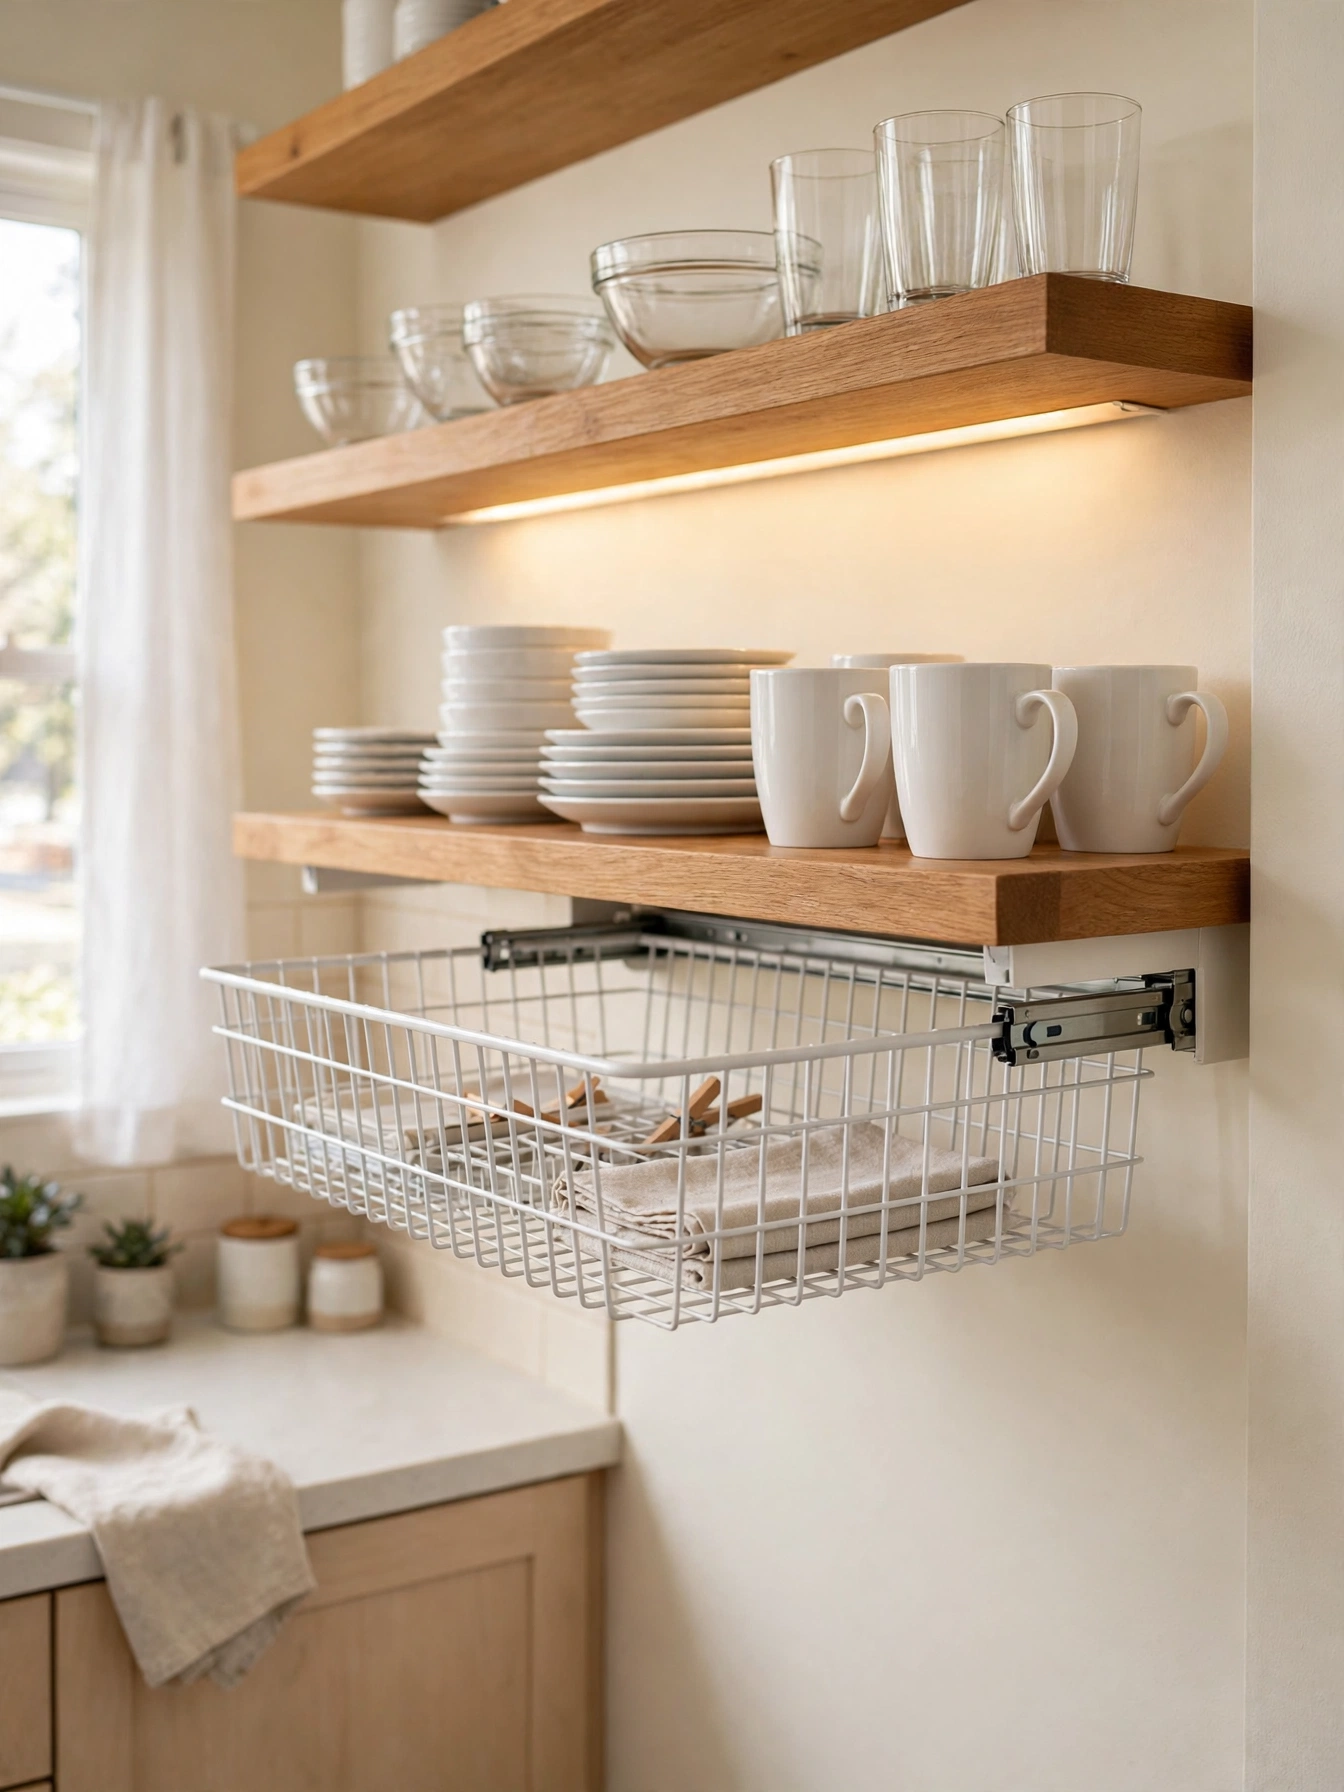
Why This Works:
- Dead air under a shelf becomes storage
- Mugs hang in reach without a new cabinet
- Wire arms grip without screws
- The basket slides out for a fast clean
The air under a shelf usually sits empty as mugs pile on the counter. A wire basket 12 inches by 10 inches slides under a shelf 12 inches deep, where the coated arms grip a shelf up to 1 inch thick. Load it with mugs and small plates, and keep the total under 5 pounds, since heavier loads bend the arms and the basket starts to sag. A 2 inch gap between the basket base and the items below lets a mug lift out without catching the shelf beneath. Canned goods pull the arms off the shelf edge, and a shelf under 1/2 inch thick gives the arms no edge to grip. The basket comes off the shelf arms with one lift, so the whole row moves to the sink for washing.
A tall gap between shelves is where the basket belongs, since the upper half of that gap sits empty. Headroom is the cost: the basket hangs 4 inches below the shelf, so tall items beneath it no longer fit, and the answer is to move tall items to another shelf. Dust settles on the coating and shows on white wire first, so give the wire a monthly wipe. Mugs move off the counter once the basket hangs, and the cabinet gains a whole extra row.
Rolling Pantry Cart
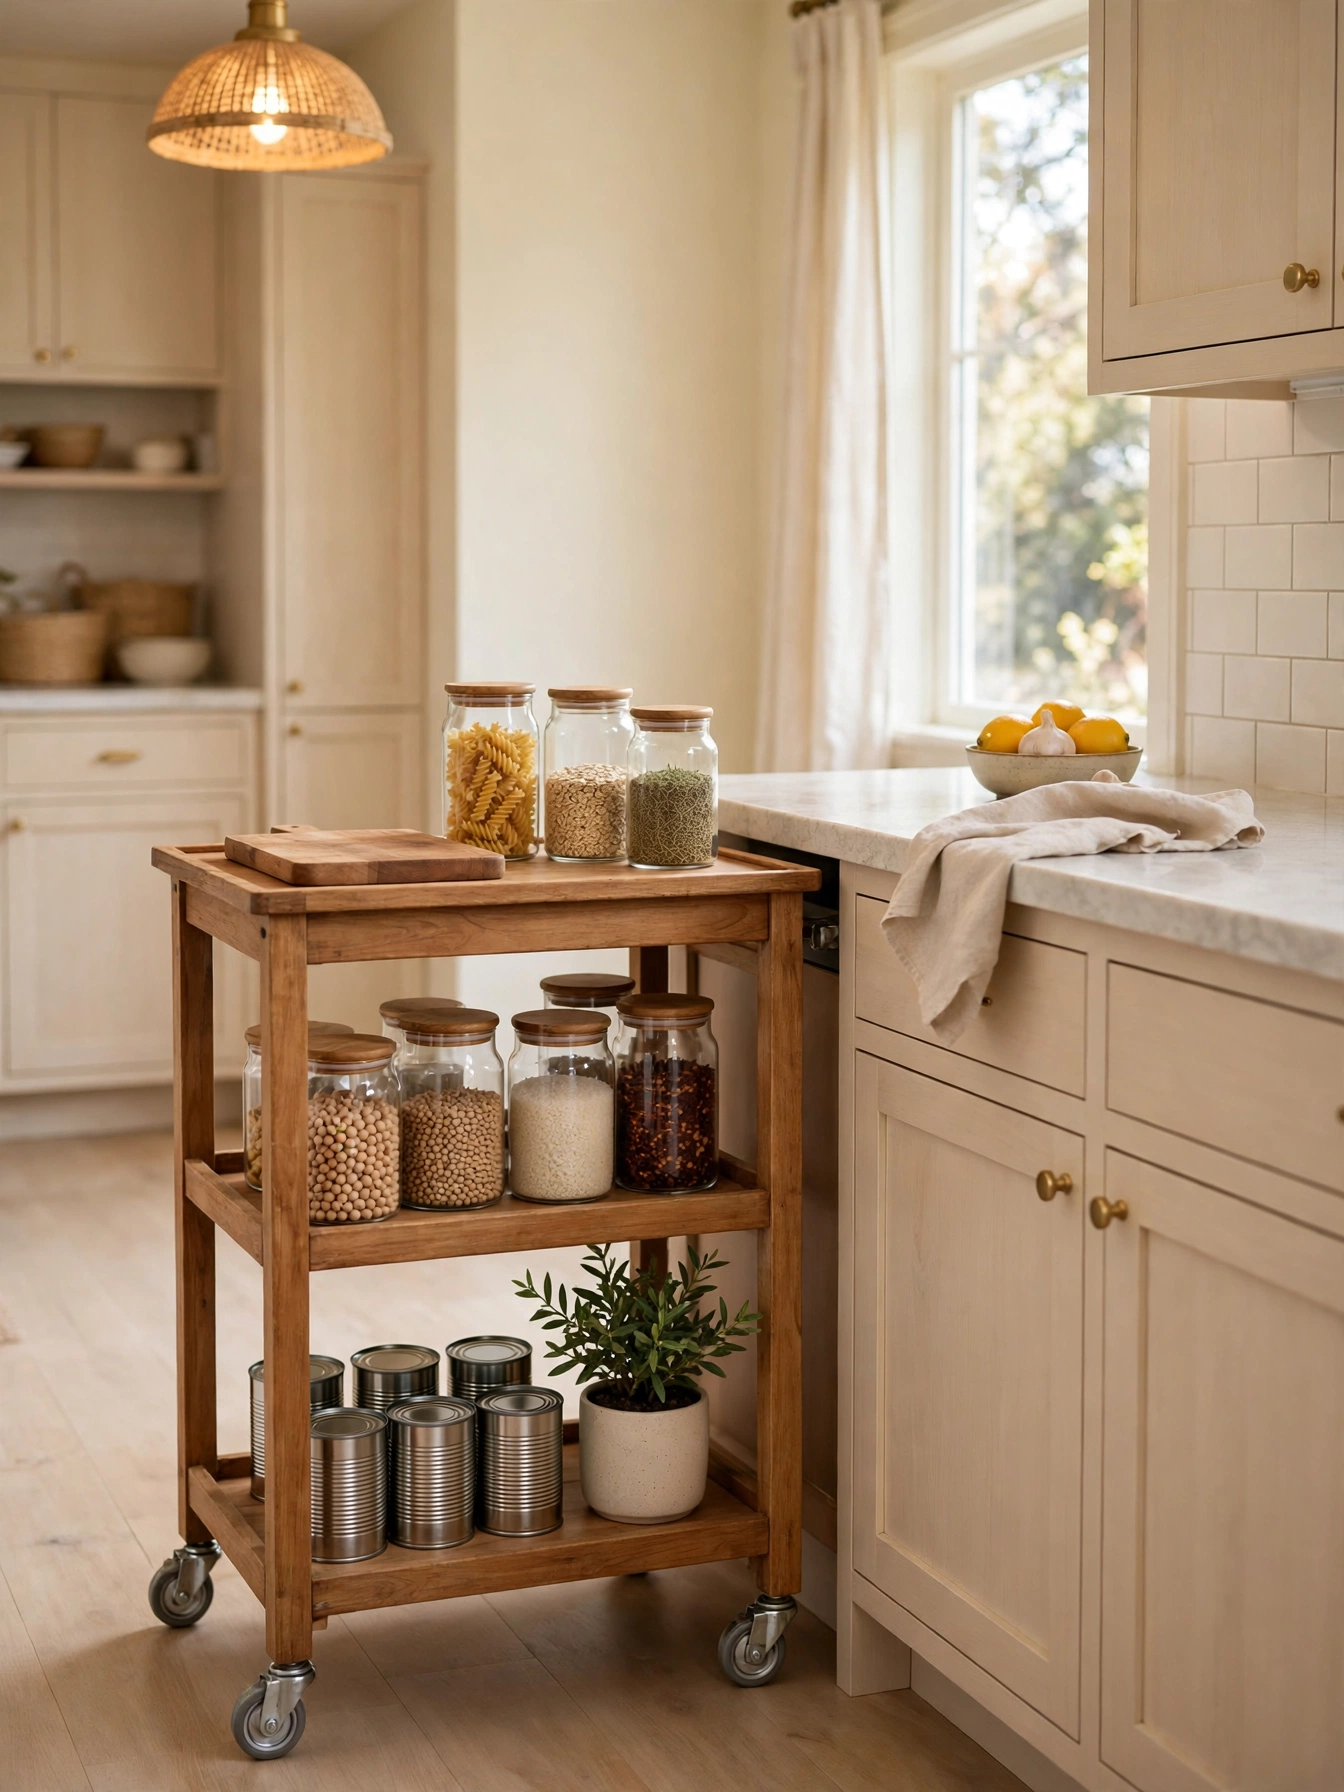
Why This Works:
- The cart fills a narrow gap by the fridge
- Three shelves hold a week of pantry goods
- Casters let the cart roll where it is needed
- Locking wheels keep it still while cooking
The gap beside the fridge collects dust and nothing else, because nothing made fits it. A cart 18 inches wide, 24 inches deep and 36 inches high fits that gap, and the casters should rate for 100 pounds total so a loaded cart rolls straight. The National Kitchen and Bath Association sets 42 inches for a one-cook work aisle, so keep that much walkway clear when the cart sits out. A cart over 20 inches wide blocks the 36 inch minimum for one cook passing in a galley kitchen and turns the room into a squeeze. The cart rolls back into its gap after dinner, and the kitchen floor stays clear for the morning.
Locking casters hold the cart steady on a flat floor, and the cart rolls to the stove during cooking. A cart rolls when bumped, so lock two casters before loading it and keep heavy cans on the bottom shelf. The top shelf holds daily items at 36 inches high, which matches the counter height and lets the cart double as extra prep space. With a home gap of its own, the cart stops drifting around the kitchen.
Hook Rail Station
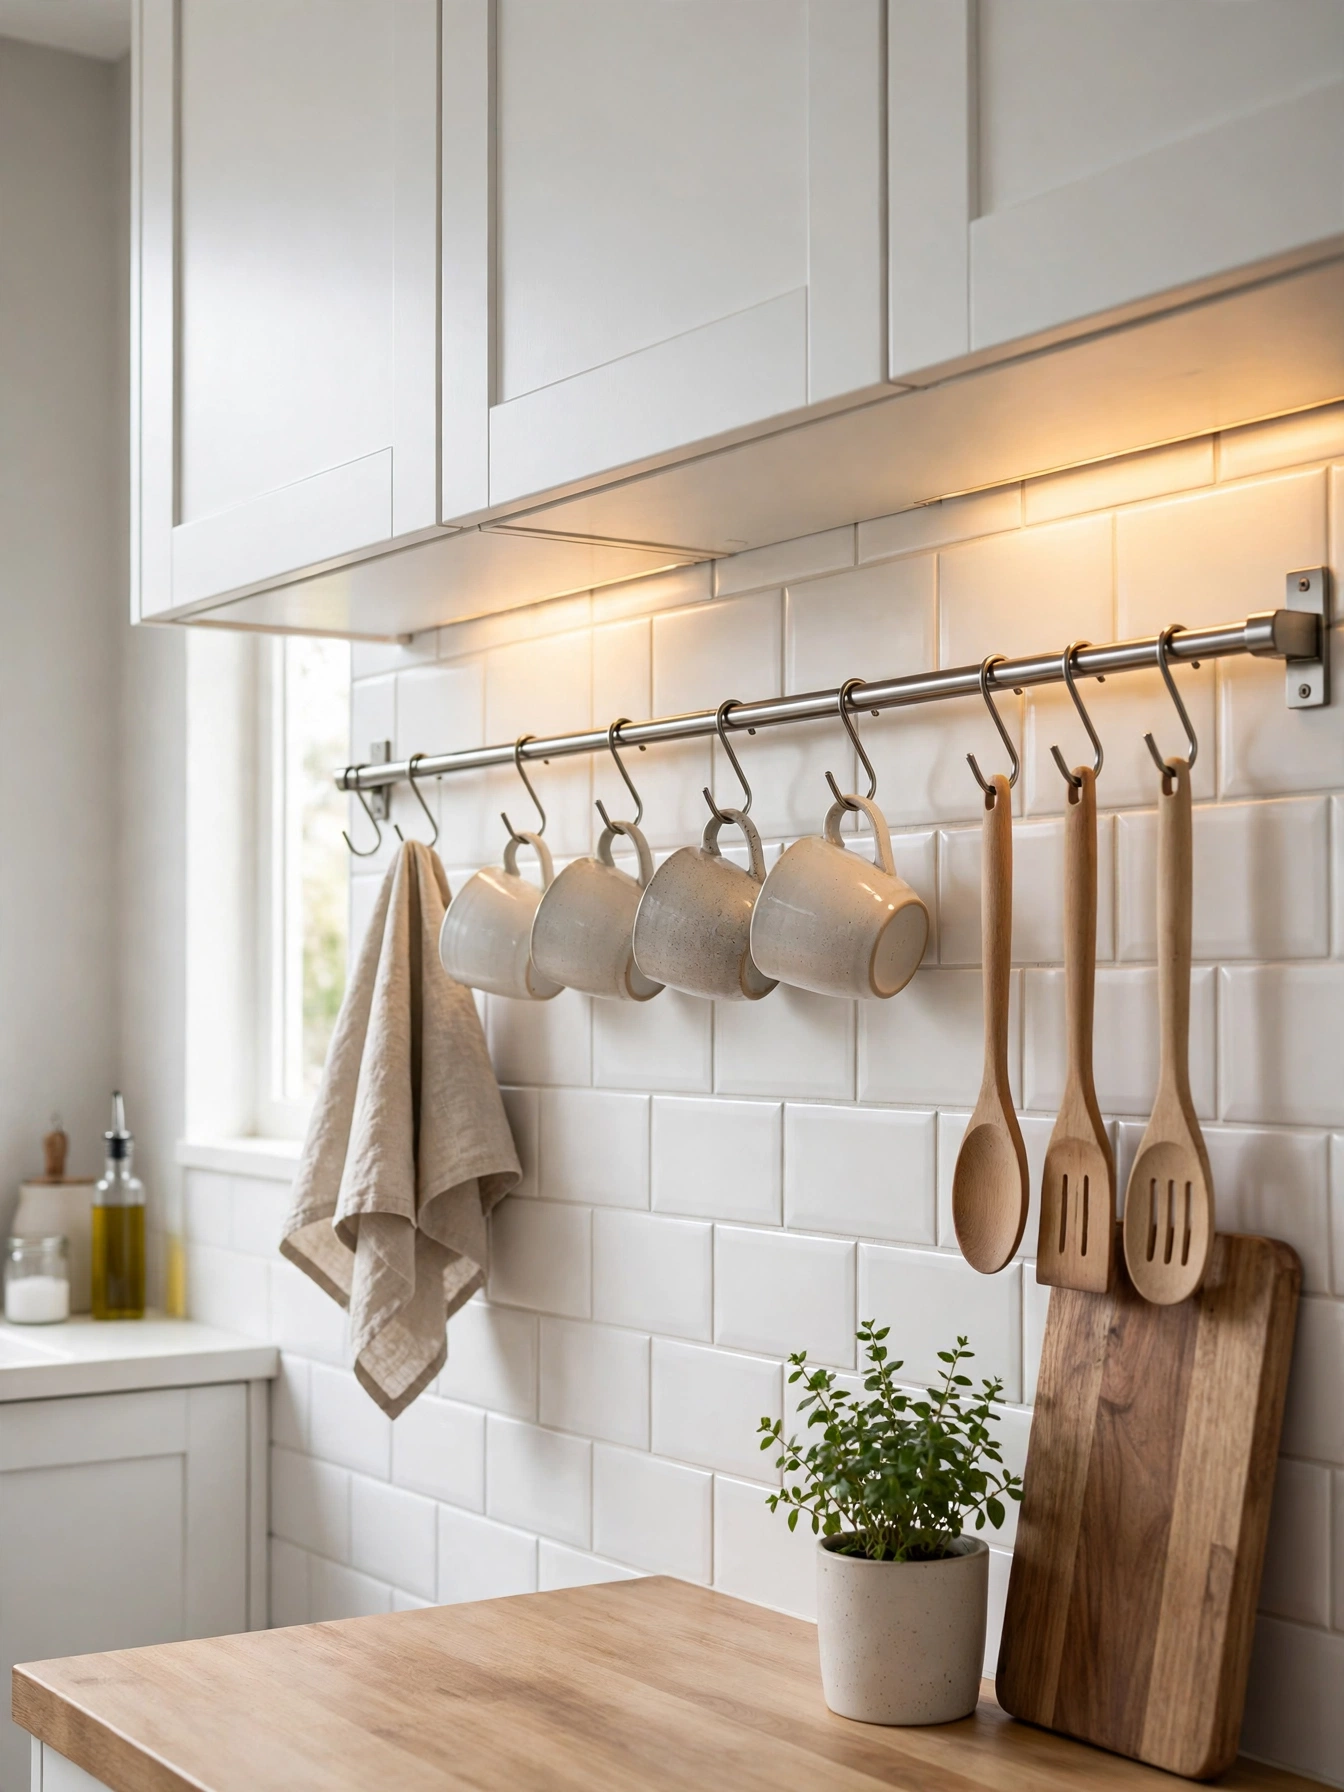
Why This Works:
- Mugs and tools hang where hands reach
- Hooks space items so nothing clinks
- The rail uses wall space, not counter
- S-hooks move when the layout changes
Mugs and ladles hang on the wall between sink and stove, where hands already reach. A 36 inch rail mounted 18 inches above the countertop on the backsplash holds hooks spaced 6 inches apart, so mugs never clink together. Use S-hooks 2 inches deep for mugs and 3 inch hooks for ladles, and fix the rail with screws into studs 16 inches apart, since a loaded rail can carry 15 pounds or more. Cast iron pulls the screws out of the tile, and grease coats everything hanging above the stove within a week. A towel hangs on the end hook, right where wet hands reach for it after washing.
Open hanging collects grease near the stove, so wipe the rail and hooks weekly with a damp cloth. The rail belongs on the stretch of wall between the sink and the stove, where mugs and towels are needed most. Daily mugs sit at the center and rarely used tools at the ends, so the grab is always short. After a month, the rail feels like part of the kitchen.
Baking Sheet Organizer
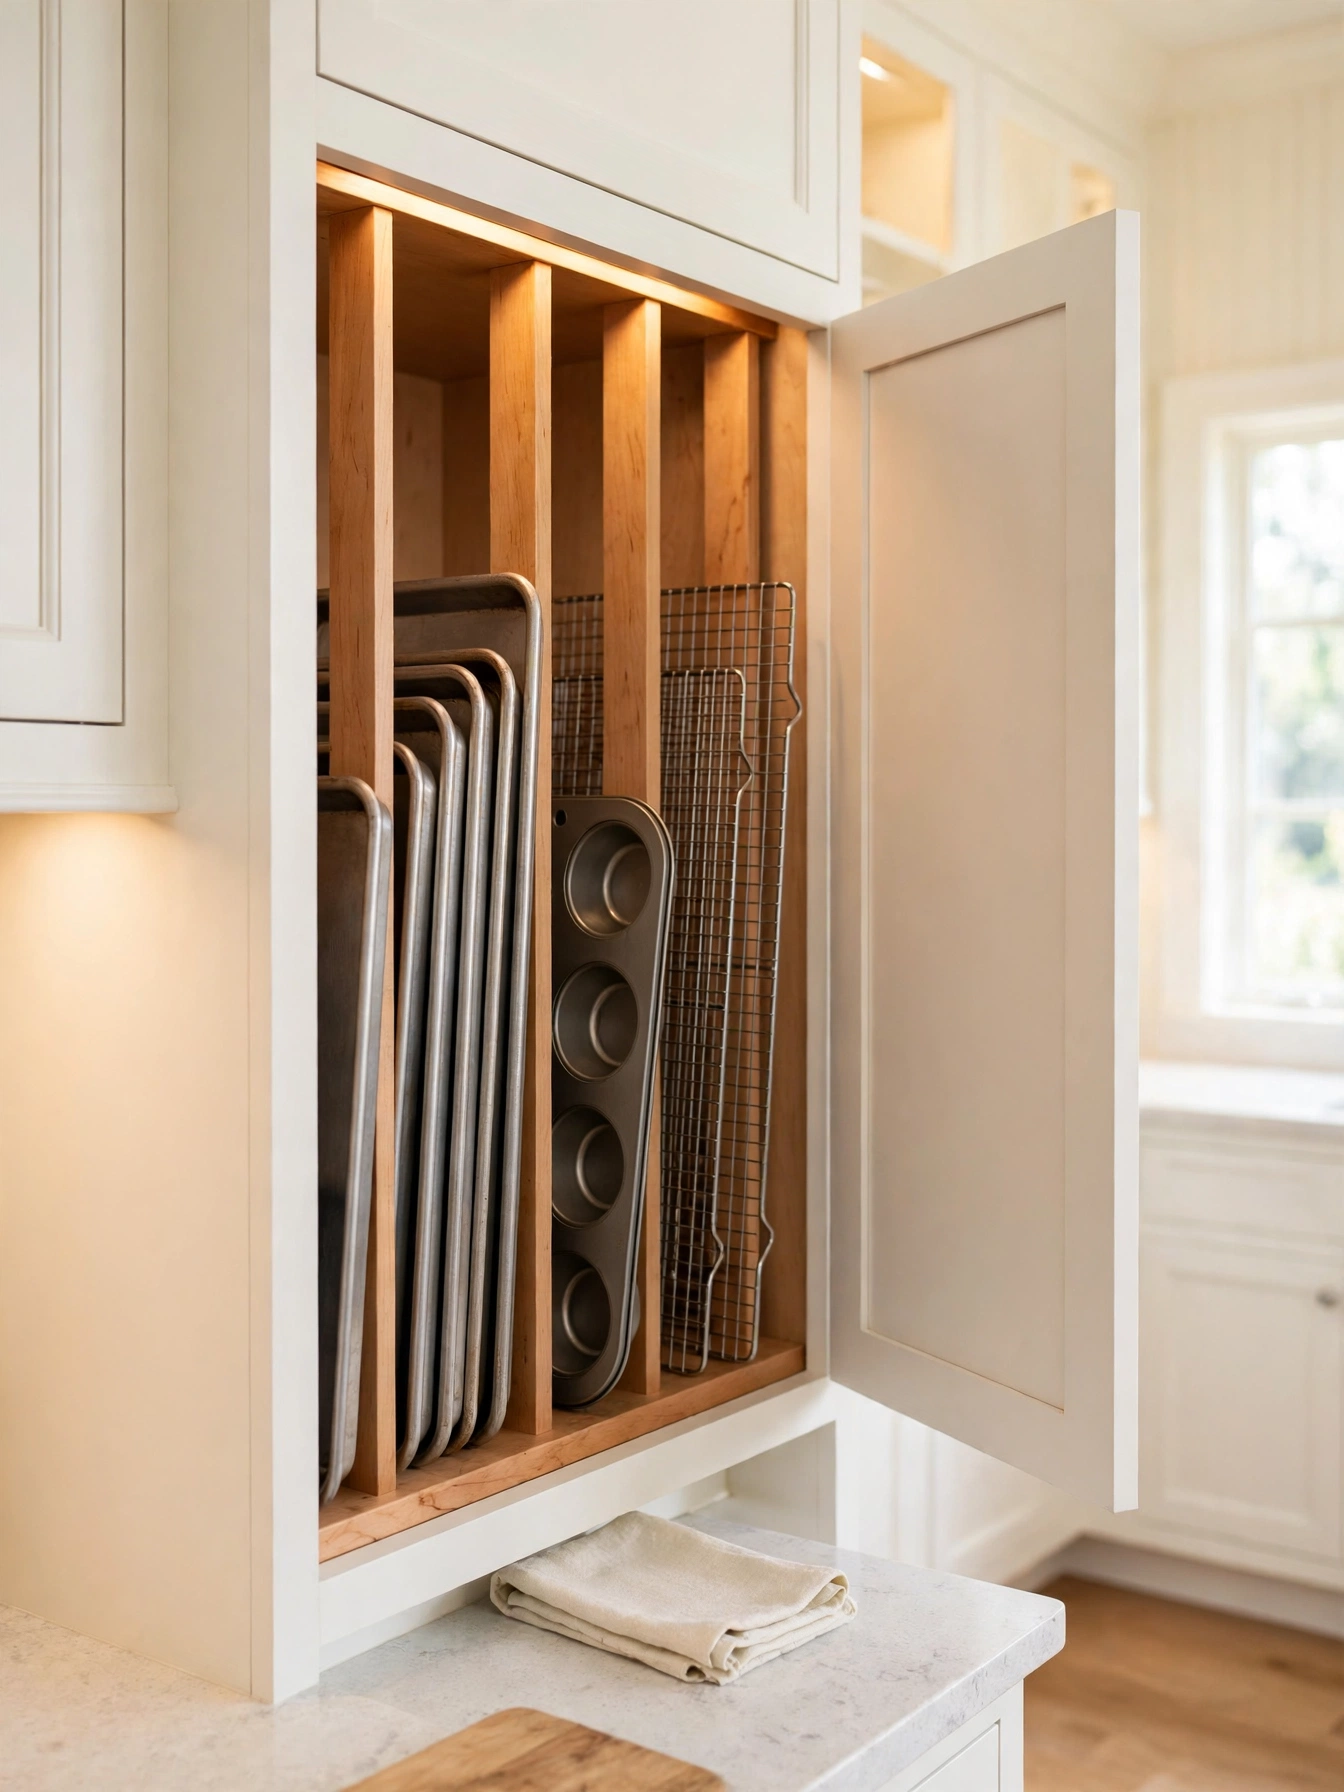
Why This Works:
- Sheets file upright like books
- One pull grabs the exact tray
- Dividers stop the sliding pile
- A narrow cabinet holds the whole flat-things set
A baking sheet filed upright comes out with one pull, like a book off a shelf. Dividers 14 inches tall hold a standard 18 by 13 inch baking sheet upright with room to lift it out. Space the slots 1.5 inches wide, so a sheet and its cooling rack share one slot without jamming, and fit the divider set into a 12 inch wide cabinet beside the oven. A fifth sheet in one slot wedges the pile tight, and the bottom sheet will not slide out; dividers under 12 inches tall let tall sheets topple forward. A damp cloth through each slot lifts the flour dust, and the dividers stay clean for the next bake.
Tall dividers leave the top 6 inches of a deep cabinet empty. The empty space above the dividers holds a folded dish towel, out of the way of the sheets. The largest sheet sits at the back and the daily tray at the front, so the most-used item is always the easiest pull. Muffin trays and cutting boards fit the same slots, which turns one narrow cabinet into the flat-things station. Sheets standing upright quiet the cabinet, which stops sounding like a drum every time it opens.
Vinegar Steam Clean
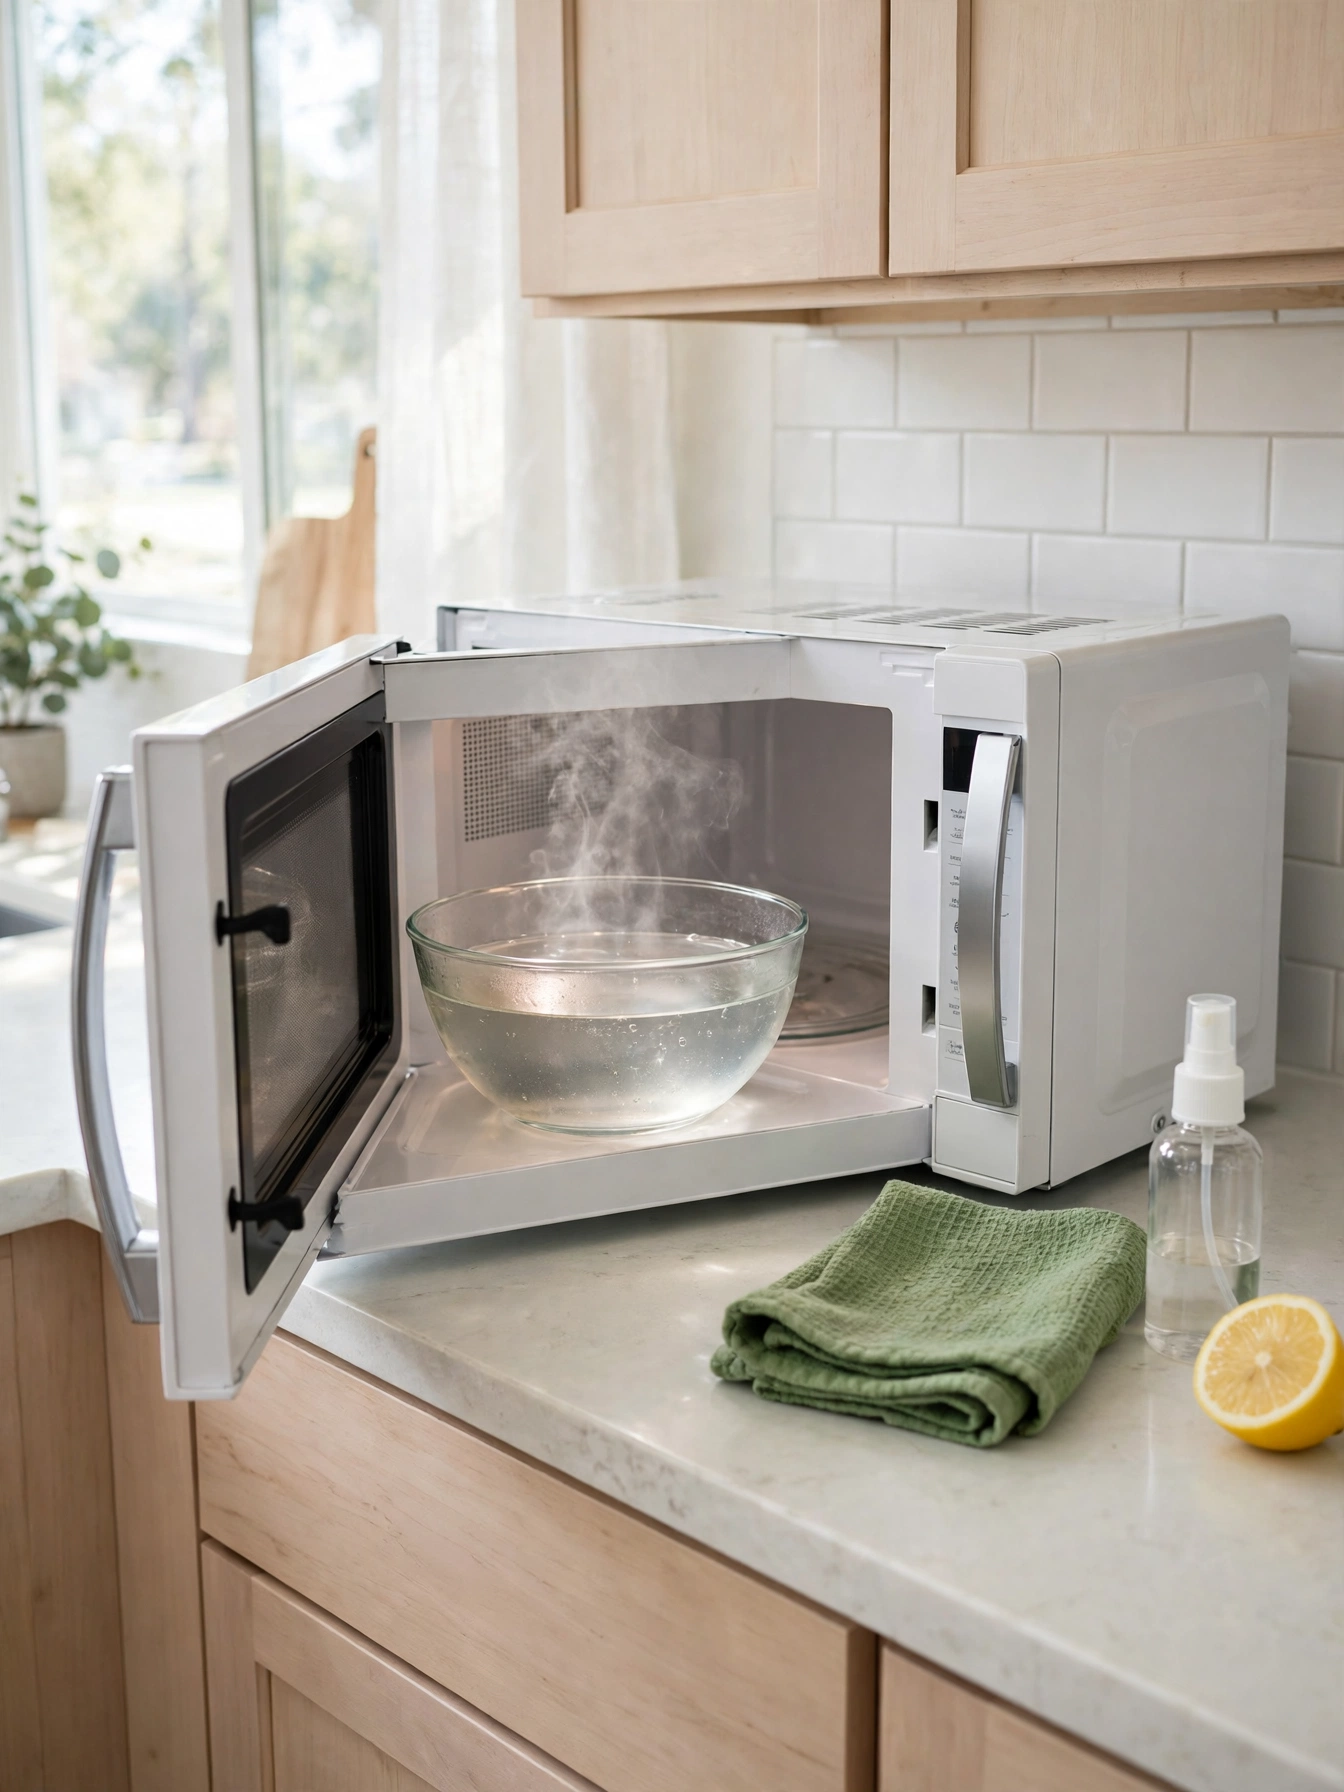
Why This Works:
- Steam softens dried food in minutes
- Vinegar cuts grease without chemicals
- One bowl cleans the whole interior
- The wipe takes less than a minute
Steam does the scrubbing inside a microwave, loosening dried food across the whole interior. A microwave-safe bowl with a 4 cup capacity takes 1 cup of white vinegar and 1 cup of water, heated on high for 5 minutes. Wait 3 minutes after the beep, since the steam keeps working as the bowl cools, then wipe the softened film with one damp cloth. The acid in vinegar etches marble and limestone within minutes. A dry bowl can crack under the heat, so the bowl always heats with water inside. The bowl goes straight into the dishwasher after, and the cloth rinses clean under the tap.
The vinegar smell lingers for about 30 minutes, so open a window before starting. The method works best on a microwave cleaned weekly, where the film is thin. A microwave ignored for months needs two rounds and a second wipe. Add a lemon half to the bowl for a fresher scent, and the citric acid helps the vinegar cut the grease. When the steam routine becomes weekly, the microwave never reaches the stage where cleaning feels like a project.
Storage Kitchen Hacks
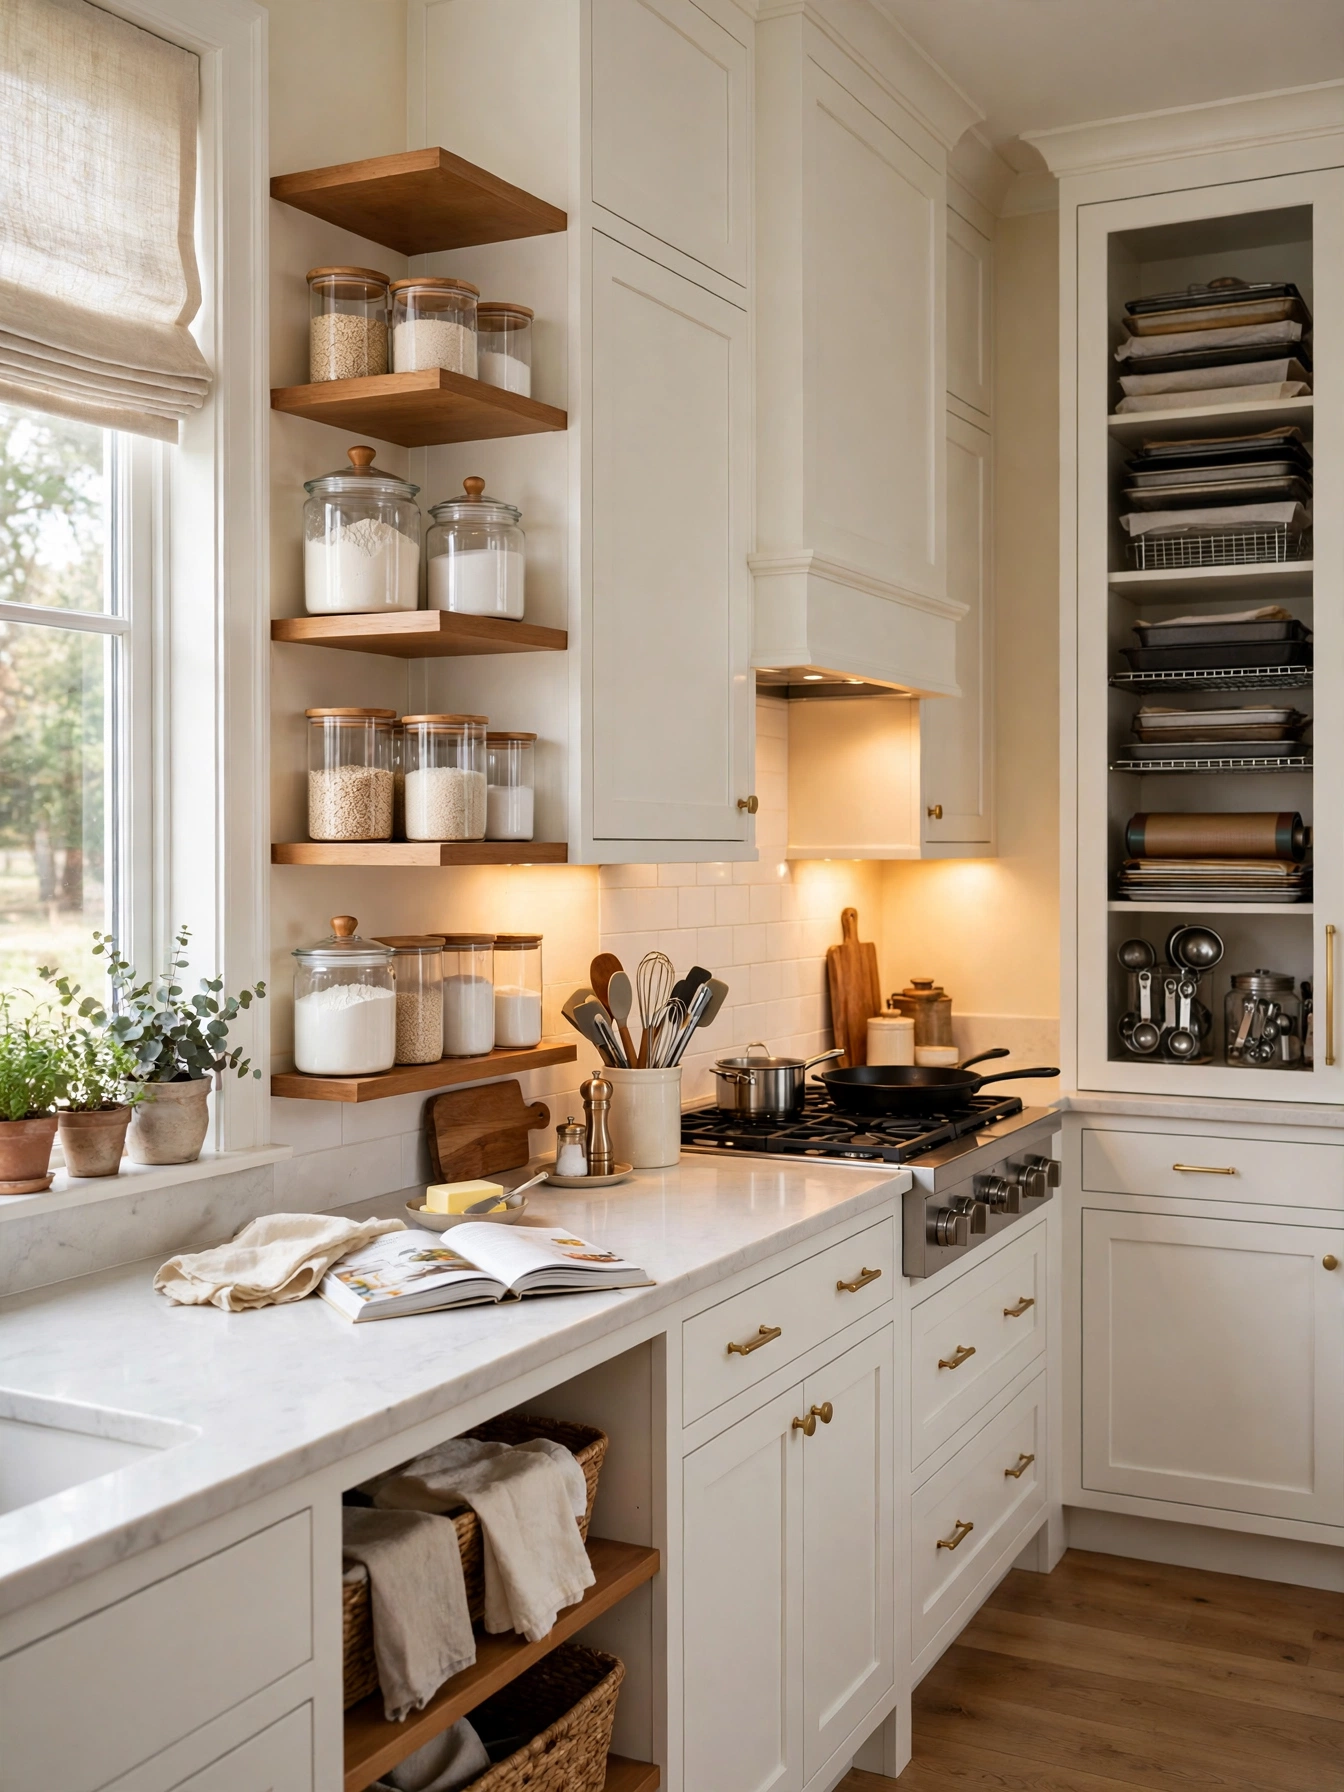
Why This Works:
- Tools live where the task happens
- Zones cut steps during cooking
- Containers show levels at a glance
- One cabinet holds the whole baking set
Tools sorted by type live scattered across the kitchen, and dinner prep visits every cabinet. Grouping tools by task keeps everyday items within 24 inches of the stove, so the cook never crosses the room mid-recipe. Store flour in a 6 quart container and sugar in a 4 quart container, with 14 inches between shelves so both fit without stacking. Daily items stay below 60 inches high, since anything above that needs a step stool and slows the cook down. Baking gear in three different cabinets turns the rolling pin into a hunt, and a deep container over 12 inches wide overhangs a 12 inch shelf and blocks the door. The baking set lives in one cabinet now, and the flour and sugar sit on the shelf right beside it.
Once the zones settle, everyone finds the same tools in the same place, and the walking between cabinets stops. The first week brings a few wrong-cabinet moments, and a small label on each zone for the first month solves it. Move anything unused for 6 months to a higher shelf, so the prime zone stays for daily tools only. When the zones settle, cooking feels shorter because the walking stops.
Board Care Routine
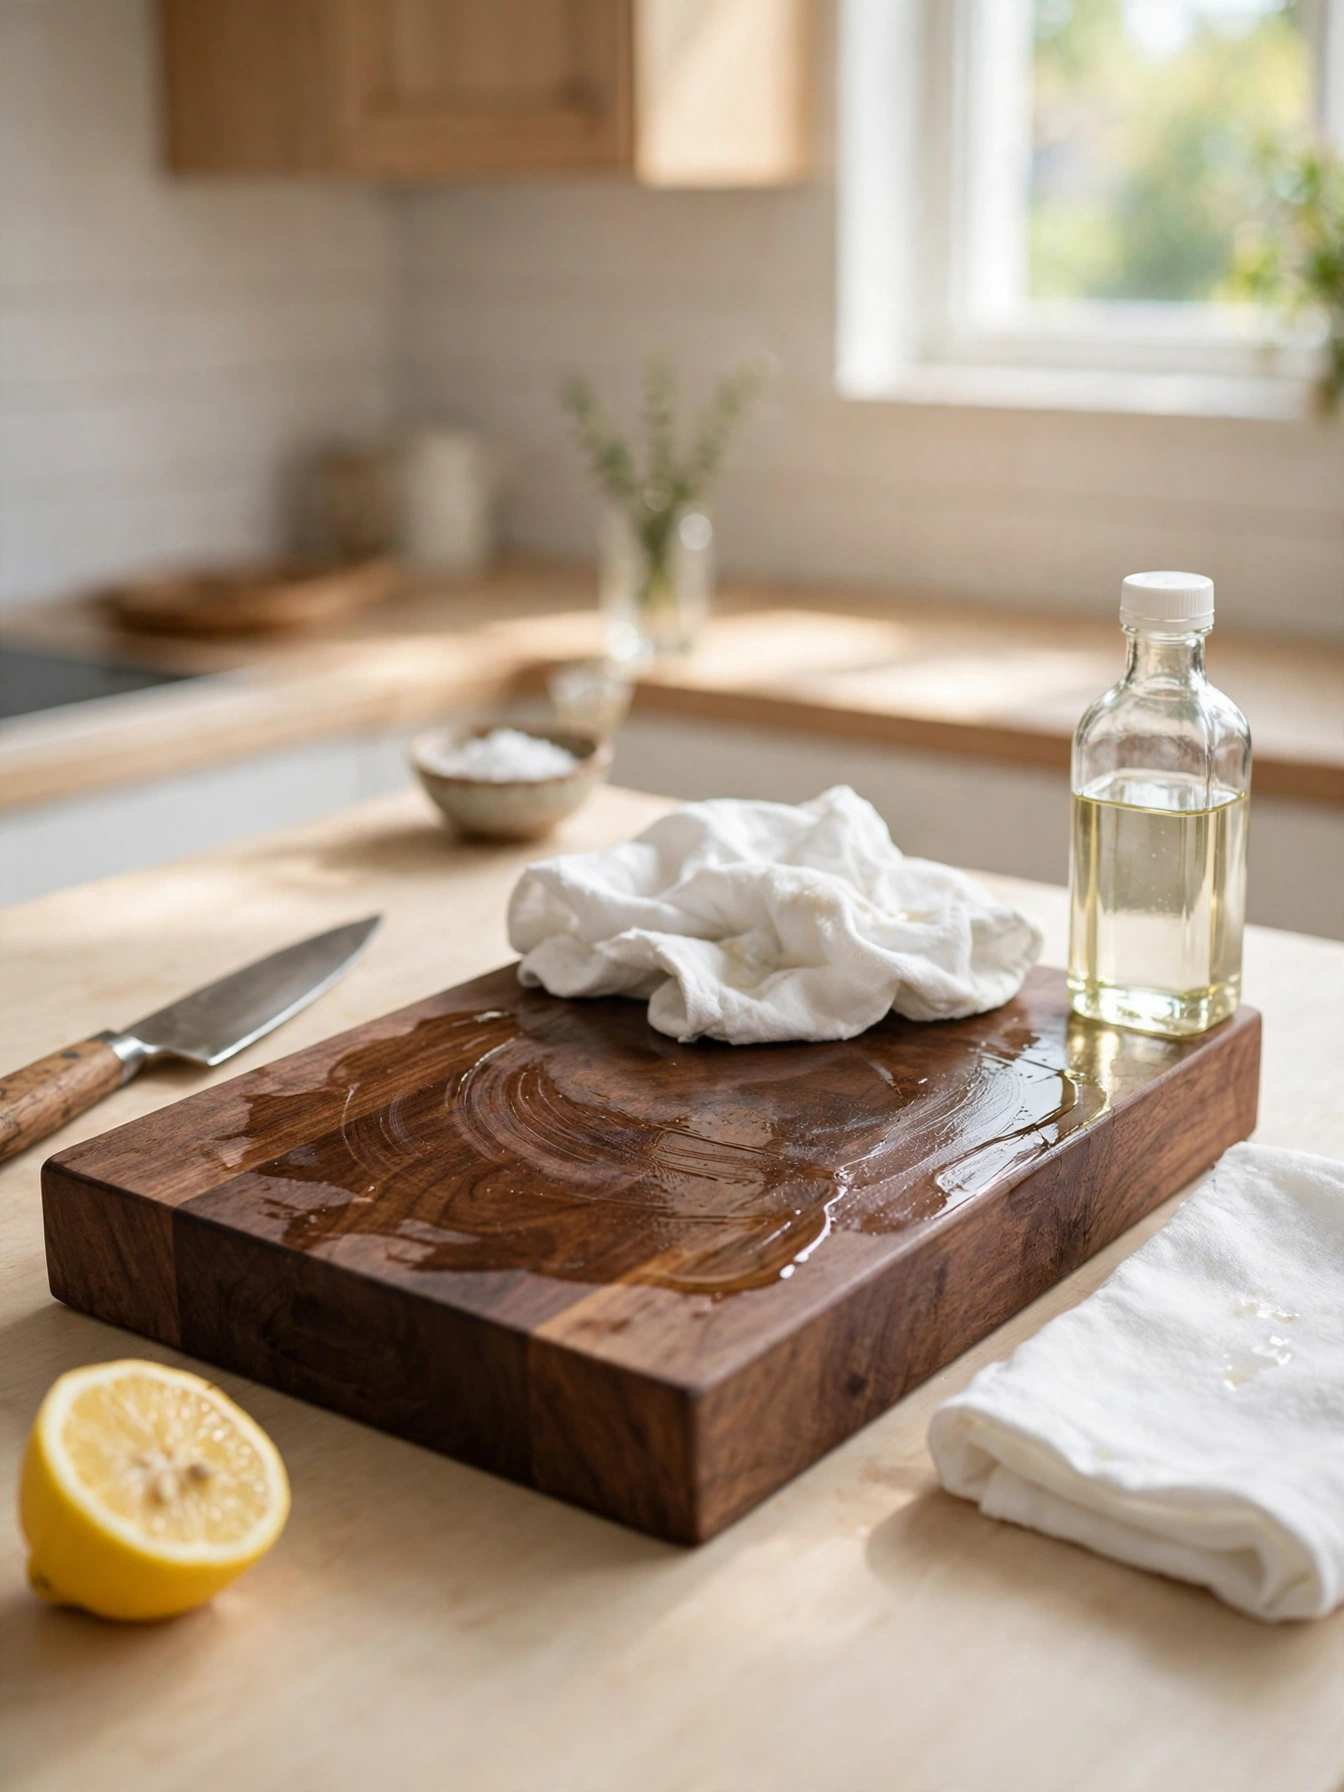
Why This Works:
- Oil seals the grain against water
- A cared board lasts for years
- Monthly oiling takes ten minutes
- The wood stays rich instead of gray
A board 18 inches by 12 inches and 1.5 inches thick takes 2 tablespoons of food-grade mineral oil, rubbed in with the grain until the surface stops drinking it in. Let the oil soak for 4 hours, then wipe off the excess with a dry cloth, and repeat the routine once a month for a board used daily. A wood board left soaking in the sink swells at the grain and cracks as it dries, and vegetable oil turns rancid within weeks and leaves a stale smell. The oil bottle lives beside the sink, and the cloth hangs on the hook right next to it.
Oiling takes 10 minutes a month, and the board keeps its color for years when the oil goes on monthly. The board sits oiled for 4 hours, so oil it after dinner and it is ready by breakfast. Plastic boards need no oiling at all. They scar faster, and the cuts harbor bacteria sooner. A board that looks gray and dry is asking for oil, and one coat usually brings the color back in an evening.
Splatter Screen Habit
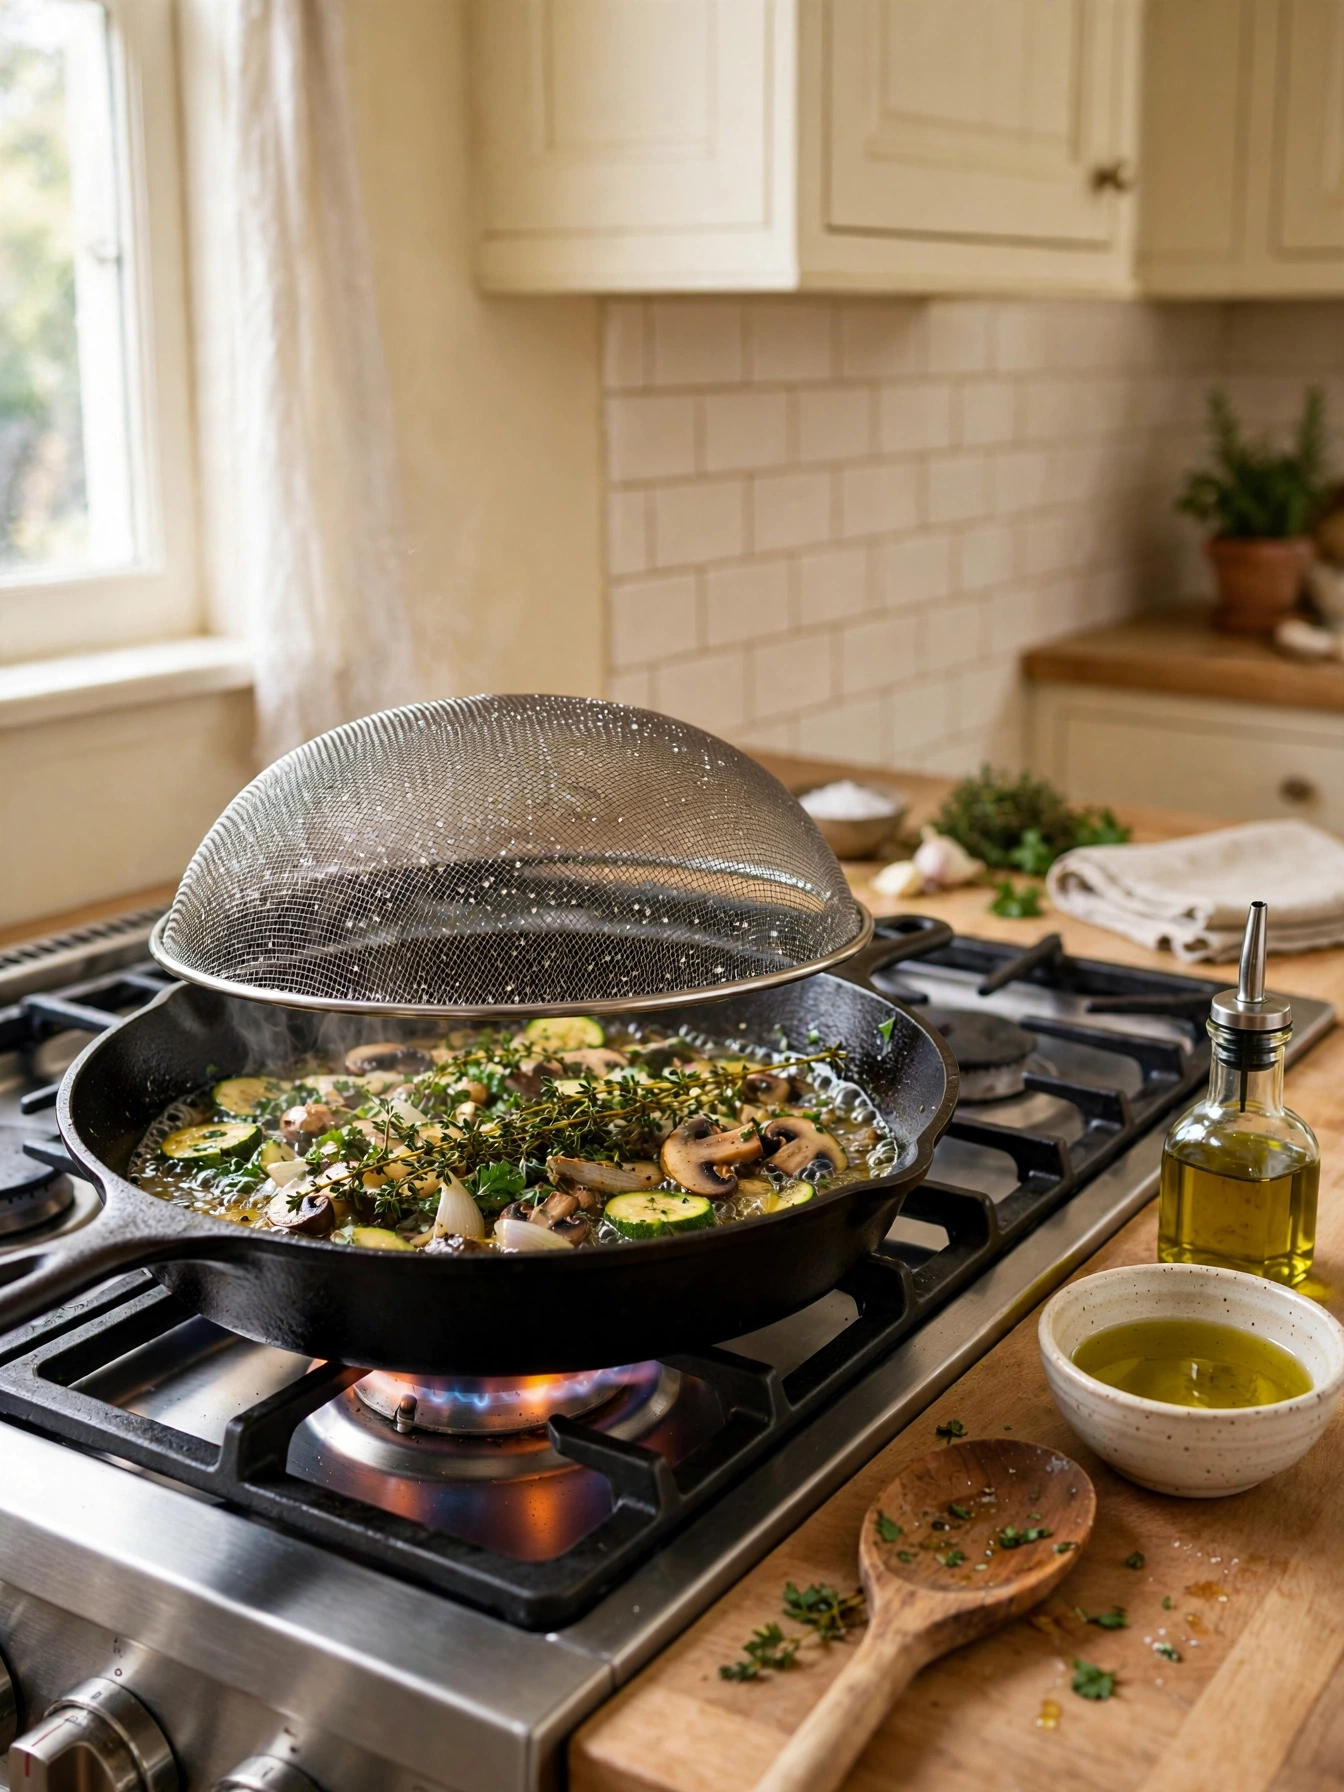
Why This Works:
- The mesh stops oil pops cold
- The stovetop stays clean during frying
- Steam escapes so food stays crisp
- A screen stores flat in a drawer
Frying without a screen paints the stovetop with oil in under a minute. A 13 inch mesh screen fits a 12 inch skillet with a half inch of overlap on each side, and the mesh runs about 18 wires per inch, fine enough to catch oil and open enough to let steam out. Hold the screen by its 6 inch handle and set it on the pan the moment the oil starts to shimmer, before the first pop. Pressing the screen down onto the food traps steam and softens the crust, and a screen short of the pan edge sprays oil straight onto the stove through the gap at the edge. The screen lifts off with one hand when the food comes out, and the mesh rinses clean under the tap.
The screen clogs with grease after a few uses, so soak it for 10 minutes in hot soapy water and brush it clean. Hang the screen on a hook inside a cabinet door, where it stays flat and within reach, and keep it away from the dishwasher top rack, since the mesh bends under a heavy load. A quick rinse after each use keeps the mesh open and the next fry just as clean. A screen habit means the stovetop wipes clean in seconds after frying.
Coffee Station Setup
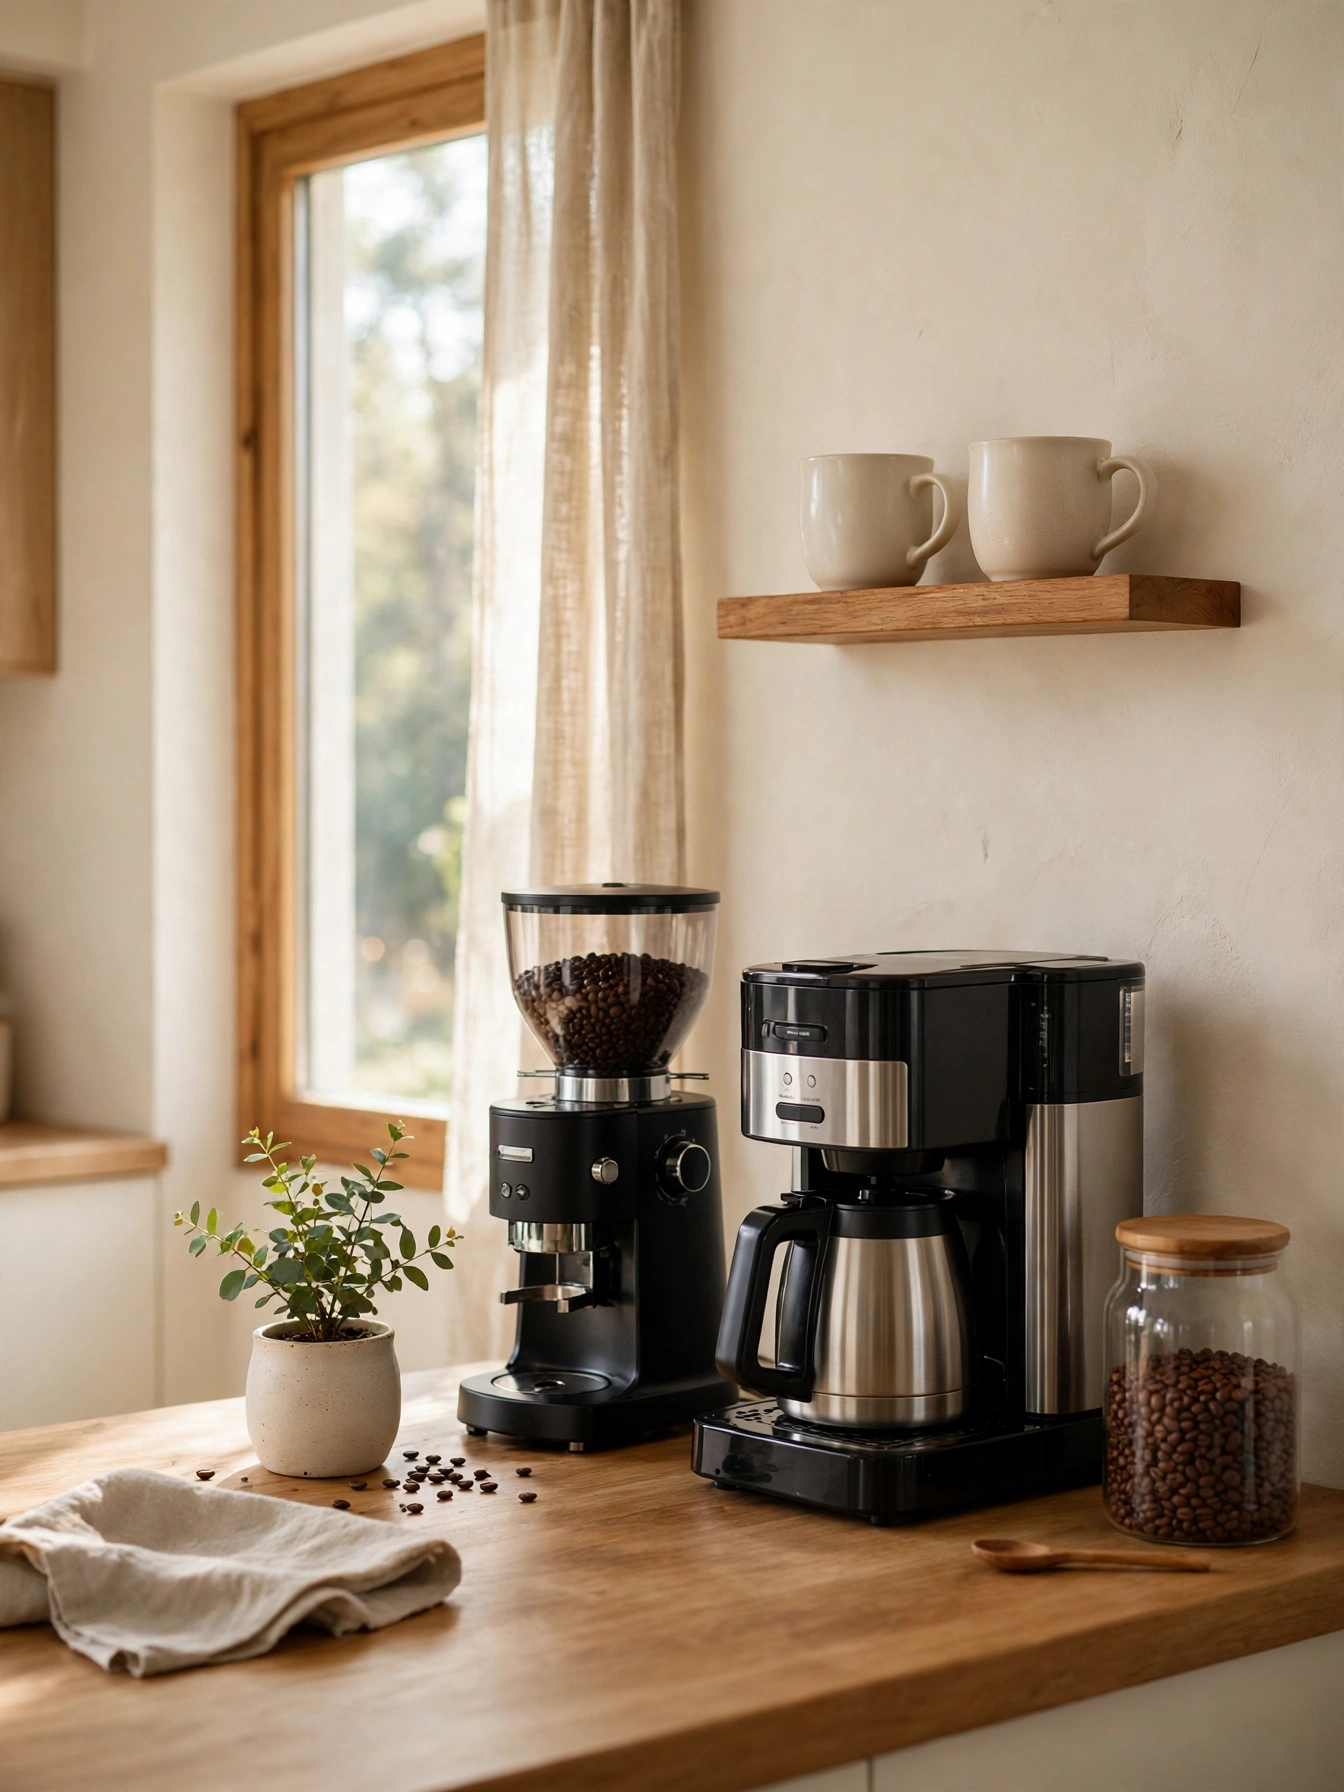
Why This Works:
- Coffee gear gathers in one 24 inch zone
- Beans, grinder and mugs sit within reach
- A shelf above holds cups off the counter
- The morning cup takes two minutes flat
The first cup of the day needs beans, grinder, maker and mug, all within one reach. A station of 24 inches of counter beside the sink keeps the grinder, maker and mugs all within 18 inches of each other. Fit a shelf 12 inches deep above the station, mounted 18 inches above the 36 inch counter, so mugs hang below it and the coffee maker fits underneath. The grinder stays away from the stove, since steam clogs the burrs and the grounds clump within days. The station sits outside the work triangle, on the stretch of counter beside the sink where nobody cooks. Two mugs, the grinder and the maker fill the 24 inch zone, and the sugar jar rides on the shelf above.
The station stays tight on purpose: maker, grinder and two mugs, nothing more. Grind the beans the same morning, since ground coffee loses its aroma within hours, and store the beans in a sealed jar away from the window. A station that holds the sugar and spoons too means the cup never needs a second trip. Within a week, the morning cup becomes a two-minute habit.
Top Rack Basket
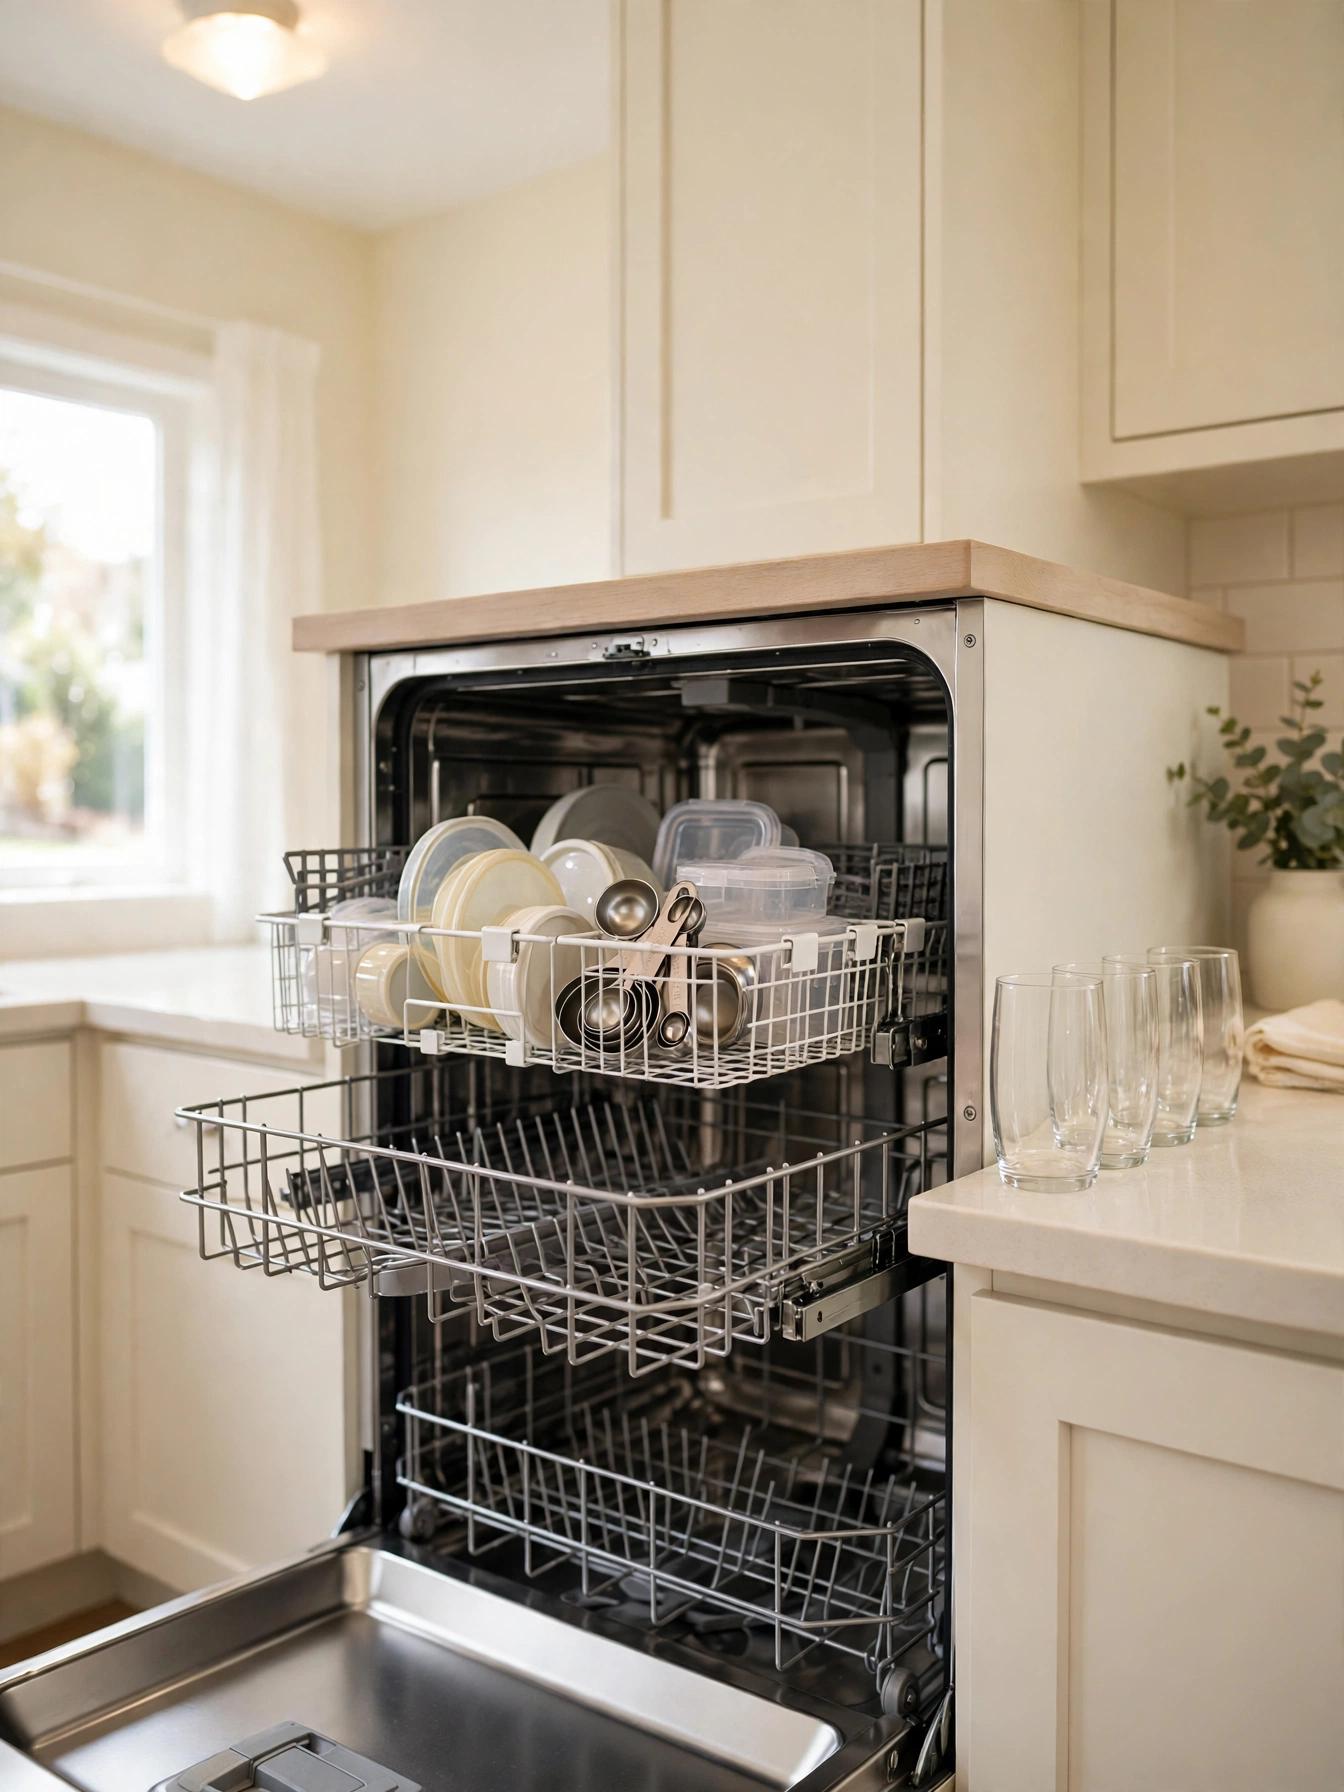
Why This Works:
- Small lids stop falling to the bottom
- The basket keeps tiny items together
- Glasses keep their own space beside it
- One clip holds the whole set steady
Small lids ride the dishwasher rack loose, and half of them end up on the bottom by the end of the cycle. A basket 12 inches by 6 inches clips to the back of the top rack, where it holds lids, small containers and measuring spoons in one place. Check that the spray arm spins freely with 2 inches of clearance below the basket, since a blocked arm leaves the top rack dirty. Place the basket away from the detergent dispenser, because the door swings open during the cycle and knocks a basket placed in front of it. Lids filled past the rim float free and land on the heating element, and tall glasses above 8 inches stop the dishwasher door from closing. The clip holds the whole set steady through the cycle, and the lids come out upright and dry.
With the dishwasher running daily, the basket keeps small lids and baby bottle parts off the bottom, where they would otherwise land. The basket takes the space of two glasses, so run it only when the small items fill it. Empty the basket first when unloading, since the small pieces hide under the glasses. A basket that rattles during the cycle needs its clip tightened, which takes seconds and stops the noise.
Bag Dispenser Roll
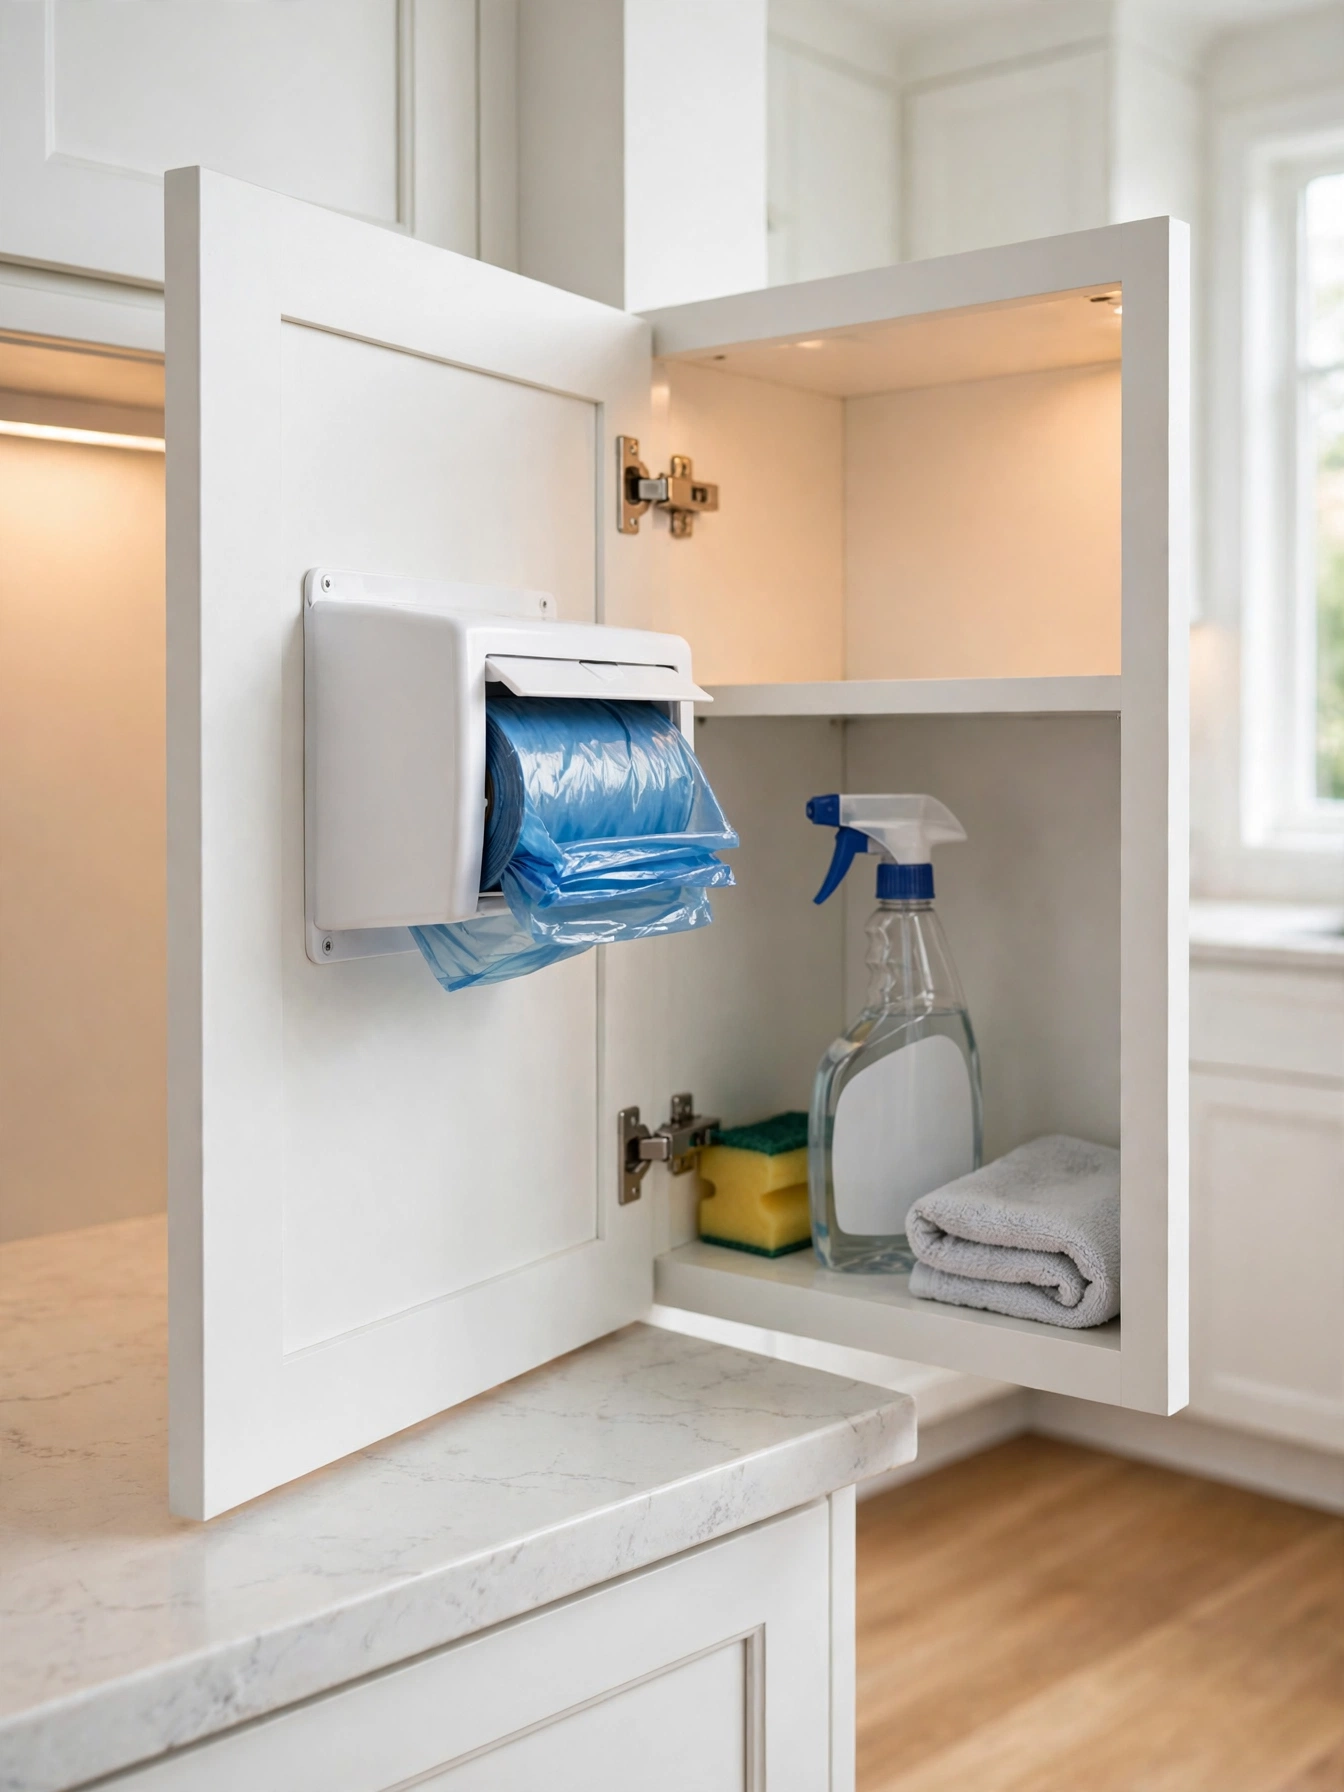
Why This Works:
- Bags wait exactly where the bin is
- A roll holds 35 bags in a small space
- The dispenser stops the loose bag pile
- One pull tears a fresh bag clean
A loose roll of trash bags unravels in the cabinet and tangles around everything beside it. A dispenser fixed inside an 18 inch cabinet door, using 2 screws 1/2 inch long driven into a door 3/4 inch thick, holds a 35 count roll of 13 gallon bags. Each bag measures about 24 inches wide by 27 inches tall, which fits the 35 quart pull-out bin with room to fold the top over the rim. Glue softens on a door that gets daily steam, and the dispenser drops within weeks; extra weight on a soft-close hinge changes the closing speed. One pull tears a fresh bag clean, and the next bag feeds through ready for the next change.
The roll runs out without warning, so keep a spare roll on the shelf directly above the dispenser and load a fresh roll when 5 bags remain. The dispenser belongs in the cabinet beside the trash pull-out, where the bag is needed the moment the bin empties. Dust settles on the roll and the first bag comes out gray, so wipe the dispenser once a month. The bag hunt ends for good once the dispenser is mounted.
Measuring Cup Hooks
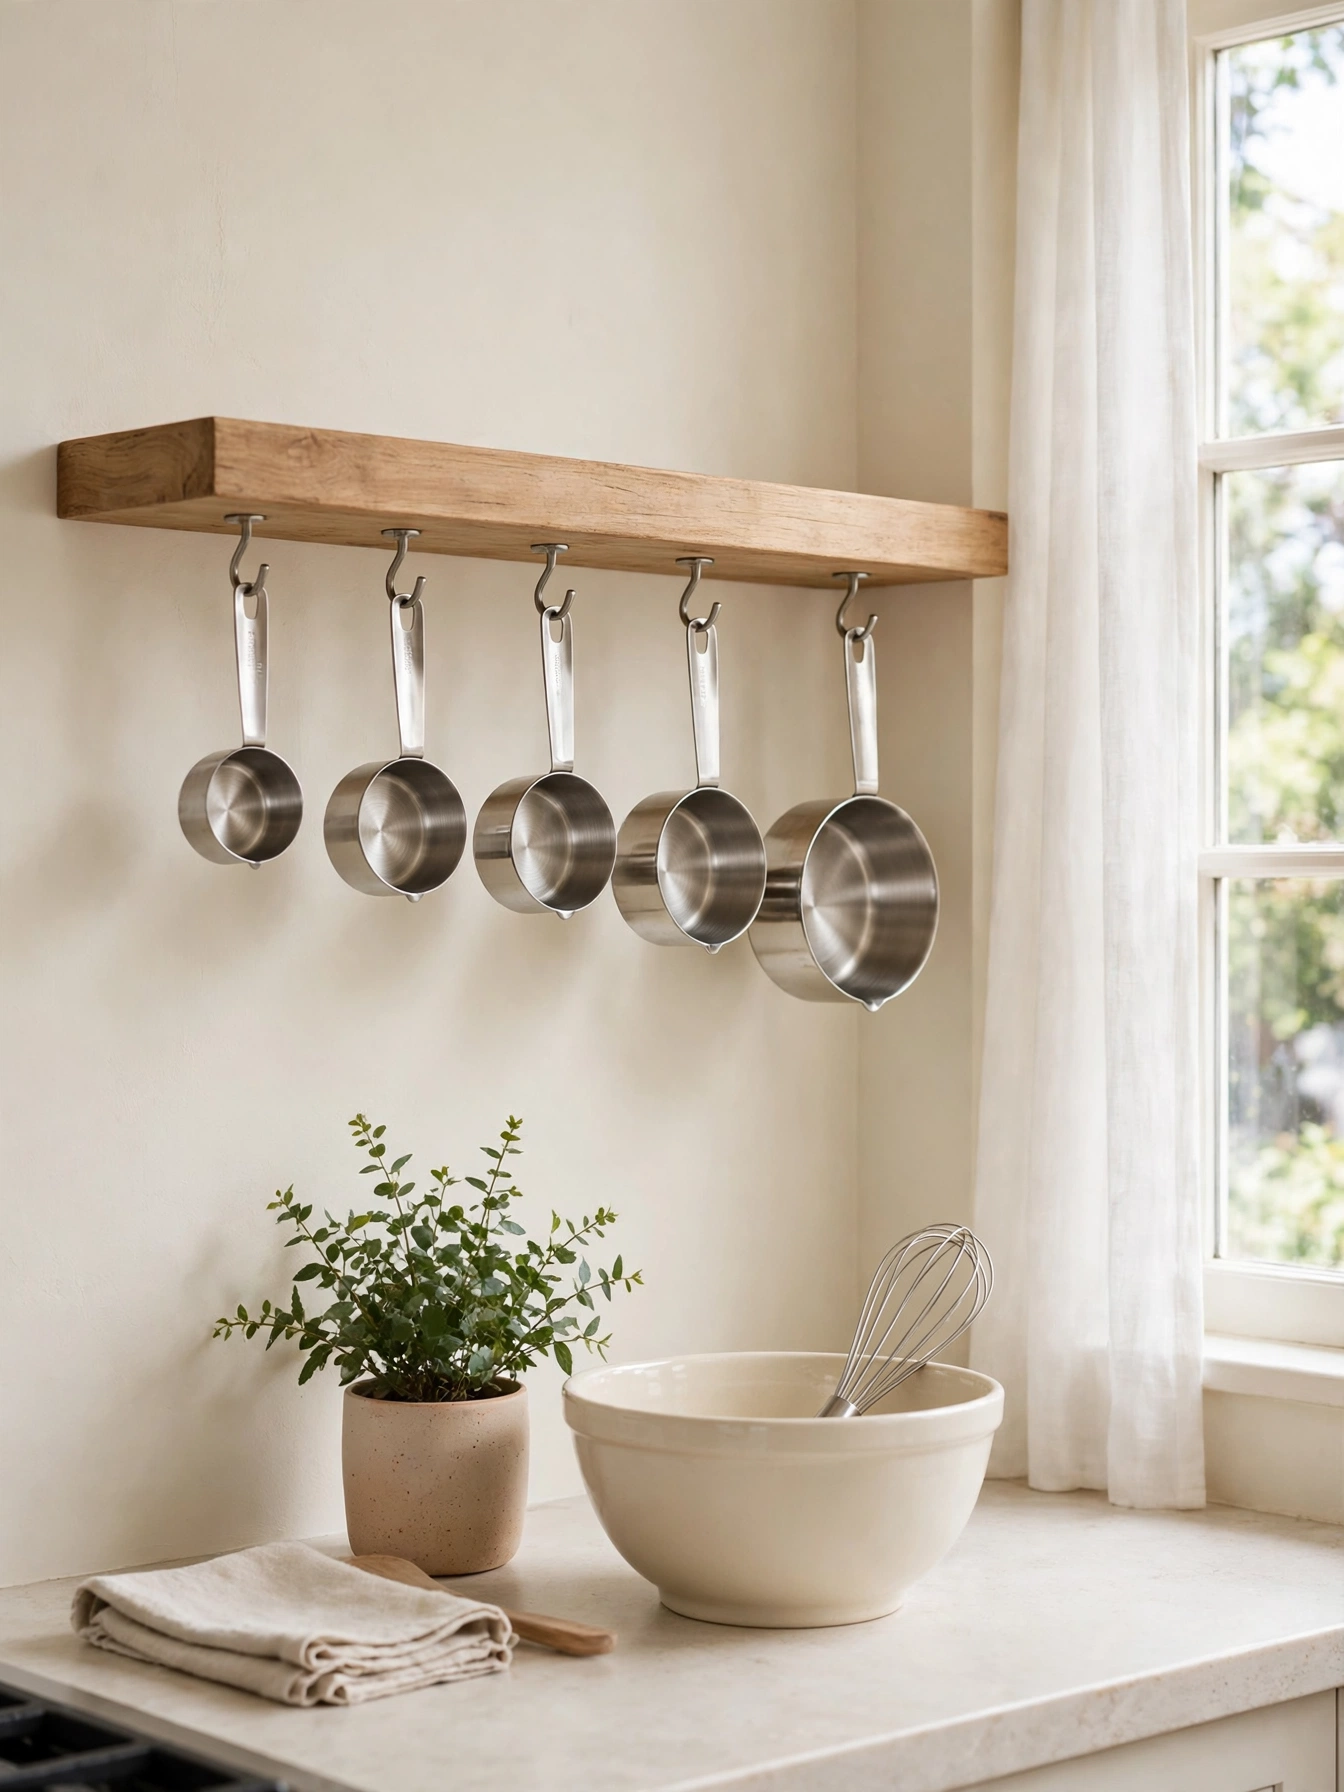
Why This Works:
- Cups hang in size order at a glance
- Handles hook on without any hardware fuss
- The set stops nesting into a stuck pile
- A quick grab, no digging through a drawer
Measuring cups nested in a drawer stick together when wet and hide the size on the bottom. Small hooks spaced 2 inches apart under a shelf 12 inches deep hold the cups, with the 1/4 cup at one end and the 1 cup measure at the other. Use cup hooks with a 1 inch shank screwed into the shelf underside, and keep the hooks 3 inches from the shelf front so the cups clear the cabinet door. Steam above the stove fogs the markings and drips onto the cooktop, and hooks under 2 inches apart let the cups clink and chip each other. The hooks hold the set in size order, and the right cup comes off its hook with one grab.
Hanging cups drip after washing, so dry them before hanging or let them drip over the sink for a minute. The cups save a minute on every recipe that measures, since the drawer version costs a search each time. The 1 cup measure hangs nearest the mixing bowl shelf, since it gets used most, and the 1/4 cup at the far end. Cups hanging in order turn measuring into a quick grab.
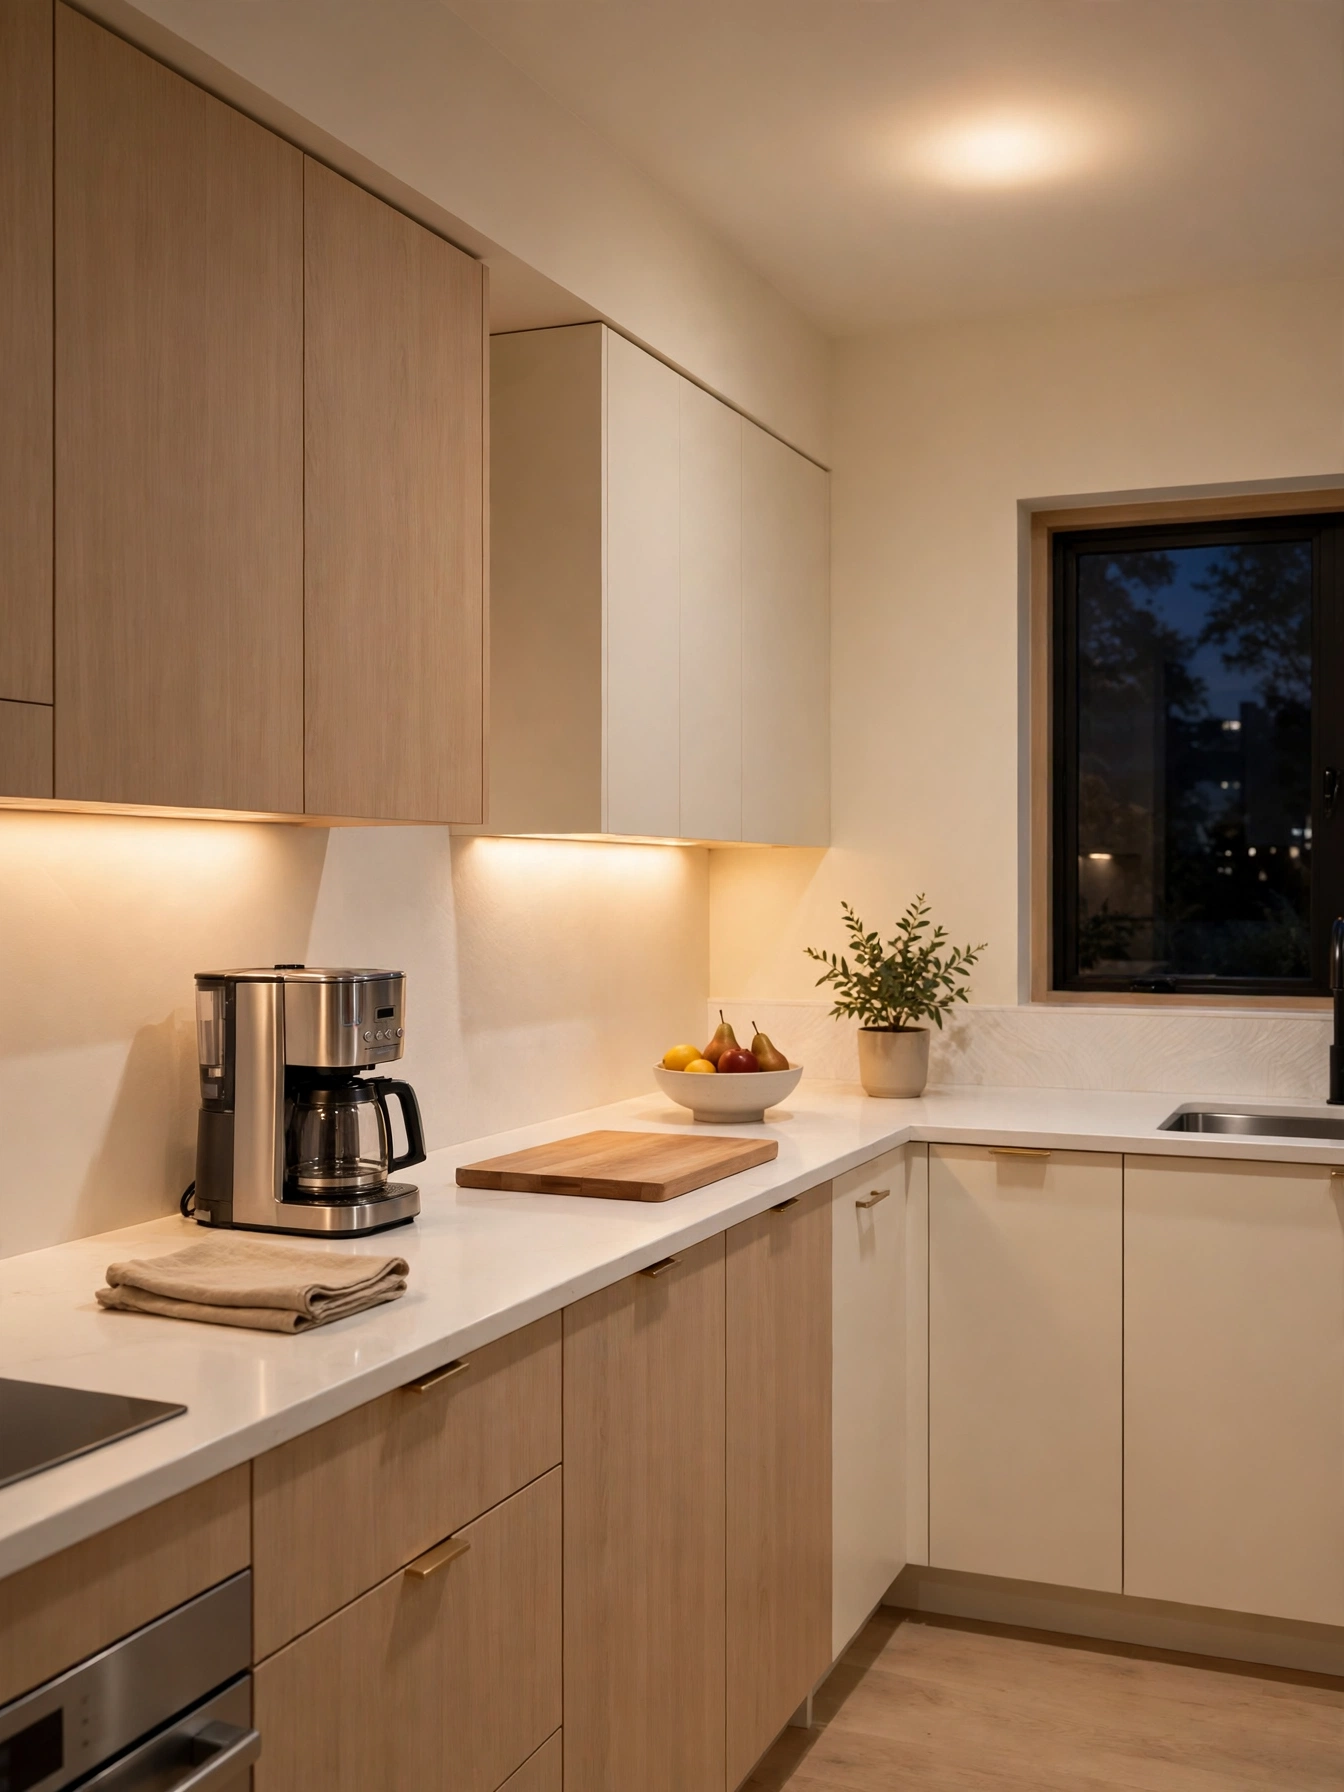
Nightly Reset Routine
Why This Works:
- Ten minutes at night saves twenty in the morning
- Clear counters invite cooking the next day
- The dishwasher runs while everyone sleeps
- Coffee waits ready at 7 AM
Ten minutes at night resets the kitchen: clear the counters, load the dishwasher, wipe the counters down, and set the coffee maker timer for 7 AM. Run the dishwasher on a 90 minute cycle overnight, so the dishes are clean and dry by breakfast, and empty it before the first cup of coffee. Wooden boards left in the sink overnight swell at the grain and crack as they dry, and dirty pans stacked beside the sink double the morning work. The reset runs even on tired evenings, since one skipped night doubles the morning work.
The reset sticks because it stays short: ten minutes, four steps, same order every night. Consistency is the hard part, so tie the reset to an existing habit, such as starting it right after dinner plates hit the sink. Set the coffee timer during the reset, not in the morning rush, so the first smell of coffee greets the cook. After two weeks, the reset feels automatic and the kitchen starts each day clean.
FAQs
What are the best kitchen hacks for saving time every morning?
A breakfast station and a 10 minute nightly reset save the most time, since coffee, cups and cereal wait in one 18 by 24 inch zone instead of three cabinets. The Spruce notes that a set home for every tool cuts the morning search to seconds.
How much counter space does a kitchen hack station need?
A breakfast station needs 24 inches of counter, with a tray 18 inches wide by 24 inches long holding the coffee maker, mugs and cereal. Keep the station outside the work triangle, and place the maker beside the outlet so its cord never crosses the worktop.
Which kitchen hacks work in a rental without drilling?
Tension rods, under-shelf baskets, a rolling cart and labelled bins need no drilling, and the knife strip still needs screws into studs for safety. Keep the under-shelf basket under 5 pounds, and use a cart 18 inches wide to fill the gap beside the fridge.
How often should I replace sponges and cloths in these kitchen hacks?
Replace a kitchen sponge every 1 to 2 weeks, since a damp sponge holds bacteria after 7 days of daily use. Better Homes and Gardens recommends swapping it sooner if it smells, and a rail that lets the sponge dry between uses stretches its life by several days.
What is the safest height for a magnetic knife strip?
A height of 18 inches above the countertop keeps the blades clear of splashes and below eye level, while the handles stay easy to grab. Fix the strip with screws driven into studs spaced 16 inches apart, because a full set of knives can weigh 10 pounds or more.
Conclusion
A kitchen that works at 7 AM is built from small systems, not big spending. Start with the station that matches your worst morning friction, whether that is the breakfast tray, the labelled pantry bins or the nightly 10 minute reset, and add one hack a week until the room runs itself. These kitchen hacks work because each one names a measurement and a place, so nothing depends on memory or luck. Set the first station up tonight, and tomorrow morning will show the difference. Follow HomelyCrafter on Pinterest for more ideas. Save this to your Pinterest boards so you can refer back to it!

Muhammad Israr is a home decor enthusiast and the writer behind Homely Crafter. He spends his days researching paint colors, layouts and budget-friendly styling ideas, then breaks them down into practical, easy-to-follow guides so you can decorate with confidence.
1 thought on “25 Handy Kitchen Hacks That Save You Time Every Day”