
The first barbecue of summer moves dinner outside. When the grill, the prep counter and the table sit in a sensible order, food moves from fire to plate without a scramble. When they sit wherever they landed, the cook walks back and forth all evening. These backyard outdoor kitchen ideas start with layout before gadgets, because layout fixes the tiring part of cooking outside. Start with that layout, where the grill, the counter and the table each earn their own spot, and work outward from there one measured decision at a time.
Inside are 21 backyard layouts for a mid-range family yard, with exact clearances, counter heights, shade sizes and material grades. Each idea names what to measure, what to avoid and what the setup costs, so the plan fits the yard. Grab a tape measure, sketch the yard on paper, and pick the layout that matches how the household really eats outside.
Grill Zone Placement
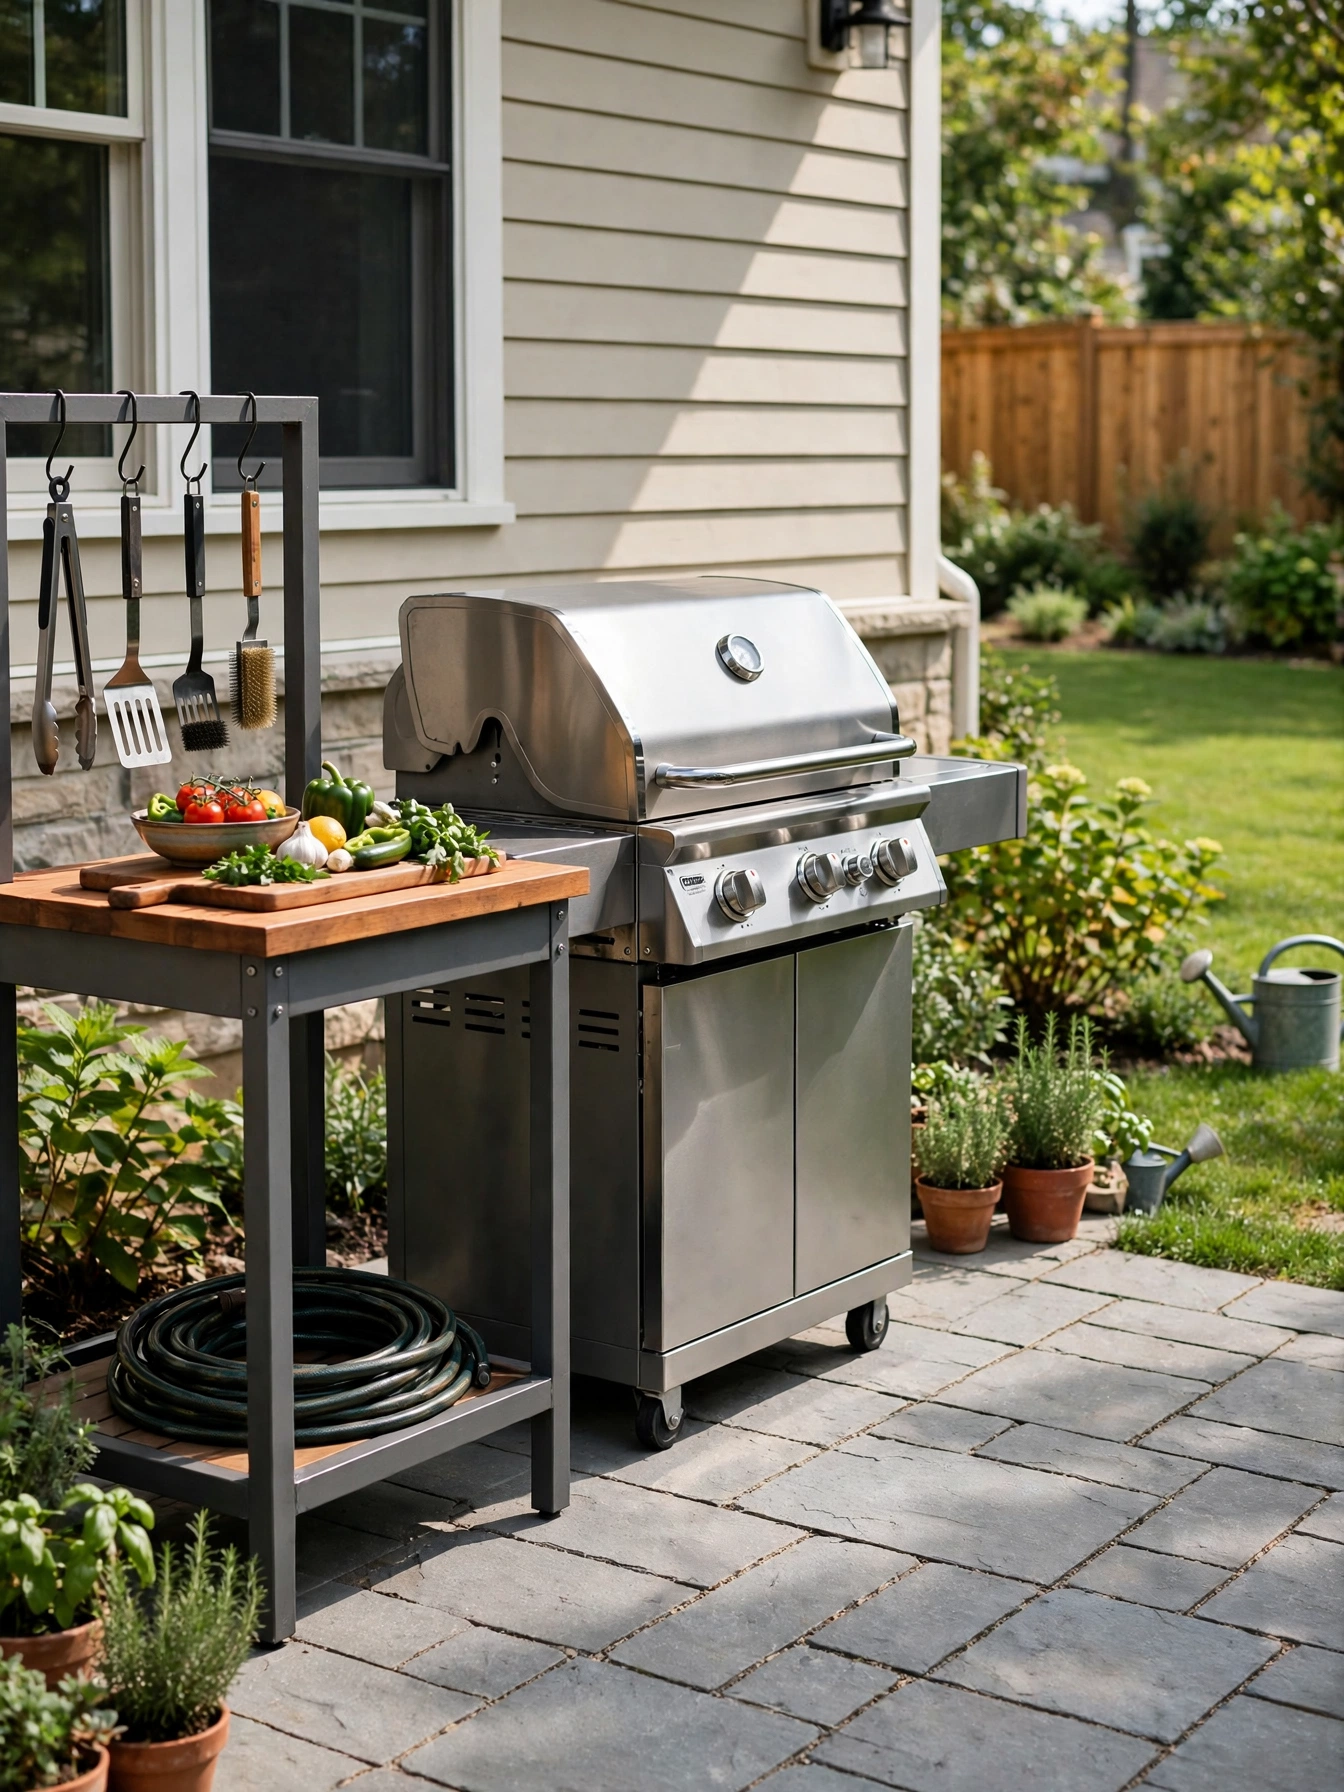
Why This Works:
- A 10 foot gap from the house keeps heat and smoke away from siding
- Landing space of 24 inches on each side holds trays without crowding
- Facing the grill toward the table lets the cook join the conversation
- A level stone pad stops the grill from rocking on soft lawn
Place the grill at least 10 feet from the house, the fence and any low tree branches, since that clearance is the standard fire services and grill makers repeat for gas and charcoal units. Keep 24 inches of counter on each side of the grill for landing trays, and leave 42 to 48 inches of walkway behind the cook so nobody squeezes past with a hot plate. A 304 grade stainless steel grill body resists rust far longer than painted steel. A charcoal kettle fills food with smoke flavor from the fuel itself, a taste gas burners leave out. A grill tucked under a low awning or a tree traps heat, scorches fabric, and dry leaves catch fast.
Summer evenings run smoother when the grill faces the dining table instead of a fence, since the cook can talk while turning food. A mid-range gas grill sells for 400 to 900 dollars, and a built-in unit adds more to the bill because the stone surround and gas line come with it. A gas grill near 36 inches high matches a standard 36 inch counter, which keeps the work surface level from prep to fire. Charcoal costs less upfront and rewards slow weekends with smoke flavor, yet it needs 20 minutes to reach cooking heat and more cleaning after each use.
House Connection Path
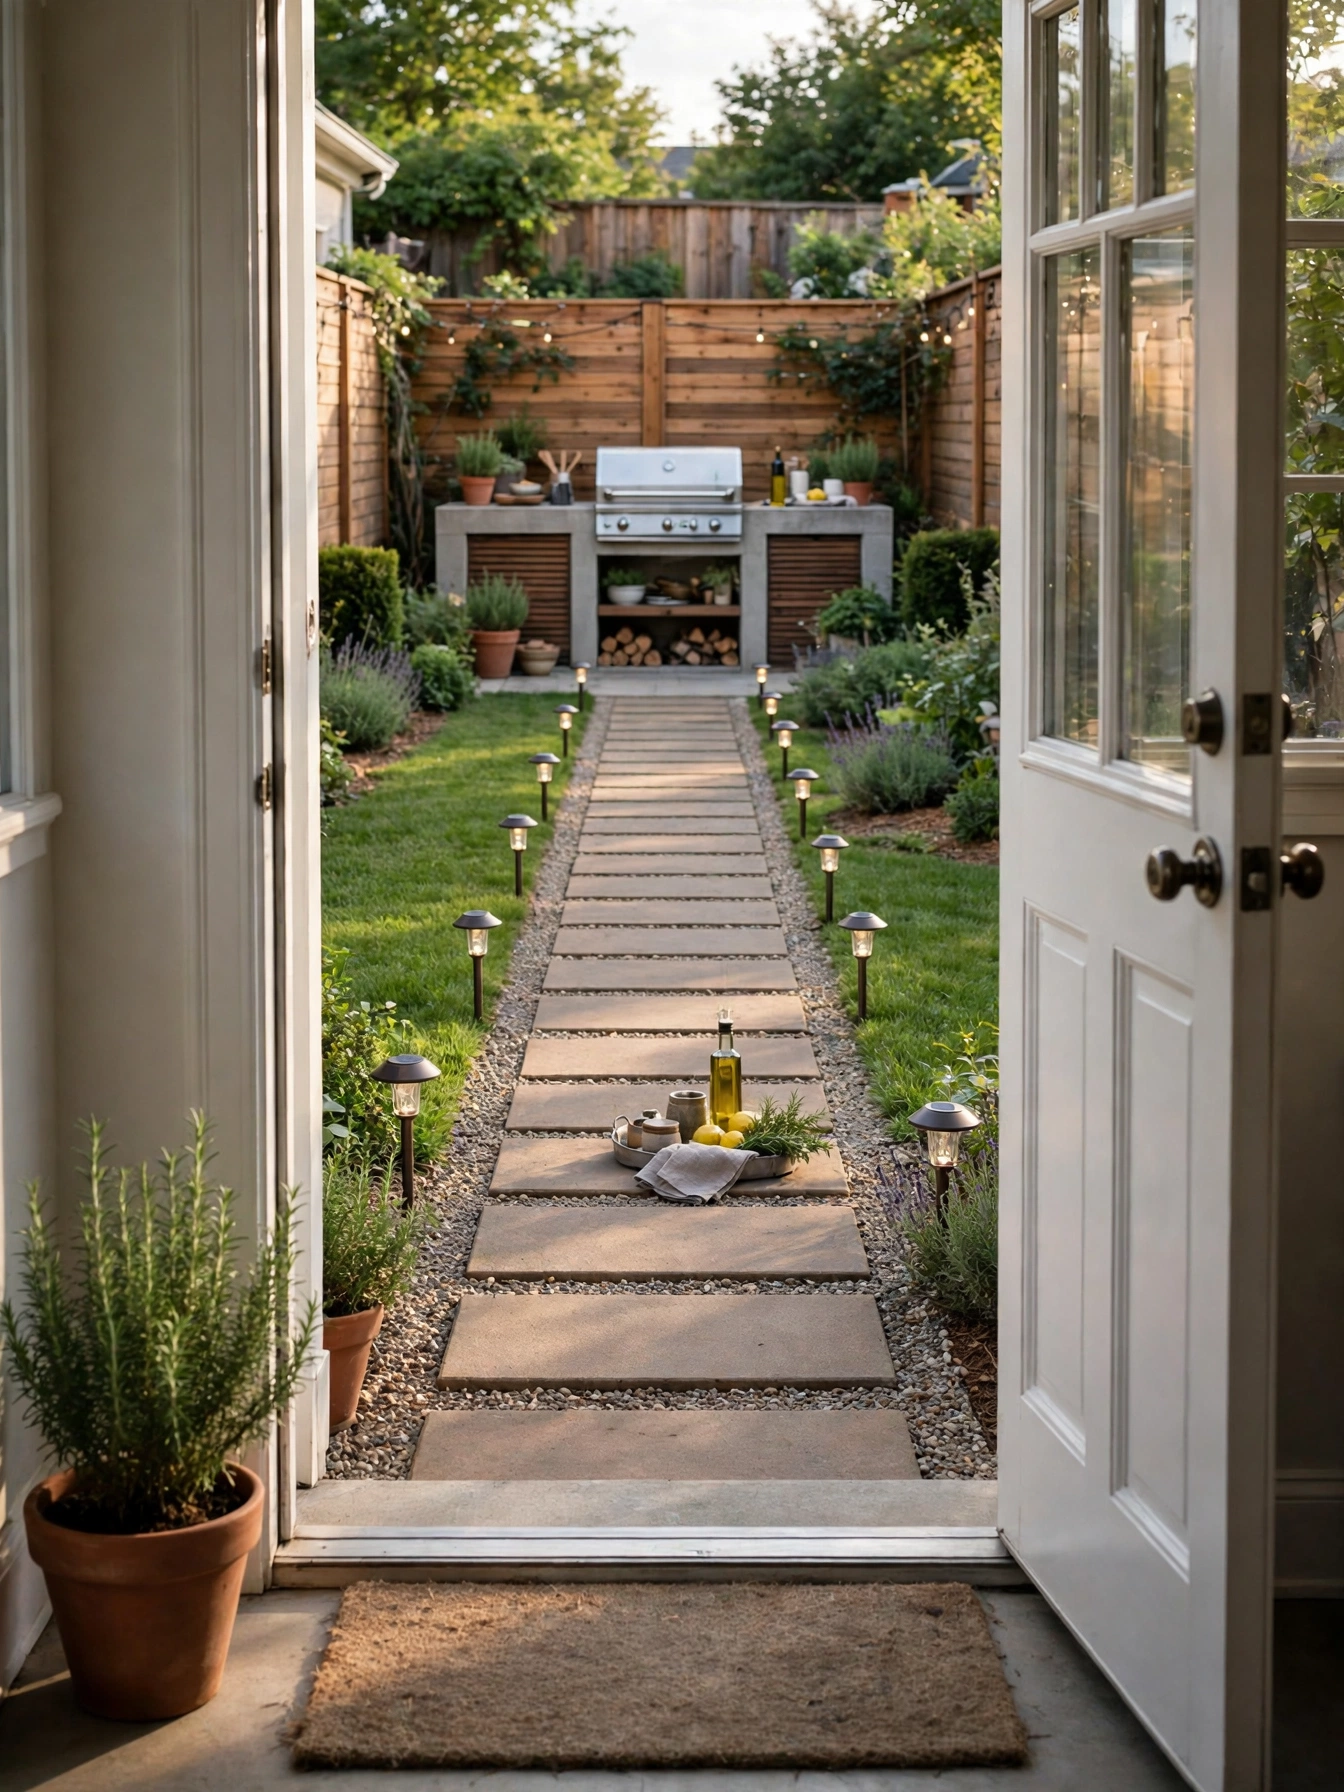
Why This Works:
- A straight path cuts the carry distance between kitchen and grill
- Stones 48 inches wide let two people pass with trays
- Solar lights along the edge mark the route after dark
- A level path stops spills on the way back inside
A short, straight path between the back door and the grill saves more steps than any gadget in the yard. Lay stepping stones 48 inches wide so two people can pass with trays, and keep the route under 20 feet when the yard allows it, since every extra 10 feet adds a trip per course. Gravel joints between stones drain rain in minutes. Solid concrete slabs stay dry underfoot, though a hard frost can open hairline cracks across a slab that was poured thin. Set the stones level within 1/4 inch, because a rocking stone tips a tray of glasses. A slope steeper than 1 inch per foot turns slippery under wet shoes and tilts a loaded tray.
Dinner service feels easy when the cook carries food 12 feet instead of 40, and kids can fetch forgotten items without crossing the grill zone. The path also keeps mud off the kitchen floor, since feet stay on stone rather than grass after rain. Loose gravel alone costs less yet scatters underfoot, so save it for garden beds rather than a food route. Stone for a 15 foot run comes in at 300 to 800 dollars. A poured concrete walk needs a full day to cure before anyone walks on it.
Prep Counter Flow
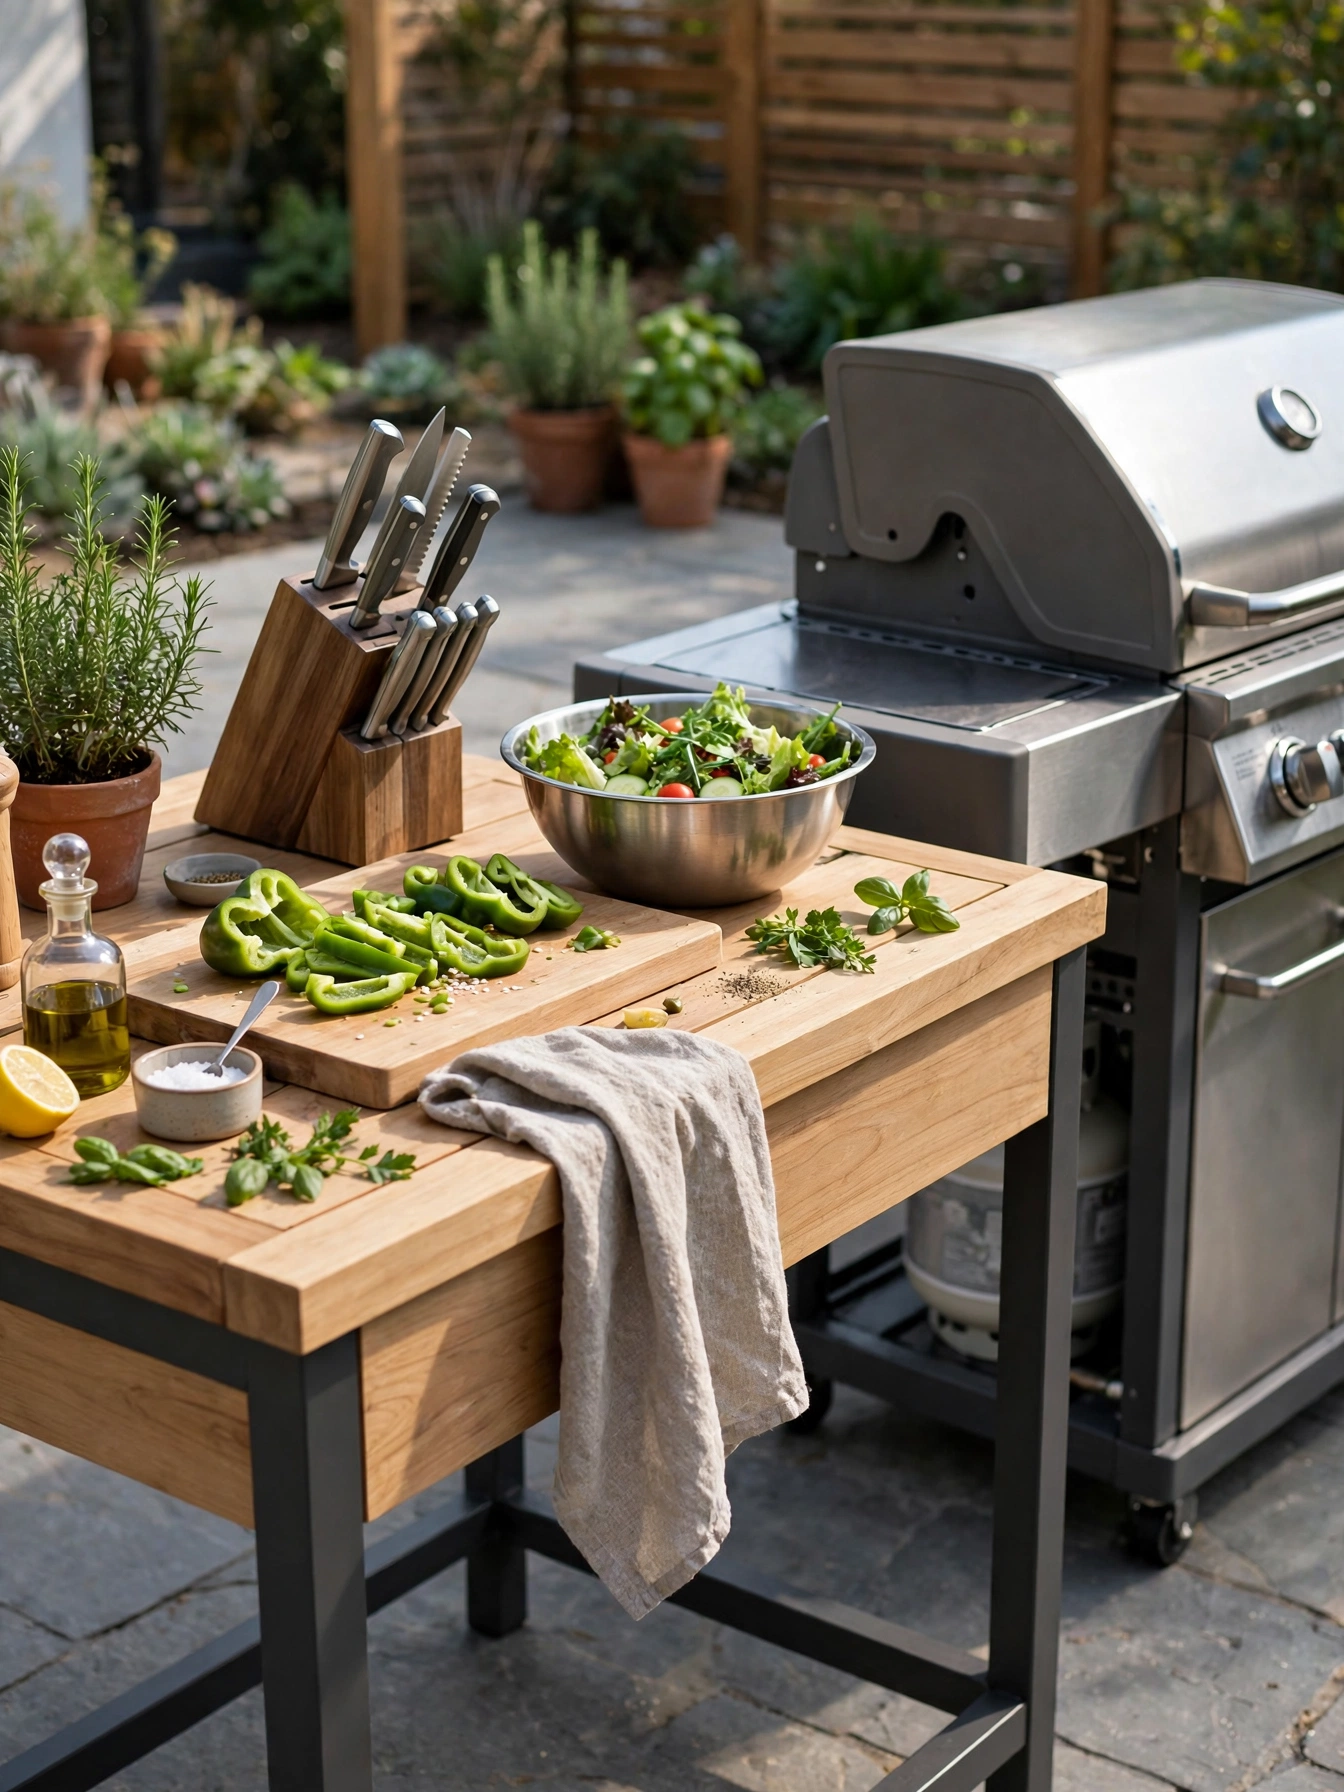
Why This Works:
- A 24 inch deep counter holds a board, a bowl and a tray at once
- Teak sealed with outdoor oil sheds rain instead of soaking it up
- The counter sits between fridge and grill, so food flows one way
- A lower shelf keeps platters off the ground and within reach
Counter space beside the grill decides whether prep happens outside or back in the kitchen. Build the prep counter 36 inches high and 24 inches deep, with at least 48 inches of length for a board, a bowl and a tray side by side. Sealed teak resists rain and sun better than raw pine. A stainless steel top wipes clean in seconds, yet it heats up under direct sun and stays too hot to lean on through the afternoon. The National Kitchen and Bath Association work triangle guideline, 4 to 9 feet between work points, adapts well outdoors, so keep grill, counter and sink within that range. Do not use an indoor laminate counter outside, since one wet season swells the core and the surface peels at the edges.
At 250 to 600 dollars, a teak prep counter near 48 inches long covers the basics. Stainless steel keeps a cooler surface in shade, which matters on a south-facing patio in July. Chopping, seasoning and plating all happen at the grill when the counter is long enough, which ends the trips back to the indoor kitchen. With chopping, seasoning and plating all at the grill, weeknight dinner reaches the table in fewer moves. A plastic folding table costs far less than a proper counter but wobbles under a heavy board, so it works as a spare rather than the main prep spot.
Shade Sail Coverage
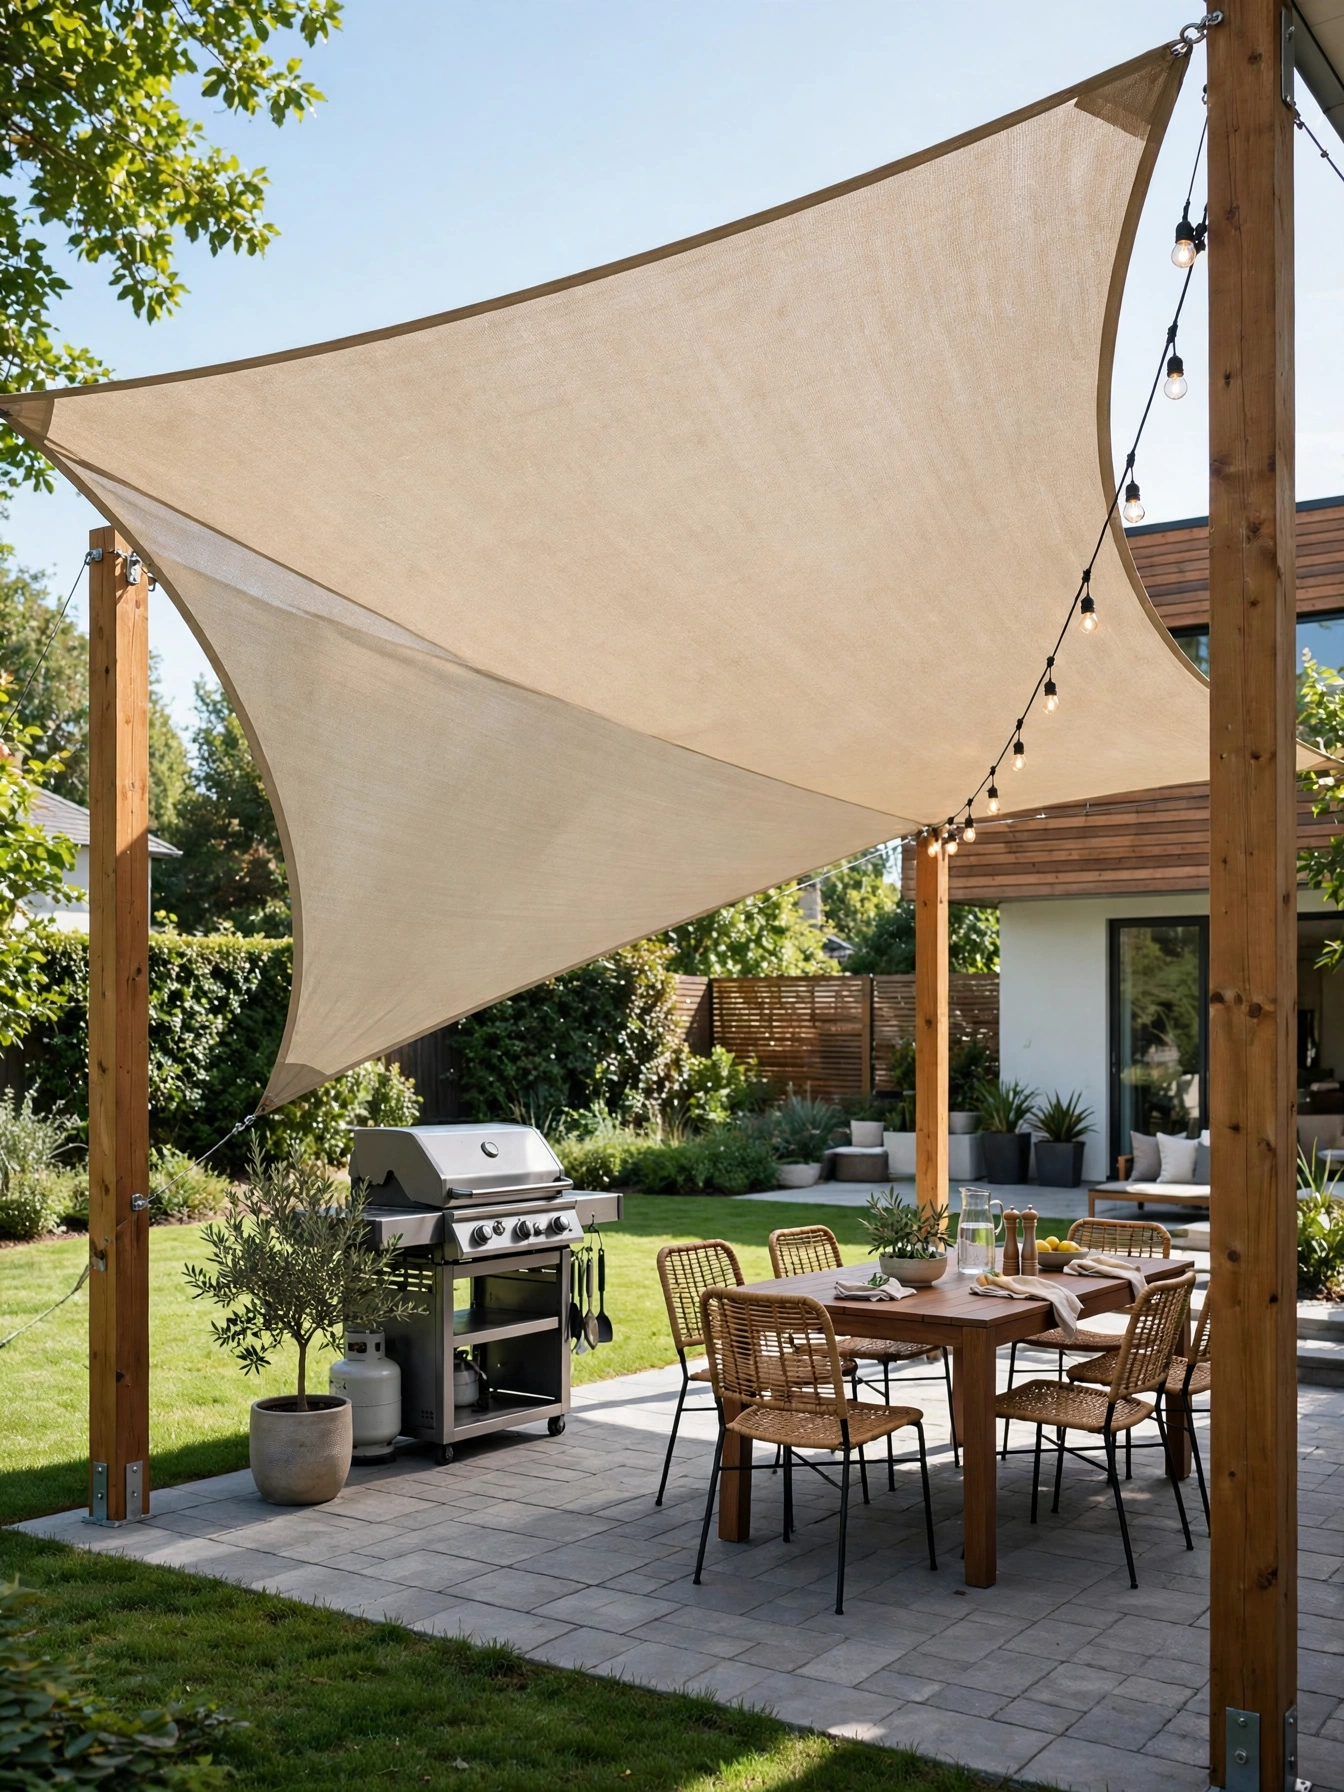
Why This Works:
- HDPE fabric blocks up to 95 percent of UV while letting air through
- Angled posts shed rain instead of pooling water on the fabric
- A 12 by 12 foot sail shades the grill and part of the table
- Sails sell for much less than a fixed roof and remove for winter
Shade sails stretch between posts and turn a hot patio into a usable room. Size the sail at 12 by 12 feet to cover the grill and the near end of the table, and set the posts 8 feet high with the low edge at 7 feet so tall guests clear it. HDPE fabric rated for UV block keeps the space cooler than a solid tarp, which traps heat and flaps in wind. Anchor each post in a concrete footing 24 inches deep and 12 inches wide, since a sail pulls hard in a gust. A sail tied to a house gutter or a fence panel pulls the fixing loose, and the fabric sags within weeks.
Afternoon cooking stays pleasant under a sail, and the grill master stops squinting into low sun. Renters get the same shade without a permanent structure, since the whole setup removes in autumn and stores in a bag. The 12 by 12 foot HDPE sail, posts and hardware included, totals 200 to 600 dollars, and a fixed pergola roof over the same area costs several times more and stays up all winter. Fabric fades after 3 to 5 seasons in strong sun, so plan on replacing the sail rather than the posts.
Dining Table Position
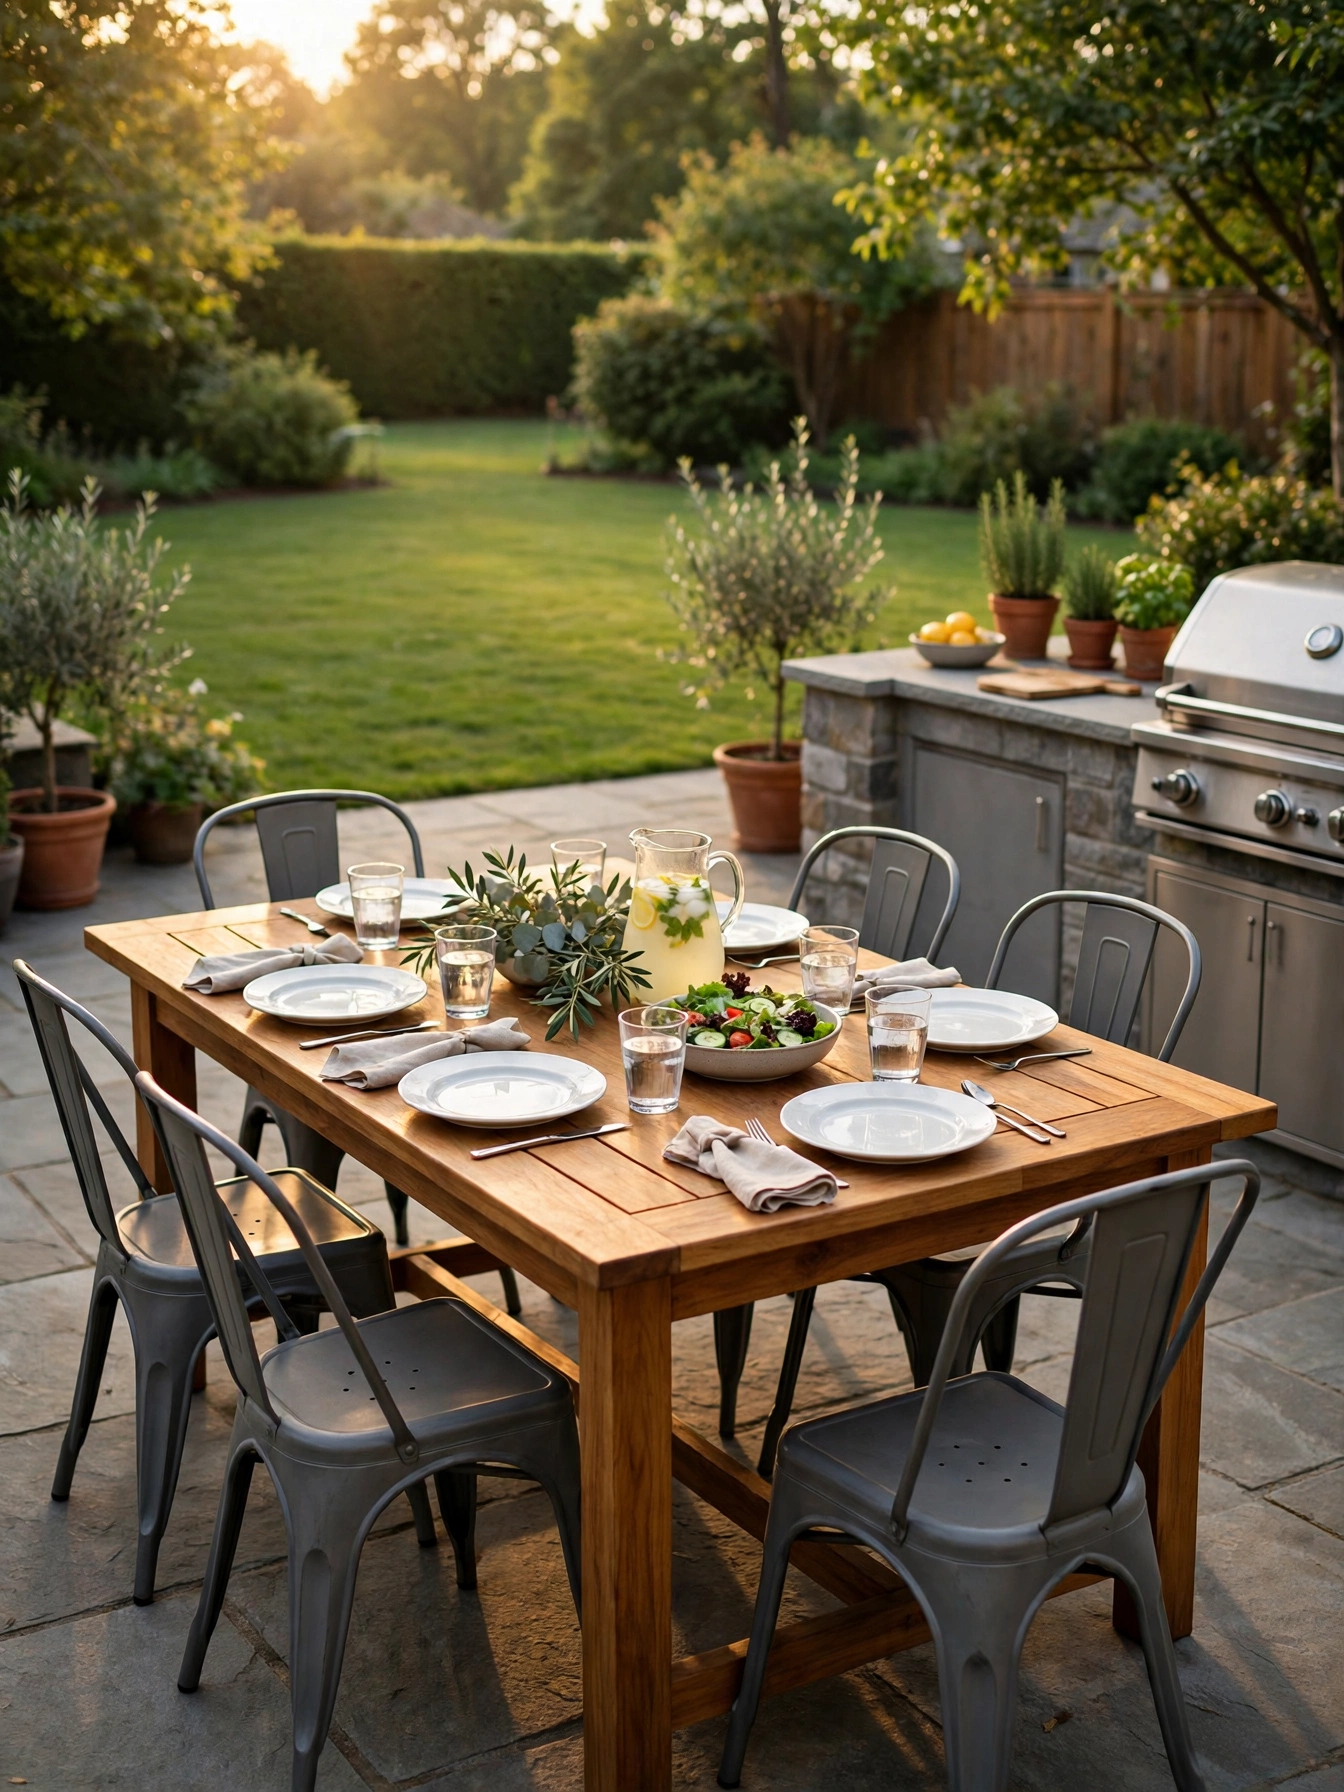
Why This Works:
- A downwind table keeps smoke off the plates while people eat
- A 72 inch table seats six with 24 inches of elbow room each
- Teak weathers to silver and needs no paint to survive rain
- Chairs with arms fit better when the table has 36 inches behind it
Set the dining table downwind of the grill so smoke drifts away from plates instead of across them. A 72 inch table seats six with 24 inches per person, and chairs need 36 inches of pull-out space behind them to slide back without hitting a wall or a planter. Teak stands up to rain with yearly oiling. Powder-coated aluminum, by contrast, stays lighter to move and never rusts, yet it feels colder to sit on in spring. Keep 48 inches between the table edge and the grill counter, a gap that covers the 36 inches chairs need to pull out and keeps the grill’s landing space clear, so the cook brings platters in from the open end of the table before guests sit down. Sap and falling leaves land on food all evening under a low branch.
Meals stretch longer when the table sits in the calm part of the yard, away from smoke and grill heat. Six-seat teak sets sit near 800 to 1,800 dollars. Aluminum sets that seat six come in lower and last just as long with less care. With young kids at the table, little ones can move between table and lawn without crossing the cooking zone. Folding chairs are the lowest-priced seat and store flat, but they wobble on uneven pavers and tire guests on long evenings.
Sink Water Access
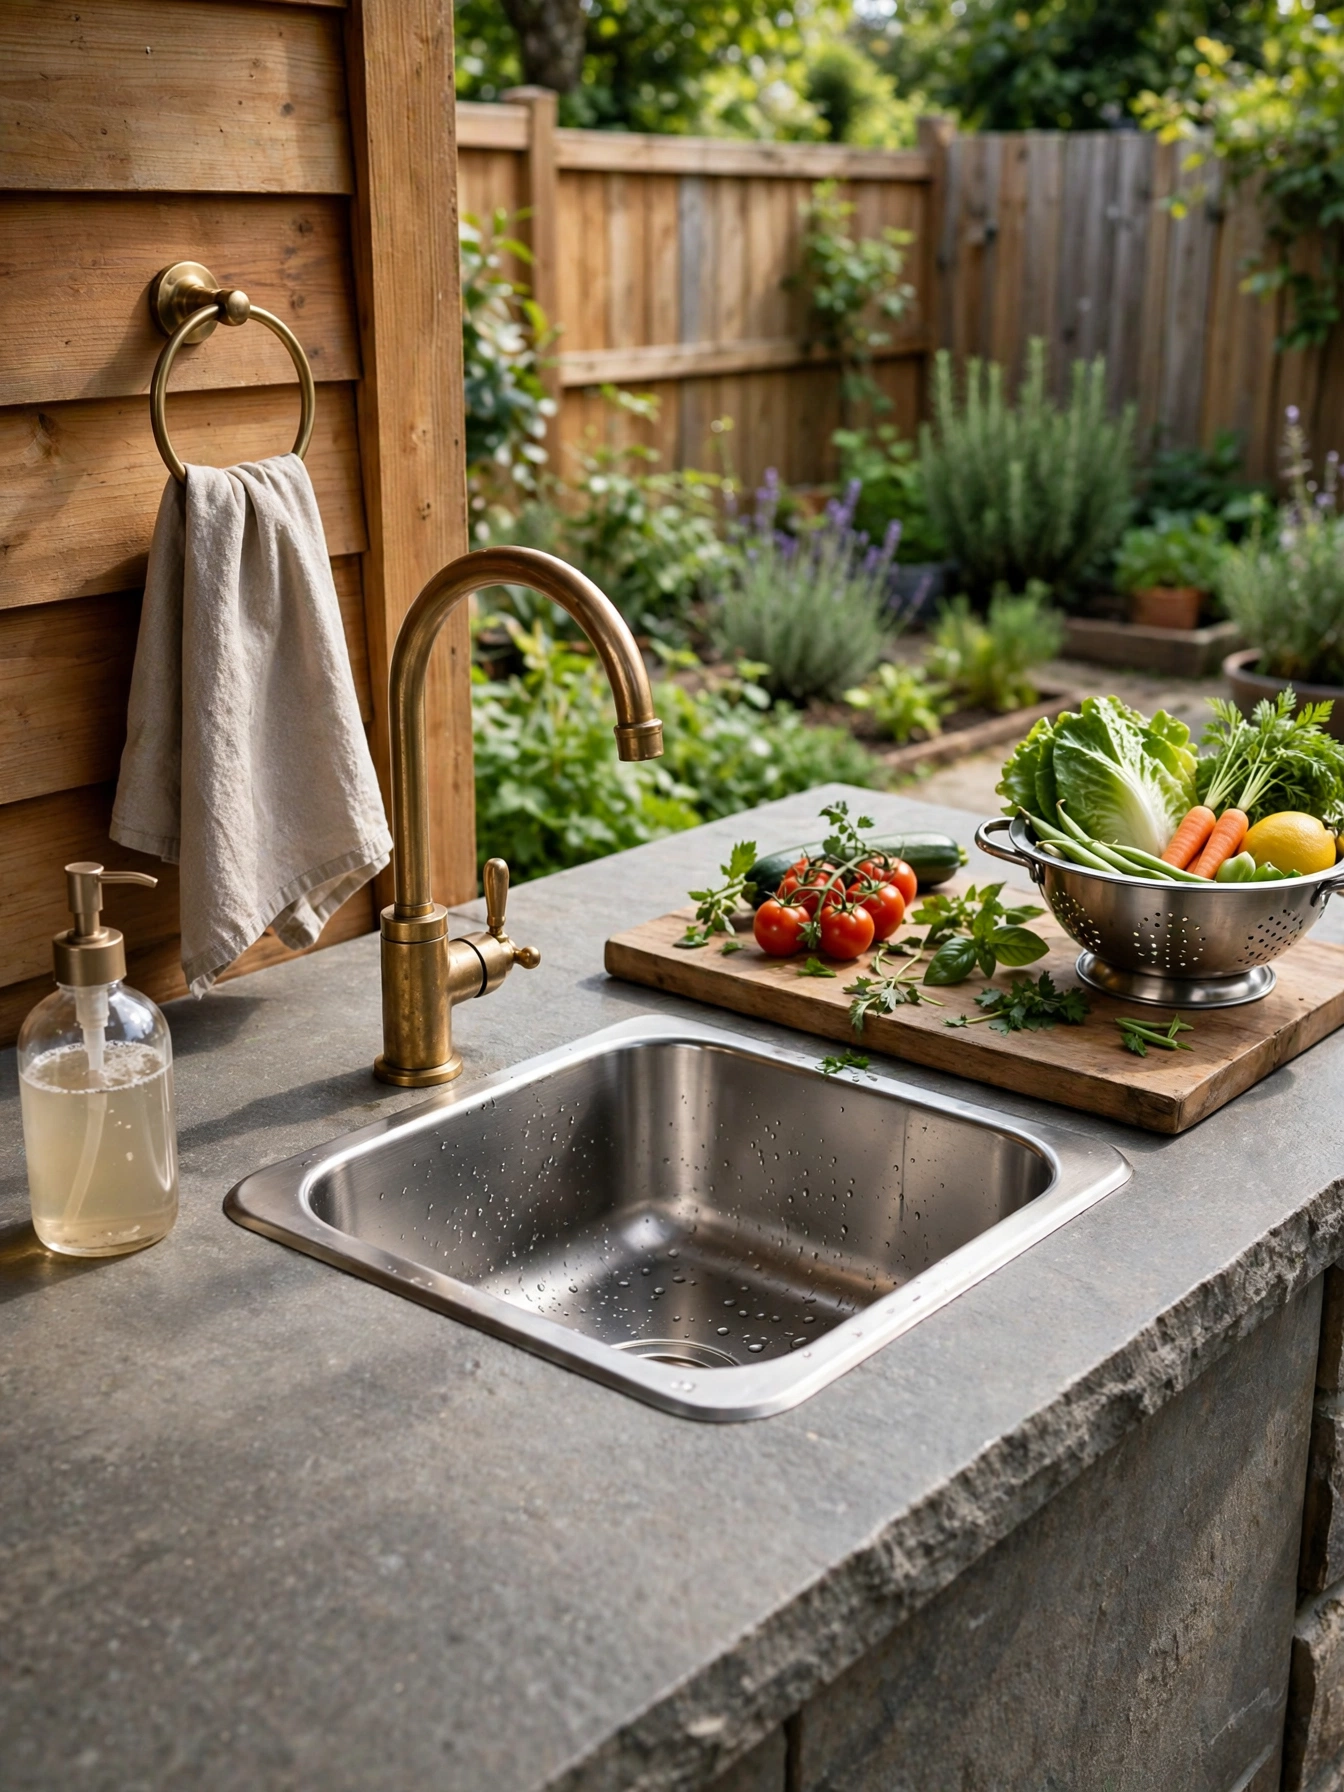
Why This Works:
- A 15 inch sink rinses vegetables without a trip indoors
- A gooseneck faucet clears tall pots and watering cans
- Stone counters drain fast and shrug off splashes
- A drain to a gravel soakaway keeps the patio dry
Running water outside changes how the cooking zone gets used, since rinsing, filling and washing all happen at the grill. Fit a 15 by 15 inch stainless steel bar sink into a 36 inch high stone counter, and run the supply line in a 1/2 inch pipe buried 18 inches deep to stay below frost. A 16 gauge basin resists dents from dropped pots better than a thinner 18 gauge bowl. A plastic utility sink turns yellow in strong sun, and the basin wall can split after a few seasons of heat and cold. The drain should fall 1/4 inch per foot toward the soakaway, which keeps water moving instead of standing in the pipe. The drain belongs on a soakaway, because soap and grease harm soil and attract pests in a garden bed.
Plumbing a basic outdoor sink setup runs 700 to 1,800 dollars; a garden hose tap with a bucket costs almost nothing yet leaves hands and vegetables washed in cold, awkward water. Washing lettuce and hands at the grill keeps the indoor kitchen clean, and a sink beside the grill turns rinsing into part of the cooking step instead of a separate trip inside. A plumber should connect the supply and drain lines, because outdoor plumbing must meet local code and a buried leak goes unnoticed until the water bill jumps. Cover the faucet in winter, since a frozen pipe splits and floods the patio in spring.
Compact Backyard Outdoor Kitchen Ideas
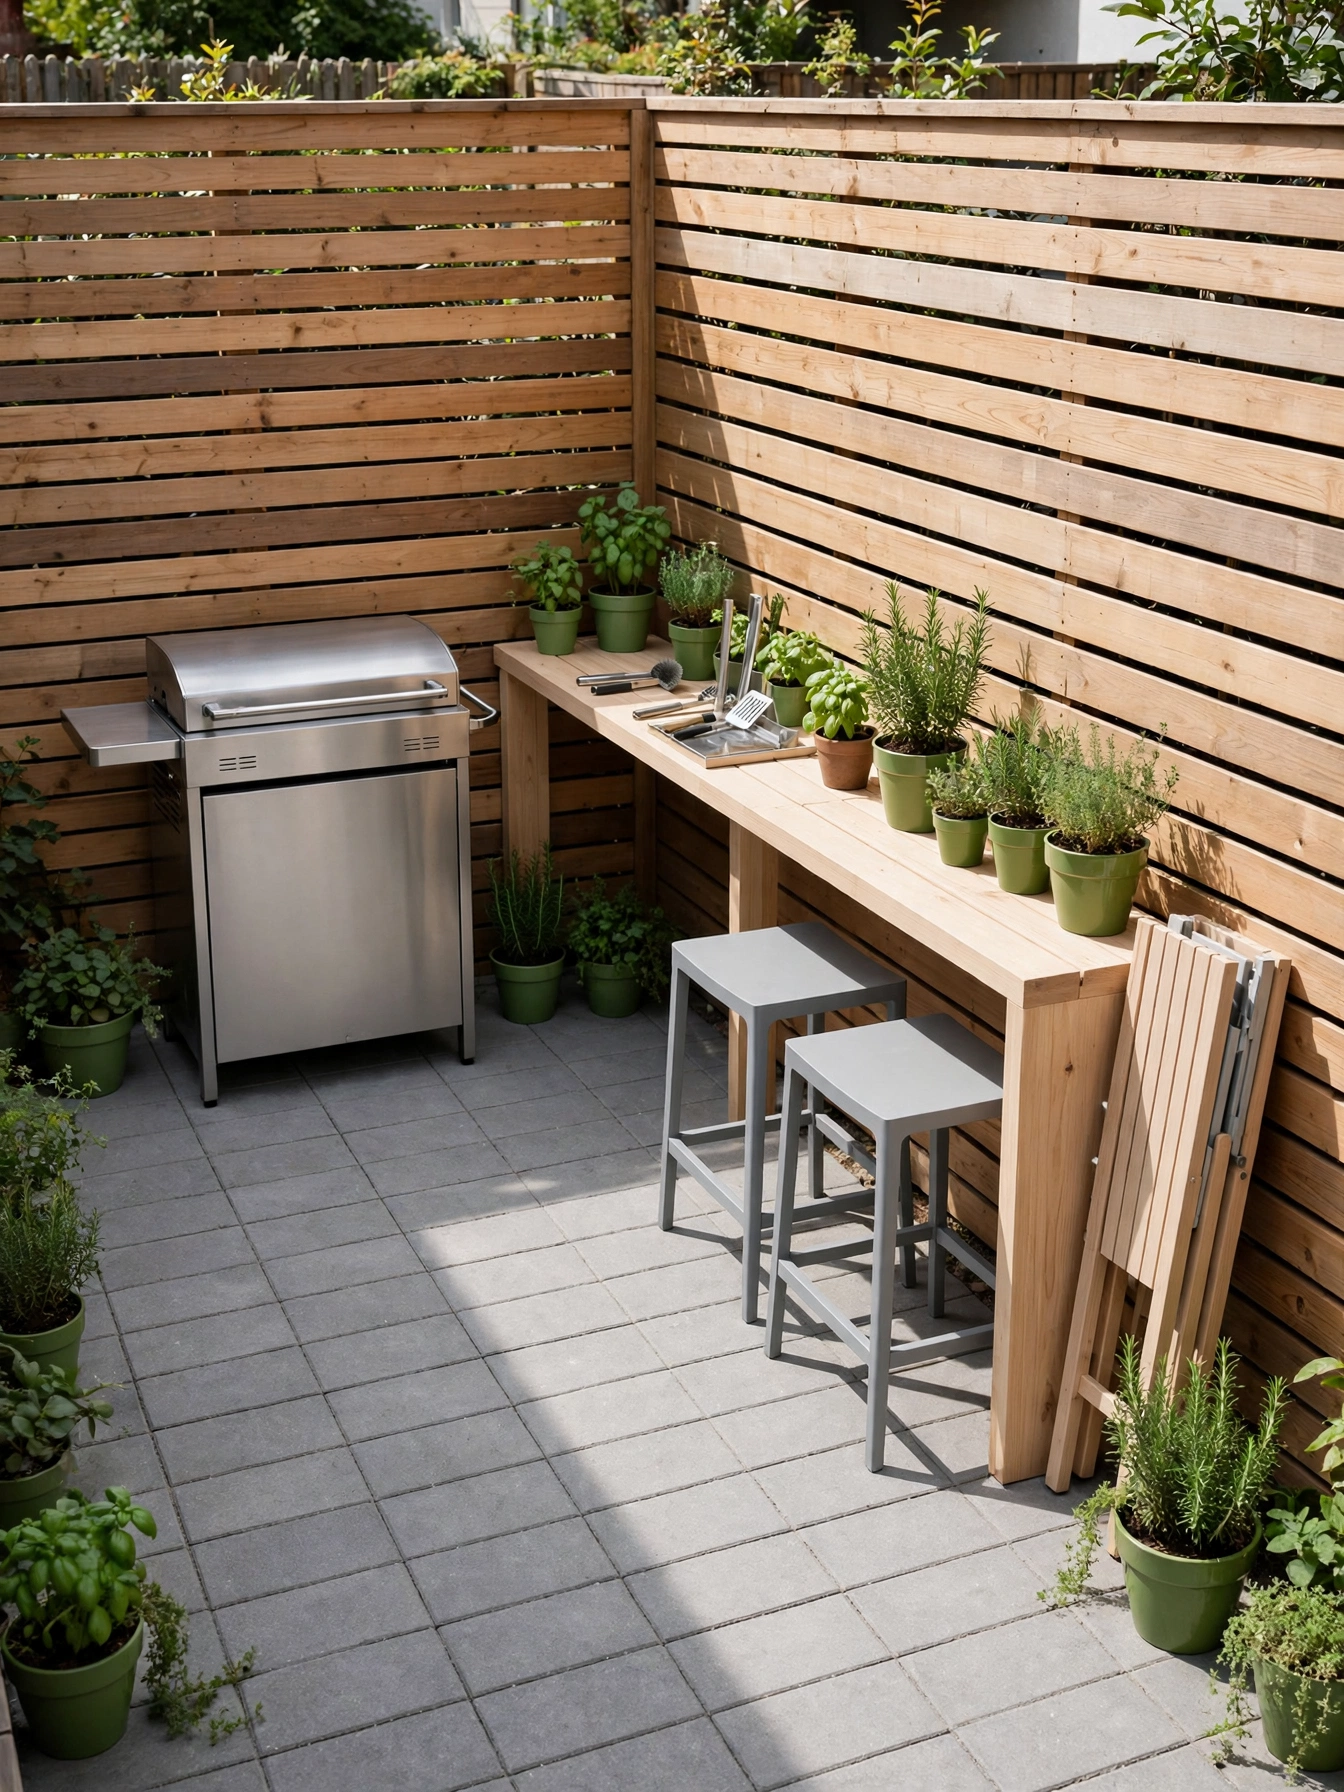
Why This Works:
- A slim grill plus a 48 inch counter fits a 25 foot yard
- Folding stools store flat when the zone is not in use
- One straight run keeps grill, prep and serving in a line
- Vertical herb pots use fence space instead of floor space
Small yards still hold a full cooking zone when the layout runs in one straight line. Set a 48 inch prep counter beside a 30 inch grill, which gives 24 inches of landing space on the grill side and keeps the whole run under 9 feet long. Keep 42 inches of walkway in front of the run so the cook can step back without tripping over chairs, and choose folding stools 16 inches wide that tuck fully under the counter. In a narrow yard, a 24 inch deep counter leaves more walkway than a 30 inch one, because those extra 6 inches eat space the yard cannot spare. A full dining table in the same strip blocks the cook and makes the zone feel cramped instead of clever.
In a townhouse yard or a small plot, dinner for four still cooks outside without rebuilding the yard. The trade-off is storage, because a slim run holds tools and a few platters, not a full set of pans. Wall hooks and a fence shelf add storage without floor space, so the small zone stays usable. 900 to 2,200 dollars buys a compact setup with grill and counter, and a full L-shaped kitchen for the same yard costs roughly double and leaves no lawn for kids or a table.
Serving Pass Through
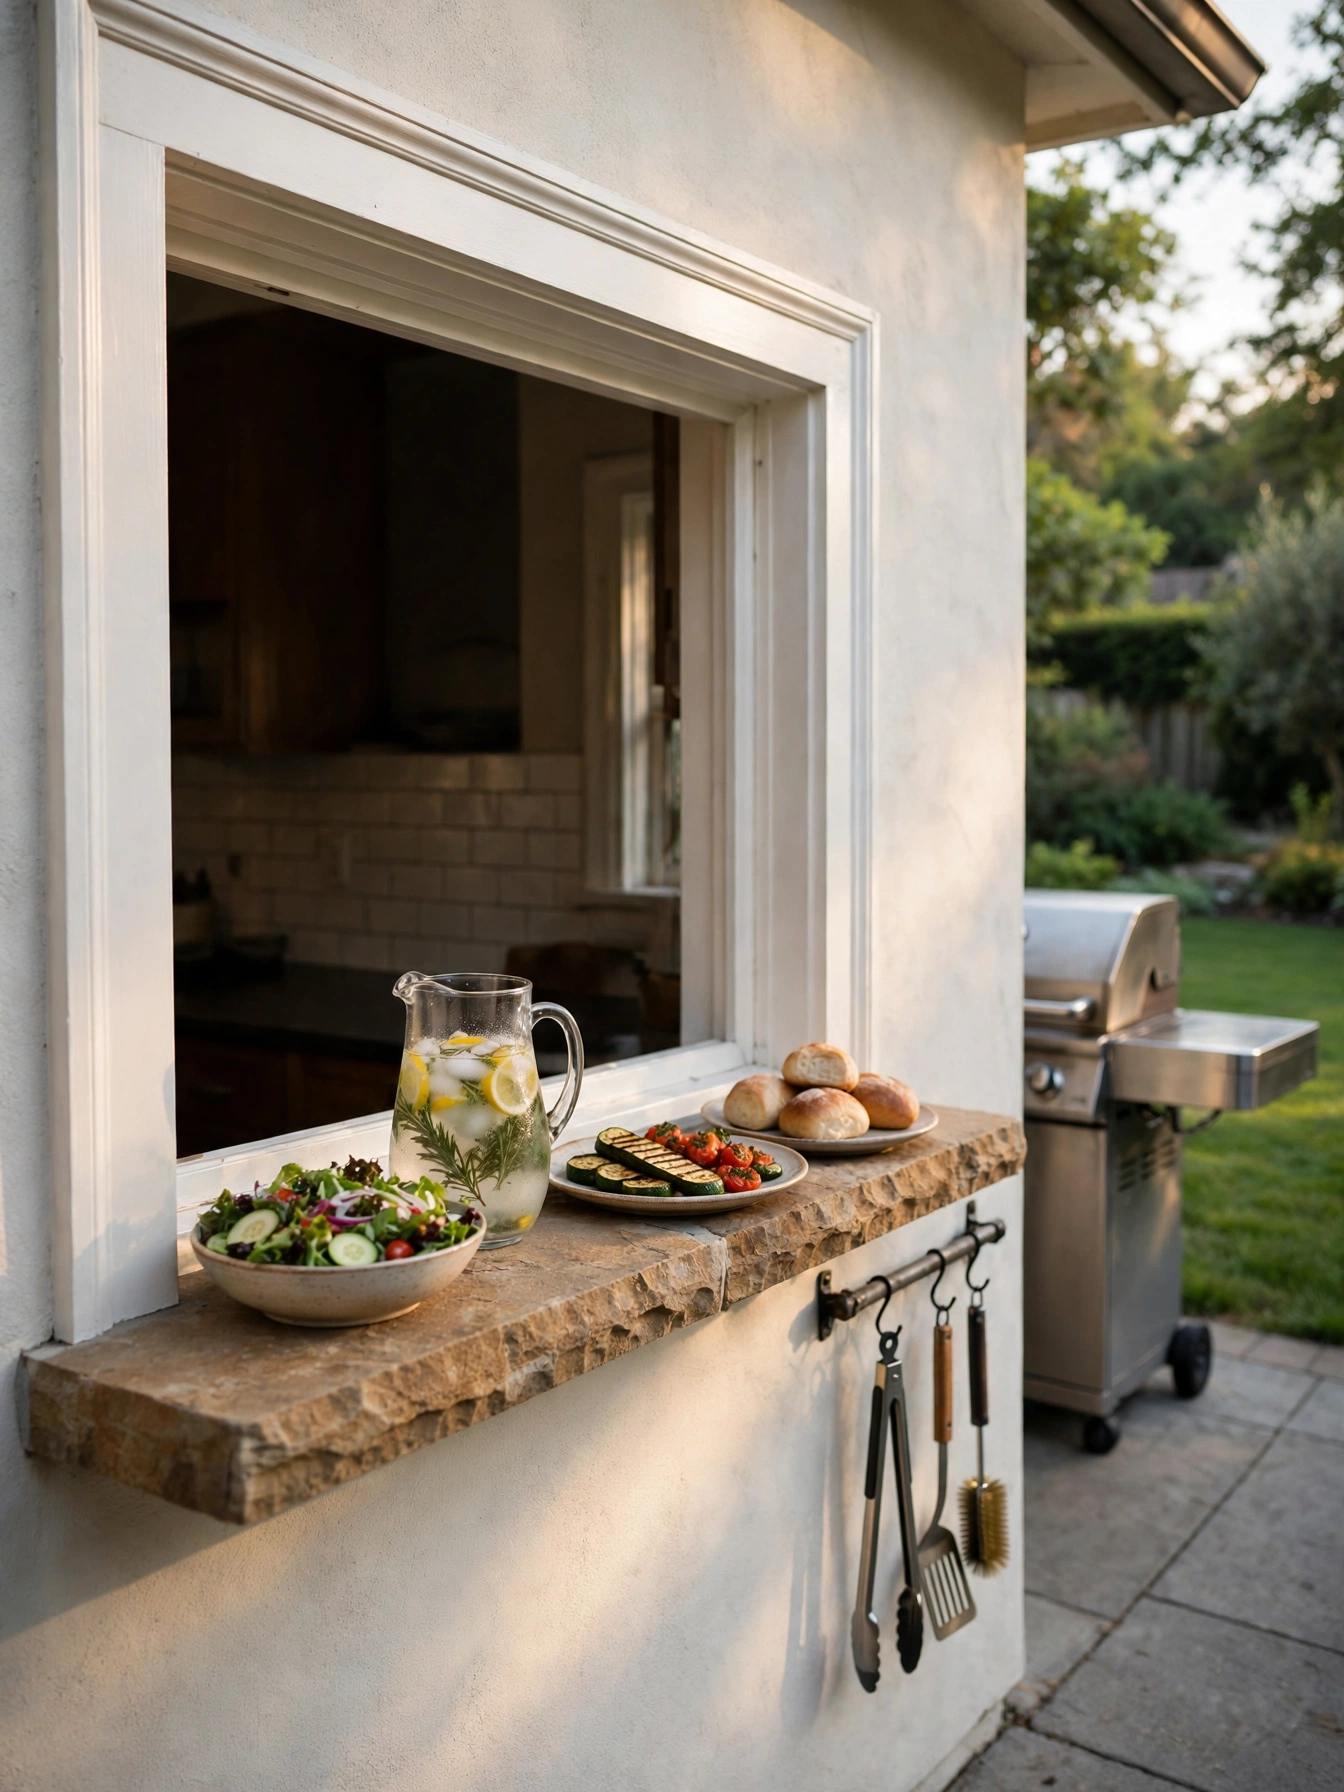
Why This Works:
- A 36 inch wide opening passes full platters without a door swing
- A stone ledge at 36 inches high matches indoor counter height
- Food travels straight from kitchen to grill in two steps
- A shutter closes the opening against rain and insects
A pass through window in the kitchen wall turns the back door into a serving hatch. Cut the opening 36 inches wide and set the ledge at 36 inches high, which matches the indoor counter and lets platters slide across without lifting. A 3 centimeter stone ledge resists heat from hot dishes better than a wood board, and a stainless steel shelf wipes clean yet shows every fingerprint. Keep 24 inches of clear counter inside the window, so plates stage there before they pass outside. An unshuttered opening lets wind drive rain onto the indoor counter, and the sill swells within a season.
For a cook who preps inside and finishes outside, plates move from oven to grill in seconds. The hatch also keeps kids from running through the cooking zone with trays, since food passes over the ledge instead. A pass through with a stone ledge and shutter lands at 500 to 1,400 dollars; a full set of patio doors for the same wall costs several times more and needs structural work. The hatch cannot replace a door for carrying large items, so keep the back door clear for furniture and big trays.
Weatherproof Storage Cabinets

Why This Works:
- Powder-coated aluminum never rusts, even in wet winters
- Sealed doors keep plates dry through a full season of rain
- Deep drawers hold 40 pounds of dishes without sagging
- Vent slots stop damp air from turning musty inside
Outdoor cabinets face rain, sun and frost, so the material matters more than the look. Choose powder-coated aluminum or 304 grade stainless steel cabinets, since both resist rust. Painted wood swells and peels after two wet winters. Build the cabinet run 36 inches high and 24 inches deep, with full-extension slides rated for 100 pounds on the drawers. A 36 inch wide drawer holds a full set of plates. A 24 inch drawer holds tools and linens. Keep vent slots at the back of each cabinet, which lets damp air escape instead of settling. Charcoal and paper towels belong away from a sealed cabinet beside the grill, since trapped heat and damp ruin both within weeks.
A three-door aluminum cabinet run is priced at 1,200 to 3,000 dollars. Stainless cabinet runs show fingerprints faster, and the doors need a wipe after every cookout to look clean. Plates, tools and linens live beside the grill instead of in the indoor kitchen, so setting the table takes one trip instead of four. A household that grills often will feel the difference every night, with the zone stocked all summer. Plastic deck boxes run a fraction of cabinet prices and hold cushions well, but they cannot match the access of drawers at waist height.
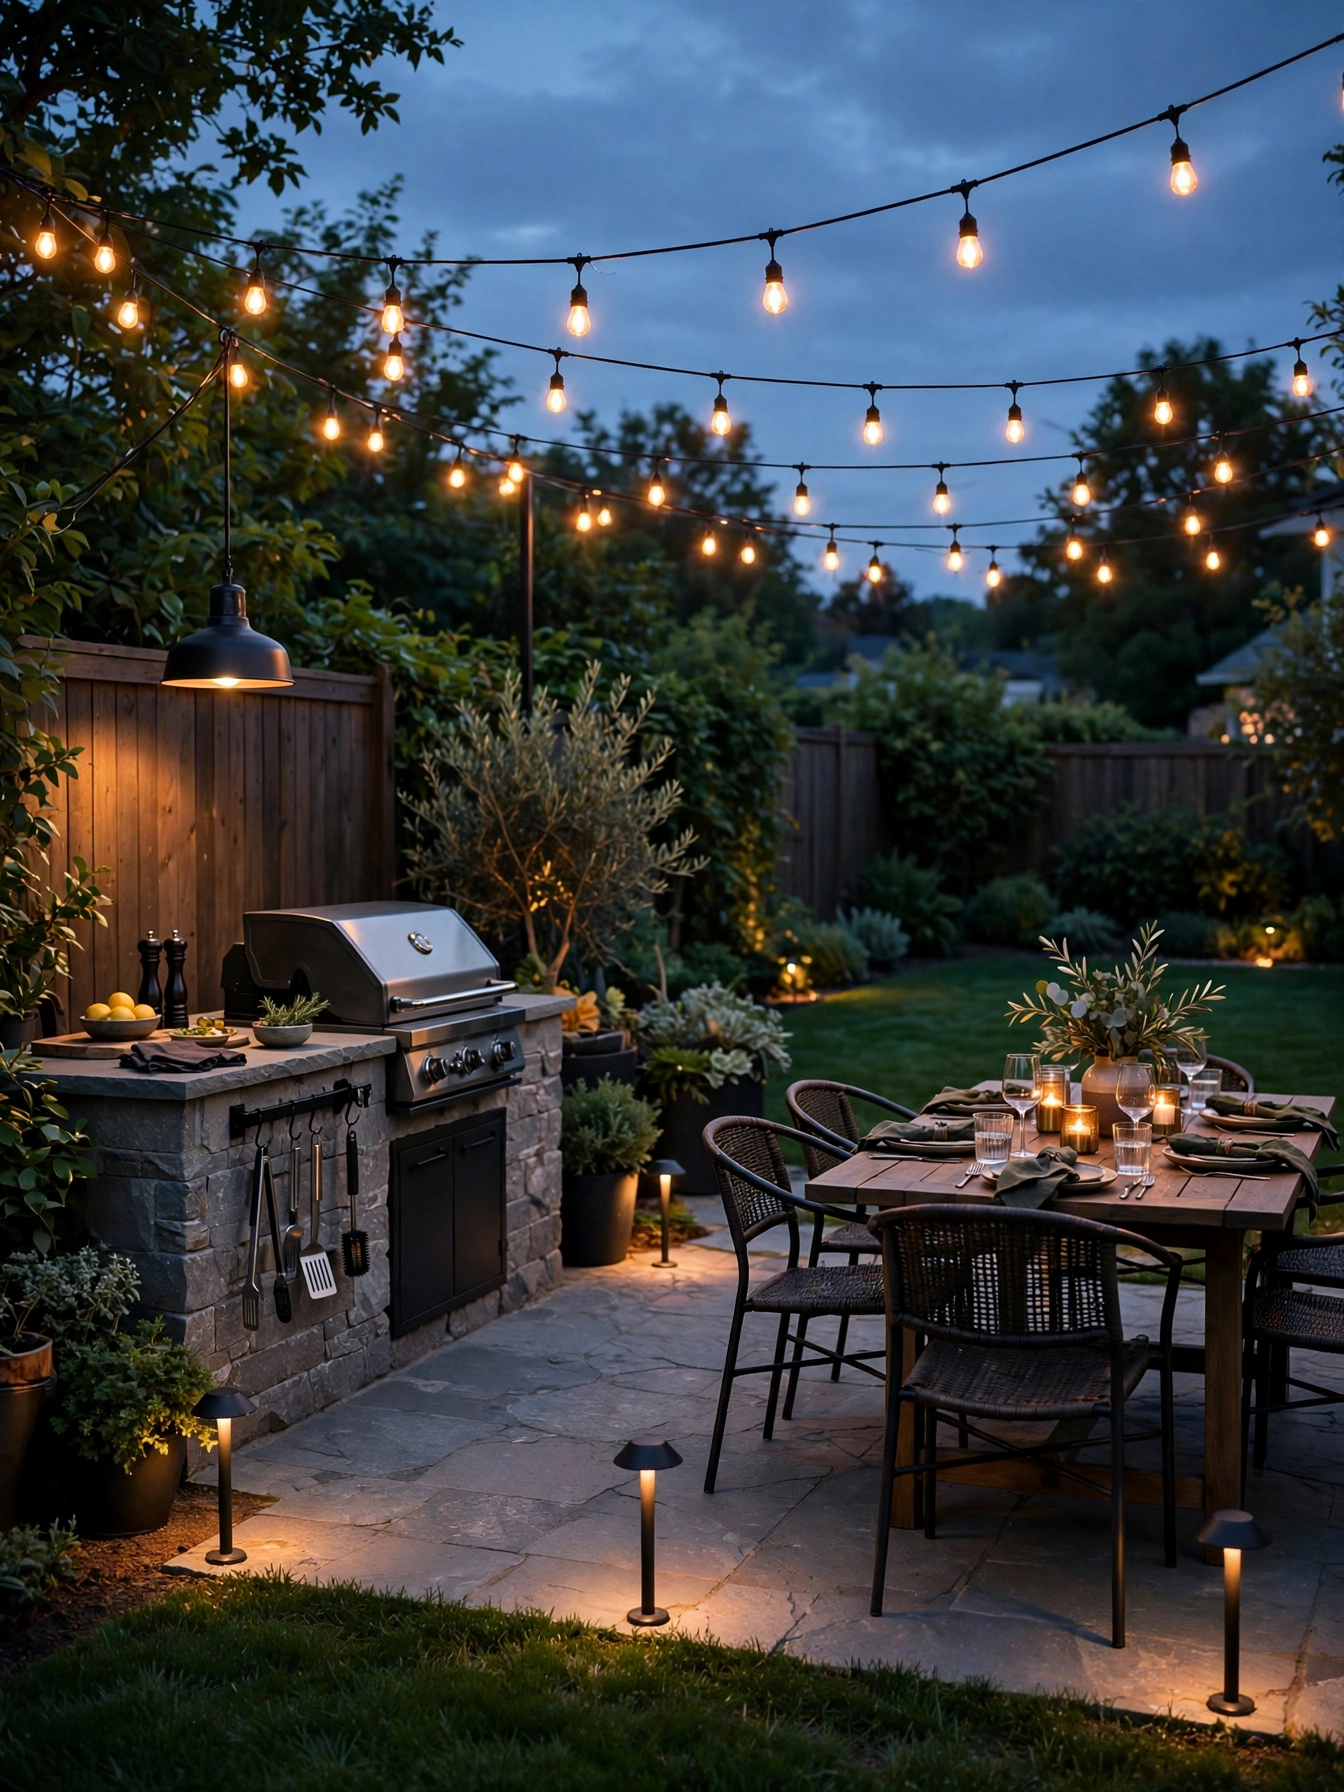
Lighting After Dark
Why This Works:
- IP65 rated fittings survive rain and hose splashes
- Warm 2700K light makes food look fresh after sunset
- String lights at 8 to 10 feet clear tall guests
- Low path lights mark steps and edges without glare
Outdoor lighting starts with the weather rating, since a fitting that fails in rain leaves the grill dark mid-cook. Choose IP65 rated lights for any fitting exposed to rain, and keep the color at 2700K to 3000K, which flatters food and feels calm after dark. Hang string lights at 8 to 10 feet high on 48 foot strands, which span most patios without a sagging middle. A pendant over the prep counter should sit 30 to 36 inches above the surface, the same height used over indoor islands. Do not use indoor rated fairy lights outside, because moisture corrodes the sockets within weeks and the strand trips the circuit.
Evening grilling stretches past sunset when the counter and the path both glow, and guests stop carrying phones as torches. Lighting the whole zone, string lights, a pendant and path lights together, adds up to 300 to 900 dollars. Solar path lights alone start near 60 dollars for a set of eight, yet they give too little light for safe chopping. For families eating outside most summer nights, that glow is the difference between a quick cook and a long evening outdoors. A 12 volt low voltage setup runs cheaper than mains lighting and is safer around kids and pets.
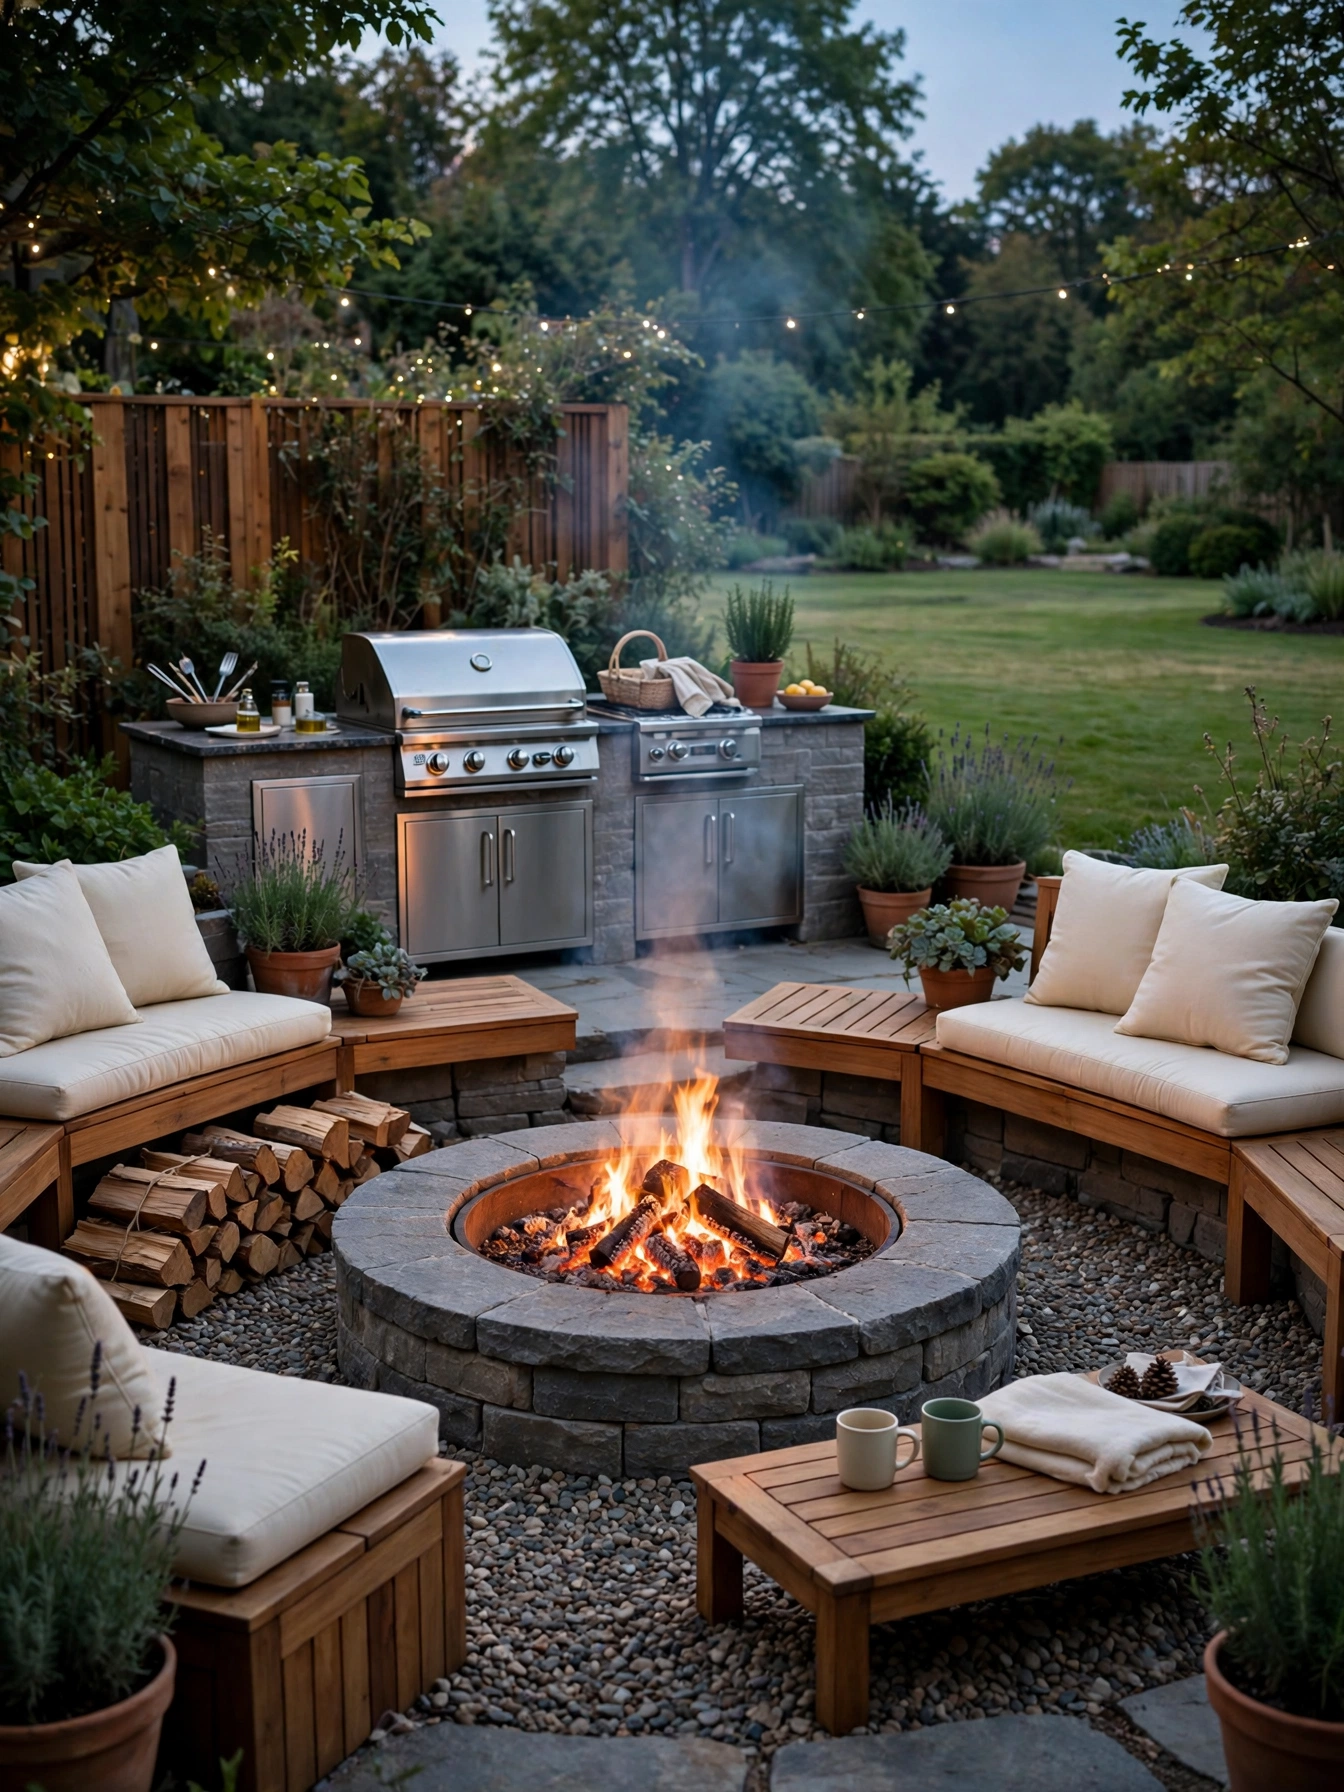
Seating Around Fire
Why This Works:
- Sparks stay off siding with a 10 foot gap from the house
- A 36 inch fire ring seats eight without crowding
- Stone benches stay cool and never need cushions stored indoors
- Gravel underfoot drains rain and stops muddy shoes
Fire seating needs the same 10 foot clearance as the grill, since sparks travel further than most people expect. Build the fire ring 36 inches across and set the seats 36 inches back from the rim, which keeps knees warm without scorching shoes. Stone or concrete benches last decades with no care, versus teak benches that feel warmer to sit on yet need oiling every year to stay sealed. The seating circle should measure at least 12 feet across for eight people, with 24 inches of seat width per person. Fire seating downwind of the table puts smoke over the plates all evening.
After dinner, the group drifts from table to fire without leaving the yard, which stretches the evening by an hour or more. Older kids get a place of their own around the fire, away from the adults at the table. Steel bowls rust within a few seasons unless the finish is powder-coated, so check the coating before buying. A stone fire pit with benches comes in at 800 to 2,500 dollars. A portable steel fire bowl sells near 150 dollars, packs away for winter, and sets up again in minutes on the first warm evening.
Herb Garden Edge

Why This Works:
- Herbs within 6 feet of the grill land in the pan in seconds
- Cedar beds resist rot for 10 years without chemical treatment
- Mint in its own pot cannot crowd the basil beside it
- A 12 inch deep bed drains well and keeps roots healthy
Herbs belong within two steps of the grill, since a cook will not walk across the yard for a pinch of basil. Build a cedar raised bed 12 inches deep and 24 inches wide along the patio edge, and space the plants 12 inches apart so air moves between leaves. Basil needs water every 3 days in summer. Rosemary prefers a weekly soak and dry soil between drinks. Mint spreads fast, so keep it in a separate 10 inch pot rather than the shared bed. A bed in the grill station’s shade starves most cooking herbs of the 6 hours of direct sun they need to stay full and fragrant.
A snip of rosemary lands on the chicken before the grill lid closes, which is the whole point of planting beside the cooking zone. A cook who grills with fresh flavors will reach for this bed first, since dried herbs never match the taste. A cedar bed with soil and six starter plants adds up to 120 to 350 dollars. A row of terracotta pots for the same herbs is about 60 dollars and moves indoors in winter. Pots dry out faster than a raised bed, so they need watering a day sooner in hot weeks.
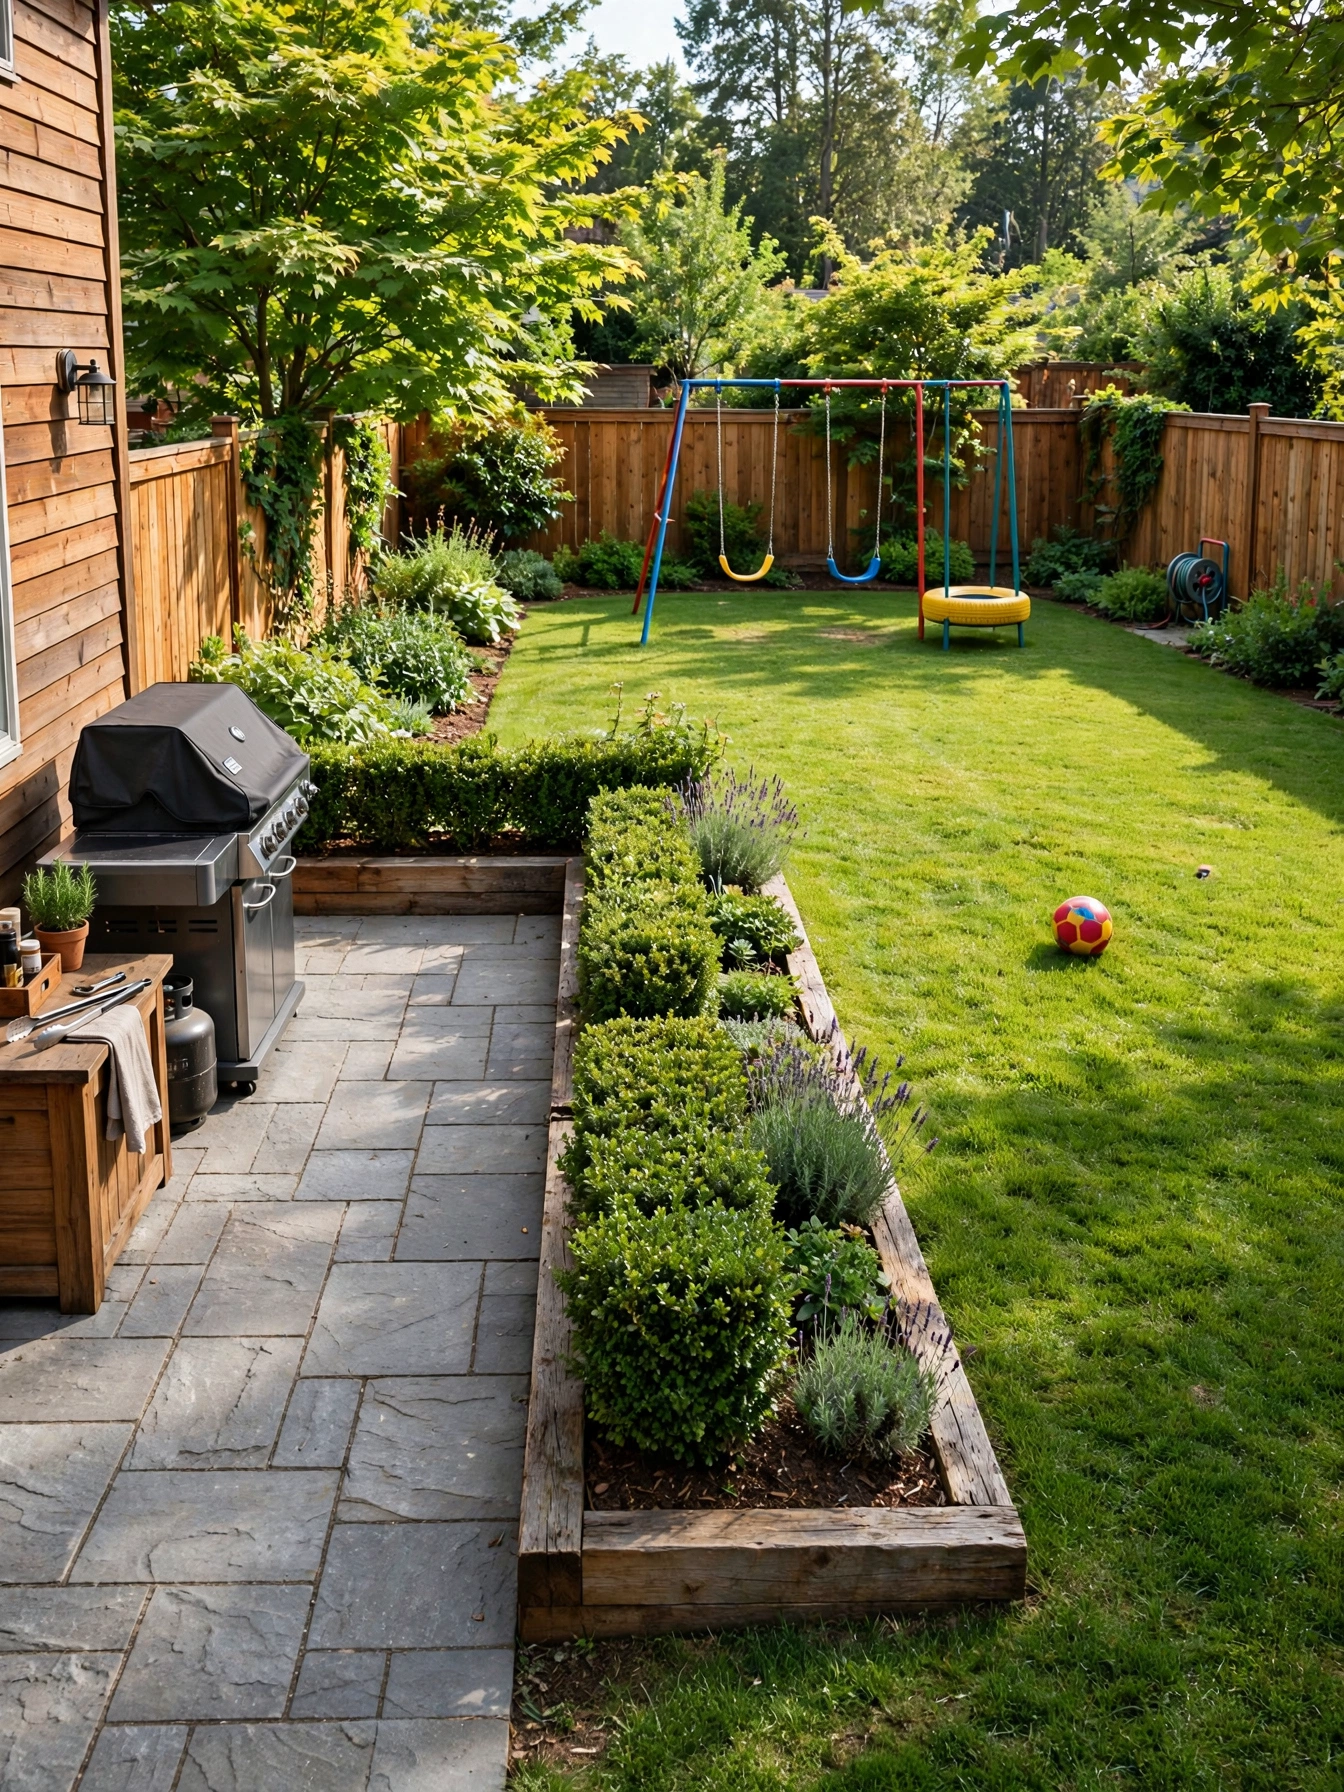
Kids Play Buffer
Why This Works:
- Ten feet of lawn, or a 36 inch planting bed plus 7 feet of lawn, between the grill and the play lawn keeps balls out of the grill zone
- Low hedging marks the boundary without blocking the view
- Lawn on the play side cushions falls better than stone
- A clear sightline lets the cook watch kids from the grill
A buffer of lawn or planting between the cooking zone and the play area keeps the two uses from colliding. Leave a 10 foot buffer between the grill counter and the play lawn, made of lawn alone or a 36 inch planting bed plus 7 feet of lawn, which stops a stray ball from reaching a hot grill. Low hedging at 24 inches high marks the boundary without blocking the cook’s view. A tall fence, on the other hand, hides the kids and defeats the purpose. Keep the play surface as grass or rubber mulch 3 inches deep, since stone pavers bruise knees and shins. A swing set within 10 feet puts the swing arc inside the heat zone, where a child can swing into danger.
Parents cook with an easy mind when kids play in sight but outside the hot zone, and that peace of mind matters most with children under 10. For a 20 foot run, a low hedge and mulch buffer costs 200 to 600 dollars to put in. A full fence with a gate across those 20 feet needs posts set 24 inches deep. That buffer eats a strip that could hold a bigger table. A simple row of potted plants is the lowest-cost boundary and moves when the kids outgrow the play area.
Wind Block Screens

Why This Works:
- Slats with 1 inch gaps cut wind speed without a solid wall
- Cedar posts set 24 inches deep stand firm in gusts
- A 6 foot screen shields the grill flame from sideways wind
- Screens double as a backdrop that hides bins and hoses
Wind turns a grill flame sideways and doubles cooking time, so a screen on the windy side pays for itself in fuel and patience. Build the screen 6 feet high and 8 feet long from cedar slats with 1 inch gaps, which slows the wind instead of blocking it outright. A solid wall creates a gusty eddy on the far side. Slatted boards let air through and keep the flame steady. Set the steel posts in concrete footings 24 inches deep and 12 inches wide, and keep the screen 36 inches from the grill so heat never reaches the wood. Untreated pine warps and splits after one wet winter.
An exposed yard or a hilltop garden feels that change at once: heat holds steady and flare-ups drop when the air stays still around the grill. The screen also hides the bins and the hose from the dining view, so the yard looks tidier. Fabric windbreaks are the cheapest windbreak yet tear in strong gusts, so they work as a trial before a permanent screen. An 8 foot cedar slat screen is 400 to 1,000 dollars. A glass wind panel cut to 8 feet needs cleaning every week to stay clear, since dust and pollen show on glass within days.
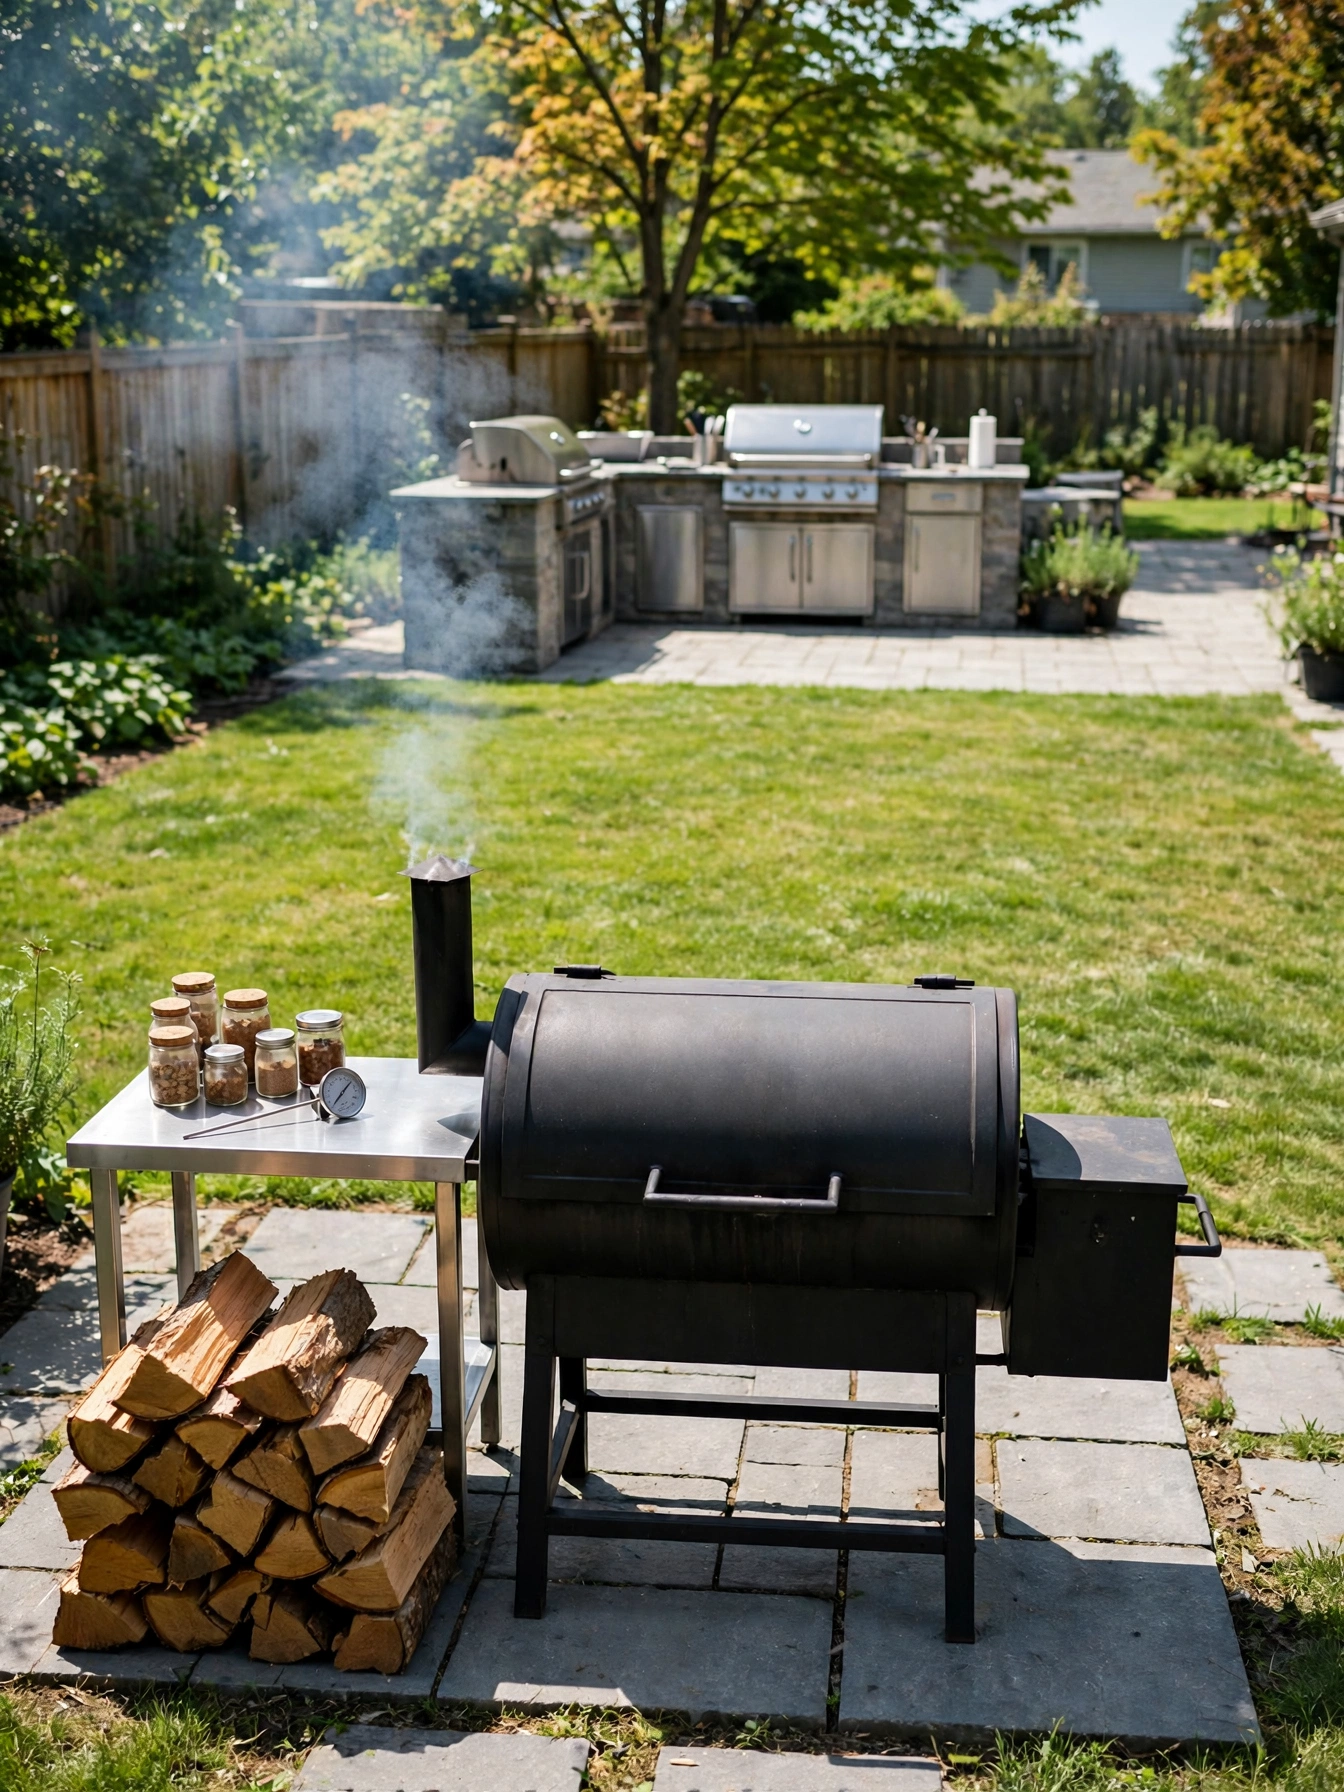
Smoker Station Spot
Why This Works:
- A far corner keeps smoke away from the dining table
- Stone 48 inches square catches ash and stops scorch marks
- A wood pile within arm’s reach feeds a 6 hour cook
- A shelf at 36 inches high holds rubs and thermometers
Smokers need distance from seating, since a 6 hour cook sends smoke across the whole yard. Place the smoker at least 15 feet from the dining table and 10 feet from the house, on a stone pad 48 inches square that catches ash and grease. A steel offset smoker holds heat steadier than a thin kettle grill. A pellet smoker controls temperature with a dial yet needs a power outlet within 10 feet. Keep a wood pile of 2 cubic feet beside the pad for a full day of cooking, and store it under a cover so rain never soaks the fuel. A smoker on a wood deck lets embers drop through the vents and scorch boards in minutes.
A quality offset smoker is priced near 400 to 1,200 dollars, and a pellet model of similar size starts higher and adds the cost of electricity and pellets. Brisket or ribs at least once a month turns this corner into a weekend ritual. A smoker needs 6 to 12 hours per cook, with temperature checks through the day. Kettle grills smoke in small batches and cost little to run, but they cannot hold a steady 225 degrees for a full day.
Side Serving Cart
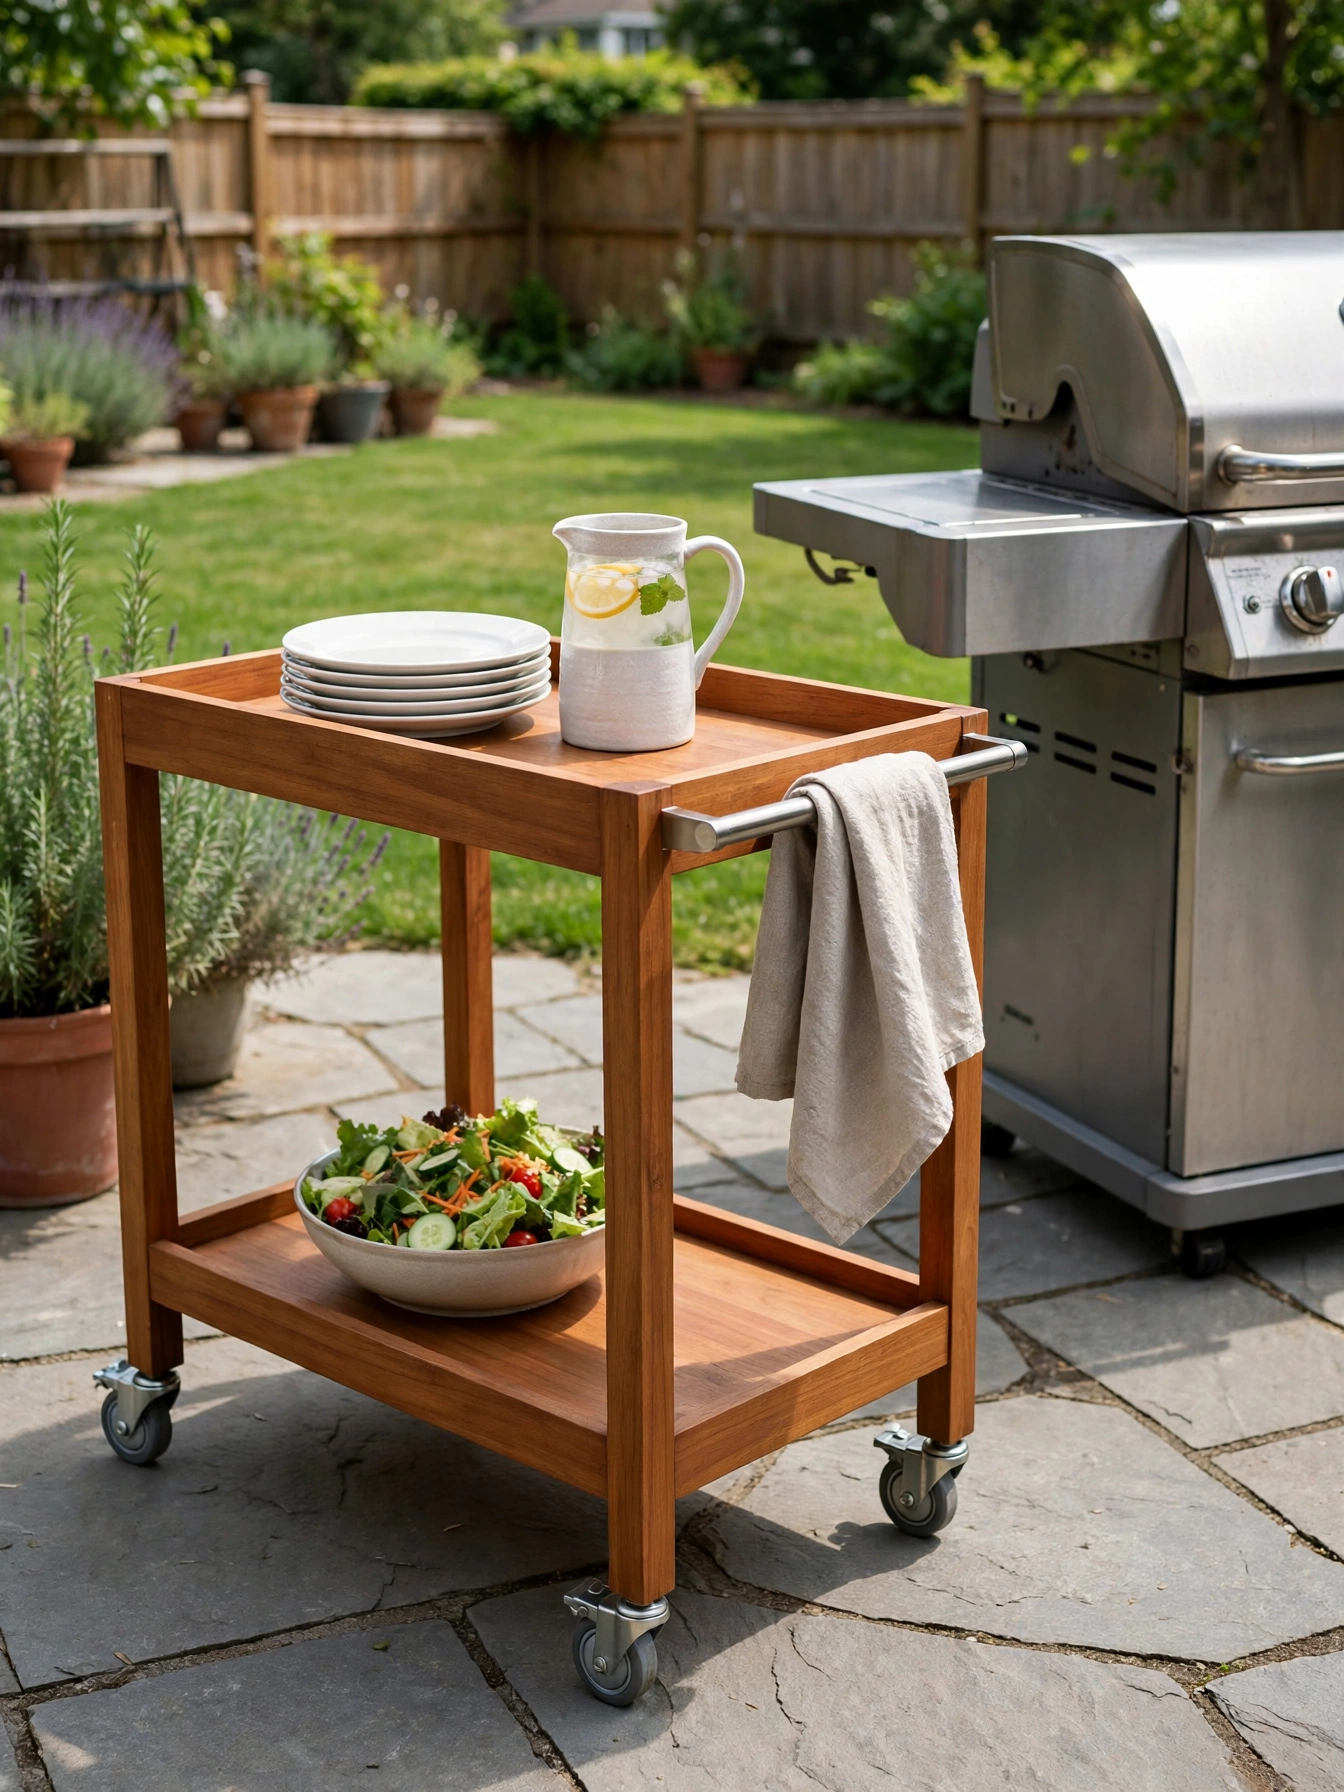
Why This Works:
- A 24 inch wide cart rolls between grill and table
- Two shelves carry 12 plates plus drinks in one trip
- Locking wheels rated for 100 pounds hold a full load steady
- The cart parks against a wall when dinner ends
A serving cart adds 24 inches of mobile counter wherever the evening needs it. Choose a teak or powder-coated cart 36 inches high and 24 inches wide, with two shelves and locking wheels rated for 100 pounds each. A cart with a 1.5 inch thick top carries a heavy platter without flexing. A thin plastic cart sags under the same load and tips on uneven pavers. Keep the cart within 6 feet of the grill so the cook reaches it without crossing the walkway, and lock all four wheels before loading hot dishes. Small 2 inch wheels sink in gravel and stall a loaded cart halfway to the table.
One loaded cart replaces four trips between grill and table, and a loaded cart parked beside the grill keeps the serving path short all evening. The cart also works as a drinks station when the meal ends, since bottles and glasses ride out on the same shelves. A sturdy teak serving cart runs 200 to 500 dollars. A stainless steel cart shrugs off rain and never needs oiling, and its shelves wipe down with a damp cloth after a messy cookout. Folding tray tables are the cheapest option yet hold only one course at a time, so they work as a spare rather than the main carrier.
Backyard Outdoor Kitchen Ideas for Shade
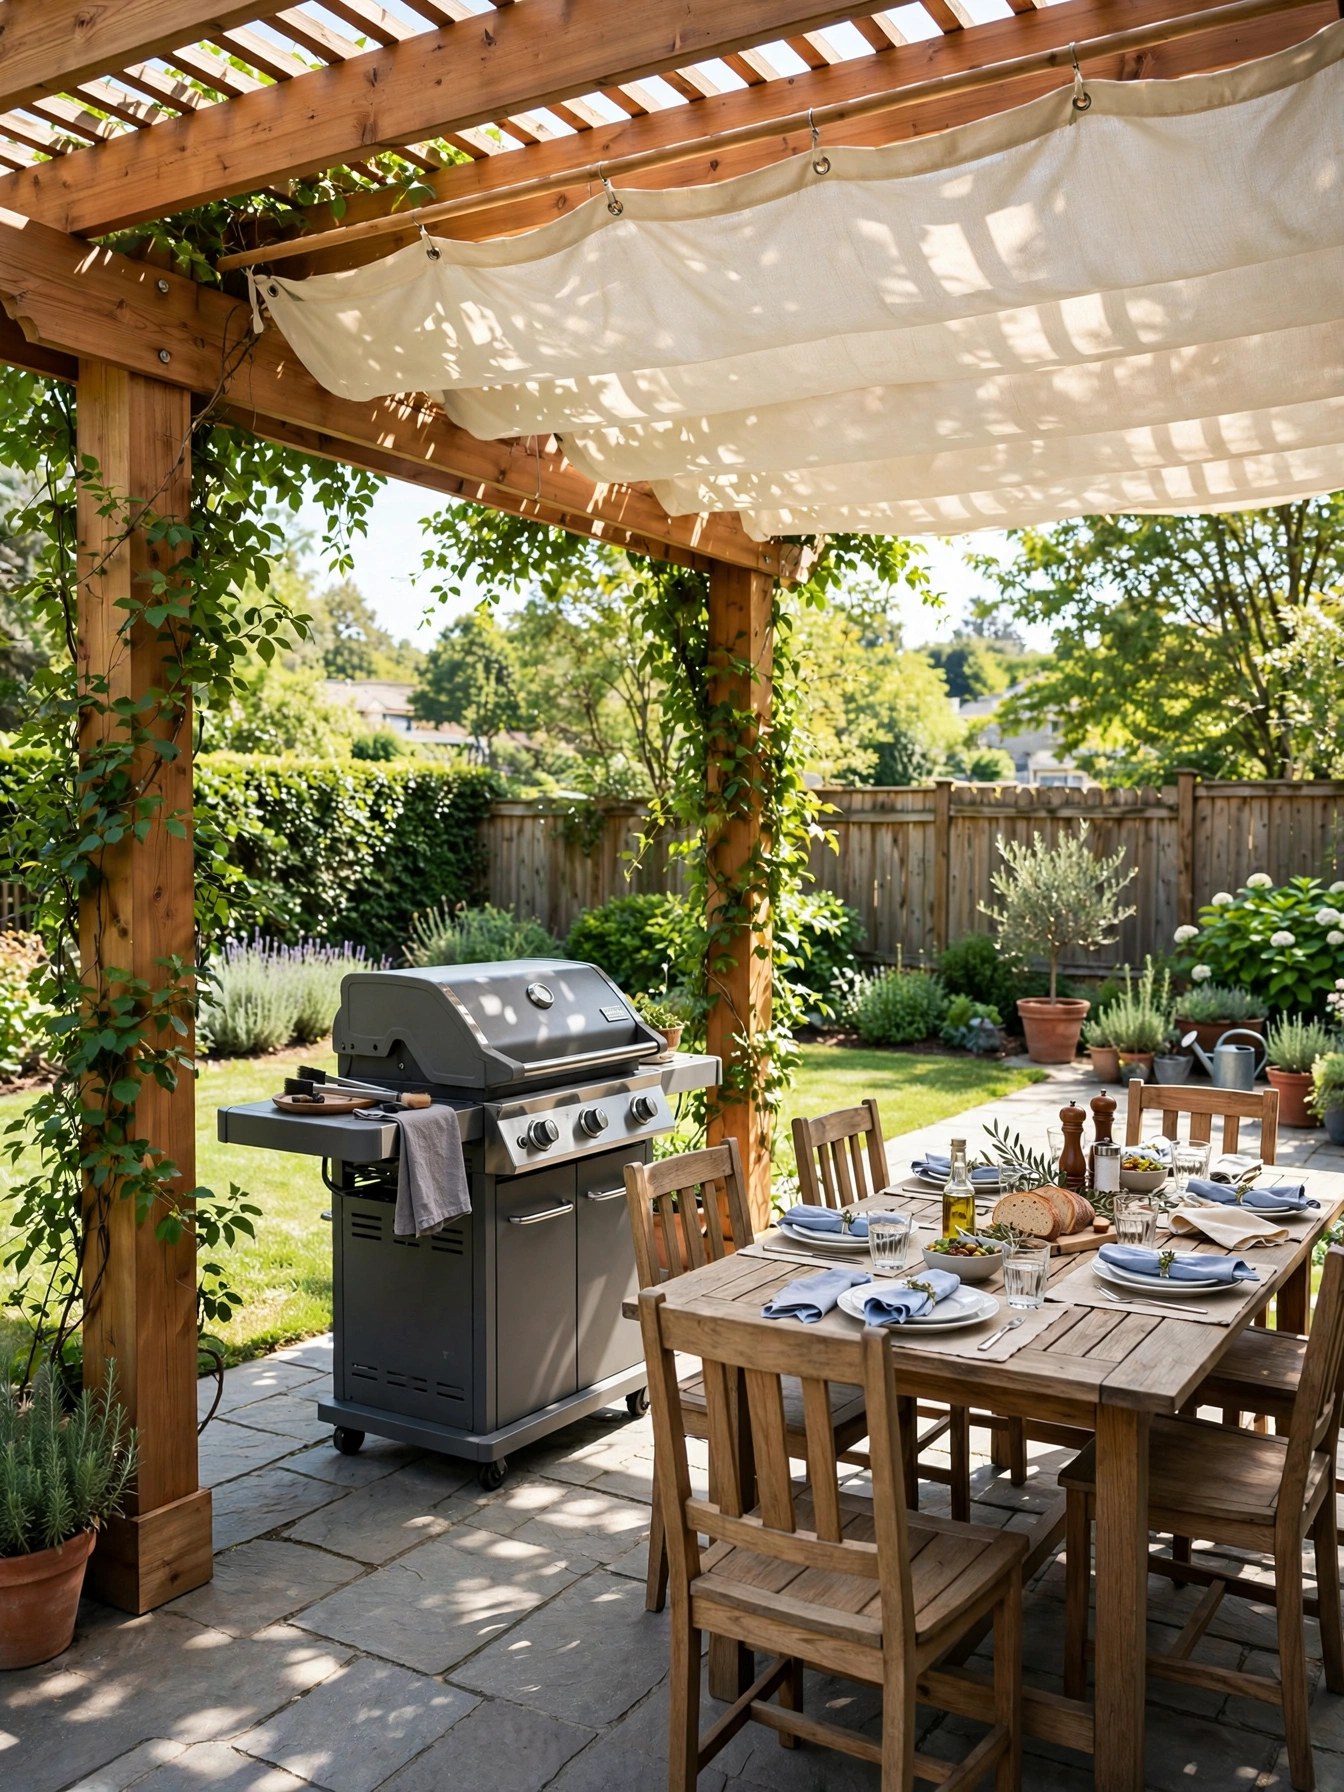
Why This Works:
- A pergola spanning 10 by 12 feet shades a full dining set
- Slats spaced 6 inches apart filter sun without blocking breeze
- A fabric panel below the slats adds shade at midday
- Climbing vines cool the air and soften the timber frame
The afternoon sun decides where shade belongs, since a cooking zone that bakes at 4 PM goes unused all summer. Build a pergola 10 by 12 feet over the grill and table, with cedar beams 6 inches deep and slats spaced 6 inches apart to filter the sun. A retractable fabric panel under the slats adds full shade at midday and rolls away on cloudy days. A solid roof blocks rain, yet it traps heat under the beams on a still afternoon, so the cooking zone feels stuffy even when the table stays dry. Set the posts in concrete footings 24 inches deep, and keep the lowest beam at 8 feet high so tall guests clear it. Vines that drop fruit over the grill stain counters and draw wasps to the food.
Installed, a cedar pergola 10 by 12 feet comes to 2,000 to 5,000 dollars; a shade sail over the same area runs a fraction of that price and removes for winter. Dappled shade keeps the cooking zone usable from noon to evening, and a sunny yard with little tree cover gains the most from that cover. The structure also anchors the whole layout, since grill, counter and table all gather under one roofline. Vines take 2 to 3 seasons to cover the frame, so the fabric panel carries the shade in the first year.
Rain Cover Options
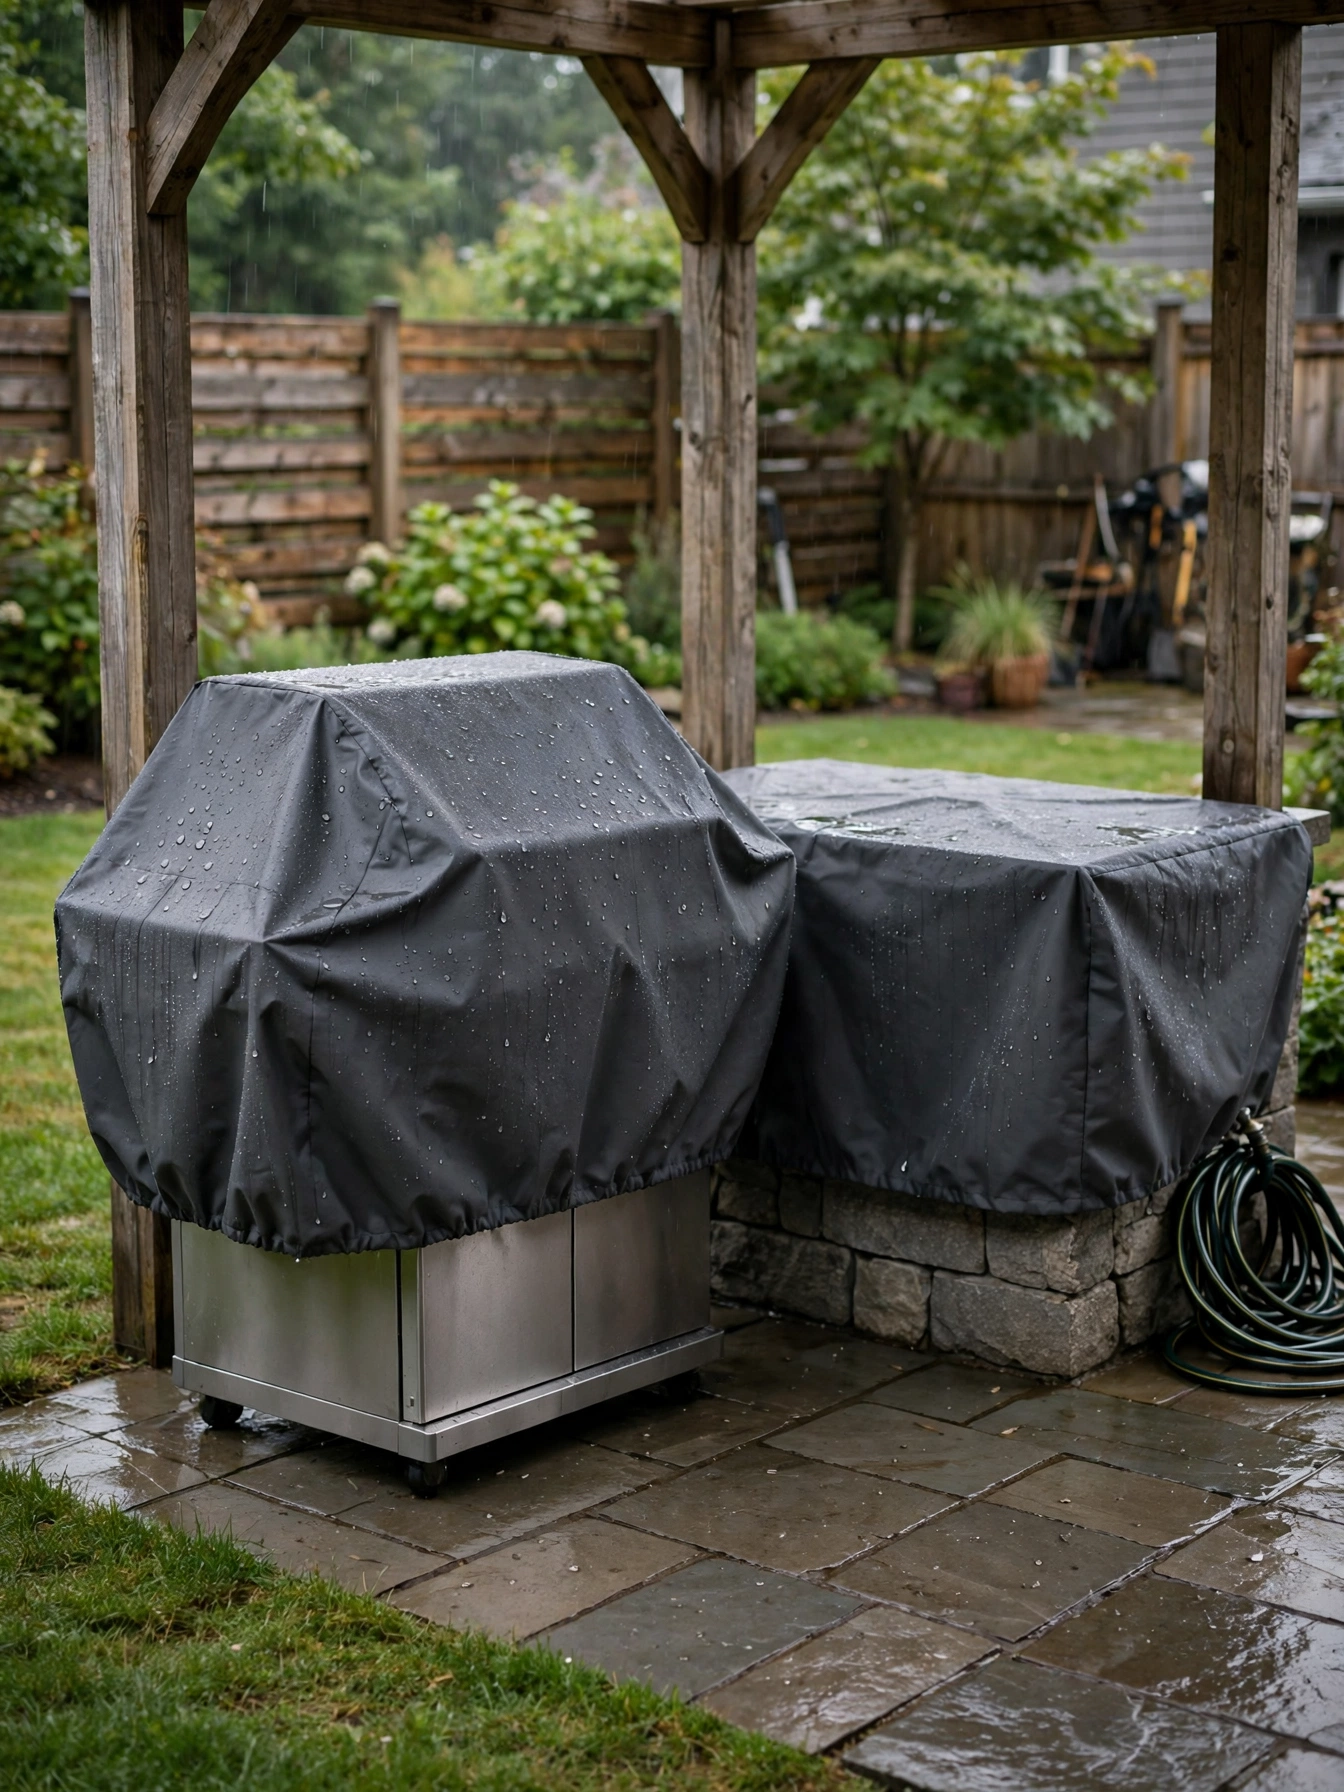
Why This Works:
- A cover rated for 600D fabric sheds rain for 3 seasons
- Vents in the cover stop condensation from rusting the grill
- A fixed roof over the grill keeps cooking going in drizzle
- Covers undercut a roof on price and fit any grill size
Rain covers protect the grill between cooks, and the fabric weight decides how long they last. Choose a 600D polyester cover with vents, since lighter 300D fabric tears in wind within one season. A fixed roof over the grill area measures 8 by 10 feet at minimum and lets cooking continue in drizzle. A cover alone means waiting for the rain to pass. Keep the cover loose enough for air to move, because a tight cover traps moisture and rusts a stainless steel grill faster than open rain. A cover on a hot grill melts its lining and sticks to the metal.
Dry equipment lasts years longer than gear left open to rain, and in a rainy region the grill stays ready without a daily wipe. A quality 600D cover goes for 40 to 120 dollars. A fixed roof over the grill area costs 1,500 to 4,000 dollars and needs posts set 24 inches deep. The cover must come off and go on every time the grill runs, a small chore that adds up over a summer. A cheap tarp undercuts every cover on price yet flaps loose and pools water, so it protects the grill poorly.
Pathway Stonework
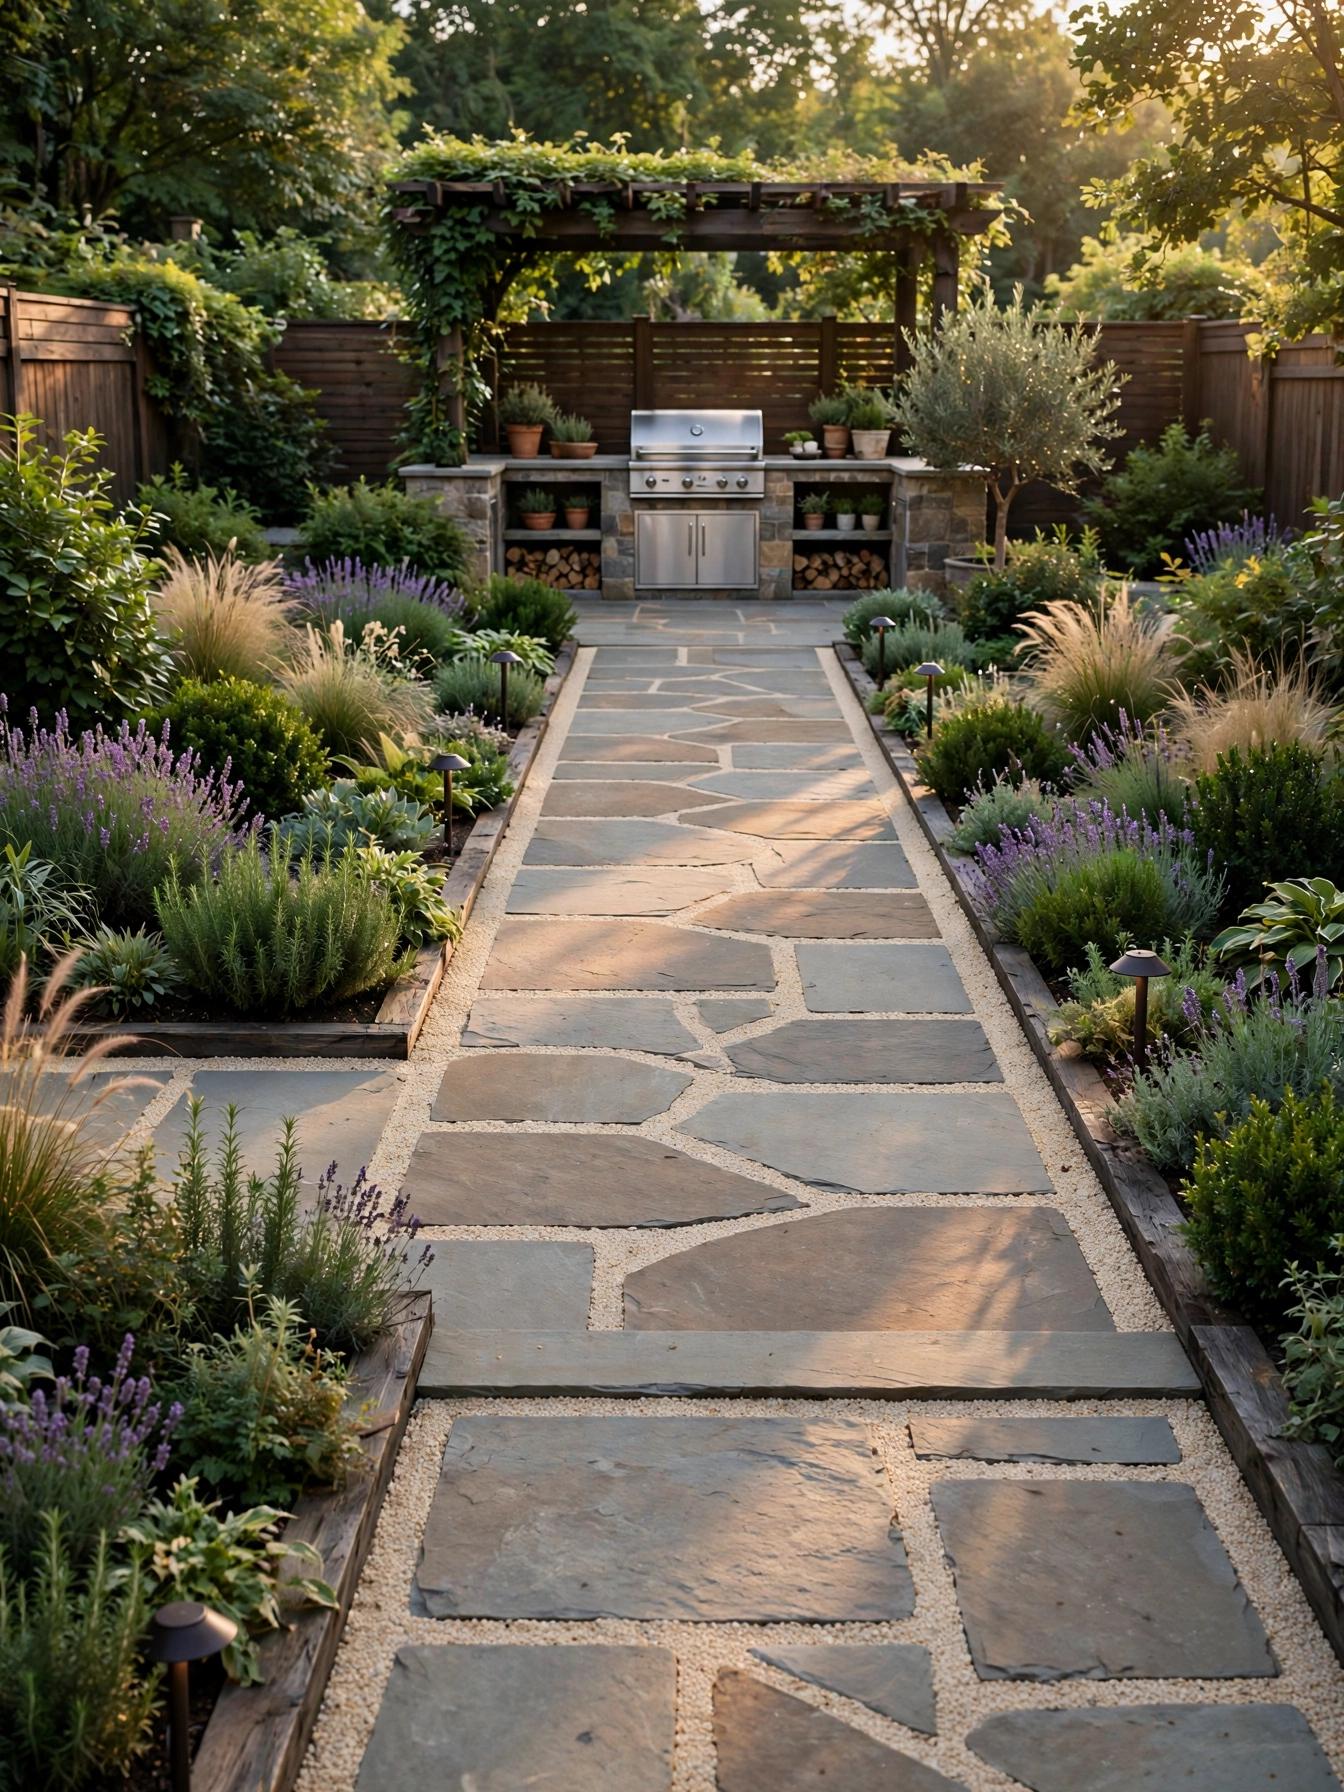
Why This Works:
- Slabs 24 inches wide give a steady footing for loaded trays
- Gravel joints drain rain in minutes and stop puddles
- Low lights at 12 inch intervals mark the edge after dark
- Timber edging keeps stones from shifting over time
Stone paths carry trays, kids and guests between the house and the cooking zone, so the footing must stay steady. Lay natural stone slabs 24 inches wide on a 4 inch gravel base, and keep the path 48 inches wide where two people pass with trays. A 1/4 inch per foot slope drains rain away from the patio. A flat path pools water and turns slippery within weeks. Timber edging 4 inches high holds the slabs in place, and low voltage lights at 12 inch intervals mark the edge after dark. Slabs laid straight on soil heave with frost within one winter and turn the path into a trip hazard.
A solid path makes the whole yard feel finished, and through a summer of outdoor meals it gets walked daily. The stone also outlasts a wood walkway, which rots at ground level after 5 to 7 years. Concrete slabs stay level through frost and come in at a modest price, though they can crack sooner than thick stone in a hard freeze. Materials for a 20 foot stone path total 600 to 1,500 dollars; gravel over the same run scatters underfoot and needs topping up every year.
Winter Storage Plan
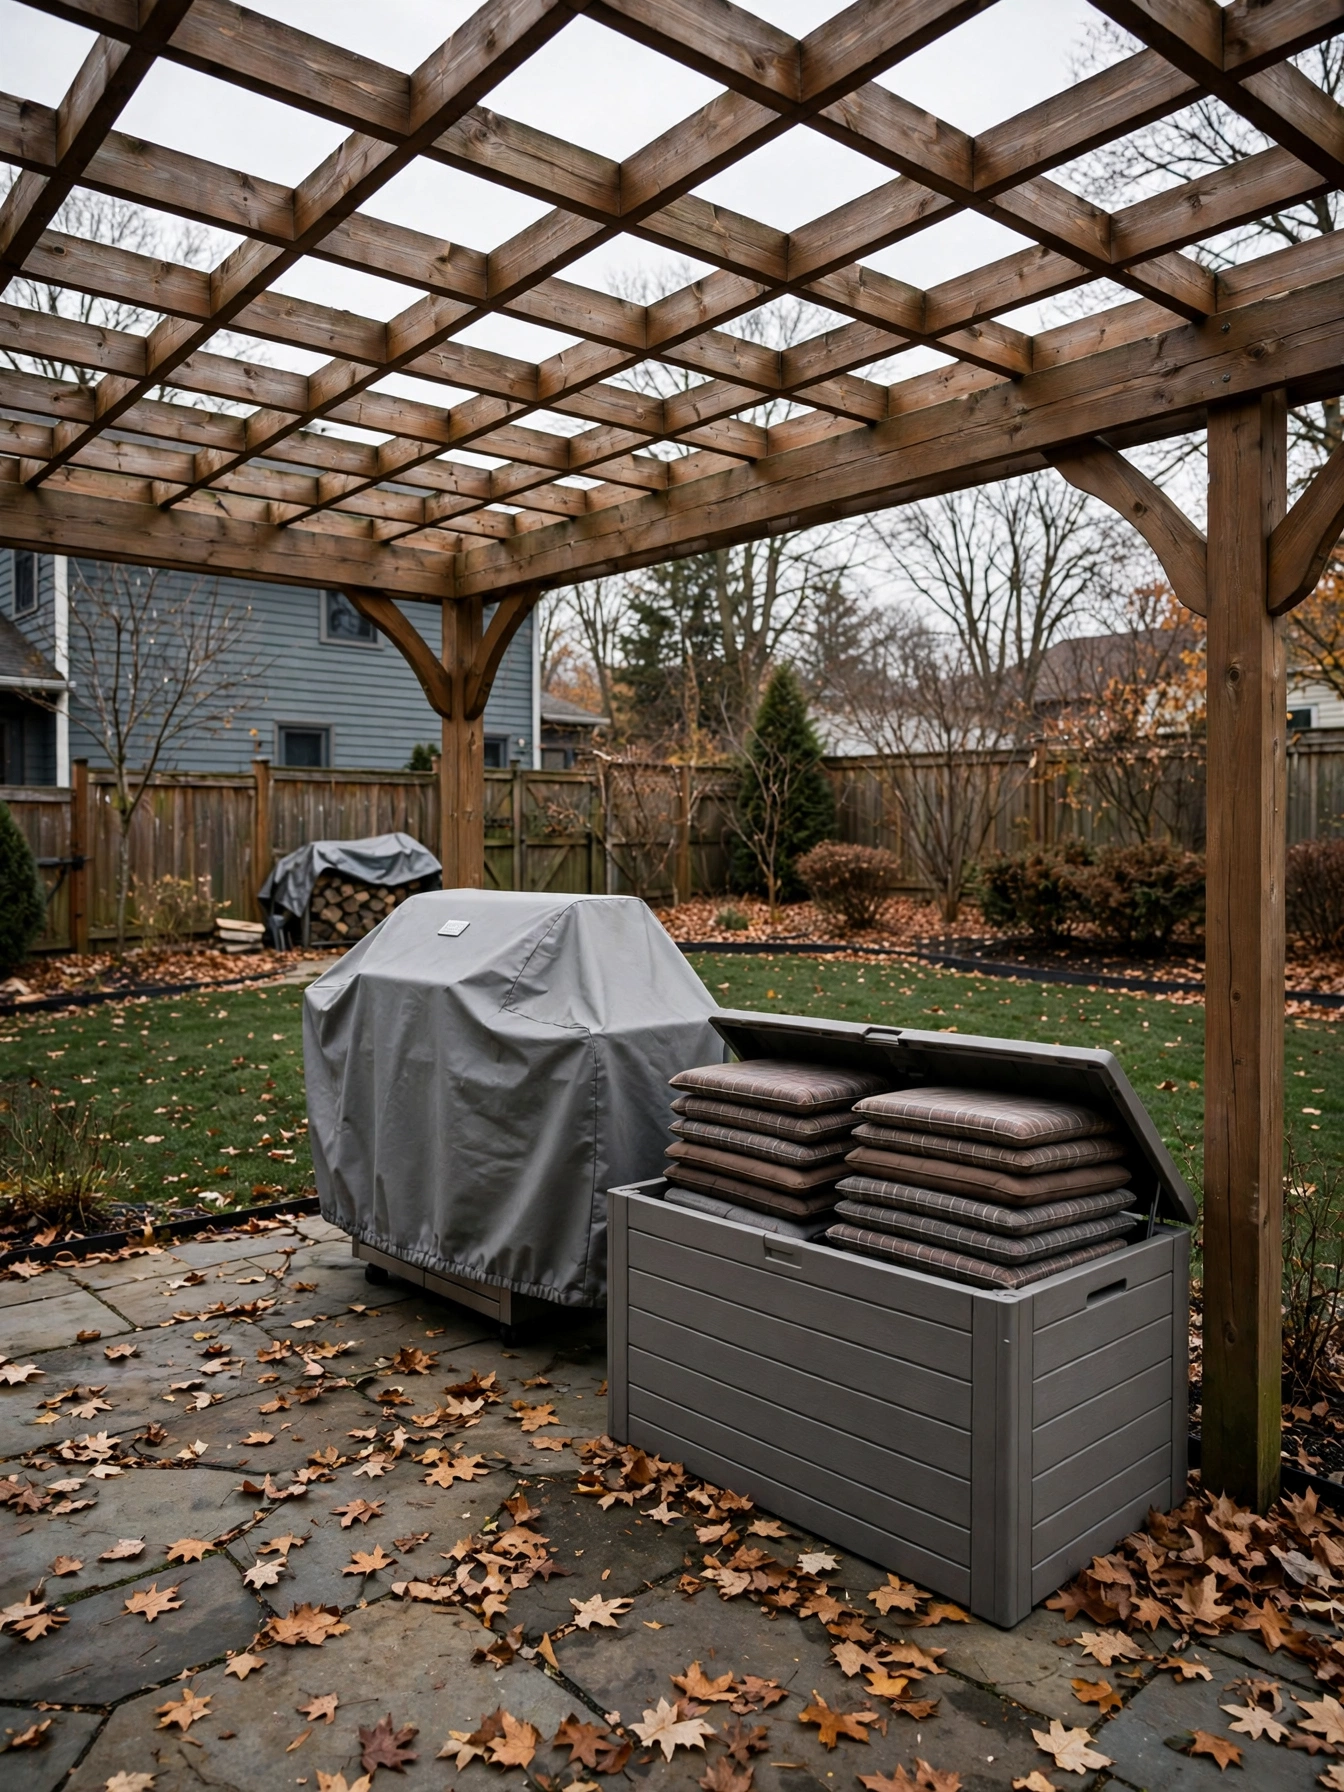
Why This Works:
- Covers rated for 600D fabric survive snow load without tearing
- A deck box 60 inches long holds all cushions in one place
- Draining the sink line before frost stops pipes from splitting
- A clean grill in autumn starts fast in spring
Winter storage starts in October, before the first frost catches the yard unprepared. Drain the outdoor sink line and shut off the supply inside the house, since a pipe with standing water splits when temperatures fall below 32 degrees. Cover the grill with a 600D fabric cover, and store cushions in a deck box 60 inches long and 24 inches deep, which holds a full dining set in one place. A stainless steel grill body survives winter uncovered better than a painted steel one, yet both last longer under a vented cover. Charcoal left in an open bag over winter turns damp, will not light in spring, and the bag rots on the patio.
In a cold climate, that afternoon of work is what keeps spring’s first barbecue to a wipe, not a repair. That afternoon of work each autumn pays back in equipment that lasts years longer. A deck box and two quality covers together come to 250 to 600 dollars. Replacing a rusted grill and a set of ruined cushions costs far more the following spring. Plastic boxes never rot and shrug off rain, but they fade in sun and crack in deep frost after several seasons.
Small Gathering Layout
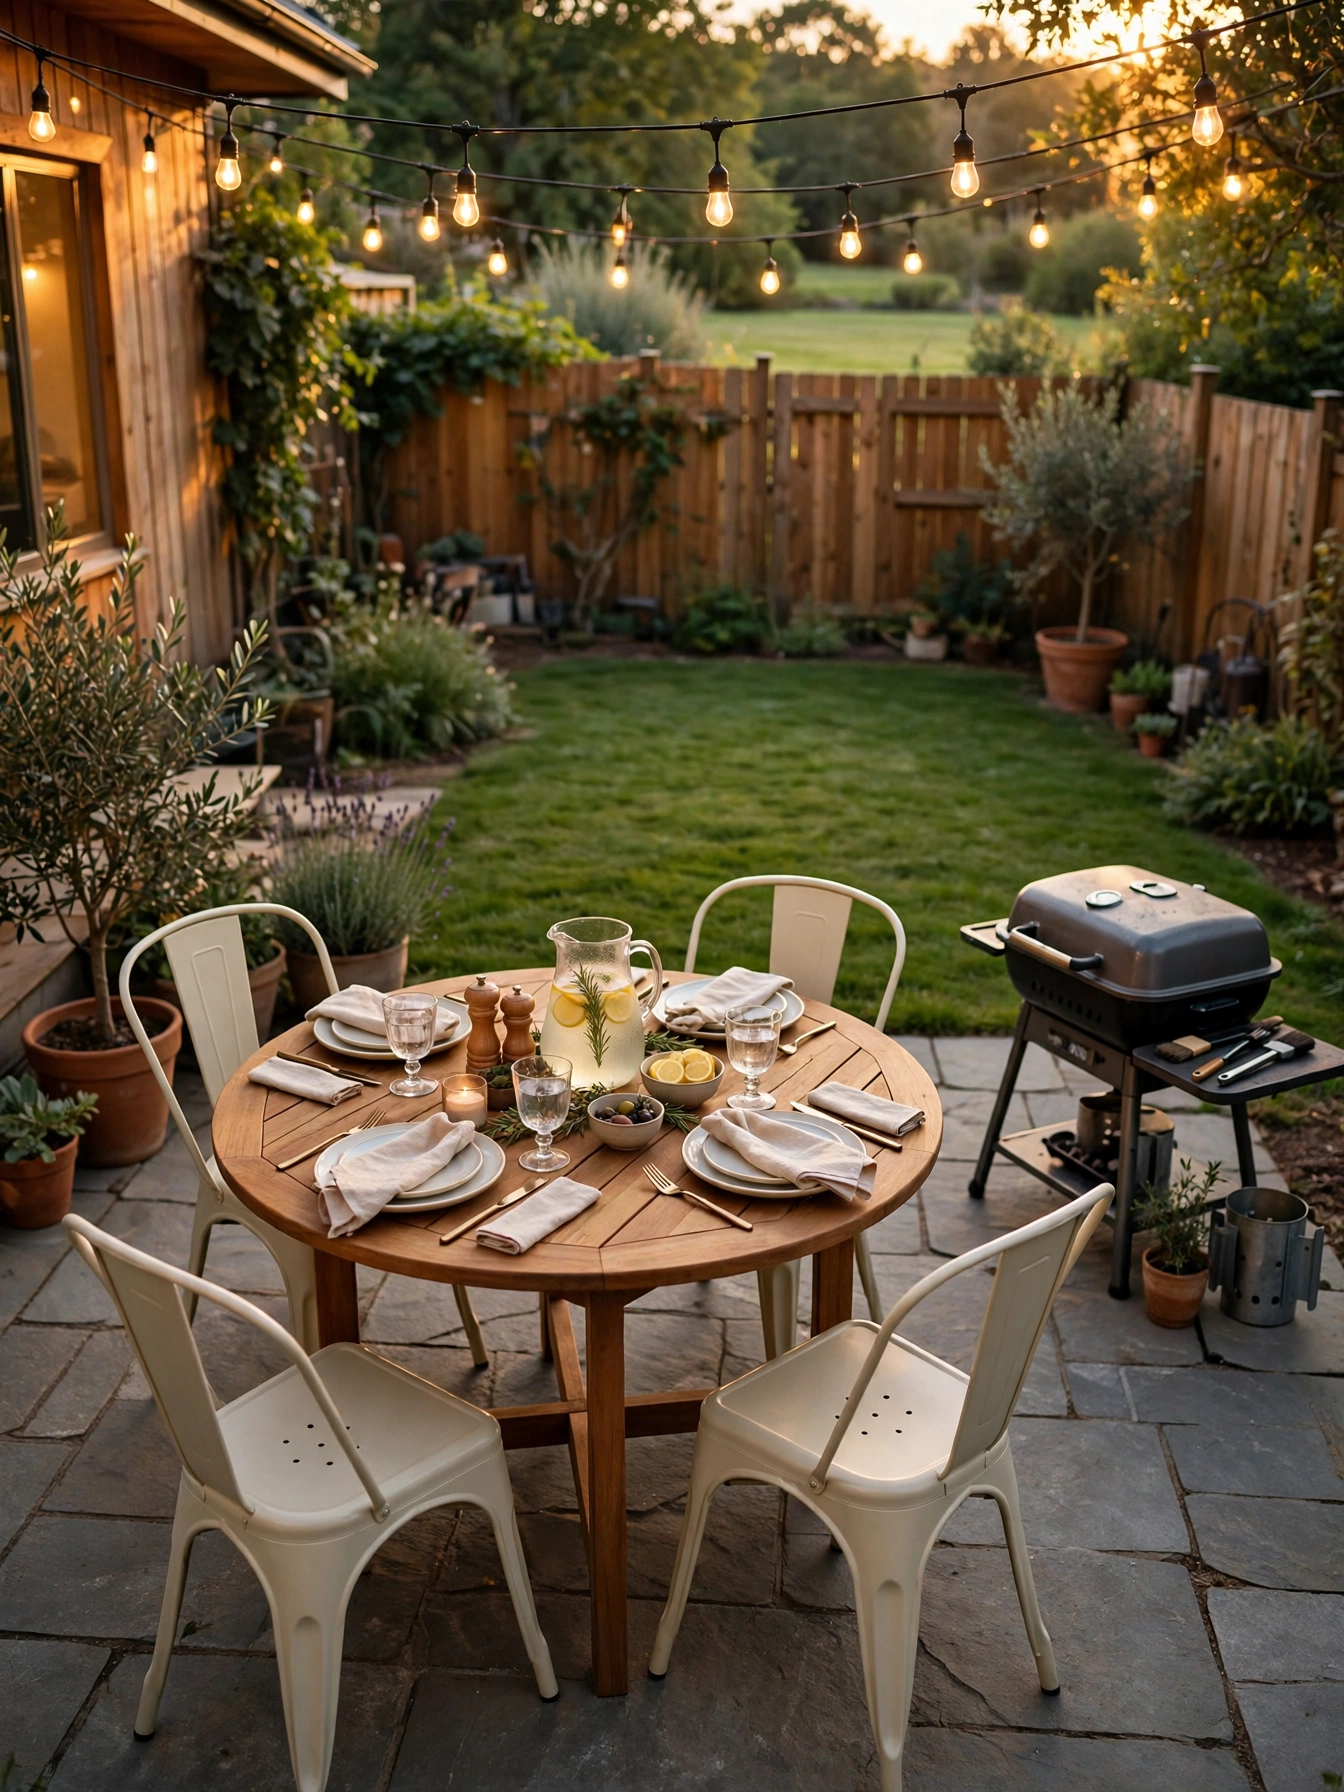
Why This Works:
- A 48 inch round table seats four without sharp corners
- A circle layout keeps every guest within 4 feet of the grill
- String lights above the table mark the gathering spot
- Four chairs store easily when the yard hosts a larger group
Small gatherings work best in a circle, since a round table keeps conversation open and nobody sits at the far end. Choose a 48 inch round table for four guests, with 24 inches of elbow room each and 36 inches of pull-out space behind every chair. A round teak table fits a small yard better than a rectangular one, because the circle wastes no corner space and the grill sits within 6 feet of every seat. Keep the grill 10 feet from the house and at least 6 feet from the table edge, so guests sit clear of sparks and the cook reaches the grill without stepping past open flame. A grill crowded beside the table pushes guests back from their plates with heat and smoke.
Four friends around a small table eat better than eight squeezed along a long one, and weeknight dinners and quiet weekends are where this layout earns its keep. A round teak set for four is listed at 500 to 1,200 dollars, and a folding table and chairs for the same group starts near 150 dollars and stores flat in a shed. The same yard cannot host a big party without rearranging the furniture. Metal bistro sets are the cheapest seats around and suit balconies, but they tip on soft lawn and feel cramped for a full meal.
FAQs
What are the best backyard outdoor kitchen ideas for a small yard?
A straight run of a 48 inch prep counter plus a 30 inch grill fits a 25 foot yard with 42 inches of walkway in front. Use folding stools 16 inches wide, wall hooks for tools, and skip a full dining table so the cook keeps room to move.
How far should a grill sit from the house?
Before placing anything else, give the grill breathing room, since heat and stray sparks travel well beyond its footprint. Keep a 10 foot gap to the house, the fence and low branches, and leave 24 inches of counter on each side so trays have a landing spot.
How much shade does a backyard outdoor kitchen need?
A 10 by 12 foot pergola shades a grill and a six-seat table, with beams at 8 feet high and slats spaced 6 inches apart. Add a retractable fabric panel for midday sun, since slats alone filter light rather than blocking it fully.
What counter height works best for backyard outdoor kitchen ideas?
Build counters 36 inches high to match indoor worktops, with 24 inches of landing space on each side of the grill and 42 to 48 inches of walkway behind the cook. That height keeps wrists level while chopping and lets platters slide across without lifting.
How much does a basic backyard outdoor kitchen cost?
A compact setup with a grill, a 48 inch counter and a shade sail usually costs 1,100 to 2,800 dollars in total. Building the full L shape instead takes about twice that budget, so start with the compact layout and add features over time.
Conclusion
A good backyard kitchen starts on paper, not at the shop, and the measurements are the plan to draw first. Keep the grill 10 feet from the house, leave 42 to 48 inches of walkway around the cooking zone, and shade the table before buying another gadget. This weekend, sketch the yard, pencil in the grill and the table where they belong, and let every later purchase fit that sketch. Follow HomelyCrafter on Pinterest for more ideas. Save this to your Pinterest boards so you can refer back to it!

Muhammad Israr is a home decor enthusiast and the writer behind Homely Crafter. He spends his days researching paint colors, layouts and budget-friendly styling ideas, then breaks them down into practical, easy-to-follow guides so you can decorate with confidence.
1 thought on “21 Relaxed Backyard Outdoor Kitchen Ideas to Enjoy”