
Gray ruled kitchens for a decade. Builders painted walls gray, fitted gray counters and hung gray tile, and for a while the look felt fresh and safe. Then every kitchen started to look the same, and the color that once felt modern began to feel flat, especially in rooms with little daylight. Sage green kitchen ideas answer that fatigue without a full remodel, because sage is a soft, muted green that brings warmth to a room.
The National Kitchen and Bath Association still sets the work triangle at 4 to 9 feet between sink and stove, and sage fits that same practical frame: it works on cabinets, walls, islands and pantry doors, and it pairs with the cream counters, white oak and brass most kitchens already hold. The 23 ideas below pair paint codes with finish choices, hardware sizes and the measurements that keep a sage room balanced, with honest notes on upkeep and the rooms where sage struggles too.
Sage Green Kitchen Ideas
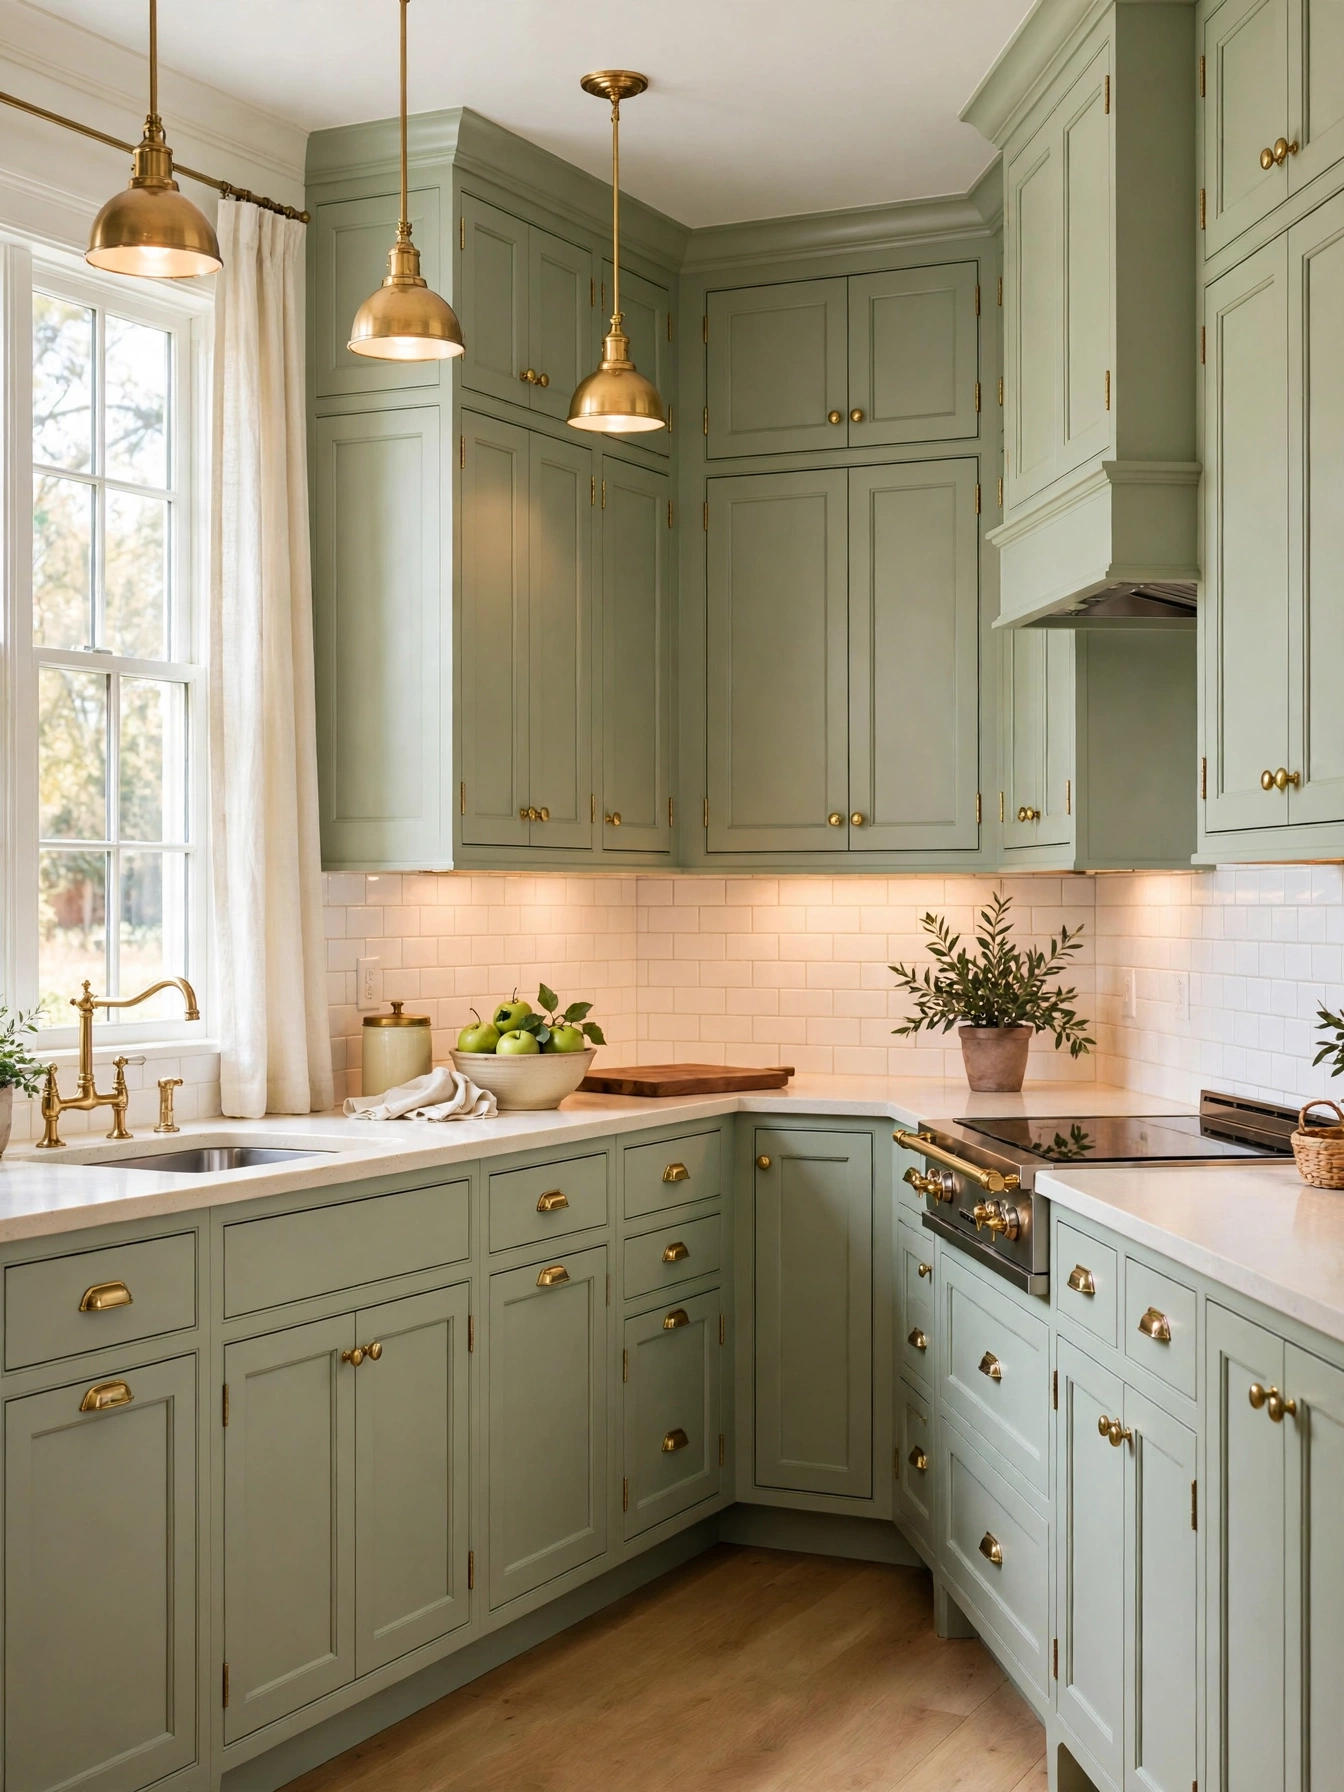
Why This Works:
- A mid-tone sage reads calm in morning and evening light
- Cream counters keep the green from feeling dark
- White tile gives the sage a clean, bright edge
- Brass pulls add warmth to the cool green tone
A mid-tone sage, such as Benjamin Moore Saybrook Sage HC-114, gives a full cabinet run its calm character, applied in 2 coats of satin acrylic enamel over primer on maple doors 3/4 inch thick. Keep upper cabinets 18 inches above the 36 inch countertop, which is the National Kitchen and Bath Association guideline for clearance, and leave 42 to 48 inches of walkway where the room allows it. A mid-tone sage hides small scuffs on busy doors. A very pale sage can read as gray in a north-facing room, so test the mid-tone on a full door first. High gloss on every cabinet shows each brush mark under kitchen lighting, so a satin sheen suits a full sage run.
A full sage kitchen changes the room with paint and primer alone, and the muted green holds its appeal year after year. Painted maple touches up with a small brush when a door chips. Keep a small jar of the exact paint on a high shelf for quick chip repairs. Oak, walnut and brass sit well beside this green. Gray floors and chrome-heavy fittings have no place in this palette; sage, cream and brass carry the scheme on their own. Test the sage on a 2 foot by 2 foot board and view it at morning and evening light before committing.
Soft Sage Cabinets
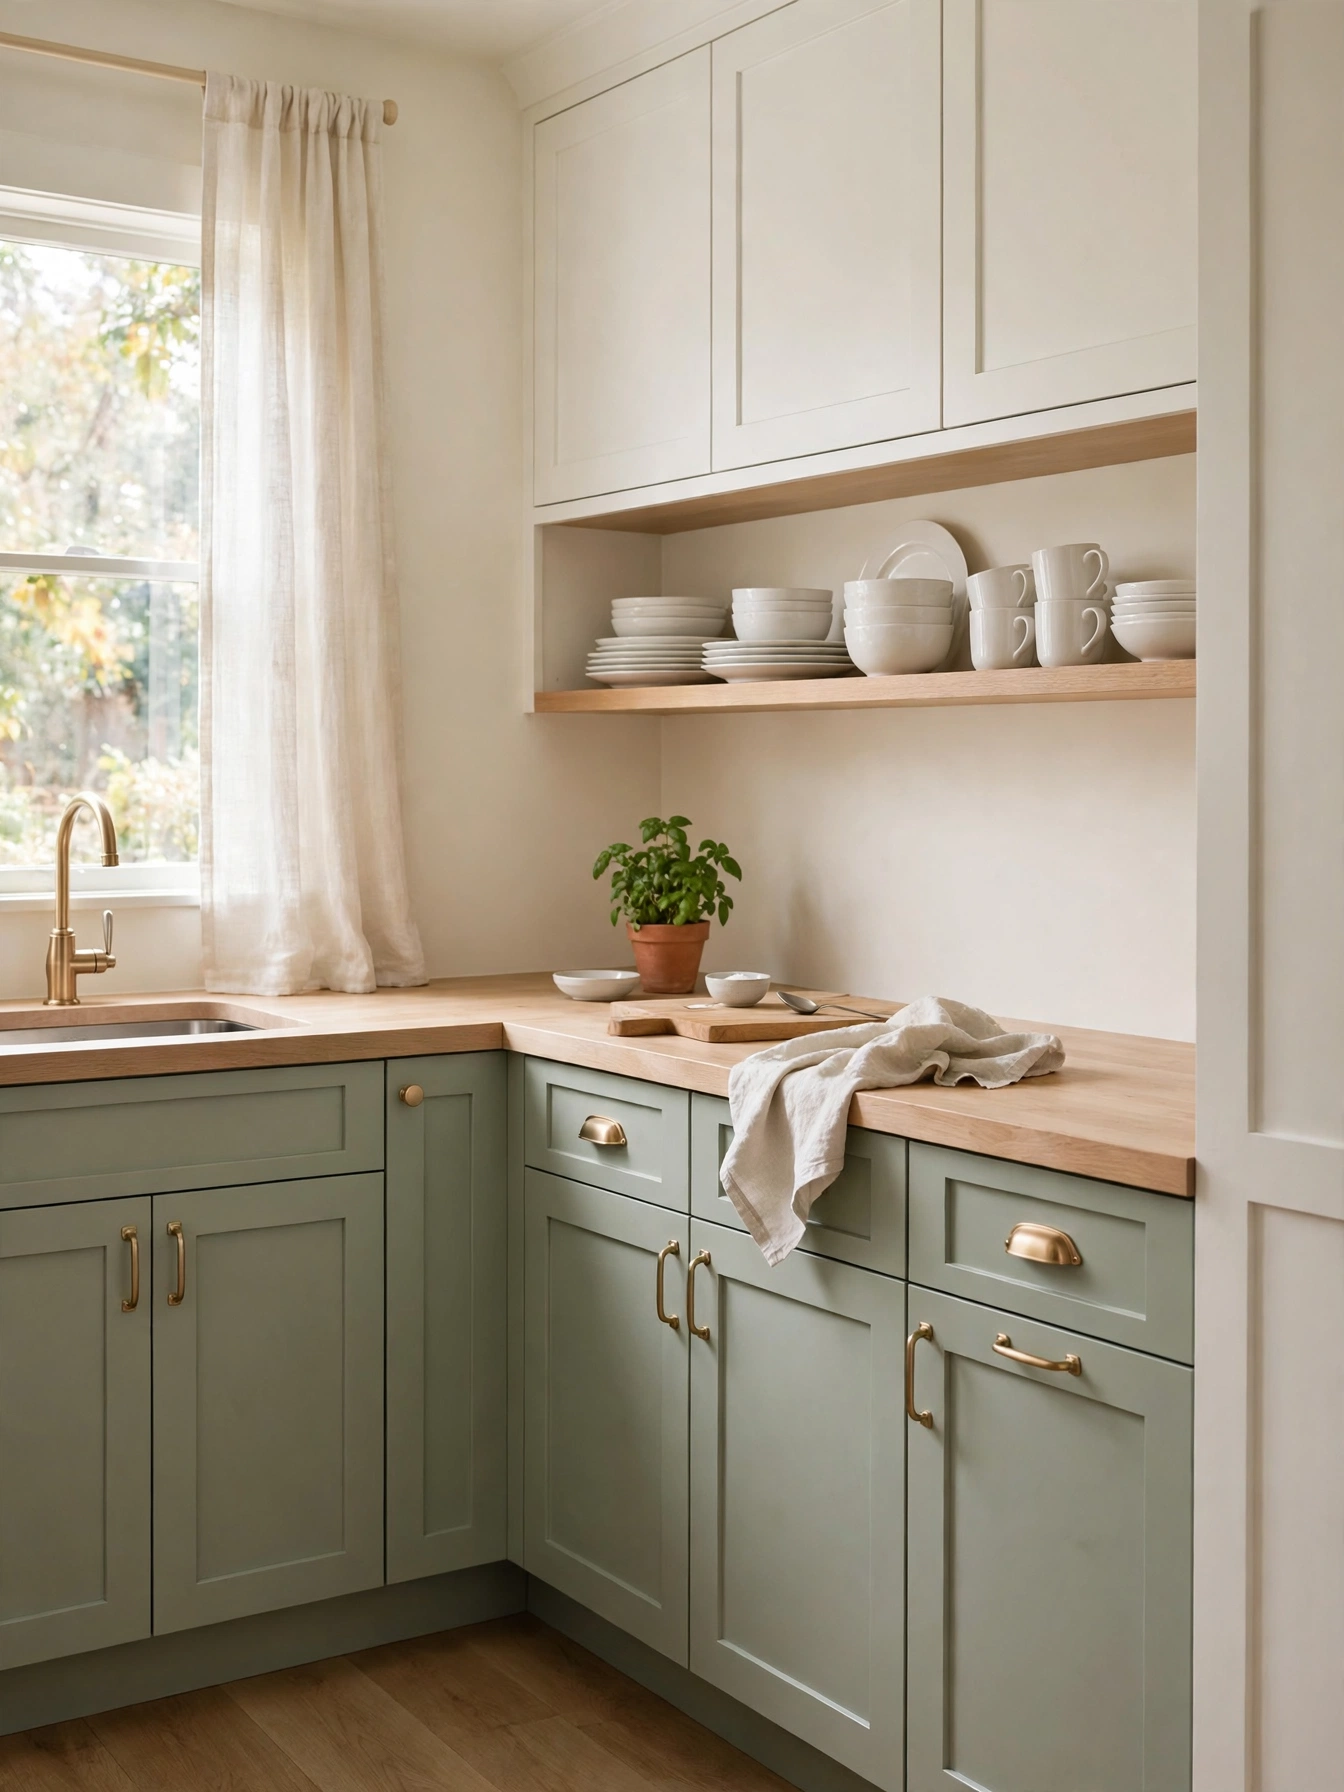
Why This Works:
- Sage lowers ground the room in a soft, steady tone
- A satin finish wipes clean and hides small fingerprints
- Pale sage pairs well with oak and cream
- Darker lowers keep everyday scuffs hidden
Soft sage cabinets gain their calm from a muted tone such as Sherwin-Williams Clary Sage SW 6178, painted in two satin coats on primed maple doors with a 2.5 inch shaker frame. Keep the lowers sage and the uppers white or cream so the room keeps its brightness, and set uppers 18 inches above the 36 inch countertop for a comfortable work gap. Pick a satin or semi-gloss paint rated for kitchen use, because flat paint soaks up grease and shows marks within weeks. In a room under 10 feet by 12 feet with one small window, choose a pale sage for the lowers, since a dark tone closes the room in and looks gray by evening.
Daily cooking leaves few visible marks on sage. A gallon of quality cabinet paint covers about 350 square feet. A full repaint of lower cabinets usually needs 2 gallons plus primer, and the work takes about 4 days with drying time. Water-based acrylic enamel dries fast and smells mild. Oil-based paint levels smooth and stays tacky for hours. Keep hardware simple, with slim bar pulls 5 inches long, so the pale doors stay the focus.
Cream Counter Pairing
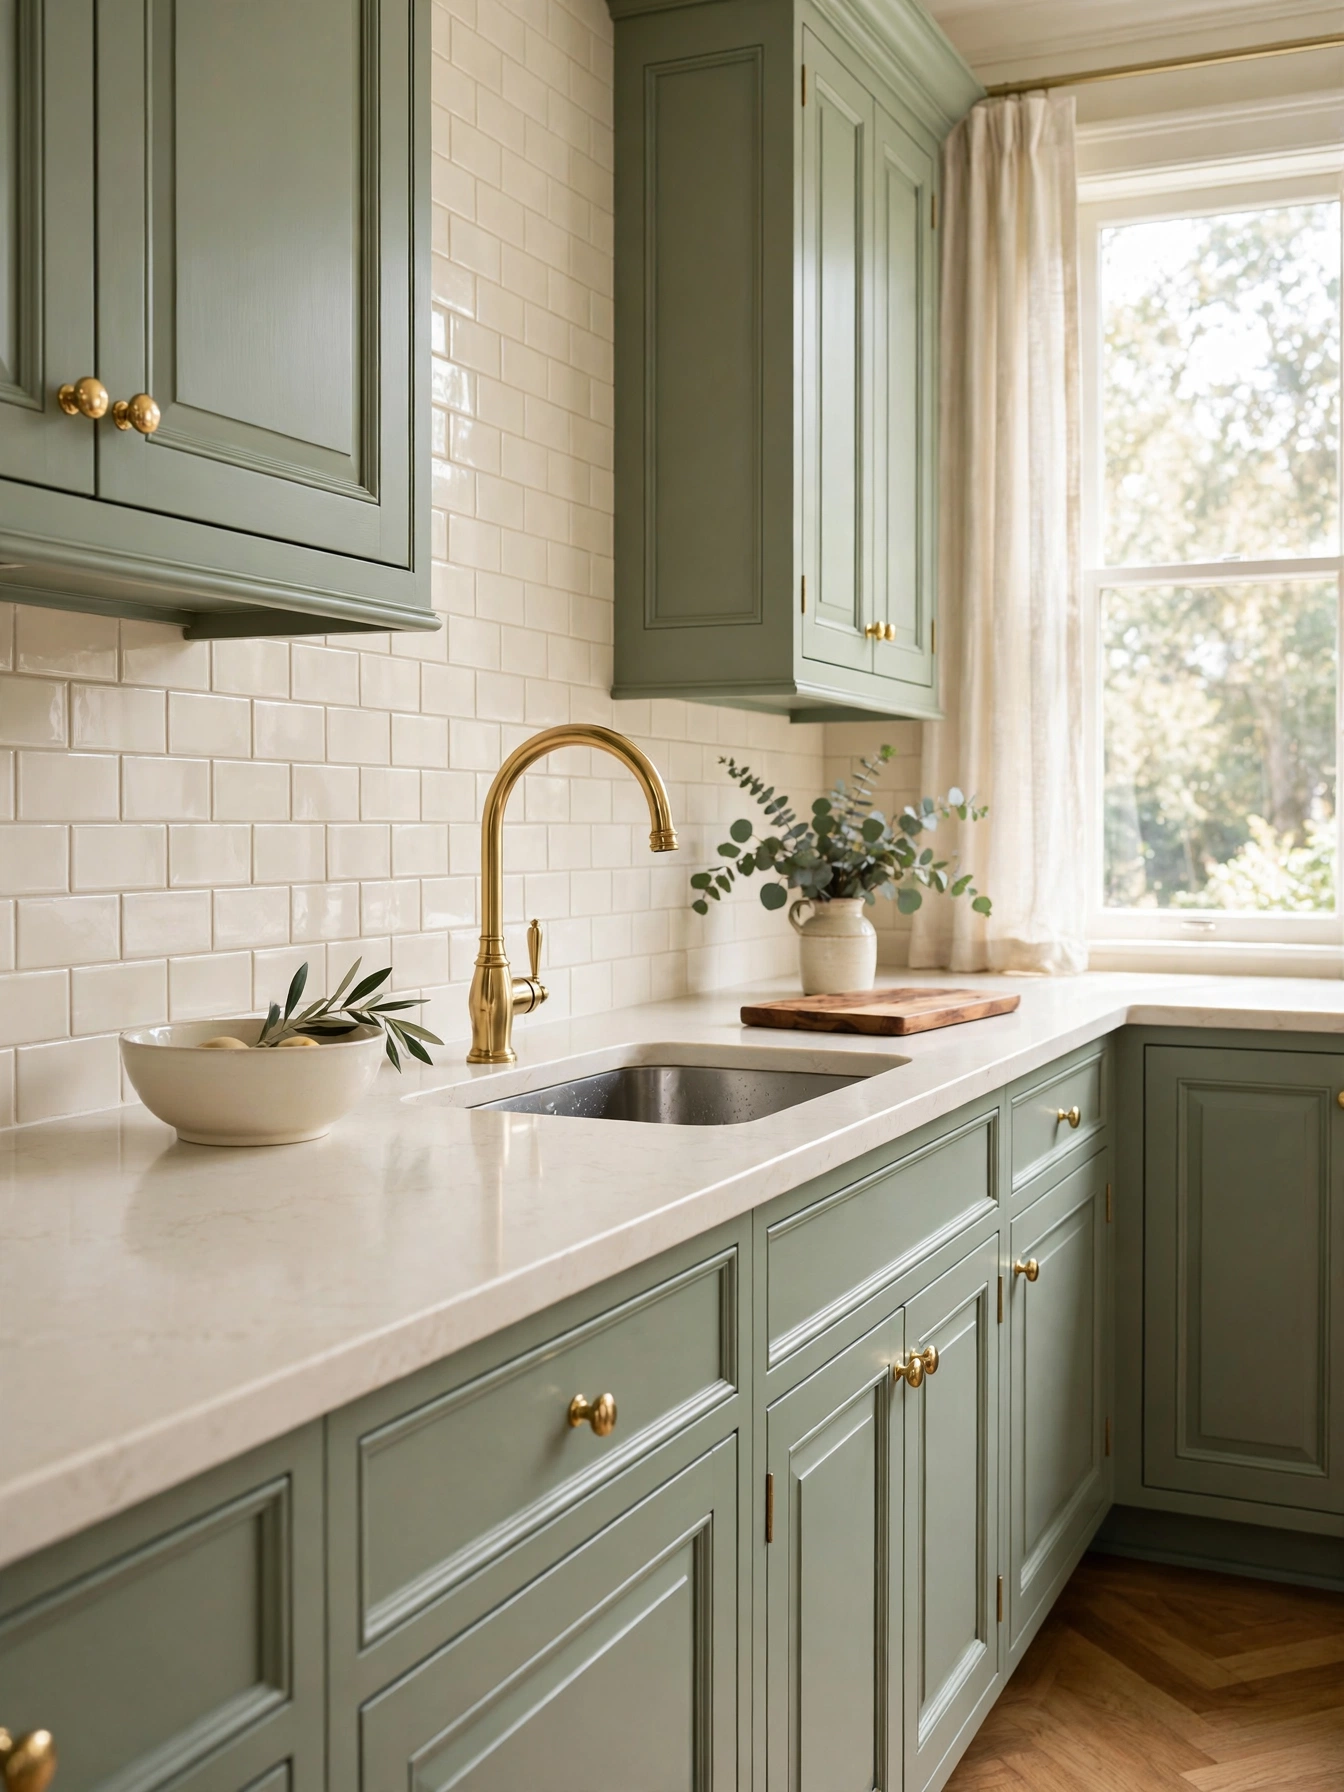
Why This Works:
- Cream counters soften the sage with warmth
- A single pale counter keeps the green as the focus
- Quartz resists stains near the range and sink
- Cream tile ties the counter to the cabinet color
Cream counters sit beside sage cabinets in a quartz slab 3 centimeters thick, with an eased edge and a 4 inch backsplash or a full-height slab behind the range. Keep the countertop 36 inches high, which is the standard working height, and match the backsplash to the 18 inch band between counter and uppers so the cream reads as one calm surface. Quartz needs no sealing and resists citrus and coffee stains. Seal marble every 6 months, and wipe citrus off it at once so it never sits long enough to stain. A cream counter, pale sage and white backsplash in one run blur together, so the sage loses its edge.
Cream quartz warms the sage and still wipes clean after daily cooking. Cream quartz keeps crumbs and water spots hard to spot on its pale surface. A standard counter run measures about 30 square feet, and a fabricator templates the slab before cutting so the sink and range openings land exactly. A brass faucet repeats the hardware tone. Set a trivet near the range for hot pans.
White Oak Shelving
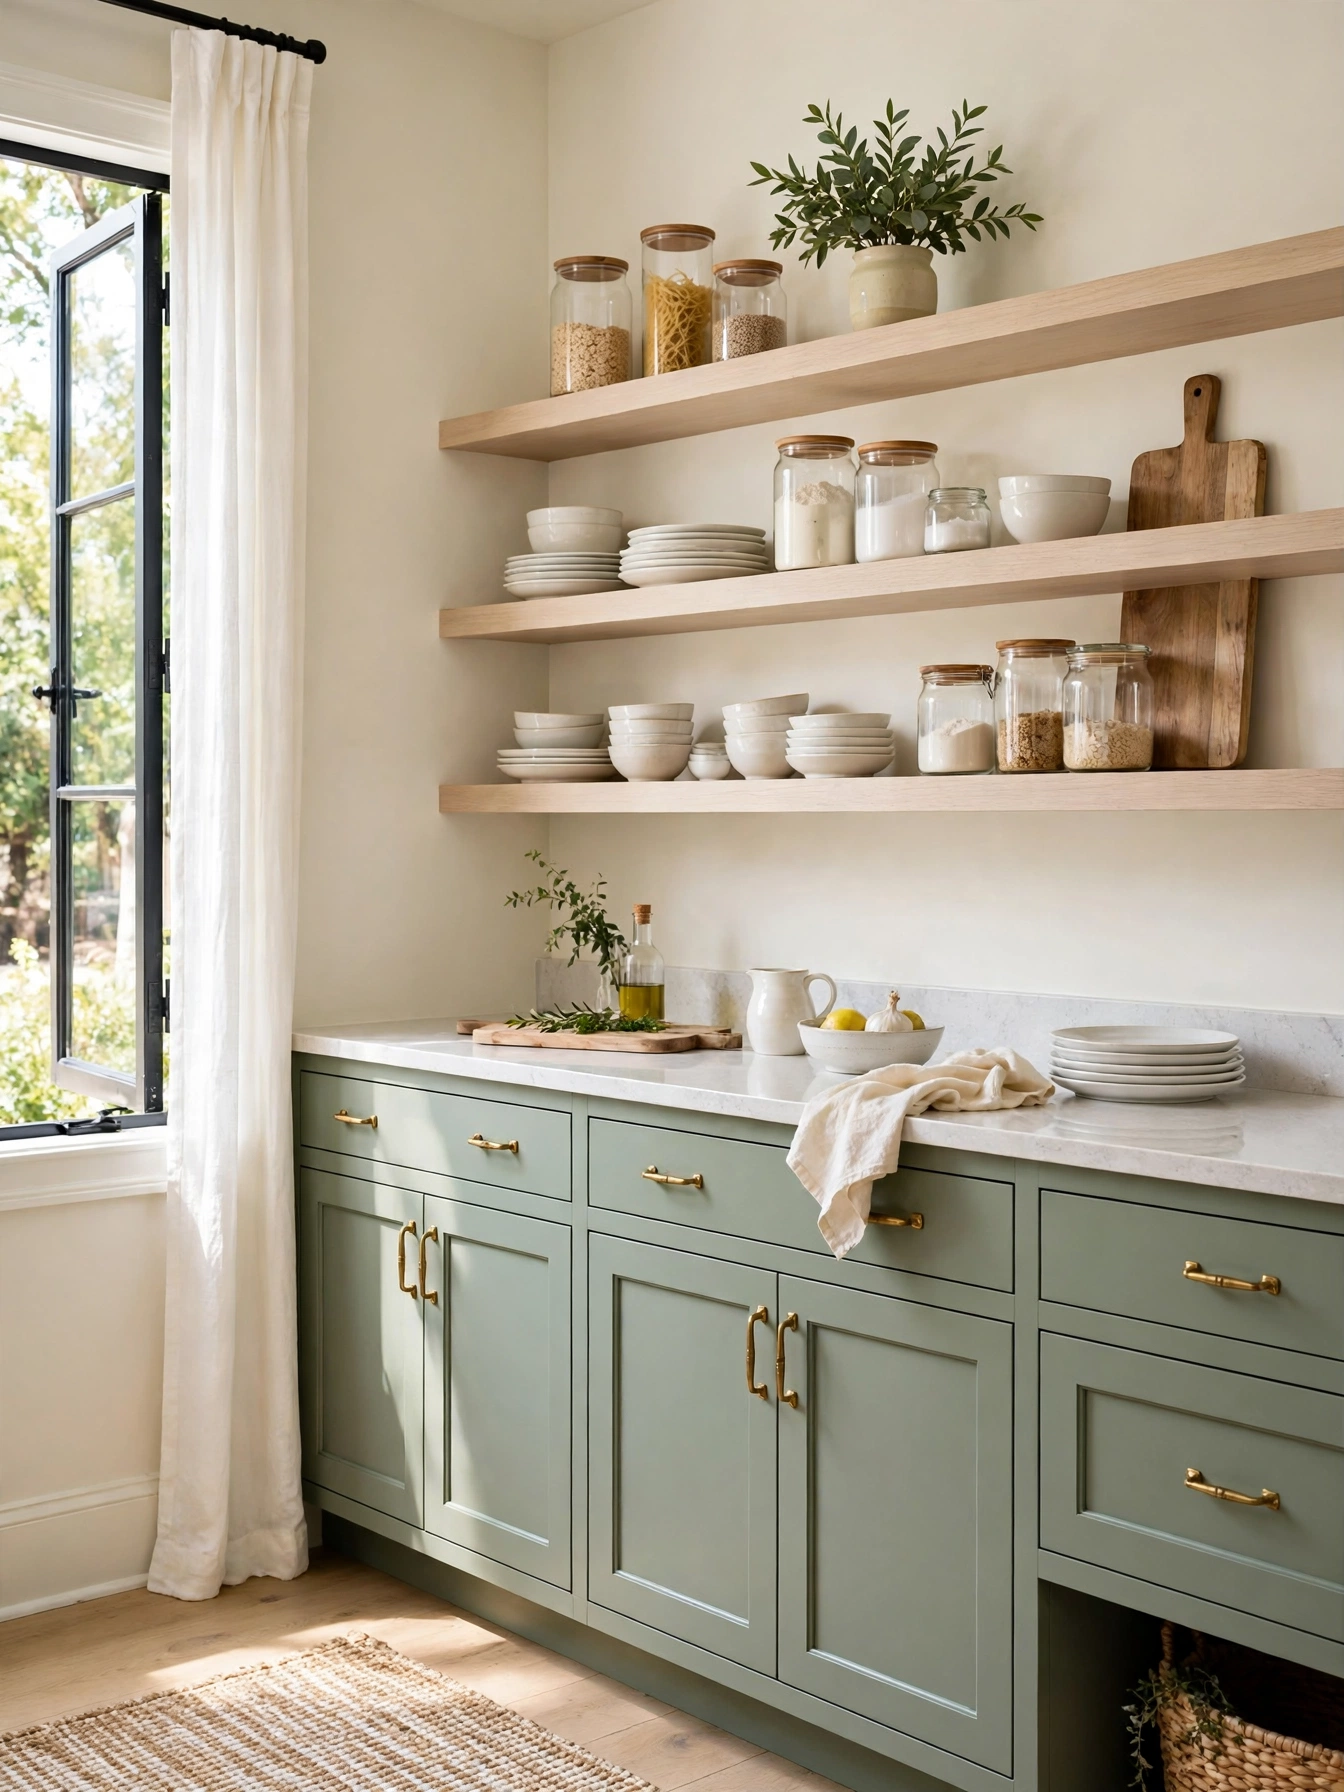
Why This Works:
- White oak warms sage instantly without a second color
- Open shelves open up the sage lower run
- Daily dishes sit where hands reach them
- Two shelves keep the wall calm and edited
White oak shelves add warmth above sage lowers when the wood stays natural and pale, finished with a clear matte oil that leaves the grain pale. Fix oak shelves 12 inches deep and 1.5 inches thick to steel brackets rated for 50 pounds per shelf, with each bracket screwed into a wall stud spaced 16 inches apart. Set the shelves at the usual upper cabinet height, 18 inches above the counter, with plates on one shelf and glasses on the next. Store cast iron pans in a lower cabinet. A loaded open shelf bends its brackets over time, and the board bows under the weight.
Fitting two wood shelves takes about 2 hours with a drill template, and the open look puts daily dishes where hands reach them. Dust settles on open shelves weekly, so a quick wipe with a damp cloth keeps the wood and dishes clean. White oak stays pale beside sage under kitchen light. Brass hardware on the sage lowers repeats the warm tone of the wood across the wall.
Sage Peninsula Breakfast
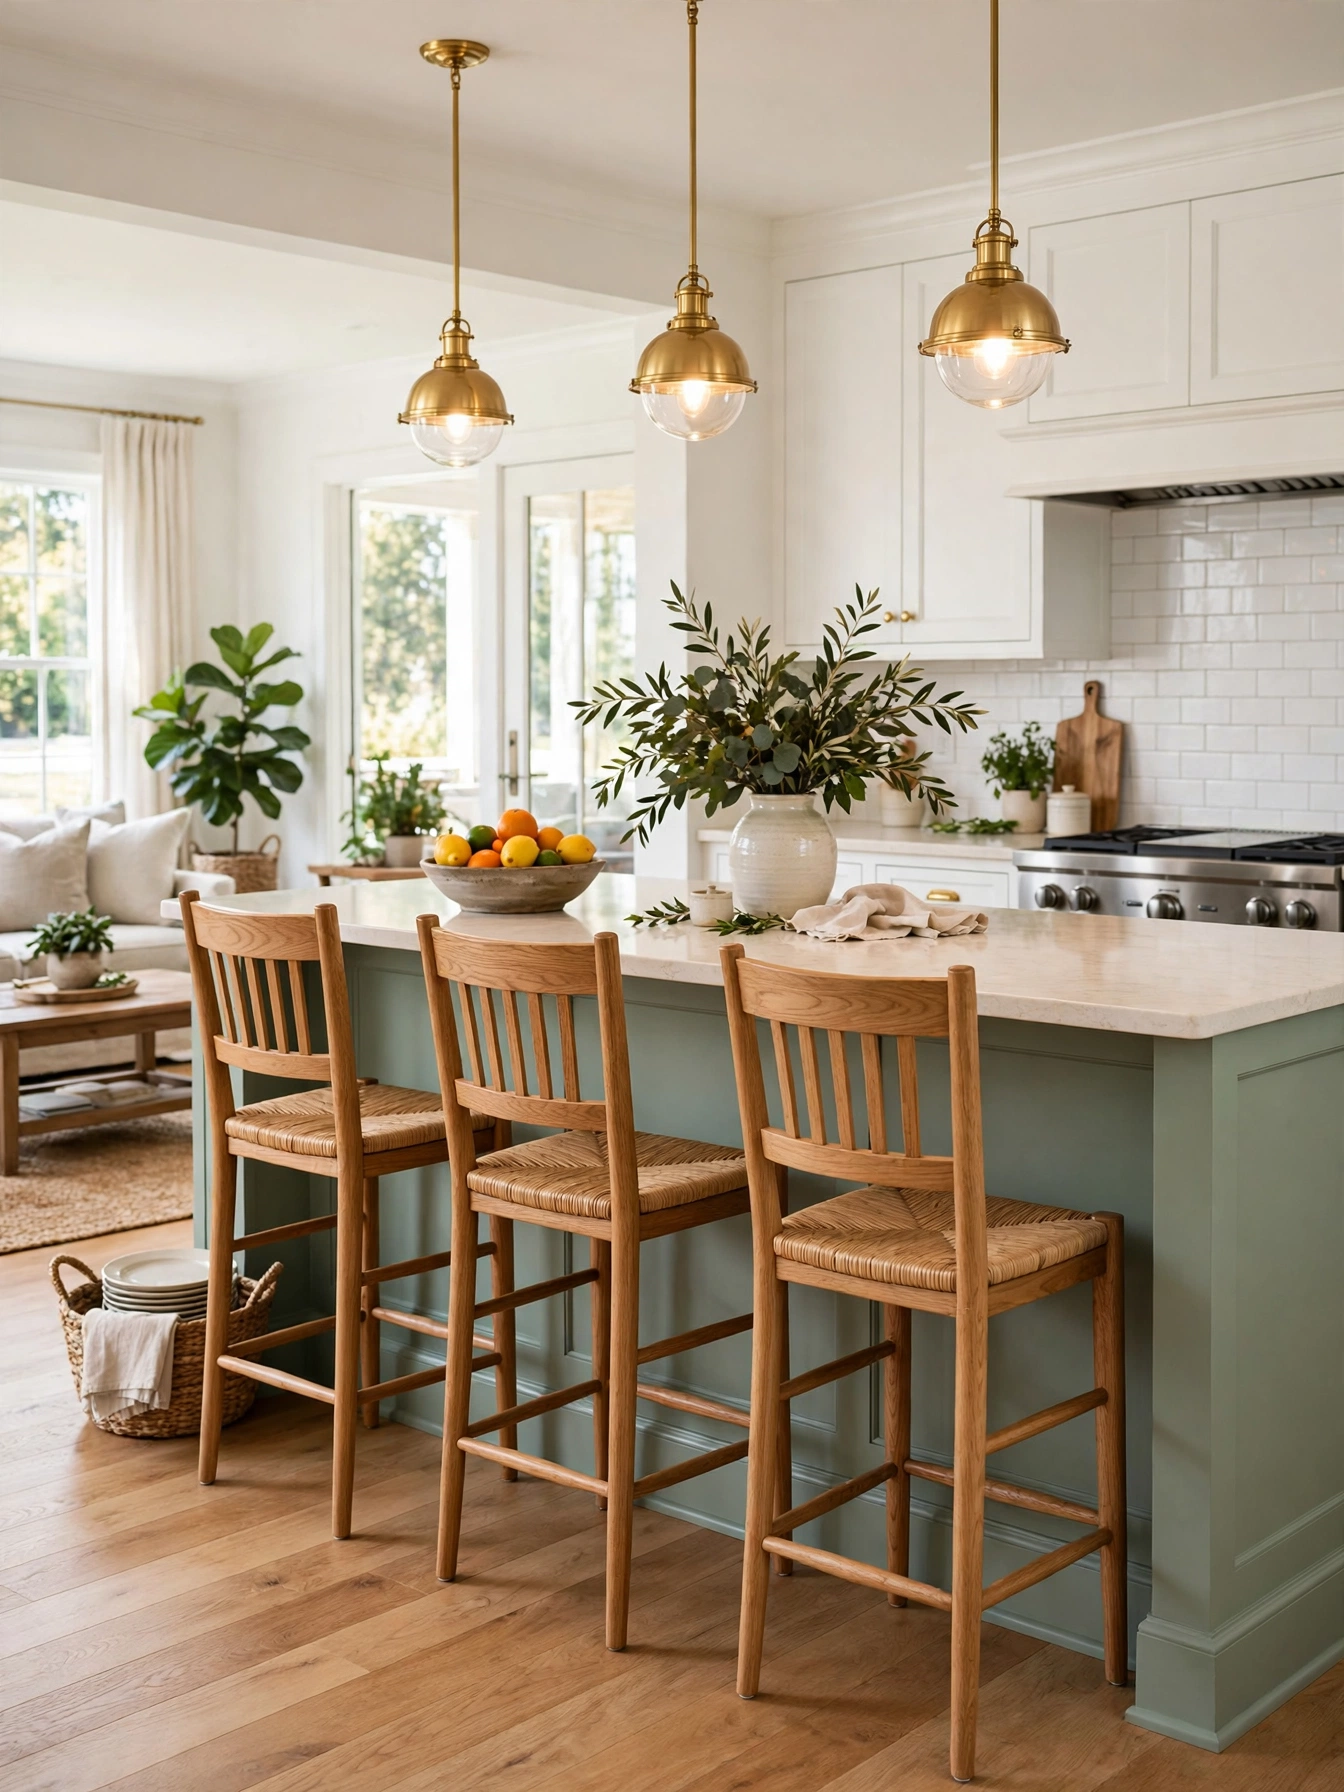
Why This Works:
- A sage peninsula adds color without repainting the room
- Pale cabinets around the edges keep the room light
- Stools tuck under a 12 inch overhang with room for knees
- Warm pendant light ties the peninsula to the rest of the room
Adding a sage peninsula gives the room a breakfast spot, and the peninsula size decides the seating. Build the peninsula 60 to 72 inches long and 36 inches wide, with a 12 to 15 inch overhang on the seating side and 24 inches of width per stool. An open-side aisle of 42 to 48 inches meets the National Kitchen and Bath Association clearance for a working kitchen. Hang pendants 30 to 36 inches above the peninsula counter, spacing them 24 to 30 inches apart so the light falls evenly across the seating. A peninsula shorter than 60 inches reads as a small sage accent, so get the length right.
Painting only the peninsula refreshes the room in a weekend, and the white perimeter keeps its finish. A peninsula works where a full island would block traffic, since it anchors to one wall and leaves the floor open on three sides. A waterfall edge runs the stone down to the floor for a bold look. An eased edge needs only a small rounded cut, and the fabricator shapes it on site. A satin finish holds up on the peninsula base, which takes daily kicks from shoes and stools.
Marble Vein Counters
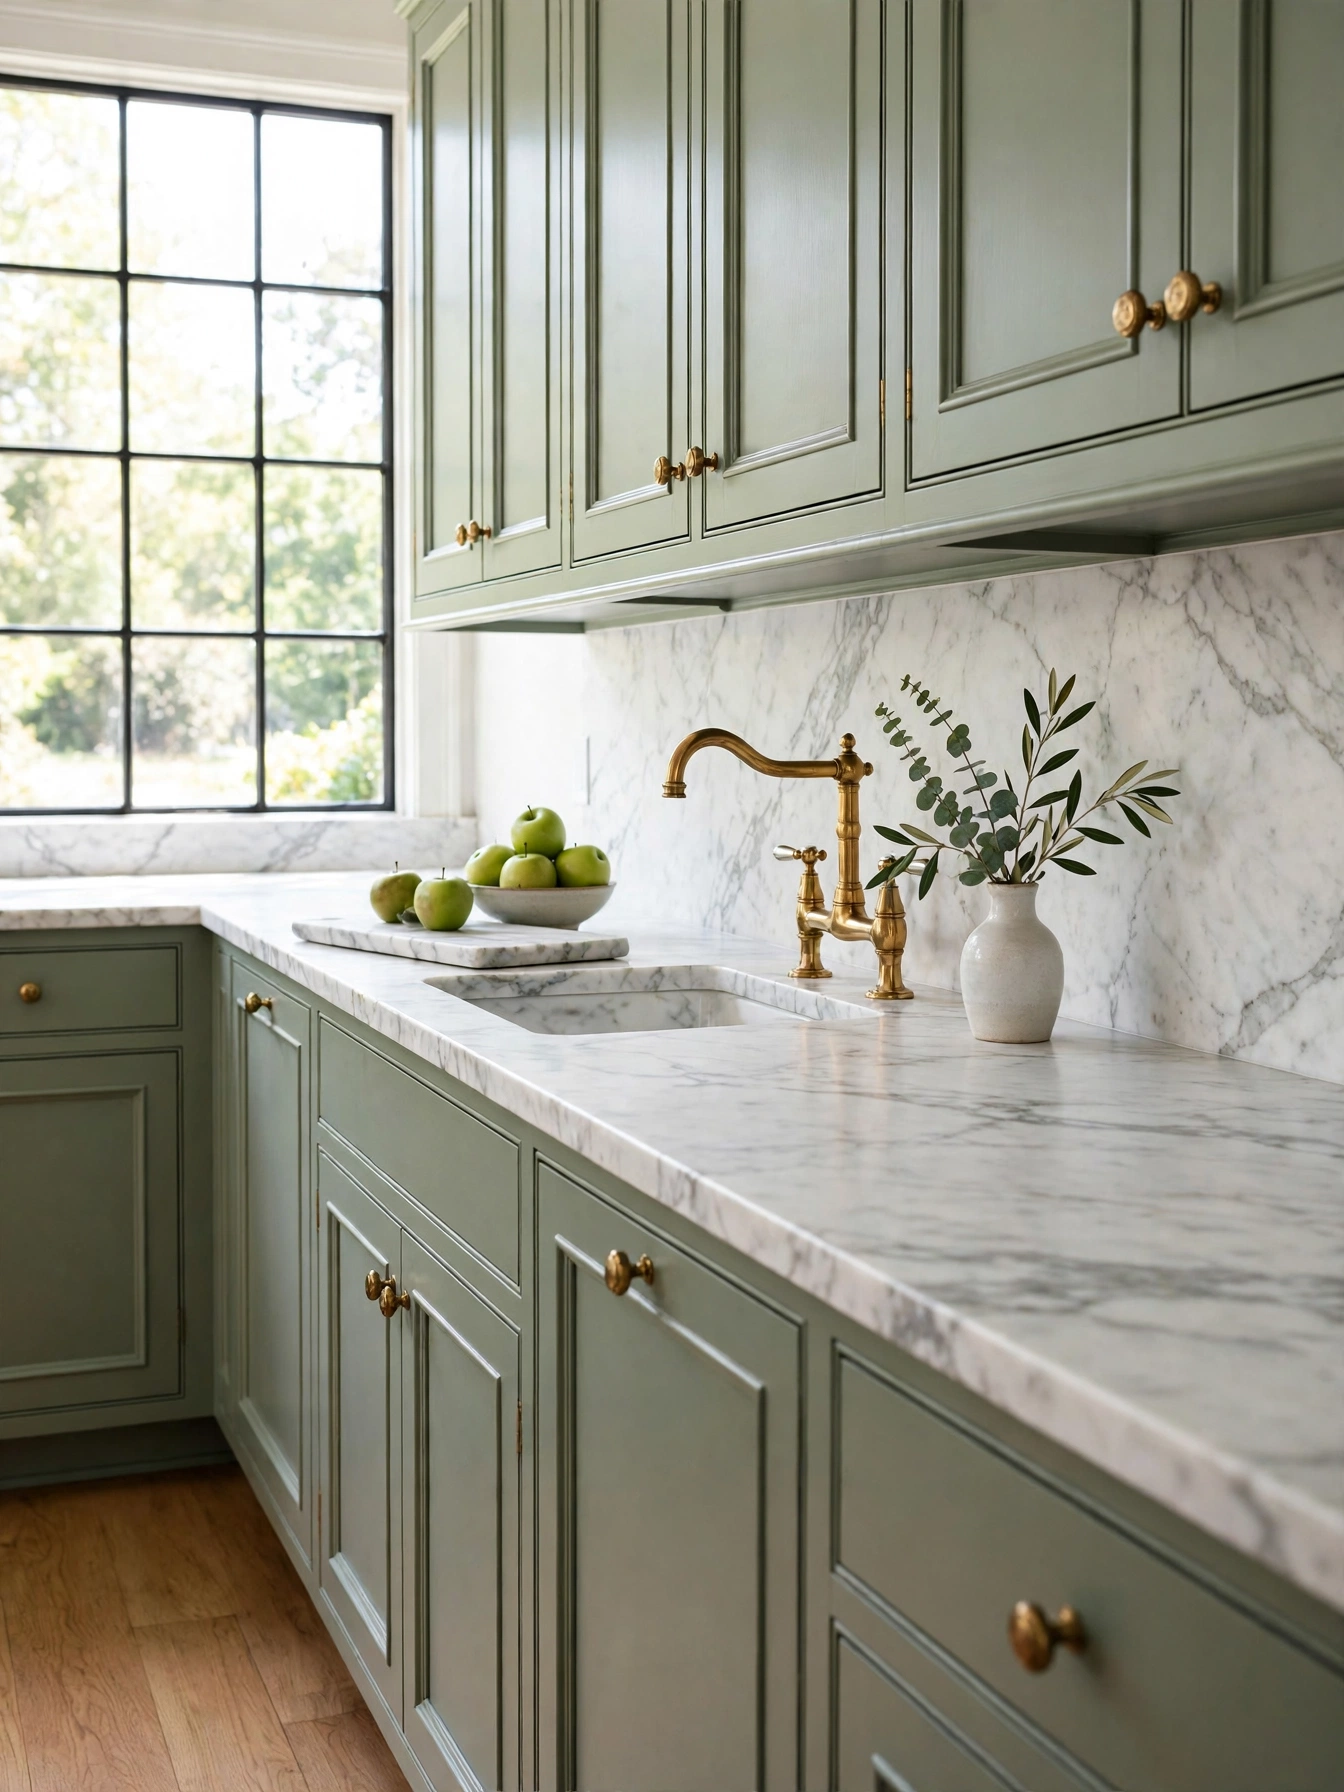
Why This Works:
- White marble cools the sage and adds natural pattern
- Gray veining links the counter with the cabinets
- A marble backsplash removes the grout line at the counter
- Brass warms the cool stone and sage pairing
Marble counters with gray veining bring natural pattern beside sage cabinets, in a slab 3 centimeters thick with a 4 inch backsplash or a full-height slab behind the range. Marble runs 75 to 200 dollars per square foot installed, and sealing takes 30 minutes every 6 months with an impregnating sealer. Lemon juice or vinegar etches marble when it sits for more than a few minutes, so keep the sealer routine ahead of daily cooking beside sage cabinets. White marble, pale sage and a white backsplash together wash the room out, so one of the three should carry a deeper tone.
The pairing reads polished and a little formal, and it reads well in a dining kitchen with a table in the room. Quartz resists stains and asks almost nothing afterward. Marble brings a pattern no factory slab can copy, so seal it on schedule and wipe spills at once. A trivet near the range takes hot pans, and the sealed stone wipes clean fast. A marble top also stays cool to the touch, which helps when rolling pastry dough on the counter.
Brass Hardware Glow
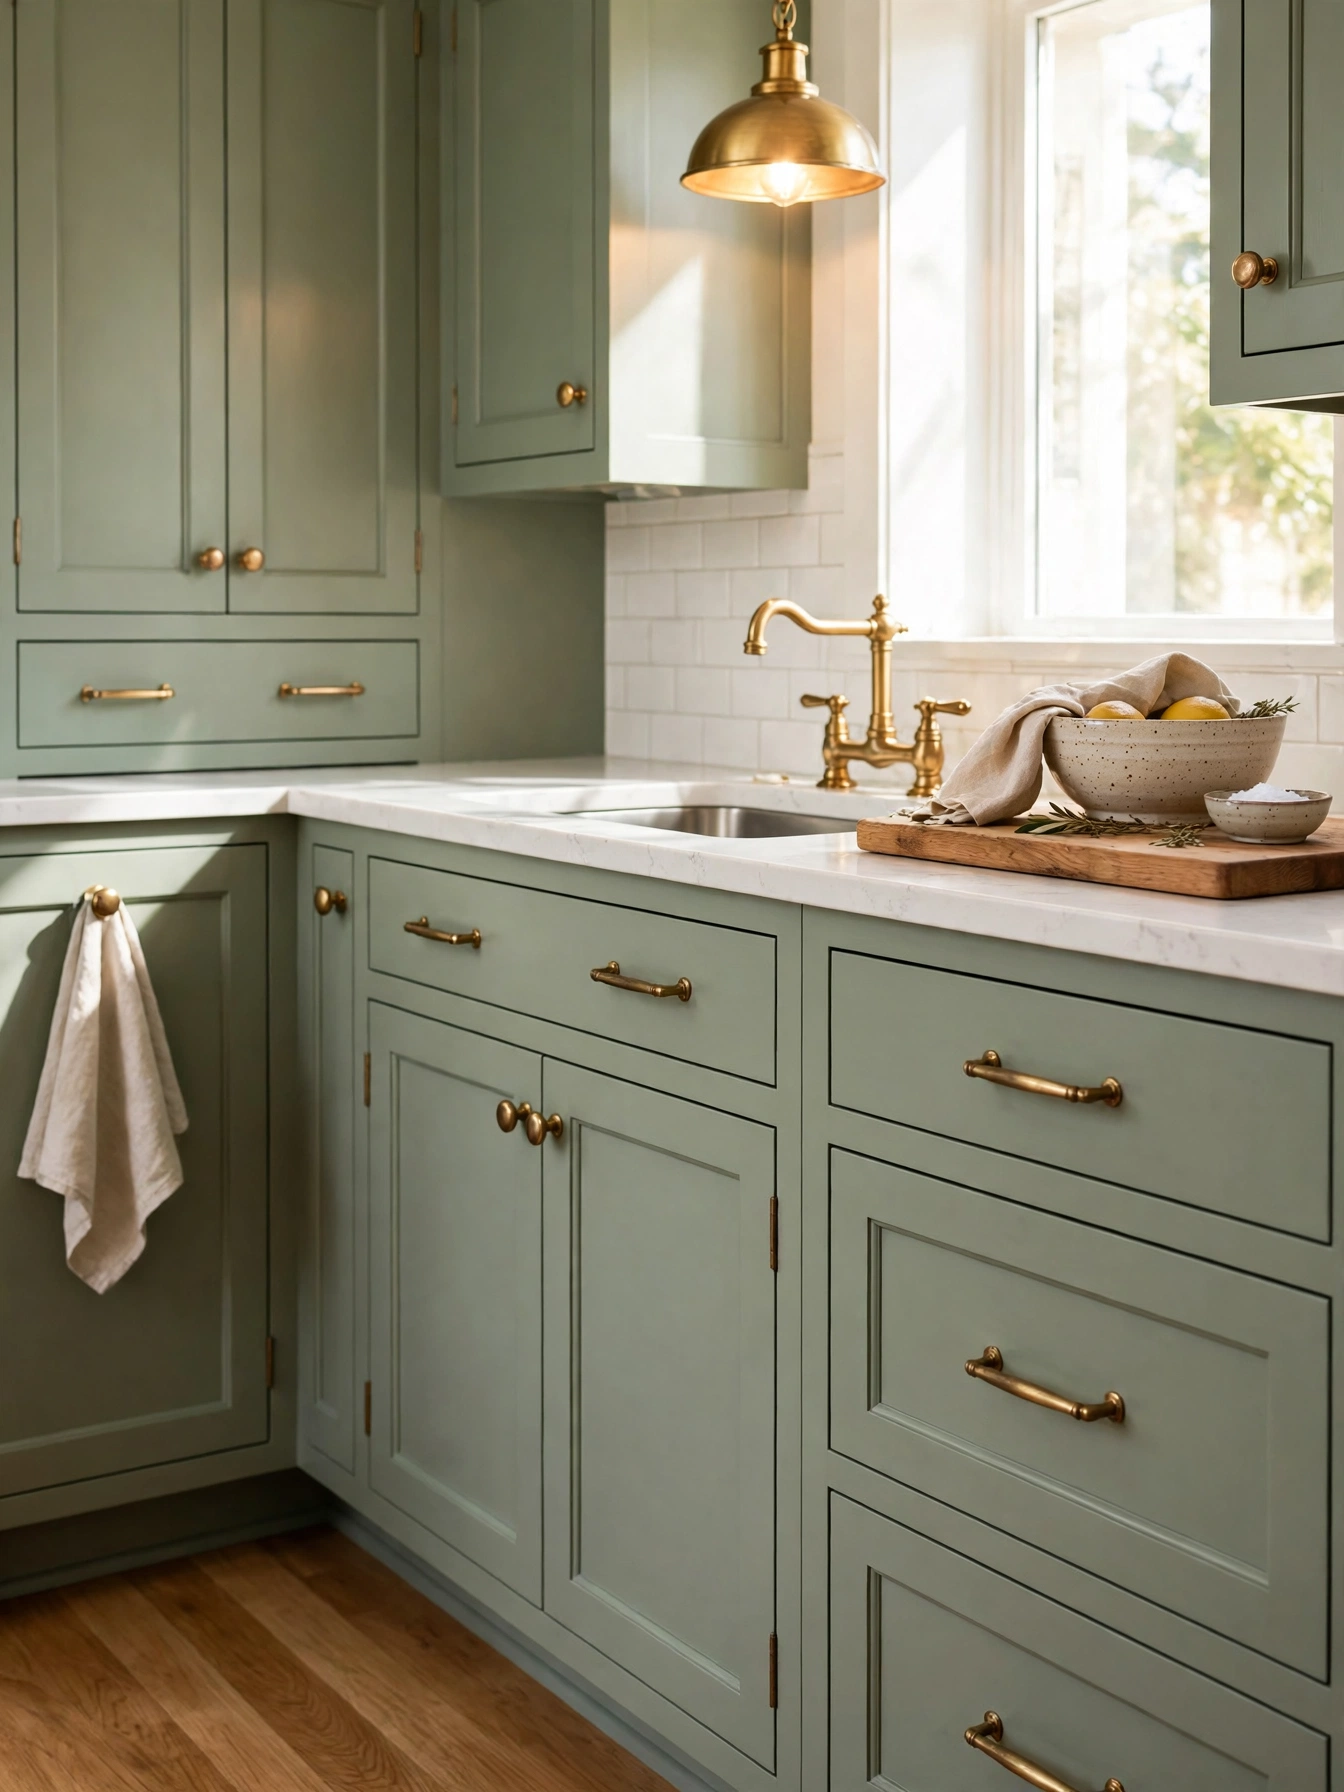
Why This Works:
- Brass brings warmth to sage where chrome stays cold
- Wide drawers take 5 inch bar pulls
- One brass tone across faucet and pulls unifies the room
- Unlacquered brass deepens to a soft patina with use
Pulls, knobs and faucet in one brass tone keep sage cabinets calm. Pick the brass first, then match the faucet to that exact tone. Size pulls to the drawer: fit 5 inch bars on any drawer wider than 24 inches. Knobs on the doors measure 1.25 inches across, and the screws need a length matched to 3/4 inch thick doors. Center each pull with 2.5 inches clear of the drawer edge, so hands never brush the door frame. Polished chrome, brushed nickel and brass in one kitchen make the room look unfinished, so one metal should lead.
Hardware is the smallest change with the largest effect on sage cabinets, and it can be swapped in an afternoon. Daily use wears the coating off plated zinc at the edges within a few years. Solid brass keeps its finish through the same daily use, and the doors need no new hardware for years. Unlacquered brass darkens with touch and lacquered brass stays bright, so the finish should match how much change feels welcome. Fitting a full set takes about 2 hours with a drill template, and the doors need no repainting afterward.
Subway Tile Backsplash
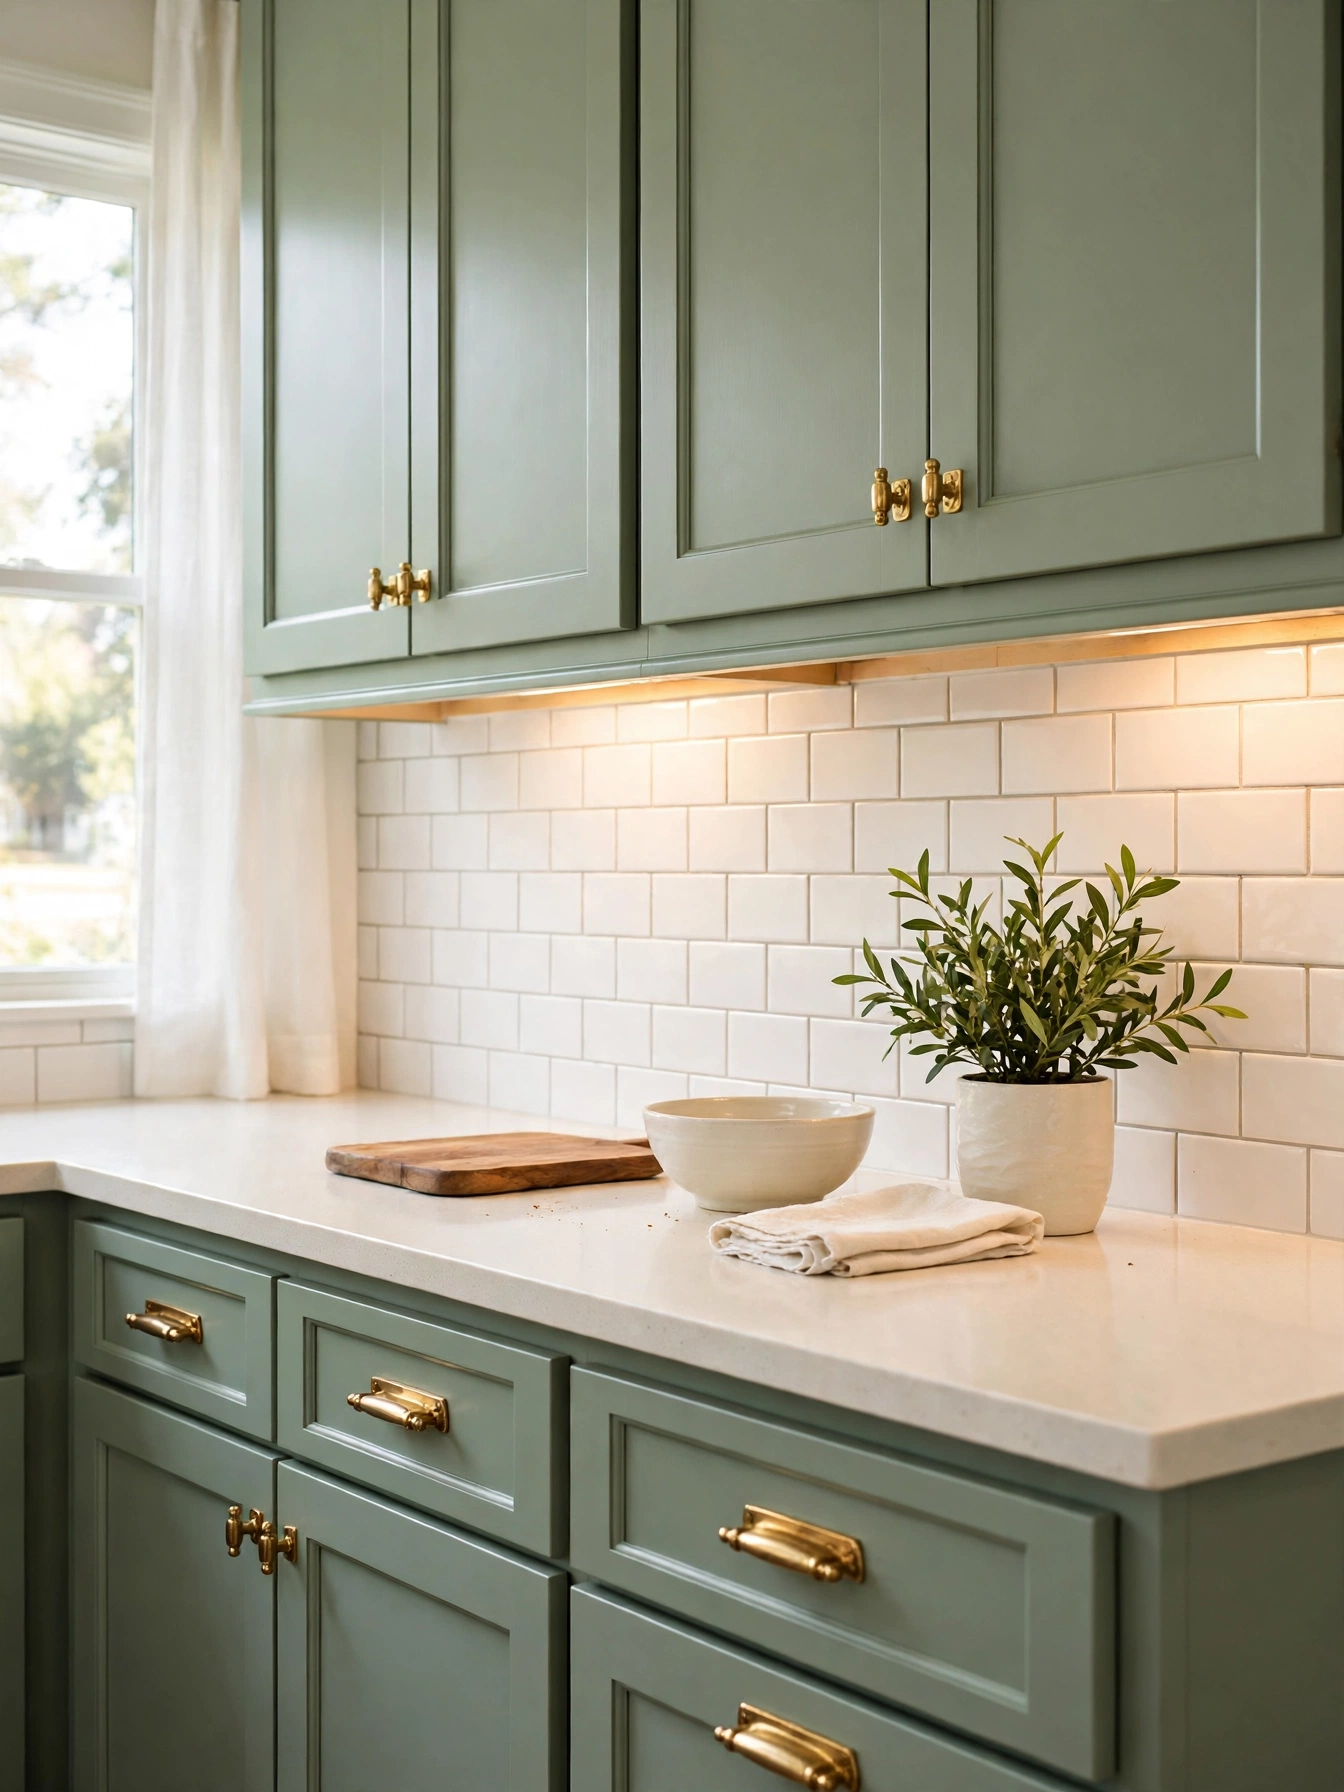
Why This Works:
- A white tile band frames the sage with a bright edge
- A 3 by 6 inch tile reads well in both classic and modern rooms
- Pale grout keeps cooking stains faint
- Tile wipes clean after daily cooking splashes
Subway tile in a soft white frames sage cabinets in a 3 by 6 inch ceramic tile, set 18 inches high between the counter and the upper cabinets, with grout in a pale gray that hides stains. A standard backsplash runs about 30 square feet, and tile should be sealed with a grout sealer every 12 months, since kitchen grout absorbs grease near the range. Sage cabinets in satin and a cream quartz counter leave the tile as the single pale pattern in the room. Pair a busy patterned tile with plain counters, since two patterns in one room look restless.
Where splashes land, tile wipes clean, and ceramic stands up to heat beside the range. Glass tile chips when a pan knocks it. Ceramic absorbs the knock and keeps its glaze, so it suits the wall beside a hot range. The white band also lifts the sage in a room with one small window, since it reflects light back onto the counters. Lay the tile in a brick pattern for a classic look. A straight stack gives the wall a tidy grid that suits a modern room.
Sage Green Kitchen Walls
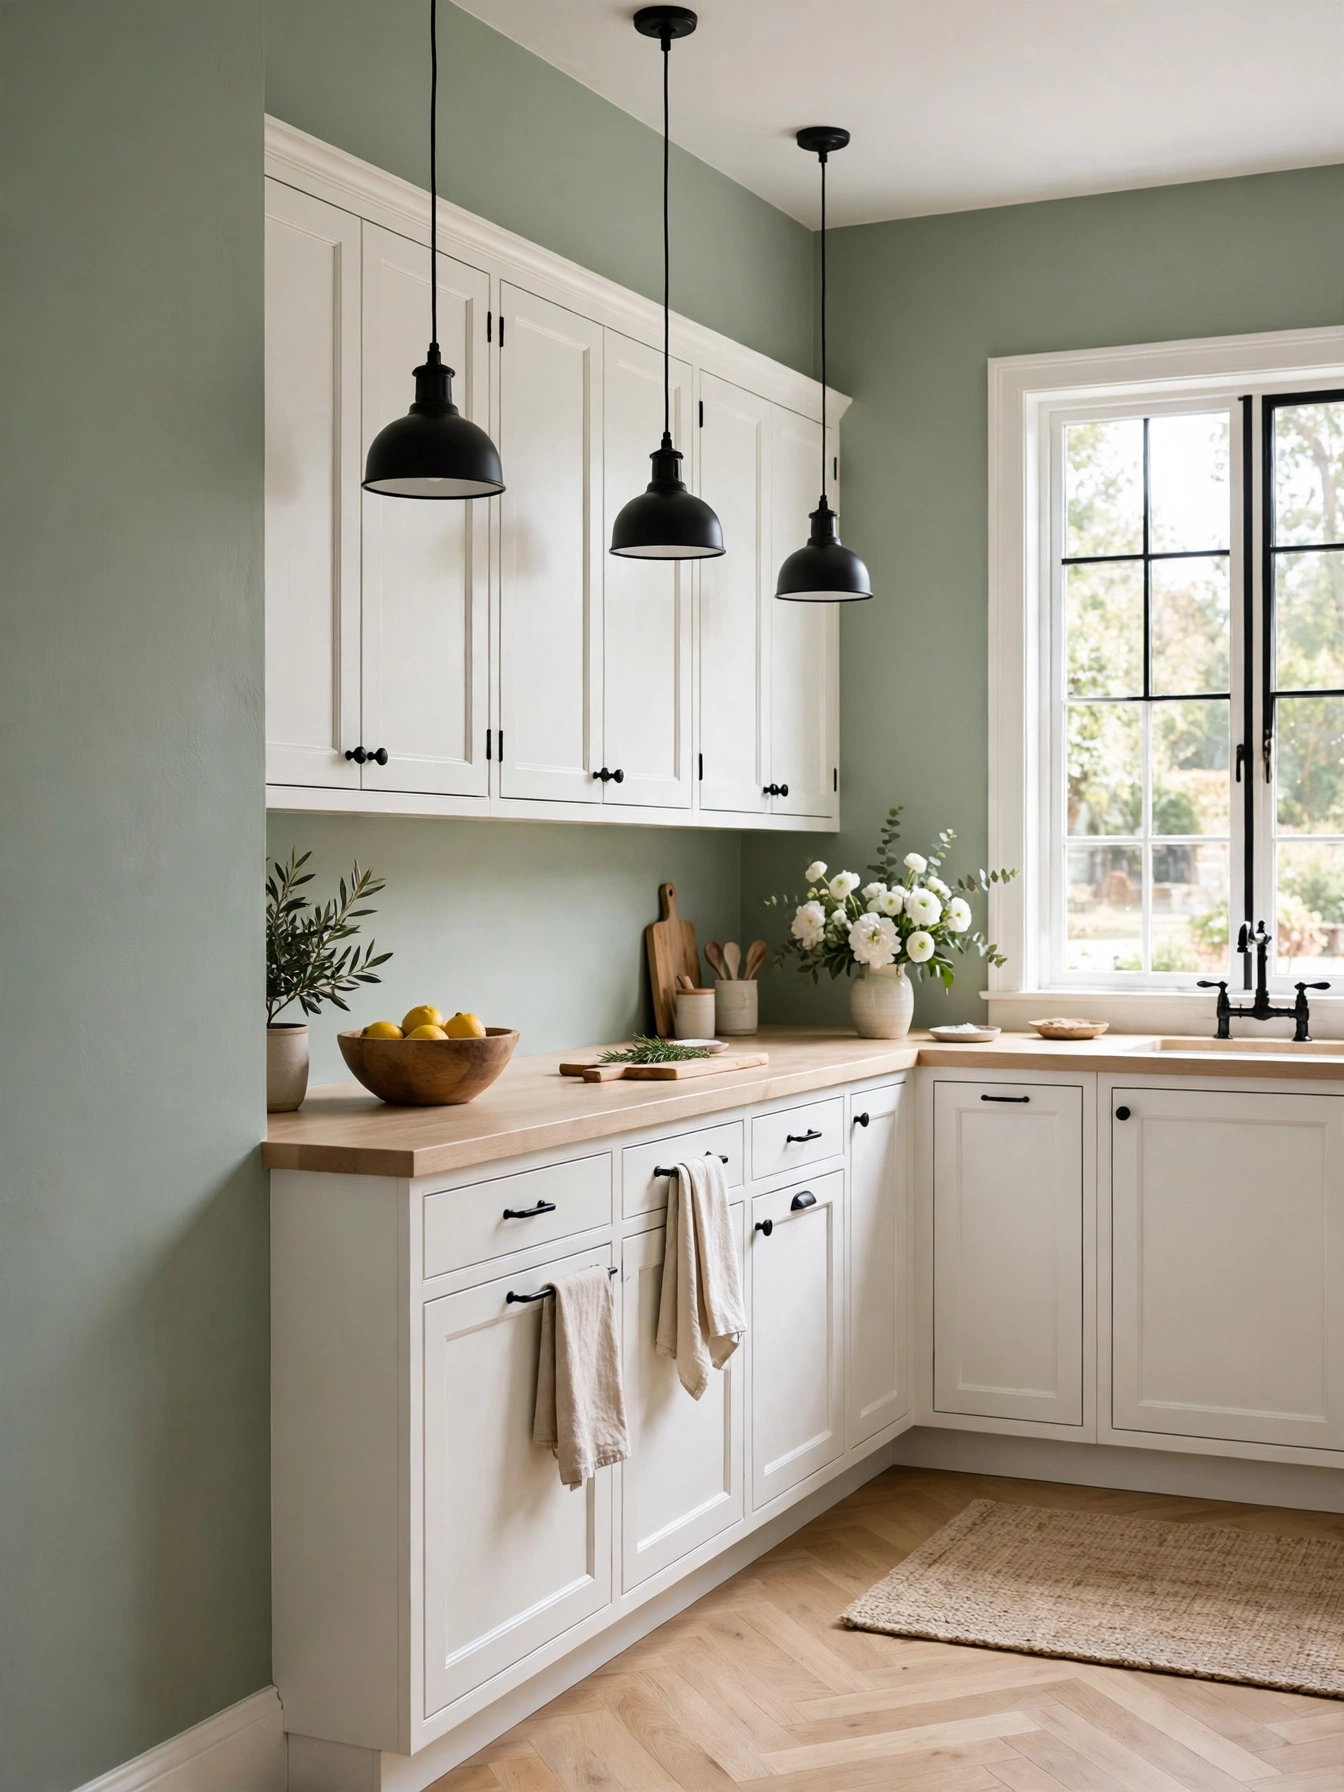
Why This Works:
- Sage walls add color without painting cabinets
- White cabinets stay bright against the green wall
- Wall paint refreshes fast when the shade needs updating
- Pale oak warms the green wall tone
Sage walls change the room with 2 coats of eggshell finish over primer on drywall sanded smooth. Paint a 2 foot by 2 foot test board first and view it at 7 AM and 7 PM, since sage reads greener in morning light and grayer by evening. Keep the ceiling and trim white, and leave 4 to 6 inches of white trim at the ceiling line so the green has a clean frame. In a room under 10 feet by 12 feet with one small window, sage on one wall is enough, since the color closes the room in and reads as gray after sunset.
A weekend of painting changes the wall color, and the white cabinets stay untouched if the shade ever needs to change. Painted walls scuff near the range and sink. Wipe those spots with a damp cloth the same day, and the satin wall paint holds up through daily cooking. The Spruce notes that mid-tone wall colors hold their character with white trim, which gives the green a clean frame at the ceiling line. White subway tile behind the range protects the painted wall from splashes and steam.
Matte Sage Finish
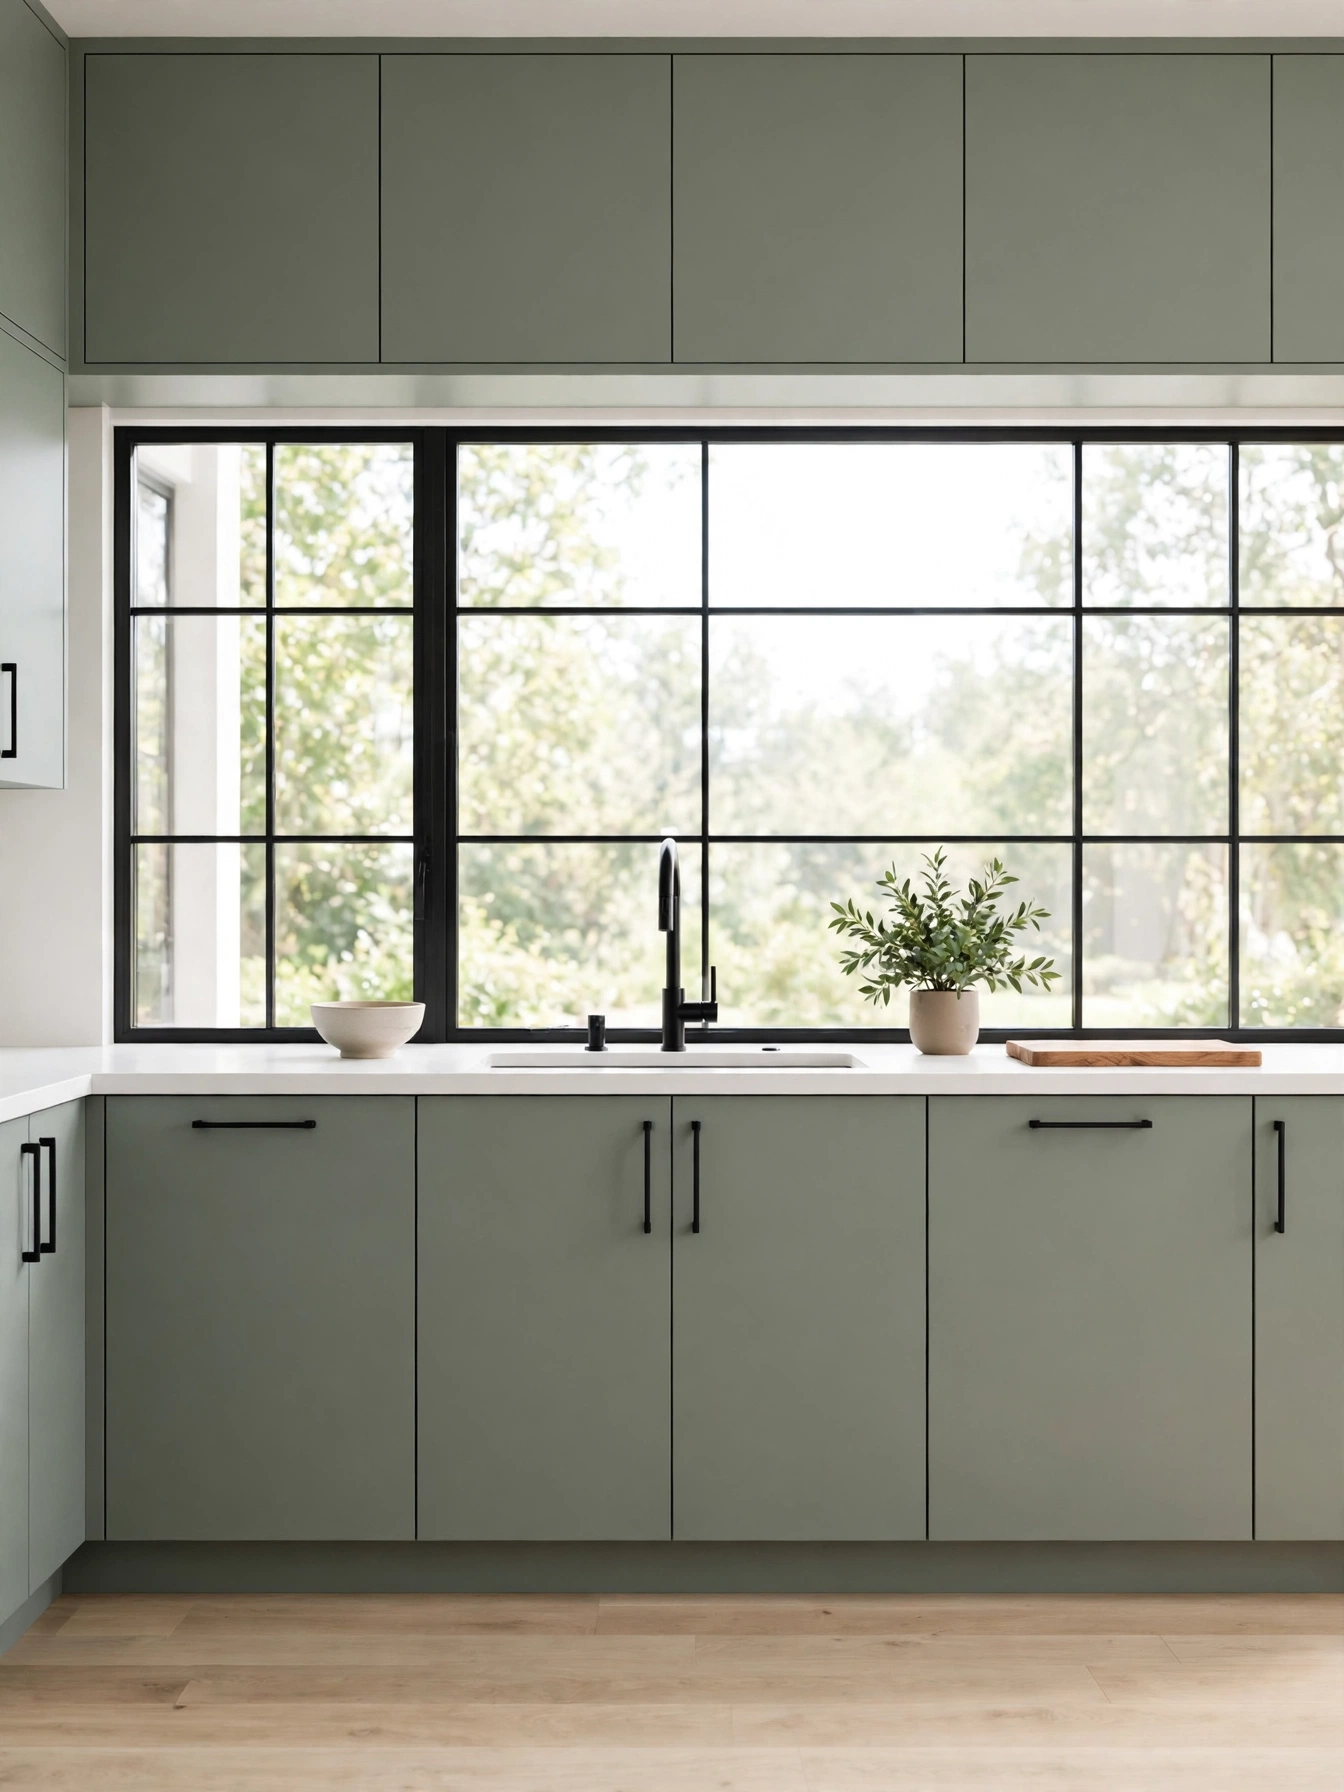
Why This Works:
- Matte sage softens a modern flat door
- A flat finish keeps fingerprints hard to spot
- Handleless kitchens suit flat panels
- Matte pairs cleanly with black fixtures
A damp cloth leaves marks on a standard matte finish, so only a washable formula belongs on matte sage cabinets. Choose a matte acrylic enamel rated for cabinets, applied in two coats on primed MDF flat doors 3/4 inch thick, and sand with 220 grit paper between coats so the second coat levels smooth. A mid-tone sage suits matte best, since a very dark matte sage looks chalky under bright light. Touch up with a small foam roller, so the repair blends into the flat surface. Cabinets beside the sink need a washable paint label, since water splashes there daily.
Matte brings a quiet surface to a modern kitchen. The finish hides small dents well. Splatter from the range lands on these doors during cooking, and a damp cloth at the end of the meal keeps the flat surface looking even. Satin shows few grease marks and wipes clean with a damp cloth. Matte gives the flat, calm face that modern rooms ask for, so save it for doors away from the range. A sprayed matte finish leaves no brush marks, which matters on flat slab doors under kitchen light.
Glass Front Display
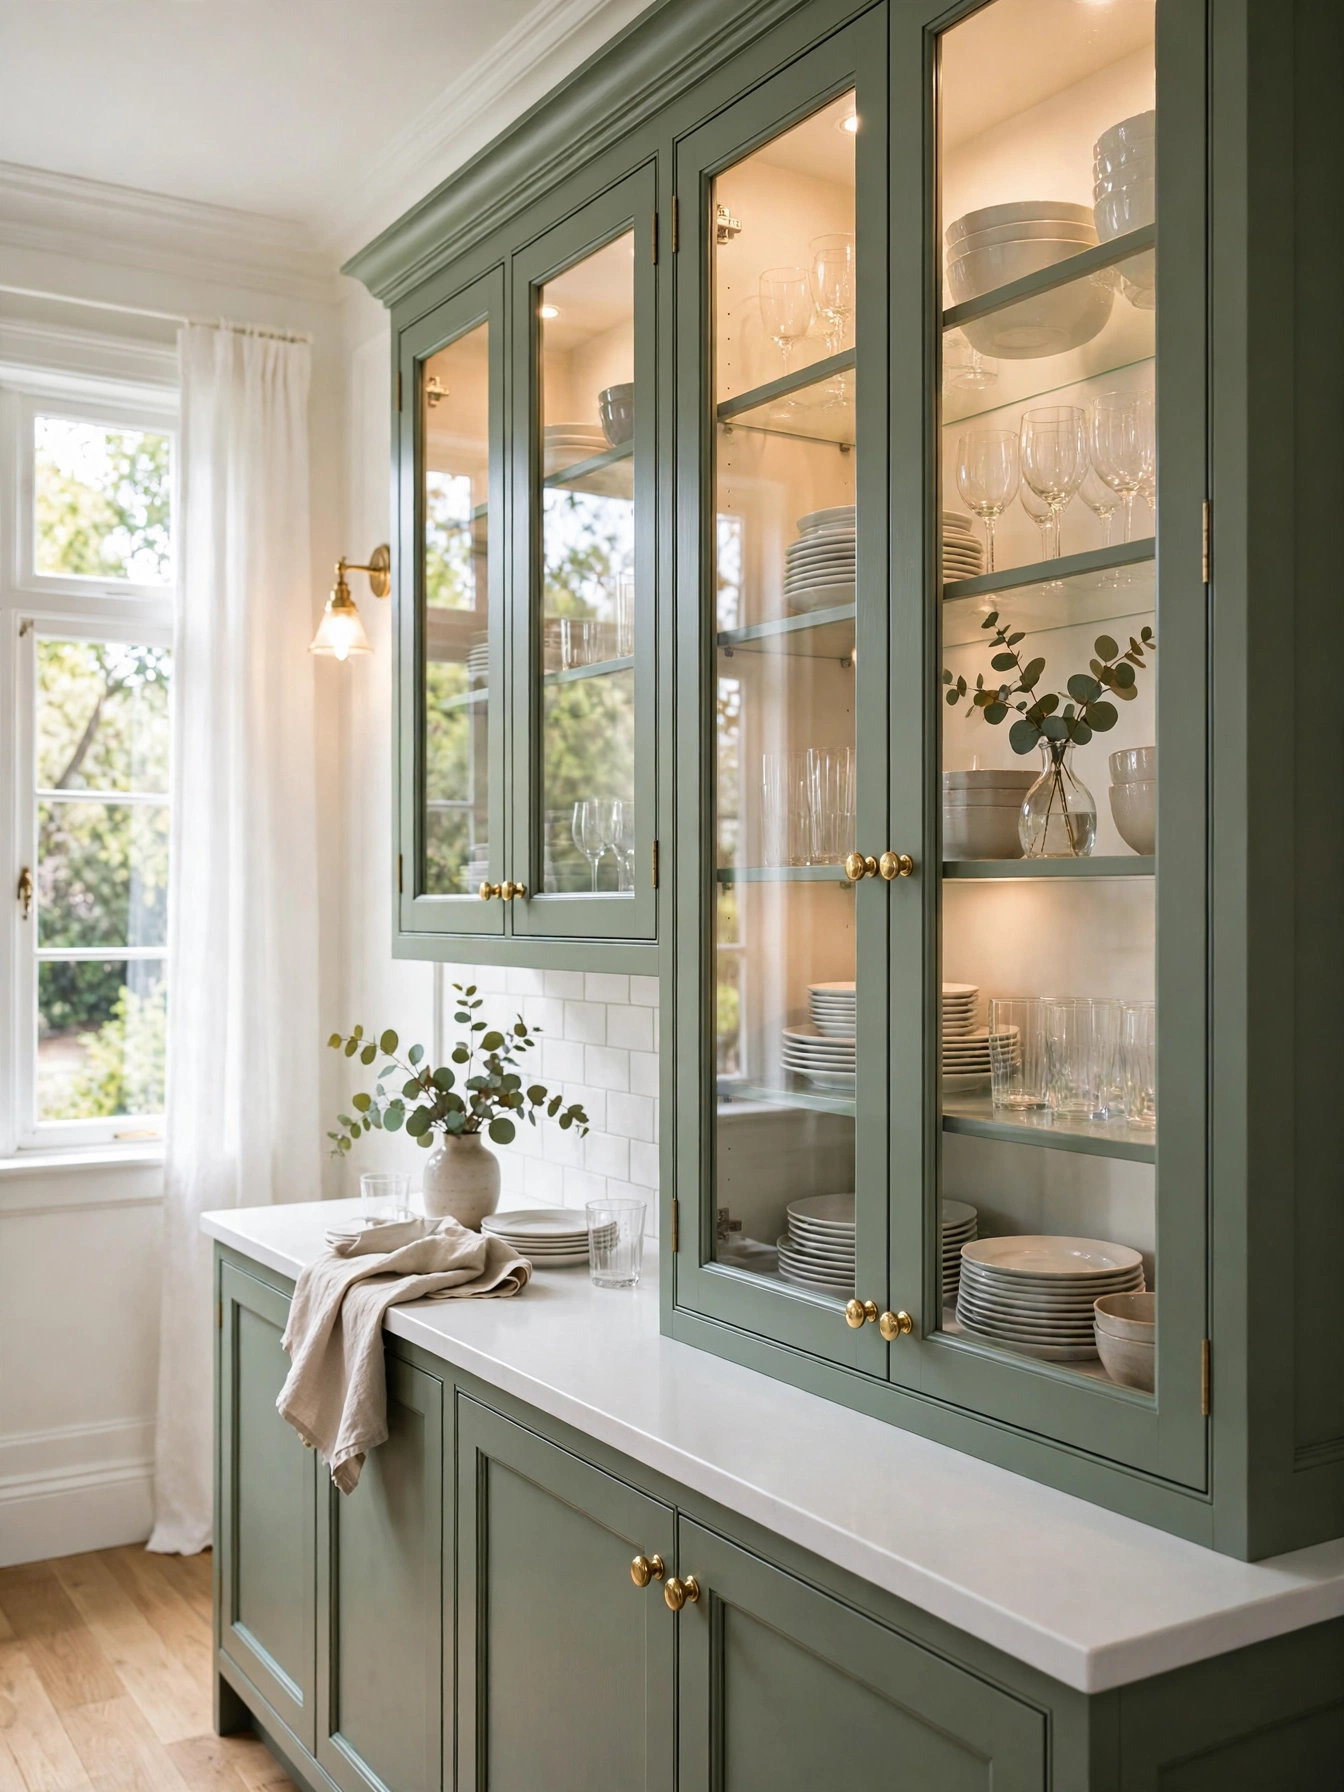
Why This Works:
- Glass fronts break up a long sage cabinet run
- White dishes inside brighten the sage frame
- Interior lights make the display glow at night
- Two glass doors are enough, the rest can stay solid
Glass front uppers start with tempered glass 1/8 inch thick in a maple frame painted the same sage as the solid doors. Glass on just two doors, set beside the range hood or the sink, keeps the display edited and leaves the rest of the wall closed. An interior LED strip at 2700K inside each glass cabinet, switched from the wall, makes the dishes glow in the evening. Limit glass to two upper doors, and the rest of the wall keeps its closed storage for the clutter that never looks good on show.
Glass doors need a wipe every week to stay clear, and the frames need the same satin paint as the solid doors to match. White plates and clear glasses look best behind glass, since pale pieces glow against the sage frame. Behind frosted panes, everyday dishes turn into pale shapes, so a crowded shelf still reads tidy from across the room. It dims the display a little, so clear glass suits a neat shelf and frosted suits a fuller one. White shelves inside let the dishes take over the display, with pale plates glowing against the sage frame.
Farmhouse Sage Charm
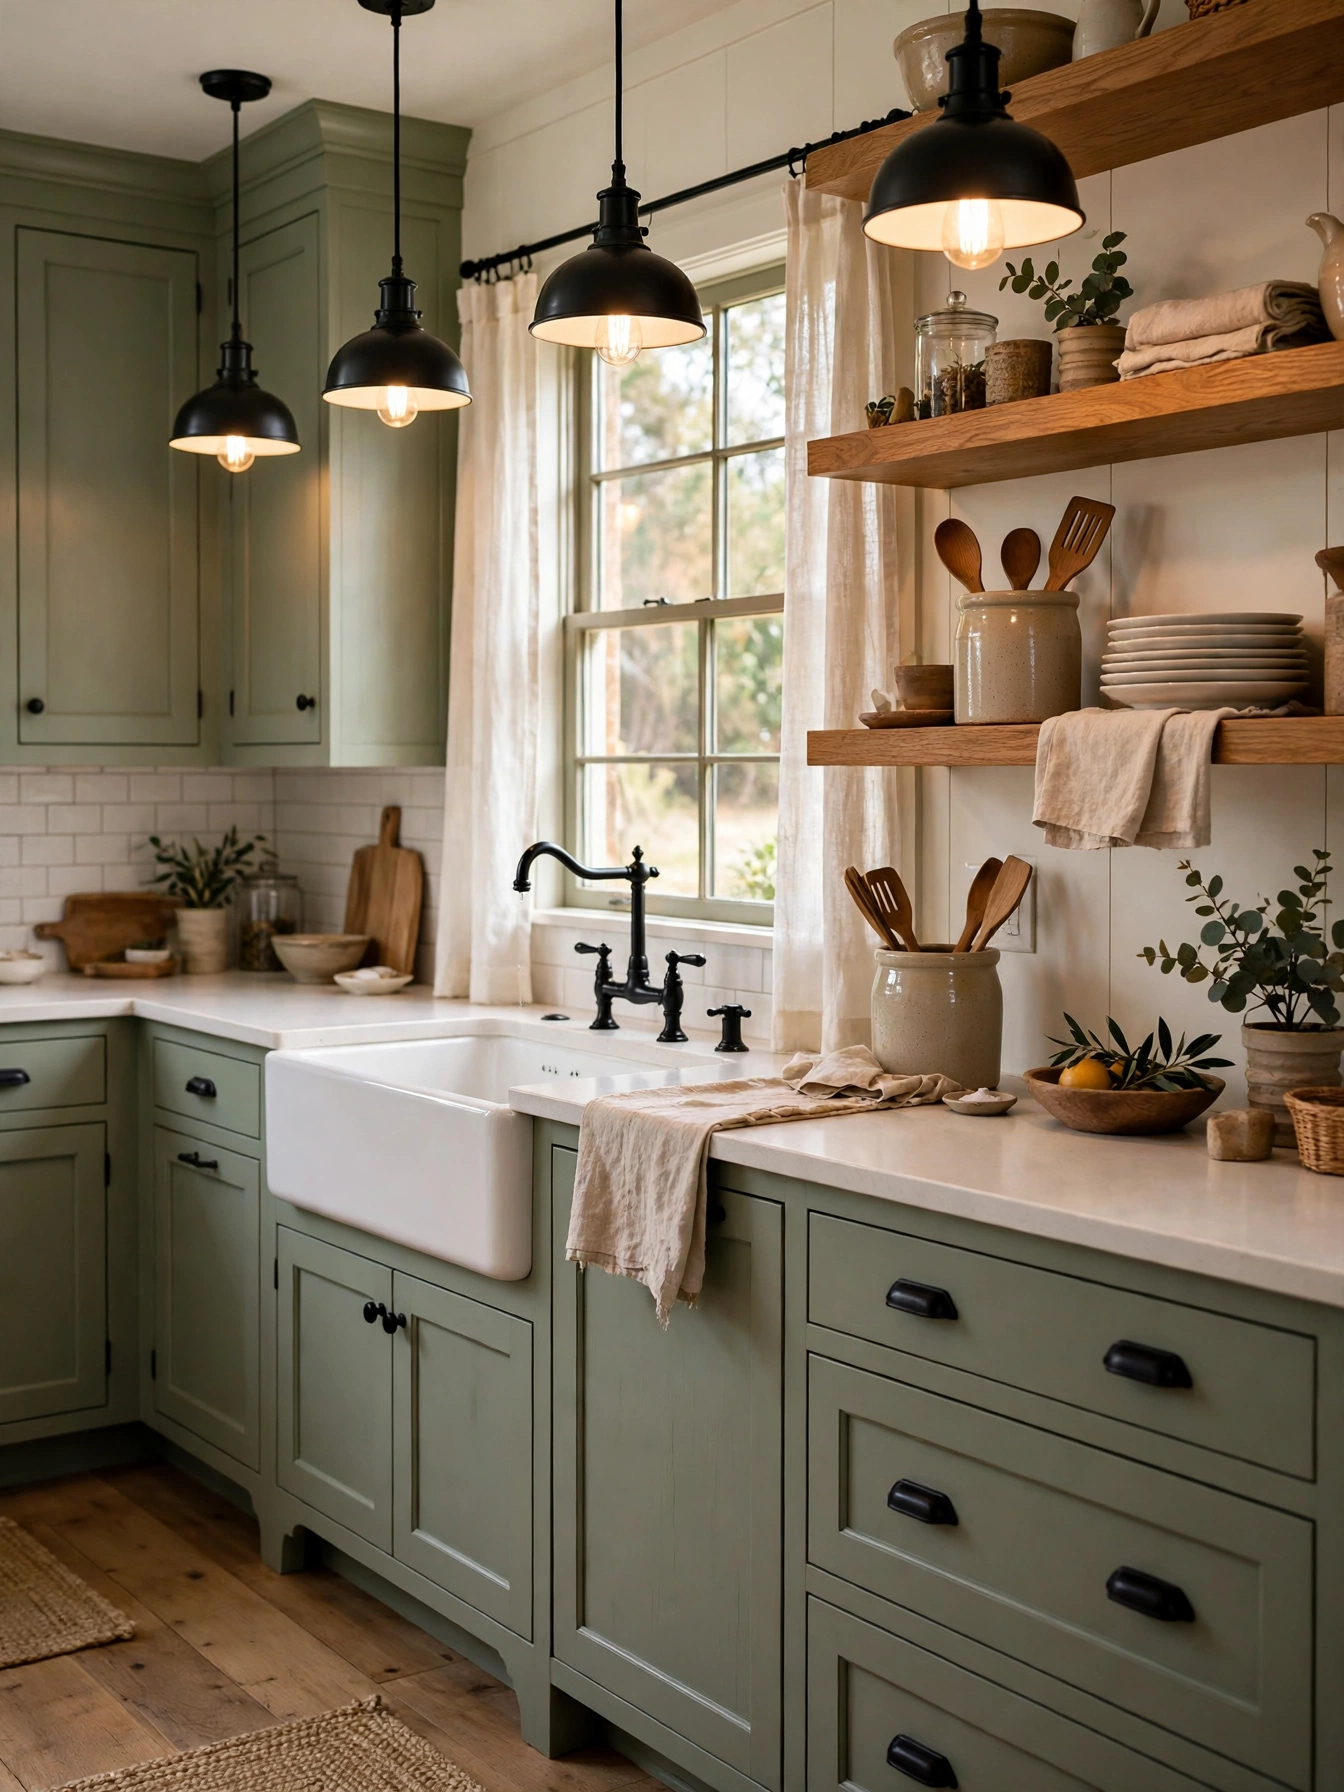
Why This Works:
- Sage softens the farmhouse look without gray
- A white apron sink gives the sage a bright center
- Wood shelves warm the painted cabinets
- Black pendants add a clear farmhouse edge
On shaker or beadboard doors, a muted sage tone gives farmhouse cabinets their relaxed character, painted in a satin finish on primed shaker doors. Pair the sage with a white fireclay apron sink 30 inches wide, which needs a cabinet base 33 inches wide to support its 80 pound weight. Keep the countertop light, such as white quartz or pale wood, and use open wood shelves 12 inches deep beside the sink for daily dishes. Keep the green muted in a farmhouse kitchen, since a vivid tone fights the relaxed wood and linen palette.
Shaker doors, a fireclay sink and wood shelves give the room a relaxed, lived-in character that suits daily cooking. Butcher block counters warm the room. Oil the block every 3 months, and wipe it dry after washing so water never pools on the wood. Keep the palette to sage, white, wood and black, so the room stays calm. A fireclay sink resists chips and matches the style. Its apron front needs a 33 inch base, so measure the cabinet before ordering.
Sage Pantry Doors
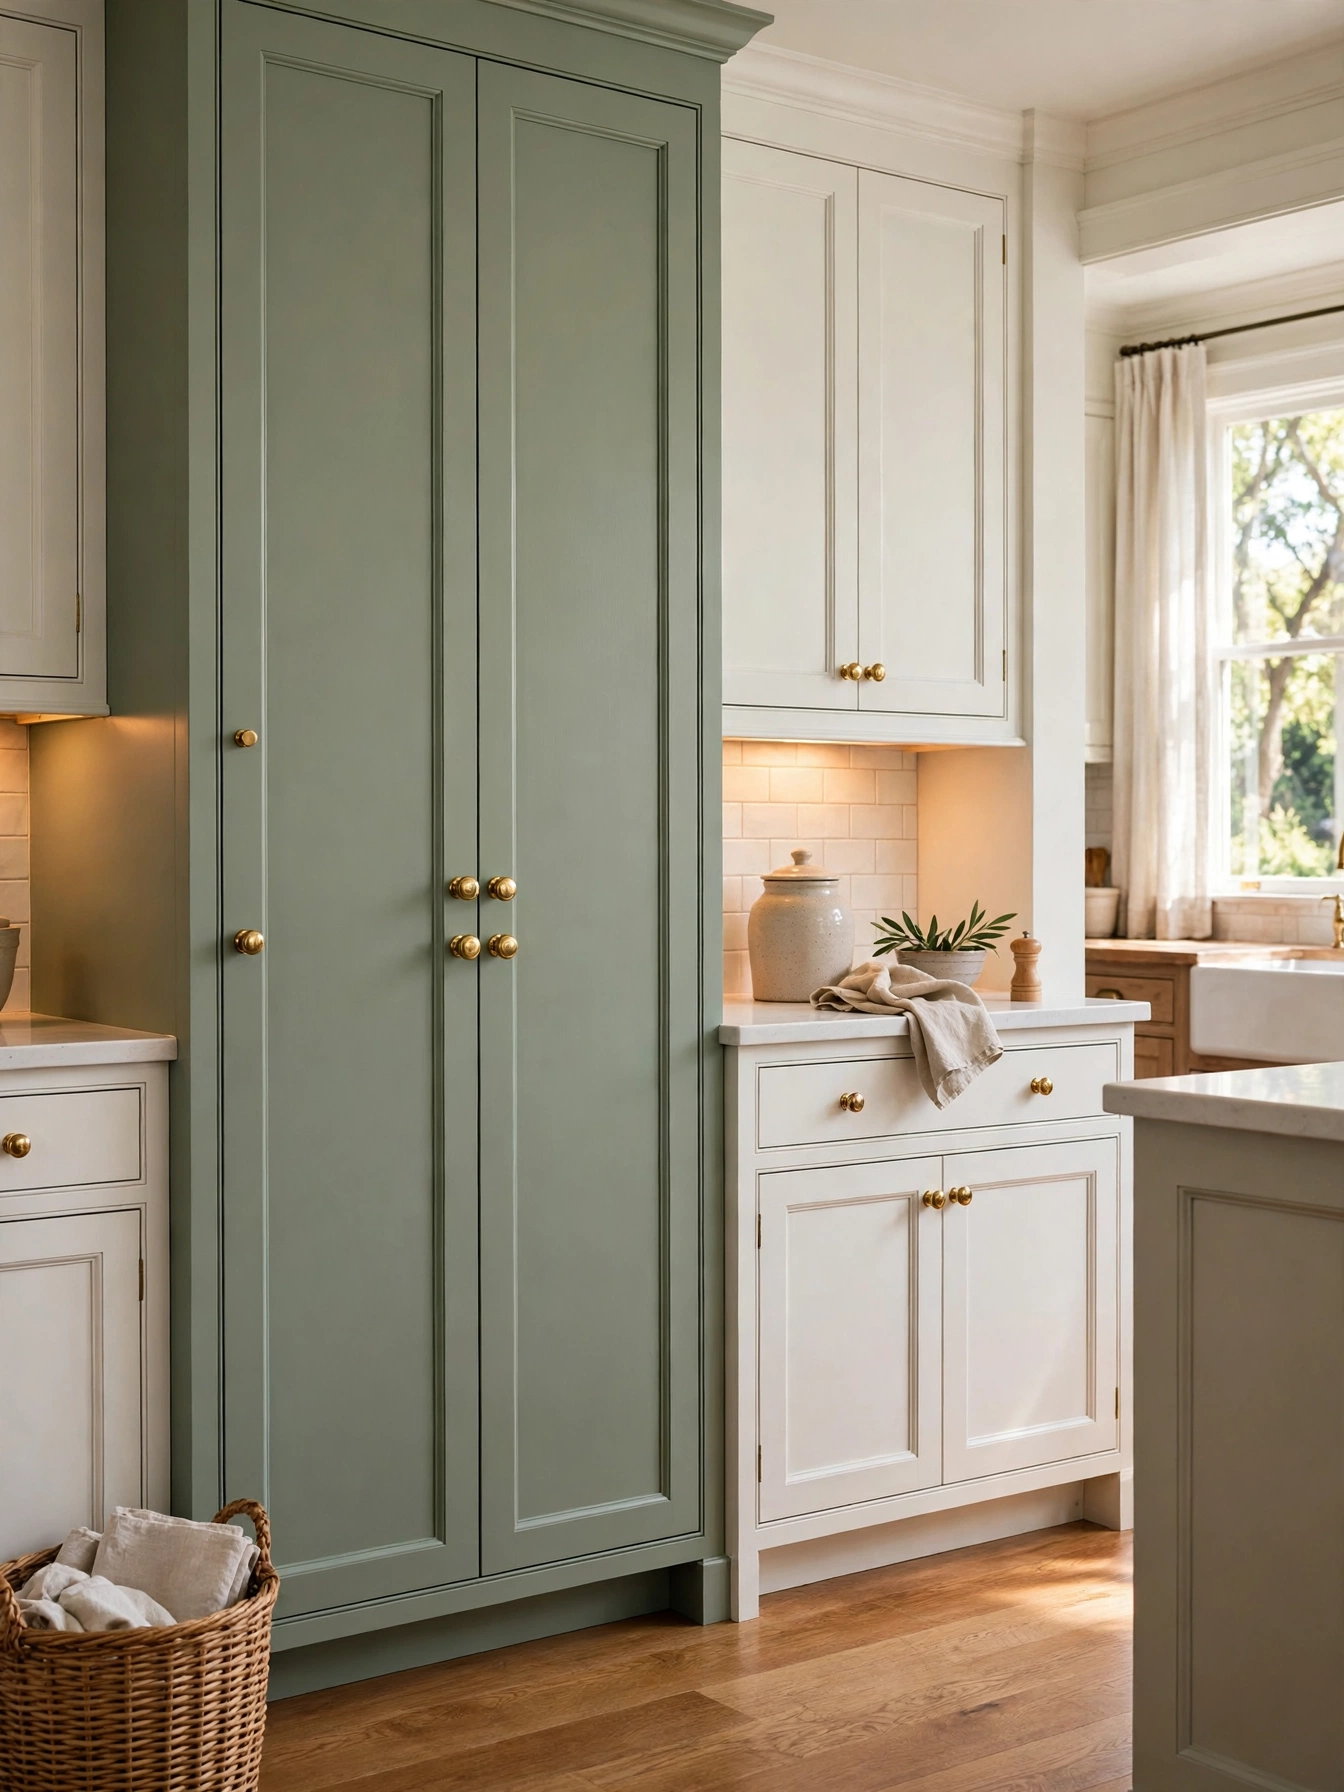
Why This Works:
- Sage pantry doors add color in one tall sweep
- The tall doors shut away food storage behind a quiet sage front
- Brass knobs pick up the tone of the other hardware in the room
- A single sage element is enough in a white kitchen
In a mostly white kitchen, sage on the pantry doors makes the color statement, and the door height sets the impact. Tall pantry doors 84 inches high and 24 inches wide, painted sage in satin with 2 coats over primer on maple, give that sweep its scale. A tall pantry door needs hinges built for its weight. Fit a soft-close pair rated to 100 pounds, and test the door swing before the shelves go in. Shelves 12 inches deep with 14 inches between them hold cereal boxes and jars without stacking. A sage pantry beside a sage island puts two large green blocks in one room, so the balance tips and one of them should stay white.
Behind closed doors the tall pantry hides food storage. Its sage face adds character to a plain wall, so one painted run is enough for the whole room. Fixed shelves hold the heaviest jars. Fit pull-outs on the two lowest shelves, where heavy jars live and reach matters most. Labels by category on each shelf mean food is found without opening every door. White interior shelves make labels and jars easy to read against the sage face.
Walnut Accent Pairing
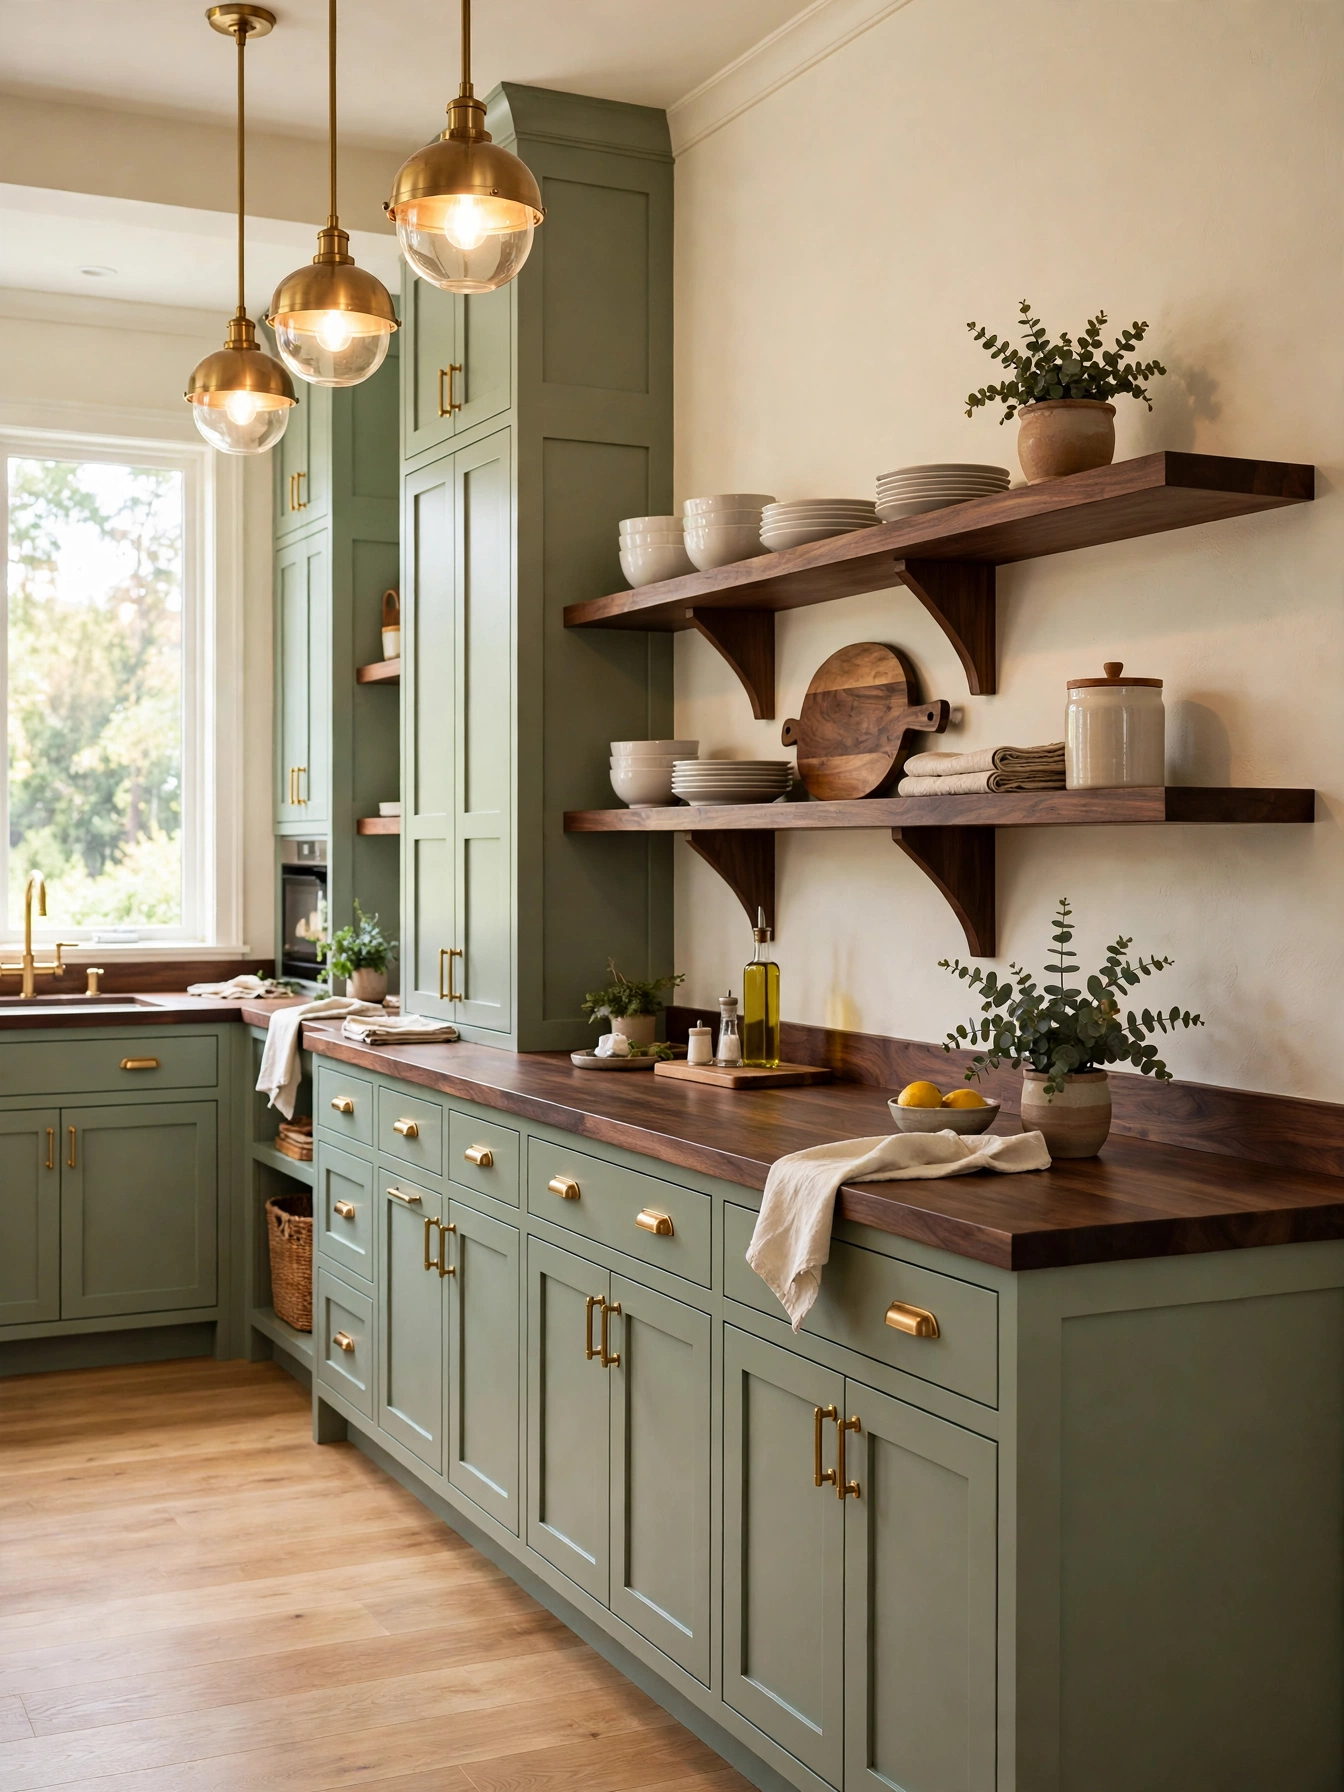
Why This Works:
- Walnut adds a rich wood layer beside sage
- Dark wood keeps pale sage from looking washed out
- Walnut shelves repeat the countertop tone
- Brass hardware warms the whole pairing
A walnut top 1.5 inches thick brings depth beside sage cabinets, set 36 inches high to match the perimeter counters, with a 12 inch overhang where seating is planned. The walnut shelves should measure 12 inches deep and sit 18 inches above the counter, finished with a clear matte oil that keeps the grain visible. A coat of oil keeps the walnut sealed against spills and stains. Rub the oil in after the counters dry, and leave the surface bare overnight so it soaks in. Pair a dark walnut stain with a mid-tone sage, since the heavy wood overwhelms a very pale green.
The pairing gives a sage kitchen a warm, grounded feel, and the dark grain anchors the pale cabinets. White oak stays light in a bright room. A light coat of oil rubbed in after cooking keeps the grain visible beside the sage. A wood countertop stays warm to the touch in winter, which matters at a breakfast bar where hands rest. Keep hardware brass and simple, with 5 inch bar pulls on drawers, so the metal repeats the warm wood tone.
Black Fixture Contrast
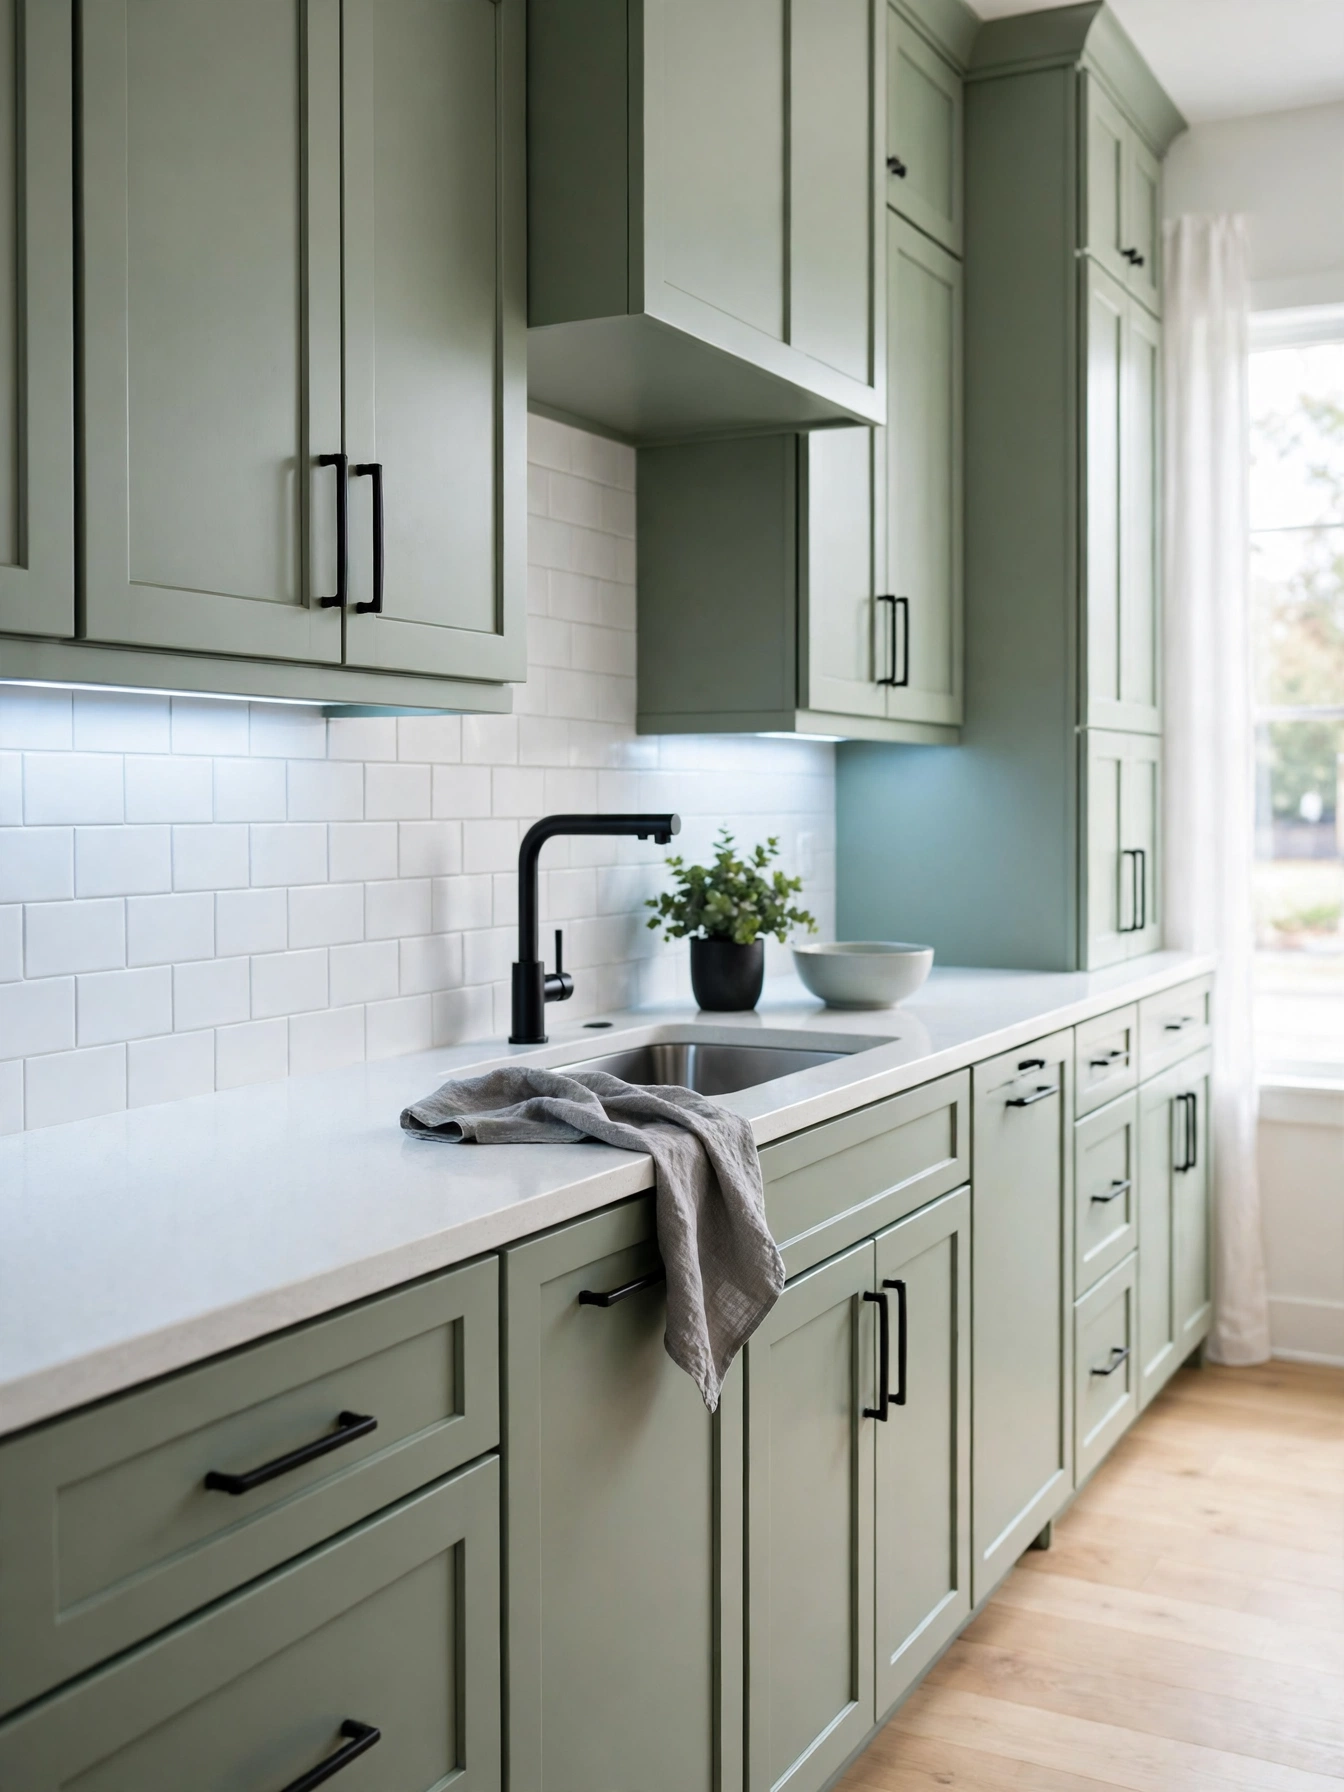
Why This Works:
- Black fixtures give soft sage a clear edge
- One dark tone sharpens every cabinet line
- Matte black shows few water spots
- White counters keep the dark accents from feeling heavy
Black fixtures sharpen sage cabinets when the black stays in one finish across faucet, pulls and lighting trim. Size the hardware to the doors: bar pulls 5 inches long on drawers wider than 24 inches, knobs 1.25 inches in diameter on doors, and screws matched to 3/4 inch thick doors. Keep the faucet matte black and the pendant trim black too, so the dark accents repeat in 3 places and read as a plan. Doors 3/4 inch thick with soft-close hinges hold heavier hardware without pulling out of square. Keep one metal finish per run, since black fixtures with polished chrome clash at a glance.
The contrast sharpens sage in a modern kitchen, and it looks crisp in a room with gray or white floors. Matte black shows dust quickly, so a weekly wipe with a damp cloth matters. Brass warms sage for a farmhouse room. Black gives a modern room a crisp edge. White subway tile 3 by 6 inches on the backsplash holds the counters and cabinets in one calm family.
Sage Green Kitchen Island
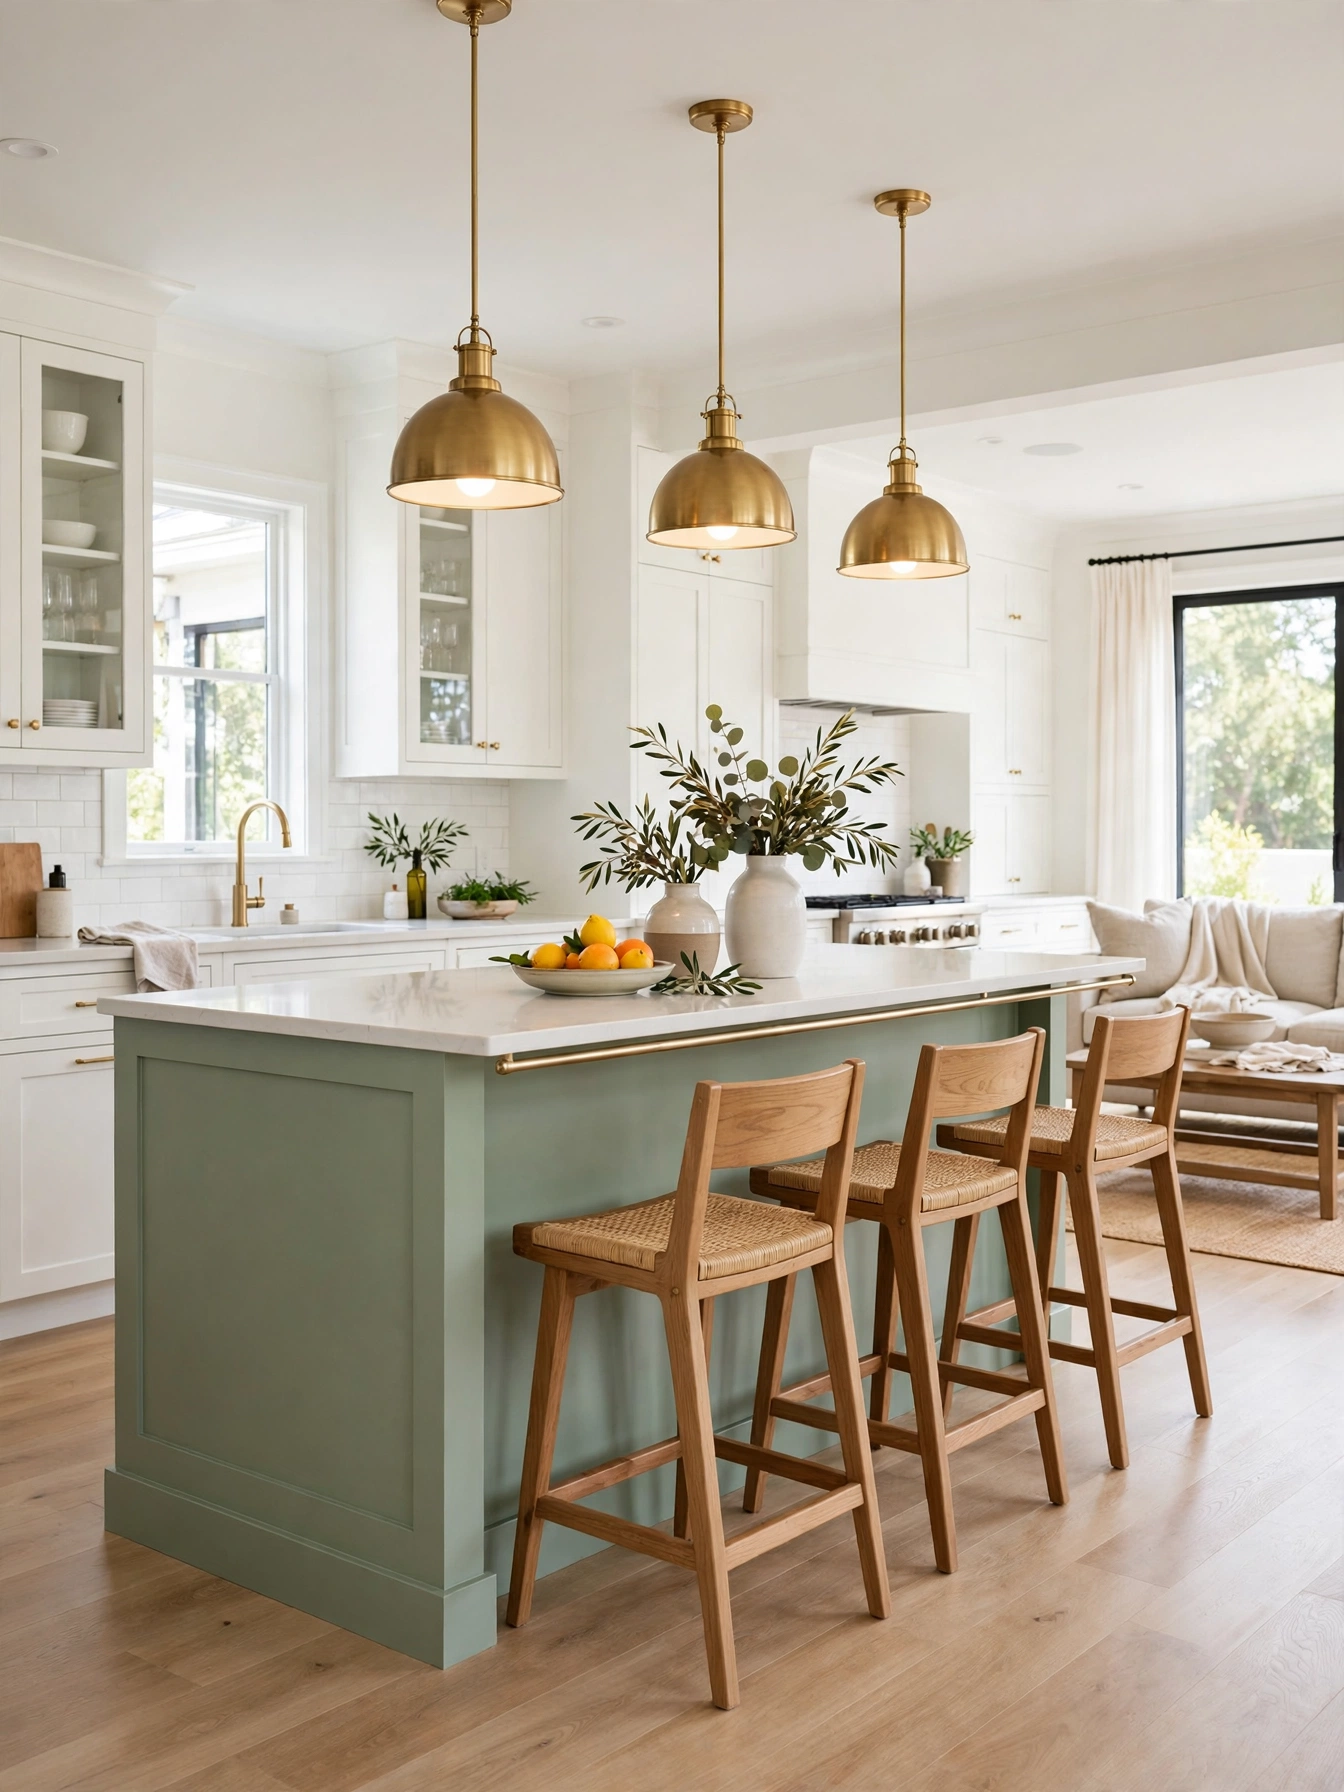
Why This Works:
- A sage island adds color without repainting the room
- White cabinets around the island keep the room light
- Knees fit comfortably under a 12 inch overhang
- Brass pendants over the island echo the hardware below
A sage island anchors the room against a white perimeter, and its length decides how many stools fit. An island 72 to 96 inches long and 36 inches wide, with a 12 to 15 inch overhang on the seating side, gives each stool 24 inches of width. Leave a clear aisle of 42 to 48 inches around the island, the passing space the National Kitchen and Bath Association sets for a working kitchen. Pendants over the island sit 30 to 36 inches above the countertop, set 24 to 30 inches apart for an even wash of light. An island shorter than 60 inches reads as a small sage accent, so size it for three stools.
Painting only the island changes the room in a weekend. Sand the island base with 220 grit paper first, and the new sage grips from the first coat. Three stools along the island turn it into the room’s morning table, with cereal bowls and school notes landing there before the day starts. A waterfall edge needs a fabricator template and exact measurements. Book the template visit before the slab is cut, so the edge lands flush with the floor. Island bases take daily scuffs from shoes and stools, so a durable satin finish belongs on them.
Open Shelf Styling
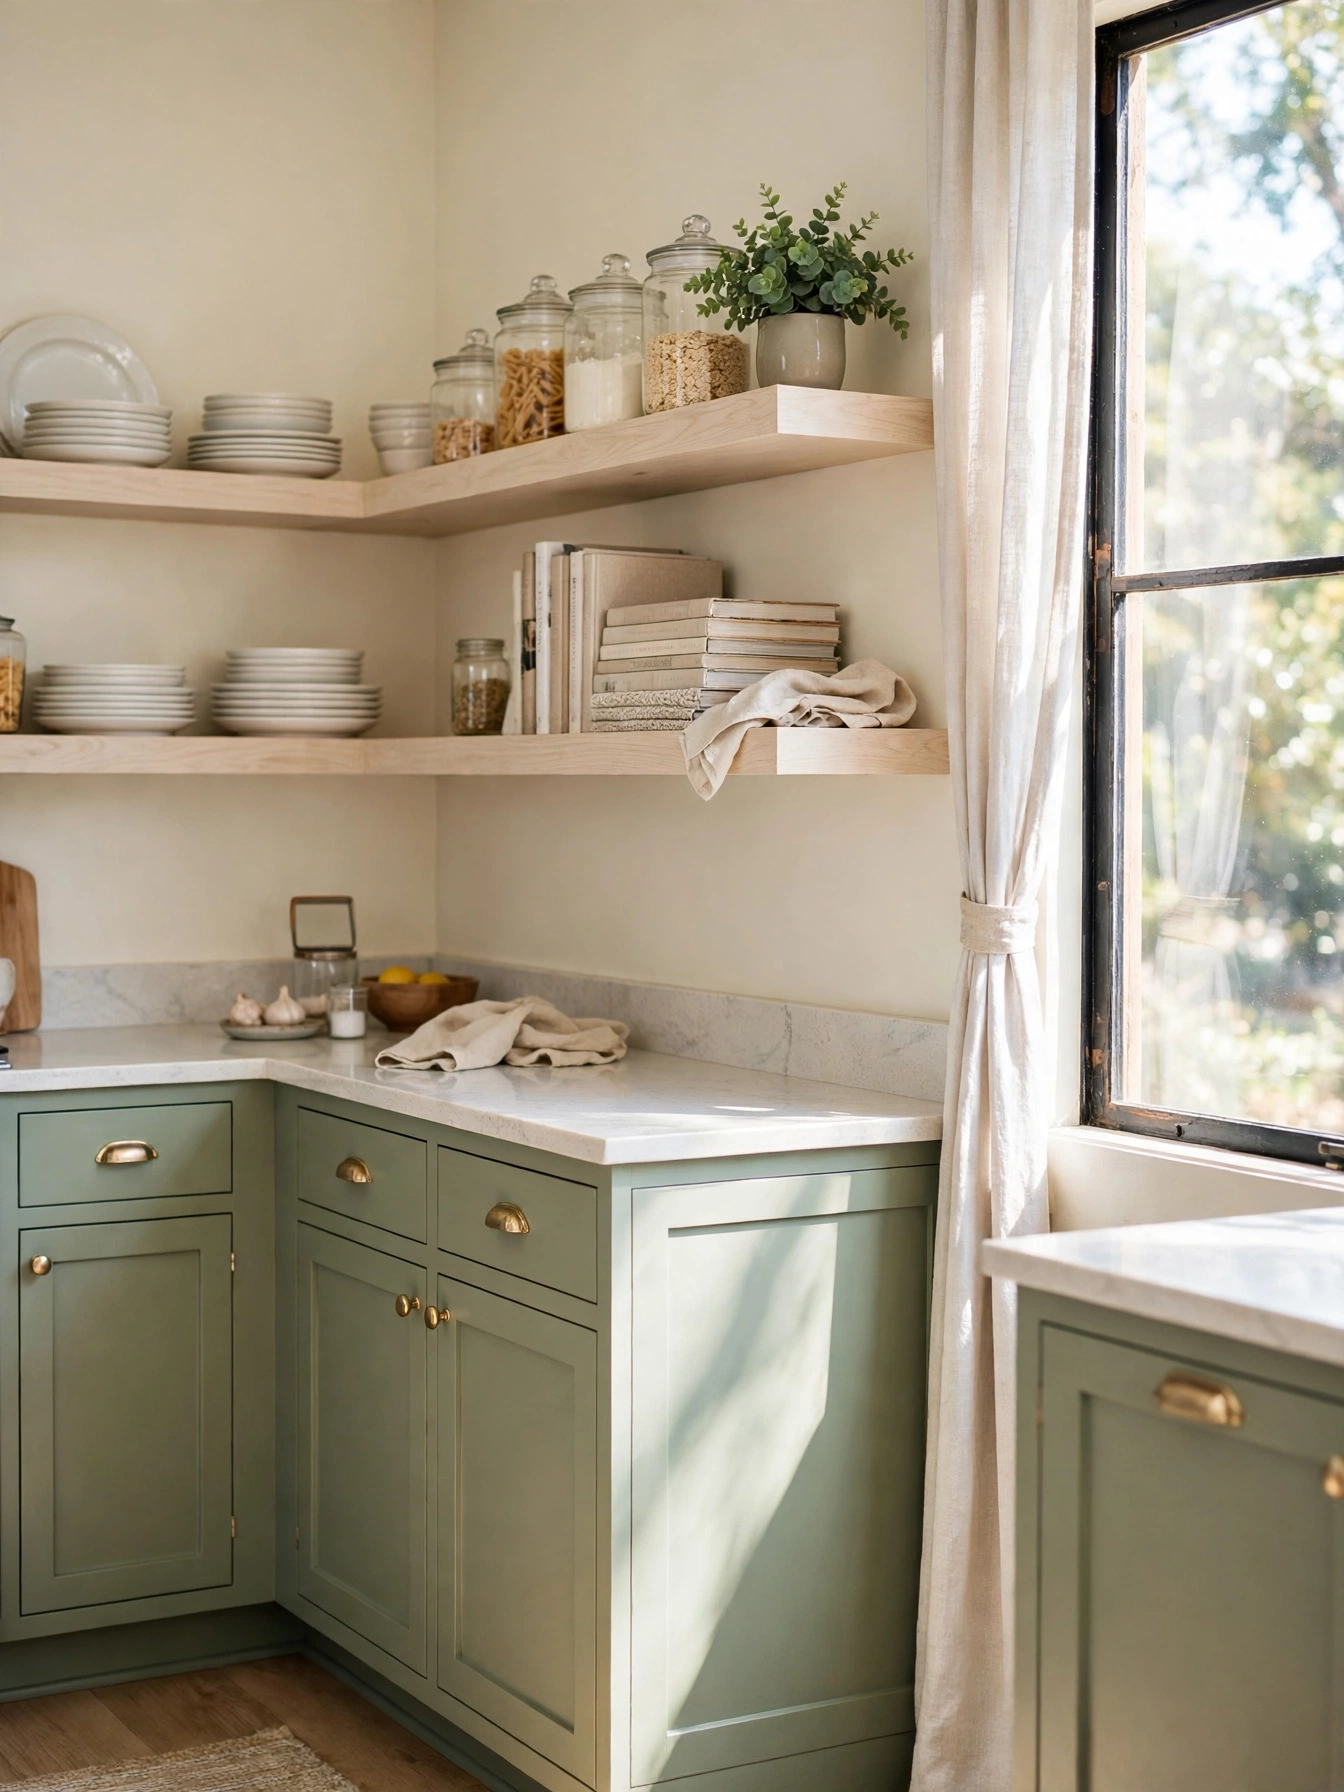
Why This Works:
- Open shelving lightens a sage lower run
- Pale wood shelves warm the sage below
- Plates and glasses stay within arm’s reach
- Styled shelves add personality without new cabinets
Open shelves above sage lowers need solid fixing, since a loaded shelf weighs more than it looks. Rest oak boards 12 inches deep and 1.5 inches thick on black metal brackets rated for 40 pounds per shelf, fixed into wall studs spaced 16 inches apart. Mount the lower shelf 18 inches above the counter, and keep plates on one shelf and glasses on the other. A base cabinet holds cast iron without stressing a wall bracket, and the shelf above stays level for plates and glasses.
A third shelf would crowd this wall and push the sage lowers out of focus, so two shelves are the limit here. Open shelves ask for a weekly wipe, since dust shows fast on wood beside a stove. Wood boards warm the room and read soft against the sage lowers. Black metal brackets hold each board from below, and their dark line frames the wood. Style each shelf with one stack, one row of jars and one plant, so the display stays edited.
Patterned Floor Tile
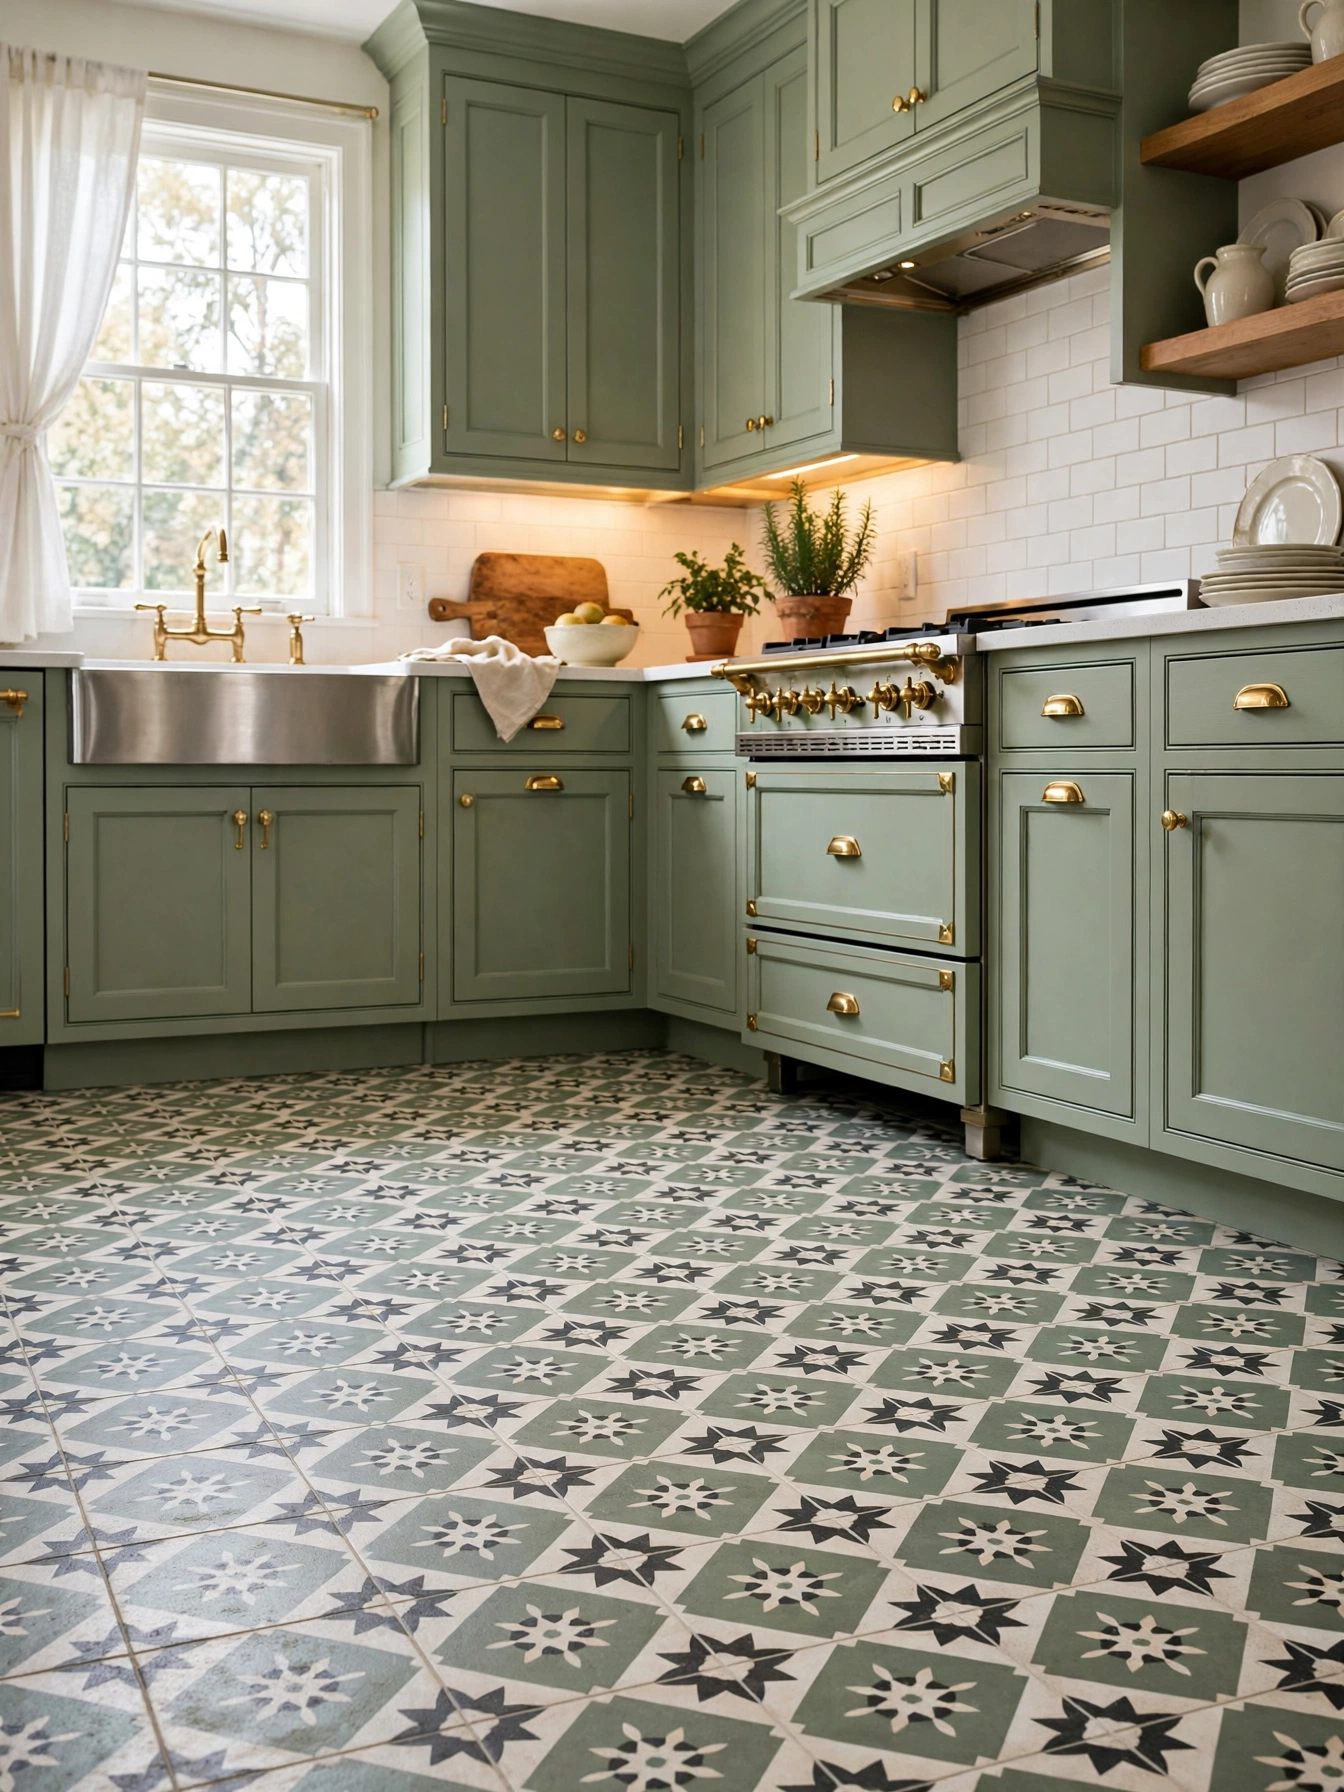
Why This Works:
- Patterned floor grounds sage cabinets with one bold move
- Sage in the tile ties the floor to the cabinets
- Porcelain tile handles drops, spills and chair legs
- A patterned floor hides crumbs between cleanings
Patterned floor tile grounds sage cabinets in a porcelain tile 8 inches by 8 inches, laid with 1/8 inch grout joints and sealed with a grout sealer every 12 months. Keep the grout a mid-tone gray, which hides stains near the range. The tile should carry a slip-resistant finish rated for kitchen floors, since smooth glazed tile turns slick when wet. A busy floor pattern needs a plain backsplash, since two patterns in one room look restless.
Patterned tile sets the character of the room from the ground up. Plain cabinets above the tile leave the floor as the single pattern in the room. Porcelain resists chips and absorbs little water, which matters beside the sink and dishwasher. Lay the tile dry first across the whole floor, so the pattern lands centered at the doorway and no thin cut shows at the threshold. A plain counter lets the tile pattern carry the room on its own.
Sage Range Hood
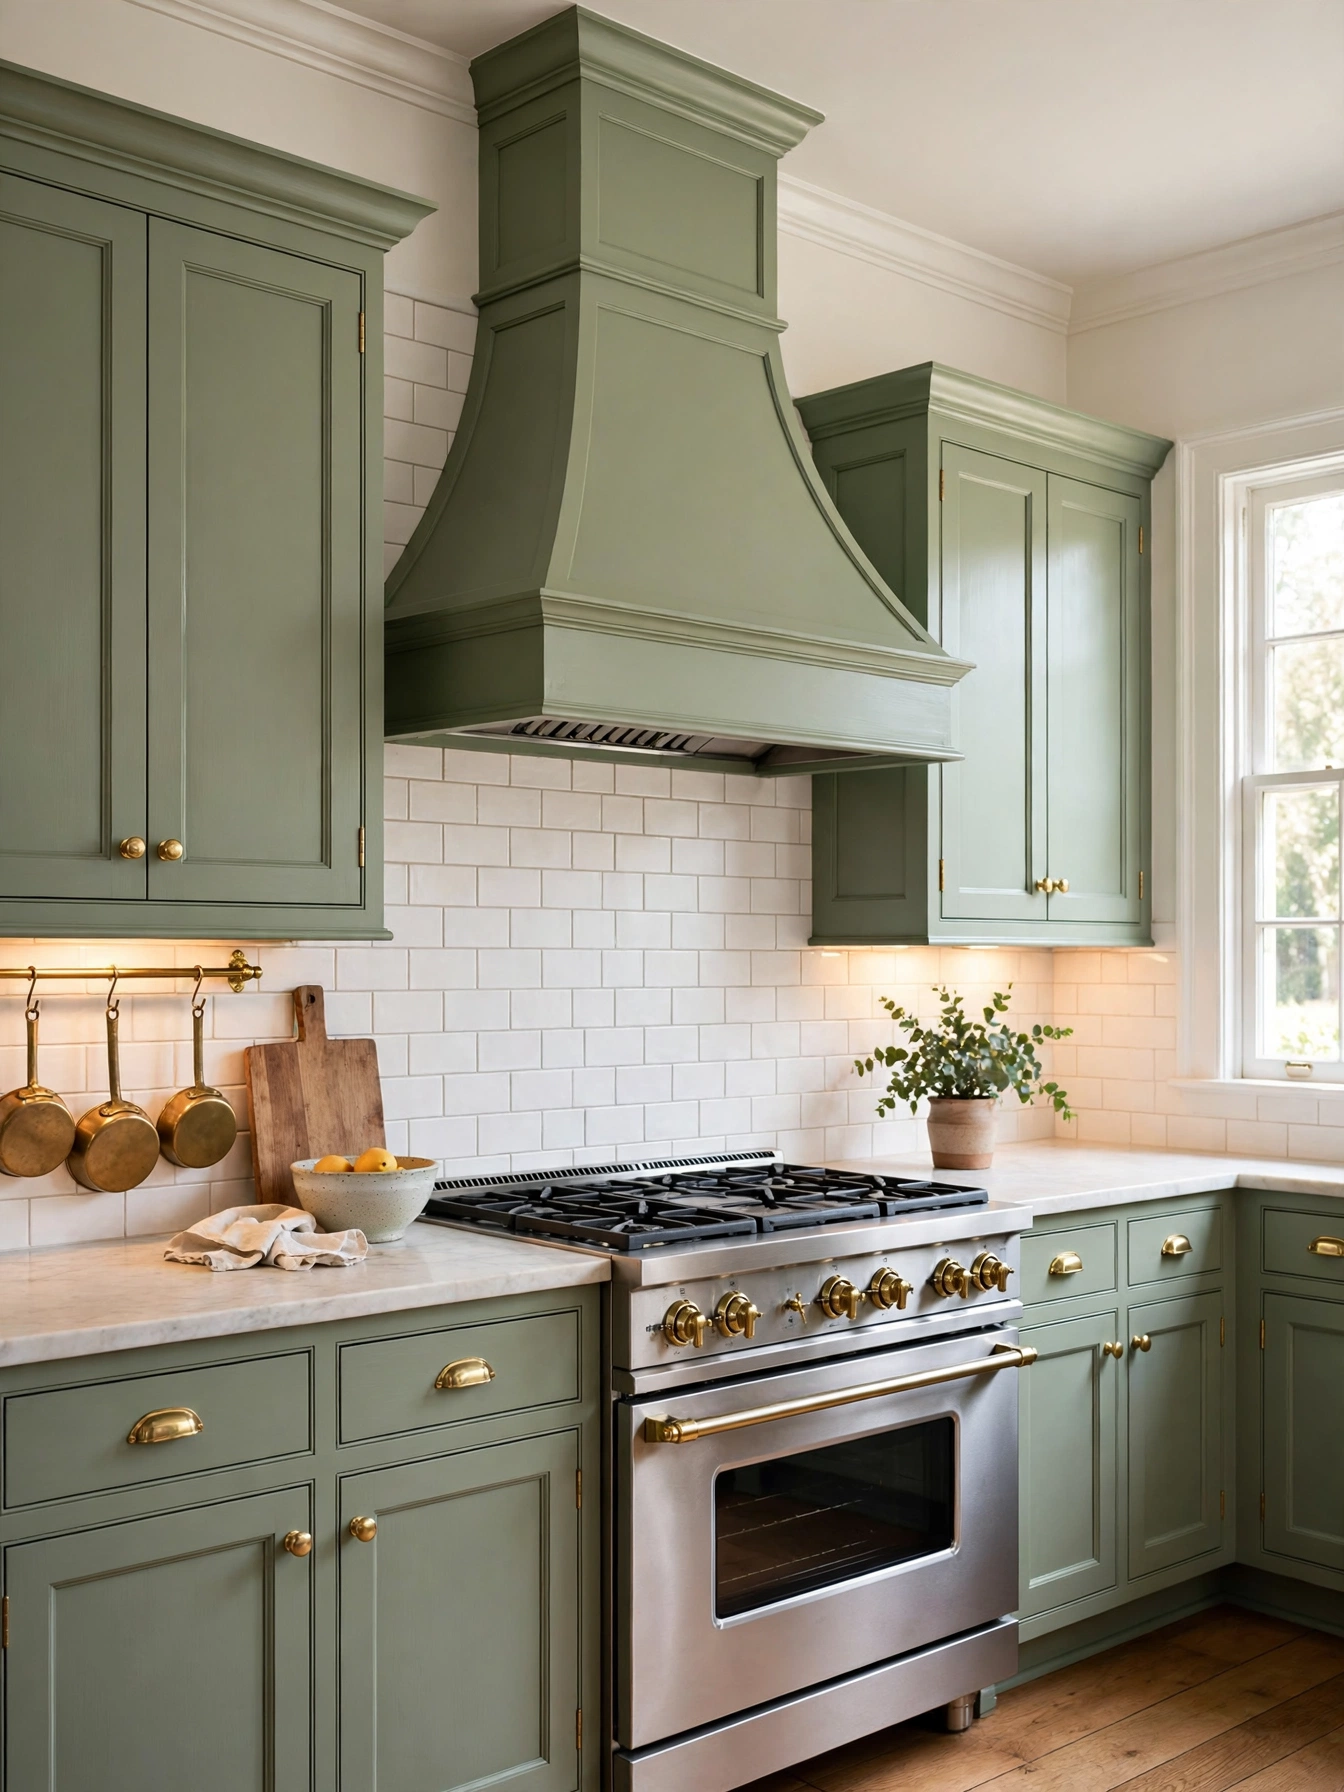
Why This Works:
- The sage hood turns the range wall into a feature
- Matching hood and cabinets read as one plan
- The hood draws the eye up and lifts the room
- Brass trim on the hood echoes the pulls and knobs
Painting the range hood sage turns the cooking wall into the room feature when the hood matches the cabinet color in the same satin finish. A custom sage hood costs 900 to 2,400 dollars installed, with a 6 inch round duct and a fan rated at 300 to 600 CFM for a standard 30 inch range. Hang the hood 30 inches above the cooktop, which keeps steam capture strong without blocking sight lines across the room. The hood body should measure 30 inches wide for a 30 inch range, or 36 inches wide for a 36 inch range, so it covers the burners fully. A ducted hood suits a gas range, since it clears heat and moisture from the room.
Ducted hoods pull steam and cooking smells straight outside, and the difference shows on cabinet paint over time. A new hood circuit needs a licensed electrician, since the fan and lights share a dedicated line and the wiring runs inside the wall. A 30 inch range pairs with the 300 CFM end of the range. Size the duct at 6 inches round, and vent it straight outside so steam leaves the room fast. White subway tile 3 by 6 inches behind the range catches the grease, and the painted hood stays clean.
Herb Garden Window
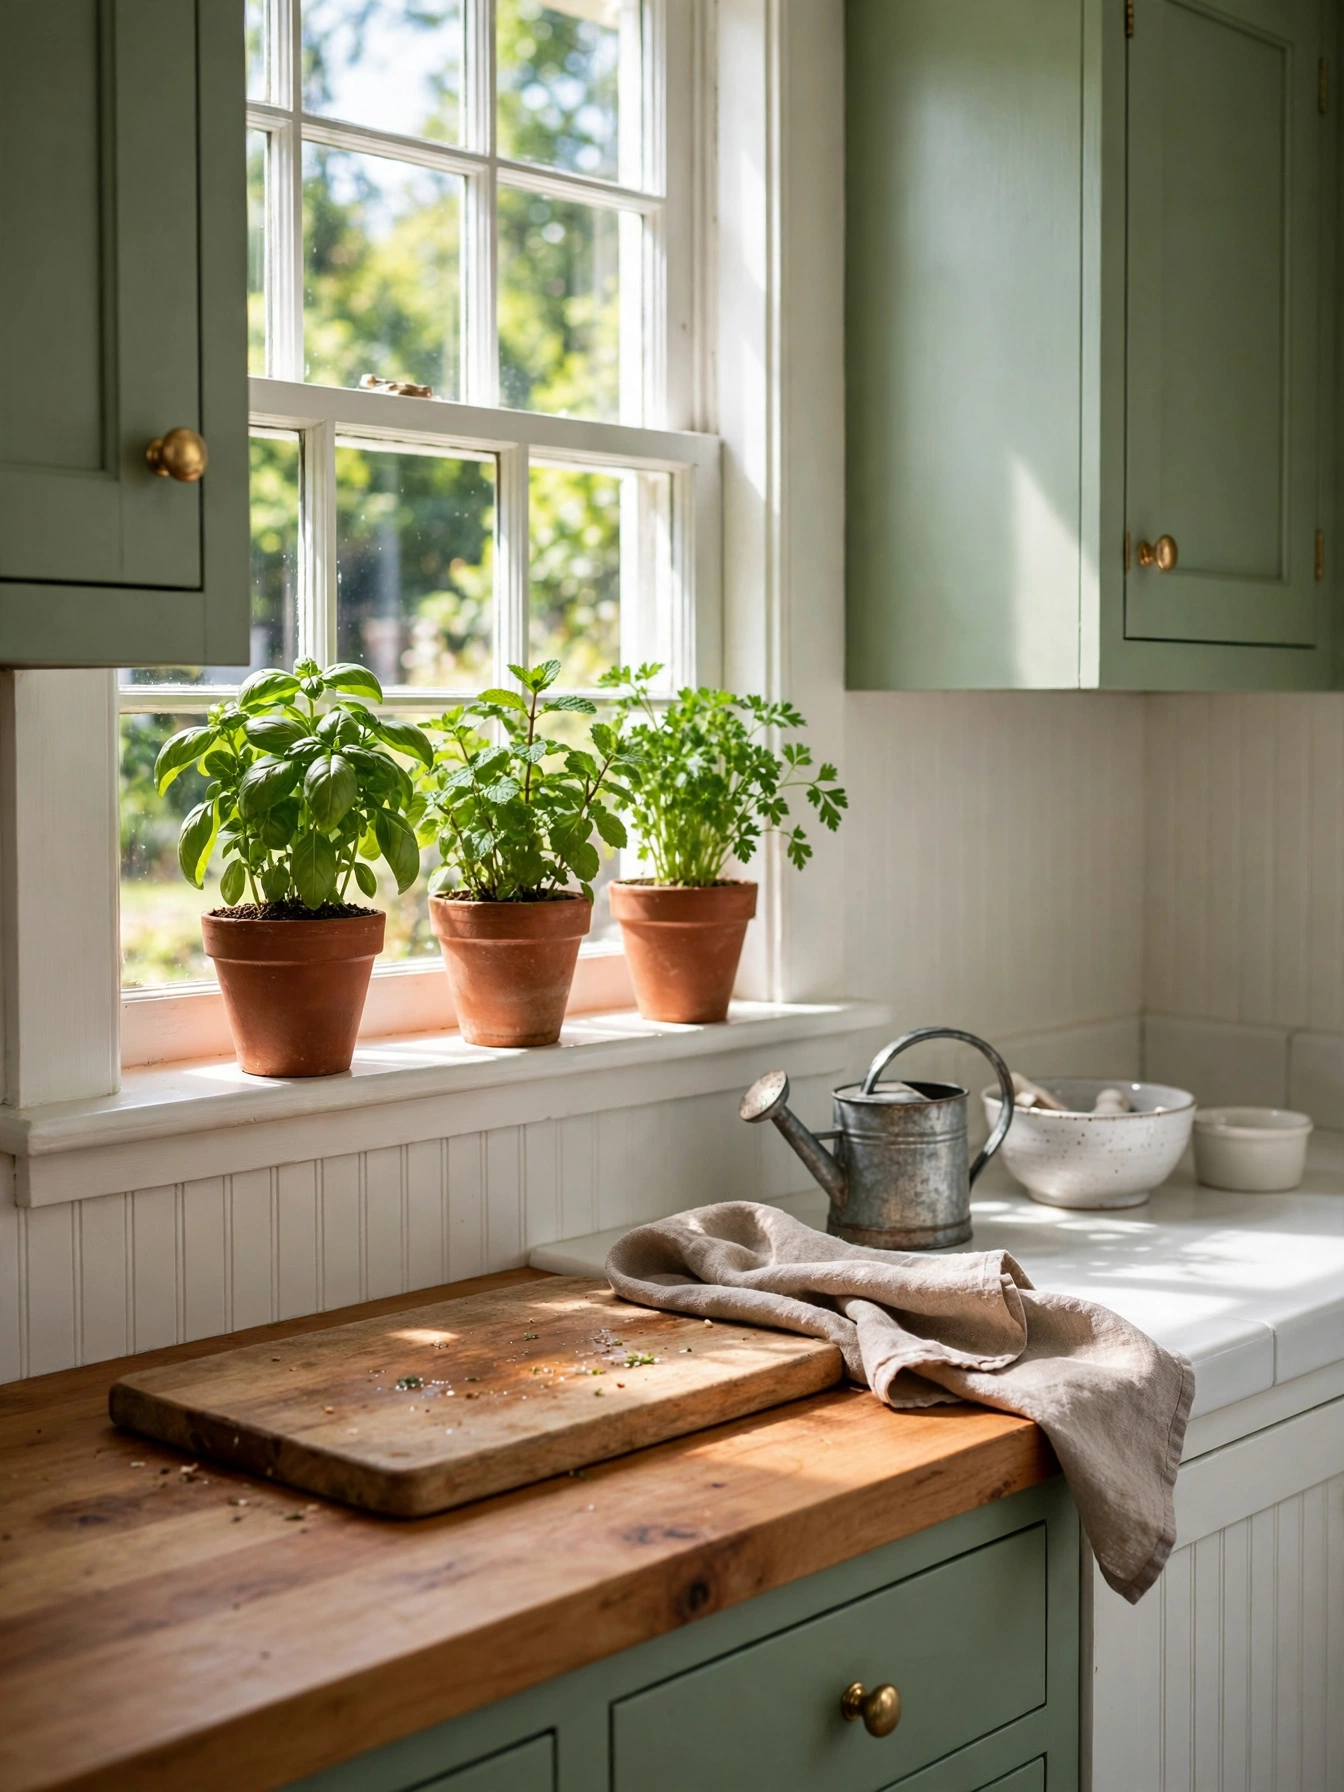
Why This Works:
- Fresh herbs add living green beside sage cabinets
- A sunny sill keeps basil and mint within reach
- Terracotta warms the cool sage tone
- Herbs cut daily and regrow in weeks
A herb garden window keeps basil, mint and parsley on a sill 4 inches deep, in terracotta pots 6 inches in diameter with drainage holes and saucers. Basil needs 6 hours of direct sun a day. Give basil the sunniest sill spot, and set mint in the shadier end of the sill. Water basil when the top 1 inch of soil feels dry, and cut mint back to 4 inches tall when it crowds the pot. Give mint its own pot, since its roots spread fast and crowd the other herbs out within a season.
Fresh herbs lift daily cooking, and the green on the sill repeats the sage cabinets across the room. Dried herbs keep for months in a jar. Cut fresh herbs the morning they are cooked with, so the flavor never sits in the fridge. Keep the pots on a tray, so watering never stains the wood sill. Rotate the pots a quarter turn each week, so every side gets sun and the plants grow straight.
Two Tone Sage
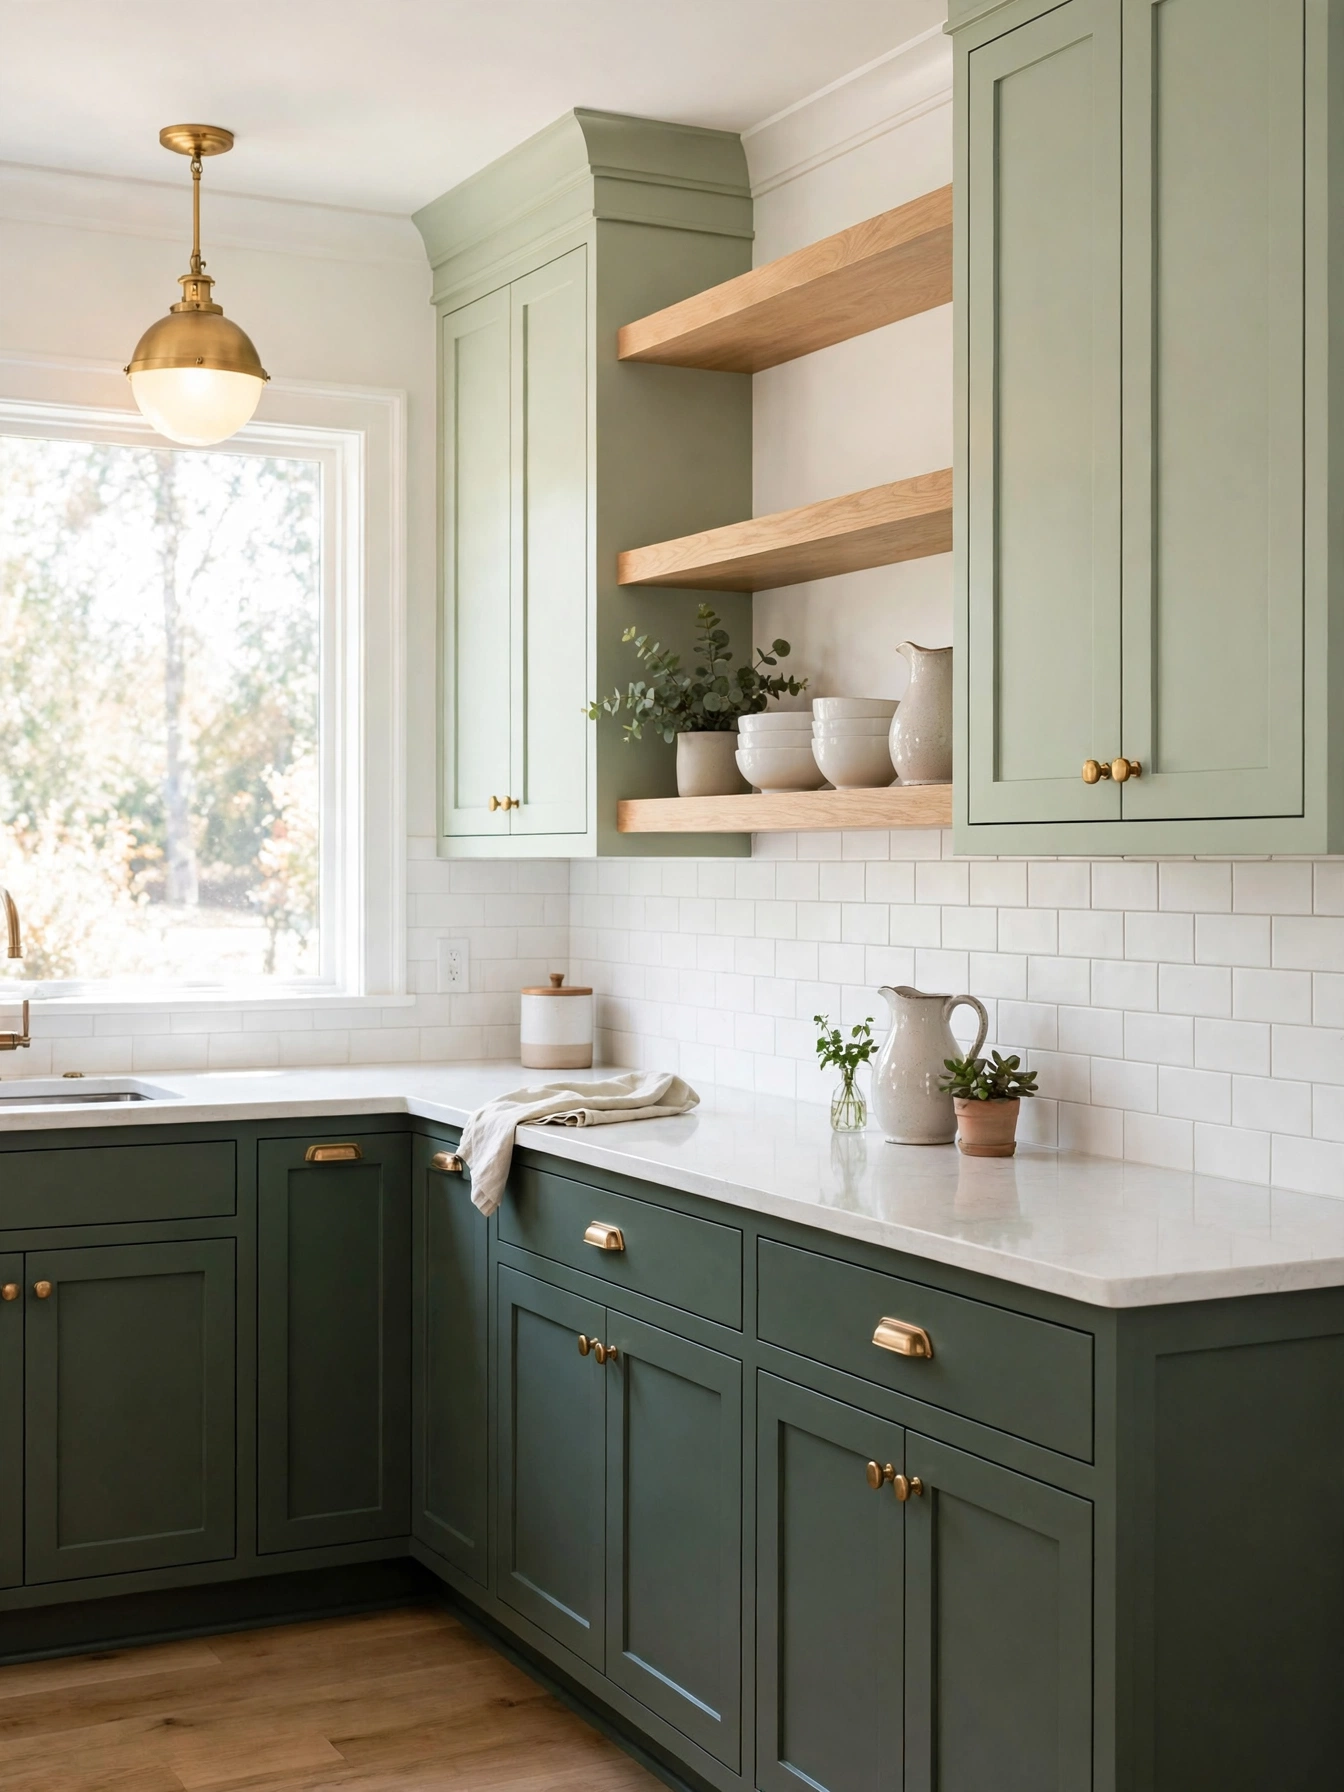
Why This Works:
- Two sage tones layer depth into the room
- Dark lowers take kicks and scuffs without showing them
- Pale uppers keep the room feeling tall
- Both tones come from one paint brand
Two sage shades need at least 3 steps between them on the same paint card, with a deep sage below and a pale sage above. Lowers and uppers take the same satin finish, so the sheen matches across the room. The darker sage belongs on the island to anchor the floor, with white countertop and backsplash leaving the greens as the focus. Two sages only 1 step apart look like a painting slip, so the gap between them needs to be wide.
A deep sage base with pale sage uppers grounds the floor, with the ceiling line staying bright above it. Repainting only the lowers takes about 2 days, and the uppers can change later without touching the base run. A single sage tone reads calm in a small room. In a room 14 feet by 16 feet or larger, paint the island the deeper sage and leave the uppers pale. One hardware set across both tones, 5 inch bar pulls on drawers and knobs on doors, keeps the room reading as one plan.
Sage Breakfast Nook
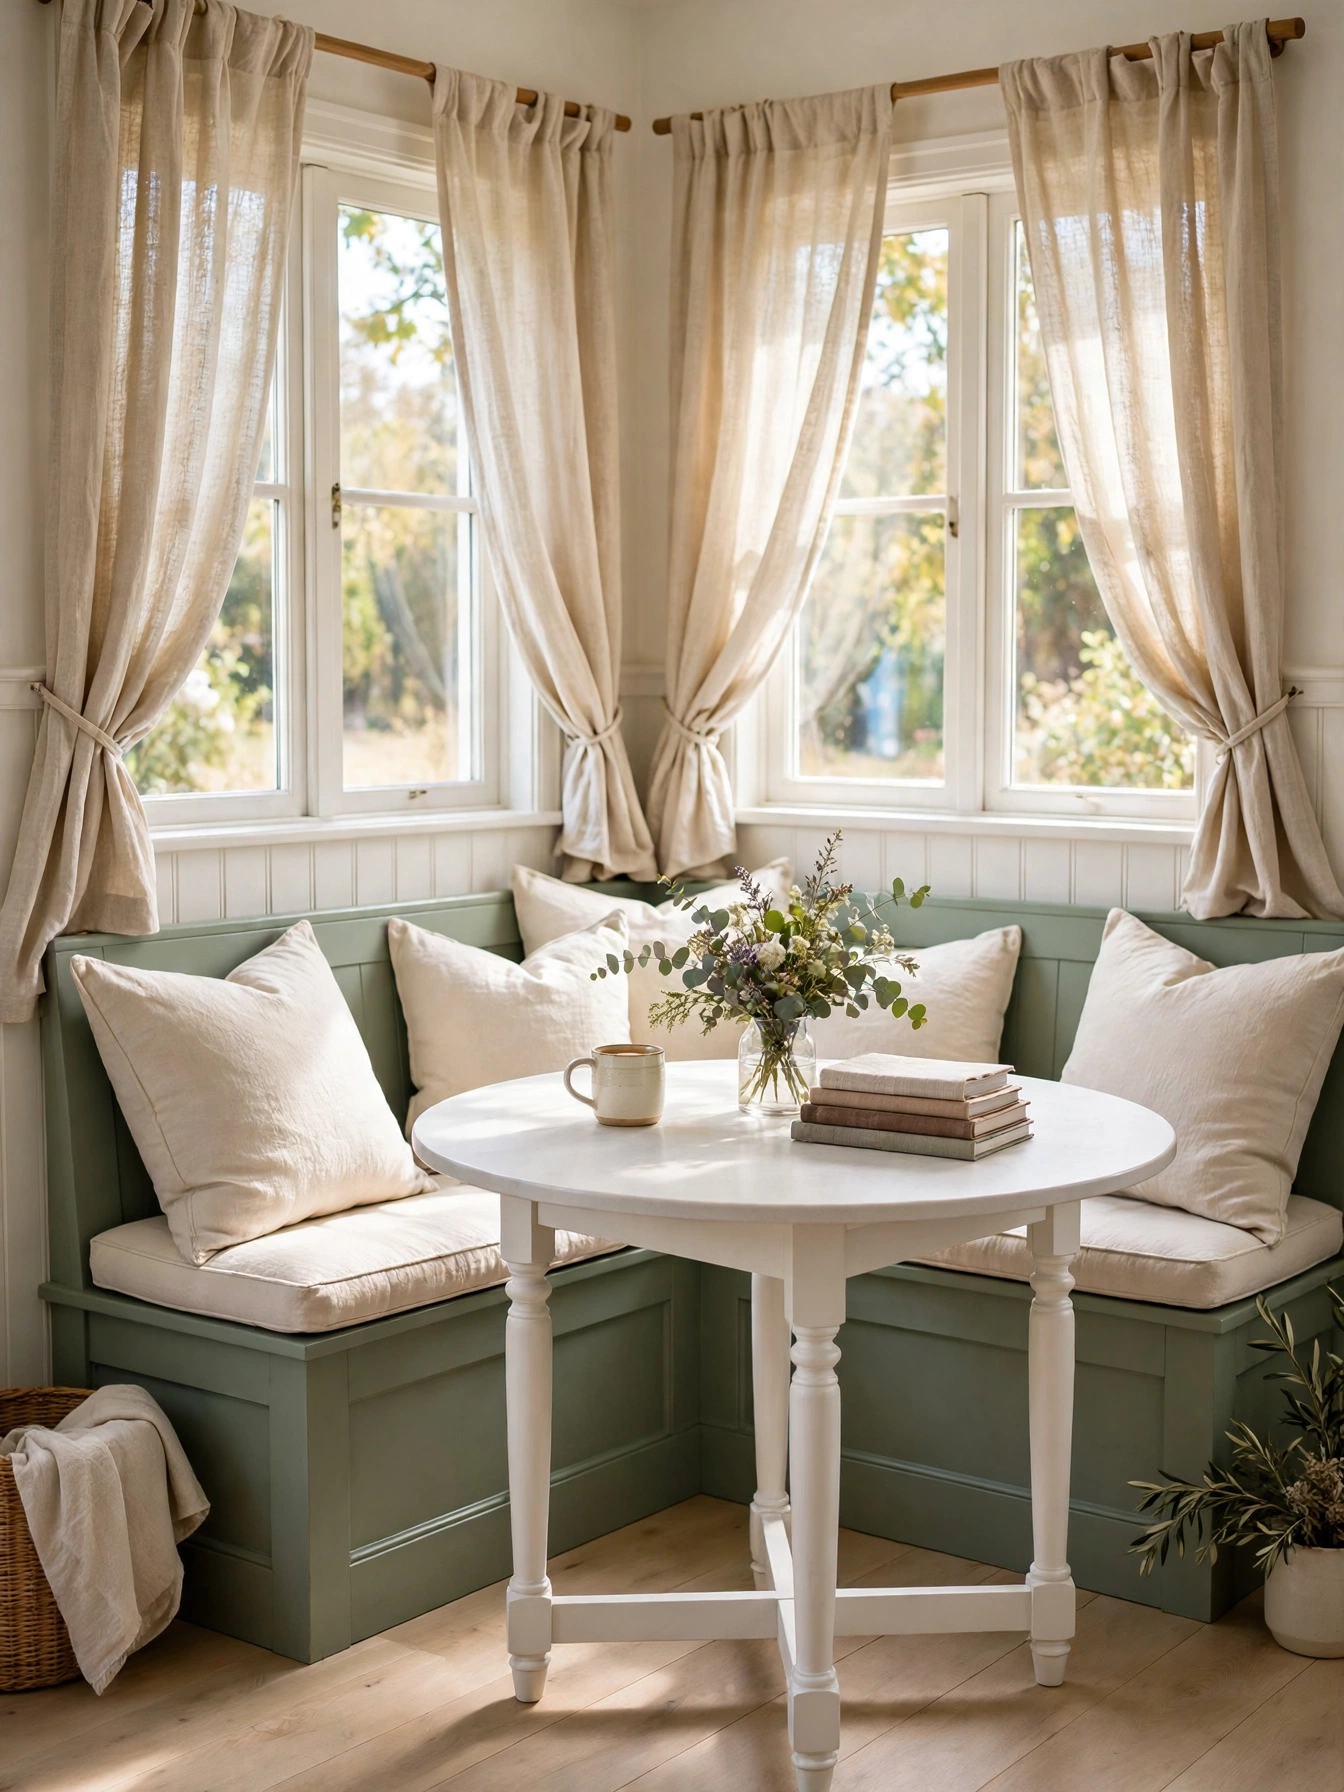
Why This Works:
- The sage banquette adds color to a corner that is often plain
- A built-in bench seats the family without crowding the corner
- Cream cushions soften the sage bench
- A round table fits the corner without sharp edges
A built-in banquette painted sage tucks into an 8 foot by 9 foot corner, with a seat 18 inches deep and 18 inches high, topped with 3 inch foam cushions in a washable cream fabric. The table should measure 30 inches round for 2 people, or 36 inches round for 4, with 24 inches of elbow room per person. Keep 36 inches of walkway between the table edge and the nearest cabinet, so chairs and bodies pass without squeezing. A round table suits a tight corner nook, since its curve leaves the walkway clear.
A banquette fills the corner with seating, and the bench base hides storage for placemats and board games. Freestanding chairs pull out and move anywhere. Lift the banquette lid to reach the storage inside, and keep placemats and board games there. Keep the banquette sage in a satin finish, so crumbs and scuffs wipe off the bench face. Hang a pendant 30 to 36 inches above the table, so the nook glows at breakfast.
Sage Green Refresh
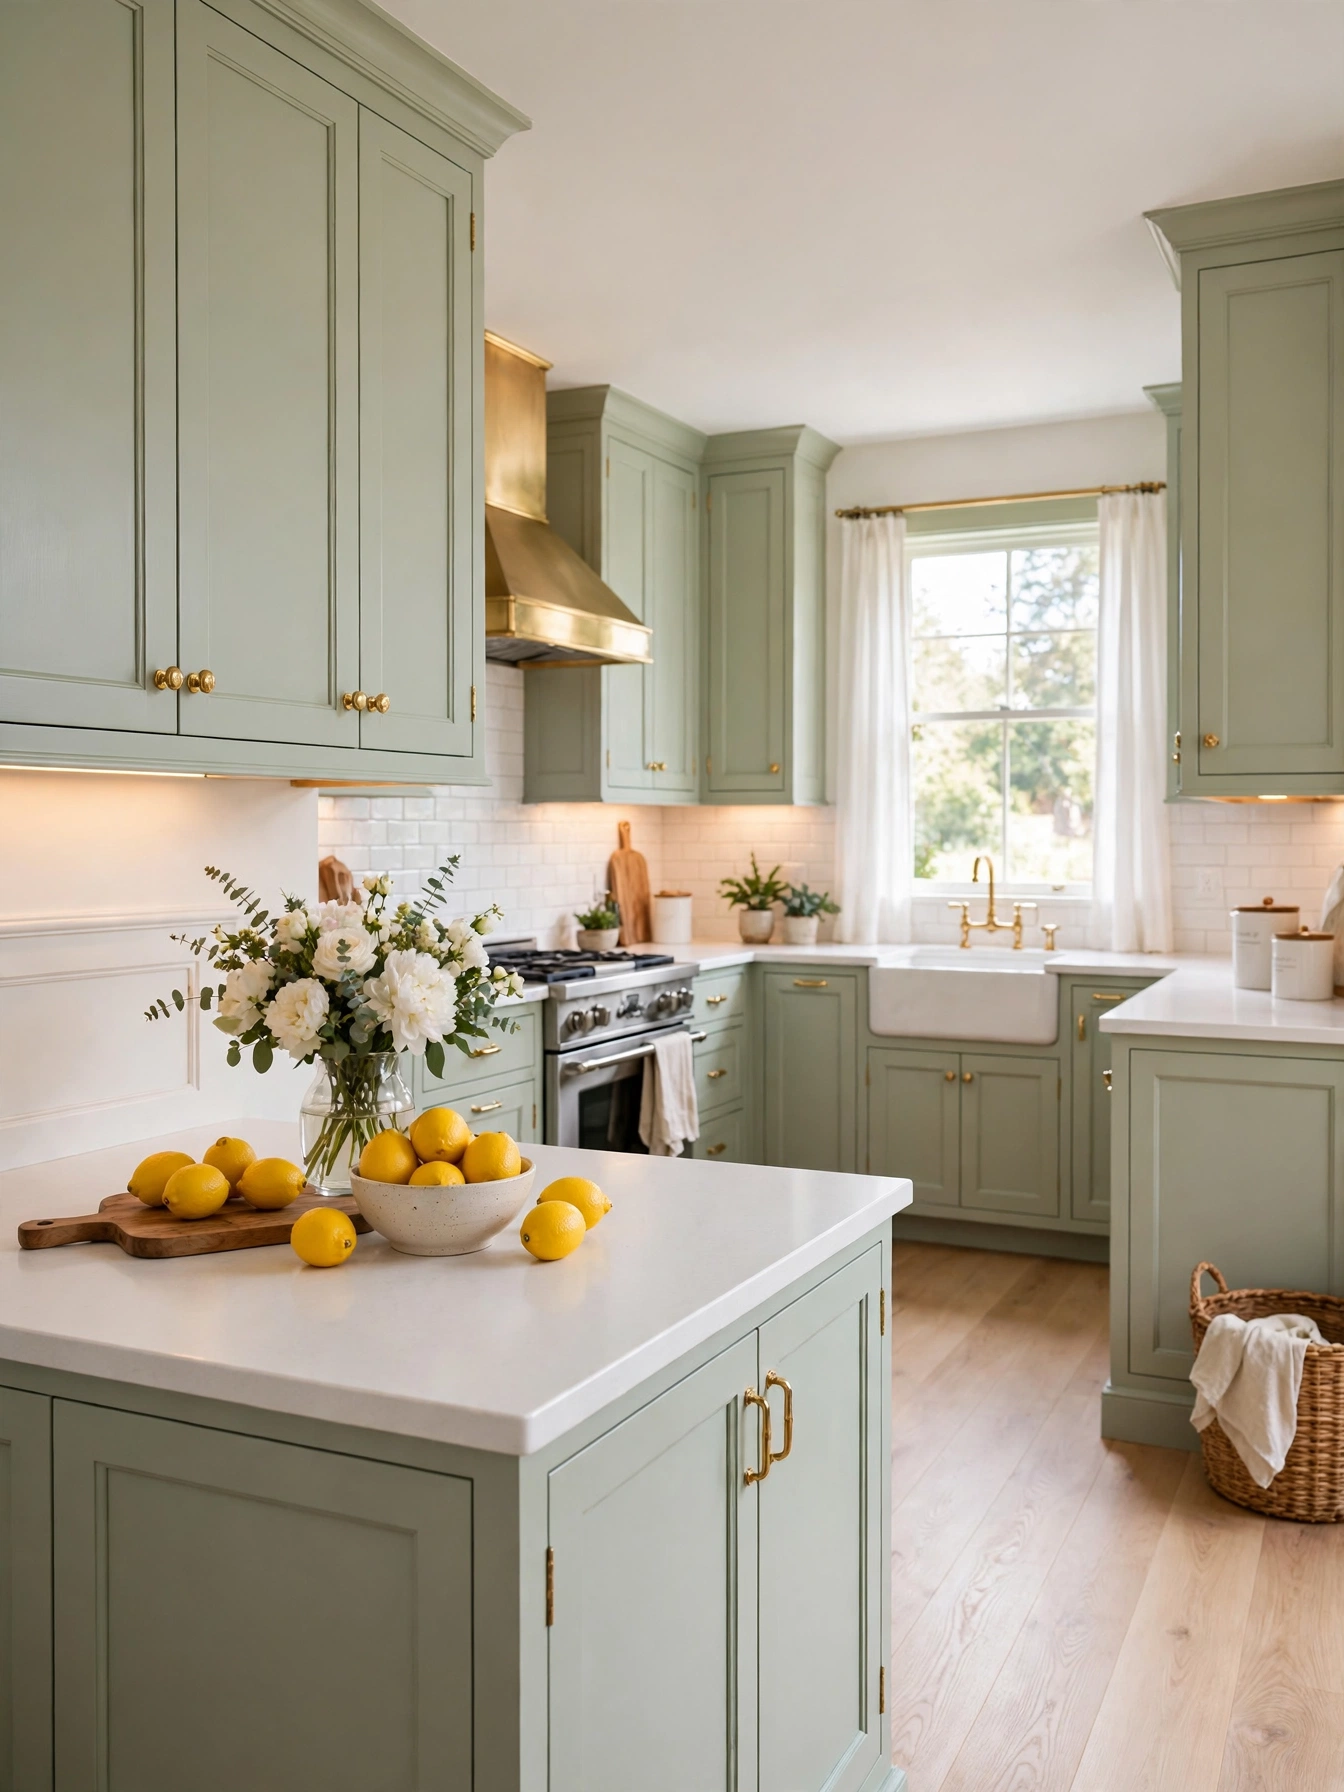
Why This Works:
- A repaint renews the kitchen without new cabinets
- Soft sage feels new for years after the repaint
- New brass hardware lifts the repainted doors
- White counters make the fresh sage read clean
A sage refresh starts with prep, because paint sticks only to a clean, sanded surface. Remove the doors, clean them with a degreaser, sand with 220 grit paper, prime, then apply 2 coats of satin acrylic enamel, allowing 24 hours of drying between coats. Keep the existing cabinet boxes if the frames are solid, since new boxes change the whole job from a repaint to a remodel. Replace the hardware at the same time, with 5 inch bar pulls on drawers and knobs on doors, so the old holes do not dictate the new look. A repaint needs sound paint underneath, since a new coat lifts with a peeling layer within months.
The renewal revives a kitchen with solid cabinets and a dated color, and it finishes in about 4 days with drying time. New cabinets take weeks to order and fit. Order new hinges and pulls with the paint, so the hardware change lands on the same weekend. Thorough prep decides the result, since paint lifts off a greasy or glossy surface within months. A soft, dusty sage still looks fresh in 5 years.
FAQs
Are sage green kitchen ideas a good choice for a small kitchen?
Yes, sage suits a small kitchen when the tone stays pale and the uppers stay white, since muted green reflects daylight without glare. Keep 42 to 48 inches of walkway, which the National Kitchen and Bath Association recommends, use a 36 inch counter, and limit sage to the lower cabinets.
Which paint finish holds up best on sage green cabinets?
A satin acrylic enamel holds up best, since grease wipes off it with a damp cloth and the sheen hides small marks. Prime first, add 2 coats, sand lightly with 220 grit paper between coats, and leave 24 hours before recoating.
What colors pair best with sage green kitchen ideas?
Cream counters, pale oak and warm brass pair best with sage, since the green needs warmth beside it. White uppers keep the room bright, black fixtures add a crisp edge, and a single wood tone across shelves and stools keeps the palette calm in a 14 foot room.
How high should pendant lights hang above a sage island?
Hang pendants with the bulbs 30 to 36 inches above the island top, so the work surface lights evenly without glare in seated eyes. The National Kitchen and Bath Association gives 30 to 36 inches as the standard height, and 3 pendants suit a 72 inch island.
How long does a sage cabinet repaint take to dry?
Plan on about 4 days from prep to final coat for a medium kitchen, with 24 hours of drying between coats. Remove the doors first, degrease and sand each one, prime, then paint 2 coats of satin enamel and wait 7 days before scrubbing the new finish.
Conclusion
These sage green kitchen ideas earn their place by calming a busy room, hiding daily wear, and pairing with cream, oak and brass without a full remodel. Start by painting one full door in Saybrook Sage, checking it in morning and evening light, then commit to the finish and hardware that match how the kitchen is used. Keep counters 36 inches high, pendants 30 to 36 inches above the island, and the palette to sage, cream and one wood tone. Follow HomelyCrafter on Pinterest for more ideas. Save this to your Pinterest boards so you can refer back to it!

Muhammad Israr is a home decor enthusiast and the writer behind Homely Crafter. He spends his days researching paint colors, layouts and budget-friendly styling ideas, then breaks them down into practical, easy-to-follow guides so you can decorate with confidence.
1 thought on “23 Soft Sage Green Kitchen Ideas That Feel Soothing”