
The first warm Saturday in June moves dinner outside: the grill rolls out of the garage, a folding table appears near the fence, and the cook spends the evening running in and out of the house for plates, tongs and drinks.
Outdoor kitchen ideas close that gap with a real cooking zone: a counter to chop on, a sink to rinse at and shade to stand under. Outdoor cooking zones borrow the 42 to 48 inch clearances used in indoor kitchens, so the layout rules you already know still apply outside.
What follows is 22 ideas, from built-in grills and pizza ovens to pergolas, fire pits and weatherproof storage, each with measurements, material grades and plain talk about price and limits, so the plan fits a real backyard and a real budget. Start with the pieces that fit your patio and your budget, and add the rest over time.
Built-In Grill Station
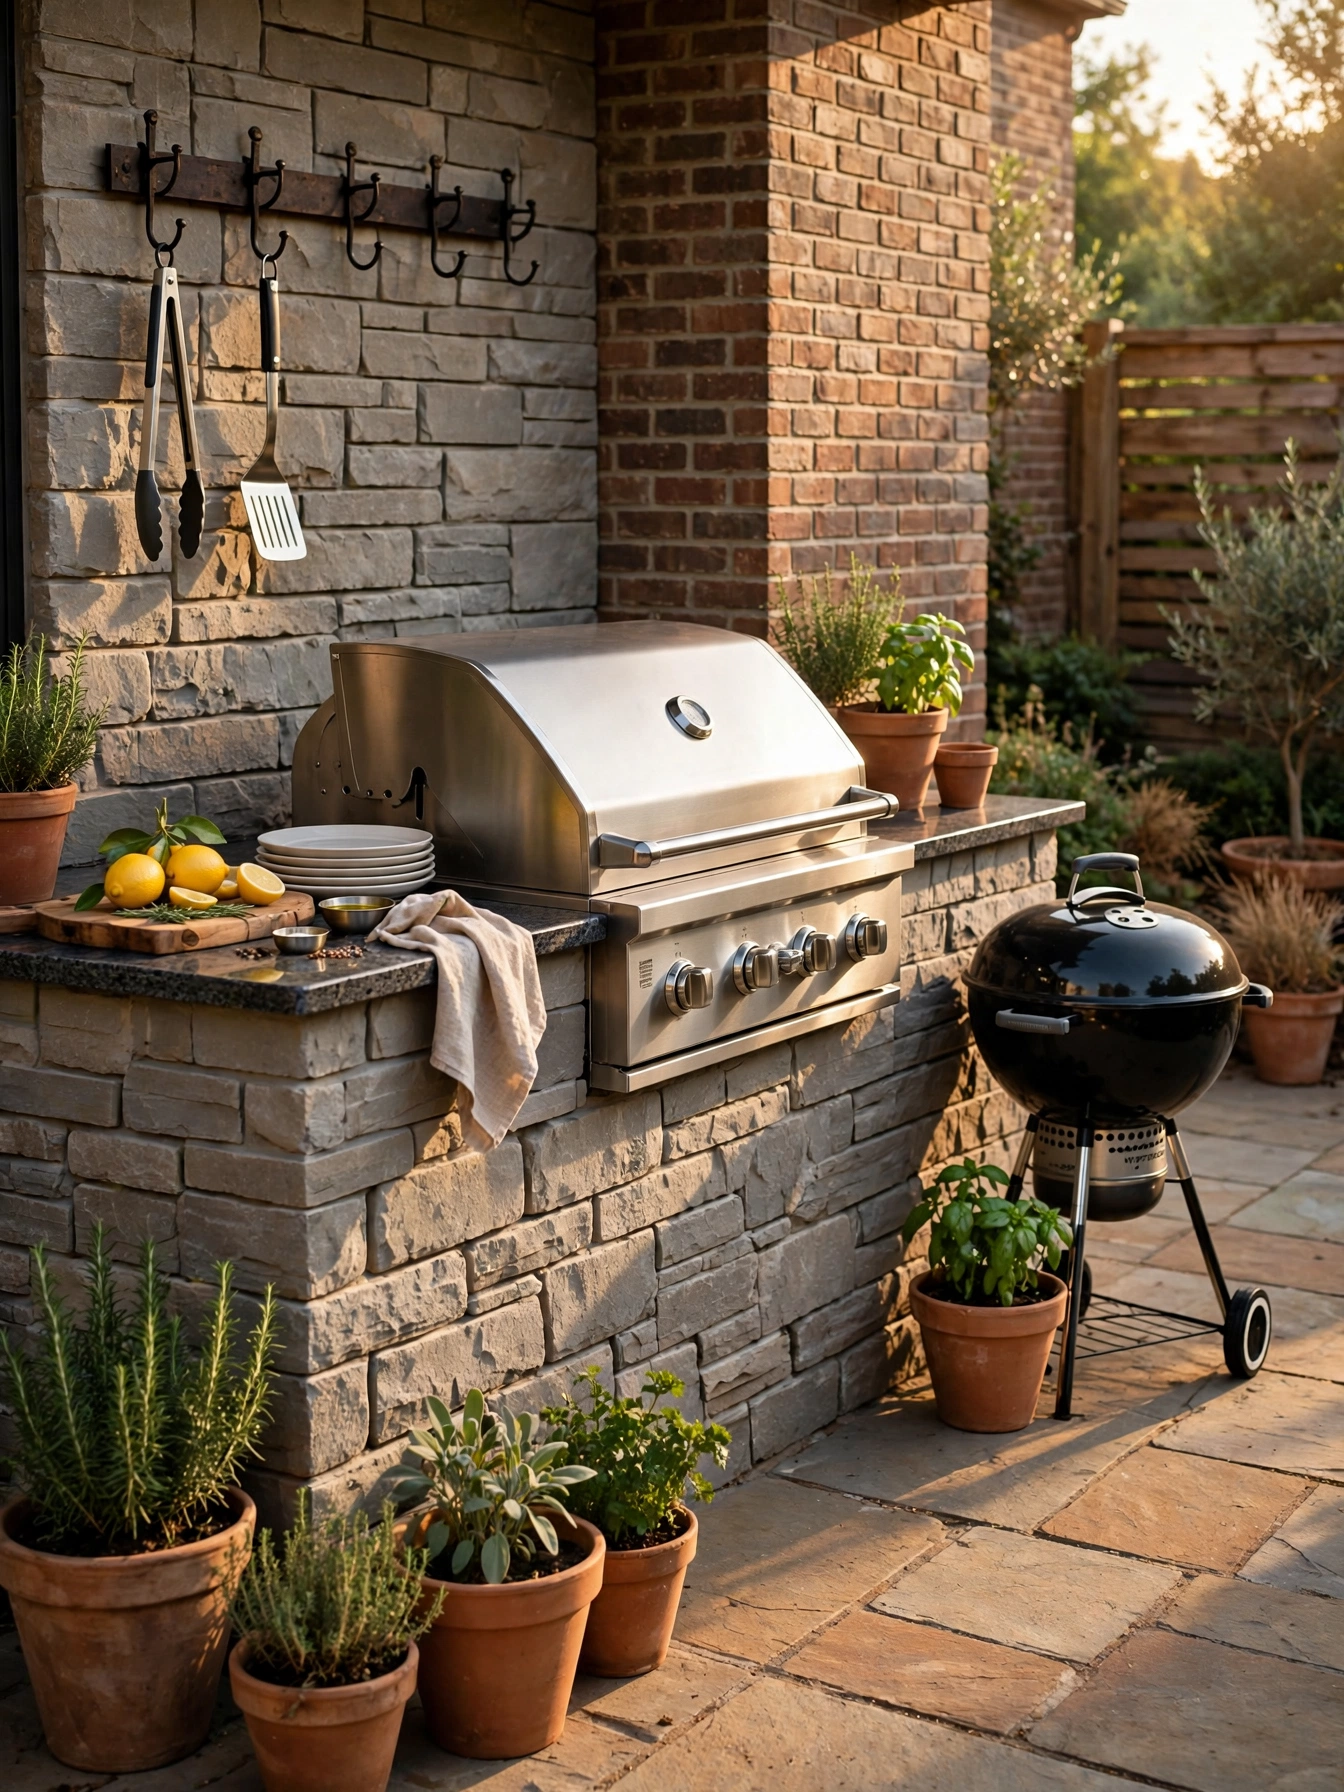
Why This Works:
- A built-in grill anchors the whole cooking zone instead of floating in the yard
- 304 stainless steel resists rust through rain, snow and humid summers
- A stone island doubles as a serving counter for plates and platters
- Side burners keep sauces and side dishes within arm’s reach
A 32 to 36 inch wide built-in gas grill suits most families, with 600 to 800 square inches of cooking surface for a dozen burgers at once. Set the grill into an island at 36 inches high, the same height as an indoor counter, with 42 to 48 inches of clear walkway behind the cook. Never place a grill closer than 10 feet to the house siding or under a low roof, since flare-ups and smoke damage the wall fast. The National Fire Protection Association recommends keeping grills at least 10 feet from any structure, and that clearance shapes the whole patio layout.
Start with the fuel choice. Gas gives push-button convenience and steady heat for weeknight cooking, and charcoal delivers deeper flavor and higher searing temperatures for weekend sessions. A licensed plumber should run the gas line, since a leak outdoors is easy to miss and dangerous to ignore, so hire a professional for that connection rather than improvising with a hose. Budget 2,500 to 5,000 dollars for a mid-range built-in setup, and 8,000 dollars or more for a premium grill with a rotisserie and sear burner. Wind is the hidden problem here, because a gusty corner cools the grill and blows smoke into the seating area, so a windbreak or a hedge on the prevailing wind side pays for itself.
Wood-Fired Pizza Oven
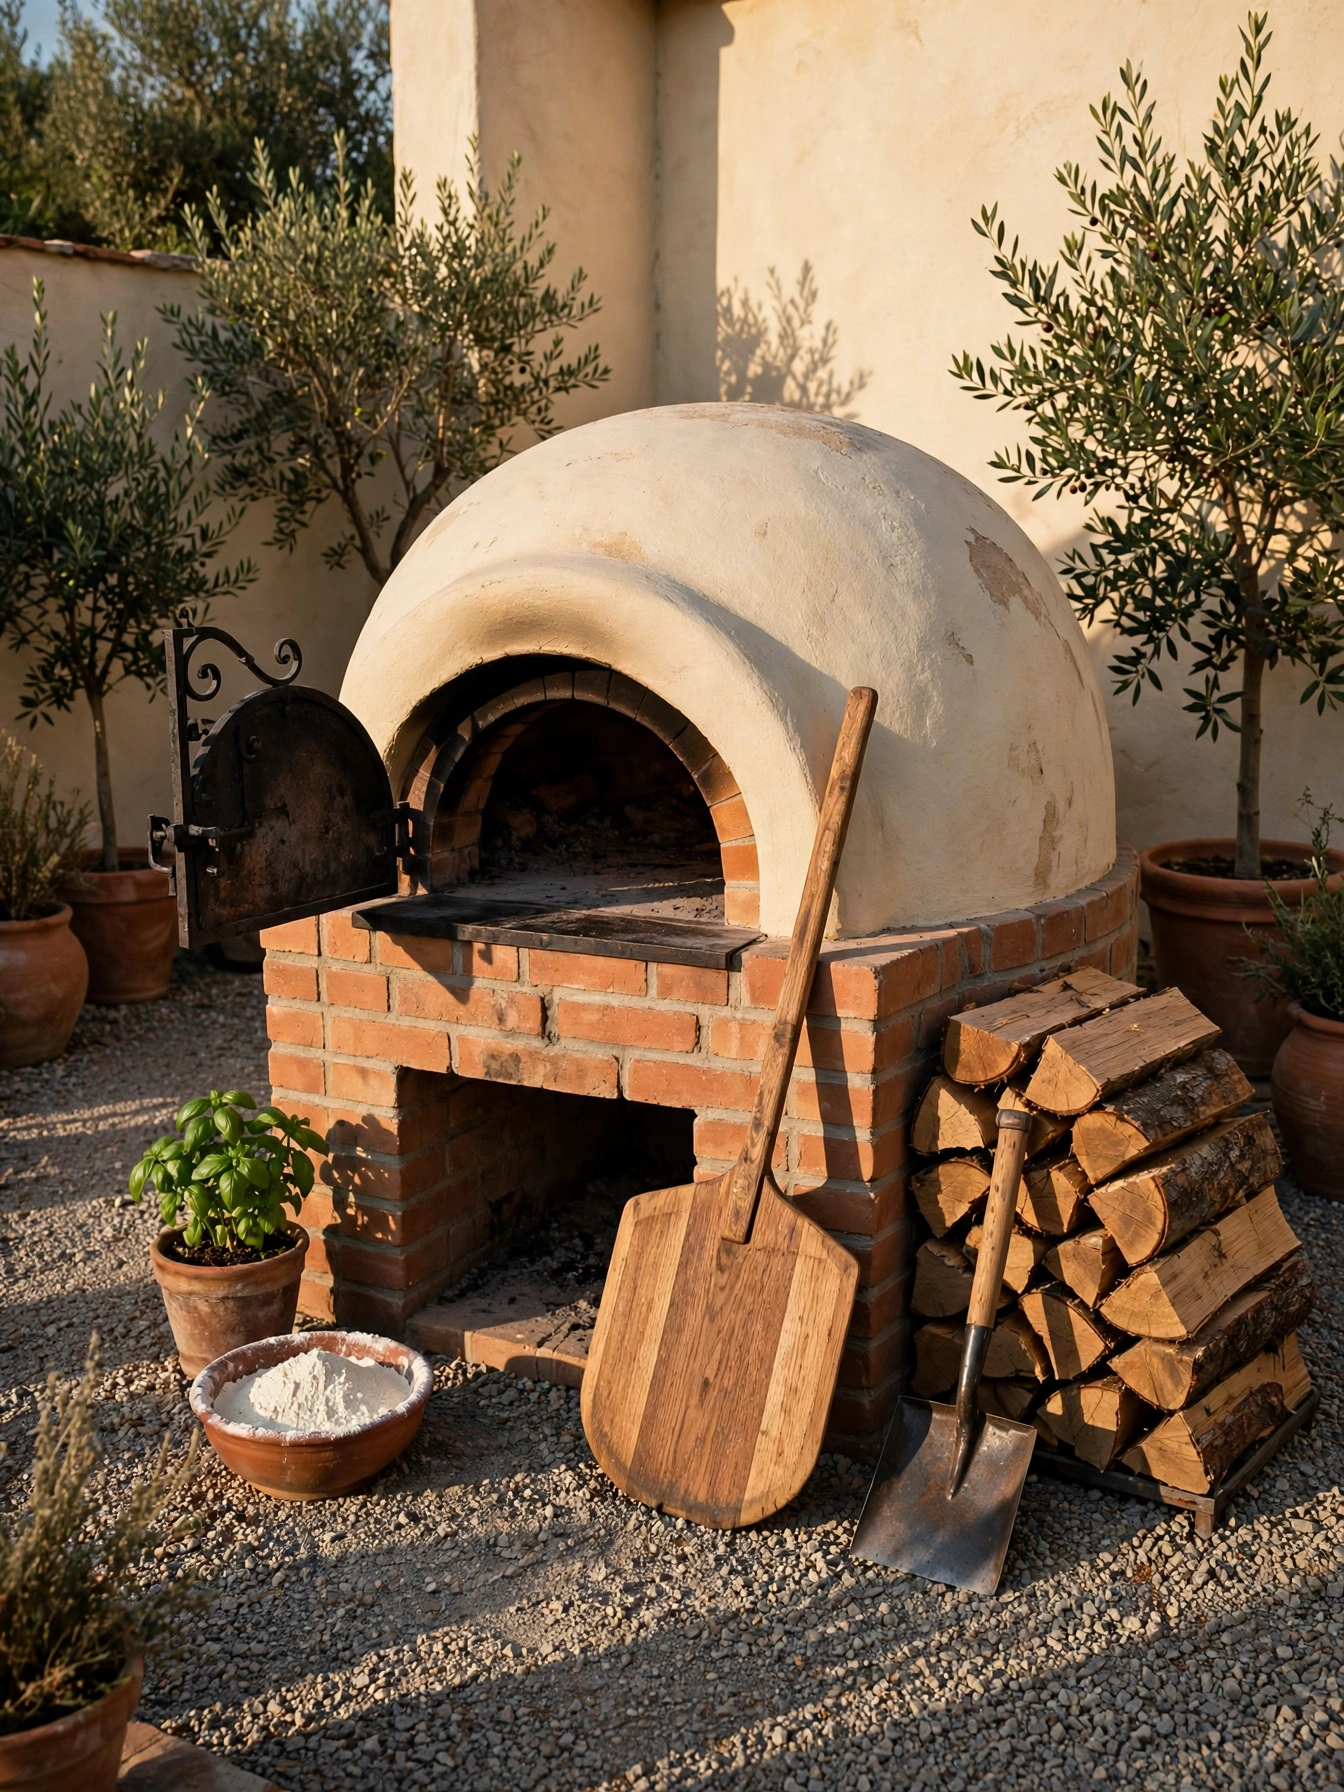
Why This Works:
- A wood-fired oven reaches 700 to 900 degrees, far hotter than any indoor oven
- The domed shape circulates heat evenly across the pizza base
- Firebrick floors crisp the crust in 90 seconds instead of 12 minutes
- A brick oven becomes a garden focal point even when it is not lit
The floor of a wood-fired pizza oven is firebrick rated for at least 1,000 degrees Fahrenheit, set on a concrete pad at least 4 inches thick to carry the 1,500 to 2,000 pound weight of a masonry oven. The oven mouth should be 12 to 14 inches high and about 18 inches wide, wide enough for a 14 inch pizza peel to slide in flat. Skip lightweight metal fireboxes for this job, because thin steel warps at 800 degrees and loses heat the moment the door opens. Keep the oven a full 10 feet out from the siding and any wooden fence, and store firewood at least 3 feet away from the oven mouth.
Occasional cooks may find a portable oven a better fit for the money: a portable steel oven runs 300 to 900 dollars and still hits 900 degrees, a tenth of the 3,000 to 7,000 dollars a masonry oven costs built in place. Let the pizza nights decide the oven. Families who host pizza nights every Friday will use a masonry oven weekly. Ash cleanup is the chore nobody mentions in the brochure: the floor needs brushing after every use, and a cold oven takes 2 hours to cool enough to cover. A rain cover is essential, since water pooling on a hot firebrick floor can crack it in a single season.
Outdoor Kitchen Ideas With Pergola
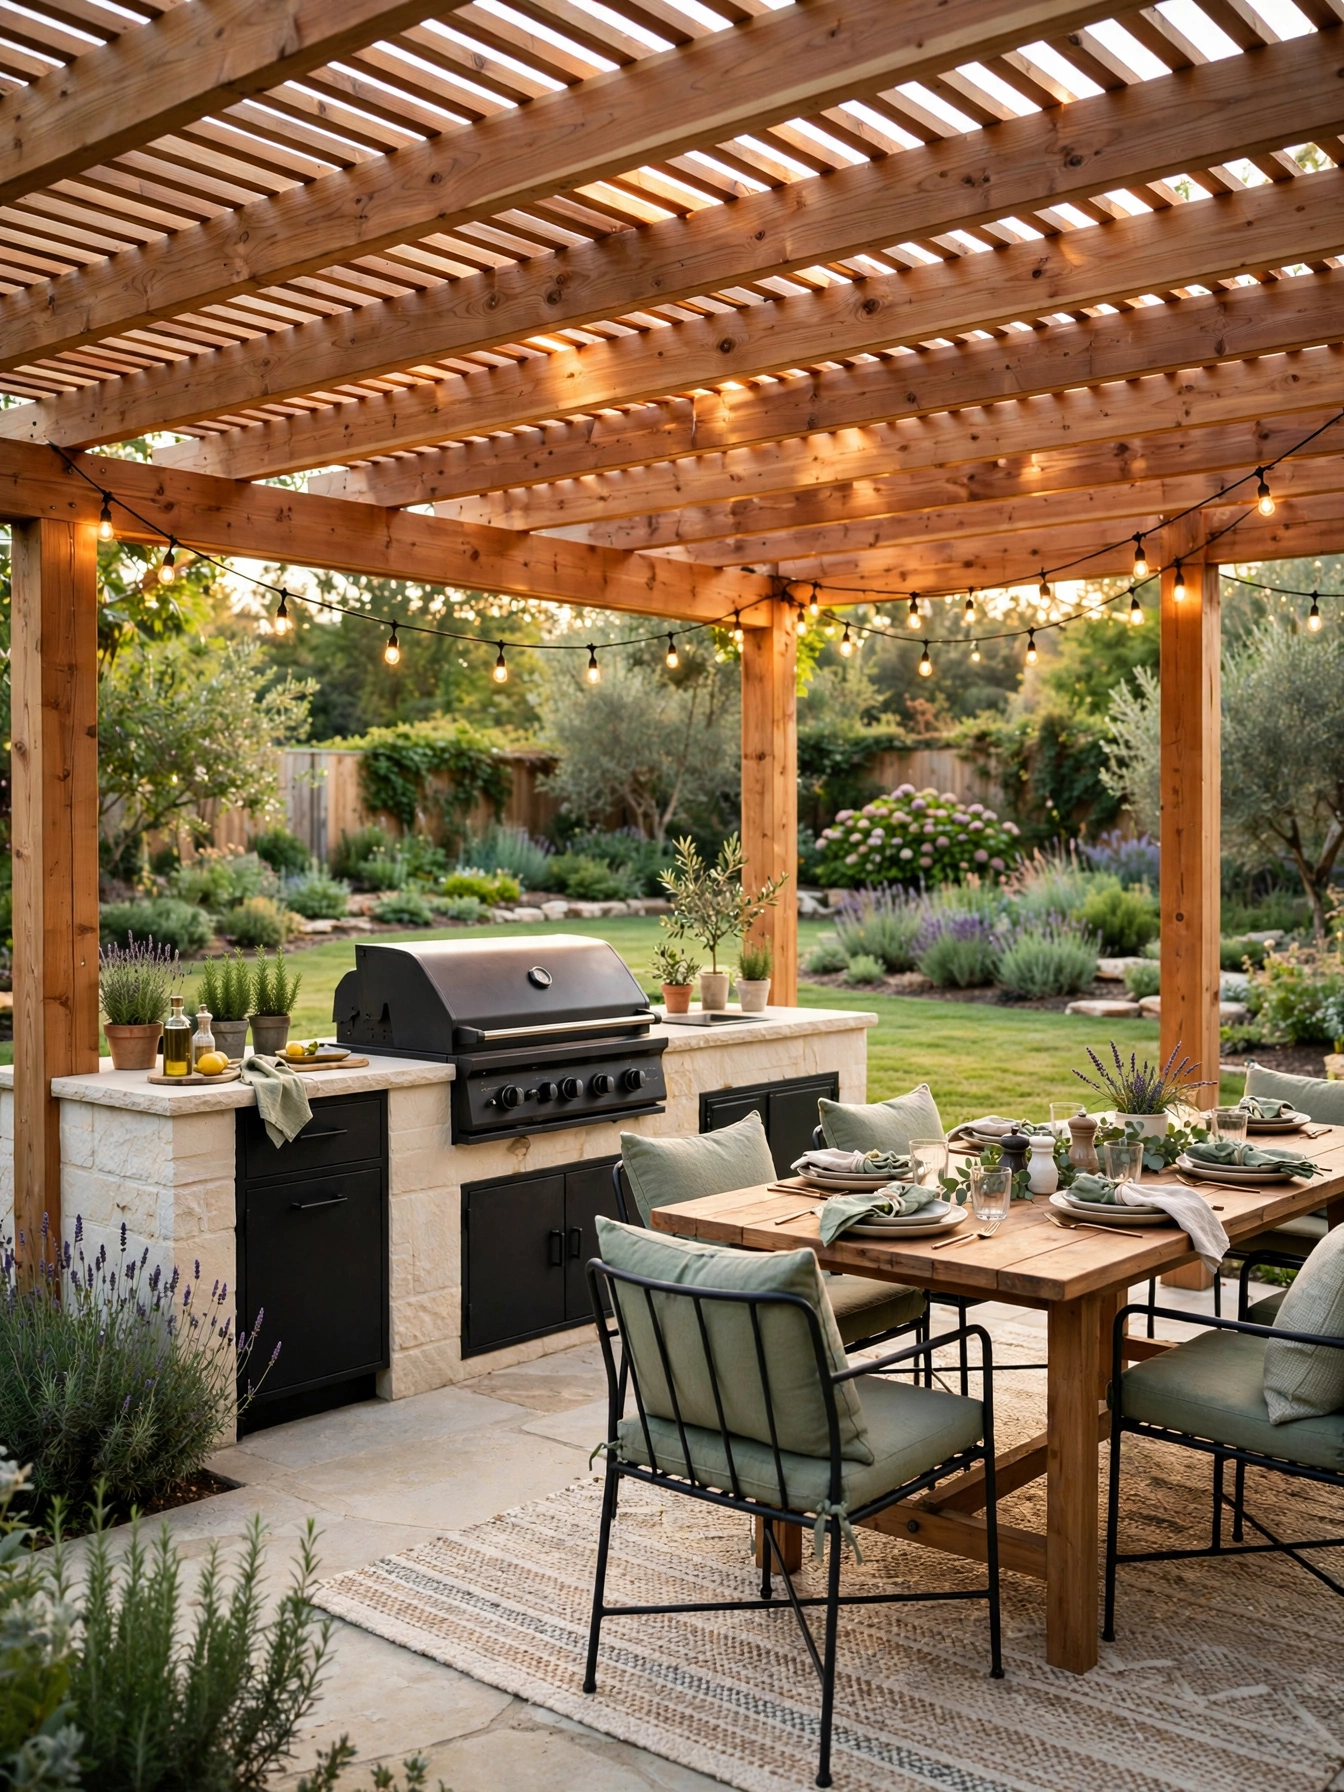
Why This Works:
- A pergola shades the cook at midday without trapping smoke like a solid roof
- Cedar beams resist rot and insects far better than untreated pine
- String lights strung under the beams make the kitchen usable after sunset
- The structure defines the kitchen zone so the rest of the yard stays open
Size the pergola at least 10 feet by 12 feet to cover a grill island and a small dining table, and 12 feet by 16 feet feels comfortable for six seats. Set the posts on concrete footings 36 inches deep, below the frost line in most northern states, so the structure does not heave in winter. Keep the lowest beam at least 8 feet above the patio so tall guests walk under it easily, and leave 36 inches of clearance above the grill hood for heat and smoke to escape. Space the rafters 12 to 16 inches apart to balance shade and airflow. Do not set the posts straight into soil without concrete footings, since ground contact rots even cedar within a few seasons.
For pressure-treated pine, expect to pay 2,500 to 5,000 dollars for a 12 by 16 foot pergola. Cedar comes to roughly 4,000 to 8,000 dollars with no chemical treatment and ages to a soft silver gray. Aluminum reaches 6,000 to 12,000 dollars with almost no upkeep. Slat spacing matters more than the wood species for a cook who grills at noon. Slats set 12 to 16 inches apart cut about 40 percent of direct sun while letting smoke rise straight through, which a solid roof cannot do. Aluminum reads cooler and more modern than wood. Because open slats stop almost no rain, plan a retractable canopy or a waterproof cover over the cooking zone, and check local rules before building, since many towns require a permit for structures over 120 square feet.
Weatherproof Counter Run
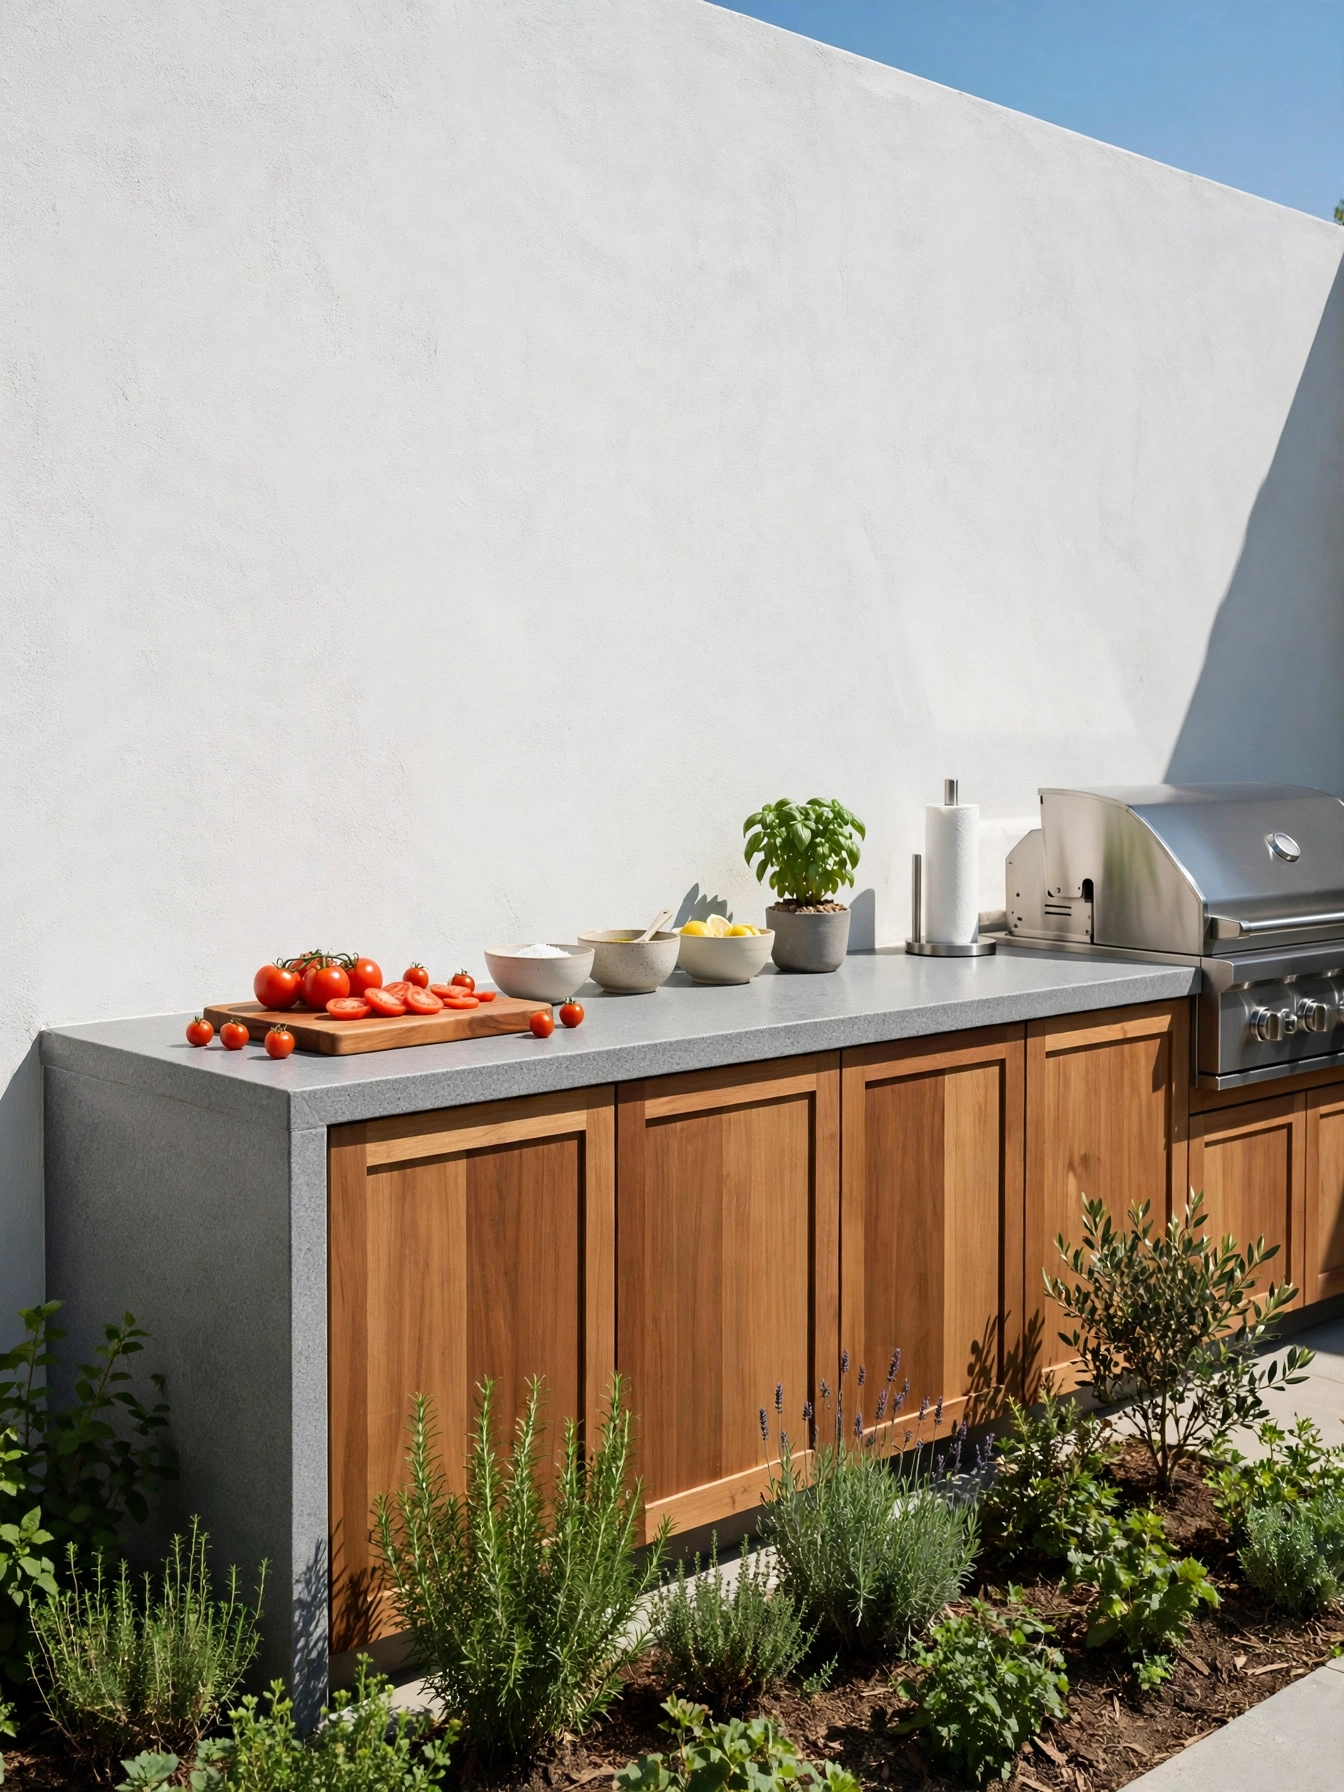
Why This Works:
- Granite shrugs off rain, heat and UV without fading or warping
- At 24 inches deep, the counter holds a cutting board and a platter side by side
- A waterfall edge protects the cabinet base from splashes and kicks
- Sealed stone wipes clean after marinade spills in seconds
Build the counter 24 to 25 inches deep and 36 inches high, matching indoor counters so chopping feels natural. Granite at 2 to 3 centimeters thick handles a hot pan straight from the grill, while porcelain slabs at 12 millimeters thick resist stains even better and weigh less on the base. Seal granite every 12 months with a penetrating sealer, since unsealed stone absorbs red wine and tomato sauce within an hour. Avoid indoor laminate or butcher block outdoors, because laminate swells after one rainy week and wood warps within a season.
Split a 10 foot run into three zones, prep at one end, serving in the middle and a small sink at the far end, since anything shorter than 6 feet forces the cook to juggle bowls. Granite comes to 60 to 100 dollars per square foot installed and handles hot pans straight off the grill. Porcelain slabs sell for 80 to 120 dollars, resist stains well and never need sealing, and they survive freeze-thaw cycles without a mark. Concrete is the budget pick at 50 to 80 dollars per square foot, needs resealing twice a year, and can hairline crack in a freeze. Slope the counter 1/8 inch per foot away from the house so rainwater drains off instead of pooling against the wall.
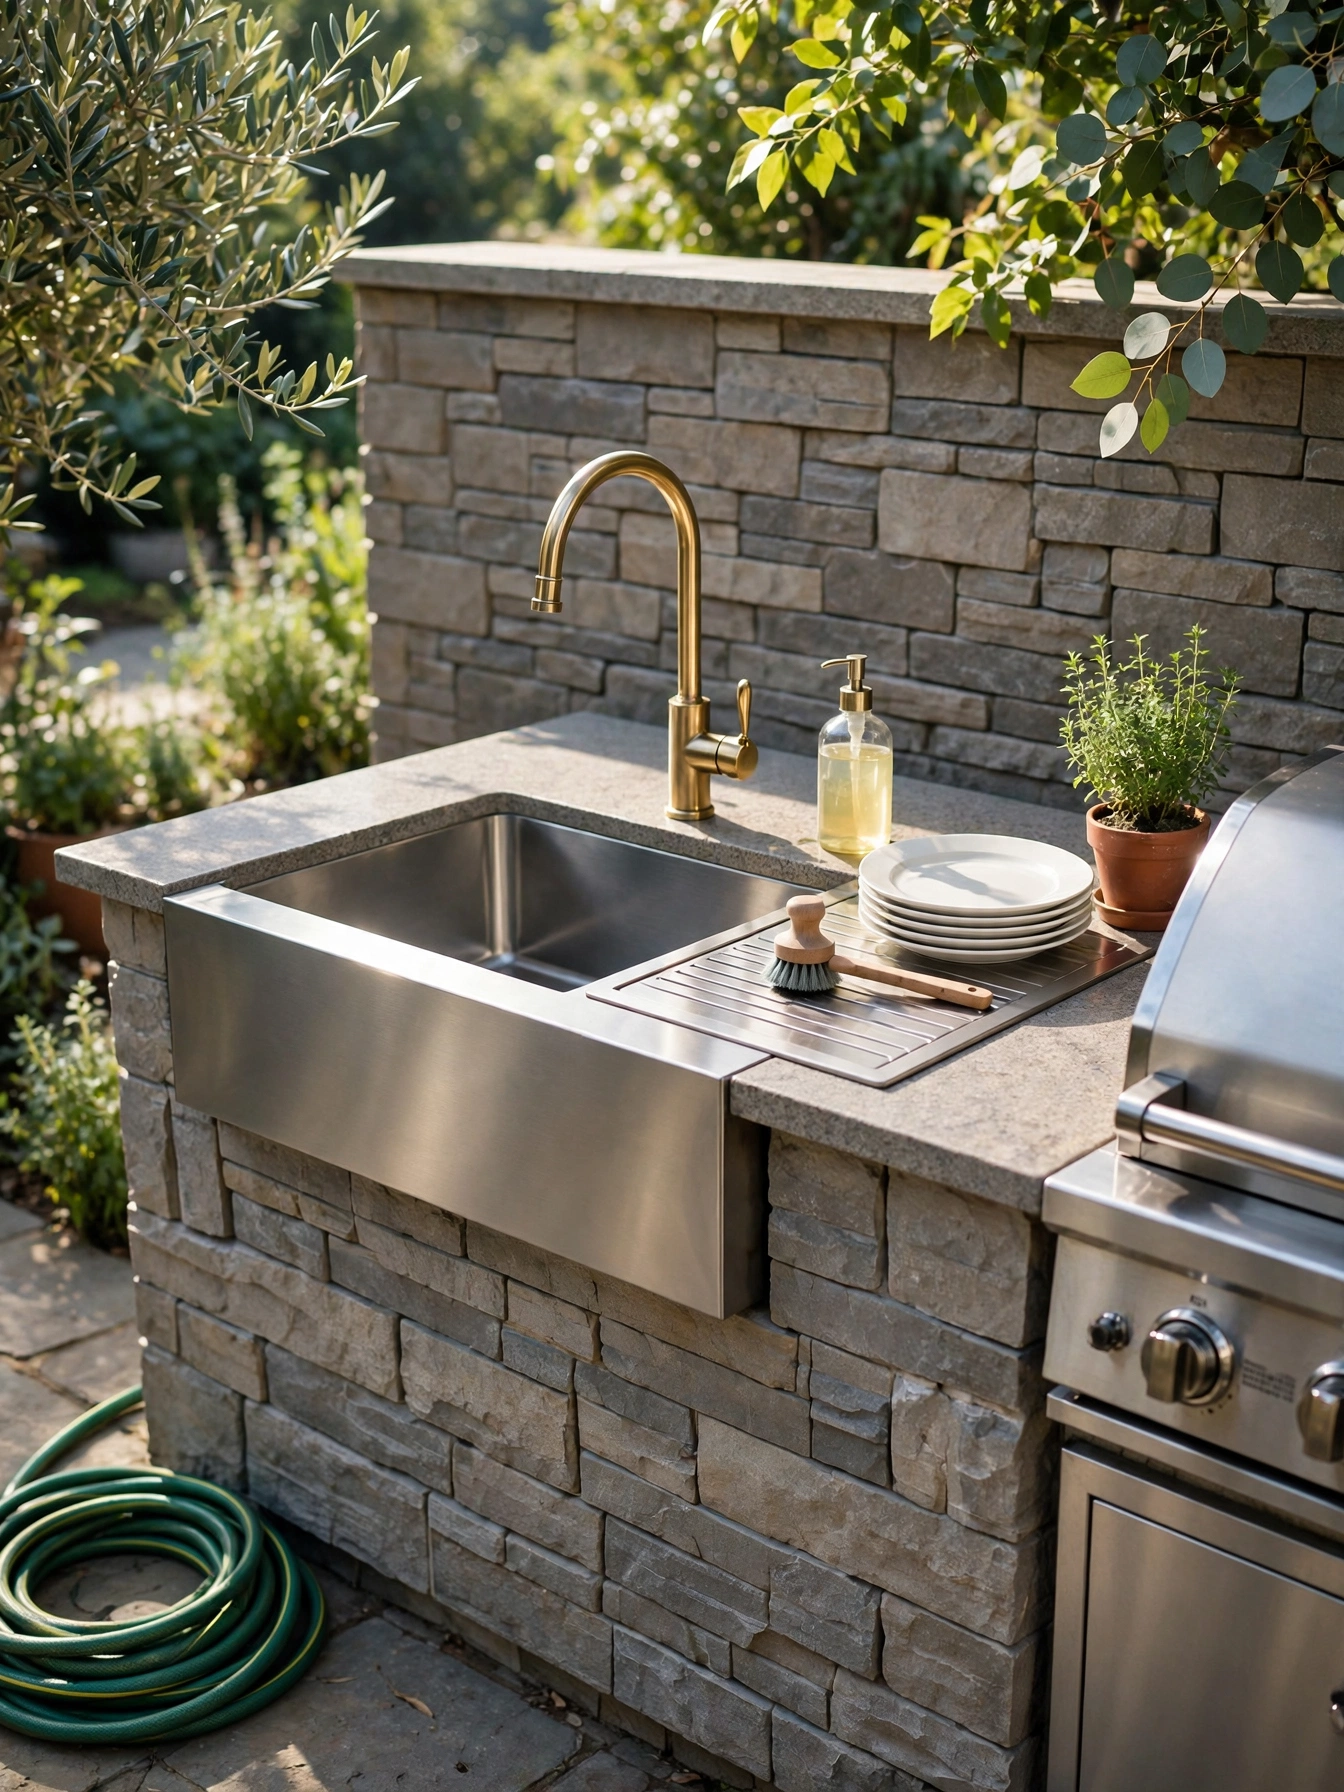
Outdoor Sink Station
Why This Works:
- A sink at the grill ends the march indoors for every rinse and wash
- 16-gauge steel resists dents from dropped tongs and heavy pots
- A gooseneck faucet clears tall stockpots and grill grates
- A draining board keeps wet plates off the food prep surface
Fit the basin to a grill grate: at least 15 inches wide and 10 inches deep, so a grate fits for soaking, with a single-bowl layout that beats a double bowl outdoors where space is tight. Run a cold water line in PEX pipe buried 12 inches deep to avoid freezing in shoulder seasons, and add a shutoff valve inside the house so the line drains before the first hard frost. In cold climates, winterize by draining the line when nights drop below 32 degrees Fahrenheit, since a frozen pipe splits and floods the patio in spring. The faucet should be rated for outdoor use with a brass body, since cheap zinc faucets corrode within two summers. Never use an indoor-only faucet outdoors, since its finish peels and its seals fail within one summer.
List the jobs the sink must handle before choosing hot or cold. A cold-only sink still handles about 80 percent of outdoor jobs, from rinsing vegetables to filling a cooler, and a basic station is listed at 800 to 1,500 dollars installed. Adding a hot water line lifts the total to 1,500 to 3,000 dollars, because it needs a small point-of-use heater, and it makes grill cleanup far easier after a greasy cook. Keep the sink within 6 feet of the grill so the cook never carries a dripping grate across the patio.
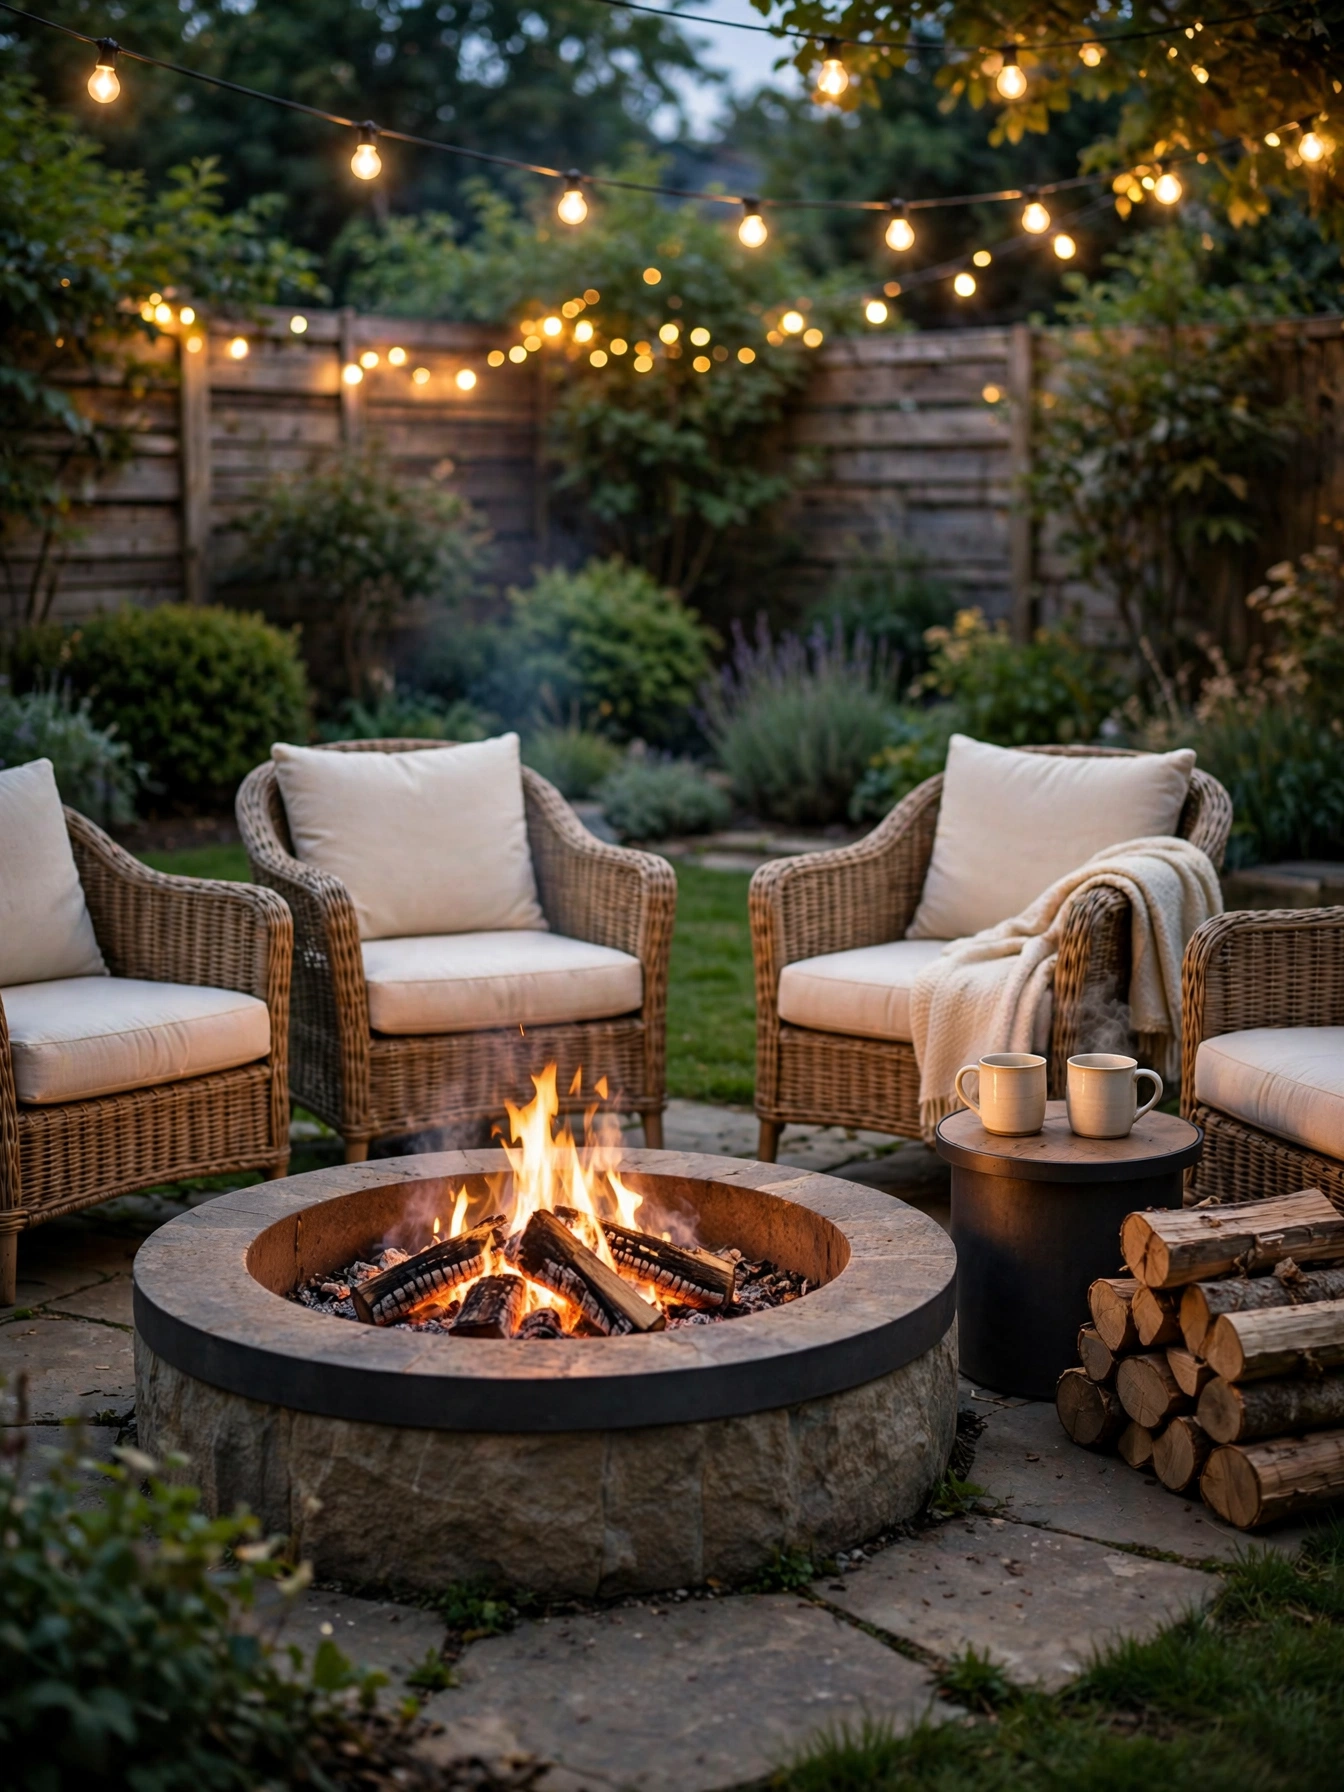
Fire Pit Dining Zone
Why This Works:
- A fire pit stretches the outdoor evening by 2 to 3 hours after sunset
- A 36 inch diameter pit seats six people in a comfortable circle
- Stone holds heat long after the flames die down
- Chairs at a 42 inch radius keep feet warm without feeling scorched
Clearance comes first in a fire pit dining zone: keep the pit at least 10 feet from the house, fences and low tree branches, and set it on a noncombustible surface such as stone pavers or concrete. A 36 to 44 inch diameter pit suits groups of four to six, while a 48 inch pit suits eight or more. The pit wall should be 12 to 18 inches high so feet rest near the heat without climbing over the rim, and a steel spark screen with 1/4 inch mesh stops embers from landing on cushions. Skip wood-burning pits on a wooden deck, since a single escaping ember chars boards in seconds; a gas pit with a 65,000 BTU burner is the safer choice there. The Spruce notes that gas fire pits light instantly and burn clean, which suits families who want heat without tending a wood fire.
Wood and gas cook differently around a fire pit. Wood gives the crackle and campfire smell that gas cannot match, yet it needs dry storage, constant tending and ash cleanup after every use. Gas costs 2,000 to 5,000 dollars installed with a buried line, while a wood stone pit runs 800 to 2,500 dollars. Gas also shuts off in seconds when the evening ends, while a wood fire needs 30 to 45 minutes to burn down safely. Place the dining table at least 6 feet from the pit so smoke drifts past rather than through the meal, and keep a 5 pound bag of sand nearby to smother flare-ups.
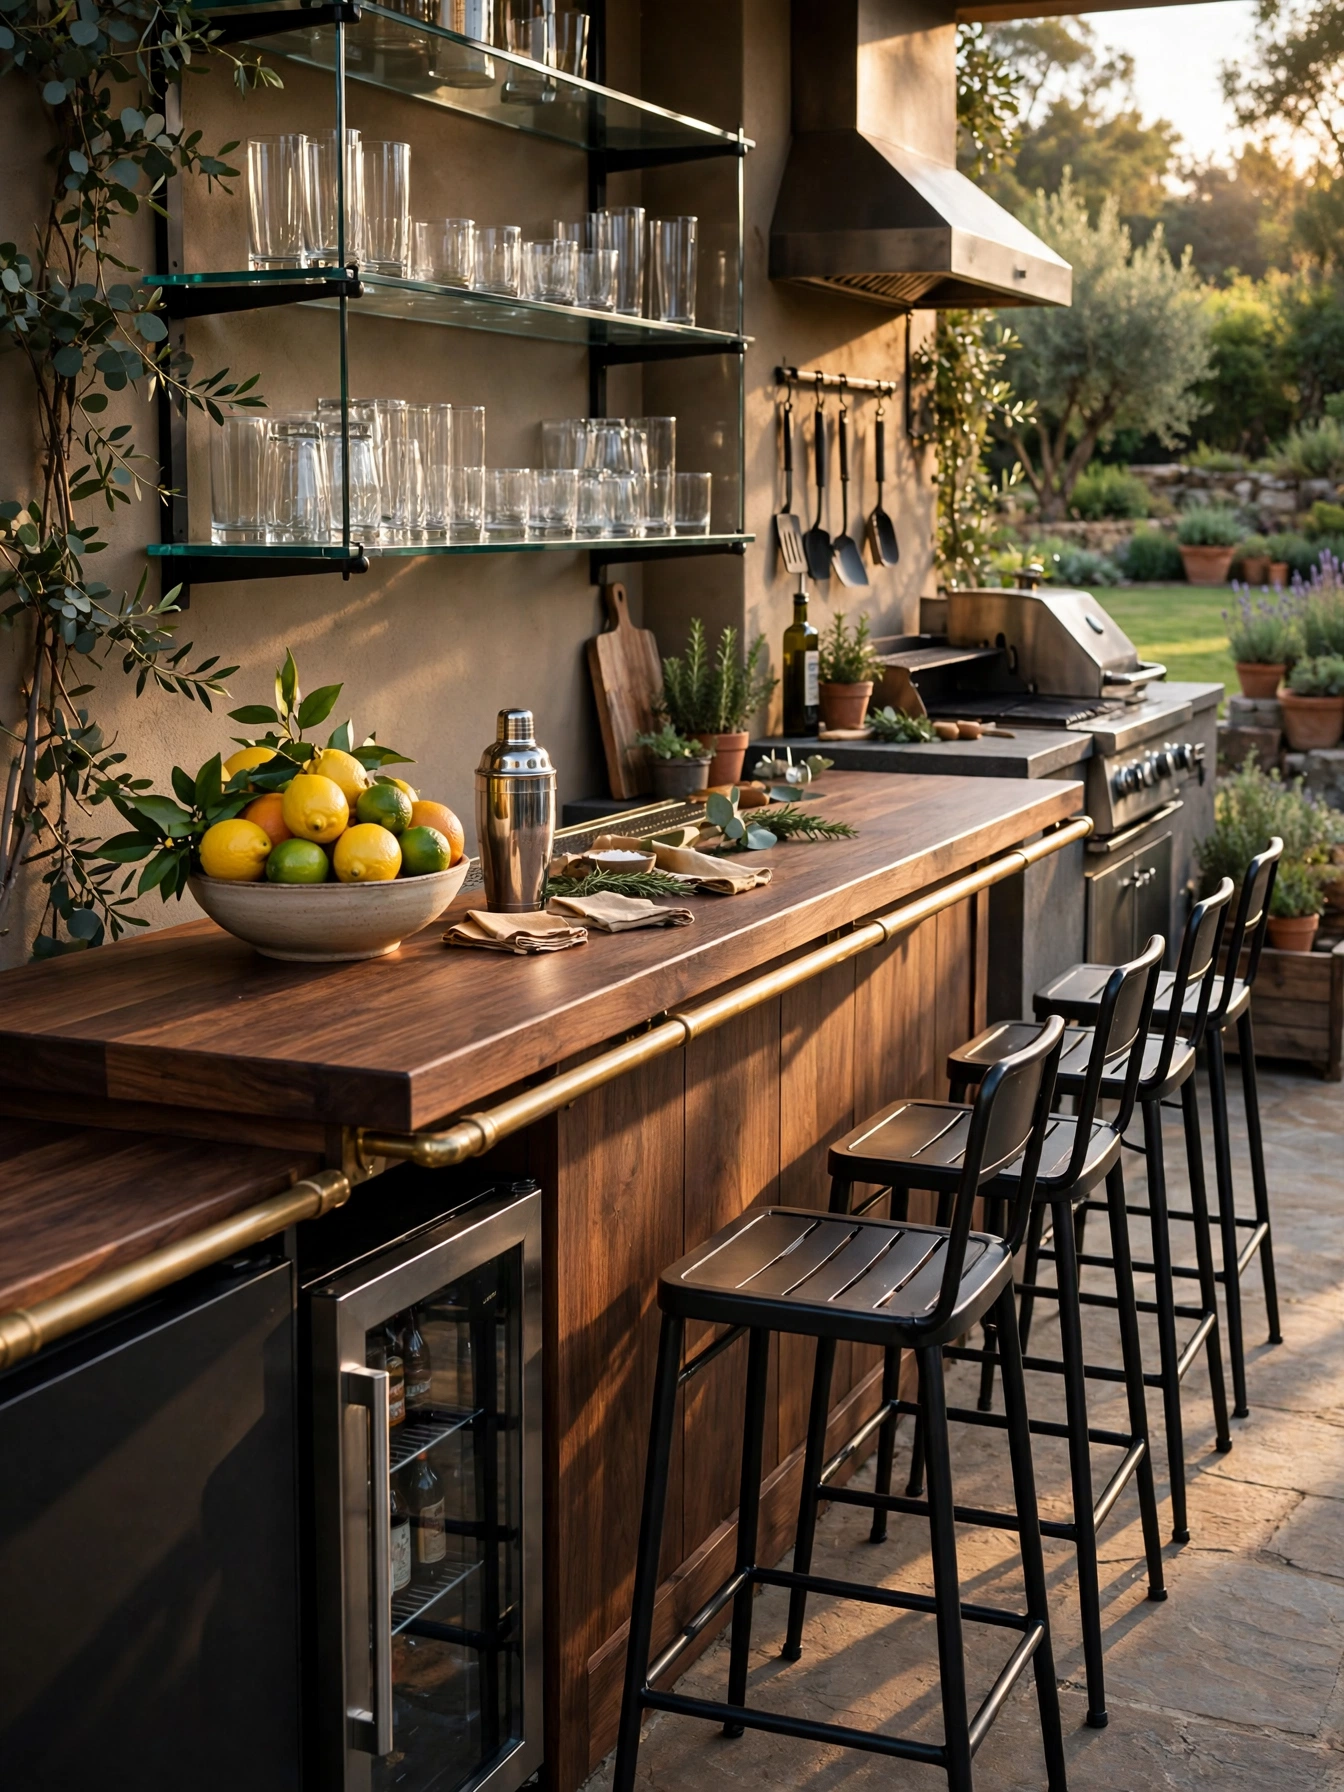
Outdoor Bar Counter
Why This Works:
- A bar counter turns waiting guests into company instead of bystanders
- A 42 inch bar height keeps drinks above grill smoke and splatter
- A footrest rail at 12 inches makes a tall stool comfortable for an hour
- An under-counter fridge keeps drinks cold without a trip indoors
Guests sit best at a 42 inch high bar counter with a 12 inch overhang on the seating side, so knees fit under the top and elbows rest comfortably. Stools need a seat height of 30 inches to match a 42 inch bar, spaced 24 inches apart center to center so guests do not bump elbows. Leave 36 inches of walkway behind the stools so the bartender and the grill cook pass without collision. A brass foot rail mounted 12 inches above the patio floor takes the weight off tired legs and stops stools from sliding. Never use indoor bar stools outdoors, since their frames rust and their cushions soak up rain in a single storm.
Face the guests toward the cook. Place the bar on the far side of the grill island so guests face the cook, which keeps conversation flowing while dinner grills. A simple bar is priced at 1,200 to 3,000 dollars. Add a fridge, sink and shelving and the setup reaches 4,000 to 8,000 dollars. For the top, polymer is about 40 dollars per square foot and never needs oiling. Teak, at roughly 80 dollars per square foot, ages gracefully and can be sanded back to new in an afternoon. Polymer shows scratches more on dark colors.
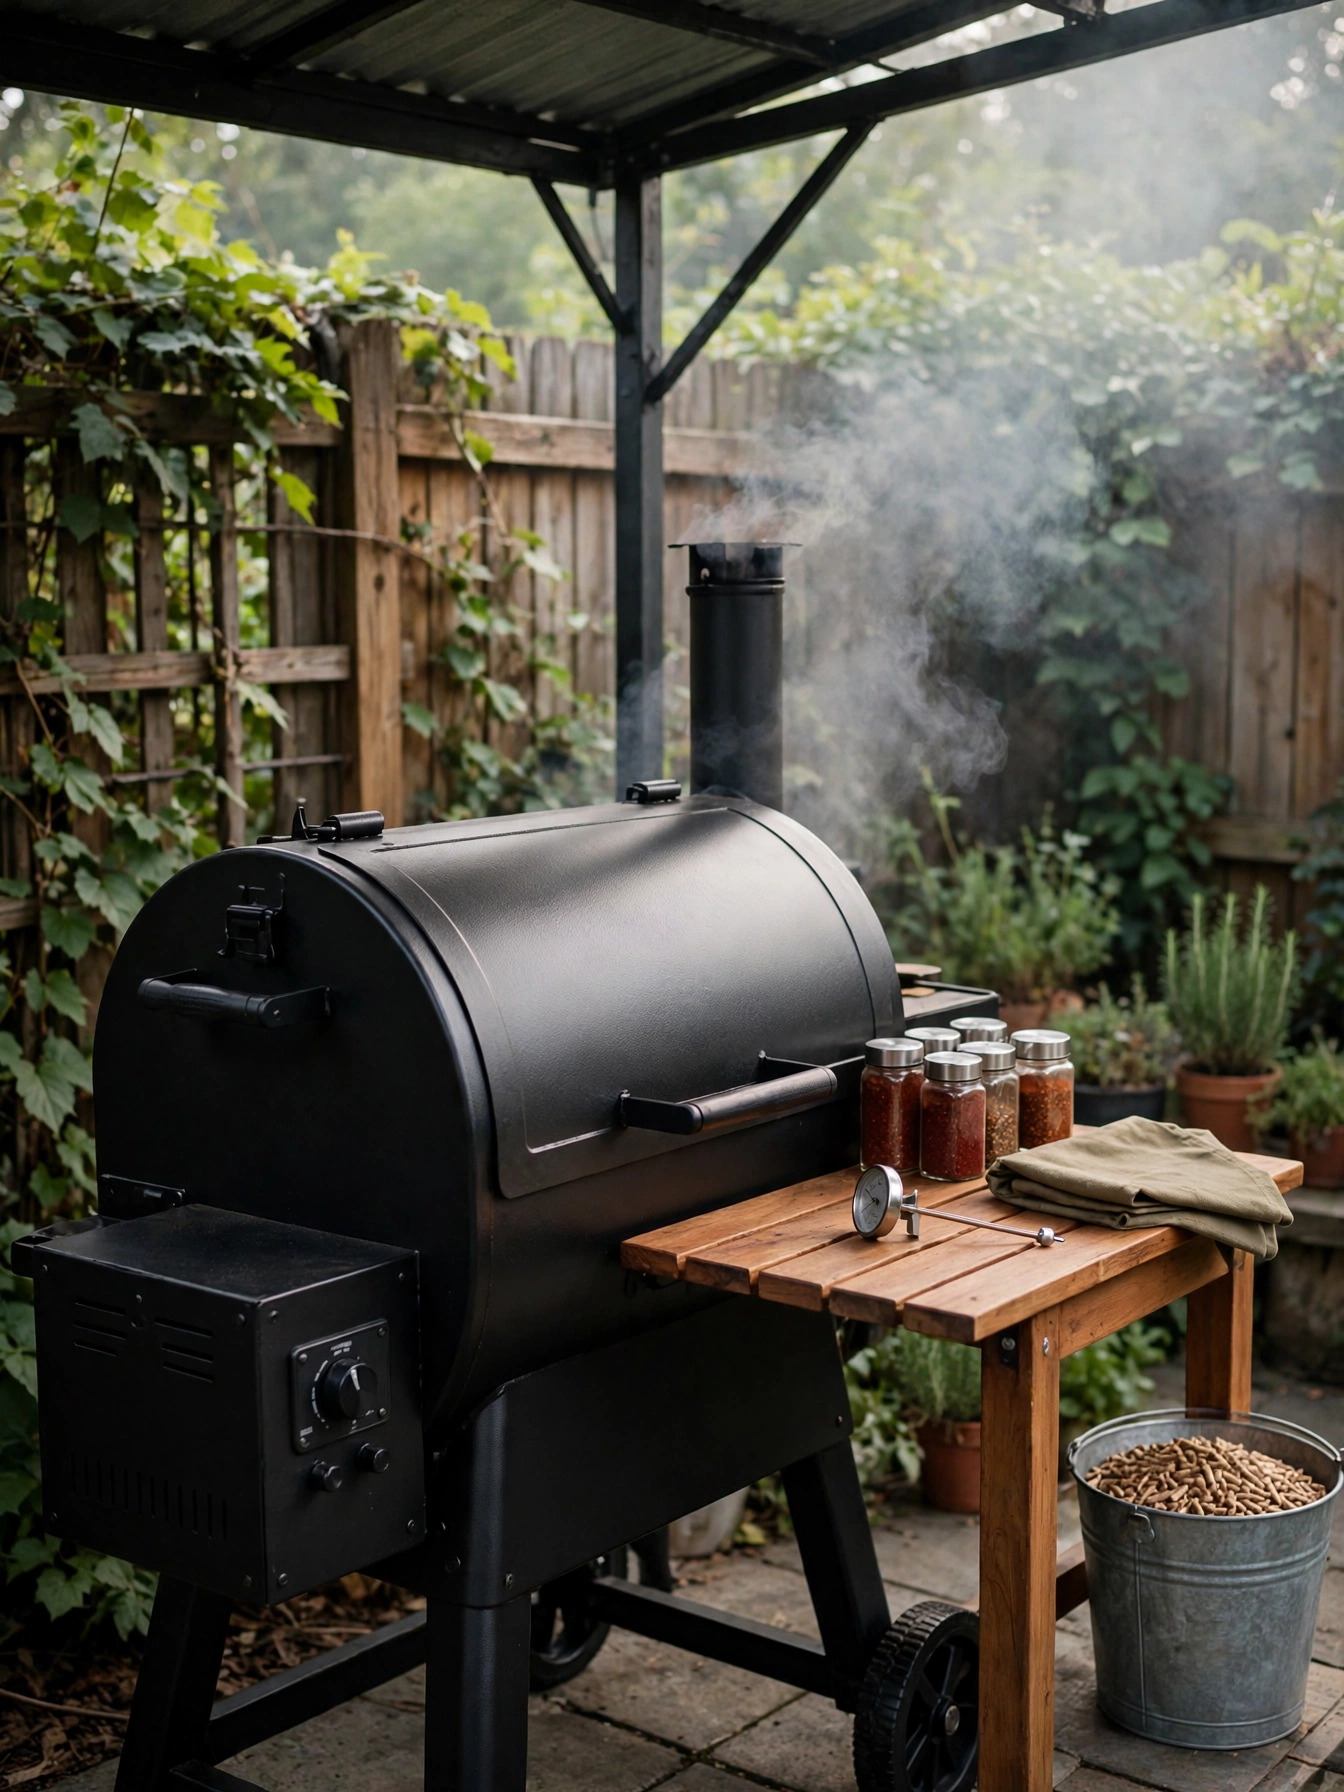
Smoker Station Setup
Why This Works:
- A dedicated smoker spot keeps 6 hour cooks away from the main grill traffic
- Pellet smokers hold 225 degrees steady for hours without babysitting
- A side shelf at 36 inches gives a landing spot for heavy briskets
- A canopy overhead keeps rain off the electronics and the cook
Set the smoker on a flat, level pad of concrete or pavers at least 4 feet by 6 feet, with 36 inches of clear space on the working side for loading and checking meat. Pellet smokers burn 1 to 2 pounds of pellets per hour at 225 degrees, so a 20 pound bag covers a full 10 hour brisket cook. Keep the smoker a 10 foot buffer from the house walls and 3 feet from any fence, since the chimney throws heat and sparks on windy days. Skip cheap thin-walled smokers if winter cooking is the plan, because a 14-gauge steel body loses heat fast below 40 degrees and burns twice the pellets.
Pellet smokers sell for 500 to 1,500 dollars, hold temperature steady and suit beginners. Expect to pay 800 to 3,000 dollars for an offset. Match the smoker to the weekend. An offset stick burner rewards patient cooks with deeper smoke flavor, and it needs tending every 45 minutes, so it suits slow Saturdays rather than weeknight dinners. A meat thermometer with a 6 inch probe and a remote alarm is the single best accessory, since it alerts the cook when the brisket hits 203 degrees without opening the lid. Clean the grease tray after every long cook, because pooled grease at 250 degrees is the most common cause of smoker fires.
String Light Canopy
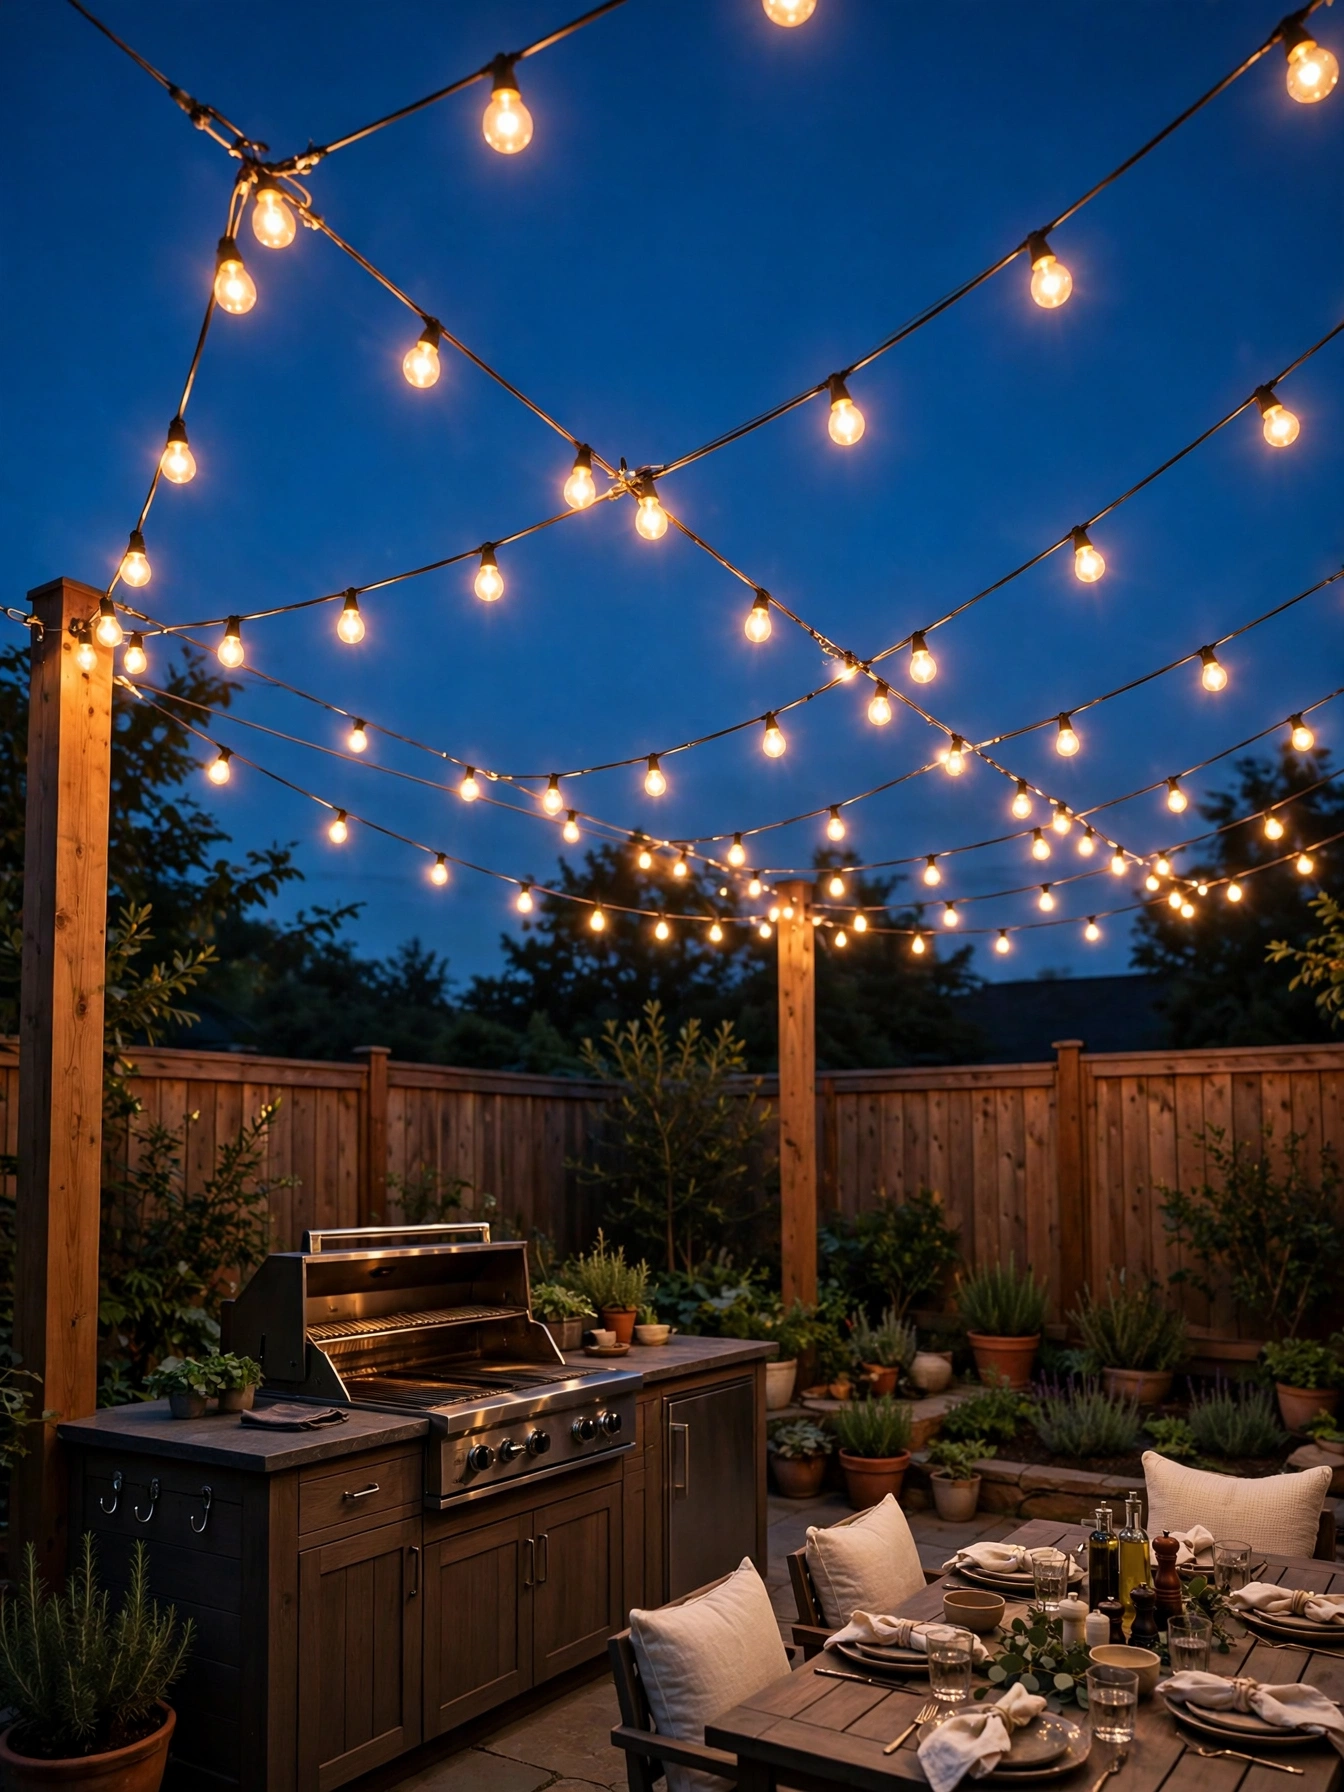
Why This Works:
- Warm 2700K bulbs flatter food and faces better than harsh white light
- A zigzag canopy lights the whole patio with one power source
- Commercial-grade strands survive rain, wind and a full winter outdoors
- Lights at 8 to 10 feet high glow without glaring into anyone’s eyes
A string light canopy works best with commercial-grade strands rated IP65, which handle rain and dust without shorting. Hang the strands on a steel guide wire tensioned between posts or the house wall, with the bulbs 8 to 10 feet above the patio so tall guests clear them by a foot. Space the strands 24 to 36 inches apart in a zigzag or parallel run, and use 48 foot strands so each run covers a 12 foot span with a gentle sag of 6 to 8 inches. Plug the strands into a GFCI-protected outdoor outlet, which cuts power in milliseconds if water gets in. Avoid draping strands over a grill hood or a fire pit, since the heat melts the insulation and shorts the whole run.
A full canopy costs 150 to 400 dollars in lights and hardware, which makes it one of the lowest-cost upgrades in this guide. Add task light beside the mood light. Evenings run on two kinds of light, and string lights only supply one of them: they create mood, not task light, so the grill and prep counter still need a dedicated 300 lumen work light for safe chopping after dark. LED bulbs use about 1 watt each against 7 watts for incandescent, so a 48 foot strand of 24 LEDs draws under 25 watts and stays cool to the touch. Take the strands down before a heavy snow season if the posts are freestanding, since ice loads snap guide wires.
Shaded Outdoor Kitchen Ideas
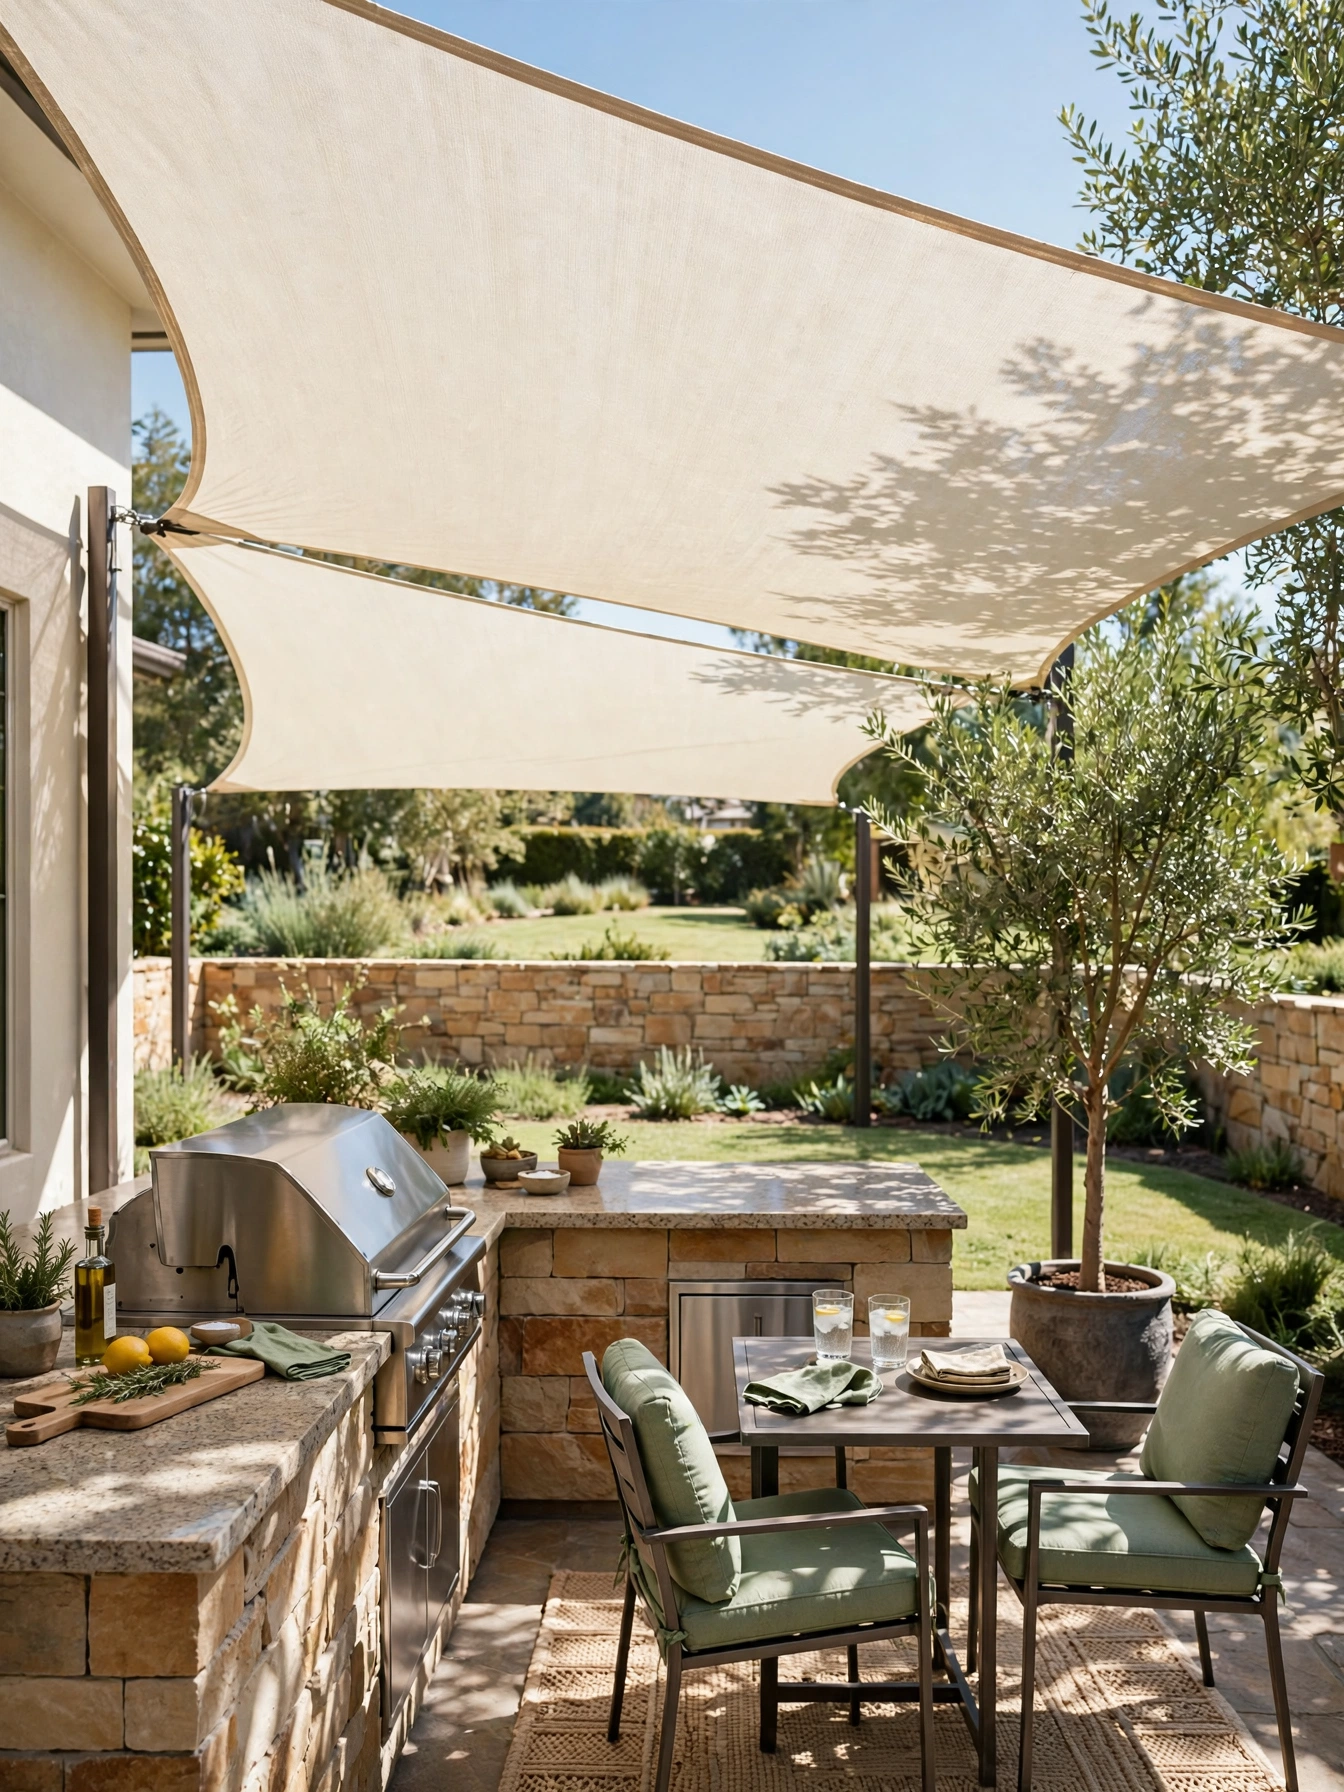
Why This Works:
- A shade sail drops the temperature under it by 10 to 15 degrees on a hot afternoon
- HDPE fabric blocks up to 95 percent of UV rays while letting breeze through
- The sail costs a fraction of a pergola and installs in a single afternoon
- A shaded counter stays cool enough to chop on at 2 PM in July
Plan on a shade sail at least 12 feet by 12 feet to cover the grill and a 36 inch prep counter, and a 16 foot triangle covers a full dining set too. Anchor the sail to posts or the house wall with turnbuckles, tensioning the fabric so it holds a 20 degree slope for rain runoff. Mount the high corner at 10 to 12 feet and the low corner at 8 feet, which sheds water instead of pooling it in the middle. HDPE shade cloth rated at 320 GSM resists tearing in 40 mile per hour winds when properly tensioned. Do not anchor a sail to a gutter or a fascia board, since the pull of a tensioned sail rips gutters off the house in the first strong wind.
Expect 4,000 to 8,000 dollars for a wooden pergola, which lasts 20 years or more. Block the 5 PM sun, not just the noon sun. Overhead shade alone cannot block a 5 PM sun angle, so pair the sail with a retractable side screen if the west side stays exposed. A quality sail is 200 to 600 dollars, lasts 5 to 8 years in strong sun, and is the budget path to real shade. Sails also flap in high wind and must come down before a storm with gusts over 50 miles per hour, or the anchors pull out.
Dedicated Pizza Prep Counter
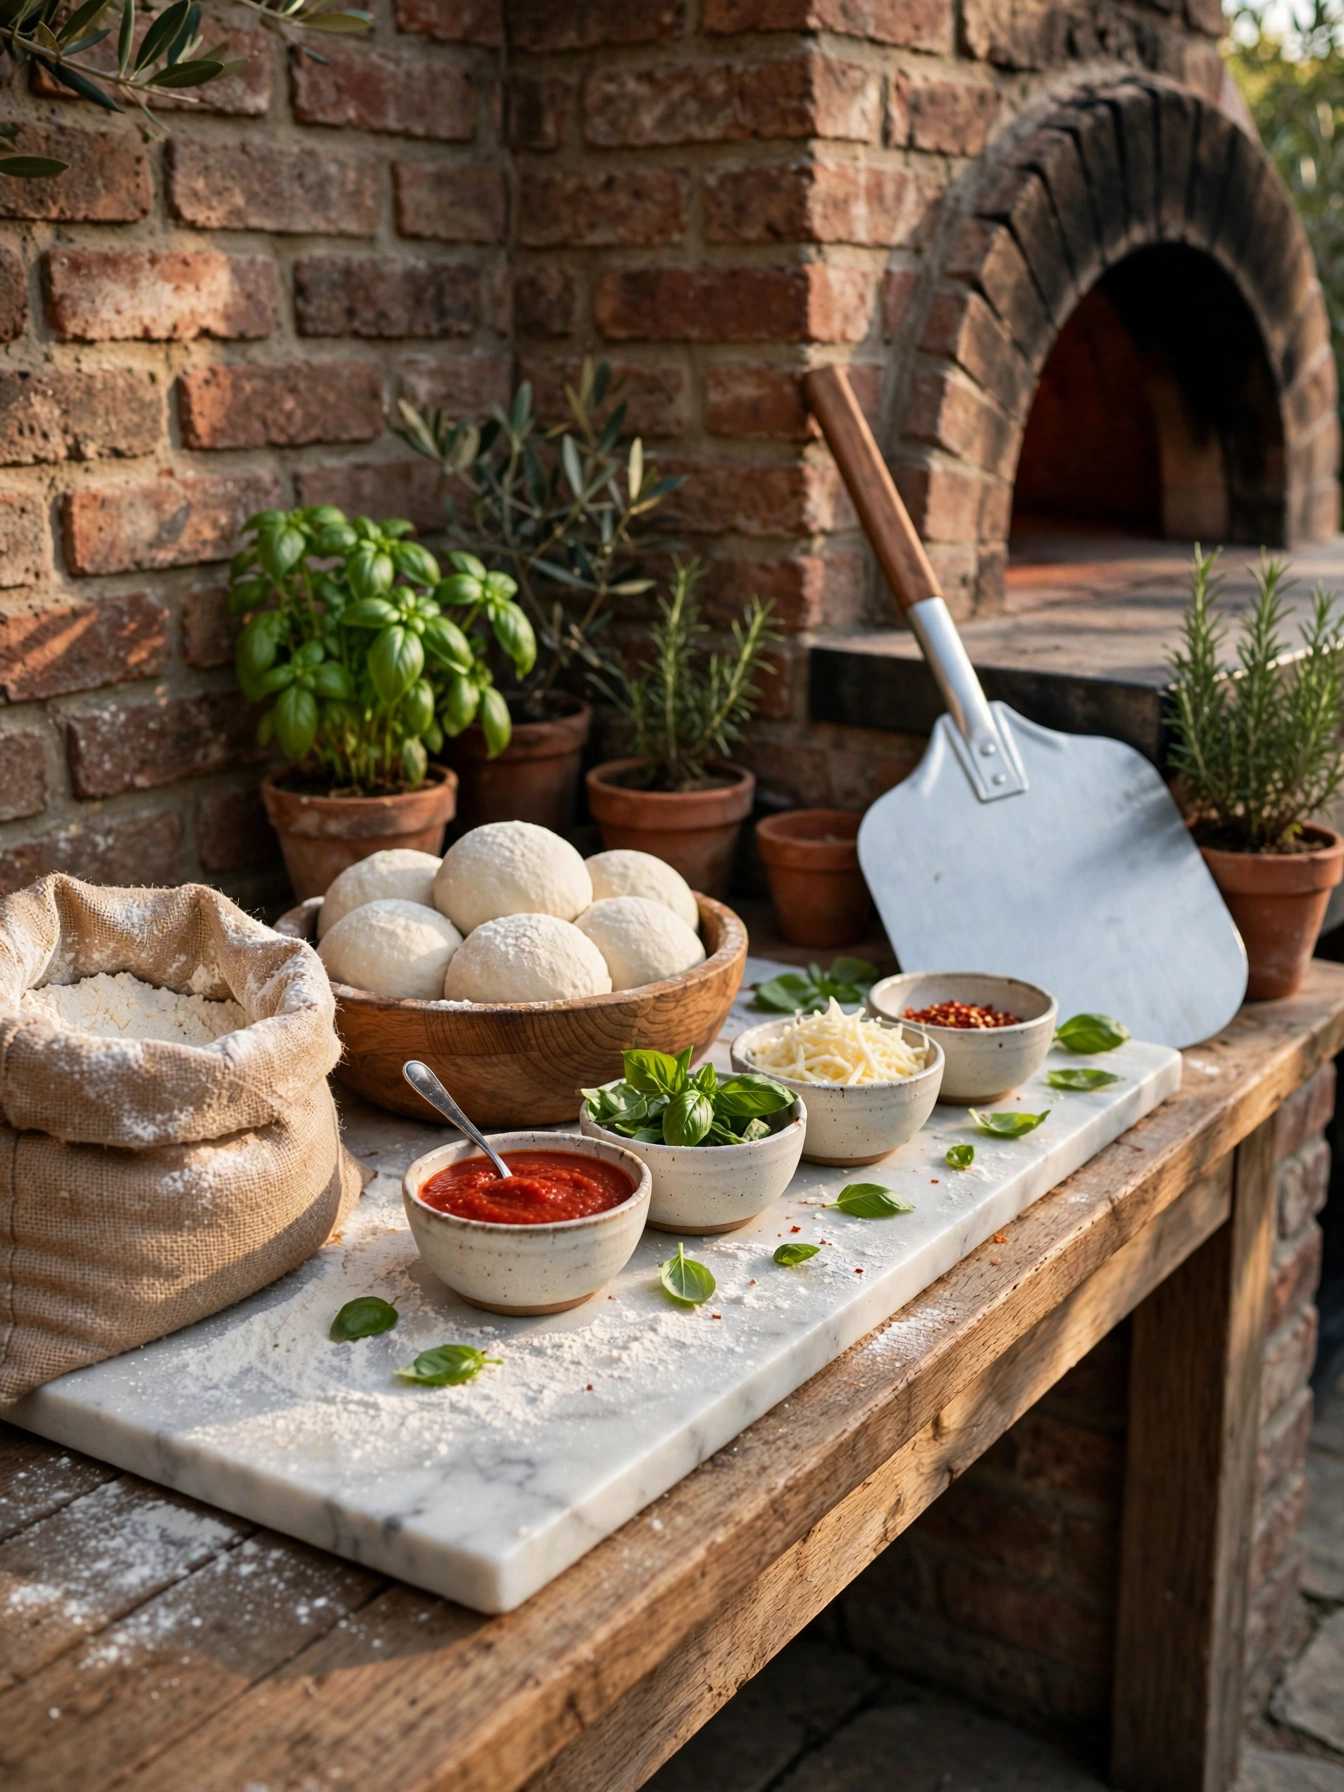
Why This Works:
- A marble slab stays cool, so pizza dough rolls without sticking or warming
- Topping bowls in a row cut assembly time to under 2 minutes per pizza
- A counter beside the oven means raw pizzas travel 3 feet, not 30
- A 6 foot run fits dough, sauce and toppings without crowding
Build the pizza prep counter 6 feet long, 24 inches deep and 36 inches high, with a marble or granite slab at least 24 inches by 18 inches set into the top. Marble feels cool to the touch and holds a lower surface temperature than wood in shade, which keeps dough workable instead of sticky. Keep the counter within 3 feet of the oven mouth so a loaded peel never crosses the patio, and fit a small under-counter fridge or cooler for cheese and sauce at 38 degrees. A stainless steel inset tray for flour, 12 inches by 12 inches and 2 inches deep, keeps the dust contained. Never store raw dough on the counter in direct sun, since it over-proofs in an hour and turns slack and sticky.
Bring in a second cook. Set aside 600 to 1,500 dollars for a 6 foot counter in stone and base. A marble slab alone is 150 to 300 dollars. With four guests, a second cook can stretch dough while the first tends the oven, instead of both crowding one board. Marble stains more easily than granite, so seal it every 6 months and wipe tomato sauce within 10 minutes. Granite costs about the same, needs sealing only once a year, and runs a few degrees warmer than marble in the sun.
Teak Dining Set

Why This Works:
- Grade A teak contains natural oils that resist rot, insects and rain
- A 72 inch table seats six comfortably without elbows colliding
- Acrylic cushions dry in under 2 hours after a summer shower
- Teak silvering with age looks intentional instead of worn out
Six seats call for a table 72 inches long and 36 to 40 inches wide, with 24 inches of elbow room per person and 36 inches of clearance behind each chair for pulling out. Grade A teak, cut from the heartwood of mature trees, lasts 25 years or more outdoors, while grade B teak lasts 10 to 15 years and grade C lasts 5 years at best. Leave the wood unoiled to silver naturally, or oil it every 3 months to hold the golden color; either way, scrub it once a year with a soft brush and soapy water. Cushions should be solution-dyed acrylic rated for 1,500 hours of UV exposure, so the color holds for 3 summers or more. Never pressure-wash teak at close range, since the jet strips the surface grain and leaves the wood rough and splintery.
A 60 to 80 pound table stays put in a storm that would send an aluminum table sliding. A comparable aluminum set is listed at 800 to 2,000 dollars and weighs half as much as teak. A quality teak set for six is priced at 1,500 to 3,500 dollars. Aluminum never rots and needs no oiling. It feels cooler to the touch and can look stark beside a warm stone kitchen. Place the table at least 6 feet from the grill so smoke drifts clear of the meal.
Outdoor Refrigerator Nook

Why This Works:
- Cold drinks 10 steps from the grill end the indoor trips for every refill
- A 304 stainless steel body resists rust in rain and humidity
- A 4.5 cubic foot fridge holds 60 cans plus condiments and marinades
- Built-in ventilation keeps the compressor cool in 100 degree heat
Rate the fridge for outdoor use first: the compressor and insulation must handle ambient temperatures from 40 to 110 degrees Fahrenheit. A 24 inch wide unit with 4.5 cubic feet of capacity suits most families, holding about 60 cans plus a few condiment bottles. The nook needs 2 inches of ventilation clearance on the sides and 3 inches at the back, plus a vent grille at the front so the compressor breathes in summer heat. Never install an indoor fridge outdoors, since its compressor fails in the first heat wave and the warranty voids the moment it sits outside. Plug it into a GFCI-protected outlet on its own 15 amp circuit so a tripped breaker does not kill the fridge along with the lights.
Plan for the hottest afternoon of the year. An outdoor unit lasts 8 to 12 years outside, where an indoor unit lasts one summer. Outdoor-rated models cost 800 to 2,000 dollars, roughly double an indoor unit of the same size, and energy use is about 350 kilowatt hours per year, similar to an indoor compact fridge. A door alarm that beeps after 60 seconds open stops kids from draining the cold air, and a fridge that holds marinades and sauces at 38 degrees also keeps raw meat out of the danger zone on a hot afternoon. In winter, unplug the unit and cover it when nights stay below 40 degrees for weeks, since the compressor can seize in sustained cold.
Herb Garden Wall
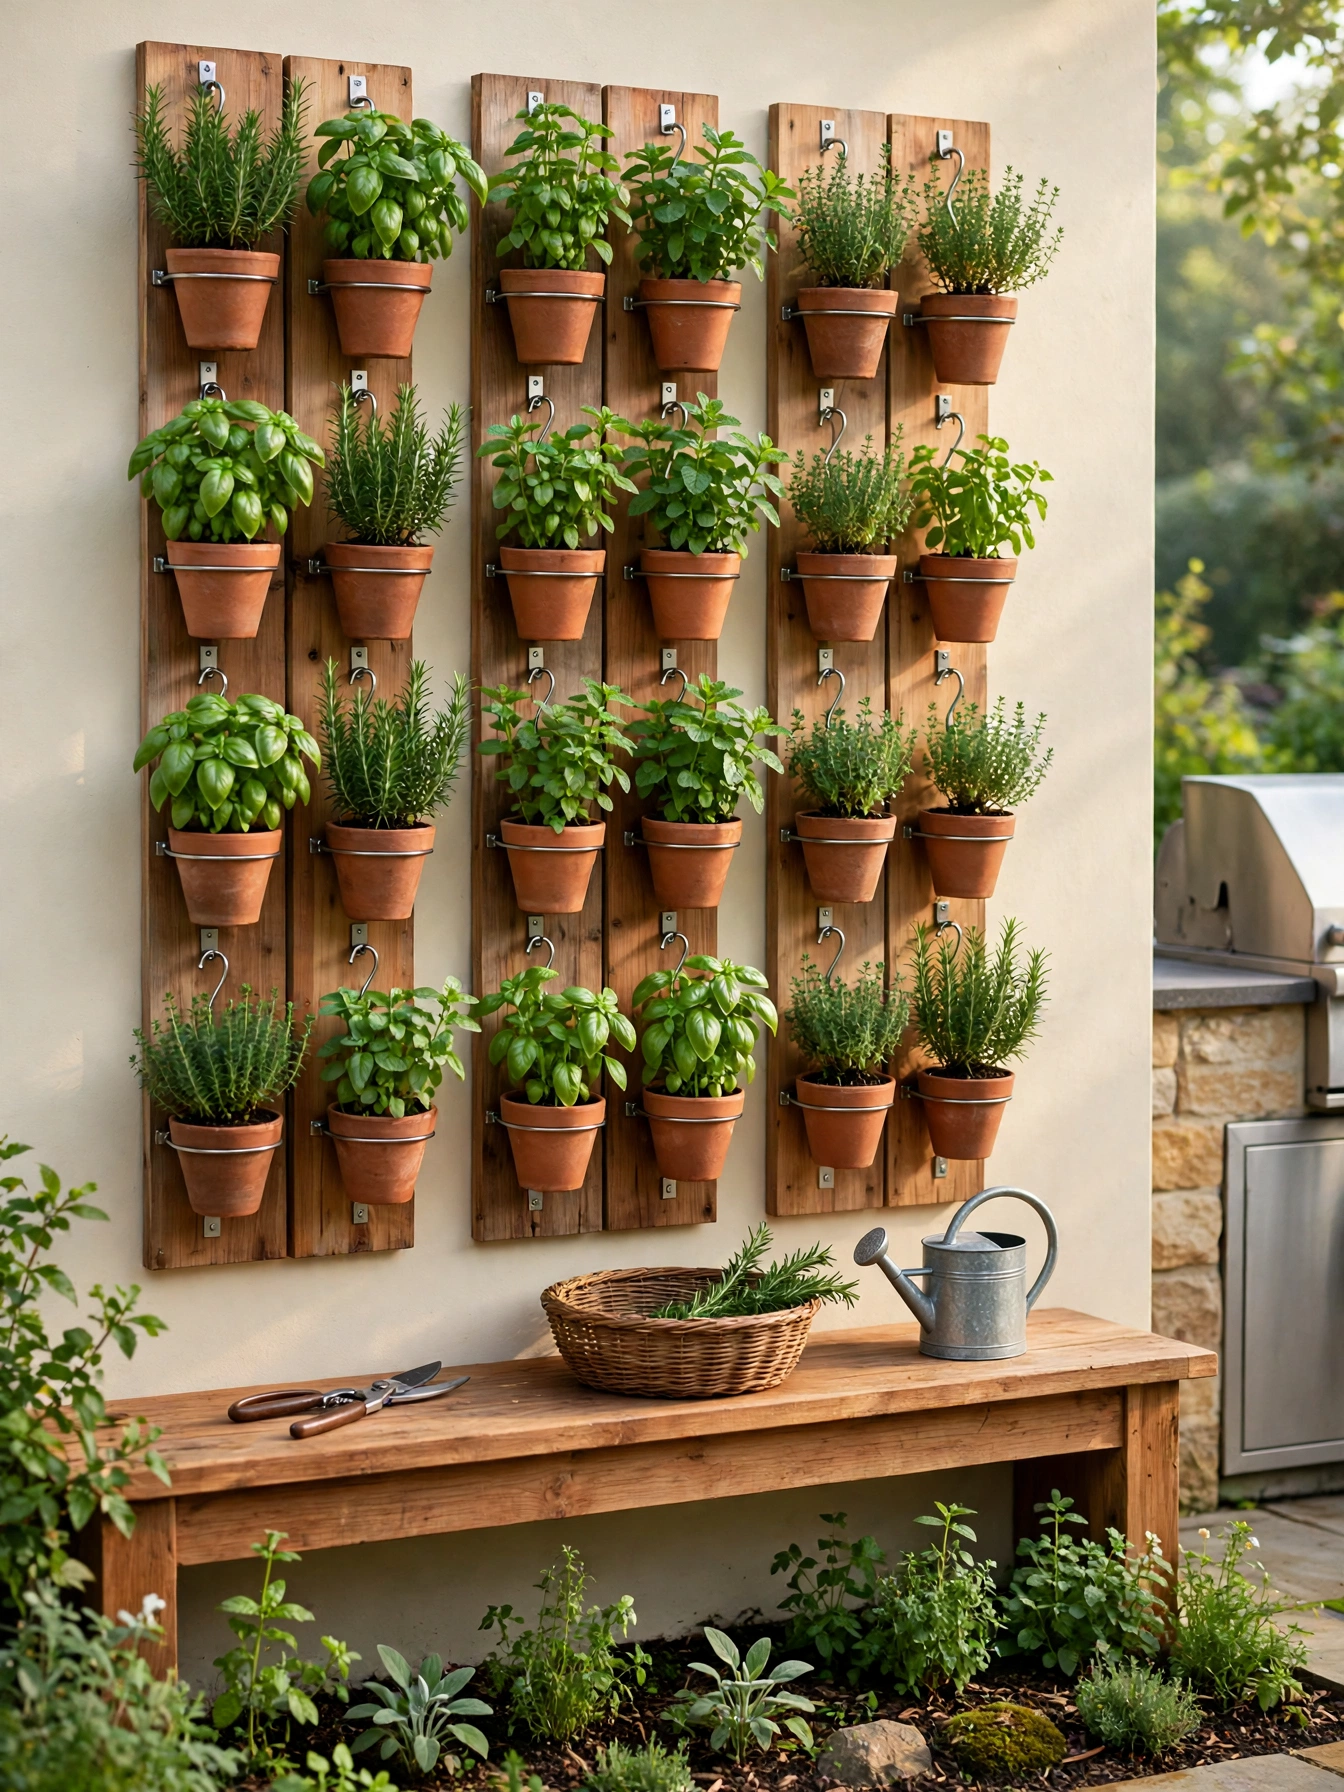
Why This Works:
- Fresh basil 3 steps from the grill beats any dried jar in the cupboard
- A vertical wall uses 6 square feet of wall instead of 20 square feet of bed
- Terracotta breathes, so roots stay drier and herbs grow stronger
- Snipping herbs at the grill turns cooking into a small ritual guests love
Give the herb garden wall 6 feet of width and 5 to 6 feet of height beside the kitchen, with pots spaced 8 to 10 inches apart so each plant gets sun and air. Mount the boards on a wall that gets 6 hours of direct sun, and give mint a pot of its own, since mint spreads through a shared bed in a single season and chokes its neighbors. Use 6 inch terracotta pots with a drainage hole and a saucer, and fill them with a potting mix that drains in under 30 seconds when watered. Skip self-watering planters for rosemary and thyme, because Mediterranean herbs rot in constantly damp soil and need to dry between waterings. The Spruce recommends watering herbs when the top inch of soil feels dry, a simple test that prevents both drought and rot.
Water basil and parsley every 2 days in July heat, since they drink fast and wilt first. Rosemary and thyme need water only once a week, because their roots rot in soil that stays damp. A full wall costs 150 to 400 dollars in boards, pots and soil. Winter is the hard limit here, since most culinary herbs die below 28 degrees, so bring the pots indoors or replant each spring. A wall at waist height, 36 to 48 inches, puts the most-used herbs within easy snipping reach without bending.
Rolling Grill Cart
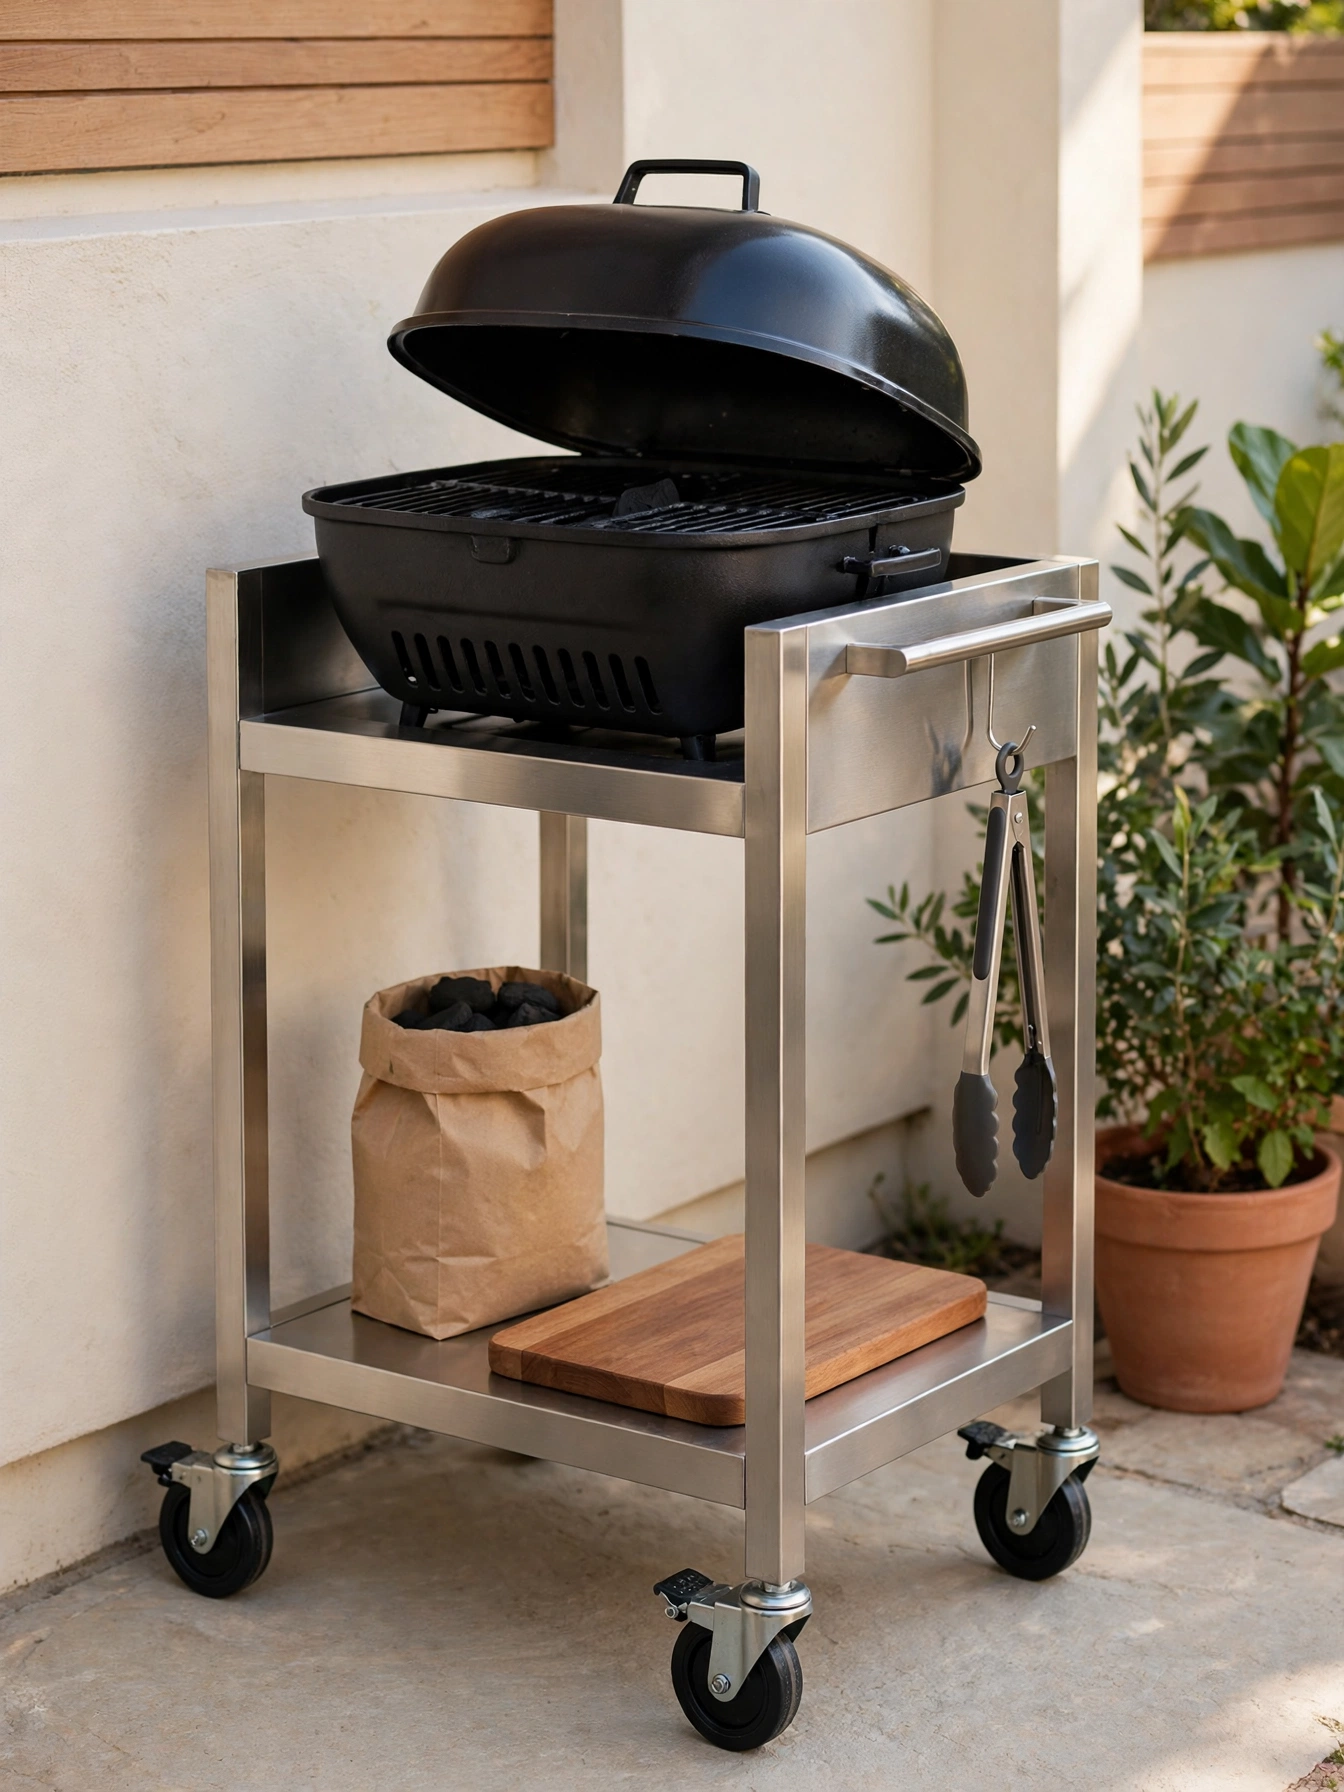
Why This Works:
- Locking casters let the whole grill move to shade or shelter in seconds
- Its 24 inch width fits patios too small for a built-in island
- The lower shelf carries charcoal, tools and a cutting board in one trip
- Stainless steel wipes clean after a greasy cookout in under a minute
A rolling grill cart suits renters and small patios, where a built-in island is impossible or unwanted. Choose a cart 24 to 30 inches wide with a work surface at 36 inches high, and casters at least 4 inches in diameter with locks on two wheels so the cart holds still on a slope. The cart should carry a grill with 300 to 400 square inches of cooking surface, enough for 8 burgers or 4 steaks at once. Load the lower shelf with no more than 50 pounds, since an overloaded cart tips when pushed over a paver edge. Park the cart 10 feet clear of any wall when cooking, the same clearance as a built-in grill, and lock the wheels before lighting. Never push a lit cart across a patio, since a bump can tip hot coals onto the pavers or onto your feet.
Roll it out, then roll it away. A cart holds one bag of charcoal and a few tools instead of a full set of cookware, and a heavy brisket on top makes it wobble, since the narrow base offers no wind protection either, so a gusty corner cools the grill fast. Fold the side shelf down when the cart parks against the wall to save 12 inches of patio space. A built-in station starts at 2,500 dollars, which makes a quality cart at 200 to 600 dollars the budget entry point to outdoor cooking.
Outdoor Kitchen Ideas On Deck
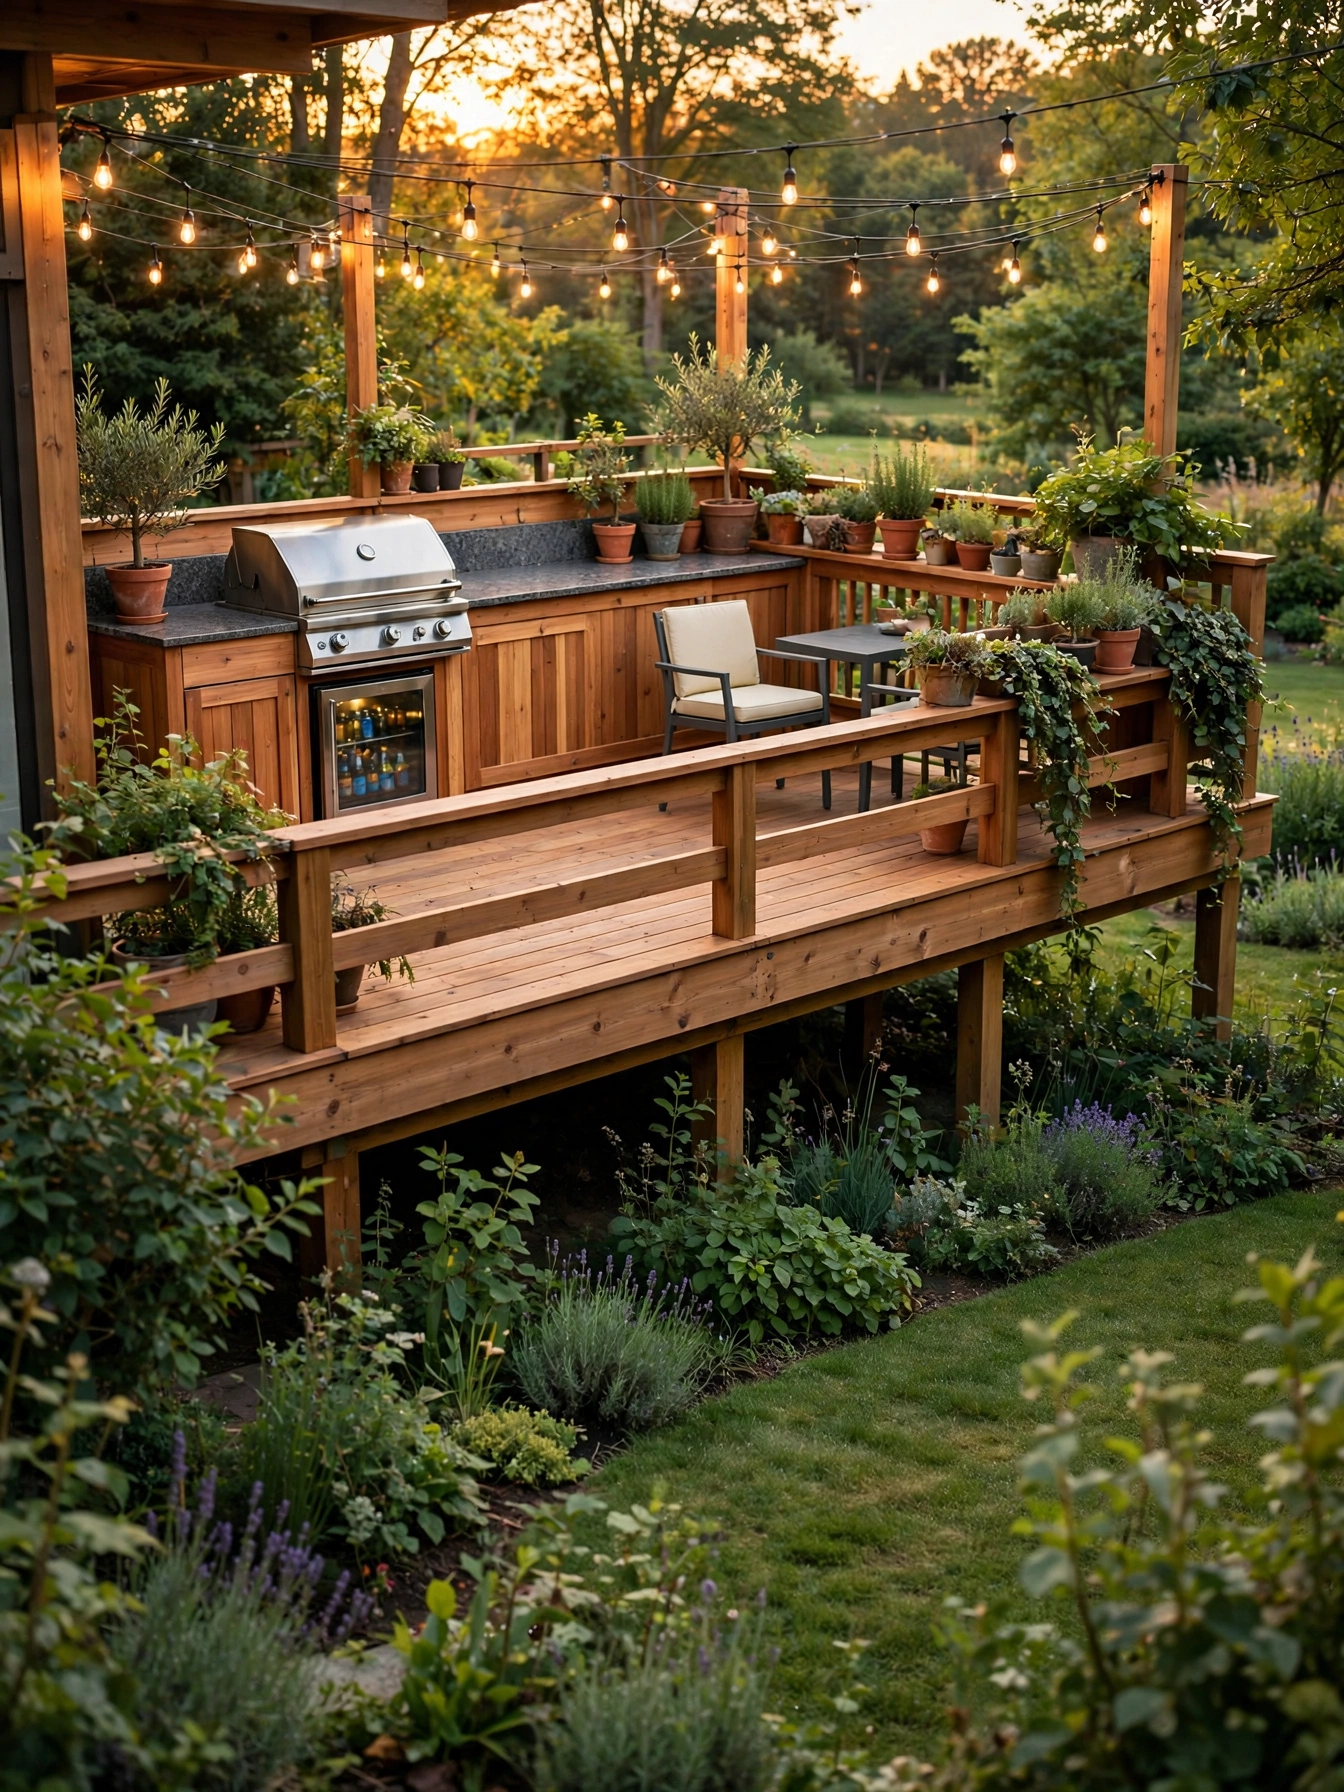
Why This Works:
- A deck kitchen sits level with the back door, so food travels 5 steps, not 20
- A narrow 18 inch counter fits a deck without eating the seating area
- Composite decking under the grill resists grease stains better than wood
- String lights above the railing make a small deck feel like a room
Tight space and a wood floor set a deck kitchen apart from a patio kitchen, so the plan changes. Keep the grill on a noncombustible mat at least 36 inches by 48 inches, and never set a charcoal grill directly on wood decking, since a single ember chars boards in seconds. A 24 inch wide built-in gas grill with a 12 inch side shelf fits most decks, and a counter 18 inches deep leaves 42 inches of walkway on a 12 foot deep deck. Check the deck load rating before adding stone: a stone island weighs 800 to 1,200 pounds, and many older decks are rated for only 40 pounds per square foot of live load. The 42 to 48 inch clearance behind the cook, carried over from indoor kitchen practice, still applies outdoors, so measure the deck depth before ordering anything. Avoid running a gas line across the deck surface, since a tripping hazard and a crushed line are both worse than paying a plumber to route it underneath.
Charcoal stays off the deck. Gas is the safer fuel on a deck, since it produces no embers and shuts off instantly, and charcoal belongs on a stone patio below. Budget 2,000 to 6,000 dollars for a deck kitchen. A composite deck board under the grill, rated for heat and grease, costs about 8 dollars per square foot. Wind hits decks harder than patios, because a raised deck has no fence or hedge to block gusts, so a glass wind screen 36 inches high along the railing protects the flame. A deck kitchen also needs a GFCI outlet within 6 feet of the grill for the rotisserie and lights.
Brick Barbecue Hearth
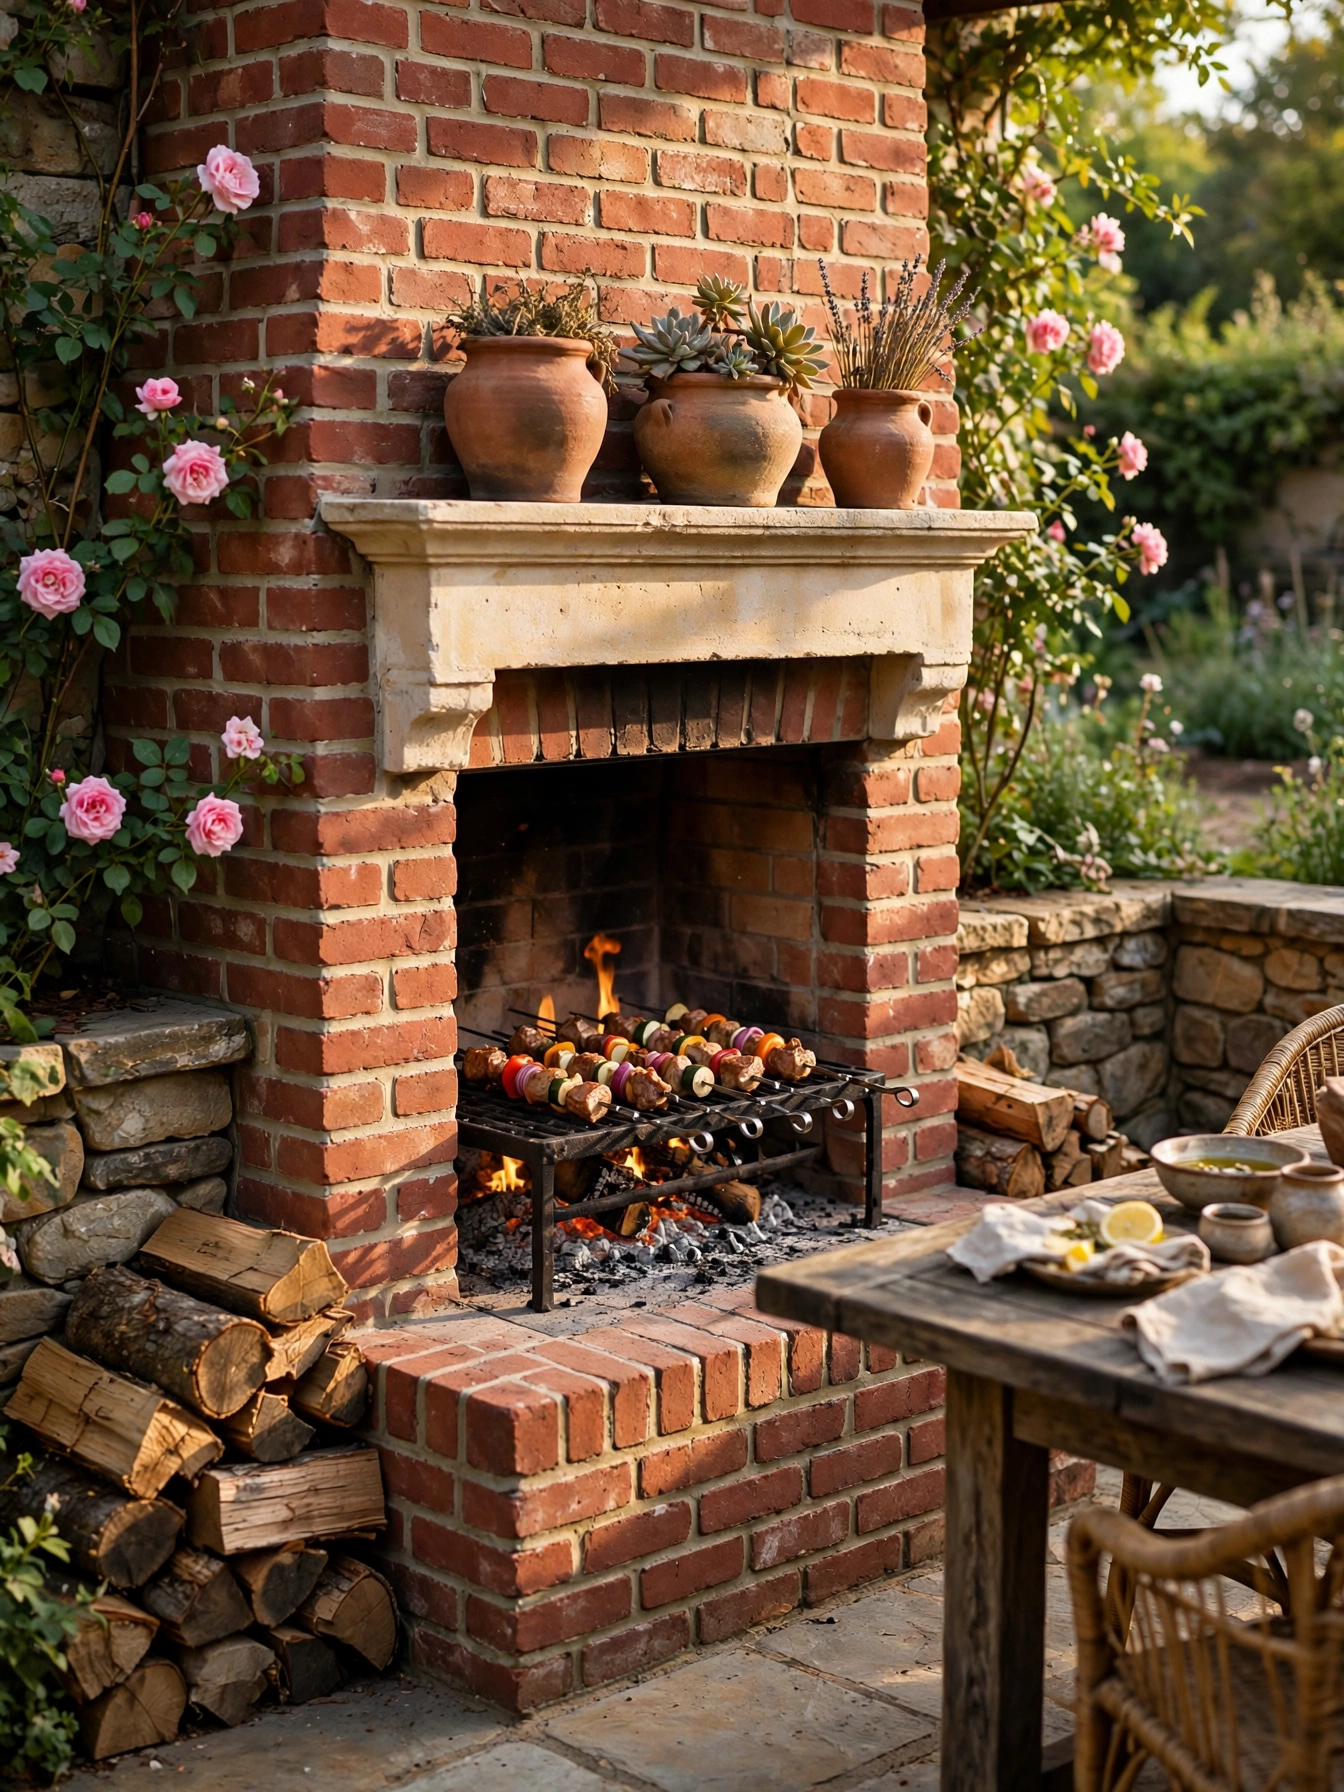
Why This Works:
- A brick hearth holds heat for hours after the fire dies down
- An adjustable grate at 3 heights controls heat from searing to slow roasting
- Firebrick lining survives 1,200 degrees without cracking like regular brick
- The mantel shelf keeps plates and spices out of the smoke zone
Line the firebox of a brick barbecue hearth with firebrick rated for 1,200 degrees Fahrenheit, set on a concrete footing 6 inches thick to carry the 2,000 to 3,000 pound weight. The firebox opening should be 24 inches wide and 18 inches high, with a cast iron grate adjustable to 3 heights, 6, 9 and 12 inches above the coals. Keep the hearth 10 feet clear of the house walls and 15 feet from any wooden fence, and build the chimney or flue at least 3 feet above the nearest roofline so smoke clears the yard. Never build the firebox from regular house brick, since standard brick spalls and cracks at 600 degrees and can throw chips into the fire. A spark screen with 1/4 inch mesh across the opening stops embers on windy evenings.
Move the coals to control the heat. Open flame is a skill, not just a fuel: the hearth suits cooks who love that flavor and already keep firewood, and it asks for more attention than a gas grill. Temperature control means moving coals by hand. A prefabricated steel firebox with a brick surround is 2,000 to 4,000 dollars, undercutting a masonry hearth built in place at 3,500 to 8,000 dollars, and a hearth also doubles as a garden fireplace in autumn, which spreads its cost across two seasons. Ash cleanup takes 15 minutes after each use, and the firebox needs a rain cover or the firebrick soaks up water and steams for an hour at the next lighting.
Retractable Shade Sail
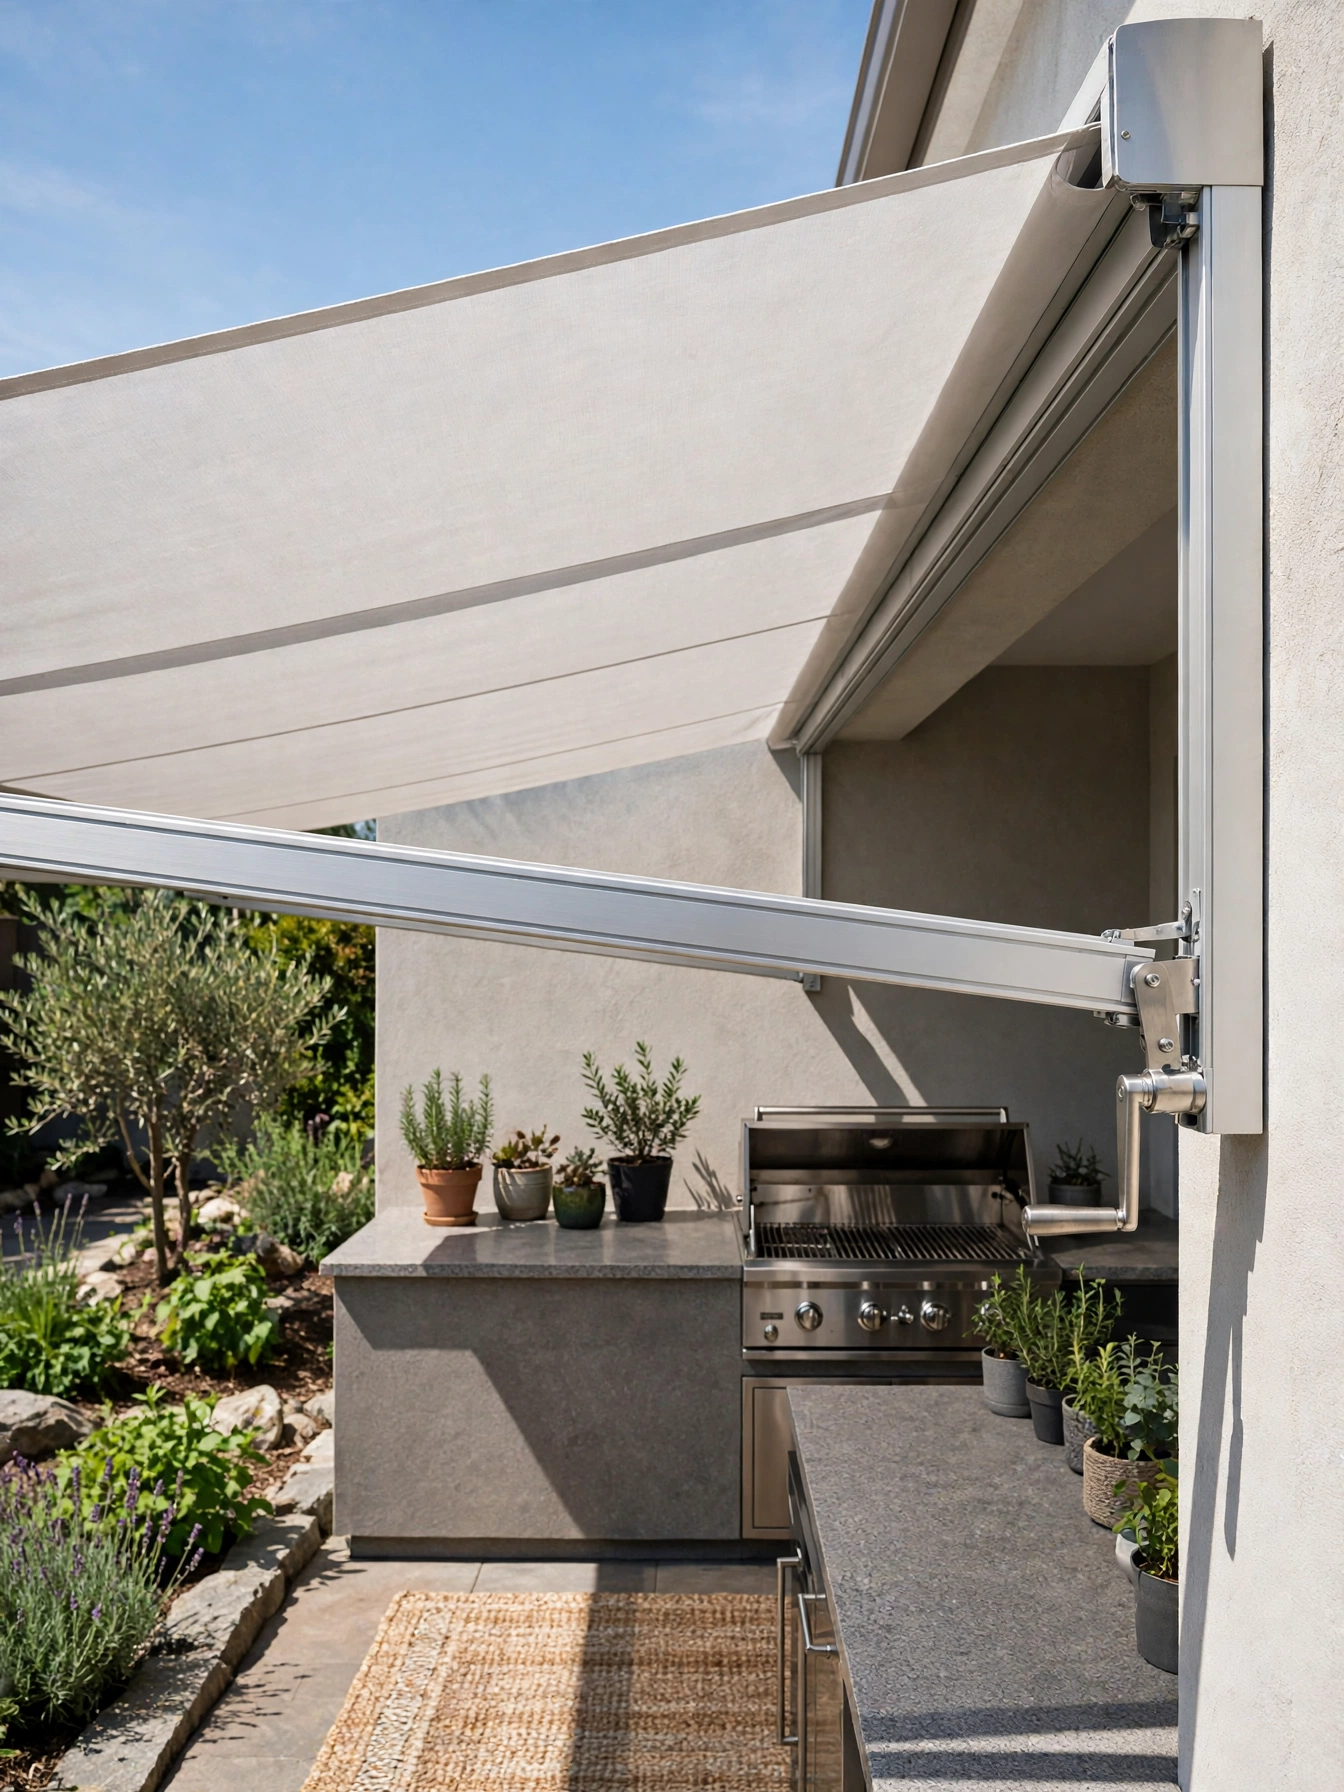
Why This Works:
- A retractable sail gives shade at noon and open sky at sunset with one pull
- Acrylic fabric blocks 98 percent of UV rays while staying breathable
- A wall-mounted track needs no posts, so the patio floor stays clear
- Retracting the sail before a storm protects the fabric and the hardware
A retractable shade sail mounts on an aluminum track fixed to the house wall at 9 to 10 feet high, extending 10 to 12 feet out over the cooking zone. The fabric should be solution-dyed acrylic rated for 2,000 hours of UV exposure, which holds its color for 4 to 5 summers. Tension the sail with a crank or a pull cord, and slope it 15 degrees so rain runs off the outer edge instead of pooling. Skip fixed sails in storm-prone areas, since a sail left out in 50 mile per hour winds can tear its mounts out of the wall. The track needs 6 lag bolts into solid wall framing, not just stucco, to hold a 12 foot span safely.
Shade the cooking zone only. A retractable system costs 600 to 1,500 dollars installed, which sits between a fixed sail at 200 to 600 dollars and a pergola at 4,000 to 8,000 dollars. A retractable sail shades only the cooking zone, so the dining table may still need its own umbrella, and pairing it with a 9 foot cantilever umbrella gives full coverage without extra posts. The track needs cleaning twice a year, and the crank mechanism lasts about 7 years before it stiffens, so budget a little upkeep into the plan.
Weatherproof Pantry Cabinet
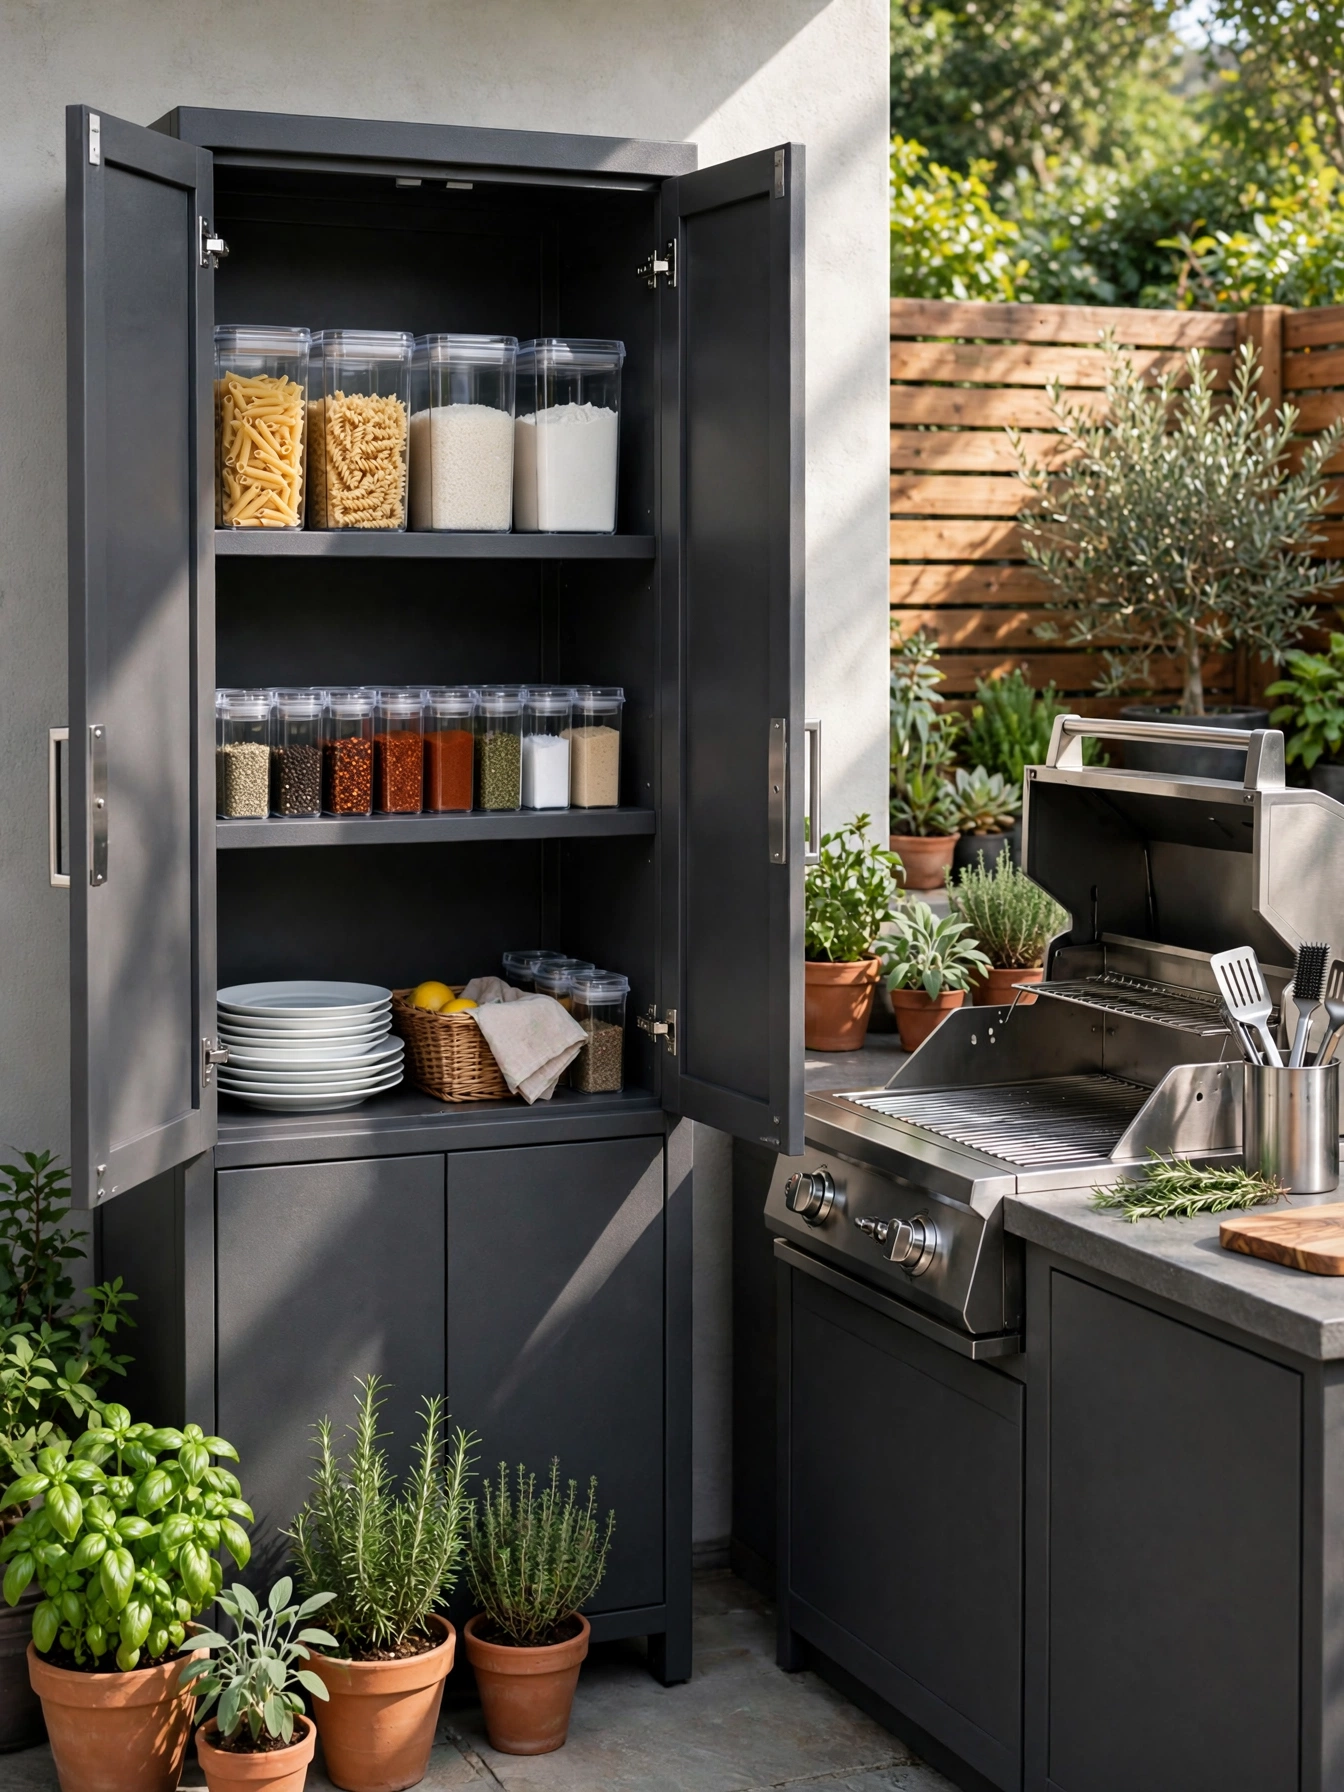
Why This Works:
- A sealed cabinet keeps spices dry through a thunderstorm
- Marine-grade polymer never rusts, warps or swells outdoors
- A 36 inch tall cabinet holds a full cookout kit within arm’s reach
- Gasket-sealed doors keep insects and dust out of dry goods
Choose marine-grade polymer or 304 stainless steel for the cabinet, never indoor MDF, which swells and falls apart after one wet season. A 36 inch wide, 72 inch tall cabinet with 5 shelves holds spices, oils, sealed dry goods and a stack of melamine plates. Shelves should be 12 inches deep so jars sit in a single visible row, and the door gasket should compress fully when closed, a seal you can test by sliding a sheet of paper through the closed door. Keep the cabinet under cover or at least 3 feet from the grill, since heat and smoke stain the contents and warp the gasket. Hinges must be stainless steel rated for outdoor use, because zinc hinges rust solid within two summers. Never store an open bag of flour or sugar in the cabinet, since humidity clumps it and ants find it within days.
Air it out once a month. A sealed cabinet in a humid climate traps moisture, so add a small silica gel canister on each shelf and air the cabinet out once a month. Dry goods and tableware are all it holds, not fresh food, so it pairs with a fridge rather than replacing one. Mount the cabinet on 4 inch legs so rainwater never pools at the base. A stainless steel unit is priced at 1,000 to 2,500 dollars, about double a quality outdoor cabinet at 500 to 1,200 dollars.
Heated Patio Seating
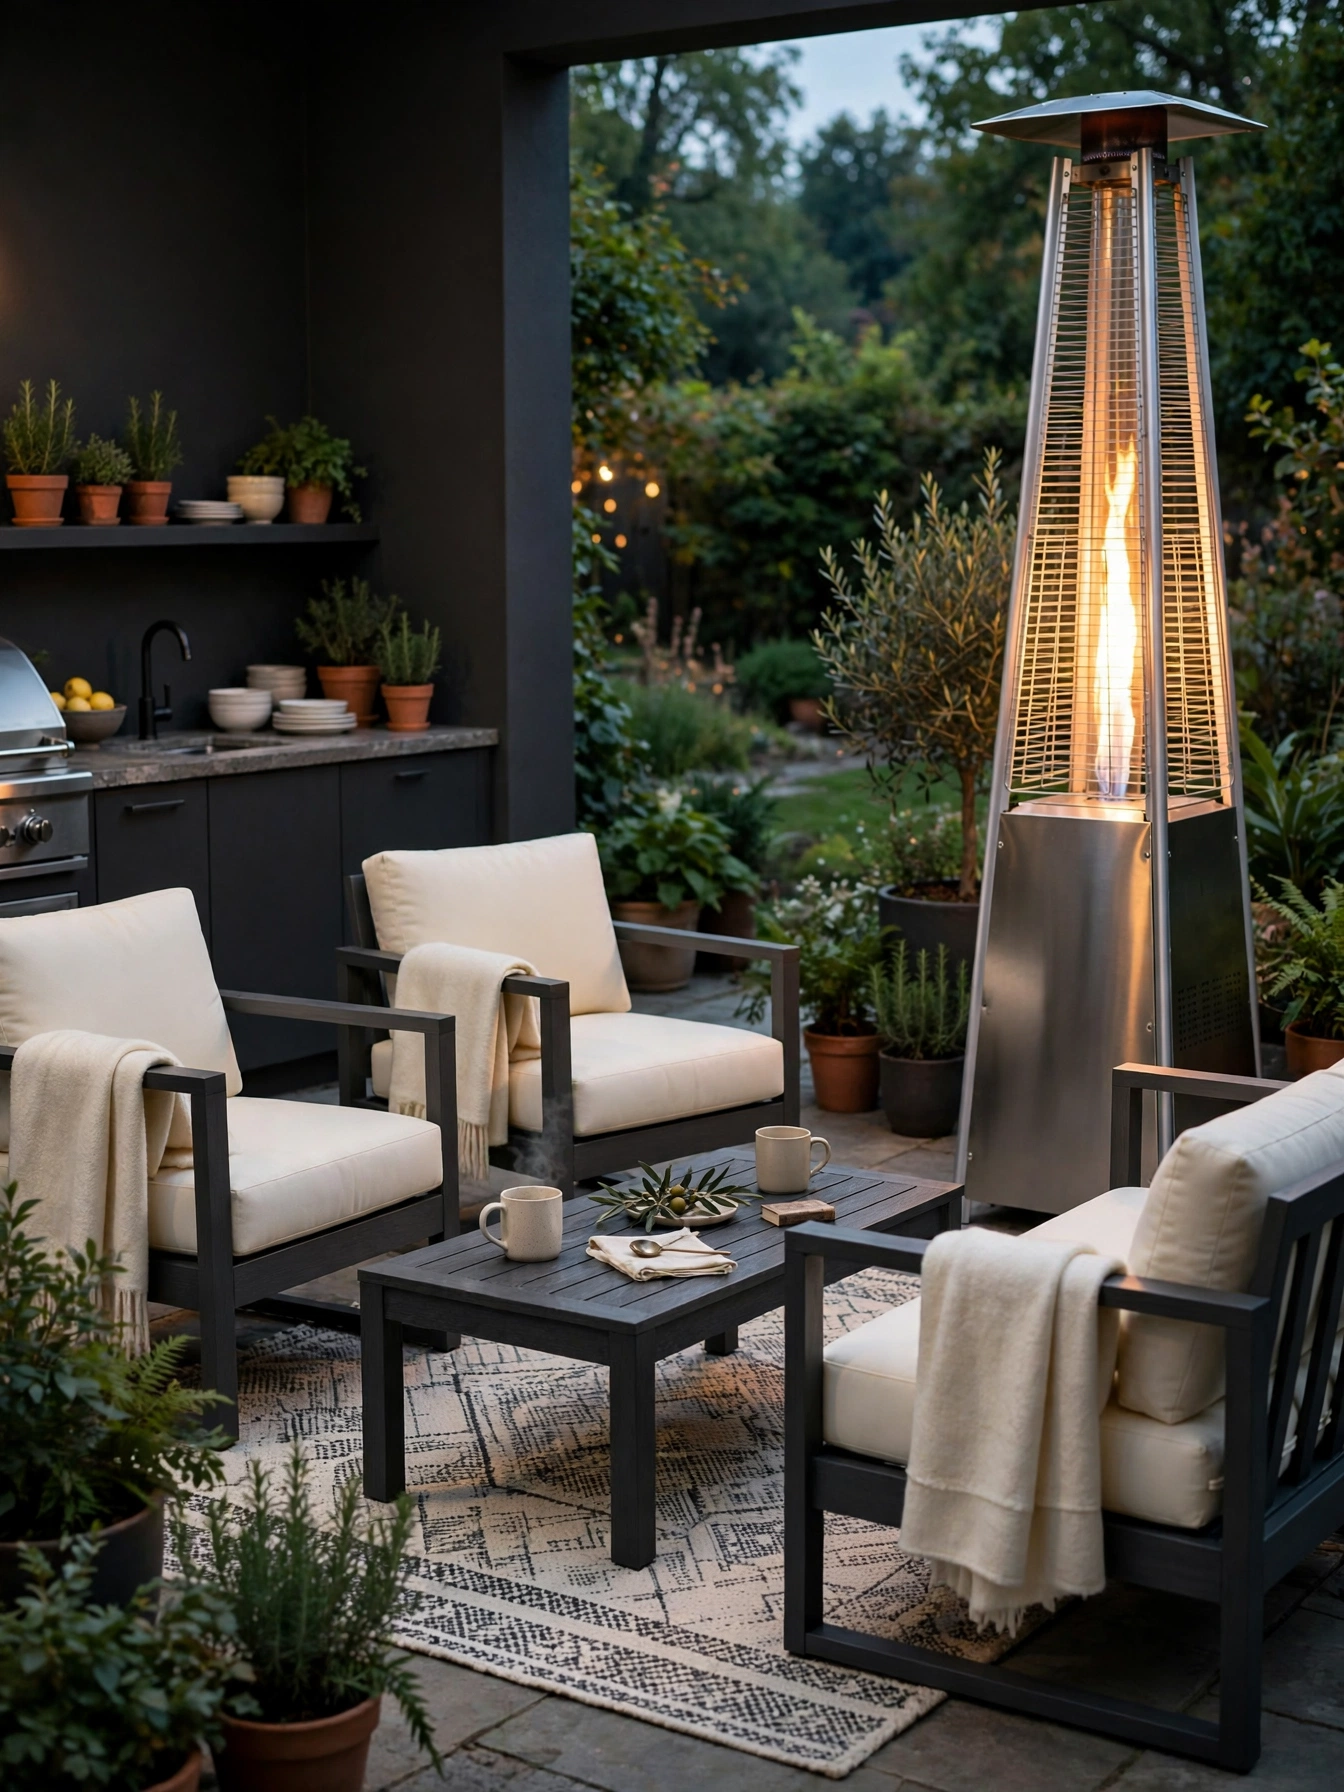
Why This Works:
- A 40,000 BTU patio heater warms a 12 foot circle on a 55 degree evening
- Heated seats keep guests lingering 2 hours longer after dinner
- Infrared heat warms people directly instead of heating the air
- A heater on wheels moves to wherever the conversation gathers
A freestanding propane heater rated at 40,000 to 48,000 BTU warms a circle about 12 feet across, while a wall-mounted infrared heater at 1,500 watts warms a 6 by 8 foot zone. Place the heater at least 3 feet from any fabric, cushion or wooden furniture, and never under a pergola beam lower than 8 feet, since the top of a propane heater reaches 300 degrees. Chairs should be 24 inches wide with seat cushions 4 inches thick, so guests sit comfortably for an hour without shifting. Keep the heater on a level surface, and check the tilt shutoff valve each season so the unit cuts out if it tips. Never place a patio heater under a low umbrella or a fabric canopy, since the heat scorches the fabric and can set it alight.
Propane reaches farther, electric runs cleaner. Propane warms a wider area, yet it needs tank swaps and produces moisture, while electric heat is silent and dry but covers a smaller zone. An electric infrared heater costs 200 to 600 dollars and draws 1,500 watts, roughly 20 cents per hour. For propane, plan on 150 to 400 dollars, with about 8 hours on high from a 20 pound tank. Over a season the fuel adds up, since a household that heats the patio 3 nights a week will spend 300 to 500 dollars on propane in a year. Add wool-blend throws, 50 by 60 inches, on each chair for guests who feel the chill first.
Outdoor Dishwasher Drawer

Why This Works:
- A dishwasher drawer ends the stack of dirty plates carried indoors after dinner
- A single drawer washes 7 place settings, enough for a family cookout
- A 24 inch drawer fits under a standard outdoor counter with no redesign
- Stainless steel racks resist rust in a humid outdoor cabinet
Cut a 24 inch wide, 16 inch tall opening under a counter at 36 inches high for an outdoor dishwasher drawer, with a water supply line and a drain within 4 feet. The unit must be rated for outdoor use, with sealed electronics and a drain pump that handles a 3 foot lift to the house drain. Winterize by draining the unit when nights drop below 32 degrees, since a frozen pump cracks and costs 200 dollars to replace. Never install an indoor drawer dishwasher outside, because its electronics corrode in humidity and the warranty voids immediately. Run the drain to the sanitary system, never to a garden bed, since detergent harms plants and soil.
Count the place settings first. One drawer holds 7 place settings, so a party of 12 needs two cycles or a second drawer. A single outdoor drawer costs 1,200 to 2,000 dollars installed, and it uses about 2 gallons of water per cycle, less than hand washing the same load. A drawer also needs a dedicated 15 amp GFCI circuit, which adds 150 to 300 dollars if the patio has no spare circuit. Households that grill 3 nights a week will run it often enough to justify the cost, and occasional grillers will find a dish tub and a sink enough.
Firewood Storage Nook
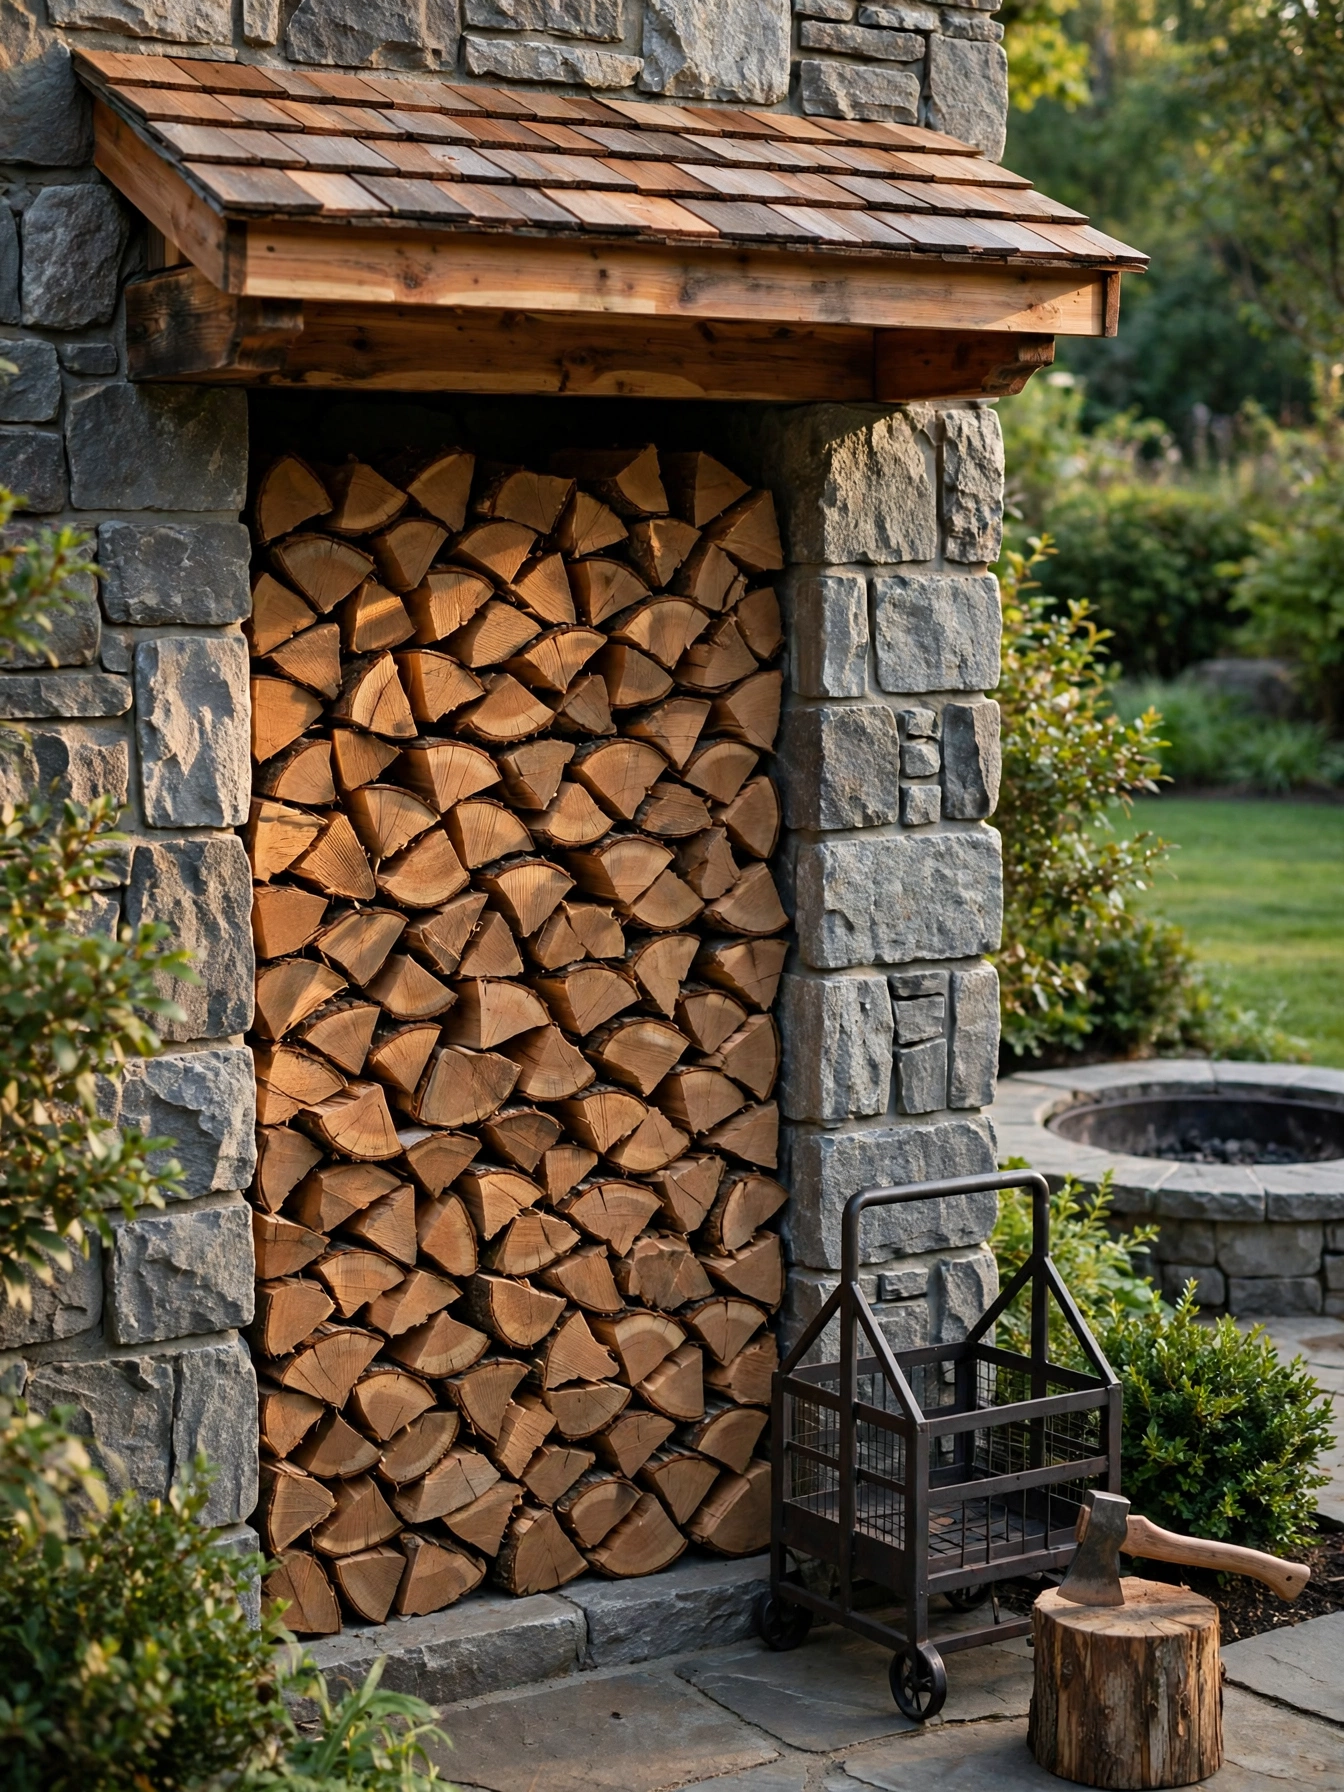
Why This Works:
- Dry wood stacked off the ground lights in minutes instead of smoking for half an hour
- A roof overhang keeps rain off the top row while air flows through the sides
- A nook beside the fire pit means no trips to the back of the yard mid-evening
- Neat rows of logs read as garden design instead of a messy pile
Size the firewood nook for at least a quarter cord of wood, about 32 cubic feet, which covers 8 to 10 evenings around the fire pit. Stack the logs 18 inches deep in rows no higher than 4 feet, with 4 inches of space between the stack and the back wall for airflow. Raise the bottom row 6 inches off the ground on a pallet or a stone ledge so rain and ground moisture never reach the wood. Cover only the top of the stack with a roof or tarp, and leave the sides open, since a fully wrapped stack traps moisture and grows mold in a month. Seasoned hardwood should read under 20 percent moisture on a meter, and green wood needs 6 to 12 months of drying before it burns cleanly. Do not stack green or damp wood in the nook, since it smokes, sparks and coats the fire pit with creosote.
Keep the nook at least 3 feet from the fire pit and a full 10 feet away from the siding, since a wood stack near a flame is a fire risk and a stack against the house invites termites. A built-in stone nook costs 400 to 1,000 dollars. A simple metal rack with a cover comes in at 80 to 200 dollars. The rack is the budget pick. It holds less and looks plainer beside a finished kitchen. A metal log carrier, 24 inches long, carries enough wood for one evening in a single trip.
FAQs
What do outdoor kitchen ideas cost for a basic setup?
A basic outdoor kitchen with a grill cart, a counter and string lights runs 1,500 to 3,000 dollars, while a built-in setup runs 8,000 to 15,000 dollars. Keep 42 to 48 inches clear behind the cook, a spacing borrowed from indoor kitchens, to keep the zone safe.
How much space does an outdoor kitchen need?
A compact outdoor kitchen fits a patio of 10 feet by 12 feet, with a grill island 6 feet long and 42 inches of walkway behind the cook. A full setup with dining for six needs at least 14 feet by 18 feet.
What materials hold up best in outdoor kitchen ideas?
Granite, porcelain and 304 stainless steel hold up best outdoors, since granite resists heat to 300 degrees and stainless steel resists rust through rain and snow. The Spruce recommends 304 stainless steel for outdoor grills and cabinets because it withstands weather far better than cheaper 430 grade steel.
How far should a grill sit from the house?
Keep any grill at least 10 feet from the house, fences and low branches, and never grill under a roof lower than 8 feet above the cooking surface. Gas grills need the same 10 foot clearance as charcoal, since flare-ups happen with either fuel.
Do outdoor kitchens need a permit?
Many towns require a permit for a gas line, a permanent structure over 120 square feet, or any new electrical circuit outdoors, and a licensed electrician should handle new outdoor circuits. Check local rules before building, since fines for unpermitted gas work can exceed 1,000 dollars.
Conclusion
The outdoor kitchen that gets used every week has a grill with room to work, a counter that survives the weather, and shade that keeps the cook comfortable past noon. Start with the grill station and the counter, then add the sink, the lighting and the seating one piece at a time as the budget allows. First, measure the patio, mark a 10 by 12 foot cooking zone with tape, and check the 10 foot clearance from the house before ordering anything. Follow HomelyCrafter on Pinterest for more ideas. Save this to your Pinterest boards so you can refer back to it!

Muhammad Israr is a home decor enthusiast and the writer behind Homely Crafter. He spends his days researching paint colors, layouts and budget-friendly styling ideas, then breaks them down into practical, easy-to-follow guides so you can decorate with confidence.
2 thoughts on “22 Homey Outdoor Kitchen Ideas for Relaxed Evenings”